

Recommandé
Recommandé
Contenu connexe
Similaire à Open Data - Data Journalism
Similaire à Open Data - Data Journalism (20)
Plus de Vittorio Pasteris
Plus de Vittorio Pasteris (20)
Open Data - Data Journalism
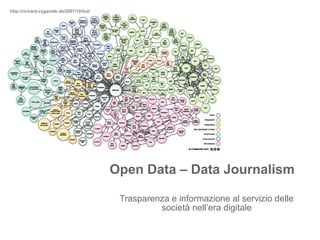
- 1. http://richard.cyganiak.de/2007/10/lod/ Open Data – Data Journalism Trasparenza e informazione al servizio delle società nell’era digitale
- 2. Open Data – Data Journalism di Andrea Fama 2 Cenni storici da un passato molto prossimo (1/2) I CABLI DI WIKILEAKS LE FOTO DEI CITIZEN JOURNALIST PLICO/ WATERGATE Dalla crisi del giornalismo molti giornalismi possibili Il D.J. eredita la parte migliore del tradizionale giornalismo d’inchiesta: i fatti La differenza è nelle dimensioni. Differenze di scala estreme = differenze di genere
- 3. Open Data – Data Journalism di Andrea Fama 3 Cenni storici da un passato molto prossimo (2/2) IL RUOLO DEL D.J. PER IL LETTORE PER IL GIORNALISTA “Certezza” del dato = bussola Distinguere i fatti dalle opinioni senza equilibrismi da “un colpo al cerchio e uno alla botte” DATI
- 4. Open Data – Data Journalism di Andrea Fama 4 Le possibilità tecniche Le redazioni sono dotate delle professionalità necessarie? “Una nuova razza a metà strada tra i tecnici e i giornalisti” (Irfan Essa) = Digitalizzazione dei fatti del mondo Enorme mole di materiale da ricercare, processare e pubblicare
- 5. Open Data – Data Journalism di Andrea Fama 5 Le ragioni giornalistiche RACCONTARE STORIE ALTRIMENTI NON RACCONTABILI INCHIESTE Deep Web Data Mining Big Data Semantic Web/Data TRASPARENZA SERVIZIO AL CITTADINO “Il D.J. incarna l’espressione più avanzata del principio di libertà e accesso all’informazione”. (Simon Roger – ex Data Blog editor,The Guardian) Open Parlamento/Voi siete qui Crime mapping (il Giro della Nera) RU486
- 6. Open Data – Data Journalism di Andrea Fama 6 La spinta civica I poteri forti lasciano che il vero messaggio passi sopra la testa del cittadino, mentre la realtà sfila sotto al suo naso. Ma oggi è sempre più difficile rivolgersi ad uditori accondiscendenti che assumono l’informazione come un farmaco sotto prescrizione, eccitante o sedativo a seconda della sintomatologia. SPINTA CIVICA ALLA CONOSCENZA TRASPARENZA PARTECIPAZIONE CONSAPEVOLEZZA
- 7. Open Data – Data Journalism di Andrea Fama 7 Applicazioni del Data Journalism Portata del D.J. e vastità di applicazioni. La tecnologia lo rende enorme, potenzialmente infinito. GEOGRAFIA Ambiente Urbanistica Turismo TRASPORTI Traffico Viabilità Qualità della vita SICUREZZA Crime mapping Disposizione forze dell’ordine Servizi di quartiere
- 8. Open Data – Data Journalism di Andrea Fama 8 La cassetta degli attrezzi del Data Journalist (1/2) GIORNALISMO Il D.J. non è un media a se, bensì una sovrapposizione di competenze appartenenti a diversi campi INFORMATICA MATEMATICASTATISTICA GRAFICA
- 9. Open Data – Data Journalism di Andrea Fama 9 I dati che abbiamo sono attendibili? Se uno scienziato dei dati produce i risultati sbagliati, accorgersene potrebbe non essere una cosa banale. la semplice trasparenza non porta al cambiamento (vedi evidenze cambiamenti climatici e politiche ambientali) non ci piacciono i numeri fornitici? basta etichettarli come corrotti se l’infografica è il nuovo discorso elettorale, mettere in dubbio i dati ne è la naturale confutazione. la trasparenza dei dati è una corsa alle armi nel mondo della divulgazione, alterare i dati è come alterare i bilanci quanti degli attuali scienziati dei dati diventeranno i periti contabili di domani, impegnati in una guerra alla frode e all’ignoranza? Alistair Croll
- 10. Open Data – Data Journalism di Andrea Fama 10 La cassetta degli attrezzi del Data Journalist Scraperwiki, Yahoo! Pipes, OutWit Hub, Google Spreadsheets. IMPORTARE VISUALIZZARE CREARE MAPPE CONDIVIDERE ManyEyes, Tableau Public. OpenHeatMap Public Data Explorer, ecc. Google Fusion
- 11. Open Data – Data Journalism di Andrea Fama 11 La cassetta degli attrezzi del Data Journalist FOCUS: Le 10 regole di Troy Thibodeaux (1/3) Importare su un foglio elettronico (es. Excell) i dati grezzi in formato universale - senza formattazione, come un insieme di valori separati da virgole Applicare filtri, formule e funzioni (if..then; vertical look-up, ecc.) Scrivere le proprie formule (esprimere le proprie idee tramite codici). 1. I FOGLI DI CALCOLO (SPREADSHEET) Il foglio di calcolo ha dei limiti Per sondare il Big Data: SQL (Structured Query Language); ACCESS; SQLite; MySQL; PostgreSQL SQL: permette di gestire insiemi e sottoinsiemi di dati correlati 2. SQL (Interrogazione di DB) Google Refine e Data Wrangler: come i fogli di calcolo, ma studiati per nomi standardizzati (Andrea Marco Fama, Fama Andrea Marco, Andrea M. Fama, ecc.) Google Refine Expression Language: come sopra, ma per insiemi di dati e codici più sfofisticati CSVKIT: studiato dai giornalisti, converte il proprio lavoro in un formato comune 3. PULIRE I DATI
- 12. Open Data – Data Journalism di Andrea Fama 12 La cassetta degli attrezzi del Data Journalist FOCUS: Le 10 regole di Troy Thibodeaux (2/3) Non è una decorazione, ma una funzione essenziale per comprendere meglio i dati e individuare tendenze altrimenti invisibili Google Fusion Tables e Tableau Public: semplici ed efficaci R: per gli esperti, è un pacchetto di statistica open source che combina analisi e visualizzazione attraverso un linguaggio di programmazione sofisticato 4. VISUALIZZAZIONE Data mapping: corrispondenza/match tra fonte ed obiettivo (due DB con gli stessi dati ma sotto nomi differenti) Strumenti: Google Fusion, Tableau Public , Qgis , Arcview Postgis e Spatiallite (specifici per dati di natura geografica) 5. SOFTWARE PER LA MAPPATURA Il governo non rilascia i dati che stanno dietro un sito web? Basta scavare per averli (Data Mining / Screen-scraper) Non si hanno i dati nel formato corretto utilizzando gli strumenti a disposizione? Basta costruirne uno proprio I linguaggi di programmazione più comuni tra i giornalisti: Python, Ruby, Perl o Php 6. LINGUAGGI DI PROGRAMMAZIONE
- 13. Open Data – Data Journalism di Andrea Fama 13 La cassetta degli attrezzi del Data Journalist FOCUS: Le 10 regole di Troy Thibodeaux (3/3) Cos’è un web framework? Una struttura di supporto su cui organizzare e progettare un software. A cosa serve? Ad evitare la riscrittura di un codice già steso in precedenza per compiti simili Strumenti: django per python; rails per ruby; symfony per il php; catalyst per perl. 7. WEB FRAMEWORK Strumenti: Textmateer Mac ; Notepad++ (Gratuito); Vim e Emacs (Open Source) 8. EDITOR Salvare i backup Estrarre elementi da versioni temporanee di file Condividere il lavoro Strumenti: github; git o subversion 9. CONTROLLO E REVISIONE Document cloud: ricerca , estrazione e condivisione (molto usato dai giornalisti) Altri strumenti: Jigsaw; Python’s Natural Language Tool Kit e Standford Corenlp. 10. ANALISI DEI DOCS
Notes de l'éditeur
- For information on applying this template onto existing presentations, refer to the notes on slide 2 of this presentation. The Input area of the Beam can be customized to reflect the content of the presentation. The Input area is an AutoShape with a picture fill. To change this, ensure you have the image you wish to use (ideally a .jpg or a .png file) in an accessible folder. The image should have a ratio of 1:1 to ensure it does not appear distorted. Acceptable images for importing into the Input area of the Beam are the three approved graphics (lines), and black and white photography or illustrations which follow the principles laid out on The Branding Zone. Color images should never be imported into this area. To create a thank you slide with a picture in the Input area of the Beam, duplicate this master slide and create a new master slide. If using the graphic on the title slide the same should be used on the thank you slide. If using a picture in the Input area of the Beam in the title slide, the same or different but related picture can be used on the thank you slide. Customize the Input area of the Beam as described below. Click on the View tab from the menu bar and select Master>Slide Master Right-click on the Input graphic and select Format AutoShape From the Fill menu, under the Color and Lines tab, click on the drop-down arrow next to Color and select the Fill Effects menu From the Picture tab, click on Select Picture . Navigate to the folder containing the image you wish to insert in the Input area. Highlight the image and tick the Lock picture aspect ratio box. Click on OK . You can now preview the image before continuing. If you are happy with how it looks, click Ok to continue. Otherwise, repeat the process until you are happy with your selected image To exit from Master View , click on View>Normal . The change you made to the Input graphic should now be visible on the title slide
- It is possible to apply this template to exiting presentations. Have the latest presentation template open Click on the View tab and select Normal Delete all unwanted slides Click on the Insert tab from the menu bar and select Slides from Files Click on Browse . Navigate to the presentation you wish to update with the new template. Highlight the presentation and click Open Wait for the slides from the presentation to load and click on Insert All . Then click Close Check the inserted slides to ensure that the most appropriate master slide has been used on each slide To change the master applied to a slide select the slide you wish to apply a different master to then click on the Format tab from the menu bar and select Slide Design From the Used in This Presentation section choose the master you wish to apply to the slide and hover over it to reveal a drop-down arrow. Click on the arrow and select Apply to Selected Slides It is important to thoroughly check the presentation to ensure that no further formatting is needed.
- It is possible to apply this template to exiting presentations. Have the latest presentation template open Click on the View tab and select Normal Delete all unwanted slides Click on the Insert tab from the menu bar and select Slides from Files Click on Browse . Navigate to the presentation you wish to update with the new template. Highlight the presentation and click Open Wait for the slides from the presentation to load and click on Insert All . Then click Close Check the inserted slides to ensure that the most appropriate master slide has been used on each slide To change the master applied to a slide select the slide you wish to apply a different master to then click on the Format tab from the menu bar and select Slide Design From the Used in This Presentation section choose the master you wish to apply to the slide and hover over it to reveal a drop-down arrow. Click on the arrow and select Apply to Selected Slides It is important to thoroughly check the presentation to ensure that no further formatting is needed.
- It is possible to apply this template to exiting presentations. Have the latest presentation template open Click on the View tab and select Normal Delete all unwanted slides Click on the Insert tab from the menu bar and select Slides from Files Click on Browse . Navigate to the presentation you wish to update with the new template. Highlight the presentation and click Open Wait for the slides from the presentation to load and click on Insert All . Then click Close Check the inserted slides to ensure that the most appropriate master slide has been used on each slide To change the master applied to a slide select the slide you wish to apply a different master to then click on the Format tab from the menu bar and select Slide Design From the Used in This Presentation section choose the master you wish to apply to the slide and hover over it to reveal a drop-down arrow. Click on the arrow and select Apply to Selected Slides It is important to thoroughly check the presentation to ensure that no further formatting is needed.
- It is possible to apply this template to exiting presentations. Have the latest presentation template open Click on the View tab and select Normal Delete all unwanted slides Click on the Insert tab from the menu bar and select Slides from Files Click on Browse . Navigate to the presentation you wish to update with the new template. Highlight the presentation and click Open Wait for the slides from the presentation to load and click on Insert All . Then click Close Check the inserted slides to ensure that the most appropriate master slide has been used on each slide To change the master applied to a slide select the slide you wish to apply a different master to then click on the Format tab from the menu bar and select Slide Design From the Used in This Presentation section choose the master you wish to apply to the slide and hover over it to reveal a drop-down arrow. Click on the arrow and select Apply to Selected Slides It is important to thoroughly check the presentation to ensure that no further formatting is needed.
- It is possible to apply this template to exiting presentations. Have the latest presentation template open Click on the View tab and select Normal Delete all unwanted slides Click on the Insert tab from the menu bar and select Slides from Files Click on Browse . Navigate to the presentation you wish to update with the new template. Highlight the presentation and click Open Wait for the slides from the presentation to load and click on Insert All . Then click Close Check the inserted slides to ensure that the most appropriate master slide has been used on each slide To change the master applied to a slide select the slide you wish to apply a different master to then click on the Format tab from the menu bar and select Slide Design From the Used in This Presentation section choose the master you wish to apply to the slide and hover over it to reveal a drop-down arrow. Click on the arrow and select Apply to Selected Slides It is important to thoroughly check the presentation to ensure that no further formatting is needed.
- It is possible to apply this template to exiting presentations. Have the latest presentation template open Click on the View tab and select Normal Delete all unwanted slides Click on the Insert tab from the menu bar and select Slides from Files Click on Browse . Navigate to the presentation you wish to update with the new template. Highlight the presentation and click Open Wait for the slides from the presentation to load and click on Insert All . Then click Close Check the inserted slides to ensure that the most appropriate master slide has been used on each slide To change the master applied to a slide select the slide you wish to apply a different master to then click on the Format tab from the menu bar and select Slide Design From the Used in This Presentation section choose the master you wish to apply to the slide and hover over it to reveal a drop-down arrow. Click on the arrow and select Apply to Selected Slides It is important to thoroughly check the presentation to ensure that no further formatting is needed.
- It is possible to apply this template to exiting presentations. Have the latest presentation template open Click on the View tab and select Normal Delete all unwanted slides Click on the Insert tab from the menu bar and select Slides from Files Click on Browse . Navigate to the presentation you wish to update with the new template. Highlight the presentation and click Open Wait for the slides from the presentation to load and click on Insert All . Then click Close Check the inserted slides to ensure that the most appropriate master slide has been used on each slide To change the master applied to a slide select the slide you wish to apply a different master to then click on the Format tab from the menu bar and select Slide Design From the Used in This Presentation section choose the master you wish to apply to the slide and hover over it to reveal a drop-down arrow. Click on the arrow and select Apply to Selected Slides It is important to thoroughly check the presentation to ensure that no further formatting is needed.
- It is possible to apply this template to exiting presentations. Have the latest presentation template open Click on the View tab and select Normal Delete all unwanted slides Click on the Insert tab from the menu bar and select Slides from Files Click on Browse . Navigate to the presentation you wish to update with the new template. Highlight the presentation and click Open Wait for the slides from the presentation to load and click on Insert All . Then click Close Check the inserted slides to ensure that the most appropriate master slide has been used on each slide To change the master applied to a slide select the slide you wish to apply a different master to then click on the Format tab from the menu bar and select Slide Design From the Used in This Presentation section choose the master you wish to apply to the slide and hover over it to reveal a drop-down arrow. Click on the arrow and select Apply to Selected Slides It is important to thoroughly check the presentation to ensure that no further formatting is needed.
- It is possible to apply this template to exiting presentations. Have the latest presentation template open Click on the View tab and select Normal Delete all unwanted slides Click on the Insert tab from the menu bar and select Slides from Files Click on Browse . Navigate to the presentation you wish to update with the new template. Highlight the presentation and click Open Wait for the slides from the presentation to load and click on Insert All . Then click Close Check the inserted slides to ensure that the most appropriate master slide has been used on each slide To change the master applied to a slide select the slide you wish to apply a different master to then click on the Format tab from the menu bar and select Slide Design From the Used in This Presentation section choose the master you wish to apply to the slide and hover over it to reveal a drop-down arrow. Click on the arrow and select Apply to Selected Slides It is important to thoroughly check the presentation to ensure that no further formatting is needed.
- It is possible to apply this template to exiting presentations. Have the latest presentation template open Click on the View tab and select Normal Delete all unwanted slides Click on the Insert tab from the menu bar and select Slides from Files Click on Browse . Navigate to the presentation you wish to update with the new template. Highlight the presentation and click Open Wait for the slides from the presentation to load and click on Insert All . Then click Close Check the inserted slides to ensure that the most appropriate master slide has been used on each slide To change the master applied to a slide select the slide you wish to apply a different master to then click on the Format tab from the menu bar and select Slide Design From the Used in This Presentation section choose the master you wish to apply to the slide and hover over it to reveal a drop-down arrow. Click on the arrow and select Apply to Selected Slides It is important to thoroughly check the presentation to ensure that no further formatting is needed.
- It is possible to apply this template to exiting presentations. Have the latest presentation template open Click on the View tab and select Normal Delete all unwanted slides Click on the Insert tab from the menu bar and select Slides from Files Click on Browse . Navigate to the presentation you wish to update with the new template. Highlight the presentation and click Open Wait for the slides from the presentation to load and click on Insert All . Then click Close Check the inserted slides to ensure that the most appropriate master slide has been used on each slide To change the master applied to a slide select the slide you wish to apply a different master to then click on the Format tab from the menu bar and select Slide Design From the Used in This Presentation section choose the master you wish to apply to the slide and hover over it to reveal a drop-down arrow. Click on the arrow and select Apply to Selected Slides It is important to thoroughly check the presentation to ensure that no further formatting is needed.