Android tutorials7 calculator_basiclayout
•Télécharger en tant que ODP, PDF•
0 j'aime•240 vues

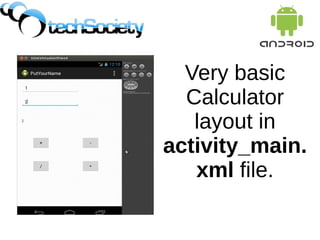
The document describes setting up the layout for a basic calculator app in Android Studio. It involves dragging buttons to represent arithmetic symbols into the activity_main.xml file and editing the properties of each button such as the text and ID. A TextView is added to display the answer and two EditText fields are added to take numeric input from the user. The layout is further customized using a relative layout and adjusting positioning of the elements.

Recommandé
Contenu connexe
Tendances
Tendances (20)
En vedette
En vedette (20)
Similaire à Android tutorials7 calculator_basiclayout
Similaire à Android tutorials7 calculator_basiclayout (20)
Plus de Vlad Kolesnyk
Plus de Vlad Kolesnyk (9)
Dernier
Dernier (20)
Android tutorials7 calculator_basiclayout
- 2. Good thing is that layout can be controlled by drug- and-drop method. So just click on “Hello World” and you can simply delete it. Then just drug into your app four buttons (which will later represent arithmetic symbols)
- 3. Now by clicking on activity_main.xml tab at the bottom you will go into the “code” of the layout. Each button is represented by opening and closing tag <Button … /> And as parameters you can change it's text, layout_width and so on... android:id sets name which represents button in a java file. Now change text and id parameters for each button. Like in the next slide.
- 4. Don't worry if your code is a bit different. Because of graphical relative layout android:layout_... might have different value <RelativeLayout xmlns:android="http://schemas.android.com/apk/res/android" xmlns:tools="http://schemas.android.com/tools" android:layout_width="match_parent" android:layout_height="match_parent" android:paddingBottom="@dimen/activity_vertical_margin" android:paddingLeft="@dimen/activity_horizontal_margin" android:paddingRight="@dimen/activity_horizontal_margin" android:paddingTop="@dimen/activity_vertical_margin" tools:context=".MainActivity" > <Button android:id="@+id/minus" android:layout_width="wrap_content" android:layout_height="wrap_content" android:layout_alignBaseline="@+id/plus" android:layout_alignBottom="@+id/plus" android:layout_alignParentRight="true" android:layout_marginRight="67dp" android:text="-" /> <Button android:id="@+id/division" android:layout_width="wrap_content" android:layout_height="wrap_content" android:layout_alignLeft="@+id/plus" android:layout_below="@+id/plus" android:layout_marginTop="47dp" android:text="/" /> <Button android:id="@+id/mult" android:layout_width="wrap_content" android:layout_height="wrap_content" android:layout_alignBaseline="@+id/division" android:layout_alignBottom="@+id/division" android:layout_alignLeft="@+id/minus" android:text="*" /> <Button android:id="@+id/plus" android:layout_width="wrap_content" android:layout_height="wrap_content" android:layout_alignParentLeft="true" android:layout_centerVertical="true" android:layout_marginLeft="39dp" android:text="+" /> </RelativeLayout>
- 5. Now change back to Graphical Layout and correct layout by drug and drop if something doesn't look beautiful enough.
- 6. From Form Widgets folder drug and drop TextView. (this field will be used to show the answer) And from Text Fields drug and drop Plain Text. (this will take two numbers as input)
- 7. Now open activity_main.xml and change id's appropriately <TextView android:id="@+id/answer" android:layout_width="wrap_content" android:layout_height="wrap_content" android:layout_alignLeft="@+id/input1" android:layout_below="@+id/input1" android:layout_marginLeft="14dp" android:layout_marginTop="27dp" android:text="TextView" /> <EditText android:id="@+id/input1" android:layout_width="wrap_content" android:layout_height="wrap_content" android:layout_alignParentLeft="true" android:layout_alignParentTop="true" android:layout_marginTop="22dp" android:ems="10" > </EditText> <EditText android:id="@+id/input2" android:layout_width="wrap_content" android:layout_height="wrap_content" android:layout_alignLeft="@+id/input1" android:layout_alignParentTop="true" android:ems="10" />