Participatory Mapping: Engaging Sites, Mobilizing Knowledges
•
1 j'aime•783 vues

Packet for workshop at Imagining America conference in Seattle, WA, Sept. 2010

Recommandé
Contenu connexe
Similaire à Participatory Mapping: Engaging Sites, Mobilizing Knowledges
Similaire à Participatory Mapping: Engaging Sites, Mobilizing Knowledges (20)
Plus de Matthew Wilson
Plus de Matthew Wilson (12)
Dernier
Dernier (20)
Participatory Mapping: Engaging Sites, Mobilizing Knowledges
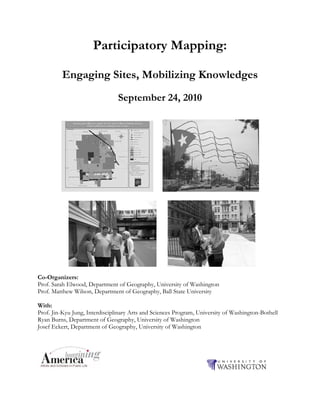
- 1. Participatory Mapping: Engaging Sites, Mobilizing Knowledges September 24, 2010 Co-Organizers: Prof. Sarah Elwood, Department of Geography, University of Washington Prof. Matthew Wilson, Department of Geography, Ball State University With: Prof. Jin-Kyu Jung, Interdisciplinary Arts and Sciences Program, University of Washington-Bothell Ryan Burns, Department of Geography, University of Washington Josef Eckert, Department of Geography, University of Washington
- 2. Your Site Visit Information Friday, September 24, 2010 * * * PLEASE READ * * * Site Visit: Participatory Mapping: Engaging Sites, Mobilizing Knowledges Location: UW Seattle Campus, Smith Hall, Room 415C Description: Building on the organizers’ experiences with mapping projects undertaken with middle-school youth and college students, this site visit explore site-making through multi-sensory and multi-modal forms of participatory mapping. Using the university itself as a site for engagement and a series of imaginative prompts, participants will experiment with various modes of data collection (documenting observations in words, sketch maps, photographs, video and audio clips) and presentation (Google Maps and geo-blogging mashups). Participants will experience participatory mapping as a curious and serendipitous exploration of public spaces, a creative platform for catalyzing new modes of public engagement, a critical tool facilitating the co-production of knowledge and interrogating the spatial intersectionalities of culture, politics, technology, and the social. The workshop will be framed by reflections on the use of these critical and creative modalities in curricular and collaborative projects from a variety of field perspectives. Collaborators: Sarah Elwood, Matthew W. Wilson, Jin-Kyu Jung, Josef Eckert, and Ryan Burns *** Your Site Visit Instructions *** Immediately after the Orientation for Site Visits, look for your group in front of Kane Hall. Your site collaborators will have your boxed lunch and be holding a sign reading “Participatory Mapping.” They will lead your group to Smith 415C to lunch together, become acquainted, and begin the workshop experience. After the site visit, you may return to Hotel Deca (4507 Brooklyn Ave NE) or explore the surrounding neighborhood. (A list of recommended restaurants, cultural sites, and events is available at the registration table and may also be found at www.imaginingamerica.org.)
- 3. Participatory Mapping: Engaging Sites, Mobilizing Knowledges Schedule 12:30 Lunch & Introductions Participants should briefly consider their answers to the following prompts: 1. What draws you to the workshop? 2. What previous activities have you experienced related to the workshop? 1:30 Convene at Smith Hall “Collaboratory” (SMI 415C). Overview selected vernacular geospatial technologies/practices. [geoblogs, mental mappings, web-based GIS, locational social media] 1:45 Overview workshop mapping activity. Discuss practice of cartographic abstraction. Discuss geographic prompts/routes. Break into groups (4 groups of 3, 2 groups of 4). 2:00 Groups walk routes on own. 2:30 Groups return to Smith Hall “Collaboratory” (SMI 415C) Discussion/reflection while digital artifacts are downloaded/uploaded. 3:00 Groups work to create digital maps of their routes. 3:30 Discuss/reflect on mapping activity. Implications for: 1. the substantive mapping of the university?, 2. the practice of mapping and digital cartographies?, and 3. the participative/collaborative production of (spatial) knowledges? Each group chooses one prompt. Discussants respond/summarize using the map. 4:00-4:30 Conclusion of workshop
- 4. Participatory Mapping: Engaging Sites, Mobilizing Knowledges “How To” Creating points, lines, and areas in Google MyMaps and embedding videos/photos: 1. Sign in to Google Maps (http://maps.google.com) and click on “My Maps”. You may be interested in watching a YouTube video on how to create a map in MyMaps (http://www.youtube.com/watch?v=TftFnot5uXw). 2. Click on “Get started”. 3. A form will open on the left side of the browser window, allowing you to enter the title of the MyMap, the description, and whether or not the map will be publically available. Click “Done” when you are finished. You may return to edit this form later.
- 5. 4. Your MyMap is now ready to edit. Click “Edit” to begin adding points to your map. There are three main tools with which you may edit your MyMap: the Hand tool (used to select and edit map features), the Point tool (used to add a placemark), and the Line/Area tool (used to draw a line or shape). 5. Add a point to the map, by clicking the Point tool. Note that your cursor turns into a placemarker allowing you to select the location for your point.
- 6. 6. Click the map to place your point. A form will appear to edit the information about that point on your MyMap. 7. Add a title for the point. You may also add a textual description, which may include a URL link and/or an embedded photo/video. You may also change the shape/color of the placemarker icon by selecting the icon in the top right corner of the form. 8. To embed a video or photo, you’ll need to locate the video/photo as it resides on the Web. To add a video, open a new browser window/tab and go to www.youtube.com to search for a video for your placemarker. 9. Select a video in your search results. Click on the “<Embed>” button at the bottom of the video.
- 7. 10. Copy the HTML text that appears. 11. Return to your MyMap browser window. Select “Edit HTML” on the form for your placemarker.
- 8. 12. Paste the HTML. Click “OK”. 13. Click “Done” to automatically save and exit the edit mode on your MyMap. Important: You will not be able to view the video until you have done this! Now test your new placemarker by clicking it and watching the YouTube video you embedded. 14. Photos can be embedded in similar ways. Add another placemarker to your MyMap (revisit steps 4 through 7 above). Add a placemarker for Chicago, IL.
- 9. 15. To embed a photo, you’ll need to locate the photo as it resides on the Web. To add a photo, open a new browser window/tab and go to www.picasa.com to search for a photo for your placemarker. 16. Select a photo from your search results. You’ll now need to extract the URL for the image. Right click on the photo to copy the URL address. 17. Return to your MyMaps browser window. Make sure you have selected “Edit HTML” on the form for your placemarker. Enter the following HTML tag: <img src=””> and in between the quotation marks, paste the URL for the photo. Click “OK” and “Done” as in steps 12 and 13. Test your new placemarks. If it you do not see your photo, make sure that you used double-quotes in your HTML tag, not single quotes and that both symbols < and > are present. Most problems will be a simple typo in the HTML tag. Success - now you know how to create multimedia maps using Google Maps and other Internet services! Any images and video you collected on your campus transects are being uploaded to Picassa and YouTube now (sketches being scanned and the resulting files uploaded). Your group will now be able to create a digital map of your route, using the steps described above. A good first step would be to create the map for your group, and use the line tool to draw out the route you mapped. Then, you’ll be able to add points and other details you recorded along the way.
- 10. Participatory Mapping: Engaging Sites, Mobilizing Knowledges References & Resources Resources for Multimedia Mapping & Geovisualization (used in today’s workshop) Google MyMaps: http://maps.google.com Picassa: http://picasaweb.google.com YouTube: http://www.youtube.com Additional Mapping & Geovisualization Resources Online GIS-based mapping from ESRI: http://www.arcgis.com/home/ Geo-blog services: http://www.mapchannels.com/ Information visualization tools: http://manyeyes.alphaworks.ibm.com/manyeyes/ Related Readings Brown, M. and Knopp, L. 2008. Queering the map: The Productive Tensions of Colliding Epistemologies. Annals of the Association of American Geographers 98(1): 40-58. Cope, M. and Elwood, S. 2009. Qualitative GIS: A Mixed Methods Approach. Sage Publications. Crampton, J. 2009b: Cartography: performative, participatory, political. Progress in Human Geography 33, 840–848. Elwood, S. 2009. Integrating action research and GIS education: Negotiating methodologies, politics, and technologies. The Journal of Geography in Higher Education 33(1): 51-65. Jung, J. and Elwood, S. 2010. Extending the qualitative capabilities of GIS: Computer-Aided Qualitative GIS. Transactions in GIS 14(1): 63-87. Kwan, M. 2007: Affecting geospatial technologies: toward a feminist politics of emotion. The Professional Geographer 59, 22–34. Parks, L. 2009: Digging into Google Earth: an analysis of ‘Critic in Darfur’. Geoforum 40, 535– 545. Rumsey, A. 2009: Scholarly Communications Institute 7: Spatial Technologies and the Humanities. Available at: http://www.uvasci.org/current-institute/summary/ . Wilson, M. In press. Training the eye’: formation of the geocoding subject. Social and Cultural Geography. Wood, D. 2003. Cartography is Dead (Thank God!). Cartographic Perspectives 45: 4-7.