2. • Create and use a template
• Import data from a text file, an Access database,
a webpage, and a Word document
• Paste special
• Transpose data while pasting it
• Convert text to columns
• Replicate formulas
Objectives
Creating Templates, Importing Data, and Working with SmartArt, Images, and Screen Shots 2
3. • Use the Quick Analysis tool
• Find and replace data
• Insert and format a 3-D cone chart
• Use WordArt to create a title
• Insert and modify a SmartArt graphic
• Format images with styles
• Include a hyperlinked screen shot
Creating Templates, Importing Data, and Working with SmartArt, Images, and Screen Shots 3
Objectives
4. Creating Templates, Importing Data, and Working with SmartArt, Images, and Screen Shots 4
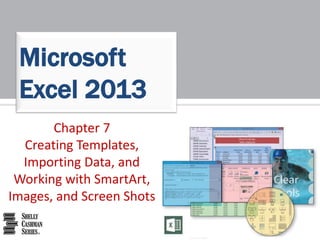
Project – Clear Pools Sales Analysis
5. • Create a template with sample data and formulas
• Use a template to create a new workbook
• Import and format outside data into an excel workbook
• Use the quick analysis tool to create charts and totals
easily
• Find and replace data
• Insert and format a 3-d cone chart
• Create and format a SmartArt graphic to display pictures
and text
• Add a hyperlinked screen shot
Creating Templates, Importing Data, and Working with SmartArt, Images, and Screen Shots 5
Roadmap
6. Creating Templates, Importing Data, and Working with SmartArt, Images, and Screen Shots 6
Saving the Template
• Tap or click the Save button to display the Save
As dialog box
• Type the desired file name in the File name box
• Tap or click the ‘Save as type’ box arrow and
then click Excel Template in the list to specify
that this workbook should be saved as a
template
• Navigate to the desired save location
• Tap or click the Save button
8. Creating Templates, Importing Data, and Working with SmartArt, Images, and Screen Shots 8
Opening a Template and Saving It as a
Workbook
• With Excel active, tap or click File Explorer app button
on the taskbar to run the File Explorer app
• Navigate to the location of the file to be opened
• Double-tap or double-click the template file to open a
new file based on the template
• Tap or click the Save button to display the Save As
gallery
• Type the file name in the File name box and then
navigate to your storage location
• Tap or click the Save button to save the file
9. Creating Templates, Importing Data, and Working with SmartArt, Images, and Screen Shots 9
Opening a Template and Saving It as a
Workbook
10. Creating Templates, Importing Data, and Working with SmartArt, Images, and Screen Shots 10
Importing Data from a Text File into a
Worksheet
• Tap or click the first cell on the worksheet to contain
the imported data
• Tap or click the ‘Get Data From Text’ button on the
DATA tab to display the Import Text File dialog box
• If necessary, navigate to the location of the file
containing text to insert
• Double-tap or double-click the name of the file to start
the Text Import Wizard and display the Text Import
Wizard – Step 1 of 3 dialog box
• Tap or click the Next button to display the Text Import
Wizard Step 2 of 3 dialog box
11. Creating Templates, Importing Data, and Working with SmartArt, Images, and Screen Shots 11
Importing Data from a Text File into a
Worksheet
• Select the delimiter
• Tap or click the Next button to display the Text Import
Wizard – Step 3 of 3 dialog box
• Tap or click the Finish button to finish importing the
selected text file and display the Import Data dialog box
• Tap or click the Properties button to display the External
Data Range Properties dialog box
• Tap or click on the desired settings, and then tap or click
the OK button to accept the settings
• Tap or click the OK button to import the data from the
text file into the worksheet, beginning in the selected cell
12. Creating Templates, Importing Data, and Working with SmartArt, Images, and Screen Shots 12
Importing Data from a Text File into a
Worksheet
13. Creating Templates, Importing Data, and Working with SmartArt, Images, and Screen Shots 13
Importing Data from an Access Table
into a Worksheet
• Tap or click the first cell on the worksheet to contain the
imported data
• Tap or click the ‘Get Data From Access’ button on the
DATA tab to display the Select Data Source dialog box
• Navigate to the location of the Access database file
containing the table to insert
• Tap or click the name of the file to import
• Tap or click the Open button to display the Import Data
dialog box
• Tap or click the OK button to import the data in the
database to a table
14. Creating Templates, Importing Data, and Working with SmartArt, Images, and Screen Shots 14
Importing Data from an Access Table
into a Worksheet
15. Creating Templates, Importing Data, and Working with SmartArt, Images, and Screen Shots 15
Formatting the Access Data
• Press and hold or right-click the desired cell and then
tap or click Table on the shortcut menu.
• Tap or click ‘Convert to Range’ on the Table submenu
and then tap or click the OK button to convert the
table to a range
16. Creating Templates, Importing Data, and Working with SmartArt, Images, and Screen Shots 16
Importing Data from a Webpage into a
Worksheet
• Tap or click the first cell on the worksheet to contain
the imported data
• Tap or click the ‘Get data From Web’ button on the
DATA tab to display the New Web Query dialog box
• Type the Web page address in the Address bar, and
then tap or click the Go button to display the
webpage in the preview area
• Tap or click the right arrow button near the data in
the HTML table to select it
17. Creating Templates, Importing Data, and Working with SmartArt, Images, and Screen Shots 17
Importing Data from a Webpage into a
Worksheet
• Tap or click the Import button to display the Import
Data dialog box
• Tap or click the Properties button to display the
External Data Range Properties dialog box
• Set the desired settings, and then tap or click the OK
button
• Tap or click the OK button to import the data from
the webpage into the worksheet
18. Creating Templates, Importing Data, and Working with SmartArt, Images, and Screen Shots 18
Importing Data from a Webpage into a
Worksheet
19. Creating Templates, Importing Data, and Working with SmartArt, Images, and Screen Shots 19
Using Paste Special
• Open the file from which the data should be copied.
• Select the data and press CTRL+C to copy the data to the
Office clipboard
• Exit the file and make Excel the active window
• Tap or click the desired cell to paste into
• Tap or click the Paste arrow on the HOME tab to display the
Paste gallery
• Tap or click the Paste Special command in the Paste Gallery
to display the Paste Special dialog box
• Tap or click the desired Paste setting and then tap or click
the OK button to paste
21. Creating Templates, Importing Data, and Working with SmartArt, Images, and Screen Shots 21
Transposing
• With the range to be copied selected, press
CTRL+C to copy the selection to the Office
Clipboard
• Tap or click a cell to prepare for pasting data into
that location
• Tap or click the Paste arrow on the HOME tab to
display the Paste gallery
• Tap or click the Transpose button in the Paste
gallery to transpose and paste the copied cells
23. Creating Templates, Importing Data, and Working with SmartArt, Images, and Screen Shots 23
Converting Text to Columns
• Select the cells to prepare for converting the text to columns
• Tap or click the ‘Text to Columns’ button on the DATA tab to
display the Convert Text to Columns Wizard – Step 1 of 3
dialog box
• Tap or click the Next button to accept Delimited as the file
type and to display the Convert Text to Columns Wizard –
Step 2 of 3 dialog box
• Tap or click to place a check mark next to the appropriated
delimiter and to display the data fields correctly in the Data
preview area
• Tap or click the Finish button to close the dialog box and
separate the data
24. Creating Templates, Importing Data, and Working with SmartArt, Images, and Screen Shots 24
Converting Text to Columns
25. Creating Templates, Importing Data, and Working with SmartArt, Images, and Screen Shots 25
Replicating Formulas
• Tap or click the formula(s) to replicate
• Drag the fill
handle down
through the
desired row
to replicate
the formula
26. Creating Templates, Importing Data, and Working with SmartArt, Images, and Screen Shots 26
Formatting with the Quick Analysis
Toolbar
• With the range you want formatted selected, tap
or click the ‘Quick Analysis Lens’ button to display
the Quick Analysis toolbar
• If necessary, tap or click the FORMATTING tab to
display the Quick Analysis buttons related to
formatting
• Tap or click the desired settings
• Tap or click a desired cell and type a legend for
the formatting
27. Creating Templates, Importing Data, and Working with SmartArt, Images, and Screen Shots 27
To Format with the Quick Analysis
Toolbar
28. Creating Templates, Importing Data, and Working with SmartArt, Images, and Screen Shots 28
Totaling Data with the Quick Analysis
Toolbar
• With the range you want to analyze selected, tap
or click the ‘Quick Analysis Lens’ button to display
the Quick Analysis toolbar
• Tap or click the TOTALS tab button tab to display
the Quick Analysis button related to totals
• Tap or click the Sum button
29. Creating Templates, Importing Data, and Working with SmartArt, Images, and Screen Shots 29
Totaling Data with the Quick Analysis
Toolbar
30. Creating Templates, Importing Data, and Working with SmartArt, Images, and Screen Shots 30
Finding Data
• Tap or click the ‘Find & Select’ button on the HOME tab to
display the Find & Select menu
• Tap or click Find to display the Find and Replace dialog box
• Tap or click the Options button to expand the dialog box
• Type in the Find what box to enter the search string
• If desired, tap or click Match case and/or ‘Match entire cell
contents’ to insert check marks in those check boxes
• Tap or click the Find Next button
• Continue tapping or clicking the Find Next button to find
additional occurrences of the string
32. Creating Templates, Importing Data, and Working with SmartArt, Images, and Screen Shots 32
Finding and Replacing
• Tap or click the Find & Select button on the HOME tab to
display the Find & Select menu
• Tap or click Replace on the Find & Select menu to display
the Find and Replace dialog box
• Type the text to find in the Find what box, and the text to
replace with in the Replace with box
• If desired, tap or click Match case and/or Match entire
cell contents to insert check marks in those check boxes
• Tap or click the Replace All button to replace the string
• Tap or click the OK button
34. Creating Templates, Importing Data, and Working with SmartArt, Images, and Screen Shots 34
Inserting a Chart Using the Quick
Analysis Toolbar
• Select the data to include in the chart
• Tap or click the ‘Quick Analysis Lens’ button to
display the Quick Analysis toolbar
• Tap or click the CHARTS tab to display the buttons
related to working with charts on the toolbar
• Tap or click the More Charts button to display the
Insert Chart dialog box
• Tap or click the ALL CHARTS tab and then type the
desired chart style
35. Creating Templates, Importing Data, and Working with SmartArt, Images, and Screen Shots 35
Inserting a Chart Using the Quick
Analysis Toolbar
• Tap or click the OK button to insert the chart
• Tap or click the Move Chart button on the CHART
TOOLS DESIGN tab to display the Move Chart
dialog box
• Tap or click the New sheet option button, and
then type the desired sheet name in the New
sheet text box
• Tap or click the OK button to move the chart to
the new sheet
36. Creating Templates, Importing Data, and Working with SmartArt, Images, and Screen Shots 36
Inserting a Chart Using the Quick
Analysis Toolbar
37. Creating Templates, Importing Data, and Working with SmartArt, Images, and Screen Shots 37
Formatting the Chart
• Tap or click the ‘Chart Quick Colors’ button on the CHART
TOOLS DESIGN tab and then select the desired color to
change the chart to
• Press and hold or right-click any of the data columns on
the chart to display the shortcut menu
• Tap or click ‘Format Data Series’ on the shortcut menu to
display the Format Data Series task pane
• If necessary, tap or click the Series Options button to
display options for working with series
• Tap or click the desired Column shape option button in
the Column shape area to select it
38. Creating Templates, Importing Data, and Working with SmartArt, Images, and Screen Shots 38
Formatting the Chart
• Tap or click the Close button to close the task pane
• Tap or click the Chart Elements button in the upper-right
corner of the chart area and then tap of lick Axis Titles in
the CHART ELEMENTS Gallery to display the axis titles
• Select the text in each of the axis and type the desired
replacement text or delete the text
• Tap or click the Chart Styles button in the upper-right
corner of the chart area and then select a style
• Tap or click the Chart Styles button again to close the
Chart Styles gallery
40. Creating Templates, Importing Data, and Working with SmartArt, Images, and Screen Shots 40
Adding a Chart Title Using the WordArt
Tool
• Tap or click anywhere on the chart
• Tap or click the Insert WordArt button in the INSERT tab to
display the WordArt gallery
• Tap or click the desired WordArt style to insert the new
WordArt object
• Drag the inserted WordArt object to the desired location
• Select the text in the WordArt object to display the mini
toolbar
• Tap or click the Font Color arrow in the HOME tab and then
tap or click the desired color
• Type the desired text for the WordArt
41. Creating Templates, Importing Data, and Working with SmartArt, Images, and Screen Shots 41
Adding a Chart Title Using the WordArt
Tool
42. Creating Templates, Importing Data, and Working with SmartArt, Images, and Screen Shots 42
Inserting a SmartArt Graphic
• Tap or click the ‘Insert SmartArt Graphic’ button in
the INSERT tab to display the SmartArt Graphic dialog
box
• Tap or click the desired type of SmartArt in the left
pane of the Choose a SmartArt Graphic dialog box
• Tap or click the desired layout in the gallery
• Tap or click the OK button in the Choose a SmartArt
Graphic dialog box to insert an Accented Picture
SmartArt graphic in the worksheet
43. Creating Templates, Importing Data, and Working with SmartArt, Images, and Screen Shots 43
Inserting a SmartArt Graphic
44. Coloring and Resizing the SmartArt
Graphic
Creating Templates, Importing Data, and Working with SmartArt, Images, and Screen Shots 44
• Tap or click the Change Colors button on the SMARTART
TOOLS DESIGN tab to display the Change Colors gallery
• Tap or click the desired color
• Drag the
sizing
handles
to resize
the
SmartArt
graphic to
the
desired size
45. Adding Shapes to a SmartArt Graphic
Creating Templates, Importing Data, and Working with SmartArt, Images, and Screen Shots 45
• Tap or click the Add Shape button on the
SMARTART TOOLS DESIGN tab to add shapes to
the
SmartArt
graphic
46. Adding Text to a SmartArt Graphic
Creating Templates, Importing Data, and Working with SmartArt, Images, and Screen Shots 46
• Tap or click the Text Pane button on the
SMARTART TOOLS DESIGN tab to display the Text
Pane
• Tap or click the first bulleted item in the Text Pane
and then type the desired text
• If desired, enter text in the other boxes
47. Adding Text to a SmartArt Graphic
Creating Templates, Importing Data, and Working with SmartArt, Images, and Screen Shots 47
48. Adding Pictures to a SmartArt Graphic
Creating Templates, Importing Data, and Working with SmartArt, Images, and Screen Shots 48
• Tap or click the first Insert Picture icon in the Text
Pane to display the Insert Pictures dialog box
• Tap or click the Office.com Clip Art box and then
type the desired search term
• Press the ENTER key to perform the search and
double-tap or double-click the desired picture
• Tap or click the Insert button to insert the picture
49. Creating Templates, Importing Data, and Working with SmartArt, Images, and Screen Shots 49
Adding Pictures to a SmartArt Graphic
50. Adding a Style to a SmartArt Graphic
Creating Templates, Importing Data, and Working with SmartArt, Images, and Screen Shots 50
• Tap or click More button in the SMARTART TOOLS
DESIGN tab to display the SmartArt Style gallery
• Tap or click the desired style to apply the style to
the SmartArt graphic
51. Inserting a Screen Shot on a Worksheet
Creating Templates, Importing Data, and Working with SmartArt, Images, and Screen Shots 51
• Display the webpage you wish to insert
• Display the Excel window
• Tap or click the ‘Take a Screenshot’ button in the
INSERT tab to display the Take a Screenshot menu
• Tap or click the live preview corresponding to the
screen you wish to insert in the worksheet
• Tap or click the Yes button to insert the screen
shot
52. Inserting a Screen Shot on a Worksheet
Creating Templates, Importing Data, and Working with SmartArt, Images, and Screen Shots 52
53. Chapter Summary
Creating Templates, Importing Data, and Working with SmartArt, Images, and Screen Shots 53
• Create and use a template
• Import data from a text file, an Access database, a
webpage, and a Word document
• Paste special
• Transpose data while pasting it
• Convert text to columns
• Replicate formulas
54. Chapter Summary
Creating Templates, Importing Data, and Working with SmartArt, Images, and Screen Shots 54
• Use the Quick Analysis tool
• Find and replace data
• Insert and format a 3-D cone chart
• Use WordArt to create a title
• Insert and modify a SmartArt graphic
• Format images with styles
• Include a hyperlinked screen shot