Dgs co 968-034 digital co sensor module
•
0 likes•101 views

Easily add Carbon Monoxide sensing to your IoT application with our digital CO sensor module that provides a calibrated and temperature compensated output. 0 to 1000 ppm Carbon Monoxide sensor with digital output

Recommended
Recommended
More Related Content
What's hot
What's hot (20)
Similar to Dgs co 968-034 digital co sensor module
Similar to Dgs co 968-034 digital co sensor module (20)
Recently uploaded
Recently uploaded (20)
Dgs co 968-034 digital co sensor module
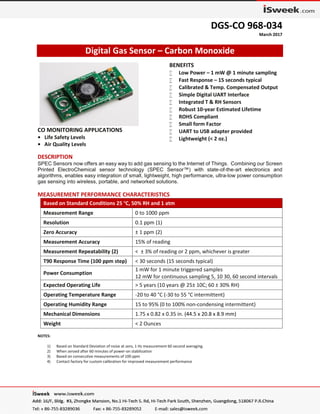
- 1. DGS-CO 968-034 March 2017 Digital Gas Sensor – Carbon Monoxide CO MONITORING APPLICATIONS • Life Safety Levels • Air Quality Levels BENEFITS Low Power – 1 mW @ 1 minute sampling Fast Response – 15 seconds typical Calibrated & Temp. Compensated Output Simple Digital UART Interface Integrated T & RH Sensors Robust 10-year Estimated Lifetime ROHS Compliant Small form Factor UART to USB adapter provided Lightweight (< 2 oz.) DESCRIPTION SPEC Sensors now offers an easy way to add gas sensing to the Internet of Things. Combining our Screen Printed ElectroChemical sensor technology (SPEC Sensor™) with state-of-the-art electronics and algorithms, enables easy integration of small, lightweight, high performance, ultra-low power consumption gas sensing into wireless, portable, and networked solutions. MEASUREMENT PERFORMANCE CHARACTERISTICS Based on Standard Conditions 25 ºC, 50% RH and 1 atm Measurement Range 0 to 1000 ppm Resolution 0.1 ppm (1) Zero Accuracy ± 1 ppm (2) Measurement Accuracy 15% of reading Measurement Repeatability (2) < ± 3% of reading or 2 ppm, whichever is greater T90 Response Time (100 ppm step) < 30 seconds (15 seconds typical) Power Consumption 1 mW for 1 minute triggered samples 12 mW for continuous sampling 5, 10 30, 60 second intervals Expected Operating Life > 5 years (10 years @ 25± 10C; 60 ± 30% RH) Operating Temperature Range -20 to 40 °C (-30 to 55 °C intermittent) Operating Humidity Range 15 to 95% (0 to 100% non-condensing intermittent) Mechanical Dimensions 1.75 x 0.82 x 0.35 in. (44.5 x 20.8 x 8.9 mm) Weight < 2 Ounces NOTES: 1) Based on Standard Deviation of noise at zero, 1 Hz measurement 60 second averaging. 2) When zeroed after 60 minutes of power-on stabilization 3) Based on consecutive measurements of 100 ppm 4) Contact factory for custom calibration for improved measurement performance
- 2. DGS-CO 968-034 March 2017 ABSOLUTE MAXIMUM RATINGS Parameter Conditions Min. Rec. Max. Units Maximum Concentration Short term exposure 0 1000 5000 ppm Supply Voltage Regulated 2.6 3.6 V Storage Temperature Vapor sealed @ 50% RH 5 20 30 ̊C Storage Humidity Non-condensing, vapor sealed 20 50 80 % RH Storage Pressure Vapor sealed 0.8 1 1.2 atm Storage Time Vapor sealed - 12 - Months Operating Temperature < 10 hours -40 - 50 ̊C Operating Humidity < 10 hours, Non-Condensing 0 - 100 % RH Operating Pressure Transient pulses -.5 0 .5 atm Operating Temperature Continuous -30 25 50 ̊C Operating Humidity Continuous, Non-Condensing 10 50 95 % RH Operating Pressure Continuous 0.8 1 1.2 atm ESD Rating Human Body Model 2 8 kV ELECTRICAL CHARACTERISTICS Parameter Conditions Min. Typ. Max. Units Supply Current V+ = 3.0 V 0.05 4 mA Power Consumption V+ = 3.0 V 0.15 12 mW CROSS SENSITIVITY The following table lists the relative response of common potential interfering gases, and the concentration at which the data was gathered. Gas/Vapor Applied Concentration Typical Response PPM CO Carbon Monoxide 400 ppm 400 Hydrogen 100 ppm 17 Isopropyl Alcohol 200 ppm 1.3 Carbon Dioxide 5000 ppm < 1 Methane 3000 ppm < 1 Ammonia 100 ppm < 1 Nitrogen Dioxide 10 ppm < 1 Hydrogen Sulfide 25 ppm < 1 Ozone 5 ppm < 1 Sulfur Dioxide 20 ppm < 1 Chlorine 10 ppm < 1 n-Heptane 500 ppm < 1 Toluene 200 ppm < 1 Acetone 200 ppm < 1
- 3. DGS-CO 968-034 March 2017 PACKAGE OUTLINE DRAWING & DIMENSIONS PINOUT Electrical connections to the DGS are made via a rectangular female socket connector (Sullins Connector Solutions P/N: PPPC041LGBN-RC; recommended mate for host board: P/N: PBC08SBAN). This connector also provides mechanical rigidity on one end of the board. A through-hole is located on the opposite end of the board to provide additional mechanical connection. Pin# Function Notes 1 N/C 2 RXD 3 TXD 4 N/C 5 N/C 6 GND 7 N/C 8 V+ Voltage Supply Input: 2.6 to 3.6 V
- 4. DGS-CO 968-034 March 2017 QUICK START – TERMINAL PROGRAM OPERATION 1. Download and install a terminal program, such as Tera Term. 2. Connect the DGS to the USB to UART Bridge via the adapter board. 3. Connect the USB to your computer a. If device drivers are not automatically downloaded and installed, you can find device drivers for your operating system by searching www.silabs.com for: “CP210x USB to UART Bridge VCP Drivers”. 4. Determine the COM port that is associated with the module a. On Windows operating systems, locate and open the Device Manager. b. The DGS device should be listed under the heading, “Ports (COM & LPT)”, as “Silicon Labs CP210x USB to UART Bridge (COMXX)”, where XX is the unique port number associated with the device. c. Make a note of the unique port number. 5. Open Tera Term and establish a serial connection with the module a. In the “New Connection” window, select the “Serial” radio button. b. In the drop down list, select the appropriate COM port, identified above, then Select “OK”. c. On the Menu bar, select “Setup”, then “Serial port…” Use: USB to UART BRIDGE SETTINGS Voltage level: 3.3 V Baud: 9600 Data bits: 8 Stop bits: 1 Parity: None Flow Control: None d. Select “OK” 6. Start Continuous Measurement in Terminal Window a. Type any key to TRIGGER a measurement that takes about 1 second. b. Type ‘c’ (lower-case c, without quotation marks). c. The terminal program then prompts for an interval time. Type any of the 4 choices (5, 10, 30, or 60s) and then press “Enter” on your keyboard. d. The format of the output is: SN [XXXXXXXXXXXX], PPB [0 : 999999], TEMP [-99 : 99], RH [0 : 99], RawSensor[ADCCount], TempDigital, RHDigital, Day [0 : 99], Hour [0 : 23], Minute [0 : 59], Second [0 : 59] e. Type ‘r’ or ‘R’ at any time to reset the module and stop the continuous data output stream. 7. Initial ZERO (Clean Air) Calibration a. When first given power after a long period of unpowered storage, the sensor needs to stabilize in clean air to its zero offset current. b. WAIT at least 1 hour in clean air while ensuring USB port has not gone to sleep. Sampling in continuous mode is one way to ensure this. c. Wake with any character, then type uppercase Z in the terminal window followed by unlock code 12345/r when prompted.
- 5. DGS-CO 968-034 March 2017 NORMAL SENSOR STARTUP FROM HAVING NO POWER APPLIED The electrochemical sensor output has the normal startup profile pictured here. When powering the sensor, its output will rapidly increase followed by a gradual decrease. Once this process is complete, the sensor output will be the most accurate and stable. The time and magnitude of this response may vary depending on the sensor type and the length of time the sensor has been unpowered. For the best results, it is recommended that the module remains always on power. DGS module automatically enters a low-power state between TRIGGER measurements keeping the sensor powered on for highest accuracy. DGS OPERATION When the DGS is connected to V+ and GND: The module’s microprocessor will automatically configure the sensor and circuit for operation, output a measurement, and then enter a low power stand-by mode. While in stand-by mode, critical sensor circuitry remains active to ensure the highest accuracy for future sensor measurements. If the module is powered and in low-power stand-by mode: Any data (i.e. single key stroke) received on the UART interface will TRIGGER a measurement that is transmitted via UART. Due to the high-accuracy ADC sampling method, there is a 1 second delay between when the module receives a command and when the module transmits a response. After this, the module will re-enter the low-power stand-by mode. If the module receives a recognized command within 1-second of a TRIGGER: The command will be executed. Refer to the Simple Command Library for more information on recognized commands. NOTE: When entering commands via a script or software, allow for a small delay in between all characters.
- 6. DGS-CO 968-034 March 2017 SIMPLE COMMAND LIBRARY To execute one of the following commands, send the corresponding case-sensitive ASCII character via UART, within 5-seconds of a TRIGGER key stroke (entering command twice works well) NOTE: When entering commands via a script or software, allow for a small delay in between all characters. Lowercase c: CONTINUOUS data output The user is prompted to enter a measurement period (5, 10, 30, or 60 seconds) Press ‘r’ or ‘R’ to exit NOTE: In this mode, the module does not enter low power stand-by between measurements. Uppercase Z: ZERO user calibration The sensor calibration is recalculated such that the module output is 0 ppm. (Enter “12345r” or “12345” followed by a return character for unlock code) Uppercase B: Barcode entry Initial setup for sensor based on the barcode sticker on the back of the sensor (Enter “12345r” or “12345” followed by a return character for unlock code) Uppercase S: Span user calibration The sensor nA/PPM value is recalculated such that the module output is the same as the entered value. (Enter “12345r” or “12345” followed by a return character for unlock code) Uppercase L: LMP91000 manual setting Allows the user the manually set the LMP91000. Refer to the LMP91000 datasheet for information on the settings. (Enter “12345r” or “12345” followed by a return character for unlock code) Lowercase l: LMP910000 read Reads out the settings on the LMP91000 Lowercase e: EEPROM readout Stored module parameters are output for diagnostic purposes. Example output on next page
- 7. DGS-CO 968-034 March 2017 EEPROM EXAMPLE OUTPUT EEPROM Values nA_per_PPM_x100 = 3947 ADC_OC = 32712 ADC_Zero = 32712 ADC_Span = 65535 PPM_Span_x100 = 65535 Temperature_Offset_x1000 = -1 T_Zero = 25360 RH_Zero = 31218 T_Span = 65535 RH_Span = 65535 LMP91000 Register 0x10 = 3 LMP91000 Register 0x11 = 182 LMP91000 Register 0x12 = 3 Barcode = 090115011033 110601 SO2 1509 39.47 Serial_Number_ = 090115011033 Part_Number = 110601 Gas = SO2 Date_Code = 1509 Sensitivity_Code = 39.47 IMPORTANT PRECAUTIONS All sensor designs are made for air monitoring @ 1 atm +/- 0.2 atm. Because applications of use and device implementation are outside our control, SPEC Sensors cannot guarantee performance in a given device or application, and disclaims any and all liability therefore. Customers should test under their own conditions to ensure the sensors are suitable for their requirements. Contact the factory to discuss specific concerns that might damage the sensor performance or life. Condensation and Water (1) High Temperature Operation (> 40C) for more than 1 month Low Humidity Operation (< 15% RH) for more than 3 months Highly contaminated air over a prolonged period High levels of particles or soot (unless proper filtering is provided)[2] (1) Use of porous PTFE membrane or filter cap may address this concern) (2) Use of replaceable filter recommended where dust and particulate is expected.
- 8. DGS-CO 968-034 March 2017 SENSOR STORAGE, HANDLING AND SOLDERING This information embodies various general recommendations concerning the storage, handling, and manual soldering conditions for SPEC SENSORS CSPEC Modules. It is only applicable for modules guaranteed by SPEC SENSORS stated in SPEC SENSORS Sensor Specification Sheet. Moreover, SPEC SENSORS' modules are NOT warranted and should NOT be used in high temperature soldering (reflow) or pre-tinning baths. Sensor & Module Handling Handle sensors with care. Take precautions, including but not limited to the following: A. DO NOT apply excessive pressure to the top or bottom of the sensor module. B. Whenever possible, handle or make contact with the sensor module from the sides of the PCB or substrate. C. Light vacuum pressure is possible during handling, DO NOT apply vacuum over gas sensor port. D. If the sealed sensor package is opened, DO NOT re-seal using vacuum or nitrogen gas. DO NOT reseal with desiccant. E. DO NOT obstruct the gas sensor port by making direct contact with any tape, apparatus, weights, etc. F. DO NOT use silicone or other conformal coatings around the sensor or gas port-holes. G. Operators are requested to wear powder free antistatic gloves. Manufacturing Assembly Floor Environment SPEC SENSORS recommends that the manufacturing assembly floor environment be maintained at controlled conditions: A. Temperature: 18 - 26°C B. Relative Humidity: 40 to 60% C. Pressure: 1.0 ± 0.2 atm Sensor & Module Storage Conditions The shelf life for sealed, packaged components is 12 months from the pack seal date, when stored in the factory- sealed bag under the following conditions: A. Temperature: 5 to 25 °C B. Relative Humidity: 20 to 80% C. Pressure: 1.0 ± 0.2 atm D. Storage Time: 12 months When moving from Storage Conditions to the Manufacturing Assembly Floor Environment, the sensors should be allowed to equilibrate at the new conditions for at least 24 hours prior to manufacturing. Module Attach Soldering Process Hand solder only. Keep the soldering iron or solder process tool away from the sensor. The sensor should not see pre-heat temperatures above 70 °C. There have been suggested cases where a heat sink cover over the sensor may be applicable to protect the sensor during processing. No Application notes to this approach available. Only to be used as reference only. A. DO NOT heat sensor above 70 °C B. Hand or peripheral process type approach C. Use solder wire alloy with the lowest possible eutectic temperature D. Use lowest possible soldering iron temperature E. Contact the host board with the soldering iron at a 45° angle on the solder pad F. Keep the soldering iron away from the top and bottom of the sensor module G. DO NOT place in reflow, wave or IR reflow type processes H. DO NOT place mounted board In a wash