
Recommended
More Related Content
Viewers also liked
Viewers also liked (12)
Similar to How To Sew: Car Organizer Bag
Similar to How To Sew: Car Organizer Bag (20)
More from CandCSewing
Recently uploaded
Recently uploaded (20)
How To Sew: Car Organizer Bag
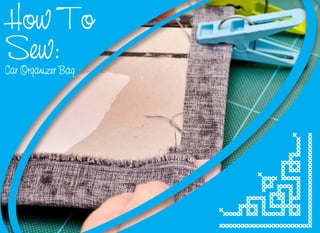
- 1. How To Sew:Car Organizer Bag
- 2. Is your auto a chaotic wreckage inside? Have inconvenience finding or achieving what you require in your auto? Make an auto coordinator with C and C Enterprises that incorporates a clear pocket and movable strap. Ideal for holding basics in a hurry! Recommended Machine: JK - SHIRLEY
- 3. You Will Need: 5/8 yard cotton fabric (quilting weight) for main bag 5/8 yard cotton fabric (quilting weight) for bag lining One 13” x 13” piece of clear vinyl for pocket window 1/4 yard fusible interfacing 1/4 yard solid colored cotton fabric (quilting weight) for bag upper edge binding One 1/2” or 5/8” button Rotary cutter, mat and ruler All-purpose thread for construction
- 4. Sewing Directions: 1. Cut two pieces 13" x 17" from the fundamental fabric and pack lining texture. Cut four pieces from the fusible interfacing. 2. Cut 1 piece from pack lining texture 23" x 3" for the strap. 3. Cut 1 piece from sack binding texture 25" x 2". 4. Combine the interfacing to each cut texture piece from step 1, taking after the interfacing producer's suggestions. 5. Put one sack lining and one external pack main panel right sides together and mark a sewing line 4" from lower cut edge and 2½" from sides what's more, upper edges. Join, in one constant sewing line on the mark, turning at the corners.
- 5. 6. Remove the inside fabrics leaving about ½" crease remittance and clasp nearly to the sewing line at the corners. Turn the textures right side out so that the wrong sides are touching. 7. Push down. 8. Slip the clear vinyl behind the opening, touching the lining texture, and sew around the opening 1/4" from the edge and again 1/4" from the edge. Cut away the overabundance vinyl leaving ¼" on the edges.
- 6. 9. Sew the fundamental sack texture panel to the primary pack fabric panel with the vinyl window along the edges and bring down edge. Utilize a ½" crease remittance. 10.Sew the fundamental coating fabric panel to the covering panel with the vinyl window along the edges and lower edge. Utilize a ½" crease recompense. 11.Cut out a ¾" square from the lower corners of the external and covering textures. 12.Open up the cut edge of one corner of the external pack textures and adjust the lower edge and side edge creases. Sew the gusset over the crease line, utilizing a ½" crease recompense. Back line to secure the crease. Rehash with each cut corner of the external pack and pack lining. 13. Turn the pack right side out and slip the coating into the fundamental sack.
- 7. 14. Press the binding strip wrong sides together in half and after that open up the squeezed strip and press each long open edge to the inside wrinkled line. Overlay it again on the first wrinkled line and press to make twofold crease authoritative. 15.Unfold the squeezed binding and sew the two short closes together with right sides confronting utilizing a ½" crease recompense. Press and re-overlay as in step 14. 16. Put authoritative on upper edge of pack catching the crude edges of the sack between the two collapsed edges of the authoritative. Topstitch the coupling onto the sack edge near the second crease of the official.
- 8. 17. Overlap each short end of the strap area to the wrong side by 1". Press the strap in the same area as step 14. 18. Topstitch the strap around the greater part of the edges 1/4" from the collapsed edge. 19. Fasten the strap onto the upper edge of the pack, 1" from the left side crease, on the fundamental board WITHOUT the vinyl window.
- 9. 20. At the inverse end of the strap make two to three button cuts, estimated to fit your button, divided ½" from the finish of the strap with 1" between each buttonhole. 21. Sew the button onto within the upper edge of the sack, 1" from the correct side crease, on the fundamental panel WITHOUT the vinyl window. 22.Using the movable strap, circle the strap around the headrest of your auto situate and button it. And now you have yourself a handy Car Organizer Bag!