
Recommended
More Related Content
What's hot
What's hot (20)
Viewers also liked
Viewers also liked (14)
Similar to Sap r3 basic_training_finance_en_v5
Similar to Sap r3 basic_training_finance_en_v5 (20)
Recently uploaded
Recently uploaded (20)
Sap r3 basic_training_finance_en_v5
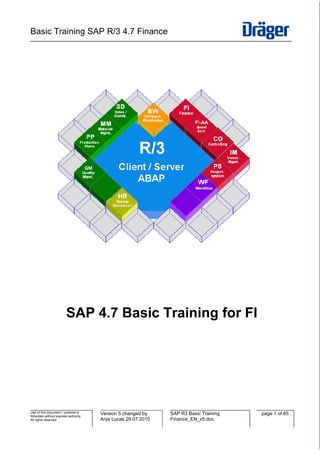
- 1. Basic Training SAP R/3 4.7 Finance _________________________________________________________________________________________________ SAP 4.7 Basic Training for FI Use of this document / contents is Version 5 changed by SAP R3 Basic Training page 1 of 85 forbidden without express authority. All rights reserved. Anja Lucas 29.07.2010 Finance_EN_v5.doc
- 2. Basic Training SAP R/3 4.7 Finance _________________________________________________________________________________________________ Contents 1 Log on to SAP .......................................................................................................................... 5 2 Navigation in the System ......................................................................................................... 9 2.1 Menu bar .................................................................................................................................. 9 2.1.1 System ................................................................................................................................... 10 2.1.1.1 Create Session.................................................................................................................. 10 2.1.1.2 End Session ...................................................................................................................... 11 2.1.1.3 User Profile........................................................................................................................ 11 2.1.1.4 Own Spool Requests ........................................................................................................ 11 2.1.1.5 Own Jobs .......................................................................................................................... 11 2.1.1.6 Status ................................................................................................................................ 11 2.1.1.7 Log off ............................................................................................................................... 11 2.1.2 Help ........................................................................................................................................ 11 2.2 Standard toolbar..................................................................................................................... 12 2.2.1 Layout menu........................................................................................................................... 13 2.3 Status bar ............................................................................................................................... 13 2.3.1 Message area......................................................................................................................... 13 2.3.2 Status fields ............................................................................................................................ 14 2.4 Working area .......................................................................................................................... 14 2.5 Scrolling to view information .................................................................................................. 15 2.6 Transaction Codes ................................................................................................................. 17 2.6.1 How to find the transaction code............................................................................................ 18 2.6.1.1 … in the menu tree............................................................................................................ 18 2.6.1.2 … in the Status display ..................................................................................................... 19 2.6.1.3 … in the Status bar ........................................................................................................... 19 2.7 Favorites................................................................................................................................. 20 2.7.1 Create / add Favorites............................................................................................................ 21 2.7.1.1 … with Drag and Drop....................................................................................................... 21 2.7.1.2 … with “Add to Favorites”.................................................................................................. 22 2.7.1.3 … with “Insert transaction” ................................................................................................ 23 2.7.1.4 … with “Add other objects”................................................................................................ 24 2.7.2 Change Favorites ................................................................................................................... 24 2.7.3 Move Favorites....................................................................................................................... 26 2.7.4 Delete Favorites ..................................................................................................................... 26 2.7.5 Insert Folder to Favorites ....................................................................................................... 27 2.7.6 Delete Folders from Favorites................................................................................................ 27 2.8 Multiple SAP Sessions ........................................................................................................... 28 2.8.1 Creating a session.................................................................................................................. 28 2.8.2 Creating a session and a task at once ................................................................................... 29 2.8.3 Moving among sessions......................................................................................................... 30 2.8.4 Ending a session .................................................................................................................... 31 2.9 Tabs........................................................................................................................................ 31 2.10 Radio Buttons and Checkboxes............................................................................................. 32 2.11 Dialog Boxes .......................................................................................................................... 33 3 Search Helps.......................................................................................................................... 34 3.1 Match Codes (F4-search help)............................................................................................... 34 3.2 Dynamic selections ................................................................................................................ 37 Use of this document / contents is Version 5 changed by SAP R3 Basic Training page 2 of 85 forbidden without express authority. All rights reserved. Anja Lucas 29.07.2010 Finance_EN_v5.doc
- 3. Basic Training SAP R/3 4.7 Finance _________________________________________________________________________________________________ 4 SAP Lists / Reports ................................................................................................................ 39 4.1 Output formats........................................................................................................................ 39 4.1.1 SAP List Viewer...................................................................................................................... 40 4.1.2 ABAP List ............................................................................................................................... 40 4.1.3 Display as table ...................................................................................................................... 41 4.2 Export Lists / Reports ............................................................................................................. 41 4.2.1 … export to Spreadsheet (without Filter criteria) ................................................................... 41 4.2.2 … save to Local File (with Filter criteria) ................................................................................ 42 4.2.3 … via icon „Microsoft Excel view“ .......................................................................................... 43 5 Working with the SAP List Viewer (ALV) in Line Item Display ............................................... 46 5.1 Navigating within the list......................................................................................................... 46 5.2 Branching to other functions .................................................................................................. 47 5.2.1 Displaying the Document for a Line Item ............................................................................... 47 5.2.2 Changing Documents............................................................................................................. 47 5.2.3 Mass Changes ....................................................................................................................... 47 5.2.4 Check Information .................................................................................................................. 49 5.2.5 Displaying Account Master Data ............................................................................................ 49 5.2.6 Credit Management................................................................................................................ 49 5.2.7 Correspondence..................................................................................................................... 50 5.3 Editing the layout of the line item display............................................................................... 50 5.3.1 Setting Filters ......................................................................................................................... 51 5.3.2 Sorting in Ascending or Descending Order............................................................................ 52 5.3.3 Changing Layouts .................................................................................................................. 52 5.3.3.1 Show or hide columns....................................................................................................... 53 5.3.3.2 Sequence of columns........................................................................................................ 56 5.3.3.3 Using Clipboard to change position of column.................................................................. 57 5.3.3.4 Length of columns............................................................................................................. 58 5.3.3.5 Group columns into several lines ...................................................................................... 59 5.3.4 Saving Layouts....................................................................................................................... 60 5.3.5 Selecting Layouts ................................................................................................................... 61 5.3.6 Creating Totals ....................................................................................................................... 61 5.3.7 Creating Subtotals.................................................................................................................. 61 5.4 Sending the List as a Document ............................................................................................ 63 6 Printing ................................................................................................................................... 65 6.1 Personal Standard Printer ...................................................................................................... 65 6.2 The Print Window ................................................................................................................... 67 6.3 Spool Requests ...................................................................................................................... 68 7 Personal User Settings........................................................................................................... 71 7.1 Own Data ............................................................................................................................... 71 7.2 Local Layout ........................................................................................................................... 72 7.2.1 Options ................................................................................................................................... 72 7.2.2 Set color to system … ............................................................................................................ 75 7.2.3 Hard Copy .............................................................................................................................. 76 7.2.4 Quick Cut and Paste .............................................................................................................. 76 7.3 Editing Options ....................................................................................................................... 76 8 Help Functions ....................................................................................................................... 79 8.1 F1 Help in SAP....................................................................................................................... 79 Use of this document / contents is Version 5 changed by SAP R3 Basic Training page 3 of 85 forbidden without express authority. All rights reserved. Anja Lucas 29.07.2010 Finance_EN_v5.doc
- 4. Basic Training SAP R/3 4.7 Finance _________________________________________________________________________________________________ 8.2 Application Help in SAP ......................................................................................................... 80 8.3 SAP Library in SAP ................................................................................................................ 81 8.4 LiveLink .................................................................................................................................. 81 8.5 Help on missing Authorization................................................................................................ 83 9 Log of from SAP ..................................................................................................................... 85 Use of this document / contents is Version 5 changed by SAP R3 Basic Training page 4 of 85 forbidden without express authority. All rights reserved. Anja Lucas 29.07.2010 Finance_EN_v5.doc
- 5. Basic Training SAP R/3 4.7 Finance _________________________________________________________________________________________________ 1 Log on to SAP To log on to SAP (either the productive system MT3 or, if necessary, the test system QMT for e.g. testing) you have to click on the SAP icon on your desktop. The screen for entering your user ID and password will appear. Use of this document / contents is Version 5 changed by SAP R3 Basic Training page 5 of 85 forbidden without express authority. All rights reserved. Anja Lucas 29.07.2010 Finance_EN_v5.doc
- 6. Basic Training SAP R/3 4.7 Finance _________________________________________________________________________________________________ Enter your SAP user and valid password. When you leave the field “Sprache Language” blank, die default language from your personal settings will be taken. When logging on the first time with an assigned temporary password the system will prompt you to enter a new one. Create a new password with between 6 to 8 characters. The system will inform you approximately every 90 days to create a new password. When creating a password you must use at least 6 but no more than 8 characters. Combination of alphanumeric characters, including the letters a through z, the numbers 0 through 9 and punctuation marks are allowed. Do not begin a password with a question mark (?), an exclamation point (!), a blank space, three identical characters (for example, bbbat) or any sequence of three characters contained in your user ID (for example, man, if your user ID is Friedman). Do not use “pass” or “init” as your password or any of the last five passwords you used. In the SAP System, passwords are case-sensitive. For example the password blue is different to Blue or BLUE. If you have entered 3 times a wrong password the SAP-screen will close and you have to re-start it. If this happens 3 times in a row, your user will be blocked and you have to contact the User Help Desk in Lübeck to re-set your password or use the attached document for resetting your password on your own (this new process has been implemented in November 2008). Reset password SSPR_EN.pdf If you are already logged in to SAP and try to log in a second time, the system will give you License information. Use of this document / contents is Version 5 changed by SAP R3 Basic Training page 6 of 85 forbidden without express authority. All rights reserved. Anja Lucas 29.07.2010 Finance_EN_v5.doc
- 7. Basic Training SAP R/3 4.7 Finance _________________________________________________________________________________________________ Multiple Logon is not allowed and either this new logon will be terminated (standard default) or you can terminate your previous logon and carry on with this (note; if your already existing logon is terminated here all unsaved data will be lost). Please note; in the productive system MT3 you can only logon once whilst in the quality system QMT a multiple logon is possible. SAP Password Rules at Dräger effective from 21/06/2010 Password Parameter Definition Requirements Number of digits This parameters sets the minimum number of digits 1 the password must contain. Number of letters This parameters sets the minimum number of letters 1 the password must contain. Password length This parameter determines the minimum length of 8 the logon password. Validity period Value specifies the number of days after which the 90 user has to change his or her password. Number of different Specifys how many characters in the new password 3 Use of this document / contents is Version 5 changed by SAP R3 Basic Training page 7 of 85 forbidden without express authority. All rights reserved. Anja Lucas 29.07.2010 Finance_EN_v5.doc
- 8. Basic Training SAP R/3 4.7 Finance _________________________________________________________________________________________________ characters in new must be different from the old password if the user password changes his or her password. Automatic logoff if no Defines that inactive users are automatically logged 7200 input at the GUI off from the SAP system after a specific period of time has expired. This parameter specifies the time period in seconds. Size of the password This parameter controls the size of the password 5 history history. The password history is evaluated when a user chooses a new password: the system rejects the (re)use of passwords that are stored in the password history. Use of this document / contents is Version 5 changed by SAP R3 Basic Training page 8 of 85 forbidden without express authority. All rights reserved. Anja Lucas 29.07.2010 Finance_EN_v5.doc
- 9. Basic Training SAP R/3 4.7 Finance _________________________________________________________________________________________________ 2 Navigation in the System The SAP window is the user interface to the SAP System. The elements of a typical SAP window are shown below: 2.1 Menu bar Menus allow you to find a specific transaction when you do not know the transaction code. The menu is organized according to the task you are doing in the SAP System. Menus are dropdown; that is, when you choose a menu item, further options appear. Use of this document / contents is Version 5 changed by SAP R3 Basic Training page 9 of 85 forbidden without express authority. All rights reserved. Anja Lucas 29.07.2010 Finance_EN_v5.doc
- 10. Basic Training SAP R/3 4.7 Finance _________________________________________________________________________________________________ The menu display can vary depending on the current transaction you are in. The following menu items are standard in every SAP screen: Contains functions that affect the system as a whole – such as Create session, End System: Session, User profile and Log off Help: Provides various forms of online help These ones are available on most SAP applications: Allows you to edit components of the current object e.g. Select, Edit and Copy. The Edit: Cancel option lets you leave a task without saving the data you have entered Allows you to move directly to other screens of the current task. Also contains the Back option, which takes you back one level in the system hierarchy. Before going Go to: back, the system checks the data you have entered on the current screen, and displays a dialog box if it detects a problem In addition below menus may also appear: Contains additional functions you can choose to complete the current object Extras: component Allows you to display the current object in different views e.g. switching between a View: single-line and double-line display of a table Settings: Allows you to set user-specific transaction parameters Allows you to do object-independent processing, such as delete, copy and print Utilities: functions In the following we will explain the most common menu items: 2.1.1 System The Assets are being carried forward with the following parameters. A variant for the program has been stored in the system: 2.1.1.1 Create Session Creates an additional working session like using button . Use of this document / contents is Version 5 changed by SAP R3 Basic Training page 10 of 85 forbidden without express authority. All rights reserved. Anja Lucas 29.07.2010 Finance_EN_v5.doc
- 11. Basic Training SAP R/3 4.7 Finance _________________________________________________________________________________________________ You can find further information on this subject in chapter “Multiple SAP Sessions”. 2.1.1.2 End Session Make sure you have saved your entries as the system will not prompt you to save your data when closing. If you have only one session open and you end it, you will log off from the system. However, before logging off the system prompts you to save your data. You can find further information on this subject in chapter “Multiple SAP Sessions”. 2.1.1.3 User Profile Under sub-item Own Data you can view and add to your personal SAP settings. Do not change the data under “Address - Person” unless checked with the administrator. Do check on the “Defaults” like “Decimal Notation” and “Date format” if they match your requirements. You can also find here the default printer which has been set up for you and where all SAP outputs will be printed on. We recommend to unmark the flag “Output Immediately” and start all print jobs from the spool to avoid unknown mass-prints. Further information on this subject can be found in chapter “Personal Standard Printer” and “Personal User Settings”. 2.1.1.4 Own Spool Requests Shows all print jobs under you name. The ones which are already printed can be identified via the status “Compl.”. To start a print from here mark the respective line and click on Print. 2.1.1.5 Own Jobs If you have background jobs started under your name (very rarely) than you can control and check them here. 2.1.1.6 Status If you are in a transaction you can see here the respective transaction code. Further information on this subject can be found in chapter “How to find the transaction code”). 2.1.1.7 Log off Login off from the SAP system. You can find further information on this subject in chapter “Log off from SAP”. 2.1.2 Help The Help function provides information about the components of the SAP System and explains how to use them. You can find further information on this subject in chapter “Help functions” Use of this document / contents is Version 5 changed by SAP R3 Basic Training page 11 of 85 forbidden without express authority. All rights reserved. Anja Lucas 29.07.2010 Finance_EN_v5.doc
- 12. Basic Training SAP R/3 4.7 Finance _________________________________________________________________________________________________ 2.2 Standard toolbar The Standard toolbar contains buttons for performing common actions such as Save and Enter. ENTER Confirms the data you have selected or entered on the screen. Same function as the Enter key. Does not save your work Command Allows you to enter commands, such as transaction codes field F11 Save Saves your work. Same function as Save in the Edit menu F3 Back Returns you to the previous screen without saving your data. If there are required fields on the screen, these fields must be completed first. F15 Exit Exits the current function without saving. Returns you to the initial screen or main menu screen. F12/ESC Cancel Exits the current task without saving. Same function as Cancel in the Edit menu. Strg+P Print Prints data from the current screen Strg+F Find Searches for data required in the current screen. Strg+G Find next Performs an extended search for data required in the current screen. F21 First page Scrolls to the first page. Same function as the CTRL + Page Up keys. F22 Previous Scrolls to the previous page. Same function as the Page Up key. page F23 Next page Scrolls to the next page. Same function as the Page Down key. F24 Last page Scrolls to the last page. Same function as the CTRL + Page Up key. Create Creates a new SAP session. Same function as Create session in the session System menu. Use of this document / contents is Version 5 changed by SAP R3 Basic Training page 12 of 85 forbidden without express authority. All rights reserved. Anja Lucas 29.07.2010 Finance_EN_v5.doc
- 13. Basic Training SAP R/3 4.7 Finance _________________________________________________________________________________________________ Strg+F Create Allows you to create a desktop shortcut to any SAP report, transaction, or shortcut task if you are working with a Windows 32-bit operating system. F1 F1 Help Provides help on the field where the cursor is positioned. Layout Allows you to customize the display options (further information on this menu issue are on the next page). Further information on items marked with this can also be found elsewhere in this document. 2.2.1 Layout menu Here you can adjust the local layout. From the available options the following ones could be of interest: • Options • Set color to system • Hardcopy • Quick Cut and Paste Details on above settings can be found in Chapter “Personal User Settings” 2.3 Status bar The status bar provides general information on the SAP System and transaction or task you are working on. At the left of the status bar, system messages are displayed. The right end of the status bar contains three fields: one with server information, the other two with status information. Message area Status fields 2.3.1 Message area In the message area the system shows you identified errors or information: identifies an error messages which has to be solved before carrying on identifies an information message which should be red identifies other system messages Use of this document / contents is Version 5 changed by SAP R3 Basic Training page 13 of 85 forbidden without express authority. All rights reserved. Anja Lucas 29.07.2010 Finance_EN_v5.doc
- 14. Basic Training SAP R/3 4.7 Finance _________________________________________________________________________________________________ 2.3.2 Status fields The status fields can either by displayed or hidden. Choose to their left or right or open/close it. It will show system information depending or your personal selection (choose in the first status field): - System - Client - User - Program - Transaction code - Response time The second status field displays the server to which you are connected. The third status field specifies your data entry mode. By clicking this field, you can toggle between the Insert (INS) and Overwrite (OVR) modes. Insert: Any data to the right of the cursor moves to the right as you type. Overwrite: You type over any data to the right of the cursor. Typically, you use the Overwrite mode to enter data, and the Insert mode to enter data between existing data (for example, if you left out a letter in the middle of a word). In the standard system, the default entry mode is Insert. However, you can to switch to Overwrite at any time. 2.4 Working area In the SAP menu tree the dropdown arrows on the left of each menu item, indicating submenu choices as shown in the following example. After you have opened a submenu, the dropdown arrow you have just used points downward. If there is no arrow next to a menu item, you go directly to the transaction screen with a double click. Use of this document / contents is Version 5 changed by SAP R3 Basic Training page 14 of 85 forbidden without express authority. All rights reserved. Anja Lucas 29.07.2010 Finance_EN_v5.doc
- 15. Basic Training SAP R/3 4.7 Finance _________________________________________________________________________________________________ Tip: You can also click with the right mouse-key on the transaction to get further functions which are otherwise available vie the menu bar. You will get to know the details on these functions when reading through the training document. 2.5 Scrolling to view information When you view information (for example, a list or online help) not all of the information may fit in your window. To see the additional information, you use scrollbars. To move: • Up and down, use the vertical scrollbar • Left and right, use the horizontal scrollbar Use of this document / contents is Version 5 changed by SAP R3 Basic Training page 15 of 85 forbidden without express authority. All rights reserved. Anja Lucas 29.07.2010 Finance_EN_v5.doc
- 16. Basic Training SAP R/3 4.7 Finance _________________________________________________________________________________________________ Vertical scroll bar Horizontal scroll bar To move within the information screen you can Choose the up or down scroll arrow on the vertical Up or down one line scrollbar. Choose the left or right scroll arrow on the horizontal Left or right one character scrollbar. Click above or below the slider box on the vertical Up or down one page scrollbar. Click to the right or left of the slider box on the horizontal Left or right the width of the page scrollbar. Drag the slider box on the vertical scrollbar to the To a certain position in the approximate location of the desired information, and information (up or down) release the mouse button. Drag the slider box on the horizontal scrollbar to the To a certain position in the approximate location of the desired information, and information (left or right) release the mouse button. Use of this document / contents is Version 5 changed by SAP R3 Basic Training page 16 of 85 forbidden without express authority. All rights reserved. Anja Lucas 29.07.2010 Finance_EN_v5.doc
- 17. Basic Training SAP R/3 4.7 Finance _________________________________________________________________________________________________ You can also Move to By Or pressing Or pressing choosing First page Shift + F9 CTRL+PageUp Last page Shift + F12 CTRL+PageDown Previous page Shift + F10 PageUp Next page Shift + F11 PageDown 2.6 Transaction Codes Each function in the SAP System has a transaction code associated which can be used instead of working with the workplace menu tree. A transaction code consists of letters, numbers, or both, for example, FB05 or MIRO. You enter transaction codes in the command field. The transaction code is entered in the command field which is closed by default. To display/open it, choose the arrow to the left of the Save icon; the command field appears. To hide it, choose the arrow to the right (outside) of the field. In addition you can display a list of the transactions you used last by choosing the drop-down arrow at the right-hand of the field. Use of this document / contents is Version 5 changed by SAP R3 Basic Training page 17 of 85 forbidden without express authority. All rights reserved. Anja Lucas 29.07.2010 Finance_EN_v5.doc
- 18. Basic Training SAP R/3 4.7 Finance _________________________________________________________________________________________________ Enter /n followed by a transaction code and ENTER to end the current task and start the new one in the same session (screen). If you do not want to end your current task but you need to do another task you can create this in a new Session (screen). For example, you are creating a purchase order and you need to look up a material. You can open a new session (screen) to look at the material without having to end your first task of creating a purchase order. To do this enter /o followed by the transaction code and ENTER. 2.6.1 How to find the transaction code Before you can use a transaction code, you must find the transaction code for the task you want to start. There are several different ways of finding this information: 2.6.1.1 … in the menu tree The easiest way is to let the system show the transaction code in the menu. If you can currently only see the transaction descriptions but not the codes then switch them on via the menu bar Extras Settings Display technical names. The menu closes. When you reopen it, the system displays the transaction code (not only for the selected item, but throughout the workplace menu). Use of this document / contents is Version 5 changed by SAP R3 Basic Training page 18 of 85 forbidden without express authority. All rights reserved. Anja Lucas 29.07.2010 Finance_EN_v5.doc
- 19. Basic Training SAP R/3 4.7 Finance _________________________________________________________________________________________________ 2.6.1.2 … in the Status display When you are in the transaction itself via menu bar System Status: 2.6.1.3 … in the Status bar When you are in the transaction itself you can select the icon in the first status field (bottom right corner of your screen). Use of this document / contents is Version 5 changed by SAP R3 Basic Training page 19 of 85 forbidden without express authority. All rights reserved. Anja Lucas 29.07.2010 Finance_EN_v5.doc
- 20. Basic Training SAP R/3 4.7 Finance _________________________________________________________________________________________________ 2.7 Favorites You can include heavily used menu options in a personal favorites list which can be structured to you own requirements. You can: • Create a favorite • Change a favorite • Create a folder in the favorites list • Move a favorite or • Delete a favorite It is possible not only to add SAP transaction codes to your favorite list but also Internet-addresses and other programs files e.g. from Word or Excel. Use of this document / contents is Version 5 changed by SAP R3 Basic Training page 20 of 85 forbidden without express authority. All rights reserved. Anja Lucas 29.07.2010 Finance_EN_v5.doc
- 21. Basic Training SAP R/3 4.7 Finance _________________________________________________________________________________________________ Favorites menu SAPs menu 2.7.1 Create / add Favorites There are several ways to create or add a transaction to your favorites-list. Note; transaction will always be “copied” to your favorites menu tree the original transaction code stays in the SAP menu tree. 2.7.1.1 … with Drag and Drop Drag a transaction into the favorites list with the mouse and drop it where you want to have it. Use of this document / contents is Version 5 changed by SAP R3 Basic Training page 21 of 85 forbidden without express authority. All rights reserved. Anja Lucas 29.07.2010 Finance_EN_v5.doc
- 22. Basic Training SAP R/3 4.7 Finance _________________________________________________________________________________________________ 2.7.1.2 … with “Add to Favorites” Click once on the transaction in the menu tree and afterwards on button “Add to Favorites” (or menu Favorites – Add); the transaction will be copied to the Favorites-menu tree. Use of this document / contents is Version 5 changed by SAP R3 Basic Training page 22 of 85 forbidden without express authority. All rights reserved. Anja Lucas 29.07.2010 Finance_EN_v5.doc
- 23. Basic Training SAP R/3 4.7 Finance _________________________________________________________________________________________________ 2.7.1.3 … with “Insert transaction” If the relevant menu option was not deactivated by the system administration and you know the transaction code then you can also create favorites directly via the menu option for including a transaction in the favorites list. An additional pop-up screen will come up where you insert the transaction code. Use of this document / contents is Version 5 changed by SAP R3 Basic Training page 23 of 85 forbidden without express authority. All rights reserved. Anja Lucas 29.07.2010 Finance_EN_v5.doc
- 24. Basic Training SAP R/3 4.7 Finance _________________________________________________________________________________________________ 2.7.1.4 … with “Add other objects” Daily used web-addresses can also be entered to your SAP Favorites-menu and started from there After clicking on ENTER a pop-up screen comes up where you can enter a Text for the link and the Web address or file itself. Click on ENTER to finish the settings. 2.7.2 Change Favorites The description of a favorite is always the SAP description for this transaction and can be changed to your requirement. Position the cursor on the node in the favorites list that you want to change and choose the menu Use of this document / contents is Version 5 changed by SAP R3 Basic Training page 24 of 85 forbidden without express authority. All rights reserved. Anja Lucas 29.07.2010 Finance_EN_v5.doc
- 25. Basic Training SAP R/3 4.7 Finance _________________________________________________________________________________________________ option for changing a favorite or click with the right mouse-button on the favorite transaction you want to change. or right mouse button You can then change the text of the favorite. Use of this document / contents is Version 5 changed by SAP R3 Basic Training page 25 of 85 forbidden without express authority. All rights reserved. Anja Lucas 29.07.2010 Finance_EN_v5.doc
- 26. Basic Training SAP R/3 4.7 Finance _________________________________________________________________________________________________ 2.7.3 Move Favorites To move a transaction under your favorites mark it first and move it either • with Drag and Drop • via the menu option with “Move” or • with buttons The transaction will move always one line up or down. With Drag and Drop you can pull it to any other position within your favorites menu. 2.7.4 Delete Favorites To delete a transaction from your favorites menu mark it first and delete it via menu Favorites > Delete or by clicking on button . After that it will be deleted only from your favorites menu; in the SAP menu it is still available. Use of this document / contents is Version 5 changed by SAP R3 Basic Training page 26 of 85 forbidden without express authority. All rights reserved. Anja Lucas 29.07.2010 Finance_EN_v5.doc
- 27. Basic Training SAP R/3 4.7 Finance _________________________________________________________________________________________________ 2.7.5 Insert Folder to Favorites For a better overview and a more structured handling of favorites you can also create your own folders where your favorite transactions can be added to. For example one folder for Accounts Payable transactions and reports, one for Accounts Receivable or one for Month-End transactions. To do this, select the menu option for creating a folder in the favorites list and enter a text for this folder. The system will add the new folder at the beginning or end of your favorites menu and you can move it afterwards to any position. When creating the transactions first, you can later on move them to their respective folders. 2.7.6 Delete Folders from Favorites When deleting a folder from your favorites menu all transactions within this folder will be deleted too. Use of this document / contents is Version 5 changed by SAP R3 Basic Training page 27 of 85 forbidden without express authority. All rights reserved. Anja Lucas 29.07.2010 Finance_EN_v5.doc
- 28. Basic Training SAP R/3 4.7 Finance _________________________________________________________________________________________________ Keep this in mind. To do this, mark the favorite folder you want to delete and click on button or choose Favorites > Delete from the menu bar. 2.8 Multiple SAP Sessions A session is basically another SAP instance on your screen. Multiple sessions allow you to work on more than one task at a time. This can save you time and reduces the need to jump from screen to screen. You can open up to six sessions and do a different task, or even the same task, in each one. Nevertheless, if you try to work on the same record (for example, the customer master record for your company code) at the same time on multiple sessions, you may "lock yourself out" of one of the sessions. If this happens, choose Exit or Back to move out of the transaction. Then you will be able to proceed. We recommend having two sessions in use. If one screen is busy with a function you can still use the other one to carry on working. 2.8.1 Creating a session You can create a session at any time. You do not lose any data in sessions that are already open. Each session you create is as if you logged on to the system again and every session is independent of the others. For example, closing the first session does not cause the other sessions to close. To create a new session from anywhere in the system choose System → Create session from the menu bar or click on button . Use of this document / contents is Version 5 changed by SAP R3 Basic Training page 28 of 85 forbidden without express authority. All rights reserved. Anja Lucas 29.07.2010 Finance_EN_v5.doc
- 29. Basic Training SAP R/3 4.7 Finance _________________________________________________________________________________________________ The system opens an additional window. The new session becomes the active session and remains the active session unless you click on a different (open or new) session. Each session has a session number, which appears in that session’s status bar. It appears in parentheses next to the system name. 2.8.2 Creating a session and a task at once You can create a session and start a task in one step by using a transaction code. When you open a session with a transaction code, the system displays the initial screen of the task in a new session. In the command field, enter /o (the forward slash and the letter o) followed by the transaction code for the task you want to start. For example, to view the line items for a vendor account you use Transaction FBL1N. To open a session and start this task at the same time, you enter /ofbl1n in the command field followed by Enter. Use of this document / contents is Version 5 changed by SAP R3 Basic Training page 29 of 85 forbidden without express authority. All rights reserved. Anja Lucas 29.07.2010 Finance_EN_v5.doc
- 30. Basic Training SAP R/3 4.7 Finance _________________________________________________________________________________________________ The system opens an additional window for the new session and displays the initial screen of the transaction. 2.8.3 Moving among sessions You can move among sessions as often as you like without losing any data. As long as you remain logged on to the SAP System, you can leave a session for as long as you like. Moving to a different session is like putting a telephone call on hold: You can resume the call whenever you are ready. To move from one session to another, click any part of the window that contains the session you want to go to or click the respective SAP-screen at the bottom of you PC. The window you choose becomes the active window: it moves in front of all the other windows on your screen. If you have several sessions open, you can minimize the sessions you are not using to significantly Use of this document / contents is Version 5 changed by SAP R3 Basic Training page 30 of 85 forbidden without express authority. All rights reserved. Anja Lucas 29.07.2010 Finance_EN_v5.doc
- 31. Basic Training SAP R/3 4.7 Finance _________________________________________________________________________________________________ reduce the system load. When you need to use one of these sessions later, you can restore it by clicking the appropriate symbol in the status bar, making it the active session. 2.8.4 Ending a session After you are done using a session, it is a good idea to end it. Each session uses system resources that can affect how fast the SAP System responds to your requests. Before you end a session, save any data you want to keep. When you end a session, the system does NOT prompt you to save your data. If you have only one session open and you end it, you will log off from the system. However, before logging you off, the system prompts you to save your data. You can either choose System → End session from the menu bar, or click on button in the upper right-hand corner of the active session. The session is closed and you return to the previous session. 2.9 Tabs Tabs enable you to enter, display, and alternate between multiple screens. In transactions containing multiple screens, they provide a clearer overview. In addition, tabs enable you to proceed from one tab page to the next without having completed all the data. To access a tab page, select the corresponding tab header. In some cases, you must complete all required input fields on a tab page before you can move to the next tab page. The fields where an entry is required to proceed look like this: In the case of longer tab-strips, not all of the tabs appear on the screen. The left and right arrows at Use of this document / contents is Version 5 changed by SAP R3 Basic Training page 31 of 85 forbidden without express authority. All rights reserved. Anja Lucas 29.07.2010 Finance_EN_v5.doc
- 32. Basic Training SAP R/3 4.7 Finance _________________________________________________________________________________________________ the top of the tab-strip allow you to scroll to all the tabs. If you choose the button at the right of the tab-strip (where available), the system displays a list of all the tabs on the tab-strip. If you select a tab from this list, the selected tab page moves to the foreground. Tabs are arranged in order of importance or in the process order of the transaction. 2.10 Radio Buttons and Checkboxes To enter information in the SAP System, you must sometimes select among several options. In some cases, you can select only one option; in others, you can select more than one. When you can select only one, the options are identified by radio buttons: To select an option, click the radio button next to that option. The selected radio button is now filled in. To change your selection, click a different radio button. The original button is now empty and the new selection is filled in. When you can select more than one, the options are identified by checkboxes: Use of this document / contents is Version 5 changed by SAP R3 Basic Training page 32 of 85 forbidden without express authority. All rights reserved. Anja Lucas 29.07.2010 Finance_EN_v5.doc
- 33. Basic Training SAP R/3 4.7 Finance _________________________________________________________________________________________________ To select one or more options, click the checkbox next to each desired option. The selected checkboxes now contain a checkmark. To deselect a checkbox containing a checkmark, click it again. The checkmark disappears. 2.11 Dialog Boxes The SAP System displays dialog boxes when it requires more information before it can proceed or when it is providing information, such as messages or specific information about your current task. Before you can continue, you must choose an action from a dialog box. To choose an action, choose one of the buttons at the bottom of the dialog box. When you end a task without saving your data, or you choose a function that may cause you to lose data, the SAP System usually displays a dialog box in which you are asked to confirm or cancel your action. Use of this document / contents is Version 5 changed by SAP R3 Basic Training page 33 of 85 forbidden without express authority. All rights reserved. Anja Lucas 29.07.2010 Finance_EN_v5.doc
- 34. Basic Training SAP R/3 4.7 Finance _________________________________________________________________________________________________ 3 Search Helps 3.1 Match Codes (F4-search help) If you are unsure of the valid entries for an input field, certain input fields enable you to display a list of possible entries. To determine if such a list is available for an input field, you place the cursor in the input field. If possible entries exist for this field, a possible entries arrow or icon appears to the right of the field. Click on this button and a pop-up screen comes up to “Restrict the Value Range”. The possible match-codes for searching field entries are displayed by tabs. To move through the different tabs you can either click on them or use the buttons . The button gives you an overview of all existing match-code IDs. Here you can also select the relevant tab. If you are for example in transaction FK03 – Display Vendor – and you are not sure which is the correct vendor number to be entered, you can search for it. The number of possible entries for a field may be very large. Therefore the system restricts the number to possible entries to a default of “500” (can be manually overwritten). If the number of possible entries exceeds 500 not all of the possibilities are displayed. In this case the system outputs a message indicating that there are further input options. Note; when marking the field “No restriction” all possible entries will be displayed. Since determining Use of this document / contents is Version 5 changed by SAP R3 Basic Training page 34 of 85 forbidden without express authority. All rights reserved. Anja Lucas 29.07.2010 Finance_EN_v5.doc
- 35. Basic Training SAP R/3 4.7 Finance _________________________________________________________________________________________________ all possible entries could be very time-consuming, and can have effects on the performance of the whole system (even for other users) you should not normally use this option. Instead please restrict your search criteria further more e.g. for City … • Boston: all vendors in Boston will be listed • *Bost* the wildcard * replaces other letters/characters of an entry. By this search entry the system will list all vendors in Boston and e.g. South Boston and additional criteria for e.g. the Name … • Arrow* all vendors in above City and with the Name beginning with Arrow will be listed If you use a wildcard (* or +), the system suggests the selection option 'Find pattern', where '+' stands for a single character, and '*' stands for a string (including empty string). For example: Character Represents all criteria... B* Starting with B *ankf* Containing the character string ankf, such as in Frankfurt *r+ Containing an r as the second-to-last character, such as Hamburg A+++++++a Starting with A, ending in a, and containing any seven characters in between, such as Argentina or Australia To select a value from the list, double-click it and the system inserts the chosen value in the field. Always enter your company code when searching for your own data. Otherwise the data of all Template companies worldwide will be listed. Use of this document / contents is Version 5 changed by SAP R3 Basic Training page 35 of 85 forbidden without express authority. All rights reserved. Anja Lucas 29.07.2010 Finance_EN_v5.doc
- 36. Basic Training SAP R/3 4.7 Finance _________________________________________________________________________________________________ Confirm your selection with ENTER or As a result the system would display the following vendors: If you not only want to search for single entries, then you can use the Multiple selection function too. There are 4 different options: the selected single values are included in your search the selected range from From/To is included in your search the entered single values are excluded in your search the selected range From/To is excluded in your search Use of this document / contents is Version 5 changed by SAP R3 Basic Training page 36 of 85 forbidden without express authority. All rights reserved. Anja Lucas 29.07.2010 Finance_EN_v5.doc
- 37. Basic Training SAP R/3 4.7 Finance _________________________________________________________________________________________________ After you made your selections you have the following possibilities: 3.2 Dynamic selections Dynamic selections considerably improve report performance because the system retrieves data very quickly when these fields are used. They also provide you with increased flexibility with regard to defining reporting criteria because they enable you to use additional selection fields to define reports in the standard system (for example, Document Type and Currency). If you want to select for example customer line items with a specific document type only, you would proceed as follows: Use of this document / contents is Version 5 changed by SAP R3 Basic Training page 37 of 85 forbidden without express authority. All rights reserved. Anja Lucas 29.07.2010 Finance_EN_v5.doc
- 38. Basic Training SAP R/3 4.7 Finance _________________________________________________________________________________________________ In the selection screen click on icon . A dialog box will be shown which displays on the left side all available dynamic selections (= fields) sorted in folders Customer master, Company code and Document. On the right side you find the already available fields (marked in green on the left). To activate new fields just double-click on the requested field on the left and it will be available on the right. The system will now only list the line items according to your specific selection Use of this document / contents is Version 5 changed by SAP R3 Basic Training page 38 of 85 forbidden without express authority. All rights reserved. Anja Lucas 29.07.2010 Finance_EN_v5.doc
- 39. Basic Training SAP R/3 4.7 Finance _________________________________________________________________________________________________ 4 SAP Lists / Reports 4.1 Output formats For some reports/lists in SAP you can choose different Output formats. Based on the report “List of customer addresses” (transaction S_ALR_87012180) some of them together with their different display will be shown below: Use of this document / contents is Version 5 changed by SAP R3 Basic Training page 39 of 85 forbidden without express authority. All rights reserved. Anja Lucas 29.07.2010 Finance_EN_v5.doc
- 40. Basic Training SAP R/3 4.7 Finance _________________________________________________________________________________________________ 4.1.1 SAP List Viewer From here you can download the list via List … or System … as mentioned below. For detailed information on how to create and work with layouts ( ) see Business Process Procedure „BPP_EN_SAP List Viewer (ALV) in Line Item Display.doc“ 4.1.2 ABAP List From here you can download the data as mentioned below or still change back to the SAP List Viewer display. Use of this document / contents is Version 5 changed by SAP R3 Basic Training page 40 of 85 forbidden without express authority. All rights reserved. Anja Lucas 29.07.2010 Finance_EN_v5.doc
- 41. Basic Training SAP R/3 4.7 Finance _________________________________________________________________________________________________ 4.1.3 Display as table As you can see, there are lots of different ways to display a report/list in a first step. Depending on the selection and the report you can usually switch to a different view later on and decide then on how to download the data. 4.2 Export Lists / Reports Instead of printing a report or list you can download it to your local drive. This might me useful for address date or line item displays. Depending or the report/list you have executed there are different ways on how to download data to e.g. Excel. 4.2.1 … export to Spreadsheet (without Filter criteria) Choose List – Export – Spreadsheet … from the menu bar. The system informs you that Filter criteria etc. are not taken into account. If you want to download data with Filter criteria then you have to use the option via System which is mentioned later on. General information about what Filter criteria are can be found in the Business Process Procedure “BPP_EN_SAP List Viewer (ALV) in Line Item Display.doc”. Use of this document / contents is Version 5 changed by SAP R3 Basic Training page 41 of 85 forbidden without express authority. All rights reserved. Anja Lucas 29.07.2010 Finance_EN_v5.doc
- 42. Basic Training SAP R/3 4.7 Finance _________________________________________________________________________________________________ The system will now display the report/list in Excel and the information can be downloaded and saved as any other excel files. 4.2.2 … save to Local File (with Filter criteria) Choose System – List – Save – Local File … from the menu bar (Filter - and Subtotal Criteria will be stored too). Use of this document / contents is Version 5 changed by SAP R3 Basic Training page 42 of 85 forbidden without express authority. All rights reserved. Anja Lucas 29.07.2010 Finance_EN_v5.doc
- 43. Basic Training SAP R/3 4.7 Finance _________________________________________________________________________________________________ Enter the path and name of the file where you want the system to write the data to. Click on “Generate” to download the data. After that start Excel, open the file and follow the directions in Excel. 4.2.3 … via icon „Microsoft Excel view“ In some Reports the system provides the icon „Microsoft Excel view“. Use of this document / contents is Version 5 changed by SAP R3 Basic Training page 43 of 85 forbidden without express authority. All rights reserved. Anja Lucas 29.07.2010 Finance_EN_v5.doc
- 44. Basic Training SAP R/3 4.7 Finance _________________________________________________________________________________________________ If the system shows you now an empty Excel Sheet, than Macro-Settings are missing. You can correct them as follows: In der leeren Excelanzeige über Extras – Makro - Sicherheit In tab „Security level“(?) the medium or low level should be activated. Go afterwards to the next tab. Use of this document / contents is Version 5 changed by SAP R3 Basic Training page 44 of 85 forbidden without express authority. All rights reserved. Anja Lucas 29.07.2010 Finance_EN_v5.doc
- 45. Basic Training SAP R/3 4.7 Finance _________________________________________________________________________________________________ Here the field „trust access of Visual Basic-Project“(?) has to be marked. Save your settings afterwards with OK. If you start the report now again and click on icon , the data should be listed correctly in a Excel format and can be downloaded/saved. Use of this document / contents is Version 5 changed by SAP R3 Basic Training page 45 of 85 forbidden without express authority. All rights reserved. Anja Lucas 29.07.2010 Finance_EN_v5.doc
- 46. Basic Training SAP R/3 4.7 Finance _________________________________________________________________________________________________ 5 Working with the SAP List Viewer (ALV) in Line Item Display The SAP List Viewer unifies and simplifies the use of lists in the R/3 System. A uniform user interface and list format is available for all lists. Not all lists in the SAP R/3 components use the full range of functions available in the SAP List Viewer but wherever you see the icons which are explained below, you can use them accordingly. For this documentation we will use the line item display which displays the selected line items for one or more accounts in a list. Here nearly all functions of the SAP List Viewer are available. Line items can be displayed for the following account types: • Customer accounts (FBL5N) • Vendor accounts (FBL1N) • G/L accounts (FBL3N) After you have entered your selection criteria for the line item display, the line items you selected are displayed in a list. You can use various functions in this list, for example, to edit the layout of the line item list, or to branch to other functions, such as displaying the document for a line item. Please note; the following explanations are not just available in the line item display but everywhere, where the SAP List Viewer (ALV) is used. 5.1 Navigating within the list In large lists in which not all the columns can be displayed initially you can use the following icons to move around: Choose First Column to go back to the column on the left side of the list Choose Last Column to go to the column on the right side of the list Choose Column Right to shift the display one column to the right. Choose Column Left to shift the display one column to the left. Use of this document / contents is Version 5 changed by SAP R3 Basic Training page 46 of 85 forbidden without express authority. All rights reserved. Anja Lucas 29.07.2010 Finance_EN_v5.doc
- 47. Basic Training SAP R/3 4.7 Finance _________________________________________________________________________________________________ 5.2 Branching to other functions 5.2.1 Displaying the Document for a Line Item You can select a line item either by double-clicking it, or by highlighting the item and then choosing (or in the classic line item display). The system displays the account assignments for the line items selected. You have the following options: Change document change the document if you have the appropriate authorization. Other document... display another document. Document overview branch to the document overview. Next item display the details of the next item in the line item list. Previous item display the details of the previous item in the line item list. Document header display the document header. More data display additional account assignments for the line item. To return to the line item display, choose . 5.2.2 Changing Documents If necessary you can change documents by choosing . The system prevents the data in certain fields of a posted document from being changed. These are such fields as the posting amount, account, posting key, fiscal year, and tax amount. Because they have updated certain account balances during posting, these fields cannot be changed and are highlighted in “grey”. Only fields highlighted in “white” can be changed (like header text and header reference, line item text or assignment and payment terms can be adjusted. 5.2.3 Mass Changes You can use to speed up the process of making changes to customer and vendor line items by changing a group of line items simultaneously, instead of having to change the line items of documents individually. This is possible for Payment data (e.g. Terms of payment, Payment block (vendor only), Payment method and House bank) and dunning data (Last dunning notice, Dunning level (customers only), Dunning block and Dunning key). In the below example we are going to change the Payment Method (which will be taken from the vendor master record when starting a payment run) for the first 3 items. Select the line items you want to change by marking the box in front of the line or choose Edit Select all. Use of this document / contents is Version 5 changed by SAP R3 Basic Training page 47 of 85 forbidden without express authority. All rights reserved. Anja Lucas 29.07.2010 Finance_EN_v5.doc
- 48. Basic Training SAP R/3 4.7 Finance _________________________________________________________________________________________________ To enter the new values for the line items, click on or choose Environment → Mass changes → New values. The dialog box New Values appears. Enter new values for the line items under Payment data, Dunning data and/or Additional data and choose Execute changes to complete the mass change. The lines are displayed in grey now when returning to the Line Item Display. After List Refresh the changes will be displayed. Use of this document / contents is Version 5 changed by SAP R3 Basic Training page 48 of 85 forbidden without express authority. All rights reserved. Anja Lucas 29.07.2010 Finance_EN_v5.doc
- 49. Basic Training SAP R/3 4.7 Finance _________________________________________________________________________________________________ 5.2.4 Check Information Subsidiaries which do actually print checks in their automatic payment run can display the check information that belongs to the line item which has been paid by check by using the icon . . 5.2.5 Displaying Account Master Data From the line item list, you can also display the account master data. Select the required line item first and click on or choose Environment → Account master data. If required select at least one processing option. The system displays the master data for the account specified. To return to the line item display, choose . 5.2.6 Credit Management Where set up, you can branch to credit management data via Environment → Credit management. Select Master Data, Credit Master Sheet or Credit overview. Use of this document / contents is Version 5 changed by SAP R3 Basic Training page 49 of 85 forbidden without express authority. All rights reserved. Anja Lucas 29.07.2010 Finance_EN_v5.doc
- 50. Basic Training SAP R/3 4.7 Finance _________________________________________________________________________________________________ 5.2.7 Correspondence You can request, display, and print customer correspondence. Choose Environment → Correspondence. When displaying a correspondence you can directly use the print symbol to output the correspondence. 5.3 Editing the layout of the line item display The functions for editing the layout of the line item display are standard functions of the SAP List Viewer (ALV) and offer the following functions: Use of this document / contents is Version 5 changed by SAP R3 Basic Training page 50 of 85 forbidden without express authority. All rights reserved. Anja Lucas 29.07.2010 Finance_EN_v5.doc
- 51. Basic Training SAP R/3 4.7 Finance _________________________________________________________________________________________________ 5.3.1 Setting Filters The Set Filter function enables you to display only those rows that fulfil certain criteria in one or more columns. To set a filter, select one or more columns by clicking on the column header and by choosing or Edit → Set Filter. In the Set Filter dialog box, enter the From/To values for each column selected. Only rows with data within the intervals specified are shown. Example: To display data for cost center 6040 to 6041 and 7110 to 7145, select the Cost center column, Click on (the field Cost Center is ready for input), click on (multiple selection) and enter in green Tab “Select Range” cost center 6040 to 6041 and 7110 to 7145 (you can also enter all single values in green Tab “Sngl.Values”). Use of this document / contents is Version 5 changed by SAP R3 Basic Training page 51 of 85 forbidden without express authority. All rights reserved. Anja Lucas 29.07.2010 Finance_EN_v5.doc
- 52. Basic Training SAP R/3 4.7 Finance _________________________________________________________________________________________________ Use red Tab “Sngl.Values” or “Ranges” to exclude certain intervals from the display (e.g. to display data for cost centers 7100 to 8105 without the data for cost centers 8000 to 8080, select the Cost center column, enter 7100 to 8105 in the green selection range and 8000 to 8080 in the red one. To delete entries for a filter criterion, position the cursor on the appropriate line and choose Delete Condition. To delete all the entries for the filter, choose Delete Filter. Choose Copy to copy the filter criteria and exit the dialog box for Filter criteria with . The Line Item Display will now only show the selected lines. To delete the Filters choose Edit → Delete Filter. 5.3.2 Sorting in Ascending or Descending Order The functions Sort in Ascending Order and Sort in Descending Order sort the report rows in the respective order for one or more columns. Select a column by clicking on the column header. Choose Sort in Ascending Order or Sort in Descending Order or Edit → Sort in Ascending Order or Edit → Sort in Descending Order. The rows are sorted in the column selected. 5.3.3 Changing Layouts You can change the layout of the line item list, that is, you define which columns are displayed, how they are sorted, for which columns totals are created, and so on. Before creating own layouts check first if another user has perhaps created a useful layout which can be used by you too (see item 3.5). To change the layout, choose or Settings Layout Change. Use of this document / contents is Version 5 changed by SAP R3 Basic Training page 52 of 85 forbidden without express authority. All rights reserved. Anja Lucas 29.07.2010 Finance_EN_v5.doc
- 53. Basic Training SAP R/3 4.7 Finance _________________________________________________________________________________________________ 5.3.3.1 Show or hide columns The Change Layout dialog box shows you which columns are currently displayed (on the left - Tab Line 1) and which additional columns can be displayed if data is available for in it the document (on the right - Hidden fields). The hidden fields can be sorted in ascending or descending order or you can search for entries . Multilevel sequential lists also distinguish between the fields in the header rows and those in the item rows. You change the layout in multilevel sequential lists separately for header rows and item rows. To get additional fields into your actual line item display you can move fields from the left to the right or the other way round, to flexible create the required view. To show or hide columns in the list, the following functions are available: • With Hide All Fields, you can hide all fields with the exception of the key fields (all fields will be moved from the left to the right). The fields appear under Hidden fields, while the only fields displayed are the key fields. Use of this document / contents is Version 5 changed by SAP R3 Basic Training page 53 of 85 forbidden without express authority. All rights reserved. Anja Lucas 29.07.2010 Finance_EN_v5.doc
- 54. Basic Training SAP R/3 4.7 Finance _________________________________________________________________________________________________ • To show all the Hidden fields, choose Show All Fields. The fields appear as Display fields, while the list of Hidden fields is empty. • To show separate fields, select the relevant rows of the Hidden fields and choose Show Selected Fields. The fields are transferred from the Hidden fields to the bottom of Displayed fields. If you know already the position where a single column should be displayed, you can mark the displayed field where the column should be entered on the left. In our example below we are going to add the field cost center in front of the column posting key. Mark the line “Cost Center” on the right and the line “Posting Key” on the left. Afterwards click on Show Selected Fields. Use of this document / contents is Version 5 changed by SAP R3 Basic Training page 54 of 85 forbidden without express authority. All rights reserved. Anja Lucas 29.07.2010 Finance_EN_v5.doc
- 55. Basic Training SAP R/3 4.7 Finance _________________________________________________________________________________________________ The fields are both available now for display in the line items. Click on afterwards to return to the line item display with the new layout. • To hide separate fields, select the relevant rows of the display fields and choose Hide Selected Fields. The fields are transferred from the display fields to the hidden fields. In the example below we don’t need field “Clearing Document” and move it to the Hidden fields. Marks the line Clearing Document on the left and click on Hide Selected Fields. The field is transferred from the display fields to the hidden fields Use of this document / contents is Version 5 changed by SAP R3 Basic Training page 55 of 85 forbidden without express authority. All rights reserved. Anja Lucas 29.07.2010 Finance_EN_v5.doc
- 56. Basic Training SAP R/3 4.7 Finance _________________________________________________________________________________________________ Click on afterwards to return to the line item display with the new layout. The new layout looks like this now: 5.3.3.2 Sequence of columns The sequence of columns in the list is determined by the item number in the Item field. The SAP R/3 System arranges the item numbers in the sequence that you use for the columns. Use of this document / contents is Version 5 changed by SAP R3 Basic Training page 56 of 85 forbidden without express authority. All rights reserved. Anja Lucas 29.07.2010 Finance_EN_v5.doc
- 57. Basic Training SAP R/3 4.7 Finance _________________________________________________________________________________________________ • To change the sequence of the columns, overwrite the item numbers. • With Refresh, you can sort the display fields according to the item number. You cannot change the item numbers of key fields. 5.3.3.3 Using Clipboard to change position of column Using a clipboard, you can cut a field from the display fields or hidden fields and insert them in the required position. • To do this, select a display field or hidden field and choose Cut. The field appears in the clipboard. Only one field can be placed in the clipboard. As soon as you cut another field, the field in the clipboard is assigned to the hidden field. • To transfer a field in the clipboard from a certain position to the display fields, select the field before which the field in the clipboard should be inserted, and choose Paste. Use of this document / contents is Version 5 changed by SAP R3 Basic Training page 57 of 85 forbidden without express authority. All rights reserved. Anja Lucas 29.07.2010 Finance_EN_v5.doc
- 58. Basic Training SAP R/3 4.7 Finance _________________________________________________________________________________________________ 5.3.3.4 Length of columns In the Length of display field column, enter the required length, if this is to be different to the standard setting (if you have changed the length of the display field and you now want to return this to the standard length, select the column and choose Get Standard Length). In the above example we have changed the column Assignment from length 18 to 12, moved the column Business Area to position 13 (to be displayed after column Text), changed the length of column Cost Center from 10 to 6, column Amount in local currency from 20 to 16 and column Text from 50 to 30. These changes should stop us to scroll through the window from left to right because of too many/wide columns. The result looks as shown below: Use of this document / contents is Version 5 changed by SAP R3 Basic Training page 58 of 85 forbidden without express authority. All rights reserved. Anja Lucas 29.07.2010 Finance_EN_v5.doc
- 59. Basic Training SAP R/3 4.7 Finance _________________________________________________________________________________________________ 5.3.3.5 Group columns into several lines If you want to group the columns into several lines in order to view all the columns in one window without having to scroll through, for example, choose Line 2 or Line 3. You can group columns in a maximum of three lines. In sequential lists, you can group the column headers as well as the subordinate rows in a maximum of three lines. For additional lines, all the remaining hidden fields are available, that is, those that have not been assigned to other lines. Assignment of the hidden fields is carried out as described in point 3. In the below example we have moved the field Text and Business Area to Line 2: Always choose Copy to copy the entries and exit the dialog box. Use of this document / contents is Version 5 changed by SAP R3 Basic Training page 59 of 85 forbidden without express authority. All rights reserved. Anja Lucas 29.07.2010 Finance_EN_v5.doc
- 60. Basic Training SAP R/3 4.7 Finance _________________________________________________________________________________________________ If you exit the SAP List Viewer without saving the layout (see Saving Layouts), your settings will not be saved. When you next call up the list, the standard settings will appear. You can no longer call up your layout. 5.3.4 Saving Layouts Choose Save layout or Settings Layout Save. In the dialog box, enter a name and a description for your layout. You cannot give the layout a name that begins with a number, since this type of name is reserved for the standard layouts in the standard system. In general, layouts are available for all users as client-specific standard layouts (that means all subsidiaries world wide could use this layout). In lists in which you can save layouts as user-specific, you can select User-specific and than this layout will only be available for you self. User-specific layouts must begin with a letter (A-Z), non-user-specific layouts (client-specific standard layouts) must begin with "/". The Layout Name and Description should give an idea of what the layout shows. If you have entered sort criteria, subtotals criteria or filter conditions (see further up or down is this documents), you can save the layout with these criteria by selecting the criteria. Choose to save the layout with the criteria entered and exit the dialog box. If a layout with the same name already exists, the system will inform you of this and you can either overwrite the existing layout (Continue) or enter another name (New entry). Use of this document / contents is Version 5 changed by SAP R3 Basic Training page 60 of 85 forbidden without express authority. All rights reserved. Anja Lucas 29.07.2010 Finance_EN_v5.doc
- 61. Basic Training SAP R/3 4.7 Finance _________________________________________________________________________________________________ If you always want to use a specific layout when for example starting vendor- or customer line items that you can enter a default layout in your personal settings. Use transaction FB00 (Accounting Editing Options) and choose tab “Line Items”. Here you enter the respective default layouts. 5.3.5 Selecting Layouts To choose an existing layout for the display of the list, choose Choose layout or Settings Display layout Choose. A list of the existing layouts is displayed where you can activate the requested layout with a double- click. 5.3.6 Creating Totals You can sum one or more columns in the list. The sums can be for value columns and for quantity columns only. If you sum incompatible units such as kilogram and liter, a separate sum is shown for each unit. Select the desired columns in the list by clicking on the respective column headers. Choose (Display Sum) or Edit → Display Sum. Note that the system can only sum columns containing values or quantities. To delete Sums, select the desired column(s) and choose again (Display Sum) or Edit → Display Sum. 5.3.7 Creating Subtotals You can create subtotals in one or more columns in the list that are not value columns. Before you can create a subtotal, you must have created a total for at least one column (usually this in anyway the amount-column). To create subtotals for just one column select the column for which you require subtotals by clicking on the column header and then on the symbol or Edit Subtotal (typical possibilities for this would be subtotals by Document type, VAT code or Date). Based on the above cost center example below is a screen shot with subtotals per Cost Center. . Use of this document / contents is Version 5 changed by SAP R3 Basic Training page 61 of 85 forbidden without express authority. All rights reserved. Anja Lucas 29.07.2010 Finance_EN_v5.doc
- 62. Basic Training SAP R/3 4.7 Finance _________________________________________________________________________________________________ When creating Subtotals for more than one column choose Subtotal or Edit → Subtotal. The dialog box Define Sort Order appears. The dialog box Define Sort Order shows all fields you can create subtotals on. On the left under “Sort fields” you can find the standard fields which are available for subtotals or the one you have selected by marking the column header and on the right under “Field list” are the ones which are also available but currently not shown in the list. To select additional fields for subtotalling, select the relevant rows on the right (you can sort the field in ascending or descending order) and choose Show selected fields (arrow key). The selected Use of this document / contents is Version 5 changed by SAP R3 Basic Training page 62 of 85 forbidden without express authority. All rights reserved. Anja Lucas 29.07.2010 Finance_EN_v5.doc
- 63. Basic Training SAP R/3 4.7 Finance _________________________________________________________________________________________________ fields then appear in the dialog box as sort fields. The sequence in which the selected fields are shown in the dialog box determines the sequence in which subtotals are created. To change the sequence of the fields, use the functions Cut and Paste. In addition you can specify whether the rows on which a subtotal is calculated are to be sorted ascending or descending. Also set the indicator for subtotals. Exit the dialog box with Copy. To Delete Subtotals proceed as shown above. Select the corresponding row(s) under Sort fields (left) and choose Hide Selected Fields (arrow key). The selected fields then appear in the dialog box under Field List (right). Exit the dialog box with Copy. 5.4 Sending the List as a Document Besides printing the Line Item Display you can send the list also directly from the display. To send the list as a mail, choose List → Send. In the initial screen Create Document and Send, the document name, description, and send date are preset. Use of this document / contents is Version 5 changed by SAP R3 Basic Training page 63 of 85 forbidden without express authority. All rights reserved. Anja Lucas 29.07.2010 Finance_EN_v5.doc
- 64. Basic Training SAP R/3 4.7 Finance _________________________________________________________________________________________________ Create a note for the list. Enter the recipient mail address and Recip.type “U Internet address”. The following icons can be used in addition: If you select this field, this document is sent to the recipient as an express message. A dialog box then appears informing the user that an express document has been sent, allowing him/her to switch to the inbox. If you select this field, the user receives the document as a copy. This means the user receives the document for his/her information and does not need to take any action. If this field is selected, the recipient receives the document as a blind copy. To send the mail, choose Send. Use of this document / contents is Version 5 changed by SAP R3 Basic Training page 64 of 85 forbidden without express authority. All rights reserved. Anja Lucas 29.07.2010 Finance_EN_v5.doc
- 65. Basic Training SAP R/3 4.7 Finance _________________________________________________________________________________________________ 6 Printing Using the SAP output system, you can output many types of documents on output devices such as printers or fax machines: purchase orders, invoices, delivery note, payroll documents, e-mails, report lists and so on. Unlike most other programs, which forward print requests directly to the printer, the SAP System temporarily stores the print data. If you want to print data in an SAP System (online or in the background) and choose a print function, such as , the SAP output system creates two types of print requests: 1. a spool request, which temporarily stores the data to be printed in the system 2. an output request, which sends the data to the desired output device 6.1 Personal Standard Printer The Output Device is usually set up together with your user-ID. Nevertheless it might be necessary to change your printer if you move e.g. to a different office. Under System > User Profile > Own Data you can set up or change your personal printing options. Use of this document / contents is Version 5 changed by SAP R3 Basic Training page 65 of 85 forbidden without express authority. All rights reserved. Anja Lucas 29.07.2010 Finance_EN_v5.doc
- 66. Basic Training SAP R/3 4.7 Finance _________________________________________________________________________________________________ A new session will be opened where your User Profile can be viewed or maintained. The defined Printer under “Output Device” is the SAP printer name which has been assigned to your user. Standard wise your documents/lists will be printed immediately regardless on how many pages Use of this document / contents is Version 5 changed by SAP R3 Basic Training page 66 of 85 forbidden without express authority. All rights reserved. Anja Lucas 29.07.2010 Finance_EN_v5.doc
- 67. Basic Training SAP R/3 4.7 Finance _________________________________________________________________________________________________ there are. As the print can’t be stopped afterwards we recommend always to leave the field “output immediately” blank and start the print request manually from the spool (see later on). It is optional to delete all print-outs straight away after their output. They will be deleted anyway automatically after 8 days. 6.2 The Print Window When you choose one of the print functions set up in your SAP System, such as Print or , a selection screen appears, the print window, in which you can make all entries required for your printout. For example, you can specify which output device you want to use, whether your print request should be output immediately or only stored temporarily, and so on. The appearance of the print window could vary depending on the SAP application. The table below explains the most important fields and functions of the possible selection screens. Field/Option Properties Output device Defaults to the printer which your administrator has defined for you it in the SAP System but can be overwritten. Number of copies Specify the number of copies of printouts of this document that are to be produced. Print All This option must be selected, if the entire document is to be printed. Print from page.... To... You can define which pages of the document are to be printed here. Use of this document / contents is Version 5 changed by SAP R3 Basic Training page 67 of 85 forbidden without express authority. All rights reserved. Anja Lucas 29.07.2010 Finance_EN_v5.doc