JET Technology Labs White Paper for Virtualized Security and Encryption Techn...
Data view intro flier
1. ®
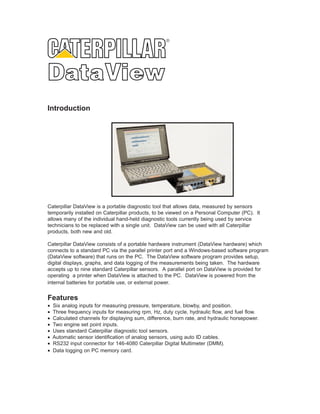
Introduction
Caterpillar DataView is a portable diagnostic tool that allows data, measured by sensors
temporarily installed on Caterpillar products, to be viewed on a Personal Computer (PC). It
allows many of the individual hand-held diagnostic tools currently being used by service
technicians to be replaced with a single unit. DataView can be used with all Caterpillar
products, both new and old.
Caterpillar DataView consists of a portable hardware instrument (DataView hardware) which
connects to a standard PC via the parallel printer port and a Windows-based software program
(DataView software) that runs on the PC. The DataView software program provides setup,
digital displays, graphs, and data logging of the measurements being taken. The hardware
accepts up to nine standard Caterpillar sensors. A parallel port on DataView is provided for
operating a printer when DataView is attached to the PC. DataView is powered from the
internal batteries for portable use, or external power.
Features
• Six analog inputs for measuring pressure, temperature, blowby, and position.
• Three frequency inputs for measuring rpm, Hz, duty cycle, hydraulic flow, and fuel flow.
• Calculated channels for displaying sum, difference, burn rate, and hydraulic horsepower.
• Two engine set point inputs.
• Uses standard Caterpillar diagnostic tool sensors.
• Automatic sensor identification of analog sensors, using auto ID cables.
• RS232 input connector for 146-4080 Caterpillar Digital Multimeter (DMM).
• Data logging on PC memory card.
2. Software Features
The following screen views show how the different tools look in the DataView software.
Setup Tool
The Setup Tool helps you select what sensors are available and tells DataView what sensors
you will be using on each channel. It is the first window you will see after connecting the
DataView hardware and software. The Setup Tool lets you specify what type of sensor is
attached to each channel. You assign units (Metric or English) to the channel, assign unique
names for easy identification, set low and high alarm values, set display rate, choose a position
probe polarity, and set the filter level to one or more channels. As you set up channels the
current output of the channel’s sensor is visible on the setup screen. You can set up channels
for immediate or future use. Setups created for future use can be saved as a permanent group.
3. Defining Sensors
To select a sensor and set up a channel, double-click on any channel and the Define Channel
box will appear as shown below.
If you install the DataView software on your PC, you can try this even if the DataView hardware
is not connected.
From the list of available sensors, select one by clicking on it. You can then select the units and
change any of the names or values in the boxes. When you select OK, that sensor will be
installed on the selected channel.
4. Status Tool
The Status tool shows the real-time values for each channel. As well as a digital value, it can
also display an analog bar graph for each channel. A “Zoom” feature provides easy reading
from a distance.
5. Setup Logger
The Data Logger tool allows information from all channels to be recorded on a PC memory card.
The PC memory card provided with DataView has a 2 MB capacity, but larger cards up to 16
MB can be used. The recording can be started manually or automatically and samples can be
taken up to 1000 times per second. This allows the recording of fast events such as
transmission clutch shift times.
6. Graph Viewer
The Graph Viewer tool combines both Strip Chart and Histogram (Bar Graph) tools. You can
choose between logged data files on the PC, real time from the DataView hardware, or logged
data files on the DataView hardware. Once the data source is selected, you can select either
the Strip Chart or the Histogram graph type. A Graph Definition Wizard allows you to select
exactly how you want to set up the strip chart graphs. Up to four separate strip charts
(channels) can be seen on one graph, each with a separate scale. Two of these graphs can be
shown at the same time for a total of eight individual channels displayed on the screen.
The above Strip Chart graphs represent an actual hydraulic system and engine performance
test on a 426C Caterpillar Backhoe Loader. These traces were recorded using the Data View
Data Logger function so they can be stored and observed later. With the graphing tool you can
also look at graphs in real time while performing a test.
The top graph has three traces which represent the Hydraulic System Performance over a
period of time while the backhoe is being exercised. The two similar traces are the Hydraulic
System Pressure and the Hydraulic Signal Pressure. The third trace is the pressure difference
between the first two pressures, and is called the Margin Pressure. With this graph it is possible
to determine what the pressure is at any time during the test and if these pressures are within
specifications.
The lower graph shows engine performance. The top trace is engine speed (RPM). At the 15
second time line, the engine speed is at low idle. Next the engine goes to High Idle (Max RPM).
Then a load is put on the engine with the hydraulics and the engine speed trace shows the full
load RPM. The lower line shows inlet manifold pressure, or engine boost. When the engine is
at full load RPM, the maximum boost pressure can be observed. The advantage of using the
graph function is the ability to view and record many measurements during or after a test.
7. These 426C Graphs are stored on the DataView software program provided with Service
Technician’s Workbench. To view these graphs, load the DataView program and follow this
procedure.
1. Start DataView program.
2. Click on the Graph Viewer icon in the DataView software toolbar. A window named “PC Log
Selection” will appear.
3. In this window, click on the option entitled “426C Performance” from the File box.
4. Click on the 426C graph in the Documents box and click OK.
5. Select the stripchart button to view that graph type.
6. Add the channels you wish to include in your graph by highlighting the channels (one by one)
in the Available Channels list box and press the “Add>>” push button. The selected channel
is moved to the Selected Channels list box. Repeat this procedure to add additional
channels.
7. Press the “Finish” push button.
8. When the Graph Selector dialog box appears, press the “OK” button. The graph is
displayed.
Sensors
Two types of sensors are used, Analog and Frequency sensors. DataView accepts many
sensors already in use with Caterpillar diagnostic tools. The analog sensors are used for
measuring pressure, temperature, blowby, or position. These sensors can be used in any of the
six analog channels (channels 1 – 6) of the DataView hardware.
Frequency sensors are used for measuring speed (rpm), frequency (Hz), %Duty Cycle or
flowmeters. They provide a frequency or pulsed output signal and can be used only in the three
frequency channels of DataView (channels 7, 8, 9).
A few of the many sensors available are listed below. A complete list and specifications of all
sensors can be viewed by ordering literature number NELG5023, as well as looking in section
28 of the Cat Tools & Shop Products Guide. This information is also shown in the DataView
user’s manual Form NEHS0662.
Analog Sensors for DataView
Pressure 143-4062 0-689 kPa (0-100 psi)
Pressure 143-4065 0-6890 kPa (0-1000 psi)
Pressure 143-4066 0-51675 kPa (0-7500 psi)
Probe Type RTD Temperature 4C-6264 25.4 mm (1”) long, 3.2 mm (.125”)
diameter (various lengths available)
Exhaust RTD Temperature 4C-6268 Exhaust RTD Temperature Sensor
Blowby 8T-2685 Small Blowby/Air Flow Pickup
(Part of 8T-2700 Blowby Group)
Frequency Sensors for DataView
Photo Pickup Speed 9U-5140 LED Photo Pickup
Photo Pickup Speed 6V-3137 Magnetic Mounting Base for 9U-5140
Photo Pickup Speed 1U-6605 Retro-Reflective Tape, 12 mm (5’ long)
Injection Line Speed 6V-4950 Injection Line Pickup Group
Tach Generator Speed 5P-7360 Tach Generator (20 Tooth Int. Gear)
Magnetic Pickup Speed 8L-4171 Gen. Purpose Magnetic Speed Sensor,
91 mm (3.5”) long, 5/8-18 Thread
8. PWM/Analog Sensor Adapter Kit
The Caterpillar 153-9630 PWM/Analog Sensor Adapter Kit allows the DataView hardware to be
used to test, monitor, graph, and Data Log the output of most permanently installed sensors on
Caterpillar electronically controlled engines and equipment. This is very helpful for locating a
intermittent sensor, or verifying if a sensor is bad when ET indicates a fault code for that sensor.
The kit provides the necessary adapter box (for PWM sensors) and cables (for PWM and
Analog sensors) to properly connect these sensors to DataView. The sensors can be tested
either removed from the machine or installed on the machine, and testing will not interfere with
the operation of the machine or engine. While testing sensors removed from the engine, the
Sensor Adapter Kit powers the sensors via an internal power supply.
Autoranging Multimeter
The Caterpillar 146-4080 Multimeter takes measurements on all Caterpillar products including
generator sets. Measurements performed by the Autoranging Multimeter include voltage,
current, temperature, duty cycle, frequency, diode check, continuity, and impedance. It can be
connected to the DataView hardware using the optional 146-8488 RS232 cable. This allows
DMM readings to be viewed with other DataView measurements and data logged or used with
other programs. The Digital Multimeter Group includes the multimeter, test leads, type K
thermocouple, and soft holster.
9. DataView Groups Available
131-5050 DataView Group
This is a very basic group that includes only the DataView hardware unit and the
accessories necessary to power it and connect it to the PC. No sensors or sensor
adapter cables are included. The memory card for data logging is not supplied and
must be purchased separately, if desired. Other items that are included in the 131-5051
DataView Portable TechStation Group can be ordered separately to customize your
DataView Group the way you want it.
DataView Group Contents
Item Part No. Description
1. JERD2163 DataView Software
2. 131-5050 DataView Hardware
3. 137-0169 Flash Programming Cable - DataView Front
4. 131-5059 Flash Programming Cable - DataView Rear
5. 131-5053 DataView to PC parallel port cable
6. 131-5052 AC Power Adapter, 90 to 264 VAC, 47 to 63 Hz
7. 131-5047 AC Power Cable, 110 VAC (USA plug)
8. 137-0171 European Power Adapter
9. NEHS0662 Hardware and Software Operating Instructions
131-5051 DataView Portable TechStation Group
This group contains all of the cables and accessories needed to operate DataView,
except the sensors. They must be ordered separately or can be taken from other
Caterpillar diagnostic tool groups you may have.
10. DataView Portable TechStation Group Contents
Item Part No. Description
1. JERD2163 DataView Software
2. 133-6976 Memory Card for DataView (2 MB capacity)
3. 131-5050 DataView Hardware
4. 137-0173 DataView Carrying Case
5. 131-5058 Foam Insert for Universal PC
6. 6V-2198 Extension Cable 5.5m (18 ft),(4 provided)
7. 8T-5111 Rack Adapter Cable
8. 1P-7446 Rack Cable
9. 131-5054 Adapter Cable for Caterpillar Pressure Sensors
10. 131-5055 Adapter Cable for Blowby/Airflow Pickups
11. 9U-7506 Magnetic Adapter Cable
12. 131-5065 Auto ID Cable for Cat Electonic Position Probe
13. 131-5056 Adapter Cable for Cat Hydraulic Flowmeters
14. NEHS0662 Hardware and Software Operating Instructions
15. 9U-7505 High Voltage Adapter
16. 6V-7072 Test Lead Set
17. 131-5053 DataView to PC Parallel Port Cable
18. 137-0169 Flash Programming Cable - DataView Front
19. 131-5047 AC Power Cable, 110 VAC (USA plug)
20. 131-5052 AC Power Adapter, 90 to 264 VAC, 47 to 63 Hz
21. 131-0171 European Power Plug Adapter
22. 131-5059 Flash Programming Cable - DataView Rear
23. NEEG2723 Group Label on Lid (131-5051 DataView Group)
For more information, refer to the Caterpillar Tools and Shop Products Guide section 28.