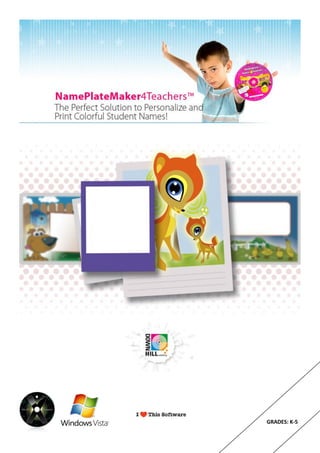
Nameplate Maker 4 Teachers
•
0 likes•1,720 views

Welcome your students and make them feel important by personalizing their names with decorative bright Name Tags! http://www.fonts4teachers.com/ProductDetails.asp?ProductCode=nm4t

Recommended
More Related Content
Viewers also liked
Similar to Nameplate Maker 4 Teachers
Similar to Nameplate Maker 4 Teachers (20)
Nameplate Maker 4 Teachers
- 1. GRADES: K-5
- 3. NAMETAGS
- 7. PHOTONAMES
- 8. NamePlate 4 Teachers TM The perfect Solution to Personalize and Print Colorful Student Names! Copyright © 2009 by DownHill Publishing LLC. Program Designed by Ramón Abajo. All rights reserved. The software and the manual are owned by DownHill pp Publishing LLC and is protected by United States copyright laws and international treaty provisions. Therefore, you must treat the software like any other copyrighted material (e.g. a book or musical recording) EXCEPT that you may either (a) make a copy of the software solely for backup or archival purposes, or (b) transfer the software to a single hard disk (single user) or multiple hard disks (with purchase of a school site license). ISBN 1-883903-07-6 DownHill Publishing LLC 36 Clover St. Newark, NJ 07105 USA (800) 203-0612 E-mail: info@ downhillpublishing.com Visit us on the internet: www.downhillpublishing.com The software and book are sold as they are, without warranty of any kind, either expressed or implied. While every precaution has been taken in the preparation of this book, the publisher and the author assume no responsibility for errors or omissions. Neither is any liability assumed for damages resulting from the use of the information or instructions contained herein. It is further stated that the publisher and author are not responsible for any damage or loss of your data or your equipment that results directly or indirectly from your use of this book and/or software. Trademark Acknowledgments: Apple, Apple Macintosh and TrueType are registered trademarks of Apple Computer Inc. Windows, Windows 95, Windows 98, Windows NT, Windows XP and Windows Vista are trademarks of Microsoft Corporation. Adobe Type Manager is a trademark of Adobe Systems Incorporated. Acknowledgments This software and book would not have been possible without the efforts of many people. First among them is Giselle Sotelo, for providing tremendous input and support; Miguel Váquez and Diego Uribe for their thoughtful comments; Carmen López, for enthusiastically working on this project; Diego García for the technical support; Manuel Flores for the great last minute jobs; Stuart Carroll for the legal support. Pamela Carrera and Crystaline Vega for the time working together; Belén Torrecillas for the so many good ideas; María del Sol Garciá López and Mary Ann Sangiago for donating a sample Lesson Plan. And last, but not least, all the folks at Xentina, Macromedia, Adobe, Quark, Microsoft, IBM and Apple for providing product information, My sincereand of course, to: good products. assistance gratitude also really Roosevelt Elementary School and Title VII in Indio, CA; Venice High School in Los Angeles, CA. Illustrations and layout design: Xentina Group: http://www.xentina.com. ♥ To our Dante and Willy Fiorini. Andrés Cal lovely Diego García Eduardo
- 10. 1 –Overview Welcome to NameplateMaker4Teachers! The perfect solution to personalizing and printing colorful NameTags, labels or nameplates for each students. 2 –Create a new Document To create a new document, just select the option “New Document” from the start screen as shown i n the following picture. From this point you will go through five easy steps to personalize your creation. 2.a Step 1: NameTags Formats: In this first step you can choose the type of format to use on the document. Available options are the following: NameTags, Desk NamePlates, Large NamePlates, Ruler NamePlates and PhotoNames. Note: The format selection on this step limit the designs that will be show on step 4. For example, if you pick NameTags on this step, you won’t be able to choose PhotoNames designs on step 4.
- 11. 2.b Step 2: Labels Edition: Here is where you type the student names you want to print. You have the freedom to type full names or nicknames. To enter a new name, type the text on (1). Once completed press the “enter” key or make a click on . Repeat this operation as many times as necessary. To go to the next step press on (2). To remove a name, first select the name from the list and then remove it by clicking on . The application stores all typed names. To clean those right click over (1) to bring the popup menu. 2.c Step 3: Font Selection: You can choose from two main Font types: - Manuscripts fonts: Print, D’Nealian and Cursive - Decorative fonts: Kids, Headlines and Alegria. Just select the desired Font with a click, then you will be able to choose from different fonts under each font style.
- 12. 2.d Step 4: Design Options: You can choose the design to that you want to print from the different options in the category you choose on step 1. To view available designs use the left and right arrows (1) and (2). Another option to move faster is by using the slider. (3) Drag it to the left or right to change the designs. Once you find the appropriate design, move to the next step by clicking directly on the picture/design that you want. 2.e Step 5: Document Output: Once all previous steps are completed, we are ready to Print or Save the New Document. You can get a preview of the document by clicking on the “Preview” button. This pops up the “Preview” window. Use the “right” and “left” arrow to navigate throw the different pages. (If the document has only one page, the arrows won’t be enabled). You can print from the Preview dialog by pressing on the “Print” button. To Print the document, just click the “Print” button. This will show the Print dialog box. To Save the document, just click on the “Save” button and select the file name to use. To Finish and go back to the start screen, click on the “End Operation” button. 2 – Open a Document NameplateMaker4Teachers let you save a document for later printing. Application files have the .npt extension. To open a file, click on the “Open Document” button and the “Openfile” window will appear (2). Then find the file on your computer and press the “Open” button. Once the document opens, the application takes you to step 5. You can Print or Edit the document by going back to the previous steps.
- 13. 3 – Internet Update You can update the designs the application use if you have an internet connection. Periodically DownHill Publishing publishes new designs that you can easily download and add to NameplateMaker4Teachers. To verify if there is an update available, click on the “Update” button. If a new update is available, the application will download the necessary files automatically. Once this process is complete, you can continue using the application as usual. Note: Updates only include designs updates and not software updates