Unleash the power of QNAP via KODI
•Download as PPTX, PDF•
4 likes•7,448 views

We all know how powerful Kodi is, and it’s also a perfect fit for QNAP NAS devices since all your media collection is stored on the NAS, and Kodi provides an easy way to playback all your media. With these add-ons/channels, it not only expands the functionality of your QNAP NAS and Kodi, but also maximizes your home theater experience.

Recommended
Recommended
More Related Content
What's hot
What's hot (15)
Similar to Unleash the power of QNAP via KODI
Similar to Unleash the power of QNAP via KODI (20)
More from Hernan Lopez
More from Hernan Lopez (10)
Recently uploaded
Recently uploaded (20)
Unleash the power of QNAP via KODI
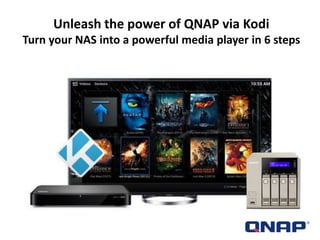
- 1. Unleash the power of QNAP via Kodi Turn your NAS into a powerful media player in 6 steps
- 2. There are a range of QNAP Turbo NAS products that are designed with a HDMI port. One of the key feature is the powerful Kodi media player (the formal XBMC). The main benefit is to store, back up, and playback all your media collections by the QNAP device. More about QTS and HD Station In addition, there are lots of powerful media streaming feature available from Kodi. Today I want to go over how to enable these powerful features to gain hundreds of channels on your QNAP. In the examples, we are using the HS-251-2G, which is a 2-bay fanless NAS which was populated 2 SSDs into the enclosure and placed next to the TV. The outstanding design makes it a quiet and powerful media center for the living room. *If you are familiar with QNAP QTS, and HD Station, you can start from Step 4. Intro
- 3. 6 Easy Steps Step 1. Connect your NAS Step 2. Connect your NAS to TV by HDMI cable. Step 3. Activate Kodi Step 4. Add channels Step 5. Add a source Install a “Repository” Step 6. Install channels Steps
- 4. 1. Install the HD Station & Kodi on QTS. Step 1
- 5. 2. Connect your NAS to TV by HDMI cable. PS: You can use QNAP remote control, or download the Android or iOS App “Q-remote” to control your HD Station. You can also use the wireless USB keyboard/ mouse to control your NAS. Step 2
- 6. 3. You will see the HD Station portal on your TV screen. Click the Kodi. Step 3
- 7. 4. When you select “Video > Add-ons > Get More…” You will see lots of default add-on channels for you to choose to install. However, there are a lot more unofficial but very interesting channels which were contributed by communities out there. Let’s walk through few examples about how to do it. The whole concept: There are different repositories available, each of those might contain different channels. Our goal is to Locate the file path of the repository first, install the repository on Kodi, and then we can find more new channels. Step 4
- 8. 5. Add source Install a “Repository” (1) Go to System> File Manager, select: “Add Source” (2) In the pop up window, input the path as “http://srp.nu” (without quotations) , and g a name e.g. “Super Repo” Step 5
- 9. (3) Go back to the Kodi main screen (4a) Go to System > Settings > (4b)Add-ons, select “Install from zip file” Step 5
- 10. (5) Click the Super Repo which you just defined. Choose from these file to install. Example: select “gotham“, and select “all” and install all these files. Step 5
- 11. 6. Install the Channels (1) Go to Video > Video Add-ons > Get more… You will find there are more new channels now are available Step 6
- 12. (2) Choose the channel you are interested in (e.g. VEVO), click and then install it. (3) Once complete the installation. You can find the channels here “Video> Add-ons” Step 6
- 13. We all know how powerful Kodi is, and it’s also a perfect fit for QNAP NAS devices since all your media collection is stored on the NAS, and Kodi provides an easy way to playback all your media. With these add-ons/channels, it not only expands the functionality of your QNAP NAS and Kodi, but also maximizes your home theater experience. Conclusion