SlideShare a Scribd company logo
1 of 111
Download to read offline
TECHNICAL MANUALTAC-404 Electronic Control Family Specifications
TA C - 4 0 4
WIRELESS DIGITAL REMOTE CONTROLLER
START
STOP
1 2 3 SLEEP
DAILY
MODE FAN SWEEP
WIRELESS DIGITAL REMOTE CONTROLLER
FILTER
AIR
CON.
TIMER
POWER
COMPRES
IMPEDANCE
PRESSURE
AUTO
OFF
REMOTE
TAC-404
1
Index:
® Abbreviations that may be used throughout this document.
® Introduction.
® General Information.
® TAC-404 Main System Features.
® TAC-404 Basic Structure.
∑ Display Assembly 4-DIP Switches.
∑ Backup Memory.
∑ Power Failure.
∑ Communication Failure.
® System Indication (& Maintenance) Lamps.
® Display Assembly 3-Position Slide Switch.
® TAC-490 Remote Controller.
∑ TAC-490 Item Definition.
∑ TAC-490 Performance.
∑ TAC-490 Environmental Conditions.
∑ TAC-490 First Powering / Power Recover (after memory content lost).
∑ TAC-490 R/C Operational Functions Description:
fiGeneral.
fiOff Mode.
fiOn Mode.
fiOn/Off Button.
fiUp/Down Rocker.
fiSelect Button.
fiChanging The Fan Speed.
fiControlling Sweep Operation.
fiChanging Energy Mode.
fiChanging A/C Operation Mode.
fiButtons Under The Front Sliding Cover:
∑ Setting Timer Periods.
∑ Clearing a Programmed Timer Period.
∑ Delayed On/Off (D.O.O).
∑ Room Button.
∑ Sense Here Button.
∑ Digital Clock Setting Button.
∑ Changing A/C ID Code.
∑ Display Reset & Test.
∑ Quick DIP Switches Resetting:
∑ Seven-Position DIP Switch.
∑ Remote Controller Seven-Position DIP Switches (Partial) Code List.
∑ Setting the R/C DIP Switches to Their Special System Characteristics.
TAC-404
2
® System General Operation Description:
∑ Operating in Cool Mode:
∑ Operating in Heat Mode:
® Main Operation Modes - Flow Charts.
∑ Cool Mode - Main Flow Chart.
∑ Heat Mode - Main Flow Chart.
∑ Dry Mode - Main Flow Chart.
∑ Fan Only Mode - Main Flow Chart.
∑ Sleep - Cool & Dry Modes.
∑ Sleep - Heat Mode.
∑ Heat Mode - De-Ice Flow Chart.
∑ Pressure Fault.
∑ Filter Check.
∑ TH-1 & TH-2 Thermistors Test.
® TH-1 & TH-2/3 Temperature to Resistance Conversion Table.
® Routines Detailed Functional Description:
∑ Cool Mode:
∑ Run Loop:
∑ Rest Loop:
∑ Pressure Release Routine (Cool Mode):
∑ Full Compressor Start-Up Routine (Cool Mode):
∑ Change Mode Routine (Cool Mode):
∑ Indoor Fan Routine (Cool Mode):
∑ Compressor Off Routine (Cool Mode):
∑ Indoor Anti-Ice Routine (Cool Mode):
∑ Night State Routine (Cool Mode):
∑ Controlling Outdoor Fan Motor (Cool Mode):
∑ Low Pressure (LOP) Routine (Cool Mode):
∑ Over Pressure (OVP) Routine (Cool Mode):
∑ Sleep Routine (Cool Mode):
∑ Conditioning Routine - General(Auto Heat/Cool Mode):
∑ Auto-Energy Routine (Cool Mode):
∑ Heat Mode:
∑ Run Loop:
∑ Rest Loop:
∑ Pressure Release Routine (Heat Mode):
∑ Full Compressor Start-Up Routine (Heat Mode):
∑ Change Mode Routine (Heat Mode):
∑ Indoor Fan Routine (Cool Mode):
∑ Compressor Off Routine (Heat Mode):
∑ Outdoor Ice Check Routine (Heat Mode):
∑ Outdoor Fan Routine (Heat Mode):
∑ Low Pressure (LOP) Routine (Heat Mode):
∑ Over Pressure (OVP) Routine (Heat Mode):
∑ Sleep Routine (Heat Mode):
∑ Conditioning Routine (Switching From The Heat To Cool Mode):
TAC-404
3
∑ Energy Change Routine (Heat Mode):
∑ Auto-Energy Routine (Heat Mode):
∑ De-Ice Routine (Heat Mode):
∑ Dry Mode Routine:
∑ Filter Check Routine:
∑ TH-1 & TH-2 Thermistors Check (Disconnection Or Short Circuit):
® Line Low Voltage Protection.
® Line Over Voltage Protection.
® TAC-404 Electrical Characteristics.
® TAC-404 Advantages.
® Replacing ATEC-220 with TAC-404.
® TAC-404 Components Cat. Nos.
® Indicator Lamps Troubleshooting.
® General Troubleshooting Chart
® TAC-444 Block Diagram.
® TAC-404 Field Connection.
® ATEC-220 Versus TAC-404 Air Conditioner Model Names.
® Bill Of Materials (BOM) - TAC-444 (Main).
® PCB Placement - TAC-444 (Main).
® Bill Of Materials (BOM) - TAC-440 (Indoor TAC-400).
® PCB Placement - TAC-440.
® Bill Of Materials (BOM) - TAC-420 (Outdoor TAC-400).
® PCB Placement - TAC-420.
® Bill Of Materials (BOM) - TAC-460TF (TNL-S9-15).
® Bill Of Materials (BOM) - TAC-460TF IR Detector (TNL-S9-15).
® PCB Placement - TAC-460TF (with IR Detector).
® Bill Of Materials (BOM) - TAC-460TN (TNL-S20-50).
® PCB Placement - TAC-460TN.
® Bill Of Materials (BOM) - TAC-460GF (GFL-S150-500).
® PCB Placement - TAC-460GF.
® Bill Of Materials (BOM) - TAC-460AN (ANL-S35-90).
® PCB Placement - TAC-460AN.
® Bill Of Materials (BOM) - TAC-490 (Remote Controller).
TAC-404
4
Abbreviations that may be used throughout this document:
A/C = Air Conditioner.
A/D = Analogue to Digital Converter.
B.O.M= Bill Of Materials.
C.O.C. = Certificate of Compliance.
DIP = Dual in Line Package.
D.O.O. = Delayed On / Off (Quick Delay).
DUT = Device Under Test.
EEPROM = Electrical Erasable Programmable
Read Only Memory.
E.F.T. = Electrical Fast Transient.
E.S.D = Electrical Static Discharge.
gr. = gram.
IAW = In Accordance With.
ID = Identification.
IF = Indoor fan (motor).
IR = Infra Red.
LCD = Liquid Crystal Display.
LOP = Low Pressure.
OF = Outdoor Fan (motor).
OVP = Over Pressure.
PCB = Printed Circuit Board.
PRR = Pressure Release Routine.
R/C = Remote Controller.
RFI = Radio Frequency Interference
.RTC = Real Time Clock.
R/V = Reverse Video.
S.P = Set Point.
TH-1 = Thermistor (sensor) no. 1
(intake/return air).
TH-2 = Thermistor (sensor) no. 2
(evaporator/indoor coil).
TH-3 = Thermistor (sensor) no. 3
(condenser/outdoor coil).
TADIRAN = TADIRAN Appliances Ltd.
TBD = To Be Defined.
ROM = Read Only Memory.
mCU = Microcontroller unit.
flag = internal (software) flag.
Please note that due to the fact that this Manual is used also for Tadiran internal use, in the
Routines Detailed Functional Description may appear names of software parameters, timers, flags
etc. that not relevant for the wide use - please disregard those names.
Edited by:
Alex LIBERMAN
Technical Support
International Marketing
TAC-404
5
TAC-404 Electronic Control Family Specifications
The TAC-404 is a highly sophisticated, modern controller designed to operate using the latest
technologies. The TAC-404 enlarges the air conditioner operation abilities.
General:
The name of the product will be changed, by adding the character ‘S’ to the model name or
adding the character ‘S’ on separate label, for example:
GFL-250H will become GFL-S250H (as you can see in Tables 2A & 2B: ATEC-220 versus
TAC-404 air conditioner 50Hz and 60Hz model names).
For the TAC-400 two models are available: ANC-65 & ANC-88 (both three phase models).
Please be advised to the two main technical issues:
For Installation:
The interconnecting cable/port has an additional control wire to accommodate the medium
outdoor fan speed (new).
For Service:
Please note that the ATEC-220 Electronic Control is interchangeable with the TAC-404
Electronic Control (as a complete system, for TFE, TNL, GFL, ANL and GNL models).
The TAC-490 Remote Controller is adapted to control all three Tadiran Electronic Controls
(ATEC-220, TAC-404 and TAC-400 models) and can be programmed for various operations.
Important Note: for most of the new TAC-404 models, comparing to the previous ATEC
models (for example: TFE-11 comparing to TNL-S11), many parts were changed (except the
electronic), such as: indoor fan motor, outdoor fan motor etc.
In some cases, the Refrigeration Cycle was changed also.
Note: All the enclosed specifications, explanations, drawing, schemes etc. are the same for TAC-
400 (ANC models) unless mentioned otherwise.
Specifications and performance data are subject to change without notice.
TAC-404
6
TAC-404 Main System Features
1. Five operating modes (Cooling, Heating, Fan, Dry and Auto).
2. Three indoor fan speeds (Low, High and Turbo) + Auto speed mode.
3. Night state (low outdoor noise).
4. Sweep control (for all TNL-S and GFL-S models).
5. Quick restart (only for heat pump models).
6. Indoor anti-ice control (in cooling mode).
7. Outdoor de-icing control (in heating mode).
8. Low & High pressure protection.
9. Low & High voltage protection.
10. Remote Controller low battery (low) indicator.
TAC-404
7
New Features (TAC-404 only):
11. Enlarged temperature control (SP = Set Point) range from 12∞C to 32∞C (54∞F to 90∞F).
12. Three outdoor fan speeds (Low, Medium and High). The additional speed allows lower
noise levels down to 45 dB/A and also allows better capacity continuity.
13. In cooling mode: TAC-404 enable operation at low outdoor temperature, down to
10∞C/50°F, instead of 20∞C/68°F and at high outdoor temperature, up to 52∞C/126°F, using
500mm diameter fan blade that supply 2400 cfm at outdoor fan motor High speed.
14. In heating mode: TAC-404 enable operation at high outdoor temperature, up to 24∞C/75°F,
instead of 15∞C/59°F and at low outdoor temperature, down to -8∞C/18°F (for Rotary
Compressors) or down to -14∞C/7°F (for Reciprocating and Scroll compressors). For efficient
heating capacity at very low outdoor temperatures, you should use 'HDE' configuration
(auxiliary indoor heater).
15. Real time 24 hours clock.
16. Timer with 3 time zones, in a 24-hour period, including daily mode.
17. Sleep mode with timer.
18. Temperature control (and sense) at specific (local) place (near to the user) - Auto Sense.
19. Room Immunity display.
20. High resistance to RFI & EMI.
21. Automatic recovery system (EEPROM memory) using electronic memory instead of using
backup battery.
22. Low & High pressure indication.
23. Low & High voltage indication.
24. Unique electronic automatic test equipment - TE-2000 accessory.
25. Possibility to control at once up to 1024 air conditioners by a PC - TAC-700.
TAC-404
8
TAC-404 Basic Structure:
The TAC-404 is composed of 3 main units:
1. TAC-460 - Display Assy. - the system “brain”, including the electronic control software
(specially shaped for each model).
2. TAC-444 - Electronic Control power box - a relay unit which provides an interface
between the software in the Display Assy. and the air-conditioner loads (indoor fan
motor, outdoor an motor, sweep motor, reverse valve, compressor, TH-1, TH-2, TH-3
and heating element).
The TAC-444 is controlled by the TAC-460.
3. TAC-490 Remote Controller.
TAC-444 “reads” the 3 thermistors (TH-1, TH-2 & TH-3), using an 8-bit A/D converter that
converts the thermistor outputs to digital data. Thermistors accuracy is 1%.
The TAC-400 (ANC) is composed of 4 main units.
1. TAC-440 - Indoor Electronic Control.
2. TAC-420 - Outdoor Electronic Control.
3. TAC-460 - Display Assy (looks like the ANL-S Display Assy but with different software).
4. TAC-490 Remote Controller.
Display Assy DIP Switches (Jumpers):
4 DIP switches located on the TAC-460 Display Assy.
DIP switch no. 1 indicates whether the unit is high wall/ceiling or floor installation. When the
switch is OFF (up), the unit is floor installation, and when the switch is ON (down), the unit is
high wall/ceiling installation.
DIP switch no. 2 indicates the compressor type. When the switch is OFF (up), the compressor
is of thereciprocating type, and when theswitch is ON (down), the compressor is a rotary type.
DIP switch no. 3 sets the air conditioner to Heat Pump/Cooling Only mode.
When the switch is OFF (up), the unit is Heating & Cooling, and when the switch is ON
(down), the unit is Cooling Only (effective from TAC-460 software version V1.51 only).
DIP switch no. 4 is for future use only (Not Connected).
DIP Switches, factory set (values in parenthesis are for 60Hz models):
Model DIP SW. 1 DIP SW. 2 DIP SW. 3 DIP SW. 4
COOL HEAT
TNL-S9-15 (1211-1215) ON ON ON OFF OFF
TNL-S20 ON ON ON OFF OFF
TNL-S25-35 (2025-2035) ON OFF ON OFF OFF
GFL-S150 (1515) OFF ON ON OFF OFF
GFL-S200-500 (2020-2050) OFF OFF ON OFF OFF
The DIP Switches set activated just after the unit is powered On (power on reset).
TAC-404
9
Backup Memory:
Programmable memory, EEPROM type saves programmed settings after a power failure
(recovering to the last settings).
This is pure Electronic Memory (no use with backup battery - much more reliable).
Power Failure:
1. If the power failure is shorter then 20 msec., TAC-404 is not affected.
2. If the power failure is longer then 20 msec., TAC-404 stops all air conditioner operations for
the next 20 sec. After power recovery, TAC-404 recovers using the Pressure Release Routine
using the last operation settings. If the software version is V1.51 or higher and the A/C is
programmed to 'COOLING ONLY' (by TAC-460 DIP Switch 3), then the TAC-404 will
enter to 5 minutes delay.
Communication Failure:
In case of a communication failure (longer then 1 sec.), TAC-404 stops all air conditioner
operations and after 10 sec. if the failure continues, the POWER led flashes.
When communication recovers, all air conditioner operations recover using the Pressure Release
Routine.
If the software version is V1.51 or higher and the A/C is programmed to 'COOLING ONLY',
then the TAC-404 will enter to 5 minutes delay.
System Indicator Lamps:
POWER (red) - Lights up when the air conditioner is connected to the power supply and
ready to receive commands from the remote controller.
Flashes when there is any failure with the power supply.
AIR CON (green) - Lights up when the air conditioner is ON.
Flashes when de-icing takes place.
FILTER (red) - Lights up after A/C 250 hours of operation
(indicates that the filter requires cleaning).
TIMER (yellow) - Lights up when air conditioner has been programmed for timer operation.
Service and Maintenance Indicator Lamps:
COMPRES. (green) - Lights up when the compressor is working.
Turns Off during the first 5 minutes of a thermostat stop.
Flashes when the minimum halt time (5 minutes) has passed and there
is no thermostat demand.
PRESSURE (red) - Lights up when there is a Low Pressure problem in the cooling system.
Flashes when there is a High Pressure problem in the cooling system.
IMPEDANCE (red) - Lights up when there is a problem with the ignition/impedance.
See also: "Indicator Lamps Troubleshooting".
TAC-404
10
Display Assembly 3-Position Slide Switch:
The TAC-460 Display Assy. includes a 3-position slide switch. This switch operates according
to the following table:
Switch Status Function
OFF ∑ Shuts A/C (air conditioner) OFF.
∑ Clear all fail flags after 2 seconds, turns off Filter indicator
lamp and resets timer settings.
∑ The A/C do not respond to the Remote Controller.
REMOTE (RMOT) ∑ Enables receiving and execution of IR (Infra Red) commands
from the Remote Controller.
AUTO ∑ Turns air conditioner ON, in automatic mode -
set point = 22∞C/72°F. The air conditioner automatically
selects cooling (TH-1>23∞C/73°F) or heating
(TH-1<21∞C/70°F) mode, as well as the air speed.
TAC-404
11
TAC-490 (VER 1.1) Remote Controller Operational Functions Specification:
TAC-490 Item Definition:
The TAC-490 is an air-conditioner remote controller (R/C) unit that intended for use with
TADIRAN APPLIANCES, LTD. electronic air-conditioners which contain TAC-400 (ANC),
TAC-404 or ATEC-220 electronic controls.
The R/C is based on Infra Red (IR) transmission, using a pulse code modulation (PCM)
protocol.
The TAC-490 transmits A/C control and timer programming commands, as defined on the
remote controller display, to the air-conditioner control unit via an IR transmitter.
The TAC-490 transmits Beacon commands to refresh the air-conditioner operation status.
The TAC-490 is composed of: case, PCB assembly, 11 buttons, Liquid Crystal Display (LCD),
temperature sensor, battery compartment cover (with two "AAA" alkaline batteries), front
sliding cover, IR transmission element, 7-position DIP switch and wall-mounting clip.
Figure 1: TAC-490 R/C Buttons Identification and Location
T I M E R
S E T
C L E A R S E N S E
R O O M
D E L AY
C L O C K
WIRELESS DIGITAL REMOTE CONTROLLER
START
STOP
1 2 3 SLEEP
DAILY
MODE FAN SWEEP
2 SELECT
LCD
THERMISTOR
1 UP
3 DOWN
4 ON/OFF
7 TIMER
5 SET
6 CLEAR
11 SENSE HERE
8 DELAY
10 TIME SET
9 ROOM
TAC-404
12
Thefollowingtablelists theTAC-490 R/C buttons, by function, switch designation and location:
Button Function Switch
Designation
Symbol Location
On/Off 4 Front face
Up/Down 1 (Up),
3 (Down)
Upper right side
Select 2 (SEL) Upper left side
Timer Set 5 Time Under front sliding cover
Timer Clear 6 Clear Under front sliding cover
Timer Mode Start /
Stop
7 Set Under front sliding cover
Delayed On/Off
(D.O.O)
8
+ 1
Under front sliding cover
Room Temperature 9 Room Under front sliding cover
Digital Clock Set 10 Clock Under front sliding cover
Sense Here
(local sense)
11 Sense Under front sliding cover
TAC-490 Performance:
The TAC-490 R/C deliver the following functions:
® Transmit IR control commands to the A/C electronic control as a function of operator input.
® Display R/C operational status, room temperature, clock, timer programming, low battery
status, transmission indication.
® Monitor A/C operation by automatic transmission of periodic Beacon informational updates.
® Sense the ambient local temperature and display in either ∞C or ∞F as defined by DIP Switch
4 setting. Temperature display is accurate to within 0.5∞C/1°F and updated each 30 sec.
In power up the R/C default will be 23∞C or 73∞F.
® Provide a time clock, accurate to 1 min. per month. In power up the R/C default will be
00:00 or 12:00 as defined by DIP switch 4.
® Provide three separate A/C operation timers (only one timer if programmed to ATEC mode).
® The TAC-490 R/C IR transmission properly received by the TAC-460 display at a distance
of up to 7m. ±15∞ off-center Transmission.
TAC-490 Environmental Conditions:
The TAC-490 R/C withstand:
∑ Operating temperature range: -10∞C to 65∞C (50°F to 149°F)
∑ Storage temperature range: -20∞C to 80∞C (68°F to 176°F)
∑ Impact of a 0.8m drop on concrete.
∑ Vibration: 0.8mm Amp. At 50Hz 2min per cycle.
∑ Thermal shock - from 10∞C to 65∞C (50°F to 149°F), in a 20 minute cycle, and vice versa.
∑ Humidity - 90% relative @ 25∞C (77°F).
∑ ESD - IAW IPC801 - 2 level 3.
∑ Radiated Electromagnetic Field - 3V per 1m.
TAC-404
13
TAC-490 First Powering / Power Recover (after memory contest lost):
When the TAC-490 powered at the first time or recovers from long power failure (for example:
the batteries were removed and the new batteries were replaced after few minutes, what caused
the memory contest to be lost) it will recover its default setting (as defined by the DIP switches
settings):
The R/C is recovering in Temperature Mode.
Section Status
Fan Auto
Mode Auto
Sweep (if applicable) Off
Energy (if applicable) Auto
Timers Off
Set Point (S.P.) 23∞C/73∞F (according to
DIP switch 4 setting)
R.T.C (Real Time Clock) 00:00/12:00 (according to
DIP switch 4 setting)
Sense Here (Local Sense) Off
DELAY (Delay On/Off) Off
* For short power brakes (usually up to 2 minutes), the R/C save all programmed settings. It is
recommended to replace the R/C batteries when the battery 'Low Battery' indicator appear.
TAC-490 R/C Operational Functions Description:
The following Sections describe all the functions executed by the TAC-490 R/C.
General:
1) The transmission symbol on the display blinks each time the R/C transmits, both in Send
command and in Beacon.
2) The display is divided into different Sections. Each Section is dedicated to the management of
certain A/C functions. Each Section contains a group of Symbols, representing the available
selection options for the relevant operating functions.
The Sections of the display are:
a) Digital Clock,
b) Low Battery Indicator,
c) Transmission indicator,
d) Timer(s) start/stop (including sleep) and daily,
e) Desired temperature (or Room temperature) indicator,
f) Sensor (local sense) active indicator,
TAC-404
14
g) Mode Select,
h) Fan Speed,
i) Sweep (that appear also on models without sweep - due to factory set),
j) Energy Level (not in use for TAC-404 A/C models - only in ANC, TAC-400 models).
3) When a given Section is selected for programming, the Section Title turns to reverse video
(R/V) and the frame around the currently selected Symbol blinks, enabling selection change
within this Section.
4) Any Mode, Fan Speed, Sweep or Energy Level selected Symbol appears with a solid frame.
5) At any given time only one Symbol frame can blink.
6) The R/C transmits a Send command, after releasing the button, on each of the following
occasions:
∑ After pressing On/Off button.
∑ After pressing Select button, in On Mode.
∑ After changing Set-Point Temperature by pressing Up-Down Rocker (in Temperature
Mode).
∑ After exiting Timer Programming Mode.
∑ After pressing Timer Clear button for 3 sec.
∑ After pressing Up/Down Rocker when acting as Start/Stop respectively, when Sweep
Section is selected.
∑ After pressing Digital Clock Set to exit current time setting.
∑ After pressing the Set button in Timer Programming Mode.
∑ After pressing the Delay On/Off button in order to set delay time to Start/Stop.
∑ Whenever a Send command is required.
7) The R/C transmits a Beacon command, on each of the following occasions:
∑ Repeat Off command every 30 min. for the next 24 hours.
∑ Repeat Off command every 6 hr. after the 24 hours.
∑ Repeat any On command every 10 min.
∑ Every 10 min. when any Timer is programmed, including Sleep.
∑ Every 10 min. (5 min. for the TAC-480 R/C) if Sense Here is active.
∑ When ever a Beacon command is required.
∑ Not active (no Beacon) when the R/C is programmed to ATEC mode.
8) Pressing button combination that is not defined will not effect the R/C.
TAC-404
15
9) The R/C includes a temperature sensor, and displays the measured room temperature
(in Off Mode and when Room Temperature button is pressed in On Mode).
The temperature is updated every 30 sec.
The temperature (Set Point Temp. or Room Temp.) can be displayed in one of two scales,
∞C or ∞F, according to the selected R/C setup (Dip switch 4).
10) The R/C includes a Digital Clock that displays the current time (default) with the colon
blinking at 1 Hz, or a programmed Time (in Timer Programming mode). The time is
displayed in one of two formats:
a) 24:00 - appears when ∞C is selected for temperature scale display.
b) 12:00 - appears when ∞F is selected for temperature scale display.
11) When the battery is low (less than 20% capacity remaining) a blinking Low Battery symbol
is displayed.
Off Mode:
Off mode is defined as the situation when the A/C is Off and the R/C display is in its default Off
mode: blank, except for the Digital Clock, which displays the current time, room temperature
with the Room Symbol and indicators and the Symbol (1, 2, 3, SLEEP, DAILY) of the active
Timer period (only).
The room temperature sensing and display is refreshed every 30 sec. Pressing any button
(excluding the On/Off and Timer Set and Timer Clear and Room Temp. button) while in Off
mode, turns On the R/C display, displaying it’s last setting and enabling the user to program the
functions on the display (without turning the A/C on).
The R/C memorizes the new setting after the Select button is pressed. The R/C returns to Off
mode immediately or 10 seconds after the last button pressing (depends which buttons were
pressed), unless the On/Off button has been pressed, which causes the R/C to memorize the new
setting, transmit an On Send command and remain in On Mode.
The R/C transmit an Off mode beacon every 30 min. in the next 24 hours after it was turned Off
to assure A/C will go Off even if there was power failure during setting the R/C to Off mode
(after 24 hours, the R/C transmit an Off beacon every 6 hours).
On Mode:
On mode is defined as the situation when the R/C display is in its default On mode, displaying
all Symbols and titles (excluding either Energy Level or Sweep Symbols, according the R/C
setup), with the previously selected Symbols displayed with frames: Fan speed, Selected Sweep
status (Swing or Static, if Sweep mode set on), Energy level (if Energy mode set on), Mode,
Digital Clock, Set point temperature (the Set Point Temperature display replaces the Room
Temperature and the Room Symbol disappears), and Timer indicators (of active timer periods).
TAC-404
16
On Mode contains two sub-modes:
a) Temperature Mode (default):
In Temperature mode all the symbols are displayed, and the active Symbol is framed.
Pressing the Up/Down Rocker in this mode, increases (Up) or decreases (Down) the Set Point
Temperature by 1∞ (∞C or ∞F according to R/C DIP switch 4 setup).
Each Set Point change causes the R/C to transmit Send command.
b) Select mode:
Pressing the Select button causes the R/C to enter Select Mode, turning the Title to R/V
sequencing the active Section, the frame around the active Symbol blinks.
Pressing the On/Off button, while in On mode, causes the R/C to transmit an Off command,
exiting On Mode turns the R/C to Off Mode.
On/Off Button:
Pressing the On/Off button when the R/C is in Off mode, turns the R/C to On Mode: displaying
all Symbols (excluding Energy or Sweep Symbols, according to the R/C setup, and the
Transmission Indicator). The previously selected Symbols are displayed with frames (default
On display), and the R/C transmits an On Send command (turning the A/C on).
The first pressing of the On/Off button within 10 seconds after any change of the R/C setting will
cause the R/C to memorize the setting and transmit an On Send command, and remain in On mode.
Pressing the On/Off button when the R/C is in On mode transmits an Off Send command
(turning the A/C off), and returns the display to Off mode.
Up/Down Rocker:
The rocker, mounted on the right side of the R/C, contains two directional push-buttons -
Up and Down (pressing both buttons simultaneously will not affect the R/C):
In Temperature mode (default), the rocker sets the Set Point Temperature from 12∞C to 32∞C
(54∞F to 90∞F).
Momentary pressing of the Up button raises the Set Point Temperature by 1∞ (°C or °F) and
transmits a Send command. Continuous pressing of this button causes the Set Point
Temperature to scroll up at a rate of 4∞ (°C or °F) per sec (useful when large Set Point increase
required).
Releasing the Rocker transmits a Send command.
Momentary pressing of the Down button lowers the Set Point Temperature by 1∞ (°C or °F) and
transmits a Send command. Continuous pressing of this button causes the Set Point Temperature
to scroll down at a rate of 4∞ (°C or °F) per sec (useful when large Set Point decrease required).
Releasing the Rocker transmits a Send command.
TAC-404
17
In Select mode, the Rocker sequences a blinking frame around the active Symbol enabling the
selection of a new active Symbol.
Pressing Up scrolls the blinking frame up to the next Symbol in a cyclic manner.
Pressing Down scrolls the blinking frame down to the next Symbol in a cyclic manner.
Select Button:
Pressing the Select button sequences the active Section, causing the Section Title to appear in
R/V and the frame around the active Symbol in the current Section to blink.
Each pressing of the Select button causes the active Section to sequence to the next Section, in
the following order: Temperature ( default ), Fan, Sweep (depending on the R/C mode setting)
Energy (depending on the R/C mode setting) and Mode, in a cyclical manner.
Each pressing of the Select button memorizes the current setting and causes a Send command
transmission.
The R/C returns to temperature mode 10 sec. after the last pressing of one of the Up/Down or
Select buttons, returning to the previous setting after the last Select button press.
Changing the Fan Speed:
Starting from Temperature mode, pressing the Select button turns the Fan Title to R/V,
displays a blinking frame around the currently selected Fan Speed (Low, High, Turbo or Auto).
Pressing the Up or Down Rocker push-button, scrolls the blinking frame of the selected Symbol.
Pressing the Select button causes transmission of a Send command of the new selected Fan
Speed (only if it was changed), and memorizes the updated setting. The currently selected
Symbol frame stops blinking, the Sweep or Energy title turns to R/V (according to R/C setting)
and the frame around the selected Energy or frame around the Sweep Symbol begins to blink.
Also, the first pressing of the On/Off button within 10 seconds after any change of the R/C
setting will cause the R/C to memorize the setting and transmit an On Send command.
* Whenever the R/C is set to Dry Mode the Fan Speed shall be set to Low without option for
change.
Controlling Sweep Operation (Sweep Mode set on by DIP switch 5):
Starting from Temperature mode, pressing the Select button twice turns the Sweep Title to
R/V and displays a blinking frame around the Sweep Symbol/Section.
Pressing the Up Rocker push-button transmits an On Sweep Send command, causes activation
of automatic, continuous Sweep, as indicated by sequential segment lighting of the Sweep
Symbol.
Pressing the Down Rocker push-button transmits an Off Sweep Send command, and turns off
the Sweep indicator sequential movement keeping the A/C louver at its present position
TAC-404
18
Pressing the Select button memorizes the updated setting. The currently selected Symbol frame
stops blinking and the Energy Title turns to R/V (if The R/C is set to Energy type).
The Select Mode Title turns to R/V and a frame around the currently selected Mode blinks.
Also, the first pressing of the On/Off button within 10 seconds after any change of the R/C
setting will cause the R/C to memorize the setting and transmit an On Send command.
The Sweep section is not displayed if the R/C is not set to Sweep configuration (the factory set
for models without SWEEP is with DIP switch No. 5 in OFF position, so SWEEP is always
available on the R/C display).
Changing Energy Mode (Energy Mode set on by DIP switch 6):
This mode is not available for all TAC-404 models (useful only for TAC-400, ANC models).
Starting from Temperature mode, pressing the Select button two or three times turns the
Energy Title to R/V, displays the relevant Energy Symbol segments according to the current
setting (1/3, 2/3, full ring, Auto).
Pressing the Up or Down Rocker push-button, scrolls the ring segments of the Energy Symbol
(1/3, 2/3, full ring, Auto).
Pressing the Select button causes transmission of the new selected Energy volume (only if it
was changed), and memorizes the updated setting. The currently relevant Energy Symbol
segments, or Auto stops blinking.
The Energy section is not displayed if the R/C is not set to Energy configuration (when DIP
switch 6 is on as in all TAC-404 models).
Changing A/C Operating Mode:
Starting from Temperature mode, pressing the Select button two, three or four times (according
to the R/C setting, with or without Sweep and with or without Energy) turns the Mode Title to
R/V, and displays a blinking frame around the currently selected Mode Symbol (Cool, Heat, if
the R/C is not set to Cool Only Mode ( DIP switch 7) , Dry, Fan, Auto).
Pressing the Up or Down Rocker push-button, scrolls the blinking frame of the selected Mode
Symbol. Pressing the Select button causes transmission of the new selected Mode volume (only
if it was changed), and memorizes the updated setting. The currently selected Symbol frame
stops blinking and the R/C returns to Temperature mode.
Also, the first pressing of the On/Off button within 10 seconds after any change of the R/C
setting will cause the R/C to memorize the setting and transmit an On Send command.
TAC-404
19
Buttons Under the Front Sliding Cover
Setting Timer Periods:
1. Three Timer periods (numbered 1, 2, 3) and Sleep function period are available for
programming (in ATEC mode only timer 1 is available). Each Timer Period can be
programmed to start and stop at a given time with selected A/C function settings.
2. The Timer Programming mode is entered by pressing the Timer button. Pressing it
again within 10 sec. from the first pressing in this mode, transmits the current
programmed Timer period.
If no timer have been set (within 10 sec.), the R/C exits to Temperature mode.
3. Starting from any mode, pressing the Timer button causes the R/C to enter Timer
Programming mode, displaying the timer symbol, the 1st
Timer Period Indicator "1",
and the word "START" blinks. Only if any of the Timer period was set, its indicator
shall light. The Timer Clock replaces the Digital Clock and the clock display blinks
with dashes (--:--).
If the timer period was not programmed, or the programmed "STOP" time is equal to its
"START' time, the Timer Clock will blink with the following display: (--:--).
4. In Timer Programming mode, pressing the Up push-button momentarily advances the
displayed time by 10 min. Pressing it continuously advances the displayed time by 10
min. increments at a rate of 40 min. per sec.
Pressing the Down push-button momentarily reverses the displayed time by 10 min.
Pressing it continuously reverses the displayed time by 10 min. increments at a rate of 40
min. per sec.
5. Pressing the Set button causes the R/C to memorize the current Timer Period setting with
its operating selected setting, and to transmit this program according to the relevant Send
command protocol (for ATEC-220H type, the R/C transmits the time difference between
the programmed time and the current time in half an hour period), and exiting the Timer
Programming mode setting.
6. Pressing the Up or Down Rocker push-button within 10 sec. after the first Timer
pressing, sets the 1st
Timer Period Start Time.
7. Pressing the Timer push-button again causes the R/C to transmit via Send command the
programmed start time, causing the word "START" to disappear, and the word "STOP"
to blink.
8. Pressing the Up or Down Rocker push-button again (within 10 sec.) sets the 1st
Timer
Period Stop Time.
TAC-404
20
9. Pressing the Timer push-button again (within 10 sec.) causes the R/C to transmit via
Send command, the programmed Stop time, the 1st
Timer Period Indicator "1" to stay on,
and the 2nd Timer Period Indicator "2" to blink with the "START" indicator.
10. The Timer Period setting process may now be repeated for the 2nd
and 3rd
Timer Periods,
and Sleep function.
11. Daily - pressing the Set button for 3 sec. (in Timer Programming mode) causes the
current Timer Period to be repeated daily and the Daily indicator to be displayed.
Releasing the Set button causes Send command transmission. When a Daily Timer period
is active the Daily indicator is displayed. A second press (less then 3 sec.) on the Set
button shall cause the R/C to exit the Timer Programming mode.
12. The R/C displays the timer period in the following manner:
∑ When the R/C is in On Mode and one of the Timer periods is set to STOP, the word
"STOP" is displayed + the relevant Timer period.
∑ When the R/C is in Off Mode and one of the Timer periods is set to START, the
word "START" is displayed + the relevant Timer period.
∑ When the R/C is in Off Mode the Sleep "START" period is displayed (but if only
Sleep STOP period is programmed, without Sleep START period, the Sleep period
will not be displayed in Off Mode).
13. Sleep Timer is the forth Timer period that marked SLEEP. When SLEEP is active, the
desired temperature is updated while the customer sleep. The room air temperature
gradually rises (in COOLING mode) until this Timer period is exited. At the end of
SLEEP Timer period, the desired temperature returns to its previous settings.
Clearing a Programmed Timer Period:
Pressing the Timer Clear button momentarily while in Timer Programming mode, deactivates the
selected Timer period, and transmits the updated Timer setting.
Pressing the Timer Clear button continuously for 3 sec., deactivates all the programmed Timer
periods, and transmits the updated Timer setting.
TAC-404
21
Delayed On/Off (D.O.O.) - Delay:
The Delay On/Off is a quick and easy to set timer for setting the A/C On or turning it Off in a
delay time (if the R/C is in On Mode it shall set time to stop and if the R/C is in Off Mode it
shall set the time to Start).
Pressing the DELAY button in On mode, converts the display to Timer Programming mode, in
which the Timer title and Timer period no.3 (or no. 1 when programmed to ATEC mode) are
displayed and the word "STOP" blinks.
The current time is replaced by the DELAY time, which is the current time +1 hr (-9 min.).
The R/C enters Off mode at the DELAY time displayed. Repeated pressing of the DELAY
button during DELAY operation, adds 1 hr. per pressing to the remaining DELAY time and
causes the updated DELAY stop time to be displayed. The Display recovers to its previous
state 5 sec. after the last DELAY button pressing.
Timer period no. 3, "STOP" and Timer title remain lit on the Display.
Pressing the DELAY button in Off mode, converts the display to Timer Programming mode, in
which the Timer title and Timer period no.3 are displayed and the word "START" blinks. The
current time is replaced by the DELAY time, which is the current time +1 hr (-9 min.).
The R/C enters On mode at the DELAY time displayed. Repeated pressing of the DELAY
button during DELAY operation, adds 1 hr. per pressing to the remaining DELAY time and
causes the updated DELAY start time to be displayed. The Display recovers to its previous
state 5 sec. after the last DELAY button pressing.
Timer period no. 3, "START" and Timer title remain lit on the Display.
Each pressing of the DELAY button causes the transmission of an On or Off Send command.
When the DELAY timer is active the R/C will transmit Beacon command each 10 min.
Room Button:
Pressing the Room button, in On Mode, displays the Room Temperature, as measured by the
R/C sensor, replacing the Set Point Temperature display, and the Room Temperature indicator.
The display stays on for 5 (to 7) sec. after the button is pressed. The Room Temperature
display refreshed every 30 sec.
Sense Here Button:
Pressing the Sense Here button activates the Sense Here mode, in which the R/C transmits
the room temperature (instead of TH-1), as sensed by the R/C sensor, via Beacon commands
each 10 min. The Room Temperature indicator blinks during Sense Here mode.
Pressing the Sense Here button again causes the R/C to exit the Sense Here mode.
If the A/C to not receive Sense Here Beacon commands for 12 min. he start using the TH-1
instead.
TAC-404
22
Digital Clock Setting button:
The Digital Clock can be set to the correct time when the R/C is in Off mode, or in On mode.
Pressing the Digital Clock Setting causes the R/C display to clear, with only the Digital Clock
Displayed and the min. on the Digital Clock display blinking.
Pressing the Up or Down button momentarily advances or reverses the displayed min.
respectively in 1 minute steps. Pressing these buttons continuously advances or reverses the
displayed min. in 1 min. increments, at a rate of 4 min. per sec.
Pressing the Select button causes the min. display to remain on, and the hr. display to blink.
Pressing the Up or Down button momentarily advances or reverses the displayed hr.
respectively in 1 hr. steps. Pressing these buttons continuously advances or reverses the
displayed hr. in 1 min. increments, at a rate of 4 hr. per sec.
Pressing Select again toggles between the min. and hr. display.
Pressing the Digital Clock Setting button with a sharp-pointed object again will cause the R/C to
transmit the appropriate Send command (On or Off), exit the Digital Clock setting mode and
return to its previous operation mode (On or Off).
The Digital Clock set (to the correct time) do not reset the Timers (except the Timers that their
operation time has "expired").
Changing A/C ID Code:
Pressing the Room button + Select buttons for 3 sec. causes a single transmission of the special
ID code (see explanation about DIP switch 3 function). With each such transmission, the ID
code toggles between the default and the alternative code.
Application: to prevent two near A/C to be effected by each other R/C.
Display Reset & Test:
Pressing the Room button + Sense Here buttons for 3 sec. causes the display to turn On all the
display elements for 3 sec. (and then the display turn Off).
This action will reset all display settings (Timers, Digital Clock etc.).
Quick DIP Switches Resetting:
If you wish to make a quick DIP switches resetting (with no need to remove the batteries):
1. Remove the battery compartment cover, and remove the plastic DIP switches protective
cover.
2. Set the DIP switches to the required positions (see: "Setting the DIP Switches to Their
Special System Characteristics").
3. Press the Room button + Sense Here buttons for 3 sec.
4. Return the battery compartment cover and the DIP switch protective cover to their proper
position.
TAC-404
23
Seven-Position DIP Switch:
7-DIP Switches are located under the battery compartment cover. A pointed-tip object is used
for setting these switches.
The R/C senses the setting of these switches every time it is turned On (after the last memory
contents was totally lost).
The settings on these switches is made by using a pointed tip and determines the transmission
protocol used by the R/C (see the following table that contains (partial) instructions for setting
the different R/C communication codes, and see also: Setting the DIP Switches to Their Special
System Characteristics).
Remote Controller Seven DIP Switches (partial) Code List:
Function DIP Switch No.
1 2 3 4 5 6 7
ATEC-220 w/o Sweep + ∞C (Default Code) OFF OFF ON OFF ON ON OFF
ATEC-220 w/o Sweep + ∞C (Alternate Code) OFF OFF OFF OFF ON ON OFF
ATEC-220 + Sweep + ∞C (Default Code) OFF OFF ON OFF OFF ON OFF
ATEC-220 + Sweep + ∞C (Alternate Code) OFF OFF OFF OFF OFF ON OFF
ATEC-220 w/o Sweep + ∞F (Default Code) OFF OFF ON ON ON ON OFF
ATEC-220 w/o Sweep + ∞F (Alternate Code) OFF OFF OFF ON ON ON OFF
ATEC-220 + Sweep + ∞F (Default Code) OFF OFF ON ON OFF ON OFF
ATEC-220 + Sweep + ∞F (Alternate Code) OFF OFF OFF ON OFF ON OFF
TAC-404 w/o Sweep + ∞C (Default Code) ON OFF OFF OFF ON ON OFF
TAC-404 w/o Sweep + ∞C (Alternate Code) ON OFF ON OFF ON ON OFF
TAC-404 + Sweep + ∞C (Default Code) ON OFF OFF OFF OFF ON OFF
TAC-404 + Sweep + ∞C (Alternate Code) ON OFF ON OFF OFF ON OFF
TAC-404 w/o Sweep + ∞F (Default Code) ON OFF OFF ON ON ON OFF
TAC-404 w/o Sweep + ∞F (Alternate Code) ON OFF ON ON ON ON OFF
TAC-404 + Sweep + ∞F (Default Code) ON OFF OFF ON OFF ON OFF
TAC-404 + Sweep + ∞F (Alternate Code) ON OFF ON ON OFF ON OFF
* For COOLING Only A/C models, DIP Switch No. 7 is set to On always (HEAT mode is not
displayed on the R/C LCD).
TAC-404
24
Setting the DIP Switches to Their Special System Characteristics:
DIP Switches No. 1 & 2 should be set as follows:
Electronic Control Type SW1 SW2
ATEC OFF OFF
TAC-404 ON OFF
DIP Switch No. 3 should be set as follows:
I.R Transmission Code TAC-404/TAC-400 ATEC
Alternate Code * ON OFF (JP-4 Removed)
Default Code OFF ON (JP-4 Installed)
For ATEC models, you must remove JP-4 (Jumper 4) on the Electronic Control. For TAC-404 models you must
transmit a special command to the A/C by simultaneously pressing on the ROOM and the upper left (Select )
buttons. The 3-position switch (on the display) of the other A/C must be in the OFF position, to prevent it from
being programmed, too.
For TAC-404/TAC-400 models, 5 beeps are sounded to acknowledge that the A/C is programmed for the alternate
transmission code.
DIP Switch No. 4 should be set as follows:
Temperature & Clock SW4
∞F + 12:00 (PM) ON
∞C + 24:00 OFF
DIP Switch No. 5 should be set as follows:
Sweep SW5
Sweep OFF ON
Sweep ON OFF
Note: The factory set for ANL-S and GNL-S (models without SWEEP) is with DIP switch No. 5 in OFF position
(SWEEP is always available on the Remote Controller display for TAC-404 models).
DIP Switch No. 6 should be set as follows:
Energy (TAC-400 only) SW6
Energy OFF ON
Energy ON OFF
Note: This DIP switch is set to OFF position only for TAC-400 (ANC) models.
DIP Switch No. 7 should be set as follows:
Cooling Only SW7
Heat Pump OFF ON
Heat Pump ON OFF
Setting the DIP switches:
1. Remove the battery compartment cover, and remove the batteries.
2. Remove the plastic DIP switches protective cover.
3. Set the DIP switches to the required positions.
4. Wait approximately 3 minutes (15 minutes if necessary) and return the batteries to their proper
position.
(see also: "Display Reset & Test" for quick DIP Switches Resetting.)
TAC-404
25
System General Operation Description:
This chapter is designated for the wide understanding of the system general operation (useful for
nun-technical personnel). For detailed information about routines functions, see:
"Routines Detailed Functional Description".
1. Operation Routines:
The TAC400 and TAC404 are using the same algorithms that enable proper operation of the Air
Condition at large envelope environmental conditions.
The Routines software controls the A/C performance.
1.1 Operating in Cool Mode:
Turning the A/C On to Cool Mode will cause the following actions:
1.1.1 Indoor Fan Motor Operation: Turning the A/C On in Cool Mode will set the Indoor
fan on at the requested Fan speed (Low, High or Turbo), as it been set on the R/C.
The Indoor Fan speed can vary according to the operator desire. When the Indoor Fan is
set to operate at Auto Speed, the Fan will operate according to the following chart:
Low
High
Turbo
SP +1.5 +3 +4.5
Note: The Low speed entry is automatically preceded with a very short run at turbo speed.
In Auto setting - the fan motor speed depends on the room temperature as measured by
the TH-1 thermistor or derived from the Beacon signal (as received from the R/C).The
Indoor Fan motor switch to lower speeds without any delay based on the TH-1, but
once set, can not be increased for the 2 min. delay time (This delay is cancelled when the
manual setting is used).
1.1.2 The A/C will perform a pressure release routine (PRR) where the control will activate
and deactivate the 4 Way-Valve. The PRR takes up to 10 Sec.
Then the A/C turns the compressor on.
TAC-404
26
1.1.3 Compressor – The Condensing unit begin to operate after the PRR ended.
Note: The Condensing unit operates for at least 3min., even if the room temperature is
satisfactory after less than 3 min., to prevent short operation cycles.
1.1.4 Outdoor Fan Motor operation – The Outdoor Fan starts to operate in medium speed
after the PRR ended for a minimum time of about 2 min. after then the Outdoor Fan
motor speed will vary according to the condenser (outdoor) coil temperature
(as measured by TH-3 sensor).
Note: 1. Since most TADIRAN A/C’s are 3 speed Outdoor Fan Motor – High, Medium &
Low, it is most important to make sure that the Fan is wired correctly.
2. The Out Door Fan speed varies in accordance with the outdoor coil temperature:
when the temperature rises the Fan will increase its speed and vise-versa.
Each speed change is executed no less then 2 min. after the last change.
3. Night state – whenever the Electronic Control senses low ambient (especially at
night), it reduces the fan speed to reduce noise level.
1.1.5 Temperature brake: When the Electronic Control senses that the room temperature is
satisfactory – reached the selected/desired Set Point temperature - via the TH-1 sensor or
the Beacon signal (using the Auto Sense sensor that located on the R/C), its stops the
A/C condensing unit for minimum time brake of 5min., but not more then 15min.
At that time, the Indoor Fan Motor continues working. During the Temperature brake,
the compressor (COMPRES) indicator turns Off, at the end of the first 5 min., and then
it begins to flash, until the Electronic Control sense temperature demand (via TH-1 or
Auto-Sense sensor) or the 15min., max time brake is up.
Note : 1. If there was no temperature demand at the end of the maximum time brake the unit
will turn on for a period of at least 3min. (to ventilate the room air).
2. During temperature brake, any change of operation mode that as been made, by the
operator via the R/C, will cause the A/C to perform Pressure Release Routine (PRR)
and to return to work in the new operation mode requested.
3. During the first 5min., of the temperature brake, manual changing (by R/C) of the Set
Point temperature, will (can) effect the A/C brake before the 5 min. time is up, so the
A/C can be switched to On before the minimal time brake (5 min.), using the PRR.
TAC-404
27
1.1.6 Sleep Routine – The Electronic Control enables the user to operate an automatic routine
that changes the desired temperature. This routine as been designed to enable the user to
increase the Set Point while sleeping when the body temperature decreases.
This routine works as described in the 'SLEEP ROUTINE' for Cool Mode & Dry Mode.
Note: At the end of sleep function the A/C return its original Set Point and do not stop
the A/C operation.
1.1.7 Special functions:
Indoor Ice prevention – whenever the Electronic Control senses ice accumulation on
the evaporator (indoor) heat exchanger, it runs a melting procedure. The ice detection
is based on the TH-2 temperature. The Electronic Control turns the Outdoor Fan Motor
Off, causing the system to rise the evaporator temperature (and melt the accumulated
ice). The Outdoor Fan Motor is halted for (maximum of) 90 sec. or until the indoor coil
temperature raise again.
Low Pressure – whenever the Electronic Control senses low capacity of the A/C (based
on an insufficient temperature differential (TH-1)-(TH-2) due to lack of gas in the
system.), it stops the A/C operation with the POWER indicator flashes and the
PRESSURE indicator will light (this combination signal Low Pressure).
Over (High) Pressure – Whenever the control senses High Pressure (Over Pressure -
OVP) on the condensing unit (by means of TH-3 temperature), it stops the A/C with
the POWER & PRESSURE indicators flashing (this combination signal High Pressure).
Recovery from the OVP fault is done by sending Off to system and re-entry to On by
mean of TAC-490 R/C or 3-position slide switch. When the recovery done by the
3-position slide switch, all flags, LEDs etc. are reset. When the recovery done by the
R/C, it cancel the POWER LED flash, but the PRESSURE fault LED remain lit.
Note: In order to perform an Over Pressure routine, the condensing temperature sensor
(TH-3) must be connected else the A/C will drive the outdoor fan motor constantly at
high speed.
Night State Routine – In order to reduce outdoor unit noise, the control changes the
outdoor fan motor speed to low when the local ambient temperature enables it.
TAC-404
28
1.2 Operating in Heat Mode:
Turning the A/C On to Heat Mode will cause the following actions:
General description:
The A/C is design for operation in Heat Mode to maintain the room temperature between the Set
Point and Set Point - 1°C (Set Point minus one Celsius degree).
In order to do so, the A/C change the gas circulation direction, so the evaporator will be hot and
the condensing unit will be cool.
Reasons why the A/C stop working (except reaching desired Set Point - temperature brake):
∑ If the condensing unit is blocked with ICE, then the A/C will perform a De-Ice routine.
∑ When the unit does not get a satisfactory efficiency - low Heating capacity (based on an
insufficient temperature differential (TH-2)-(TH-1) due to lack of gas in the system.), it
stops the A/C operation and will indicate unit failure.
1.2.1 Indoor Fan Motor - Turning the A/C On in Heat Mode will set the Indoor fan on at the
following manner:
∑ The Fan will turn On to the selected speed after 10-20sec., or when the Indoor coil
temperature reaches the temperature of 45°C/113°F. The Indoor Fan Motor speed
can varies according to the operator desire.
∑ When the Indoor Fan Motor is set to operate at Auto Speed the Fan will operate
according to the following chart:
1.2.2
Low
High
Turbo
SP-1.5-3-4.5Temp.0
C
TAC-404
29
Note: In Auto setting - the fan motor speed depends on the room temperature as
measured by the TH-1 thermistor or derived from the Beacon signal (as received from the
R/C). The Indoor Fan motor switch to lower speeds without any delay based on the TH-
1, but once set, can not be increased for the 2 min. delay time (This delay is cancelled
when the manual setting is used).
1.2.3 The A/C will perform a pressure release routine (PRR), where the control will activate
and deactivate the 4 Way Valve. The PRR takes up to 10 Sec.
The PRR is used to discharge the system pressure build during compressor run. Failure
to do so, may trip the compressor to over-load (protection) during the start-up trial
(only if the start-up happens less than 5 minutes after the last compressor run).
This routine is used only for the first entry to the Heat mode or upon power return
following a power brake (Quick restart trial in Heat Pump models). Switching between
modes require this routine each time the mode is re-entered.
Then the A/C turns the compressor on.
1.2.4 Compressor – The Condensing unit begin to operate after the PRR ended.
Note: The Condensing unit operates for at least 3min., even if the room temperature is
satisfactory. This cycle is for preventing short operation cycle of the A/C.
1.2.5 Outdoor Fan Motor operation – The Outdoor Fan Motor starts to operate in medium
speed after the PRR ended for a minimum time of about 2 min. Afterwards, the Outdoor
Fan Motor speed will vary according to the indoor coil temperature (by means of the
TH-2 temperature).
Note: 1. Since most TADIRAN A/C’s are 3 speed Outdoor Fan Motor– High, Medium &
Low, it is most important to make sure that the Fan Motor is wired correctly.
2. The Outdoor Fan Motor speed varies according to the indoor coil temperature
when the temperature rises the Fan will decrease its speed and vise-versa.
Each speed change is executed no less then 2 min. after the last change.
3. If there is no demand for heating, the unit will not start!
For e.g., if the room temperature is 20°C/68°F and the Set Point is 16°C/61°F.
TAC-404
30
1.2.6 Temperature brake: When the Electronic Control senses that the room temperature is
satisfactory – reached the selected/desired Set Point temperature - via the TH-1 sensor or
the Beacon signal, using the Auto Sense sensor (located on the R/C), its stops the A/C
condensing unit for minimum time brake of 5min., but not more then 15min.
At the same time, the Indoor Fan, Outdoor Fan and the compressor turns Off but the
4way valve remain On. During the Temperature brake the Compressor indicator turns
Off after 5 min., and if there is no temperature demand, it begins to flash until the control
sense temperature reaches Set Point - 1°C/2°F (Set Point minus one Celsius degree or
minus two Fahrenheit degree), via TH-1 or Beacon signal (Auto-Sense sensor), or the
15min., max time brake is up.
Note : 1. If there was no temperature demand at the end of the maximum time brake the unit
will turn on for a period of at least 3min. (to ventilate the room air).
2. During temperature brake, any change of operation mode, via the R/C, will cause
the A/C to perform Pressure Release Routine and to return to work in the new
operation mode requested.
3. During the first 5min., of the temperature brake, changing of Set Point will effect
the A/C brake before the 5 min. time is up.
4. When the A/C is high wall type, the Electronic Control compensate the location of
return air sensor by adding 6°C/11°F to the measured temperature.
5. When turning the A/C Off in Heat mode, the Reverse Valve remains On for
additional 2 min. (this prevent the unit self pressure release noise).
1.2.7 Sleep Routine – The control enables the user to operate an automatic routine that
changes the desired temperature. This routine as been designed to enable the user to
decrease the Set Point when the body temperature decreases.
This routine works as described in the 'SLEEP ROUTINE' for Heat Mode.
TAC-404
31
1.3 Operating in Dry Mode
Dry mode is basically a version of Cool Mode but with indoor fan motor working at low speed
only. The idea behind it is to reduce maximal humidity by compromising the efficiency of the
A/C. The system operate at same manner as in Cool mode.
Note: When there is temperature brake in the Dry mode, the indoor fan motor is stopped!
1.4 Operating in Auto Mode:
1.4.1 Setting the A/C, via the R/C, to operate in Auto Mode causes the A/C to select
automatically its operation mode. The control will decide its operation mode in
accordance with the following table (see also 'CONDITIONING ROUTINE'):
Operation
Condition
Cool Heat
Last operation Cool, Dry, Fan or TH-1>SP+1°C/2°F On Off
Last operation Heat or TH-1<SP-1°C/2°F Off On
1.4.2 Setting the A/C to Auto Mode via the 3-position slide switch, will create the same
function as it was set by the R/C, but with a default Set Point temperature of 22°C/72°F.
Indoor fan motor will work in Auto and all timer functions will be disabled.
1.5 Power Fail protection:
TADIRAN control is programmed to protect the A/C condenser against many types of power
failures. In those cases the A/C operation will be stopped, until the power will stabilize and then
the A/C will be turned On again to its last operation setting.
∑ “Short” Power Failure – When the line power fails for less then 20mSec., the Electronic
Control will ignore the power interference and will continue proper operation of the A/C.
∑ “Long” Power Failure – When the power fails for more then 20mSec., the A/C will return to
work 20 Sec. after the recovery of the power.
TAC-404
32
∑ Line Low Voltage Failure (Protection) – The control is programmed to stop all A/C
operation each time it senses Low line voltage (different values for Rotary compressors or
Reciprocating & Scroll compressors, as defined by DIP switch 2). The Electronic Control
will recover to its normal operation when it will sense a 20 Sec. of continuous normal line
voltage. If the power failure continue, the Electronic Control stops all A/C operation with
the indication of POWER & IMPEDANCE indicators flashing and the COMPRES indicator
lit.
∑ Start-Up Power Failure – During compressor start-up, the Electronic Control tests the line
power in order to prevent the power to fail under the compressor manufacturer
specifications.
When the line power falls under the compressor allowed limits, the Electronic Control will
stop the A/C operation for 20Sec., and will retry to start (restart) the unit again. If the A/C
fails to restart 5 times in sequence, the A/C will stop immediately.
Recovery from the Power failure is done by sending Off command to the unit and re-entry to
On (by mean of the R/C or the 3-position slide switch).
∑ Line Over Voltage Failure (Protection) – The control is programmed to stop all A/C
operation each time it senses High line voltage (different values for Rotary compressors or
Reciprocating compressors, as defined by DIP switch 2).
The Electronic Control stops all A/C operation with the indication of POWER indicator
flash and the COMPRES & IMPEDANCE indicators lit.
1.5.1 Special functions:
∑ Filter Clean Indicator - A FILTER clean indicator is placed on each display. The indicator
lights after 250 hours of A/C operation, to alert the user that the filter(s) require cleaning.
After cleaning the filter(s), in order to clear (set off) the FITER indicator, the user should set
the 3-position slide switch (on the display) to Off for 2-3 sec. (at least).
∑ Outdoor De-Ice – whenever the Electronic Control senses ice accumulation on the
condensing (outdoor) heat exchanger unit, it runs melting procedure.
TAC-404
33
∑ The procedure works as follow:
One. The indoor fan motor stops,
Two. The A/C stops all Heat Mode functions and switch, via PRR, to Cool mode
where the 4 way valve turns the gas cycle as in the Cool mode, so now the
hot condenser (outdoor) coil begin melting the ice. This process will continue
until the condenser coil temperature rise above 20_C/68°F or 10min. (at the
most) after the process begins.
Three. At the end of the process, the unit recovers to the Heat mode operation,
again via the PRR.
Four. The Defrost process is in cycles, when each cycle period depends on the
condensing (outdoor) unit coil temperature.
The detection process counts for time temperature development.
The detection process start when TH-3 temperature falls below +3°C/37°F.
Then, the Electronic Control start counting time.
If the temperature rise back to the +3°C/37°F, before the ice has been
detected, the De-Ice process is canceled.
∑ Low-Pressure – whenever the Electronic Control senses low Heating capacity of the A/C
(based on an insufficient temperature differential (TH-2)-(TH-1) due to lack of gas in the
system), it stops the A/C operation and will indicate unit failure.
∑ Over (High) Pressure – Whenever the control senses High Pressure (Over Pressure - OVP)
on the indoor unit (by means of TH-2 temperature), it stops the A/C with the POWER &
PRESSURE indicators flashing (this combination signal High Pressure).
Recovery from the OVP fault is done by sending Off to system and re-entry to On by mean
of TAC-490 R/C or 3-position slide switch. When the recovery done by the 3-position slide
switch, all flags, LEDs etc. are reset. When the recovery done by the R/C, it cancel the
POWER LED flash, but the PRESSURE fault LED remain lit.
TAC-404
34
2 The Electronic Control structure:
TADIRAN Electronic Control is based on two main parts:
Main unit named TAC-444 and Display Assy named TAC-460XX when the XX stands for the
type of A/C its fits to, for example: TAC-460GF means that the display fits to all GFL-S A/C
family.
The main unit is same unit for all type of A/C whether its ANL, TNL or GFL.
The display unit contains the operation logic that runs the A/C in all operation Mode and via all
operation procedures.
2.1 Communication:
2.1.1 The main unit TAC-444 and the Display Assy TAC-460. The control uses
communication between these two unit when the main unit supply the data coming up
from the A/C, the Display Assy process the data and send operation command to be
executed by the main TAC-444 unit.
2.1.2 Data transferred from the Main unit (TAC-444) to the Display Assy (TAC-460):
2.1.2.1 Temperature - the Main unit transfer the temperature measured by the thermistors
located at the Return-Air (TH-1), Indoor coil (TH-2) and Out door coil (TH-3).
2.1.2.2 Power – The Main unit measures the power line voltage and transmits it to the Display
Assy.
2.1.2.3 Operation feedback – the Main unit transmit operation feedback to the Display Assy,
assuring what are the units that are loaded.
2.1.3 Command transferred from the Display Assy (TAC-460) to the Main unit (TAC-444).
The Display Assy transfers command to the main unit such as:
Operate the A/C accordingly Set the compressor On or turn it Off, set the
Indoor fan motor speed to one of its operation speed or turn it Off, set the Outdoor fan
motor speed to one of its operation speed or turn it Off & 4 way valve set On or Off.
2.1.4 Communication failure: In case of communication failure the following action will take place:
- All A/C loads (fans, compressor & 4 way valve) will turn Off.
- The Power indicator will flash – no other indicator will light.
TAC-404
35
TAC-404 COOL MODE - Auto Mode Flow Chart
AUTO MODE
TH1 or Tb < SP+T7
TH1 or Tb < SP+T6
INDOOR FAN
ROUTINE
Fig. 5E
CHANGE MODE
ROUTINE
Fig. 5D
HEAT MODE
REQUEST
FLAG = 1
ENTRY
N
Y
Y
N
N
Y
EXIT
TAD5080D.GFC
SSW7 T6 T7
0oC
-1oC
-3oC
-4oC
Install.
UPPER/BEACON
LOWER
SWITCH TO
HEAT MODE
Fig. 1 TAC-404 - CONDITIONING ROUTINE
COOL MODE
0
1
TAC-404
36
TAC-404 HEAT MODE - Auto Mode Flow Chart
AUTO MODE
D42(2M) DELAY
TRIGGER
INDOOR FAN
LOW
SSW7= 1
TH1 or Tb < SP+T3
TH1 or Tb > (SP+T4)
D42(2M)
RUNOUT
TH1 or Tb < SP+T4
D42(2M)
RUNOUT
D42(2M)
RUNOUT
INDOOR FAN
OFF
CHANGE MODE
ROUTINE
Fig. 6D
COOL MODE
REQUEST
FLAG = 1
N
Y
ENTRY
N
Y
N
N
Y
Y
N
N
Y
EXIT
TAD5098D.GFC
T3 T4 INSTALL.
0 +5oC +4oC UPPER
1 -2oC +2oC LOWER
SSW7
Y (LOWER)
N (UPPER)
Y
+0oC +3oC BEACON
Fig. 2 TAC-404 - CONDITIONING ROUTINE
(HEAT TO COOL)- F.C.
N
Y
TAC-404
37
TAC-404 COOL MODE - Main Flow Chart
SSW7 T5 T6 T7 INSTALL.
0 -1oC 0oC -3oC UPPER/BEACON
1 -2oC -1oC -4oC LOWER
Software Switch
* COMPR. LED FLASH
500ms 500ms
TH1 or Tb <SP+T5
SYSTEM
D1(3M) & D2(3M)
DELAY
TRIGGER
RECOVER ENERGY
SET-UP
Fig. 5S
PRESSURE
FAULT
OVP or LOP
FLAG
ICE
FLAG ON
TH1 or
Tb<SP+T5
D3(15M)/30min**
DELAY TRIGGER
COMPR. OFF
ROUTINE
Fig. 5F
* COMPR. LED
FLASH
D3(15M) DELAY
R UNOUT
CONDITIONING
ROUTINE
Fig. 5L
COMPR. ON
ROUTINE
Fig. 5A
PRESS. FAULT
ROUTINE
Fig. 7
D4(5M) DELAY
TRIGGER
BOTH COMPR.
OFF
STANDBY
CHANGE
MODE
CHANGE
MODE
PRESSURE
RELEASE
Fig. 5B
Y
ANC
Y
N
N
Y
R
U
N
L
O
O
P
R
E
S
T
L
O
O
P
ENTRY
COOL MODE ENTRY PROCEDURES
CHANGE
MODE
D23(2M) TRIGGER
(Keeps O.F. entry
speed)
RECOVER
OUTDOOR FAN
Fig.5R
ICE FLAG OFF
D1(3M)
RUNOUT
N
D 21(10M) DELAY
TRIGGER
MEMORIZE
OUTDOOR FAN
SPEED
MEMORIZE ENERGY
SETUP
QUICK RE-ENTRY
PRESSURE
RELEASE
Fig.5Q
5MIN.
ANR
Fig. 3 -TAC-404 - COOL MODE - MAIN F.C.
TH1 or Tb
<SP+T5
TH1 or Tb
>SP+T6
N
NY
Y
N
Y
N
**constant 30minute
15min**
Run out
Y
Y
N
Y
Y
TAD5068E.GFC
N
TAC-404
38
TAC-404 HEAT MODE - Main Flow Chart
TAD5085D.GFC
TH1 or Tb <SP+T3
SYSTEM
D25(3M) & D26(10M)
DELAY
TRIGGER
RECOVER ENERGY
SET-UP
Fig. 6S
PRESSURE
FAULT
OVP or LOP
or HOT FLAG
ICE
FLAG ON
TH1 or Tb >SP+T1
D31(15M)/30M*
DELAY TRIGGER
COMPR. OFF
ROUTINE
Fig. 6F
COMPR. LED
FLASH
D 31(15M)
DELAY
RUNOUT
TH1 or
Tb<SP+T3
CONDITIONING
ROUTINE
Fig. 6L
COMPR. ON
ROUTINE
Fig. 6A
PRESS. FAULT
R OUTINE
Fig. 7
D29(10S) DELAY
TRIGGER
BOTH COMPR.
OFF
STAND BY
CHANGE
MODE
CHANGE
MODE
PRESSURE
RELEASE
Fig. 6B
y
ANC
ANR
Y
N
Y
N
N
N
R
U
N
L
O
O
P
R
E
S
T
L
O
O
P
ENTRY
CHANGE
MODE
Y
D30(5M) DELAY
TRIGGER
D27(10S) & D28(20S)
DELAY TRIGGER
DE-ICE
ROUTINE
Fig. 8
Y
SSW7 T1 T3
0 +6oC +5oC
1 -1oC -2oC
Software Switch
Install.
UPPER
LOWER
D23(2M)
TRIGGER
RECOVER
OUTDOOR FAN
Fig. 6R
D25(3M)
RUNOUT
Y
N
MEMORIZE
OUTDOOR FAN
SPEED
D21(10M) DELAY
TRIGGER
QUICK RE-ENTRY
PRESSURE RELEASE
Fig. 6Q
MEMORIZE ENERGY
STATUS
Y BEACON+1oC +0oC BEACON
Fig. 4- TAC-404 - HEAT MODE - MAIN F.C.
TH1 or Tb
>SP+T1
15m*DELAY
RUNOUT
N
Y
Y
N
N
Y
N
Y
*CONSTANT 30 MINUTE
N
TAC-404
39
TAC-404 DRY MODE - Main Flow Chart
SSW7 T5 T6 T7 INSTALL.
0 -1oC 0oC -3oC UPPER/BEACON
1 -2oC -1oC -4oC LOWER
Software Switch
TAD5105D.GFC
* COMPR. LED FLASH
500ms
500ms
TH1 or Tb<SP+T5
SYSTEM
D1(3M) & D2(3M)
DELAY
TRIGGER
R ECOVER ENERGY
SET-UP
Fig. 5S
PRESSURE
FAULT
OVP or LOP
FLAG
ICE
FLAG ON
TH1 or Tb<SP+T5
D3(15M) DELAY
TRIGGER
C OMPR. OFF
ROUTINE
Fig. 9E
* COMPR. LED
FLASH
D3(15M) DELAY
R UNOUT
TH1 or Tb >SP+T6
COMPR. ON
ROUTINE
Fig. 9A
PRESS. FAULT
ROUTINE
Fig. 7
D4(5M) DELAY
TRIGGER
BOTH COMPR.
OFF
STANDBY
C HANGE
MODE
PRESSURE
RELEASE
Fig. 9B
Y
ANL
Y
N
Y
N
Y
N
N
N
R
U
N
L
O
O
P
R
E
S
T
L
O
O
P
ENTRY
CHANGE
MODE
D23(2M) TRIGGER
ANC
D1(3M)
RUNOUT
ICE FLAG OFF
Y
D21(10M) DELAY
TRIGGER
MEMORIZE
OUTDOOR FAN
SPEED
MEMORIZE
ENERGY
SETUP
QUICK RE-ENTRY
PRESS. RELEASE
Fig. 5Q
R ECOVER
OUTDOOR FAN
Fig. 5R
Y
Fig. 5 TAC-404 - DRY MODE - MAIN F.C.
N
Y
N
N
Y
TAC-404
40
TAC-404 FAN ONLY MODE - Main Flow Chart
INDOOR FAN
Fig 5E
CHANGE MODE
Fig 5D
REV.
VALVE
D24 (120S)
ACTIVE
REV. VALVE
OFF
CHANGE MODE
OR OFF
ENTER
ON
Y
N
tad5230d.gfc
Fig. 6 - TAC-404 FAN ONLY MODE ROUTINE
OFF
TAC-404
41
SLEEP - COOL & DRY MODES
SLEEP
STATE
SP=SP+SLEEP OFFSET*SP = NORMAL
ENTRY
EXIT
TAD5079D.GFC
(a)
(b)
Fig. 7 - TAC-404 - SLEEP ROUTINE
COOL MODE & DRY MODE
Y
N
TAC-404
42
SLEEP - HEAT MODE
*
SLEEP MODE
SP = SP+HEAT OFFSETSP = NORMAL
ENTRY
EXIT
* SLEEP MODE is automatically entered with the
TIMER OFF function.
TAD5097D.GFC
(a)
(b)
N
Y
Fig. 8 - TAC-404 - SLEEP ROUTINE F.C.
HEAT MODE
TAC-404
43
HEAT MODR - DE-ICE flow chart
* FLASH -
TAD5104D.GFC
MEMORIZE
SETTINGS
D43(30S) &
D44(40S)
DELAY TRIGGER
COMPR. OFF
LED OFF
A/C ON LED
* FLASH
OUTDOOR FAN
OFF
INDOOR FAN
OFF
REV. VALVE
ON
D43(30S)
RUNOUT
D44(40S)
RUNOUT
REV. VALVE
OFF
D45(10M)
TRIGGER
SYSTEM
FULL COMP.
START-UP ROUTINE
Fig. 6W
COMP. ON
REV. VALVE OFF
COMP. ON
OUTDOOR FAN
OFF
INDOOR FAN
OFF
A/C ON LED
* FLASH
TH3 >T74(20oC)
D45(10M)
RUNOUT
D43(30S) DELAY
TRIGGER
COMPR.S ON
LED ON
REV. VALVE
ON
OUTDOOR FAN
HIGH
INDOOR FAN
OFF
A/C ON LED
FLASH
D43(30S)
RUNOUT
ANL
N
Y
YN
GRADUAL PRESSURE
RELEASE
"COOL" CYCLE
GRADUAL PRESS. RELEASE
1.2 SEC.
0.5
Fig. 9 TAC-400 - DE-ICE ROUTINE F.C.
HEAT MODE
CHANGE MODE
ROUTINE
Fig.6D
CHANGE MODE
ROUTINE
FIG. 6D
CHAGE MODE
ROUTINE
FIG.6D
Y
Y
N
N
N
EXIT
ANC
ENTRY
TAC-404
44
PRESSURE FAULT
A/C SYSTEM
OFF
POWER LED
FLASH
PRESS. LED ON
(PRESS. FAULT)
A/C LED OFF
SYSTEM
STANDBY
A/C = AIR Conditioner
EXIT
ENTRY
TAD5103D.GFC
FAULT
PRESS. LED
* FLASH
(LOP)
(OVP)
* PRESSURE LED FLASH WAVEFORM
ON
OFF
0.5 0.5 0.5 sec.
OFF
ON
HIGH PRESS.
LOW PRESS.
Fig. 10 TAC-404 - PRESSURE FAULT ROUTINE
TAC-404
45
FILTER CHECK
FILTER CNT
START FILTER
CNT.
D46(250H)
ELIPSED
RESET
PROCEDURE
FILTER CHECK
LED FLASH
FILTER CHECK
LED OFF
ENTER
(FROM INTERRUPT ROUTINE)
Y
N
Y
N N
Y
EXIT
TAD5112D.GFC
Fig. 11 TAC-404 - FILTER CHECK ROUTINE
TAC-404
46
TH-1 & TH-2 THERMISTORS TEST
THx
* < -40oC
TMR**
ACTIVE
OFF
COMMAND
TH1 = FAIL
TMR > 1min
TMR
RESET
TMR
RESET
THERMISTOR
FAIL FLAG = 0
PRESS. IND. OFF
IMPEDANCE
FLASH
PRESS. FLASH
IMPEDANCE =
OFF
TMR
TRIGGER
INDICATORS:
POWER FLASH
COMPR. FLASH
SYSTEM HALT
ALL RELAYS OFF
THERMISTOR
FAIL FLAG = 1
ENTER
EXIT
tad5229D.gfc
THx >+85oC
YN
Y
N
N
N
N
Y
Y
Y
NOTES:
* X = 1 ; 2.
** TMR -- LOCAL TIMER
Fig. 12 - TAC404 - TH1 & TH2 THERMISTORS
TEST ROUTINE
N
Y
TAC-404
47
TH-1 & TH-2/3 Temperature to Resistance Conversion Table:
Temperature
(∞C)
Temperature
(∞F)
Temperature
Tolerance
(∞C)
Temperature
Tolerance
(∞F)
Minimum
Resistanc
e
(KW)
Mean
Resistanc
e
(KW)
Maximum
Resistanc
e
(KW)
-20 -4.0 ±1.1 ±2.0 30.89 32.44 34.05
-19 -2.2 ±1.1 ±2.0 29.46 30.93 32.45
-18 -0.4 ±1.1 ±2.0 28.12 29.51 30.94
-17 1.4 ±1.1 ±2.0 26.84 28.16 29.51
-16 3.2 ±1.1 ±2.0 25.64 26.88 28.15
-15 5.0 ±1.1 ±2.0 24.49 25.66 26.87
-14 6.8 ±1.1 ±2.0 23.40 24.52 25.66
-13 8.6 ±1.1 ±2.0 22.38 23.43 24.50
-12 10.4 ±1.1 ±2.0 21.40 22.39 23.41
-11 12.2 ±1.1 ±2.0 20.47 21.41 22.38
-10 14.0 ±1.0 ±1.8 19.59 20.48 21.40
-9 15.8 ±1.0 ±1.8 18.74 19.59 20.45
-8 17.6 ±1.0 ±1.8 17.94 18.74 19.56
-7 19.4 ±1.0 ±1.8 17.17 17.93 18.71
-6 21.2 ±1.0 ±1.8 16.44 17.16 17.90
-5 23.0 ±1.0 ±1.8 15.75 16.43 17.13
-4 24.8 ±1.0 ±1.8 15.10 15.74 16.40
-3 26.6 ±1.0 ±1.8 14.47 15.08 15.71
-2 28.4 ±1.0 ±1.8 13.87 14.46 15.05
-1 30.2 ±1.0 ±1.8 13.31 13.86 14.42
0 32.0 ±1.0 ±1.8 12.77 13.29 13.83
1 33.8 ±1.0 ±1.8 12.25 12.74 13.25
2 35.6 ±1.0 ±1.8 11.75 12.22 12.70
3 37.4 ±1.0 ±1.8 11.28 11.73 12.18
4 39.2 ±1.0 ±1.8 10.83 11.25 11.68
5 41.0 ±1.0 ±1.8 10.40 10.80 11.21
6 42.8 ±1.0 ±1.8 9.986 10.370 10.76
7 44.6 ±1.0 ±1.8 9.595 9.960 10.33
8 46.4 ±1.0 ±1.8 9.222 9.569 9.921
9 48.2 ±1.0 ±1.8 8.866 9.196 9.530
10 50.0 ±1.0 ±1.8 8.526 8.840 9.157
11 51.8 ±1.0 ±1.8 8.197 8.496 8.797
12 53.6 ±1.0 ±1.8 7.883 8.167 8.453
13 55.4 ±0.9 ±1.6 7.583 7.853 8.125
14 57.2 ±0.9 ±1.6 7.296 7.553 7.812
15 59.0 ±0.9 ±1.6 7.022 7.267 7.513
16 60.8 ±0.9 ±1.6 6.761 6.993 7.227
17 62.6 ±0.9 ±1.6 6.510 6.731 6.954
18 64.4 ±0.9 ±1.6 6.271 6.481 6.693
19 66.2 ±0.9 ±1.6 6.042 6.242 6.444
20 68.0 ±0.9 ±1.6 5.822 6.013 6.205
21 69.8 ±0.9 ±1.6 5.611 5.793 5.975
22 71.6 ±0.9 ±1.6 5.408 5.581 5.755
23 73.4 ±0.9 ±1.6 5.214 5.379 5.544
24 75.2 ±0.9 ±1.6 5.028 5.185 5.343
25 77.0 ±0.9 ±1.6 4.850 5.000 5.150
26 78.8 ±0.9 ±1.6 4.675 4.821 4.968
27 80.6 ±0.9 ±1.6 4.508 4.650 4.793
28 82.4 ±0.9 ±1.6 4.347 4.486 4.626
29 84.2 ±1.0 ±1.8 4.193 4.329 4.466
Resistance Tolerance ± 3% ; B Value Tolerance ± 1%
TAC-404
48
TH-1 & TH-2/3 Temperature to Resistance Conversion Table (Continued):
Temperature
(∞C)
Temperature
(∞F)
Temperature
Tolerance
(∞C)
Temperature
Tolerance
(∞F)
Minimum
Resistanc
e
(KW)
Mean
Resistanc
e
(KW)
Maximum
Resistanc
e
(KW)
30 86.0 ±1.0 ±1.8 4.046 4.179 4.312
31 87.8 ±1.0 ±1.8 3.904 4.033 4.163
32 89.6 ±1.0 ±1.8 3.767 3.894 4.020
33 91.4 ±1.0 ±1.8 3.637 3.760 3.884
34 93.2 ±1.0 ±1.8 3.511 3.631 3.752
35 95.0 ±1.0 ±1.8 3.391 3.508 3.626
36 96.8 ±1.1 ±2.0 3.275 3.390 3.505
37 98.6 ±1.1 ±2.0 3.164 3.276 3.389
38 100.4 ±1.1 ±2.0 3.058 3.167 3.277
39 102.2 ±1.1 ±2.0 2.956 3.062 3.169
40 104.0 ±1.1 ±2.0 2.857 2.961 3.066
41 105.8 ±1.1 ±2.0 2.762 2.864 2.966
42 107.6 ±1.1 ±2.0 2.671 2.770 2.870
43 109.4 ±1.2 ±2.2 2.583 2.679 2.777
44 111.2 ±1.2 ±2.2 2.498 2.593 2.688
45 113.0 ±1.2 ±2.2 2.417 2.509 2.602
46 114.8 ±1.2 ±2.2 2.339 2.429 2.520
47 116.6 ±1.2 ±2.2 2.264 2.352 2.441
48 118.4 ±1.3 ±2.3 2.192 2.227 2.364
49 120.2 ±1.3 ±2.3 2.122 2.206 2.291
50 122.0 ±1.3 ±2.3 2.055 2.137 2.220
51 123.8 ±1.3 ±2.3 1.990 2.070 2.151
52 125.6 ±1.3 ±2.3 1.928 2.006 2.085
53 127.4 ±1.3 ±2.3 1.867 1.943 2.021
54 129.2 ±1.3 ±2.3 1.809 1.883 1.959
55 131.0 ±1.4 ±2.5 1.753 1.826 1.900
56 132.8 ±1.4 ±2.5 1.699 1.770 1.842
57 134.6 ±1.4 ±2.5 1.647 1.717 1.787
58 136.4 ±1.4 ±2.5 1.597 1.665 1.734
59 138.2 ±1.4 ±2.5 1.549 1.615 1.683
60 140.0 ±1.4 ±2.5 1.503 1.567 1.633
61 141.8 ±1.5 ±2.7 1.458 1.521 1.585
62 143.6 ±1.5 ±2.7 1.414 1.476 1.539
63 145.4 ±1.5 ±2.7 1.372 1.432 1.494
64 147.2 ±1.5 ±2.7 1.332 1.391 1.451
65 149.0 ±1.5 ±2.7 1.293 1.350 1.409
66 150.8 ±1.6 ±2.9 1.255 1.311 1.369
67 152.6 ±1.6 ±2.9 1.219 1.274 1.330
68 154.4 ±1.6 ±2.9 1.184 1.237 1.292
69 156.2 ±1.6 ±2.9 1.150 1.202 1.256
70 158.0 ±1.6 ±2.9 1.117 1.168 1.221
71 159.8 ±1.6 ±2.9 1.085 1.135 1.187
72 161.6 ±1.7 ±3.1 1.054 1.103 1.154
73 163.4 ±1.7 ±3.1 1.025 1.073 1.122
74 165.2 ±1.7 ±3.1 0.9958 1.043 1.091
75 167.0 ±1.7 ±3.1 0.9680 1.014 1.061
76 168.8 ±1.7 ±3.1 0.9411 0.9861 1.032
77 170.6 ±1.8 ±3.2 0.9152 0.9592 1.004
78 172.4 ±1.8 ±3.2 0.8900 0.9331 0.9774
79 174.2 ±1.8 ±3.2 0.8658 0.9079 0.9512
Resistance Tolerance ± 3% ; B Value Tolerance ± 1%
TAC-404
49
Routines Detailed Functional Description:
(This section designated for the detailed understanding of the software routines operation).
COOL MODE:
The COOL MODE consists of entry procedure the 'RUN Loop' and 'REST Loop'.
The entry procedure set (or verifies) that the compressor(s) is Off and enter the PRESSURE
RELEASE ROUTINE for 10 sec. approximately. The TAC-404 system has one compressor and
the TAC-400 (ANC models) two compressors: one small and one large.
(The ANC system may run one of the compressors or both, but the startup for two
compressors requires special procedure.)
During normal operation, the TH-1 (intake/return air) thermistor switches between the RUN and
REST loops depending on the incoming air (room) temperature.
The PRESSURE RELEASE ROUTINE is not used during these switching cycles (it is used only
upon entry to the COOL MODE for the first time).
RUN LOOP:
(The entry to the RUN Loop for the ANC is made via special routine that starts both
compressors sequentially.) After switched to run, the 5 and 10 minute delays are triggered.
The 5 minutes delay is used as the minimum compressor/s run period, the 10 minute delay is
used to skip the LOW PRESSURE ROUTINE test for the first 10 minutes of compressor run.
REST LOOP:
When the room temperature as measured by the TH-1 (or received by the Beacon signal) reach
the desired Set-Point temperature (and the corresponding offsets), the RUN Loop is exited and
the system switched to REST Loop (Thermostat Stop/Temperature Brake).
The REST Loop is entered after a 5 min. and 15 min. delays are triggered. The 5 min. delay is
used as the 'minimum compressor rest period', while the 15 min. delay is the 'maximum
compressor rest period'
First, the REST Loop setting the compressor(s), reverse valve, outdoor fan motor and the
compressor (COMPRESS) LED Off. In addition, it also checks for any request to quit the cool
mode or Timer OFF demand to stop the system.
TAC-404
50
The 'INDOOR FAN ROUTINE' - sets the required indoor fan motor speed as per operator
manual setting or automatic speed control (according to the room temperature).
After the 5 minutes of the REST Loop, the compressor LED is set to flash to indicate that the
REST Loop is controlled by the room temperature (TH-1 or Beacon signal and their
corresponding offsets).
If 15 minutes (the 'maximum compressor rest period') is reached, the system is switched to the
RUN Loop - this in spite the fact that the room temperature did not rise (above the desired Set
Point) to trigger the system to run. In addition, before the RUN Loop is entered, a
CONDITIONING ROUTINE is scanned. This routine is activated on Auto Mode where the
system may switch automatically between the Cool and Heat modes.
PRESSURE RELEASE ROUTINE (COOL MODE):
The 'PRESSURE RELEASE ROUTINE' is used to discharge the system pressure build during
compressor run. Failure to do so, may trip the compressor to over-load (protection) during the
start-up trial (only if the start-up happens less than 5 minutes after the last compressor run).
This routine is scanned only for the first entry to the Cool mode or upon power return following
a power brake (Quick restart trial in Heat Pump models). Switching between modes require this
routine each time the mode is re-entered.
This routine is not active during normal compressor RUN-REST cycles (Loops).
The routine is used also if during the 'minimum compressor rest period', there is a manual request
(by mean of R/C) to change the desired Set Point and/or operation mode (to Heat). Then, if
necessary, the re-entry will be via the 'PRESSURE RELEASE ROUTINE'.
The routine is divided into two parts where the Reverse Valve is set to On and Off.
During this routine:
∑ the compressor/s set/kept Off;
∑ the 'INDOOR FAN ROUTINE' scanned for IF (indoor fan motor) speed;
∑ the outdoor fan motor set/kept in High speed;
TAC-404
51
∑ The indicators:
Æ POWER LED On;
Æ AIR CON LED On;
Æ FILTER LED On or Off (according to 'FILTER CHECK ROUTINE');
Æ COMPRESS LED Off;
Æ IMPEDANCE LED per Power Failure Routines;
Æ PRESSURE LED per 'PRESSURE FAULT ROUTINE' and, OVP or LOP Routine
Upon completion, this routine is exited entirely.
Important Note: due to all the above mentioned, in COOLING ONLY A/C models with
software version below V1.51 you must connect the Reverse Valve (solenoid) - yellow wire
(station number 3 on the indoor and outdoor terminal boards).
For COOLING ONLY A/C models (when TAC-460 DIP Switch no. 3 is set to On) with the
TAC-460 software version starting from V1.51, this routine is skipped and a 5 min. time delay
is used between restarts.
FULL COMPRESSOR START-UP ROUTINE (COOL MODE):
This routine controls sequential start-up for both compressors in TAC-400 (ANC) only.
First, the Small compressor is turned On, and after 2 sec. delay, the Large compressor is
started. During this time the indoor fan speed is controlled by the 'INDOOR FAN ROUTINE'
while the outdoor fan speed is controlled by the 'NIGHT STATE ROUTINE'.
Before exit, the Compressor LED (COMPRES) is switched to On (continuously) indicating that
both compressors are running.
CHANGE MODE ROUTINE (COOL MODE):
This routine checks if manual or Timer OFF function are set. This routine may branch the
system:
to Off or;
∑ to other than the current Cool mode;
The manual demand is entered by the R/C. When the operator change the operating mode, the
system leave the running mode and enter the new mode.
TAC-404
52
If Timer functions are active, this routine monitor the Timer flag and if the flag is Set (i.e. Timer
OFF is demanded), the system is turned Off with all the last settings memorized including,
MODE, FAN, SET-POINT TEMPERATURE etc.
When no change is required, this routine is skipped.
If a new mode or system Off is required, all the current system delays of the Cool cycle are
cleared (as well as the Auto Energy settings in the ANC system).
INDOOR FAN ROUTINE (COOL MODE):
The routine controls the indoor fan motor speed to one of the three speeds: Low, High or Turbo.
The Low speed entry is automatically preceded with 0.5 second run at turbo speed.
The routine has two branches:
∑ Manual setting - the fan motor speed is set by the operator (by means of the TAC-490 R/C).
∑ Auto setting - the fan motor speed depends on the room temperature (with the corresponding
offsets) as measured by the TH-1 thermistor or derived from the Beacon signal (using the
temperature values as received from the R/C).
The routine switch to lower speeds without any delay based on the TH-1 (and the offsets),
but once set, can not be increased for the 2 min. delay time (This delay is cancelled when the
manual setting is used).
1. If TH-1 is higher than the SP by (not more than) 1.5∞C, the speed is Low.
2. If TH-1 is higher than the SP by more than 1.5∞C to 3∞C, the speed is High.
3. If TH-1 is higher than the SP by 3∞C or more, the speed is Turbo.
(SP = Set Point = desired temperature.)
COMPRESSOR OFF ROUTINE (COOL MODE):
This routine sets and keeps the compressor(s) Off in the REST Loop (Thermostat Stop).
For the first 5 min., the 'minimum compressor rest period', the following settings and routines
are scanned:
∑ Compressor(s) set and kept Off;
∑ Reverse Valve kept Off;
∑ Outdoor fan motor set and kept Off;
∑ 'CHANGE MODE ROUTINE' scanned for any request to quit the Cool mode or Timer Off
demand to stop the system;
TAC-404
53
∑ 'INDOOR FAN ROUTINE' - to set the required fan motor speed as per operator manual
setting or automatic speed control (according to the room temperature), and;
∑ the compressor LED (COMPRES) is set to Off.
After the 5 minutes, control of the compressor LED is set to flash as controlled in the REST
Loop afterwards.
INDOOR ANTI-ICE ROUTINE (COOL MODE):
The 'ANTI-ICE ROUTINE' checks for ice accumulation on the evaporator (indoor) heat
exchanger and run melting procedure if necessary.
The ice detection is based on the TH-2 temperature. When TH-2 sense below -1°C/30°F (minus
one Celsius/thirty Fahrenheit) temperature, the De-Ice Process is initiated; triggering the 90 sec.
delay (maximum outdoor fan motor halt time) and turn Off the outdoor fan motor (the outdoor
fan motor state is memorized).
The halt of the outdoor fan motor cause the system to rise the evaporator temperature (and melt
the accumulated ice).
Next scan of this routine is when the outdoor fan is Off. Here the TH-2 temperature is checked
for TH-2 > +5°C/41°F condition. The outdoor fan motor continues to be halted as long as the
condition is not met or the halt time is less than the 90 sec.; otherwise, the outdoor fan motor is
recovered (set to On).
NIGHT STATE ROUTINE (COOL MODE):
The 'NIGHT STATE ROUTINE' switches the outdoor fan motor to its Low speed during lower
ambient temperatures as expected during nighttime.
The routine is skipped if the outdoor fan is Off (during De-Ice Process - see 'INDOOR ANTI-
ICE ROUTINE') or the TH-3 is disconnected. In the last case, the outdoor fan motor is set to
High speed unconditionally.
During normal operation, the outdoor fan motor is switched according to TH-3 temperature.
TAC-404
54
Controlling Outdoor Fan Motor (COOL MODE):
TAC-404 supports 3 outdoor fan motor speeds.
∑ After air conditioner startup, the outdoor fan motor speed is always medium.
∑ Each speed change is executed no less then 2 minutes after the last change.
LOW PRESSURE (LOP) ROUTINE (COOL MODE):
This routine detects "Low Pressure" in the evaporator (indoor), based on an insufficient
temperature differential (TH-1)-(TH-2) due to lack of gas in the system.
The routine is skipped for the first 10 min. from the RUN Loop entry.
The differential threshold is depended on the number and size of compressors active during the
routine scan. The following limits shall turn the Low Pressure flag to '1' (the temperature scale is
in °C/°F degrees):
If both compressors running or TAC-404 system (TH-1)-(TH-2) < 6°C/11°F
If Large (2/3) compressor run (TAC-400 system only) (TH-1)-(TH-2) < 4°C/7°F
If Small (1/3) compressor run (TAC-400 system only) (TH-1)-(TH-2) < 2°C/4°F
This routine is used for Low cooling capacity detection (and protection).
If none of these conditions is met, the Pressure LED is set to Off.
The LOP flag is scanned in RUN Loop and if set for first time, the REST Loop is entered.
The LOP flag remains set.
Pressure Fault Conditions:
If after the REST Loop, re-entry of the RUN Loop and the 10 min. run, the LOP conditions
developed again, the Pressure Fault flag is set (in addition to the LOP flag). This condition shall
switch the system to Stop.
The Low Pressure Fault condition is indicated by:
∑ PRESSURE LED is set to On;
∑ POWER LED is flashing and;
∑ AIR CON LED is set to Off.
TAC-404
55
Recovery from the Low Pressure fault is done by sending Off to system and re-entry to On (by
mean of TAC-490 R/C or 3-position slide switch). When the recovery is done by the R/C, it
cancels the POWER LED flash and the system shall run again, but the PRESSURE Fault LED
shall stay On (indicating that a Pressure fault occurred).
When the recovery done by the 3-position slide switch, it will reset all LED's (including
switching off PRESSURE LED).
OVER PRESSURE (OVP) ROUTINE (COOL MODE):
The 'OVER PRESSURE ROUTINE' checks for pressure rise by means of TH-3 temperature. If
Over Pressure conditions met, the OVP flag is set and the system is switched to Rest Loop.
If the Over Pressure condition repeats, Pressure fault flag is set and the system operation is
halted and PRESSURE LED (maintenance indicator) is set to On. The last indicates a Pressure
fault condition.
This routine is skipped when TH-3 is disconnected.
The High Pressure is detected when:
∑ (TH-3) > 65°C/149°F (for rotary compressor: TAC-460 DIP Switch no. 2 is On) or;
∑ (TH-3) > 75°C/167°F (for reciprocating and scroll compressors: TAC-460 DIP Switch no. 2
is On). Then;
For the first time the Over Pressure detected, the Pressure fault LED and the OVP timer are Off.
This results in triggering the OVP timer and setting the OVP flag = 1. The last one is checked in
the RUN Loop and switches the system to the REST Loop with the COMPRES LED Off (as in
Thermostat Stop - so the user will see it as a temperature brake);
After the system re-enter the RUN Loop, the OVP flag is reset and if the system do not develop
the Over Pressure again within 3 min. (of running), the OVP timer and the Pressure fault LED
are reset, thus, the initial conditions restored;
If the Over Pressure condition is developed again within 3 min. (from the previous/first OVP
detection (after the minimum rest completion), the Pressure fault flag is set. The last flag is
checked in the RUN Loop and switch the system to Halt via the 'PRESSURE FAULT
ROUTINE' where the Pressure fault LED is set to On;
TAC-404
56
The Over Pressure Fault condition is indicated by:
∑ PRESSURE LED is flashing;
∑ POWER LED is flashing and;
∑ AIR CON LED is set to Off.
Recovery from the Over Pressure fault is done by sending Off to system and re-entry to On by
mean of TAC-490 R/C or 3-position slide switch. When the recovery done by the 3-position
slide switch, all flags, LEDs etc. are reset. When the recovery done by the R/C, it cancel the
POWER LED flash, but the PRESSURE fault LED remain lit (indicating that a Pressure fault
occurred).
Note: Switching to other mode of operation will reset all flags, LEDs and timers in the
'OVER PRESSURE ROUTINE'.
SLEEP ROUTINE (COOL MODE):
The 'SLEEP ROUTINE' is automatically initiated by the (R/C Sleep) TIMER STOP function. It
allow temperature Set Point to be offset with time. This results in longer compressor Off
intervals (and power saving).
CONDITIONING ROUTINE - GENERAL (AUTO HEAT/COOL MODE):
A mode in which the A/C switches automatically the HEAT and COOL (and vice versa)
operations. The selection is based on the previous status and room temperature variations.
This AUTO mode can be selected manually either by the R/C or the 3-position slide switch on
the TAC-460 Display Assy.
On the entry to the AUTO mode, the initial decision to run the HEAT or COOL shall be based
on the last, prior to the AUTO mode entry, operation mode;
If within the last hour, the last operation mode was COOL, DRY or FAN ONLY, the
Auto shall run COOL, or;
If within the last hour, the last operation mode was HEAT, the Auto shall run HEAT,
or;
TAC-404
57
If no run last at last hour, prior to the Auto selection, the initial selection between the COOL
and HEAT run shall be made automatically as follows:
∑ If (TH-1) > (SP + 1°C/2°F) then set to COOL mode;
∑ If (TH-1) < (SP - 1°C/2°F) then set to HEAT mode;
∑ If (SP - 1°C/2°F) £ (TH-1) £ (SP + 1°C/2°F) then restore the last, COOL or HEAT, mode. If
the last mode was set to COOL, DRY or FAN ONLY, the system is switched to COOL mode.
If set from the R/C, all other present R/C parameters are executed in parallel (Temperature Set
Point, Fan Motor speed, Timer etc.)
If set by the 3-position slide switch, the initial conditions are activated as follow:
∑ FAN: Auto.
∑ TIMERs: Reset.
∑ S.P. Temperature: 22°C/72°F.
AUTO-ENERGY ROUTINE (COOL MODE):
This routine automatically adjust the Energy drived (only) in the TAC-400 (ANC) system, by
selecting which of the compressors or both to be run.
The selection depends on the current indoor fan motor speed and compressors that in run and
the evaporating temperature in Cool mode (or condensing temperature in Heat mode).
TAC-404
58
HEAT MODE:
The HEAT MODE consists of entry procedure the 'RUN Loop' and 'REST Loop'.
The entry procedure set (or verifies) that the compressors are Off and enter the PRESSURE
RELEASE ROUTINE for 10 sec. approximately. The TAC-404 system has one compressor and
the TAC-400 (ANC models) two compressors: one small and one large.
(The ANC system may run one of the compressors or both, but the startup for two
compressors requires special procedure.)
During normal operation, the TH-1 (intake/return air) thermistor switches between the RUN and
REST loops depending on the incoming air (room) temperature.
The PRESSURE RELEASE ROUTINE is not used during these switching cycles (it is used only
upon entry to the HEAT MODE for the first time).
RUN LOOP:
(The entry to the RUN Loop for the ANC is made via special routine that starts both
compressors sequentially. After switched to run, the 5 and 10 minute as well as 10 and 20 sec.
delays are triggered.
The 5 minutes delay is used as the minimum compressor(s) run period, the 10 minute delay is
used to skip the LOW PRESSURE ROUTINE test for the first 10 minutes of compressor run.
The 10 and 20 sec. delays are used to delay the indoor fan start for the reciprocating or rotary
compressors respectively. This avoids blow of chill (cold) air before the evaporator (indoor) coil
temperature has been reached to 45°C/113°F (see also: 'INDOOR FAN ROUTINE').
REST LOOP:
When the room temperature as measured by the TH-1 (or received by the Beacon signal) reach
the Set-Point temperature (and the corresponding offsets), the RUN Loop is exited and the
system switched to REST Loop (Thermostat Stop/Temperature Brake).
The REST Loop is entered after 15 sec., 5 & 15 min. delays are triggered. The 15 sec. is used to
delay the indoor fan motor stop (so the heating capacity is still supplied until the indoor coil
temperature drops). The 5 min. delay is used as the 'minimum compressor rest period', while the
15 min. delay is the 'maximum compressor rest period'.
TAC-404
59
First the REST Loop is setting the compressor(s), outdoor fan motor and the compressor
(COMPRES) LED Off. The Reverse Valve is kept On as well as the indoor fan motor (see:
'INDOOR FAN ROUTINE'). In addition, it also checks for any request to quit the Heat mode
or Timer OFF demand to stop the system. The 'INDOOR FAN ROUTINE' sets the required
indoor fan speed as per operator manual setting or automatic speed control (according to the
room temperature).
Then, after the 15 sec., the above functions continue with the indoor fan Off for the next 5 min.
(the 'minimum compressor rest period').
After the 5 minutes of the REST Loop, the compressor LED is set to flash to indicate that the
REST Loop is controlled by the room temperature (TH-1 or Beacon signal and their
corresponding offsets).
If 15 minutes (the 'maximum compressor rest period') is reached, the system is switched to the
RUN Loop - this in spite the fact that the room temperature did not fall rise (below the desired
Set Point) to trigger the system to run. In addition, before the RUN Loop is entered, a
CONDITIONING ROUTINE is scanned. This routine is activated on Auto Mode where the
system may switch automatically between the Cool and Heat modes.
PRESSURE RELEASE ROUTINE (HEAT MODE):
The 'PRESSURE RELEASE ROUTINE' is used to discharge the system pressure build during
compressor run. Failure to do so, may trip the compressor to over-load (protection) during the
start-up trial (only if the start-up happens less than 5 minutes after the last compressor run).
This routine is scanned only for the first entry to the Heat mode or upon power return following
a power brake (Quick restart trial in Heat Pump models). Switching between modes require this
routine each time the mode is re-entered.
This routine is not active during normal compressor RUN-REST cycles (Loops).
The routine is used also if during the 'minimum compressor rest period', there is a manual request
(by mean of R/C) to change the desired Set Point and/or operation mode (to Cool). Then, if
necessary, the re-entry will be via the 'PRESSURE RELEASE ROUTINE'.
The routine is divided into two parts where the Reverse Valve is set to Off and On.
During this routine:
TAC-404
60
∑ the compressor/s set/kept Off;
∑ the indoor fan motor is Off;
∑ the outdoor fan motor set/kept in High speed;
∑ The indicators:
ÆPOWER LED On;
ÆAIR CON LED On;
ÆFILTER LED On or Off (according to 'FILTER CHECK ROUTINE');
ÆCOMPRES LED Off;
ÆIMPEDANCE LED per Power Failure Routines;
ÆPRESSURE LED per 'PRESSURE FAULT ROUTINE' and, OVP or LOP Routine
Upon completion of the 10 sec. approximately, this routine is exited entirely.
FULL COMPRESSOR START-UP ROUTINE (HEAT MODE):
This routine controls sequential start-up for both compressors in TAC-400 (ANC) only.
First, the Small compressor is turned On, and after 2 sec. delay, the Large compressor is
started. During this time the indoor fan motor speed is kept Off, while the outdoor fan speed is
set to High.
CHANGE MODE ROUTINE (HEAT MODE):
This routine checks if manual or Timer OFF function are set. This routine may branch the
system:
∑ to Off or;
∑ to other than the current Heat mode;
The manual demand is entered by the R/C. When the operator change the operating mode, a flag
for Change Mode Request is turned On. During scan of this routine, this flag is reset and if
different than the running mode has been requested, the system leaves the running mode and
enter the new mode.
If Timer functions are active, this routine monitor the Timer flag and if the flag is Set (i.e. Timer
OFF is demanded), the system is turned Off with all the last settings memorized including,
MODE, FAN, SET-POINT TEMPERATURE etc.
TAC-404
61
When no change is required, this routine is skipped.
If a new mode or system Off is required, all the current system delays of the Heat cycle are
cleared (as well as the Auto Energy settings in the ANC system).
INDOOR FAN ROUTINE (HEAT MODE):
The routine controls the indoor fan motor speed to one of the three speeds: Low, High or Turbo.
The Low speed entry is automatically preceded with 0.5 second run at turbo speed.
The routine starts with 10 sec. (for reciprocating or 20 sec for rotary type compressor) hold off
of the indoor fan motor. Unless the TH-2 temperature rises above 45°C/113°F, the indoor fan
motor shall be Off for that time.
If the 10 sec. (or 20 sec.) elapsed or the TH-2 > 45°C/113°F, whichever comes first, the indoor
fan motor shall be started and controlled by one of the two branches:
∑ Manual setting - the fan motor speed is set by the operator (by means of the TAC-490 R/C).
∑ Auto setting - the fan motor speed depends on the room temperature (with the corresponding
offsets) as measured by the TH-1 thermistor or derived from the Beacon signal (using the
temperature values as received from the R/C).
The routine switch to lower speeds without any delay based on the TH-1 (and the
corresponding offsets), but once set, can not be increased for the 2 min. delay time (This delay is
cancelled when the manual setting is used).
COMPRESSOR OFF ROUTINE (HEAT MODE):
This routine sets and keeps the compressor(s) Off in the REST Loop (Thermostat Stop).
For the first 15 sec., the indoor fan motor continues to run. Then, for the 5 min., the 'minimum
compressor rest period', the following settings and routines are scanned:
∑ compressor(s) set and kept Off;
∑ Reverse Valve kept On;
∑ outdoor fan motor set and kept Off;
∑ 'CHANGE MODE ROUTINE' scanned for any request to quit the Heat mode or Timer Off
demand to stop the system;
∑ Indoor fan motor is set and kept Off;
∑ the compressor LED (COMPRES) is set to Off.
TAC-404
62
After the 5 minutes, control of the compressor LED is set to flash as controlled in the REST
Loop afterwards.
OUTDOOR ICE CHECK ROUTINE (HEAT MODE):
In Heat mode the TH-3 thermistor sense for ice accumulation on the outdoor (condenser) heat
exchanger and run defrost procedure if necessary. The detection process counts for time
temperature development.
The detection process starts when TH-3 temperature falls below +3°C/37°F. Then, the ICE
Timer start counting time.
If the temperature rises back to the +3°C/37°F, before the ice has been detected (as described
below), the ICE Timer is cleared and the process canceled.
Ice is detected if one of the conditions is met:
a. the (TH-3) < (-8°C/18°F) and 30 minute elapsed or;
b. the (TH-3) < (-4°C/21°F) and 60 minute elapsed or;
c. the (TH-3) < (-2°C/28°F) and 120 minute elapsed or;
Upon ice detection, the DE-ICE request flag is set and when scanned in the RUN Loop, the
system is entered to the ‘DE-ICEING ROUTINE’.
OUTDOOR FAN ROUTINE (HEAT MODE):
This routine is scanned automatically during Heat mode RUN Loop within the ‘COMPRESSOR
ON ROUTINE’.
The routine try to reduce a high pressure developed in indoor unit (due to deviation in
environmental conditions). If this control by ‘OUTDOOR FAN ROUTINE’ fail, the system is
further controlled by the ‘OVER PRESSURE ROUTINE’.
The routine operation:
∑ The routine checks for high pressure in the evaporator unit by means of the TH-2 thermistor
temperature. If high pressure condition met, i.e.: TH-2 > 55°C/131°F, the outdoor fan motor
is stopped resulting in pressure drop. The outdoor fan motor halt is limited to 11 minutes.
Tac404 electronic control_family_specifications

More Related Content

Similar to Tac404 electronic control_family_specifications

DMP Catalogue
DMP CatalogueDMP Catalogue
DMP CatalogueAdhyKeraf
 
Catalog Thermostat Honeywell T6373
Catalog Thermostat Honeywell T6373Catalog Thermostat Honeywell T6373
Catalog Thermostat Honeywell T6373Beeteco
 
12 pdb 1 kr ahu-comm.kit_220_v,5060hz_eu_mfl68924303_0caa0-02c_july.2020
12 pdb 1   kr ahu-comm.kit_220_v,5060hz_eu_mfl68924303_0caa0-02c_july.202012 pdb 1   kr ahu-comm.kit_220_v,5060hz_eu_mfl68924303_0caa0-02c_july.2020
12 pdb 1 kr ahu-comm.kit_220_v,5060hz_eu_mfl68924303_0caa0-02c_july.2020ElkinErnestoRamirezV
 
4DES-7; R404A; t0 -5; tc 45.pdf for CS S
4DES-7; R404A; t0 -5; tc 45.pdf for CS S4DES-7; R404A; t0 -5; tc 45.pdf for CS S
4DES-7; R404A; t0 -5; tc 45.pdf for CS STedyChriswanda1
 
PRESENTATION AIRWELL VRF 2014 GB
PRESENTATION  AIRWELL VRF 2014 GBPRESENTATION  AIRWELL VRF 2014 GB
PRESENTATION AIRWELL VRF 2014 GBArjang Ahmadi
 
Incontri Formativi 16 marzo 2016 - W. Bianchi - EMERSON
Incontri Formativi 16 marzo 2016 - W. Bianchi - EMERSON Incontri Formativi 16 marzo 2016 - W. Bianchi - EMERSON
Incontri Formativi 16 marzo 2016 - W. Bianchi - EMERSON Centro Studi Galileo
 
Mitsubishi inverter freqrol-f700 series
Mitsubishi inverter freqrol-f700 seriesMitsubishi inverter freqrol-f700 series
Mitsubishi inverter freqrol-f700 seriesDien Ha The
 
Mitsubishi inverter freqrol-f700 series
Mitsubishi inverter freqrol-f700 seriesMitsubishi inverter freqrol-f700 series
Mitsubishi inverter freqrol-f700 seriesDien Ha The
 
Mitsubishi inverter freqrol-f700 series dienhathe.vn
Mitsubishi inverter freqrol-f700 series dienhathe.vnMitsubishi inverter freqrol-f700 series dienhathe.vn
Mitsubishi inverter freqrol-f700 series dienhathe.vnDien Ha The
 
Digital Temperature Controllers
Digital Temperature ControllersDigital Temperature Controllers
Digital Temperature ControllersDwyer Instruments
 

Similar to Tac404 electronic control_family_specifications (20)

Toshiba
ToshibaToshiba
Toshiba
 
DMP Catalogue
DMP CatalogueDMP Catalogue
DMP Catalogue
 
Mac 050
Mac 050Mac 050
Mac 050
 
Sc y un50_00
Sc y un50_00Sc y un50_00
Sc y un50_00
 
Catalog Thermostat Honeywell T6373
Catalog Thermostat Honeywell T6373Catalog Thermostat Honeywell T6373
Catalog Thermostat Honeywell T6373
 
12 pdb 1 kr ahu-comm.kit_220_v,5060hz_eu_mfl68924303_0caa0-02c_july.2020
12 pdb 1   kr ahu-comm.kit_220_v,5060hz_eu_mfl68924303_0caa0-02c_july.202012 pdb 1   kr ahu-comm.kit_220_v,5060hz_eu_mfl68924303_0caa0-02c_july.2020
12 pdb 1 kr ahu-comm.kit_220_v,5060hz_eu_mfl68924303_0caa0-02c_july.2020
 
Termostato 24 v proporcional belimo ext-rcp-24
Termostato 24 v proporcional   belimo ext-rcp-24Termostato 24 v proporcional   belimo ext-rcp-24
Termostato 24 v proporcional belimo ext-rcp-24
 
4DES-7; R404A; t0 -5; tc 45.pdf for CS S
4DES-7; R404A; t0 -5; tc 45.pdf for CS S4DES-7; R404A; t0 -5; tc 45.pdf for CS S
4DES-7; R404A; t0 -5; tc 45.pdf for CS S
 
Cat t600
Cat t600Cat t600
Cat t600
 
MITSUBISHI ELECTRIC SPLIT-TYPE
MITSUBISHI ELECTRIC SPLIT-TYPEMITSUBISHI ELECTRIC SPLIT-TYPE
MITSUBISHI ELECTRIC SPLIT-TYPE
 
PRESENTATION AIRWELL VRF 2014 GB
PRESENTATION  AIRWELL VRF 2014 GBPRESENTATION  AIRWELL VRF 2014 GB
PRESENTATION AIRWELL VRF 2014 GB
 
Incontri Formativi 16 marzo 2016 - W. Bianchi - EMERSON
Incontri Formativi 16 marzo 2016 - W. Bianchi - EMERSON Incontri Formativi 16 marzo 2016 - W. Bianchi - EMERSON
Incontri Formativi 16 marzo 2016 - W. Bianchi - EMERSON
 
Mitsubishi inverter freqrol-f700 series
Mitsubishi inverter freqrol-f700 seriesMitsubishi inverter freqrol-f700 series
Mitsubishi inverter freqrol-f700 series
 
Mitsubishi inverter freqrol-f700 series
Mitsubishi inverter freqrol-f700 seriesMitsubishi inverter freqrol-f700 series
Mitsubishi inverter freqrol-f700 series
 
Mitsubishi inverter freqrol-f700 series dienhathe.vn
Mitsubishi inverter freqrol-f700 series dienhathe.vnMitsubishi inverter freqrol-f700 series dienhathe.vn
Mitsubishi inverter freqrol-f700 series dienhathe.vn
 
Trs y un50_00
Trs y un50_00Trs y un50_00
Trs y un50_00
 
Ank y na60_00
Ank y na60_00Ank y na60_00
Ank y na60_00
 
Yanmar 4 lha-htp
Yanmar 4 lha-htpYanmar 4 lha-htp
Yanmar 4 lha-htp
 
Digital Temperature Controllers
Digital Temperature ControllersDigital Temperature Controllers
Digital Temperature Controllers
 
Rpf y un50_00
Rpf y un50_00Rpf y un50_00
Rpf y un50_00
 

More from Josedgeo

Miller thunderbolt 225 ac
Miller thunderbolt 225 acMiller thunderbolt 225 ac
Miller thunderbolt 225 acJosedgeo
 
Miller thunderbolt 225 ac dc
Miller thunderbolt 225 ac dcMiller thunderbolt 225 ac dc
Miller thunderbolt 225 ac dcJosedgeo
 
Correas scooter
Correas scooterCorreas scooter
Correas scooterJosedgeo
 
Robo de oro
Robo de oroRobo de oro
Robo de oroJosedgeo
 
Calentador de agua materiales reciclables
Calentador de agua materiales reciclablesCalentador de agua materiales reciclables
Calentador de agua materiales reciclablesJosedgeo
 
Calculo y trazado de Escaleras
Calculo y trazado de EscalerasCalculo y trazado de Escaleras
Calculo y trazado de EscalerasJosedgeo
 
Revox A77 service manual
Revox A77 service manualRevox A77 service manual
Revox A77 service manualJosedgeo
 
Yamaha virago xv250s 1999 servicio técnico
 Yamaha virago xv250s 1999 servicio técnico Yamaha virago xv250s 1999 servicio técnico
Yamaha virago xv250s 1999 servicio técnicoJosedgeo
 
Yumbo c110 manual servicios
Yumbo c110   manual serviciosYumbo c110   manual servicios
Yumbo c110 manual serviciosJosedgeo
 
Winner scooter lx 125 - GY6 50cc a 150cc - Service manual
Winner  scooter lx 125 - GY6 50cc a 150cc - Service manualWinner  scooter lx 125 - GY6 50cc a 150cc - Service manual
Winner scooter lx 125 - GY6 50cc a 150cc - Service manualJosedgeo
 
Technics cd sl-pd8
Technics cd sl-pd8Technics cd sl-pd8
Technics cd sl-pd8Josedgeo
 
Que es un psicopata
Que es un psicopataQue es un psicopata
Que es un psicopataJosedgeo
 
Ponerologia politica
Ponerologia politicaPonerologia politica
Ponerologia politicaJosedgeo
 
Hongos comestibles y venenosos de Uruguay
Hongos comestibles y venenosos de UruguayHongos comestibles y venenosos de Uruguay
Hongos comestibles y venenosos de UruguayJosedgeo
 
DEFECTOS CONSTRUCTIVOS EN EL MURO DOBLE CON CÁMARA DE AIRE
DEFECTOS CONSTRUCTIVOS EN EL MURO DOBLE CON CÁMARA DE AIREDEFECTOS CONSTRUCTIVOS EN EL MURO DOBLE CON CÁMARA DE AIRE
DEFECTOS CONSTRUCTIVOS EN EL MURO DOBLE CON CÁMARA DE AIREJosedgeo
 
Montaje motor vespa
Montaje motor vespaMontaje motor vespa
Montaje motor vespaJosedgeo
 
Gases Mezclas de soldar
Gases Mezclas de soldarGases Mezclas de soldar
Gases Mezclas de soldarJosedgeo
 
Manual soldadura oerlikon
Manual soldadura oerlikonManual soldadura oerlikon
Manual soldadura oerlikonJosedgeo
 
Los cortes de la carne vacuna
Los cortes de la carne vacunaLos cortes de la carne vacuna
Los cortes de la carne vacunaJosedgeo
 
Catalogo de partes Bajaj Kb125
Catalogo de partes Bajaj Kb125Catalogo de partes Bajaj Kb125
Catalogo de partes Bajaj Kb125Josedgeo
 

More from Josedgeo (20)

Miller thunderbolt 225 ac
Miller thunderbolt 225 acMiller thunderbolt 225 ac
Miller thunderbolt 225 ac
 
Miller thunderbolt 225 ac dc
Miller thunderbolt 225 ac dcMiller thunderbolt 225 ac dc
Miller thunderbolt 225 ac dc
 
Correas scooter
Correas scooterCorreas scooter
Correas scooter
 
Robo de oro
Robo de oroRobo de oro
Robo de oro
 
Calentador de agua materiales reciclables
Calentador de agua materiales reciclablesCalentador de agua materiales reciclables
Calentador de agua materiales reciclables
 
Calculo y trazado de Escaleras
Calculo y trazado de EscalerasCalculo y trazado de Escaleras
Calculo y trazado de Escaleras
 
Revox A77 service manual
Revox A77 service manualRevox A77 service manual
Revox A77 service manual
 
Yamaha virago xv250s 1999 servicio técnico
 Yamaha virago xv250s 1999 servicio técnico Yamaha virago xv250s 1999 servicio técnico
Yamaha virago xv250s 1999 servicio técnico
 
Yumbo c110 manual servicios
Yumbo c110   manual serviciosYumbo c110   manual servicios
Yumbo c110 manual servicios
 
Winner scooter lx 125 - GY6 50cc a 150cc - Service manual
Winner  scooter lx 125 - GY6 50cc a 150cc - Service manualWinner  scooter lx 125 - GY6 50cc a 150cc - Service manual
Winner scooter lx 125 - GY6 50cc a 150cc - Service manual
 
Technics cd sl-pd8
Technics cd sl-pd8Technics cd sl-pd8
Technics cd sl-pd8
 
Que es un psicopata
Que es un psicopataQue es un psicopata
Que es un psicopata
 
Ponerologia politica
Ponerologia politicaPonerologia politica
Ponerologia politica
 
Hongos comestibles y venenosos de Uruguay
Hongos comestibles y venenosos de UruguayHongos comestibles y venenosos de Uruguay
Hongos comestibles y venenosos de Uruguay
 
DEFECTOS CONSTRUCTIVOS EN EL MURO DOBLE CON CÁMARA DE AIRE
DEFECTOS CONSTRUCTIVOS EN EL MURO DOBLE CON CÁMARA DE AIREDEFECTOS CONSTRUCTIVOS EN EL MURO DOBLE CON CÁMARA DE AIRE
DEFECTOS CONSTRUCTIVOS EN EL MURO DOBLE CON CÁMARA DE AIRE
 
Montaje motor vespa
Montaje motor vespaMontaje motor vespa
Montaje motor vespa
 
Gases Mezclas de soldar
Gases Mezclas de soldarGases Mezclas de soldar
Gases Mezclas de soldar
 
Manual soldadura oerlikon
Manual soldadura oerlikonManual soldadura oerlikon
Manual soldadura oerlikon
 
Los cortes de la carne vacuna
Los cortes de la carne vacunaLos cortes de la carne vacuna
Los cortes de la carne vacuna
 
Catalogo de partes Bajaj Kb125
Catalogo de partes Bajaj Kb125Catalogo de partes Bajaj Kb125
Catalogo de partes Bajaj Kb125
 

Recently uploaded

Kalyan callg Girls, { 07738631006 } || Call Girl In Kalyan Women Seeking Men ...
Kalyan callg Girls, { 07738631006 } || Call Girl In Kalyan Women Seeking Men ...Kalyan callg Girls, { 07738631006 } || Call Girl In Kalyan Women Seeking Men ...
Kalyan callg Girls, { 07738631006 } || Call Girl In Kalyan Women Seeking Men ...Pooja Nehwal
 
VVIP Pune Call Girls Warje (7001035870) Pune Escorts Nearby with Complete Sat...
VVIP Pune Call Girls Warje (7001035870) Pune Escorts Nearby with Complete Sat...VVIP Pune Call Girls Warje (7001035870) Pune Escorts Nearby with Complete Sat...
VVIP Pune Call Girls Warje (7001035870) Pune Escorts Nearby with Complete Sat...Call Girls in Nagpur High Profile
 
Call Girls In Andheri East Call 9892124323 Book Hot And Sexy Girls,
Call Girls In Andheri East Call 9892124323 Book Hot And Sexy Girls,Call Girls In Andheri East Call 9892124323 Book Hot And Sexy Girls,
Call Girls In Andheri East Call 9892124323 Book Hot And Sexy Girls,Pooja Nehwal
 
FULL ENJOY - 8264348440 Call Girls in Hauz Khas | Delhi
FULL ENJOY - 8264348440 Call Girls in Hauz Khas | DelhiFULL ENJOY - 8264348440 Call Girls in Hauz Khas | Delhi
FULL ENJOY - 8264348440 Call Girls in Hauz Khas | Delhisoniya singh
 
(PARI) Alandi Call Girls Just Call 7001035870 [ Cash on Delivery ] Pune Escorts
(PARI) Alandi Call Girls Just Call 7001035870 [ Cash on Delivery ] Pune Escorts(PARI) Alandi Call Girls Just Call 7001035870 [ Cash on Delivery ] Pune Escorts
(PARI) Alandi Call Girls Just Call 7001035870 [ Cash on Delivery ] Pune Escortsranjana rawat
 
Makarba ( Call Girls ) Ahmedabad ✔ 6297143586 ✔ Hot Model With Sexy Bhabi Rea...
Makarba ( Call Girls ) Ahmedabad ✔ 6297143586 ✔ Hot Model With Sexy Bhabi Rea...Makarba ( Call Girls ) Ahmedabad ✔ 6297143586 ✔ Hot Model With Sexy Bhabi Rea...
Makarba ( Call Girls ) Ahmedabad ✔ 6297143586 ✔ Hot Model With Sexy Bhabi Rea...Naicy mandal
 
presentation about microsoft power point
presentation about microsoft power pointpresentation about microsoft power point
presentation about microsoft power pointchhavia330
 
9892124323, Call Girl in Juhu Call Girls Services (Rate ₹8.5K) 24×7 with Hote...
9892124323, Call Girl in Juhu Call Girls Services (Rate ₹8.5K) 24×7 with Hote...9892124323, Call Girl in Juhu Call Girls Services (Rate ₹8.5K) 24×7 with Hote...
9892124323, Call Girl in Juhu Call Girls Services (Rate ₹8.5K) 24×7 with Hote...Pooja Nehwal
 
Call Girls Service Kolkata Aishwarya 🤌 8250192130 🚀 Vip Call Girls Kolkata
Call Girls Service Kolkata Aishwarya 🤌  8250192130 🚀 Vip Call Girls KolkataCall Girls Service Kolkata Aishwarya 🤌  8250192130 🚀 Vip Call Girls Kolkata
Call Girls Service Kolkata Aishwarya 🤌 8250192130 🚀 Vip Call Girls Kolkataanamikaraghav4
 
VIP Call Girls Kavuri Hills ( Hyderabad ) Phone 8250192130 | ₹5k To 25k With ...
VIP Call Girls Kavuri Hills ( Hyderabad ) Phone 8250192130 | ₹5k To 25k With ...VIP Call Girls Kavuri Hills ( Hyderabad ) Phone 8250192130 | ₹5k To 25k With ...
VIP Call Girls Kavuri Hills ( Hyderabad ) Phone 8250192130 | ₹5k To 25k With ...Suhani Kapoor
 
Book Sex Workers Available Pune Call Girls Yerwada 6297143586 Call Hot India...
Book Sex Workers Available Pune Call Girls Yerwada  6297143586 Call Hot India...Book Sex Workers Available Pune Call Girls Yerwada  6297143586 Call Hot India...
Book Sex Workers Available Pune Call Girls Yerwada 6297143586 Call Hot India...Call Girls in Nagpur High Profile
 
High Profile Call Girls In Andheri 7738631006 Call girls in mumbai Mumbai ...
High Profile Call Girls In Andheri 7738631006 Call girls in mumbai  Mumbai ...High Profile Call Girls In Andheri 7738631006 Call girls in mumbai  Mumbai ...
High Profile Call Girls In Andheri 7738631006 Call girls in mumbai Mumbai ...Pooja Nehwal
 
VIP Call Girls Hitech City ( Hyderabad ) Phone 8250192130 | ₹5k To 25k With R...
VIP Call Girls Hitech City ( Hyderabad ) Phone 8250192130 | ₹5k To 25k With R...VIP Call Girls Hitech City ( Hyderabad ) Phone 8250192130 | ₹5k To 25k With R...
VIP Call Girls Hitech City ( Hyderabad ) Phone 8250192130 | ₹5k To 25k With R...Suhani Kapoor
 
Lucknow 💋 Call Girls Adil Nagar | ₹,9500 Pay Cash 8923113531 Free Home Delive...
Lucknow 💋 Call Girls Adil Nagar | ₹,9500 Pay Cash 8923113531 Free Home Delive...Lucknow 💋 Call Girls Adil Nagar | ₹,9500 Pay Cash 8923113531 Free Home Delive...
Lucknow 💋 Call Girls Adil Nagar | ₹,9500 Pay Cash 8923113531 Free Home Delive...anilsa9823
 
Call Girls Chikhali Call Me 7737669865 Budget Friendly No Advance Booking
Call Girls Chikhali Call Me 7737669865 Budget Friendly No Advance BookingCall Girls Chikhali Call Me 7737669865 Budget Friendly No Advance Booking
Call Girls Chikhali Call Me 7737669865 Budget Friendly No Advance Bookingroncy bisnoi
 
NO1 Verified Amil Baba In Karachi Kala Jadu In Karachi Amil baba In Karachi A...
NO1 Verified Amil Baba In Karachi Kala Jadu In Karachi Amil baba In Karachi A...NO1 Verified Amil Baba In Karachi Kala Jadu In Karachi Amil baba In Karachi A...
NO1 Verified Amil Baba In Karachi Kala Jadu In Karachi Amil baba In Karachi A...Amil baba
 
Call Girls in Vashi Escorts Services - 7738631006
Call Girls in Vashi Escorts Services - 7738631006Call Girls in Vashi Escorts Services - 7738631006
Call Girls in Vashi Escorts Services - 7738631006Pooja Nehwal
 
(MEGHA) Hinjewadi Call Girls Just Call 7001035870 [ Cash on Delivery ] Pune E...
(MEGHA) Hinjewadi Call Girls Just Call 7001035870 [ Cash on Delivery ] Pune E...(MEGHA) Hinjewadi Call Girls Just Call 7001035870 [ Cash on Delivery ] Pune E...
(MEGHA) Hinjewadi Call Girls Just Call 7001035870 [ Cash on Delivery ] Pune E...ranjana rawat
 
Russian Escorts in lucknow 💗 9719455033 💥 Lovely Lasses: Radiant Beauties Shi...
Russian Escorts in lucknow 💗 9719455033 💥 Lovely Lasses: Radiant Beauties Shi...Russian Escorts in lucknow 💗 9719455033 💥 Lovely Lasses: Radiant Beauties Shi...
Russian Escorts in lucknow 💗 9719455033 💥 Lovely Lasses: Radiant Beauties Shi...nagunakhan
 
Book Paid Lohegaon Call Girls Pune 8250192130Low Budget Full Independent High...
Book Paid Lohegaon Call Girls Pune 8250192130Low Budget Full Independent High...Book Paid Lohegaon Call Girls Pune 8250192130Low Budget Full Independent High...
Book Paid Lohegaon Call Girls Pune 8250192130Low Budget Full Independent High...ranjana rawat
 

Recently uploaded (20)

Kalyan callg Girls, { 07738631006 } || Call Girl In Kalyan Women Seeking Men ...
Kalyan callg Girls, { 07738631006 } || Call Girl In Kalyan Women Seeking Men ...Kalyan callg Girls, { 07738631006 } || Call Girl In Kalyan Women Seeking Men ...
Kalyan callg Girls, { 07738631006 } || Call Girl In Kalyan Women Seeking Men ...
 
VVIP Pune Call Girls Warje (7001035870) Pune Escorts Nearby with Complete Sat...
VVIP Pune Call Girls Warje (7001035870) Pune Escorts Nearby with Complete Sat...VVIP Pune Call Girls Warje (7001035870) Pune Escorts Nearby with Complete Sat...
VVIP Pune Call Girls Warje (7001035870) Pune Escorts Nearby with Complete Sat...
 
Call Girls In Andheri East Call 9892124323 Book Hot And Sexy Girls,
Call Girls In Andheri East Call 9892124323 Book Hot And Sexy Girls,Call Girls In Andheri East Call 9892124323 Book Hot And Sexy Girls,
Call Girls In Andheri East Call 9892124323 Book Hot And Sexy Girls,
 
FULL ENJOY - 8264348440 Call Girls in Hauz Khas | Delhi
FULL ENJOY - 8264348440 Call Girls in Hauz Khas | DelhiFULL ENJOY - 8264348440 Call Girls in Hauz Khas | Delhi
FULL ENJOY - 8264348440 Call Girls in Hauz Khas | Delhi
 
(PARI) Alandi Call Girls Just Call 7001035870 [ Cash on Delivery ] Pune Escorts
(PARI) Alandi Call Girls Just Call 7001035870 [ Cash on Delivery ] Pune Escorts(PARI) Alandi Call Girls Just Call 7001035870 [ Cash on Delivery ] Pune Escorts
(PARI) Alandi Call Girls Just Call 7001035870 [ Cash on Delivery ] Pune Escorts
 
Makarba ( Call Girls ) Ahmedabad ✔ 6297143586 ✔ Hot Model With Sexy Bhabi Rea...
Makarba ( Call Girls ) Ahmedabad ✔ 6297143586 ✔ Hot Model With Sexy Bhabi Rea...Makarba ( Call Girls ) Ahmedabad ✔ 6297143586 ✔ Hot Model With Sexy Bhabi Rea...
Makarba ( Call Girls ) Ahmedabad ✔ 6297143586 ✔ Hot Model With Sexy Bhabi Rea...
 
presentation about microsoft power point
presentation about microsoft power pointpresentation about microsoft power point
presentation about microsoft power point
 
9892124323, Call Girl in Juhu Call Girls Services (Rate ₹8.5K) 24×7 with Hote...
9892124323, Call Girl in Juhu Call Girls Services (Rate ₹8.5K) 24×7 with Hote...9892124323, Call Girl in Juhu Call Girls Services (Rate ₹8.5K) 24×7 with Hote...
9892124323, Call Girl in Juhu Call Girls Services (Rate ₹8.5K) 24×7 with Hote...
 
Call Girls Service Kolkata Aishwarya 🤌 8250192130 🚀 Vip Call Girls Kolkata
Call Girls Service Kolkata Aishwarya 🤌  8250192130 🚀 Vip Call Girls KolkataCall Girls Service Kolkata Aishwarya 🤌  8250192130 🚀 Vip Call Girls Kolkata
Call Girls Service Kolkata Aishwarya 🤌 8250192130 🚀 Vip Call Girls Kolkata
 
VIP Call Girls Kavuri Hills ( Hyderabad ) Phone 8250192130 | ₹5k To 25k With ...
VIP Call Girls Kavuri Hills ( Hyderabad ) Phone 8250192130 | ₹5k To 25k With ...VIP Call Girls Kavuri Hills ( Hyderabad ) Phone 8250192130 | ₹5k To 25k With ...
VIP Call Girls Kavuri Hills ( Hyderabad ) Phone 8250192130 | ₹5k To 25k With ...
 
Book Sex Workers Available Pune Call Girls Yerwada 6297143586 Call Hot India...
Book Sex Workers Available Pune Call Girls Yerwada  6297143586 Call Hot India...Book Sex Workers Available Pune Call Girls Yerwada  6297143586 Call Hot India...
Book Sex Workers Available Pune Call Girls Yerwada 6297143586 Call Hot India...
 
High Profile Call Girls In Andheri 7738631006 Call girls in mumbai Mumbai ...
High Profile Call Girls In Andheri 7738631006 Call girls in mumbai  Mumbai ...High Profile Call Girls In Andheri 7738631006 Call girls in mumbai  Mumbai ...
High Profile Call Girls In Andheri 7738631006 Call girls in mumbai Mumbai ...
 
VIP Call Girls Hitech City ( Hyderabad ) Phone 8250192130 | ₹5k To 25k With R...
VIP Call Girls Hitech City ( Hyderabad ) Phone 8250192130 | ₹5k To 25k With R...VIP Call Girls Hitech City ( Hyderabad ) Phone 8250192130 | ₹5k To 25k With R...
VIP Call Girls Hitech City ( Hyderabad ) Phone 8250192130 | ₹5k To 25k With R...
 
Lucknow 💋 Call Girls Adil Nagar | ₹,9500 Pay Cash 8923113531 Free Home Delive...
Lucknow 💋 Call Girls Adil Nagar | ₹,9500 Pay Cash 8923113531 Free Home Delive...Lucknow 💋 Call Girls Adil Nagar | ₹,9500 Pay Cash 8923113531 Free Home Delive...
Lucknow 💋 Call Girls Adil Nagar | ₹,9500 Pay Cash 8923113531 Free Home Delive...
 
Call Girls Chikhali Call Me 7737669865 Budget Friendly No Advance Booking
Call Girls Chikhali Call Me 7737669865 Budget Friendly No Advance BookingCall Girls Chikhali Call Me 7737669865 Budget Friendly No Advance Booking
Call Girls Chikhali Call Me 7737669865 Budget Friendly No Advance Booking
 
NO1 Verified Amil Baba In Karachi Kala Jadu In Karachi Amil baba In Karachi A...
NO1 Verified Amil Baba In Karachi Kala Jadu In Karachi Amil baba In Karachi A...NO1 Verified Amil Baba In Karachi Kala Jadu In Karachi Amil baba In Karachi A...
NO1 Verified Amil Baba In Karachi Kala Jadu In Karachi Amil baba In Karachi A...
 
Call Girls in Vashi Escorts Services - 7738631006
Call Girls in Vashi Escorts Services - 7738631006Call Girls in Vashi Escorts Services - 7738631006
Call Girls in Vashi Escorts Services - 7738631006
 
(MEGHA) Hinjewadi Call Girls Just Call 7001035870 [ Cash on Delivery ] Pune E...
(MEGHA) Hinjewadi Call Girls Just Call 7001035870 [ Cash on Delivery ] Pune E...(MEGHA) Hinjewadi Call Girls Just Call 7001035870 [ Cash on Delivery ] Pune E...
(MEGHA) Hinjewadi Call Girls Just Call 7001035870 [ Cash on Delivery ] Pune E...
 
Russian Escorts in lucknow 💗 9719455033 💥 Lovely Lasses: Radiant Beauties Shi...
Russian Escorts in lucknow 💗 9719455033 💥 Lovely Lasses: Radiant Beauties Shi...Russian Escorts in lucknow 💗 9719455033 💥 Lovely Lasses: Radiant Beauties Shi...
Russian Escorts in lucknow 💗 9719455033 💥 Lovely Lasses: Radiant Beauties Shi...
 
Book Paid Lohegaon Call Girls Pune 8250192130Low Budget Full Independent High...
Book Paid Lohegaon Call Girls Pune 8250192130Low Budget Full Independent High...Book Paid Lohegaon Call Girls Pune 8250192130Low Budget Full Independent High...
Book Paid Lohegaon Call Girls Pune 8250192130Low Budget Full Independent High...
 

Tac404 electronic control_family_specifications

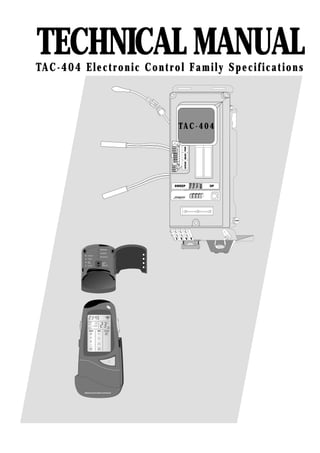
  • 1. TECHNICAL MANUALTAC-404 Electronic Control Family Specifications TA C - 4 0 4 WIRELESS DIGITAL REMOTE CONTROLLER START STOP 1 2 3 SLEEP DAILY MODE FAN SWEEP WIRELESS DIGITAL REMOTE CONTROLLER FILTER AIR CON. TIMER POWER COMPRES IMPEDANCE PRESSURE AUTO OFF REMOTE
  • 2. TAC-404 1 Index: ® Abbreviations that may be used throughout this document. ® Introduction. ® General Information. ® TAC-404 Main System Features. ® TAC-404 Basic Structure. ∑ Display Assembly 4-DIP Switches. ∑ Backup Memory. ∑ Power Failure. ∑ Communication Failure. ® System Indication (& Maintenance) Lamps. ® Display Assembly 3-Position Slide Switch. ® TAC-490 Remote Controller. ∑ TAC-490 Item Definition. ∑ TAC-490 Performance. ∑ TAC-490 Environmental Conditions. ∑ TAC-490 First Powering / Power Recover (after memory content lost). ∑ TAC-490 R/C Operational Functions Description: fiGeneral. fiOff Mode. fiOn Mode. fiOn/Off Button. fiUp/Down Rocker. fiSelect Button. fiChanging The Fan Speed. fiControlling Sweep Operation. fiChanging Energy Mode. fiChanging A/C Operation Mode. fiButtons Under The Front Sliding Cover: ∑ Setting Timer Periods. ∑ Clearing a Programmed Timer Period. ∑ Delayed On/Off (D.O.O). ∑ Room Button. ∑ Sense Here Button. ∑ Digital Clock Setting Button. ∑ Changing A/C ID Code. ∑ Display Reset & Test. ∑ Quick DIP Switches Resetting: ∑ Seven-Position DIP Switch. ∑ Remote Controller Seven-Position DIP Switches (Partial) Code List. ∑ Setting the R/C DIP Switches to Their Special System Characteristics.
  • 3. TAC-404 2 ® System General Operation Description: ∑ Operating in Cool Mode: ∑ Operating in Heat Mode: ® Main Operation Modes - Flow Charts. ∑ Cool Mode - Main Flow Chart. ∑ Heat Mode - Main Flow Chart. ∑ Dry Mode - Main Flow Chart. ∑ Fan Only Mode - Main Flow Chart. ∑ Sleep - Cool & Dry Modes. ∑ Sleep - Heat Mode. ∑ Heat Mode - De-Ice Flow Chart. ∑ Pressure Fault. ∑ Filter Check. ∑ TH-1 & TH-2 Thermistors Test. ® TH-1 & TH-2/3 Temperature to Resistance Conversion Table. ® Routines Detailed Functional Description: ∑ Cool Mode: ∑ Run Loop: ∑ Rest Loop: ∑ Pressure Release Routine (Cool Mode): ∑ Full Compressor Start-Up Routine (Cool Mode): ∑ Change Mode Routine (Cool Mode): ∑ Indoor Fan Routine (Cool Mode): ∑ Compressor Off Routine (Cool Mode): ∑ Indoor Anti-Ice Routine (Cool Mode): ∑ Night State Routine (Cool Mode): ∑ Controlling Outdoor Fan Motor (Cool Mode): ∑ Low Pressure (LOP) Routine (Cool Mode): ∑ Over Pressure (OVP) Routine (Cool Mode): ∑ Sleep Routine (Cool Mode): ∑ Conditioning Routine - General(Auto Heat/Cool Mode): ∑ Auto-Energy Routine (Cool Mode): ∑ Heat Mode: ∑ Run Loop: ∑ Rest Loop: ∑ Pressure Release Routine (Heat Mode): ∑ Full Compressor Start-Up Routine (Heat Mode): ∑ Change Mode Routine (Heat Mode): ∑ Indoor Fan Routine (Cool Mode): ∑ Compressor Off Routine (Heat Mode): ∑ Outdoor Ice Check Routine (Heat Mode): ∑ Outdoor Fan Routine (Heat Mode): ∑ Low Pressure (LOP) Routine (Heat Mode): ∑ Over Pressure (OVP) Routine (Heat Mode): ∑ Sleep Routine (Heat Mode): ∑ Conditioning Routine (Switching From The Heat To Cool Mode):
  • 4. TAC-404 3 ∑ Energy Change Routine (Heat Mode): ∑ Auto-Energy Routine (Heat Mode): ∑ De-Ice Routine (Heat Mode): ∑ Dry Mode Routine: ∑ Filter Check Routine: ∑ TH-1 & TH-2 Thermistors Check (Disconnection Or Short Circuit): ® Line Low Voltage Protection. ® Line Over Voltage Protection. ® TAC-404 Electrical Characteristics. ® TAC-404 Advantages. ® Replacing ATEC-220 with TAC-404. ® TAC-404 Components Cat. Nos. ® Indicator Lamps Troubleshooting. ® General Troubleshooting Chart ® TAC-444 Block Diagram. ® TAC-404 Field Connection. ® ATEC-220 Versus TAC-404 Air Conditioner Model Names. ® Bill Of Materials (BOM) - TAC-444 (Main). ® PCB Placement - TAC-444 (Main). ® Bill Of Materials (BOM) - TAC-440 (Indoor TAC-400). ® PCB Placement - TAC-440. ® Bill Of Materials (BOM) - TAC-420 (Outdoor TAC-400). ® PCB Placement - TAC-420. ® Bill Of Materials (BOM) - TAC-460TF (TNL-S9-15). ® Bill Of Materials (BOM) - TAC-460TF IR Detector (TNL-S9-15). ® PCB Placement - TAC-460TF (with IR Detector). ® Bill Of Materials (BOM) - TAC-460TN (TNL-S20-50). ® PCB Placement - TAC-460TN. ® Bill Of Materials (BOM) - TAC-460GF (GFL-S150-500). ® PCB Placement - TAC-460GF. ® Bill Of Materials (BOM) - TAC-460AN (ANL-S35-90). ® PCB Placement - TAC-460AN. ® Bill Of Materials (BOM) - TAC-490 (Remote Controller).
  • 5. TAC-404 4 Abbreviations that may be used throughout this document: A/C = Air Conditioner. A/D = Analogue to Digital Converter. B.O.M= Bill Of Materials. C.O.C. = Certificate of Compliance. DIP = Dual in Line Package. D.O.O. = Delayed On / Off (Quick Delay). DUT = Device Under Test. EEPROM = Electrical Erasable Programmable Read Only Memory. E.F.T. = Electrical Fast Transient. E.S.D = Electrical Static Discharge. gr. = gram. IAW = In Accordance With. ID = Identification. IF = Indoor fan (motor). IR = Infra Red. LCD = Liquid Crystal Display. LOP = Low Pressure. OF = Outdoor Fan (motor). OVP = Over Pressure. PCB = Printed Circuit Board. PRR = Pressure Release Routine. R/C = Remote Controller. RFI = Radio Frequency Interference .RTC = Real Time Clock. R/V = Reverse Video. S.P = Set Point. TH-1 = Thermistor (sensor) no. 1 (intake/return air). TH-2 = Thermistor (sensor) no. 2 (evaporator/indoor coil). TH-3 = Thermistor (sensor) no. 3 (condenser/outdoor coil). TADIRAN = TADIRAN Appliances Ltd. TBD = To Be Defined. ROM = Read Only Memory. mCU = Microcontroller unit. flag = internal (software) flag. Please note that due to the fact that this Manual is used also for Tadiran internal use, in the Routines Detailed Functional Description may appear names of software parameters, timers, flags etc. that not relevant for the wide use - please disregard those names. Edited by: Alex LIBERMAN Technical Support International Marketing
  • 6. TAC-404 5 TAC-404 Electronic Control Family Specifications The TAC-404 is a highly sophisticated, modern controller designed to operate using the latest technologies. The TAC-404 enlarges the air conditioner operation abilities. General: The name of the product will be changed, by adding the character ‘S’ to the model name or adding the character ‘S’ on separate label, for example: GFL-250H will become GFL-S250H (as you can see in Tables 2A & 2B: ATEC-220 versus TAC-404 air conditioner 50Hz and 60Hz model names). For the TAC-400 two models are available: ANC-65 & ANC-88 (both three phase models). Please be advised to the two main technical issues: For Installation: The interconnecting cable/port has an additional control wire to accommodate the medium outdoor fan speed (new). For Service: Please note that the ATEC-220 Electronic Control is interchangeable with the TAC-404 Electronic Control (as a complete system, for TFE, TNL, GFL, ANL and GNL models). The TAC-490 Remote Controller is adapted to control all three Tadiran Electronic Controls (ATEC-220, TAC-404 and TAC-400 models) and can be programmed for various operations. Important Note: for most of the new TAC-404 models, comparing to the previous ATEC models (for example: TFE-11 comparing to TNL-S11), many parts were changed (except the electronic), such as: indoor fan motor, outdoor fan motor etc. In some cases, the Refrigeration Cycle was changed also. Note: All the enclosed specifications, explanations, drawing, schemes etc. are the same for TAC- 400 (ANC models) unless mentioned otherwise. Specifications and performance data are subject to change without notice.
  • 7. TAC-404 6 TAC-404 Main System Features 1. Five operating modes (Cooling, Heating, Fan, Dry and Auto). 2. Three indoor fan speeds (Low, High and Turbo) + Auto speed mode. 3. Night state (low outdoor noise). 4. Sweep control (for all TNL-S and GFL-S models). 5. Quick restart (only for heat pump models). 6. Indoor anti-ice control (in cooling mode). 7. Outdoor de-icing control (in heating mode). 8. Low & High pressure protection. 9. Low & High voltage protection. 10. Remote Controller low battery (low) indicator.
  • 8. TAC-404 7 New Features (TAC-404 only): 11. Enlarged temperature control (SP = Set Point) range from 12∞C to 32∞C (54∞F to 90∞F). 12. Three outdoor fan speeds (Low, Medium and High). The additional speed allows lower noise levels down to 45 dB/A and also allows better capacity continuity. 13. In cooling mode: TAC-404 enable operation at low outdoor temperature, down to 10∞C/50°F, instead of 20∞C/68°F and at high outdoor temperature, up to 52∞C/126°F, using 500mm diameter fan blade that supply 2400 cfm at outdoor fan motor High speed. 14. In heating mode: TAC-404 enable operation at high outdoor temperature, up to 24∞C/75°F, instead of 15∞C/59°F and at low outdoor temperature, down to -8∞C/18°F (for Rotary Compressors) or down to -14∞C/7°F (for Reciprocating and Scroll compressors). For efficient heating capacity at very low outdoor temperatures, you should use 'HDE' configuration (auxiliary indoor heater). 15. Real time 24 hours clock. 16. Timer with 3 time zones, in a 24-hour period, including daily mode. 17. Sleep mode with timer. 18. Temperature control (and sense) at specific (local) place (near to the user) - Auto Sense. 19. Room Immunity display. 20. High resistance to RFI & EMI. 21. Automatic recovery system (EEPROM memory) using electronic memory instead of using backup battery. 22. Low & High pressure indication. 23. Low & High voltage indication. 24. Unique electronic automatic test equipment - TE-2000 accessory. 25. Possibility to control at once up to 1024 air conditioners by a PC - TAC-700.
  • 9. TAC-404 8 TAC-404 Basic Structure: The TAC-404 is composed of 3 main units: 1. TAC-460 - Display Assy. - the system “brain”, including the electronic control software (specially shaped for each model). 2. TAC-444 - Electronic Control power box - a relay unit which provides an interface between the software in the Display Assy. and the air-conditioner loads (indoor fan motor, outdoor an motor, sweep motor, reverse valve, compressor, TH-1, TH-2, TH-3 and heating element). The TAC-444 is controlled by the TAC-460. 3. TAC-490 Remote Controller. TAC-444 “reads” the 3 thermistors (TH-1, TH-2 & TH-3), using an 8-bit A/D converter that converts the thermistor outputs to digital data. Thermistors accuracy is 1%. The TAC-400 (ANC) is composed of 4 main units. 1. TAC-440 - Indoor Electronic Control. 2. TAC-420 - Outdoor Electronic Control. 3. TAC-460 - Display Assy (looks like the ANL-S Display Assy but with different software). 4. TAC-490 Remote Controller. Display Assy DIP Switches (Jumpers): 4 DIP switches located on the TAC-460 Display Assy. DIP switch no. 1 indicates whether the unit is high wall/ceiling or floor installation. When the switch is OFF (up), the unit is floor installation, and when the switch is ON (down), the unit is high wall/ceiling installation. DIP switch no. 2 indicates the compressor type. When the switch is OFF (up), the compressor is of thereciprocating type, and when theswitch is ON (down), the compressor is a rotary type. DIP switch no. 3 sets the air conditioner to Heat Pump/Cooling Only mode. When the switch is OFF (up), the unit is Heating & Cooling, and when the switch is ON (down), the unit is Cooling Only (effective from TAC-460 software version V1.51 only). DIP switch no. 4 is for future use only (Not Connected). DIP Switches, factory set (values in parenthesis are for 60Hz models): Model DIP SW. 1 DIP SW. 2 DIP SW. 3 DIP SW. 4 COOL HEAT TNL-S9-15 (1211-1215) ON ON ON OFF OFF TNL-S20 ON ON ON OFF OFF TNL-S25-35 (2025-2035) ON OFF ON OFF OFF GFL-S150 (1515) OFF ON ON OFF OFF GFL-S200-500 (2020-2050) OFF OFF ON OFF OFF The DIP Switches set activated just after the unit is powered On (power on reset).
  • 10. TAC-404 9 Backup Memory: Programmable memory, EEPROM type saves programmed settings after a power failure (recovering to the last settings). This is pure Electronic Memory (no use with backup battery - much more reliable). Power Failure: 1. If the power failure is shorter then 20 msec., TAC-404 is not affected. 2. If the power failure is longer then 20 msec., TAC-404 stops all air conditioner operations for the next 20 sec. After power recovery, TAC-404 recovers using the Pressure Release Routine using the last operation settings. If the software version is V1.51 or higher and the A/C is programmed to 'COOLING ONLY' (by TAC-460 DIP Switch 3), then the TAC-404 will enter to 5 minutes delay. Communication Failure: In case of a communication failure (longer then 1 sec.), TAC-404 stops all air conditioner operations and after 10 sec. if the failure continues, the POWER led flashes. When communication recovers, all air conditioner operations recover using the Pressure Release Routine. If the software version is V1.51 or higher and the A/C is programmed to 'COOLING ONLY', then the TAC-404 will enter to 5 minutes delay. System Indicator Lamps: POWER (red) - Lights up when the air conditioner is connected to the power supply and ready to receive commands from the remote controller. Flashes when there is any failure with the power supply. AIR CON (green) - Lights up when the air conditioner is ON. Flashes when de-icing takes place. FILTER (red) - Lights up after A/C 250 hours of operation (indicates that the filter requires cleaning). TIMER (yellow) - Lights up when air conditioner has been programmed for timer operation. Service and Maintenance Indicator Lamps: COMPRES. (green) - Lights up when the compressor is working. Turns Off during the first 5 minutes of a thermostat stop. Flashes when the minimum halt time (5 minutes) has passed and there is no thermostat demand. PRESSURE (red) - Lights up when there is a Low Pressure problem in the cooling system. Flashes when there is a High Pressure problem in the cooling system. IMPEDANCE (red) - Lights up when there is a problem with the ignition/impedance. See also: "Indicator Lamps Troubleshooting".
  • 11. TAC-404 10 Display Assembly 3-Position Slide Switch: The TAC-460 Display Assy. includes a 3-position slide switch. This switch operates according to the following table: Switch Status Function OFF ∑ Shuts A/C (air conditioner) OFF. ∑ Clear all fail flags after 2 seconds, turns off Filter indicator lamp and resets timer settings. ∑ The A/C do not respond to the Remote Controller. REMOTE (RMOT) ∑ Enables receiving and execution of IR (Infra Red) commands from the Remote Controller. AUTO ∑ Turns air conditioner ON, in automatic mode - set point = 22∞C/72°F. The air conditioner automatically selects cooling (TH-1>23∞C/73°F) or heating (TH-1<21∞C/70°F) mode, as well as the air speed.
  • 12. TAC-404 11 TAC-490 (VER 1.1) Remote Controller Operational Functions Specification: TAC-490 Item Definition: The TAC-490 is an air-conditioner remote controller (R/C) unit that intended for use with TADIRAN APPLIANCES, LTD. electronic air-conditioners which contain TAC-400 (ANC), TAC-404 or ATEC-220 electronic controls. The R/C is based on Infra Red (IR) transmission, using a pulse code modulation (PCM) protocol. The TAC-490 transmits A/C control and timer programming commands, as defined on the remote controller display, to the air-conditioner control unit via an IR transmitter. The TAC-490 transmits Beacon commands to refresh the air-conditioner operation status. The TAC-490 is composed of: case, PCB assembly, 11 buttons, Liquid Crystal Display (LCD), temperature sensor, battery compartment cover (with two "AAA" alkaline batteries), front sliding cover, IR transmission element, 7-position DIP switch and wall-mounting clip. Figure 1: TAC-490 R/C Buttons Identification and Location T I M E R S E T C L E A R S E N S E R O O M D E L AY C L O C K WIRELESS DIGITAL REMOTE CONTROLLER START STOP 1 2 3 SLEEP DAILY MODE FAN SWEEP 2 SELECT LCD THERMISTOR 1 UP 3 DOWN 4 ON/OFF 7 TIMER 5 SET 6 CLEAR 11 SENSE HERE 8 DELAY 10 TIME SET 9 ROOM
  • 13. TAC-404 12 Thefollowingtablelists theTAC-490 R/C buttons, by function, switch designation and location: Button Function Switch Designation Symbol Location On/Off 4 Front face Up/Down 1 (Up), 3 (Down) Upper right side Select 2 (SEL) Upper left side Timer Set 5 Time Under front sliding cover Timer Clear 6 Clear Under front sliding cover Timer Mode Start / Stop 7 Set Under front sliding cover Delayed On/Off (D.O.O) 8 + 1 Under front sliding cover Room Temperature 9 Room Under front sliding cover Digital Clock Set 10 Clock Under front sliding cover Sense Here (local sense) 11 Sense Under front sliding cover TAC-490 Performance: The TAC-490 R/C deliver the following functions: ® Transmit IR control commands to the A/C electronic control as a function of operator input. ® Display R/C operational status, room temperature, clock, timer programming, low battery status, transmission indication. ® Monitor A/C operation by automatic transmission of periodic Beacon informational updates. ® Sense the ambient local temperature and display in either ∞C or ∞F as defined by DIP Switch 4 setting. Temperature display is accurate to within 0.5∞C/1°F and updated each 30 sec. In power up the R/C default will be 23∞C or 73∞F. ® Provide a time clock, accurate to 1 min. per month. In power up the R/C default will be 00:00 or 12:00 as defined by DIP switch 4. ® Provide three separate A/C operation timers (only one timer if programmed to ATEC mode). ® The TAC-490 R/C IR transmission properly received by the TAC-460 display at a distance of up to 7m. ±15∞ off-center Transmission. TAC-490 Environmental Conditions: The TAC-490 R/C withstand: ∑ Operating temperature range: -10∞C to 65∞C (50°F to 149°F) ∑ Storage temperature range: -20∞C to 80∞C (68°F to 176°F) ∑ Impact of a 0.8m drop on concrete. ∑ Vibration: 0.8mm Amp. At 50Hz 2min per cycle. ∑ Thermal shock - from 10∞C to 65∞C (50°F to 149°F), in a 20 minute cycle, and vice versa. ∑ Humidity - 90% relative @ 25∞C (77°F). ∑ ESD - IAW IPC801 - 2 level 3. ∑ Radiated Electromagnetic Field - 3V per 1m.
  • 14. TAC-404 13 TAC-490 First Powering / Power Recover (after memory contest lost): When the TAC-490 powered at the first time or recovers from long power failure (for example: the batteries were removed and the new batteries were replaced after few minutes, what caused the memory contest to be lost) it will recover its default setting (as defined by the DIP switches settings): The R/C is recovering in Temperature Mode. Section Status Fan Auto Mode Auto Sweep (if applicable) Off Energy (if applicable) Auto Timers Off Set Point (S.P.) 23∞C/73∞F (according to DIP switch 4 setting) R.T.C (Real Time Clock) 00:00/12:00 (according to DIP switch 4 setting) Sense Here (Local Sense) Off DELAY (Delay On/Off) Off * For short power brakes (usually up to 2 minutes), the R/C save all programmed settings. It is recommended to replace the R/C batteries when the battery 'Low Battery' indicator appear. TAC-490 R/C Operational Functions Description: The following Sections describe all the functions executed by the TAC-490 R/C. General: 1) The transmission symbol on the display blinks each time the R/C transmits, both in Send command and in Beacon. 2) The display is divided into different Sections. Each Section is dedicated to the management of certain A/C functions. Each Section contains a group of Symbols, representing the available selection options for the relevant operating functions. The Sections of the display are: a) Digital Clock, b) Low Battery Indicator, c) Transmission indicator, d) Timer(s) start/stop (including sleep) and daily, e) Desired temperature (or Room temperature) indicator, f) Sensor (local sense) active indicator,
  • 15. TAC-404 14 g) Mode Select, h) Fan Speed, i) Sweep (that appear also on models without sweep - due to factory set), j) Energy Level (not in use for TAC-404 A/C models - only in ANC, TAC-400 models). 3) When a given Section is selected for programming, the Section Title turns to reverse video (R/V) and the frame around the currently selected Symbol blinks, enabling selection change within this Section. 4) Any Mode, Fan Speed, Sweep or Energy Level selected Symbol appears with a solid frame. 5) At any given time only one Symbol frame can blink. 6) The R/C transmits a Send command, after releasing the button, on each of the following occasions: ∑ After pressing On/Off button. ∑ After pressing Select button, in On Mode. ∑ After changing Set-Point Temperature by pressing Up-Down Rocker (in Temperature Mode). ∑ After exiting Timer Programming Mode. ∑ After pressing Timer Clear button for 3 sec. ∑ After pressing Up/Down Rocker when acting as Start/Stop respectively, when Sweep Section is selected. ∑ After pressing Digital Clock Set to exit current time setting. ∑ After pressing the Set button in Timer Programming Mode. ∑ After pressing the Delay On/Off button in order to set delay time to Start/Stop. ∑ Whenever a Send command is required. 7) The R/C transmits a Beacon command, on each of the following occasions: ∑ Repeat Off command every 30 min. for the next 24 hours. ∑ Repeat Off command every 6 hr. after the 24 hours. ∑ Repeat any On command every 10 min. ∑ Every 10 min. when any Timer is programmed, including Sleep. ∑ Every 10 min. (5 min. for the TAC-480 R/C) if Sense Here is active. ∑ When ever a Beacon command is required. ∑ Not active (no Beacon) when the R/C is programmed to ATEC mode. 8) Pressing button combination that is not defined will not effect the R/C.
  • 16. TAC-404 15 9) The R/C includes a temperature sensor, and displays the measured room temperature (in Off Mode and when Room Temperature button is pressed in On Mode). The temperature is updated every 30 sec. The temperature (Set Point Temp. or Room Temp.) can be displayed in one of two scales, ∞C or ∞F, according to the selected R/C setup (Dip switch 4). 10) The R/C includes a Digital Clock that displays the current time (default) with the colon blinking at 1 Hz, or a programmed Time (in Timer Programming mode). The time is displayed in one of two formats: a) 24:00 - appears when ∞C is selected for temperature scale display. b) 12:00 - appears when ∞F is selected for temperature scale display. 11) When the battery is low (less than 20% capacity remaining) a blinking Low Battery symbol is displayed. Off Mode: Off mode is defined as the situation when the A/C is Off and the R/C display is in its default Off mode: blank, except for the Digital Clock, which displays the current time, room temperature with the Room Symbol and indicators and the Symbol (1, 2, 3, SLEEP, DAILY) of the active Timer period (only). The room temperature sensing and display is refreshed every 30 sec. Pressing any button (excluding the On/Off and Timer Set and Timer Clear and Room Temp. button) while in Off mode, turns On the R/C display, displaying it’s last setting and enabling the user to program the functions on the display (without turning the A/C on). The R/C memorizes the new setting after the Select button is pressed. The R/C returns to Off mode immediately or 10 seconds after the last button pressing (depends which buttons were pressed), unless the On/Off button has been pressed, which causes the R/C to memorize the new setting, transmit an On Send command and remain in On Mode. The R/C transmit an Off mode beacon every 30 min. in the next 24 hours after it was turned Off to assure A/C will go Off even if there was power failure during setting the R/C to Off mode (after 24 hours, the R/C transmit an Off beacon every 6 hours). On Mode: On mode is defined as the situation when the R/C display is in its default On mode, displaying all Symbols and titles (excluding either Energy Level or Sweep Symbols, according the R/C setup), with the previously selected Symbols displayed with frames: Fan speed, Selected Sweep status (Swing or Static, if Sweep mode set on), Energy level (if Energy mode set on), Mode, Digital Clock, Set point temperature (the Set Point Temperature display replaces the Room Temperature and the Room Symbol disappears), and Timer indicators (of active timer periods).
  • 17. TAC-404 16 On Mode contains two sub-modes: a) Temperature Mode (default): In Temperature mode all the symbols are displayed, and the active Symbol is framed. Pressing the Up/Down Rocker in this mode, increases (Up) or decreases (Down) the Set Point Temperature by 1∞ (∞C or ∞F according to R/C DIP switch 4 setup). Each Set Point change causes the R/C to transmit Send command. b) Select mode: Pressing the Select button causes the R/C to enter Select Mode, turning the Title to R/V sequencing the active Section, the frame around the active Symbol blinks. Pressing the On/Off button, while in On mode, causes the R/C to transmit an Off command, exiting On Mode turns the R/C to Off Mode. On/Off Button: Pressing the On/Off button when the R/C is in Off mode, turns the R/C to On Mode: displaying all Symbols (excluding Energy or Sweep Symbols, according to the R/C setup, and the Transmission Indicator). The previously selected Symbols are displayed with frames (default On display), and the R/C transmits an On Send command (turning the A/C on). The first pressing of the On/Off button within 10 seconds after any change of the R/C setting will cause the R/C to memorize the setting and transmit an On Send command, and remain in On mode. Pressing the On/Off button when the R/C is in On mode transmits an Off Send command (turning the A/C off), and returns the display to Off mode. Up/Down Rocker: The rocker, mounted on the right side of the R/C, contains two directional push-buttons - Up and Down (pressing both buttons simultaneously will not affect the R/C): In Temperature mode (default), the rocker sets the Set Point Temperature from 12∞C to 32∞C (54∞F to 90∞F). Momentary pressing of the Up button raises the Set Point Temperature by 1∞ (°C or °F) and transmits a Send command. Continuous pressing of this button causes the Set Point Temperature to scroll up at a rate of 4∞ (°C or °F) per sec (useful when large Set Point increase required). Releasing the Rocker transmits a Send command. Momentary pressing of the Down button lowers the Set Point Temperature by 1∞ (°C or °F) and transmits a Send command. Continuous pressing of this button causes the Set Point Temperature to scroll down at a rate of 4∞ (°C or °F) per sec (useful when large Set Point decrease required). Releasing the Rocker transmits a Send command.
  • 18. TAC-404 17 In Select mode, the Rocker sequences a blinking frame around the active Symbol enabling the selection of a new active Symbol. Pressing Up scrolls the blinking frame up to the next Symbol in a cyclic manner. Pressing Down scrolls the blinking frame down to the next Symbol in a cyclic manner. Select Button: Pressing the Select button sequences the active Section, causing the Section Title to appear in R/V and the frame around the active Symbol in the current Section to blink. Each pressing of the Select button causes the active Section to sequence to the next Section, in the following order: Temperature ( default ), Fan, Sweep (depending on the R/C mode setting) Energy (depending on the R/C mode setting) and Mode, in a cyclical manner. Each pressing of the Select button memorizes the current setting and causes a Send command transmission. The R/C returns to temperature mode 10 sec. after the last pressing of one of the Up/Down or Select buttons, returning to the previous setting after the last Select button press. Changing the Fan Speed: Starting from Temperature mode, pressing the Select button turns the Fan Title to R/V, displays a blinking frame around the currently selected Fan Speed (Low, High, Turbo or Auto). Pressing the Up or Down Rocker push-button, scrolls the blinking frame of the selected Symbol. Pressing the Select button causes transmission of a Send command of the new selected Fan Speed (only if it was changed), and memorizes the updated setting. The currently selected Symbol frame stops blinking, the Sweep or Energy title turns to R/V (according to R/C setting) and the frame around the selected Energy or frame around the Sweep Symbol begins to blink. Also, the first pressing of the On/Off button within 10 seconds after any change of the R/C setting will cause the R/C to memorize the setting and transmit an On Send command. * Whenever the R/C is set to Dry Mode the Fan Speed shall be set to Low without option for change. Controlling Sweep Operation (Sweep Mode set on by DIP switch 5): Starting from Temperature mode, pressing the Select button twice turns the Sweep Title to R/V and displays a blinking frame around the Sweep Symbol/Section. Pressing the Up Rocker push-button transmits an On Sweep Send command, causes activation of automatic, continuous Sweep, as indicated by sequential segment lighting of the Sweep Symbol. Pressing the Down Rocker push-button transmits an Off Sweep Send command, and turns off the Sweep indicator sequential movement keeping the A/C louver at its present position
  • 19. TAC-404 18 Pressing the Select button memorizes the updated setting. The currently selected Symbol frame stops blinking and the Energy Title turns to R/V (if The R/C is set to Energy type). The Select Mode Title turns to R/V and a frame around the currently selected Mode blinks. Also, the first pressing of the On/Off button within 10 seconds after any change of the R/C setting will cause the R/C to memorize the setting and transmit an On Send command. The Sweep section is not displayed if the R/C is not set to Sweep configuration (the factory set for models without SWEEP is with DIP switch No. 5 in OFF position, so SWEEP is always available on the R/C display). Changing Energy Mode (Energy Mode set on by DIP switch 6): This mode is not available for all TAC-404 models (useful only for TAC-400, ANC models). Starting from Temperature mode, pressing the Select button two or three times turns the Energy Title to R/V, displays the relevant Energy Symbol segments according to the current setting (1/3, 2/3, full ring, Auto). Pressing the Up or Down Rocker push-button, scrolls the ring segments of the Energy Symbol (1/3, 2/3, full ring, Auto). Pressing the Select button causes transmission of the new selected Energy volume (only if it was changed), and memorizes the updated setting. The currently relevant Energy Symbol segments, or Auto stops blinking. The Energy section is not displayed if the R/C is not set to Energy configuration (when DIP switch 6 is on as in all TAC-404 models). Changing A/C Operating Mode: Starting from Temperature mode, pressing the Select button two, three or four times (according to the R/C setting, with or without Sweep and with or without Energy) turns the Mode Title to R/V, and displays a blinking frame around the currently selected Mode Symbol (Cool, Heat, if the R/C is not set to Cool Only Mode ( DIP switch 7) , Dry, Fan, Auto). Pressing the Up or Down Rocker push-button, scrolls the blinking frame of the selected Mode Symbol. Pressing the Select button causes transmission of the new selected Mode volume (only if it was changed), and memorizes the updated setting. The currently selected Symbol frame stops blinking and the R/C returns to Temperature mode. Also, the first pressing of the On/Off button within 10 seconds after any change of the R/C setting will cause the R/C to memorize the setting and transmit an On Send command.
  • 20. TAC-404 19 Buttons Under the Front Sliding Cover Setting Timer Periods: 1. Three Timer periods (numbered 1, 2, 3) and Sleep function period are available for programming (in ATEC mode only timer 1 is available). Each Timer Period can be programmed to start and stop at a given time with selected A/C function settings. 2. The Timer Programming mode is entered by pressing the Timer button. Pressing it again within 10 sec. from the first pressing in this mode, transmits the current programmed Timer period. If no timer have been set (within 10 sec.), the R/C exits to Temperature mode. 3. Starting from any mode, pressing the Timer button causes the R/C to enter Timer Programming mode, displaying the timer symbol, the 1st Timer Period Indicator "1", and the word "START" blinks. Only if any of the Timer period was set, its indicator shall light. The Timer Clock replaces the Digital Clock and the clock display blinks with dashes (--:--). If the timer period was not programmed, or the programmed "STOP" time is equal to its "START' time, the Timer Clock will blink with the following display: (--:--). 4. In Timer Programming mode, pressing the Up push-button momentarily advances the displayed time by 10 min. Pressing it continuously advances the displayed time by 10 min. increments at a rate of 40 min. per sec. Pressing the Down push-button momentarily reverses the displayed time by 10 min. Pressing it continuously reverses the displayed time by 10 min. increments at a rate of 40 min. per sec. 5. Pressing the Set button causes the R/C to memorize the current Timer Period setting with its operating selected setting, and to transmit this program according to the relevant Send command protocol (for ATEC-220H type, the R/C transmits the time difference between the programmed time and the current time in half an hour period), and exiting the Timer Programming mode setting. 6. Pressing the Up or Down Rocker push-button within 10 sec. after the first Timer pressing, sets the 1st Timer Period Start Time. 7. Pressing the Timer push-button again causes the R/C to transmit via Send command the programmed start time, causing the word "START" to disappear, and the word "STOP" to blink. 8. Pressing the Up or Down Rocker push-button again (within 10 sec.) sets the 1st Timer Period Stop Time.
  • 21. TAC-404 20 9. Pressing the Timer push-button again (within 10 sec.) causes the R/C to transmit via Send command, the programmed Stop time, the 1st Timer Period Indicator "1" to stay on, and the 2nd Timer Period Indicator "2" to blink with the "START" indicator. 10. The Timer Period setting process may now be repeated for the 2nd and 3rd Timer Periods, and Sleep function. 11. Daily - pressing the Set button for 3 sec. (in Timer Programming mode) causes the current Timer Period to be repeated daily and the Daily indicator to be displayed. Releasing the Set button causes Send command transmission. When a Daily Timer period is active the Daily indicator is displayed. A second press (less then 3 sec.) on the Set button shall cause the R/C to exit the Timer Programming mode. 12. The R/C displays the timer period in the following manner: ∑ When the R/C is in On Mode and one of the Timer periods is set to STOP, the word "STOP" is displayed + the relevant Timer period. ∑ When the R/C is in Off Mode and one of the Timer periods is set to START, the word "START" is displayed + the relevant Timer period. ∑ When the R/C is in Off Mode the Sleep "START" period is displayed (but if only Sleep STOP period is programmed, without Sleep START period, the Sleep period will not be displayed in Off Mode). 13. Sleep Timer is the forth Timer period that marked SLEEP. When SLEEP is active, the desired temperature is updated while the customer sleep. The room air temperature gradually rises (in COOLING mode) until this Timer period is exited. At the end of SLEEP Timer period, the desired temperature returns to its previous settings. Clearing a Programmed Timer Period: Pressing the Timer Clear button momentarily while in Timer Programming mode, deactivates the selected Timer period, and transmits the updated Timer setting. Pressing the Timer Clear button continuously for 3 sec., deactivates all the programmed Timer periods, and transmits the updated Timer setting.
  • 22. TAC-404 21 Delayed On/Off (D.O.O.) - Delay: The Delay On/Off is a quick and easy to set timer for setting the A/C On or turning it Off in a delay time (if the R/C is in On Mode it shall set time to stop and if the R/C is in Off Mode it shall set the time to Start). Pressing the DELAY button in On mode, converts the display to Timer Programming mode, in which the Timer title and Timer period no.3 (or no. 1 when programmed to ATEC mode) are displayed and the word "STOP" blinks. The current time is replaced by the DELAY time, which is the current time +1 hr (-9 min.). The R/C enters Off mode at the DELAY time displayed. Repeated pressing of the DELAY button during DELAY operation, adds 1 hr. per pressing to the remaining DELAY time and causes the updated DELAY stop time to be displayed. The Display recovers to its previous state 5 sec. after the last DELAY button pressing. Timer period no. 3, "STOP" and Timer title remain lit on the Display. Pressing the DELAY button in Off mode, converts the display to Timer Programming mode, in which the Timer title and Timer period no.3 are displayed and the word "START" blinks. The current time is replaced by the DELAY time, which is the current time +1 hr (-9 min.). The R/C enters On mode at the DELAY time displayed. Repeated pressing of the DELAY button during DELAY operation, adds 1 hr. per pressing to the remaining DELAY time and causes the updated DELAY start time to be displayed. The Display recovers to its previous state 5 sec. after the last DELAY button pressing. Timer period no. 3, "START" and Timer title remain lit on the Display. Each pressing of the DELAY button causes the transmission of an On or Off Send command. When the DELAY timer is active the R/C will transmit Beacon command each 10 min. Room Button: Pressing the Room button, in On Mode, displays the Room Temperature, as measured by the R/C sensor, replacing the Set Point Temperature display, and the Room Temperature indicator. The display stays on for 5 (to 7) sec. after the button is pressed. The Room Temperature display refreshed every 30 sec. Sense Here Button: Pressing the Sense Here button activates the Sense Here mode, in which the R/C transmits the room temperature (instead of TH-1), as sensed by the R/C sensor, via Beacon commands each 10 min. The Room Temperature indicator blinks during Sense Here mode. Pressing the Sense Here button again causes the R/C to exit the Sense Here mode. If the A/C to not receive Sense Here Beacon commands for 12 min. he start using the TH-1 instead.
  • 23. TAC-404 22 Digital Clock Setting button: The Digital Clock can be set to the correct time when the R/C is in Off mode, or in On mode. Pressing the Digital Clock Setting causes the R/C display to clear, with only the Digital Clock Displayed and the min. on the Digital Clock display blinking. Pressing the Up or Down button momentarily advances or reverses the displayed min. respectively in 1 minute steps. Pressing these buttons continuously advances or reverses the displayed min. in 1 min. increments, at a rate of 4 min. per sec. Pressing the Select button causes the min. display to remain on, and the hr. display to blink. Pressing the Up or Down button momentarily advances or reverses the displayed hr. respectively in 1 hr. steps. Pressing these buttons continuously advances or reverses the displayed hr. in 1 min. increments, at a rate of 4 hr. per sec. Pressing Select again toggles between the min. and hr. display. Pressing the Digital Clock Setting button with a sharp-pointed object again will cause the R/C to transmit the appropriate Send command (On or Off), exit the Digital Clock setting mode and return to its previous operation mode (On or Off). The Digital Clock set (to the correct time) do not reset the Timers (except the Timers that their operation time has "expired"). Changing A/C ID Code: Pressing the Room button + Select buttons for 3 sec. causes a single transmission of the special ID code (see explanation about DIP switch 3 function). With each such transmission, the ID code toggles between the default and the alternative code. Application: to prevent two near A/C to be effected by each other R/C. Display Reset & Test: Pressing the Room button + Sense Here buttons for 3 sec. causes the display to turn On all the display elements for 3 sec. (and then the display turn Off). This action will reset all display settings (Timers, Digital Clock etc.). Quick DIP Switches Resetting: If you wish to make a quick DIP switches resetting (with no need to remove the batteries): 1. Remove the battery compartment cover, and remove the plastic DIP switches protective cover. 2. Set the DIP switches to the required positions (see: "Setting the DIP Switches to Their Special System Characteristics"). 3. Press the Room button + Sense Here buttons for 3 sec. 4. Return the battery compartment cover and the DIP switch protective cover to their proper position.
  • 24. TAC-404 23 Seven-Position DIP Switch: 7-DIP Switches are located under the battery compartment cover. A pointed-tip object is used for setting these switches. The R/C senses the setting of these switches every time it is turned On (after the last memory contents was totally lost). The settings on these switches is made by using a pointed tip and determines the transmission protocol used by the R/C (see the following table that contains (partial) instructions for setting the different R/C communication codes, and see also: Setting the DIP Switches to Their Special System Characteristics). Remote Controller Seven DIP Switches (partial) Code List: Function DIP Switch No. 1 2 3 4 5 6 7 ATEC-220 w/o Sweep + ∞C (Default Code) OFF OFF ON OFF ON ON OFF ATEC-220 w/o Sweep + ∞C (Alternate Code) OFF OFF OFF OFF ON ON OFF ATEC-220 + Sweep + ∞C (Default Code) OFF OFF ON OFF OFF ON OFF ATEC-220 + Sweep + ∞C (Alternate Code) OFF OFF OFF OFF OFF ON OFF ATEC-220 w/o Sweep + ∞F (Default Code) OFF OFF ON ON ON ON OFF ATEC-220 w/o Sweep + ∞F (Alternate Code) OFF OFF OFF ON ON ON OFF ATEC-220 + Sweep + ∞F (Default Code) OFF OFF ON ON OFF ON OFF ATEC-220 + Sweep + ∞F (Alternate Code) OFF OFF OFF ON OFF ON OFF TAC-404 w/o Sweep + ∞C (Default Code) ON OFF OFF OFF ON ON OFF TAC-404 w/o Sweep + ∞C (Alternate Code) ON OFF ON OFF ON ON OFF TAC-404 + Sweep + ∞C (Default Code) ON OFF OFF OFF OFF ON OFF TAC-404 + Sweep + ∞C (Alternate Code) ON OFF ON OFF OFF ON OFF TAC-404 w/o Sweep + ∞F (Default Code) ON OFF OFF ON ON ON OFF TAC-404 w/o Sweep + ∞F (Alternate Code) ON OFF ON ON ON ON OFF TAC-404 + Sweep + ∞F (Default Code) ON OFF OFF ON OFF ON OFF TAC-404 + Sweep + ∞F (Alternate Code) ON OFF ON ON OFF ON OFF * For COOLING Only A/C models, DIP Switch No. 7 is set to On always (HEAT mode is not displayed on the R/C LCD).
  • 25. TAC-404 24 Setting the DIP Switches to Their Special System Characteristics: DIP Switches No. 1 & 2 should be set as follows: Electronic Control Type SW1 SW2 ATEC OFF OFF TAC-404 ON OFF DIP Switch No. 3 should be set as follows: I.R Transmission Code TAC-404/TAC-400 ATEC Alternate Code * ON OFF (JP-4 Removed) Default Code OFF ON (JP-4 Installed) For ATEC models, you must remove JP-4 (Jumper 4) on the Electronic Control. For TAC-404 models you must transmit a special command to the A/C by simultaneously pressing on the ROOM and the upper left (Select ) buttons. The 3-position switch (on the display) of the other A/C must be in the OFF position, to prevent it from being programmed, too. For TAC-404/TAC-400 models, 5 beeps are sounded to acknowledge that the A/C is programmed for the alternate transmission code. DIP Switch No. 4 should be set as follows: Temperature & Clock SW4 ∞F + 12:00 (PM) ON ∞C + 24:00 OFF DIP Switch No. 5 should be set as follows: Sweep SW5 Sweep OFF ON Sweep ON OFF Note: The factory set for ANL-S and GNL-S (models without SWEEP) is with DIP switch No. 5 in OFF position (SWEEP is always available on the Remote Controller display for TAC-404 models). DIP Switch No. 6 should be set as follows: Energy (TAC-400 only) SW6 Energy OFF ON Energy ON OFF Note: This DIP switch is set to OFF position only for TAC-400 (ANC) models. DIP Switch No. 7 should be set as follows: Cooling Only SW7 Heat Pump OFF ON Heat Pump ON OFF Setting the DIP switches: 1. Remove the battery compartment cover, and remove the batteries. 2. Remove the plastic DIP switches protective cover. 3. Set the DIP switches to the required positions. 4. Wait approximately 3 minutes (15 minutes if necessary) and return the batteries to their proper position. (see also: "Display Reset & Test" for quick DIP Switches Resetting.)
  • 26. TAC-404 25 System General Operation Description: This chapter is designated for the wide understanding of the system general operation (useful for nun-technical personnel). For detailed information about routines functions, see: "Routines Detailed Functional Description". 1. Operation Routines: The TAC400 and TAC404 are using the same algorithms that enable proper operation of the Air Condition at large envelope environmental conditions. The Routines software controls the A/C performance. 1.1 Operating in Cool Mode: Turning the A/C On to Cool Mode will cause the following actions: 1.1.1 Indoor Fan Motor Operation: Turning the A/C On in Cool Mode will set the Indoor fan on at the requested Fan speed (Low, High or Turbo), as it been set on the R/C. The Indoor Fan speed can vary according to the operator desire. When the Indoor Fan is set to operate at Auto Speed, the Fan will operate according to the following chart: Low High Turbo SP +1.5 +3 +4.5 Note: The Low speed entry is automatically preceded with a very short run at turbo speed. In Auto setting - the fan motor speed depends on the room temperature as measured by the TH-1 thermistor or derived from the Beacon signal (as received from the R/C).The Indoor Fan motor switch to lower speeds without any delay based on the TH-1, but once set, can not be increased for the 2 min. delay time (This delay is cancelled when the manual setting is used). 1.1.2 The A/C will perform a pressure release routine (PRR) where the control will activate and deactivate the 4 Way-Valve. The PRR takes up to 10 Sec. Then the A/C turns the compressor on.
  • 27. TAC-404 26 1.1.3 Compressor – The Condensing unit begin to operate after the PRR ended. Note: The Condensing unit operates for at least 3min., even if the room temperature is satisfactory after less than 3 min., to prevent short operation cycles. 1.1.4 Outdoor Fan Motor operation – The Outdoor Fan starts to operate in medium speed after the PRR ended for a minimum time of about 2 min. after then the Outdoor Fan motor speed will vary according to the condenser (outdoor) coil temperature (as measured by TH-3 sensor). Note: 1. Since most TADIRAN A/C’s are 3 speed Outdoor Fan Motor – High, Medium & Low, it is most important to make sure that the Fan is wired correctly. 2. The Out Door Fan speed varies in accordance with the outdoor coil temperature: when the temperature rises the Fan will increase its speed and vise-versa. Each speed change is executed no less then 2 min. after the last change. 3. Night state – whenever the Electronic Control senses low ambient (especially at night), it reduces the fan speed to reduce noise level. 1.1.5 Temperature brake: When the Electronic Control senses that the room temperature is satisfactory – reached the selected/desired Set Point temperature - via the TH-1 sensor or the Beacon signal (using the Auto Sense sensor that located on the R/C), its stops the A/C condensing unit for minimum time brake of 5min., but not more then 15min. At that time, the Indoor Fan Motor continues working. During the Temperature brake, the compressor (COMPRES) indicator turns Off, at the end of the first 5 min., and then it begins to flash, until the Electronic Control sense temperature demand (via TH-1 or Auto-Sense sensor) or the 15min., max time brake is up. Note : 1. If there was no temperature demand at the end of the maximum time brake the unit will turn on for a period of at least 3min. (to ventilate the room air). 2. During temperature brake, any change of operation mode that as been made, by the operator via the R/C, will cause the A/C to perform Pressure Release Routine (PRR) and to return to work in the new operation mode requested. 3. During the first 5min., of the temperature brake, manual changing (by R/C) of the Set Point temperature, will (can) effect the A/C brake before the 5 min. time is up, so the A/C can be switched to On before the minimal time brake (5 min.), using the PRR.
  • 28. TAC-404 27 1.1.6 Sleep Routine – The Electronic Control enables the user to operate an automatic routine that changes the desired temperature. This routine as been designed to enable the user to increase the Set Point while sleeping when the body temperature decreases. This routine works as described in the 'SLEEP ROUTINE' for Cool Mode & Dry Mode. Note: At the end of sleep function the A/C return its original Set Point and do not stop the A/C operation. 1.1.7 Special functions: Indoor Ice prevention – whenever the Electronic Control senses ice accumulation on the evaporator (indoor) heat exchanger, it runs a melting procedure. The ice detection is based on the TH-2 temperature. The Electronic Control turns the Outdoor Fan Motor Off, causing the system to rise the evaporator temperature (and melt the accumulated ice). The Outdoor Fan Motor is halted for (maximum of) 90 sec. or until the indoor coil temperature raise again. Low Pressure – whenever the Electronic Control senses low capacity of the A/C (based on an insufficient temperature differential (TH-1)-(TH-2) due to lack of gas in the system.), it stops the A/C operation with the POWER indicator flashes and the PRESSURE indicator will light (this combination signal Low Pressure). Over (High) Pressure – Whenever the control senses High Pressure (Over Pressure - OVP) on the condensing unit (by means of TH-3 temperature), it stops the A/C with the POWER & PRESSURE indicators flashing (this combination signal High Pressure). Recovery from the OVP fault is done by sending Off to system and re-entry to On by mean of TAC-490 R/C or 3-position slide switch. When the recovery done by the 3-position slide switch, all flags, LEDs etc. are reset. When the recovery done by the R/C, it cancel the POWER LED flash, but the PRESSURE fault LED remain lit. Note: In order to perform an Over Pressure routine, the condensing temperature sensor (TH-3) must be connected else the A/C will drive the outdoor fan motor constantly at high speed. Night State Routine – In order to reduce outdoor unit noise, the control changes the outdoor fan motor speed to low when the local ambient temperature enables it.
  • 29. TAC-404 28 1.2 Operating in Heat Mode: Turning the A/C On to Heat Mode will cause the following actions: General description: The A/C is design for operation in Heat Mode to maintain the room temperature between the Set Point and Set Point - 1°C (Set Point minus one Celsius degree). In order to do so, the A/C change the gas circulation direction, so the evaporator will be hot and the condensing unit will be cool. Reasons why the A/C stop working (except reaching desired Set Point - temperature brake): ∑ If the condensing unit is blocked with ICE, then the A/C will perform a De-Ice routine. ∑ When the unit does not get a satisfactory efficiency - low Heating capacity (based on an insufficient temperature differential (TH-2)-(TH-1) due to lack of gas in the system.), it stops the A/C operation and will indicate unit failure. 1.2.1 Indoor Fan Motor - Turning the A/C On in Heat Mode will set the Indoor fan on at the following manner: ∑ The Fan will turn On to the selected speed after 10-20sec., or when the Indoor coil temperature reaches the temperature of 45°C/113°F. The Indoor Fan Motor speed can varies according to the operator desire. ∑ When the Indoor Fan Motor is set to operate at Auto Speed the Fan will operate according to the following chart: 1.2.2 Low High Turbo SP-1.5-3-4.5Temp.0 C
  • 30. TAC-404 29 Note: In Auto setting - the fan motor speed depends on the room temperature as measured by the TH-1 thermistor or derived from the Beacon signal (as received from the R/C). The Indoor Fan motor switch to lower speeds without any delay based on the TH- 1, but once set, can not be increased for the 2 min. delay time (This delay is cancelled when the manual setting is used). 1.2.3 The A/C will perform a pressure release routine (PRR), where the control will activate and deactivate the 4 Way Valve. The PRR takes up to 10 Sec. The PRR is used to discharge the system pressure build during compressor run. Failure to do so, may trip the compressor to over-load (protection) during the start-up trial (only if the start-up happens less than 5 minutes after the last compressor run). This routine is used only for the first entry to the Heat mode or upon power return following a power brake (Quick restart trial in Heat Pump models). Switching between modes require this routine each time the mode is re-entered. Then the A/C turns the compressor on. 1.2.4 Compressor – The Condensing unit begin to operate after the PRR ended. Note: The Condensing unit operates for at least 3min., even if the room temperature is satisfactory. This cycle is for preventing short operation cycle of the A/C. 1.2.5 Outdoor Fan Motor operation – The Outdoor Fan Motor starts to operate in medium speed after the PRR ended for a minimum time of about 2 min. Afterwards, the Outdoor Fan Motor speed will vary according to the indoor coil temperature (by means of the TH-2 temperature). Note: 1. Since most TADIRAN A/C’s are 3 speed Outdoor Fan Motor– High, Medium & Low, it is most important to make sure that the Fan Motor is wired correctly. 2. The Outdoor Fan Motor speed varies according to the indoor coil temperature when the temperature rises the Fan will decrease its speed and vise-versa. Each speed change is executed no less then 2 min. after the last change. 3. If there is no demand for heating, the unit will not start! For e.g., if the room temperature is 20°C/68°F and the Set Point is 16°C/61°F.
  • 31. TAC-404 30 1.2.6 Temperature brake: When the Electronic Control senses that the room temperature is satisfactory – reached the selected/desired Set Point temperature - via the TH-1 sensor or the Beacon signal, using the Auto Sense sensor (located on the R/C), its stops the A/C condensing unit for minimum time brake of 5min., but not more then 15min. At the same time, the Indoor Fan, Outdoor Fan and the compressor turns Off but the 4way valve remain On. During the Temperature brake the Compressor indicator turns Off after 5 min., and if there is no temperature demand, it begins to flash until the control sense temperature reaches Set Point - 1°C/2°F (Set Point minus one Celsius degree or minus two Fahrenheit degree), via TH-1 or Beacon signal (Auto-Sense sensor), or the 15min., max time brake is up. Note : 1. If there was no temperature demand at the end of the maximum time brake the unit will turn on for a period of at least 3min. (to ventilate the room air). 2. During temperature brake, any change of operation mode, via the R/C, will cause the A/C to perform Pressure Release Routine and to return to work in the new operation mode requested. 3. During the first 5min., of the temperature brake, changing of Set Point will effect the A/C brake before the 5 min. time is up. 4. When the A/C is high wall type, the Electronic Control compensate the location of return air sensor by adding 6°C/11°F to the measured temperature. 5. When turning the A/C Off in Heat mode, the Reverse Valve remains On for additional 2 min. (this prevent the unit self pressure release noise). 1.2.7 Sleep Routine – The control enables the user to operate an automatic routine that changes the desired temperature. This routine as been designed to enable the user to decrease the Set Point when the body temperature decreases. This routine works as described in the 'SLEEP ROUTINE' for Heat Mode.
  • 32. TAC-404 31 1.3 Operating in Dry Mode Dry mode is basically a version of Cool Mode but with indoor fan motor working at low speed only. The idea behind it is to reduce maximal humidity by compromising the efficiency of the A/C. The system operate at same manner as in Cool mode. Note: When there is temperature brake in the Dry mode, the indoor fan motor is stopped! 1.4 Operating in Auto Mode: 1.4.1 Setting the A/C, via the R/C, to operate in Auto Mode causes the A/C to select automatically its operation mode. The control will decide its operation mode in accordance with the following table (see also 'CONDITIONING ROUTINE'): Operation Condition Cool Heat Last operation Cool, Dry, Fan or TH-1>SP+1°C/2°F On Off Last operation Heat or TH-1<SP-1°C/2°F Off On 1.4.2 Setting the A/C to Auto Mode via the 3-position slide switch, will create the same function as it was set by the R/C, but with a default Set Point temperature of 22°C/72°F. Indoor fan motor will work in Auto and all timer functions will be disabled. 1.5 Power Fail protection: TADIRAN control is programmed to protect the A/C condenser against many types of power failures. In those cases the A/C operation will be stopped, until the power will stabilize and then the A/C will be turned On again to its last operation setting. ∑ “Short” Power Failure – When the line power fails for less then 20mSec., the Electronic Control will ignore the power interference and will continue proper operation of the A/C. ∑ “Long” Power Failure – When the power fails for more then 20mSec., the A/C will return to work 20 Sec. after the recovery of the power.
  • 33. TAC-404 32 ∑ Line Low Voltage Failure (Protection) – The control is programmed to stop all A/C operation each time it senses Low line voltage (different values for Rotary compressors or Reciprocating & Scroll compressors, as defined by DIP switch 2). The Electronic Control will recover to its normal operation when it will sense a 20 Sec. of continuous normal line voltage. If the power failure continue, the Electronic Control stops all A/C operation with the indication of POWER & IMPEDANCE indicators flashing and the COMPRES indicator lit. ∑ Start-Up Power Failure – During compressor start-up, the Electronic Control tests the line power in order to prevent the power to fail under the compressor manufacturer specifications. When the line power falls under the compressor allowed limits, the Electronic Control will stop the A/C operation for 20Sec., and will retry to start (restart) the unit again. If the A/C fails to restart 5 times in sequence, the A/C will stop immediately. Recovery from the Power failure is done by sending Off command to the unit and re-entry to On (by mean of the R/C or the 3-position slide switch). ∑ Line Over Voltage Failure (Protection) – The control is programmed to stop all A/C operation each time it senses High line voltage (different values for Rotary compressors or Reciprocating compressors, as defined by DIP switch 2). The Electronic Control stops all A/C operation with the indication of POWER indicator flash and the COMPRES & IMPEDANCE indicators lit. 1.5.1 Special functions: ∑ Filter Clean Indicator - A FILTER clean indicator is placed on each display. The indicator lights after 250 hours of A/C operation, to alert the user that the filter(s) require cleaning. After cleaning the filter(s), in order to clear (set off) the FITER indicator, the user should set the 3-position slide switch (on the display) to Off for 2-3 sec. (at least). ∑ Outdoor De-Ice – whenever the Electronic Control senses ice accumulation on the condensing (outdoor) heat exchanger unit, it runs melting procedure.
  • 34. TAC-404 33 ∑ The procedure works as follow: One. The indoor fan motor stops, Two. The A/C stops all Heat Mode functions and switch, via PRR, to Cool mode where the 4 way valve turns the gas cycle as in the Cool mode, so now the hot condenser (outdoor) coil begin melting the ice. This process will continue until the condenser coil temperature rise above 20_C/68°F or 10min. (at the most) after the process begins. Three. At the end of the process, the unit recovers to the Heat mode operation, again via the PRR. Four. The Defrost process is in cycles, when each cycle period depends on the condensing (outdoor) unit coil temperature. The detection process counts for time temperature development. The detection process start when TH-3 temperature falls below +3°C/37°F. Then, the Electronic Control start counting time. If the temperature rise back to the +3°C/37°F, before the ice has been detected, the De-Ice process is canceled. ∑ Low-Pressure – whenever the Electronic Control senses low Heating capacity of the A/C (based on an insufficient temperature differential (TH-2)-(TH-1) due to lack of gas in the system), it stops the A/C operation and will indicate unit failure. ∑ Over (High) Pressure – Whenever the control senses High Pressure (Over Pressure - OVP) on the indoor unit (by means of TH-2 temperature), it stops the A/C with the POWER & PRESSURE indicators flashing (this combination signal High Pressure). Recovery from the OVP fault is done by sending Off to system and re-entry to On by mean of TAC-490 R/C or 3-position slide switch. When the recovery done by the 3-position slide switch, all flags, LEDs etc. are reset. When the recovery done by the R/C, it cancel the POWER LED flash, but the PRESSURE fault LED remain lit.
  • 35. TAC-404 34 2 The Electronic Control structure: TADIRAN Electronic Control is based on two main parts: Main unit named TAC-444 and Display Assy named TAC-460XX when the XX stands for the type of A/C its fits to, for example: TAC-460GF means that the display fits to all GFL-S A/C family. The main unit is same unit for all type of A/C whether its ANL, TNL or GFL. The display unit contains the operation logic that runs the A/C in all operation Mode and via all operation procedures. 2.1 Communication: 2.1.1 The main unit TAC-444 and the Display Assy TAC-460. The control uses communication between these two unit when the main unit supply the data coming up from the A/C, the Display Assy process the data and send operation command to be executed by the main TAC-444 unit. 2.1.2 Data transferred from the Main unit (TAC-444) to the Display Assy (TAC-460): 2.1.2.1 Temperature - the Main unit transfer the temperature measured by the thermistors located at the Return-Air (TH-1), Indoor coil (TH-2) and Out door coil (TH-3). 2.1.2.2 Power – The Main unit measures the power line voltage and transmits it to the Display Assy. 2.1.2.3 Operation feedback – the Main unit transmit operation feedback to the Display Assy, assuring what are the units that are loaded. 2.1.3 Command transferred from the Display Assy (TAC-460) to the Main unit (TAC-444). The Display Assy transfers command to the main unit such as: Operate the A/C accordingly Set the compressor On or turn it Off, set the Indoor fan motor speed to one of its operation speed or turn it Off, set the Outdoor fan motor speed to one of its operation speed or turn it Off & 4 way valve set On or Off. 2.1.4 Communication failure: In case of communication failure the following action will take place: - All A/C loads (fans, compressor & 4 way valve) will turn Off. - The Power indicator will flash – no other indicator will light.
  • 36. TAC-404 35 TAC-404 COOL MODE - Auto Mode Flow Chart AUTO MODE TH1 or Tb < SP+T7 TH1 or Tb < SP+T6 INDOOR FAN ROUTINE Fig. 5E CHANGE MODE ROUTINE Fig. 5D HEAT MODE REQUEST FLAG = 1 ENTRY N Y Y N N Y EXIT TAD5080D.GFC SSW7 T6 T7 0oC -1oC -3oC -4oC Install. UPPER/BEACON LOWER SWITCH TO HEAT MODE Fig. 1 TAC-404 - CONDITIONING ROUTINE COOL MODE 0 1
  • 37. TAC-404 36 TAC-404 HEAT MODE - Auto Mode Flow Chart AUTO MODE D42(2M) DELAY TRIGGER INDOOR FAN LOW SSW7= 1 TH1 or Tb < SP+T3 TH1 or Tb > (SP+T4) D42(2M) RUNOUT TH1 or Tb < SP+T4 D42(2M) RUNOUT D42(2M) RUNOUT INDOOR FAN OFF CHANGE MODE ROUTINE Fig. 6D COOL MODE REQUEST FLAG = 1 N Y ENTRY N Y N N Y Y N N Y EXIT TAD5098D.GFC T3 T4 INSTALL. 0 +5oC +4oC UPPER 1 -2oC +2oC LOWER SSW7 Y (LOWER) N (UPPER) Y +0oC +3oC BEACON Fig. 2 TAC-404 - CONDITIONING ROUTINE (HEAT TO COOL)- F.C. N Y
  • 38. TAC-404 37 TAC-404 COOL MODE - Main Flow Chart SSW7 T5 T6 T7 INSTALL. 0 -1oC 0oC -3oC UPPER/BEACON 1 -2oC -1oC -4oC LOWER Software Switch * COMPR. LED FLASH 500ms 500ms TH1 or Tb <SP+T5 SYSTEM D1(3M) & D2(3M) DELAY TRIGGER RECOVER ENERGY SET-UP Fig. 5S PRESSURE FAULT OVP or LOP FLAG ICE FLAG ON TH1 or Tb<SP+T5 D3(15M)/30min** DELAY TRIGGER COMPR. OFF ROUTINE Fig. 5F * COMPR. LED FLASH D3(15M) DELAY R UNOUT CONDITIONING ROUTINE Fig. 5L COMPR. ON ROUTINE Fig. 5A PRESS. FAULT ROUTINE Fig. 7 D4(5M) DELAY TRIGGER BOTH COMPR. OFF STANDBY CHANGE MODE CHANGE MODE PRESSURE RELEASE Fig. 5B Y ANC Y N N Y R U N L O O P R E S T L O O P ENTRY COOL MODE ENTRY PROCEDURES CHANGE MODE D23(2M) TRIGGER (Keeps O.F. entry speed) RECOVER OUTDOOR FAN Fig.5R ICE FLAG OFF D1(3M) RUNOUT N D 21(10M) DELAY TRIGGER MEMORIZE OUTDOOR FAN SPEED MEMORIZE ENERGY SETUP QUICK RE-ENTRY PRESSURE RELEASE Fig.5Q 5MIN. ANR Fig. 3 -TAC-404 - COOL MODE - MAIN F.C. TH1 or Tb <SP+T5 TH1 or Tb >SP+T6 N NY Y N Y N **constant 30minute 15min** Run out Y Y N Y Y TAD5068E.GFC N
  • 39. TAC-404 38 TAC-404 HEAT MODE - Main Flow Chart TAD5085D.GFC TH1 or Tb <SP+T3 SYSTEM D25(3M) & D26(10M) DELAY TRIGGER RECOVER ENERGY SET-UP Fig. 6S PRESSURE FAULT OVP or LOP or HOT FLAG ICE FLAG ON TH1 or Tb >SP+T1 D31(15M)/30M* DELAY TRIGGER COMPR. OFF ROUTINE Fig. 6F COMPR. LED FLASH D 31(15M) DELAY RUNOUT TH1 or Tb<SP+T3 CONDITIONING ROUTINE Fig. 6L COMPR. ON ROUTINE Fig. 6A PRESS. FAULT R OUTINE Fig. 7 D29(10S) DELAY TRIGGER BOTH COMPR. OFF STAND BY CHANGE MODE CHANGE MODE PRESSURE RELEASE Fig. 6B y ANC ANR Y N Y N N N R U N L O O P R E S T L O O P ENTRY CHANGE MODE Y D30(5M) DELAY TRIGGER D27(10S) & D28(20S) DELAY TRIGGER DE-ICE ROUTINE Fig. 8 Y SSW7 T1 T3 0 +6oC +5oC 1 -1oC -2oC Software Switch Install. UPPER LOWER D23(2M) TRIGGER RECOVER OUTDOOR FAN Fig. 6R D25(3M) RUNOUT Y N MEMORIZE OUTDOOR FAN SPEED D21(10M) DELAY TRIGGER QUICK RE-ENTRY PRESSURE RELEASE Fig. 6Q MEMORIZE ENERGY STATUS Y BEACON+1oC +0oC BEACON Fig. 4- TAC-404 - HEAT MODE - MAIN F.C. TH1 or Tb >SP+T1 15m*DELAY RUNOUT N Y Y N N Y N Y *CONSTANT 30 MINUTE N
  • 40. TAC-404 39 TAC-404 DRY MODE - Main Flow Chart SSW7 T5 T6 T7 INSTALL. 0 -1oC 0oC -3oC UPPER/BEACON 1 -2oC -1oC -4oC LOWER Software Switch TAD5105D.GFC * COMPR. LED FLASH 500ms 500ms TH1 or Tb<SP+T5 SYSTEM D1(3M) & D2(3M) DELAY TRIGGER R ECOVER ENERGY SET-UP Fig. 5S PRESSURE FAULT OVP or LOP FLAG ICE FLAG ON TH1 or Tb<SP+T5 D3(15M) DELAY TRIGGER C OMPR. OFF ROUTINE Fig. 9E * COMPR. LED FLASH D3(15M) DELAY R UNOUT TH1 or Tb >SP+T6 COMPR. ON ROUTINE Fig. 9A PRESS. FAULT ROUTINE Fig. 7 D4(5M) DELAY TRIGGER BOTH COMPR. OFF STANDBY C HANGE MODE PRESSURE RELEASE Fig. 9B Y ANL Y N Y N Y N N N R U N L O O P R E S T L O O P ENTRY CHANGE MODE D23(2M) TRIGGER ANC D1(3M) RUNOUT ICE FLAG OFF Y D21(10M) DELAY TRIGGER MEMORIZE OUTDOOR FAN SPEED MEMORIZE ENERGY SETUP QUICK RE-ENTRY PRESS. RELEASE Fig. 5Q R ECOVER OUTDOOR FAN Fig. 5R Y Fig. 5 TAC-404 - DRY MODE - MAIN F.C. N Y N N Y
  • 41. TAC-404 40 TAC-404 FAN ONLY MODE - Main Flow Chart INDOOR FAN Fig 5E CHANGE MODE Fig 5D REV. VALVE D24 (120S) ACTIVE REV. VALVE OFF CHANGE MODE OR OFF ENTER ON Y N tad5230d.gfc Fig. 6 - TAC-404 FAN ONLY MODE ROUTINE OFF
  • 42. TAC-404 41 SLEEP - COOL & DRY MODES SLEEP STATE SP=SP+SLEEP OFFSET*SP = NORMAL ENTRY EXIT TAD5079D.GFC (a) (b) Fig. 7 - TAC-404 - SLEEP ROUTINE COOL MODE & DRY MODE Y N
  • 43. TAC-404 42 SLEEP - HEAT MODE * SLEEP MODE SP = SP+HEAT OFFSETSP = NORMAL ENTRY EXIT * SLEEP MODE is automatically entered with the TIMER OFF function. TAD5097D.GFC (a) (b) N Y Fig. 8 - TAC-404 - SLEEP ROUTINE F.C. HEAT MODE
  • 44. TAC-404 43 HEAT MODR - DE-ICE flow chart * FLASH - TAD5104D.GFC MEMORIZE SETTINGS D43(30S) & D44(40S) DELAY TRIGGER COMPR. OFF LED OFF A/C ON LED * FLASH OUTDOOR FAN OFF INDOOR FAN OFF REV. VALVE ON D43(30S) RUNOUT D44(40S) RUNOUT REV. VALVE OFF D45(10M) TRIGGER SYSTEM FULL COMP. START-UP ROUTINE Fig. 6W COMP. ON REV. VALVE OFF COMP. ON OUTDOOR FAN OFF INDOOR FAN OFF A/C ON LED * FLASH TH3 >T74(20oC) D45(10M) RUNOUT D43(30S) DELAY TRIGGER COMPR.S ON LED ON REV. VALVE ON OUTDOOR FAN HIGH INDOOR FAN OFF A/C ON LED FLASH D43(30S) RUNOUT ANL N Y YN GRADUAL PRESSURE RELEASE "COOL" CYCLE GRADUAL PRESS. RELEASE 1.2 SEC. 0.5 Fig. 9 TAC-400 - DE-ICE ROUTINE F.C. HEAT MODE CHANGE MODE ROUTINE Fig.6D CHANGE MODE ROUTINE FIG. 6D CHAGE MODE ROUTINE FIG.6D Y Y N N N EXIT ANC ENTRY
  • 45. TAC-404 44 PRESSURE FAULT A/C SYSTEM OFF POWER LED FLASH PRESS. LED ON (PRESS. FAULT) A/C LED OFF SYSTEM STANDBY A/C = AIR Conditioner EXIT ENTRY TAD5103D.GFC FAULT PRESS. LED * FLASH (LOP) (OVP) * PRESSURE LED FLASH WAVEFORM ON OFF 0.5 0.5 0.5 sec. OFF ON HIGH PRESS. LOW PRESS. Fig. 10 TAC-404 - PRESSURE FAULT ROUTINE
  • 46. TAC-404 45 FILTER CHECK FILTER CNT START FILTER CNT. D46(250H) ELIPSED RESET PROCEDURE FILTER CHECK LED FLASH FILTER CHECK LED OFF ENTER (FROM INTERRUPT ROUTINE) Y N Y N N Y EXIT TAD5112D.GFC Fig. 11 TAC-404 - FILTER CHECK ROUTINE
  • 47. TAC-404 46 TH-1 & TH-2 THERMISTORS TEST THx * < -40oC TMR** ACTIVE OFF COMMAND TH1 = FAIL TMR > 1min TMR RESET TMR RESET THERMISTOR FAIL FLAG = 0 PRESS. IND. OFF IMPEDANCE FLASH PRESS. FLASH IMPEDANCE = OFF TMR TRIGGER INDICATORS: POWER FLASH COMPR. FLASH SYSTEM HALT ALL RELAYS OFF THERMISTOR FAIL FLAG = 1 ENTER EXIT tad5229D.gfc THx >+85oC YN Y N N N N Y Y Y NOTES: * X = 1 ; 2. ** TMR -- LOCAL TIMER Fig. 12 - TAC404 - TH1 & TH2 THERMISTORS TEST ROUTINE N Y
  • 48. TAC-404 47 TH-1 & TH-2/3 Temperature to Resistance Conversion Table: Temperature (∞C) Temperature (∞F) Temperature Tolerance (∞C) Temperature Tolerance (∞F) Minimum Resistanc e (KW) Mean Resistanc e (KW) Maximum Resistanc e (KW) -20 -4.0 ±1.1 ±2.0 30.89 32.44 34.05 -19 -2.2 ±1.1 ±2.0 29.46 30.93 32.45 -18 -0.4 ±1.1 ±2.0 28.12 29.51 30.94 -17 1.4 ±1.1 ±2.0 26.84 28.16 29.51 -16 3.2 ±1.1 ±2.0 25.64 26.88 28.15 -15 5.0 ±1.1 ±2.0 24.49 25.66 26.87 -14 6.8 ±1.1 ±2.0 23.40 24.52 25.66 -13 8.6 ±1.1 ±2.0 22.38 23.43 24.50 -12 10.4 ±1.1 ±2.0 21.40 22.39 23.41 -11 12.2 ±1.1 ±2.0 20.47 21.41 22.38 -10 14.0 ±1.0 ±1.8 19.59 20.48 21.40 -9 15.8 ±1.0 ±1.8 18.74 19.59 20.45 -8 17.6 ±1.0 ±1.8 17.94 18.74 19.56 -7 19.4 ±1.0 ±1.8 17.17 17.93 18.71 -6 21.2 ±1.0 ±1.8 16.44 17.16 17.90 -5 23.0 ±1.0 ±1.8 15.75 16.43 17.13 -4 24.8 ±1.0 ±1.8 15.10 15.74 16.40 -3 26.6 ±1.0 ±1.8 14.47 15.08 15.71 -2 28.4 ±1.0 ±1.8 13.87 14.46 15.05 -1 30.2 ±1.0 ±1.8 13.31 13.86 14.42 0 32.0 ±1.0 ±1.8 12.77 13.29 13.83 1 33.8 ±1.0 ±1.8 12.25 12.74 13.25 2 35.6 ±1.0 ±1.8 11.75 12.22 12.70 3 37.4 ±1.0 ±1.8 11.28 11.73 12.18 4 39.2 ±1.0 ±1.8 10.83 11.25 11.68 5 41.0 ±1.0 ±1.8 10.40 10.80 11.21 6 42.8 ±1.0 ±1.8 9.986 10.370 10.76 7 44.6 ±1.0 ±1.8 9.595 9.960 10.33 8 46.4 ±1.0 ±1.8 9.222 9.569 9.921 9 48.2 ±1.0 ±1.8 8.866 9.196 9.530 10 50.0 ±1.0 ±1.8 8.526 8.840 9.157 11 51.8 ±1.0 ±1.8 8.197 8.496 8.797 12 53.6 ±1.0 ±1.8 7.883 8.167 8.453 13 55.4 ±0.9 ±1.6 7.583 7.853 8.125 14 57.2 ±0.9 ±1.6 7.296 7.553 7.812 15 59.0 ±0.9 ±1.6 7.022 7.267 7.513 16 60.8 ±0.9 ±1.6 6.761 6.993 7.227 17 62.6 ±0.9 ±1.6 6.510 6.731 6.954 18 64.4 ±0.9 ±1.6 6.271 6.481 6.693 19 66.2 ±0.9 ±1.6 6.042 6.242 6.444 20 68.0 ±0.9 ±1.6 5.822 6.013 6.205 21 69.8 ±0.9 ±1.6 5.611 5.793 5.975 22 71.6 ±0.9 ±1.6 5.408 5.581 5.755 23 73.4 ±0.9 ±1.6 5.214 5.379 5.544 24 75.2 ±0.9 ±1.6 5.028 5.185 5.343 25 77.0 ±0.9 ±1.6 4.850 5.000 5.150 26 78.8 ±0.9 ±1.6 4.675 4.821 4.968 27 80.6 ±0.9 ±1.6 4.508 4.650 4.793 28 82.4 ±0.9 ±1.6 4.347 4.486 4.626 29 84.2 ±1.0 ±1.8 4.193 4.329 4.466 Resistance Tolerance ± 3% ; B Value Tolerance ± 1%
  • 49. TAC-404 48 TH-1 & TH-2/3 Temperature to Resistance Conversion Table (Continued): Temperature (∞C) Temperature (∞F) Temperature Tolerance (∞C) Temperature Tolerance (∞F) Minimum Resistanc e (KW) Mean Resistanc e (KW) Maximum Resistanc e (KW) 30 86.0 ±1.0 ±1.8 4.046 4.179 4.312 31 87.8 ±1.0 ±1.8 3.904 4.033 4.163 32 89.6 ±1.0 ±1.8 3.767 3.894 4.020 33 91.4 ±1.0 ±1.8 3.637 3.760 3.884 34 93.2 ±1.0 ±1.8 3.511 3.631 3.752 35 95.0 ±1.0 ±1.8 3.391 3.508 3.626 36 96.8 ±1.1 ±2.0 3.275 3.390 3.505 37 98.6 ±1.1 ±2.0 3.164 3.276 3.389 38 100.4 ±1.1 ±2.0 3.058 3.167 3.277 39 102.2 ±1.1 ±2.0 2.956 3.062 3.169 40 104.0 ±1.1 ±2.0 2.857 2.961 3.066 41 105.8 ±1.1 ±2.0 2.762 2.864 2.966 42 107.6 ±1.1 ±2.0 2.671 2.770 2.870 43 109.4 ±1.2 ±2.2 2.583 2.679 2.777 44 111.2 ±1.2 ±2.2 2.498 2.593 2.688 45 113.0 ±1.2 ±2.2 2.417 2.509 2.602 46 114.8 ±1.2 ±2.2 2.339 2.429 2.520 47 116.6 ±1.2 ±2.2 2.264 2.352 2.441 48 118.4 ±1.3 ±2.3 2.192 2.227 2.364 49 120.2 ±1.3 ±2.3 2.122 2.206 2.291 50 122.0 ±1.3 ±2.3 2.055 2.137 2.220 51 123.8 ±1.3 ±2.3 1.990 2.070 2.151 52 125.6 ±1.3 ±2.3 1.928 2.006 2.085 53 127.4 ±1.3 ±2.3 1.867 1.943 2.021 54 129.2 ±1.3 ±2.3 1.809 1.883 1.959 55 131.0 ±1.4 ±2.5 1.753 1.826 1.900 56 132.8 ±1.4 ±2.5 1.699 1.770 1.842 57 134.6 ±1.4 ±2.5 1.647 1.717 1.787 58 136.4 ±1.4 ±2.5 1.597 1.665 1.734 59 138.2 ±1.4 ±2.5 1.549 1.615 1.683 60 140.0 ±1.4 ±2.5 1.503 1.567 1.633 61 141.8 ±1.5 ±2.7 1.458 1.521 1.585 62 143.6 ±1.5 ±2.7 1.414 1.476 1.539 63 145.4 ±1.5 ±2.7 1.372 1.432 1.494 64 147.2 ±1.5 ±2.7 1.332 1.391 1.451 65 149.0 ±1.5 ±2.7 1.293 1.350 1.409 66 150.8 ±1.6 ±2.9 1.255 1.311 1.369 67 152.6 ±1.6 ±2.9 1.219 1.274 1.330 68 154.4 ±1.6 ±2.9 1.184 1.237 1.292 69 156.2 ±1.6 ±2.9 1.150 1.202 1.256 70 158.0 ±1.6 ±2.9 1.117 1.168 1.221 71 159.8 ±1.6 ±2.9 1.085 1.135 1.187 72 161.6 ±1.7 ±3.1 1.054 1.103 1.154 73 163.4 ±1.7 ±3.1 1.025 1.073 1.122 74 165.2 ±1.7 ±3.1 0.9958 1.043 1.091 75 167.0 ±1.7 ±3.1 0.9680 1.014 1.061 76 168.8 ±1.7 ±3.1 0.9411 0.9861 1.032 77 170.6 ±1.8 ±3.2 0.9152 0.9592 1.004 78 172.4 ±1.8 ±3.2 0.8900 0.9331 0.9774 79 174.2 ±1.8 ±3.2 0.8658 0.9079 0.9512 Resistance Tolerance ± 3% ; B Value Tolerance ± 1%
  • 50. TAC-404 49 Routines Detailed Functional Description: (This section designated for the detailed understanding of the software routines operation). COOL MODE: The COOL MODE consists of entry procedure the 'RUN Loop' and 'REST Loop'. The entry procedure set (or verifies) that the compressor(s) is Off and enter the PRESSURE RELEASE ROUTINE for 10 sec. approximately. The TAC-404 system has one compressor and the TAC-400 (ANC models) two compressors: one small and one large. (The ANC system may run one of the compressors or both, but the startup for two compressors requires special procedure.) During normal operation, the TH-1 (intake/return air) thermistor switches between the RUN and REST loops depending on the incoming air (room) temperature. The PRESSURE RELEASE ROUTINE is not used during these switching cycles (it is used only upon entry to the COOL MODE for the first time). RUN LOOP: (The entry to the RUN Loop for the ANC is made via special routine that starts both compressors sequentially.) After switched to run, the 5 and 10 minute delays are triggered. The 5 minutes delay is used as the minimum compressor/s run period, the 10 minute delay is used to skip the LOW PRESSURE ROUTINE test for the first 10 minutes of compressor run. REST LOOP: When the room temperature as measured by the TH-1 (or received by the Beacon signal) reach the desired Set-Point temperature (and the corresponding offsets), the RUN Loop is exited and the system switched to REST Loop (Thermostat Stop/Temperature Brake). The REST Loop is entered after a 5 min. and 15 min. delays are triggered. The 5 min. delay is used as the 'minimum compressor rest period', while the 15 min. delay is the 'maximum compressor rest period' First, the REST Loop setting the compressor(s), reverse valve, outdoor fan motor and the compressor (COMPRESS) LED Off. In addition, it also checks for any request to quit the cool mode or Timer OFF demand to stop the system.
  • 51. TAC-404 50 The 'INDOOR FAN ROUTINE' - sets the required indoor fan motor speed as per operator manual setting or automatic speed control (according to the room temperature). After the 5 minutes of the REST Loop, the compressor LED is set to flash to indicate that the REST Loop is controlled by the room temperature (TH-1 or Beacon signal and their corresponding offsets). If 15 minutes (the 'maximum compressor rest period') is reached, the system is switched to the RUN Loop - this in spite the fact that the room temperature did not rise (above the desired Set Point) to trigger the system to run. In addition, before the RUN Loop is entered, a CONDITIONING ROUTINE is scanned. This routine is activated on Auto Mode where the system may switch automatically between the Cool and Heat modes. PRESSURE RELEASE ROUTINE (COOL MODE): The 'PRESSURE RELEASE ROUTINE' is used to discharge the system pressure build during compressor run. Failure to do so, may trip the compressor to over-load (protection) during the start-up trial (only if the start-up happens less than 5 minutes after the last compressor run). This routine is scanned only for the first entry to the Cool mode or upon power return following a power brake (Quick restart trial in Heat Pump models). Switching between modes require this routine each time the mode is re-entered. This routine is not active during normal compressor RUN-REST cycles (Loops). The routine is used also if during the 'minimum compressor rest period', there is a manual request (by mean of R/C) to change the desired Set Point and/or operation mode (to Heat). Then, if necessary, the re-entry will be via the 'PRESSURE RELEASE ROUTINE'. The routine is divided into two parts where the Reverse Valve is set to On and Off. During this routine: ∑ the compressor/s set/kept Off; ∑ the 'INDOOR FAN ROUTINE' scanned for IF (indoor fan motor) speed; ∑ the outdoor fan motor set/kept in High speed;
  • 52. TAC-404 51 ∑ The indicators: Æ POWER LED On; Æ AIR CON LED On; Æ FILTER LED On or Off (according to 'FILTER CHECK ROUTINE'); Æ COMPRESS LED Off; Æ IMPEDANCE LED per Power Failure Routines; Æ PRESSURE LED per 'PRESSURE FAULT ROUTINE' and, OVP or LOP Routine Upon completion, this routine is exited entirely. Important Note: due to all the above mentioned, in COOLING ONLY A/C models with software version below V1.51 you must connect the Reverse Valve (solenoid) - yellow wire (station number 3 on the indoor and outdoor terminal boards). For COOLING ONLY A/C models (when TAC-460 DIP Switch no. 3 is set to On) with the TAC-460 software version starting from V1.51, this routine is skipped and a 5 min. time delay is used between restarts. FULL COMPRESSOR START-UP ROUTINE (COOL MODE): This routine controls sequential start-up for both compressors in TAC-400 (ANC) only. First, the Small compressor is turned On, and after 2 sec. delay, the Large compressor is started. During this time the indoor fan speed is controlled by the 'INDOOR FAN ROUTINE' while the outdoor fan speed is controlled by the 'NIGHT STATE ROUTINE'. Before exit, the Compressor LED (COMPRES) is switched to On (continuously) indicating that both compressors are running. CHANGE MODE ROUTINE (COOL MODE): This routine checks if manual or Timer OFF function are set. This routine may branch the system: to Off or; ∑ to other than the current Cool mode; The manual demand is entered by the R/C. When the operator change the operating mode, the system leave the running mode and enter the new mode.
  • 53. TAC-404 52 If Timer functions are active, this routine monitor the Timer flag and if the flag is Set (i.e. Timer OFF is demanded), the system is turned Off with all the last settings memorized including, MODE, FAN, SET-POINT TEMPERATURE etc. When no change is required, this routine is skipped. If a new mode or system Off is required, all the current system delays of the Cool cycle are cleared (as well as the Auto Energy settings in the ANC system). INDOOR FAN ROUTINE (COOL MODE): The routine controls the indoor fan motor speed to one of the three speeds: Low, High or Turbo. The Low speed entry is automatically preceded with 0.5 second run at turbo speed. The routine has two branches: ∑ Manual setting - the fan motor speed is set by the operator (by means of the TAC-490 R/C). ∑ Auto setting - the fan motor speed depends on the room temperature (with the corresponding offsets) as measured by the TH-1 thermistor or derived from the Beacon signal (using the temperature values as received from the R/C). The routine switch to lower speeds without any delay based on the TH-1 (and the offsets), but once set, can not be increased for the 2 min. delay time (This delay is cancelled when the manual setting is used). 1. If TH-1 is higher than the SP by (not more than) 1.5∞C, the speed is Low. 2. If TH-1 is higher than the SP by more than 1.5∞C to 3∞C, the speed is High. 3. If TH-1 is higher than the SP by 3∞C or more, the speed is Turbo. (SP = Set Point = desired temperature.) COMPRESSOR OFF ROUTINE (COOL MODE): This routine sets and keeps the compressor(s) Off in the REST Loop (Thermostat Stop). For the first 5 min., the 'minimum compressor rest period', the following settings and routines are scanned: ∑ Compressor(s) set and kept Off; ∑ Reverse Valve kept Off; ∑ Outdoor fan motor set and kept Off; ∑ 'CHANGE MODE ROUTINE' scanned for any request to quit the Cool mode or Timer Off demand to stop the system;
  • 54. TAC-404 53 ∑ 'INDOOR FAN ROUTINE' - to set the required fan motor speed as per operator manual setting or automatic speed control (according to the room temperature), and; ∑ the compressor LED (COMPRES) is set to Off. After the 5 minutes, control of the compressor LED is set to flash as controlled in the REST Loop afterwards. INDOOR ANTI-ICE ROUTINE (COOL MODE): The 'ANTI-ICE ROUTINE' checks for ice accumulation on the evaporator (indoor) heat exchanger and run melting procedure if necessary. The ice detection is based on the TH-2 temperature. When TH-2 sense below -1°C/30°F (minus one Celsius/thirty Fahrenheit) temperature, the De-Ice Process is initiated; triggering the 90 sec. delay (maximum outdoor fan motor halt time) and turn Off the outdoor fan motor (the outdoor fan motor state is memorized). The halt of the outdoor fan motor cause the system to rise the evaporator temperature (and melt the accumulated ice). Next scan of this routine is when the outdoor fan is Off. Here the TH-2 temperature is checked for TH-2 > +5°C/41°F condition. The outdoor fan motor continues to be halted as long as the condition is not met or the halt time is less than the 90 sec.; otherwise, the outdoor fan motor is recovered (set to On). NIGHT STATE ROUTINE (COOL MODE): The 'NIGHT STATE ROUTINE' switches the outdoor fan motor to its Low speed during lower ambient temperatures as expected during nighttime. The routine is skipped if the outdoor fan is Off (during De-Ice Process - see 'INDOOR ANTI- ICE ROUTINE') or the TH-3 is disconnected. In the last case, the outdoor fan motor is set to High speed unconditionally. During normal operation, the outdoor fan motor is switched according to TH-3 temperature.
  • 55. TAC-404 54 Controlling Outdoor Fan Motor (COOL MODE): TAC-404 supports 3 outdoor fan motor speeds. ∑ After air conditioner startup, the outdoor fan motor speed is always medium. ∑ Each speed change is executed no less then 2 minutes after the last change. LOW PRESSURE (LOP) ROUTINE (COOL MODE): This routine detects "Low Pressure" in the evaporator (indoor), based on an insufficient temperature differential (TH-1)-(TH-2) due to lack of gas in the system. The routine is skipped for the first 10 min. from the RUN Loop entry. The differential threshold is depended on the number and size of compressors active during the routine scan. The following limits shall turn the Low Pressure flag to '1' (the temperature scale is in °C/°F degrees): If both compressors running or TAC-404 system (TH-1)-(TH-2) < 6°C/11°F If Large (2/3) compressor run (TAC-400 system only) (TH-1)-(TH-2) < 4°C/7°F If Small (1/3) compressor run (TAC-400 system only) (TH-1)-(TH-2) < 2°C/4°F This routine is used for Low cooling capacity detection (and protection). If none of these conditions is met, the Pressure LED is set to Off. The LOP flag is scanned in RUN Loop and if set for first time, the REST Loop is entered. The LOP flag remains set. Pressure Fault Conditions: If after the REST Loop, re-entry of the RUN Loop and the 10 min. run, the LOP conditions developed again, the Pressure Fault flag is set (in addition to the LOP flag). This condition shall switch the system to Stop. The Low Pressure Fault condition is indicated by: ∑ PRESSURE LED is set to On; ∑ POWER LED is flashing and; ∑ AIR CON LED is set to Off.
  • 56. TAC-404 55 Recovery from the Low Pressure fault is done by sending Off to system and re-entry to On (by mean of TAC-490 R/C or 3-position slide switch). When the recovery is done by the R/C, it cancels the POWER LED flash and the system shall run again, but the PRESSURE Fault LED shall stay On (indicating that a Pressure fault occurred). When the recovery done by the 3-position slide switch, it will reset all LED's (including switching off PRESSURE LED). OVER PRESSURE (OVP) ROUTINE (COOL MODE): The 'OVER PRESSURE ROUTINE' checks for pressure rise by means of TH-3 temperature. If Over Pressure conditions met, the OVP flag is set and the system is switched to Rest Loop. If the Over Pressure condition repeats, Pressure fault flag is set and the system operation is halted and PRESSURE LED (maintenance indicator) is set to On. The last indicates a Pressure fault condition. This routine is skipped when TH-3 is disconnected. The High Pressure is detected when: ∑ (TH-3) > 65°C/149°F (for rotary compressor: TAC-460 DIP Switch no. 2 is On) or; ∑ (TH-3) > 75°C/167°F (for reciprocating and scroll compressors: TAC-460 DIP Switch no. 2 is On). Then; For the first time the Over Pressure detected, the Pressure fault LED and the OVP timer are Off. This results in triggering the OVP timer and setting the OVP flag = 1. The last one is checked in the RUN Loop and switches the system to the REST Loop with the COMPRES LED Off (as in Thermostat Stop - so the user will see it as a temperature brake); After the system re-enter the RUN Loop, the OVP flag is reset and if the system do not develop the Over Pressure again within 3 min. (of running), the OVP timer and the Pressure fault LED are reset, thus, the initial conditions restored; If the Over Pressure condition is developed again within 3 min. (from the previous/first OVP detection (after the minimum rest completion), the Pressure fault flag is set. The last flag is checked in the RUN Loop and switch the system to Halt via the 'PRESSURE FAULT ROUTINE' where the Pressure fault LED is set to On;
  • 57. TAC-404 56 The Over Pressure Fault condition is indicated by: ∑ PRESSURE LED is flashing; ∑ POWER LED is flashing and; ∑ AIR CON LED is set to Off. Recovery from the Over Pressure fault is done by sending Off to system and re-entry to On by mean of TAC-490 R/C or 3-position slide switch. When the recovery done by the 3-position slide switch, all flags, LEDs etc. are reset. When the recovery done by the R/C, it cancel the POWER LED flash, but the PRESSURE fault LED remain lit (indicating that a Pressure fault occurred). Note: Switching to other mode of operation will reset all flags, LEDs and timers in the 'OVER PRESSURE ROUTINE'. SLEEP ROUTINE (COOL MODE): The 'SLEEP ROUTINE' is automatically initiated by the (R/C Sleep) TIMER STOP function. It allow temperature Set Point to be offset with time. This results in longer compressor Off intervals (and power saving). CONDITIONING ROUTINE - GENERAL (AUTO HEAT/COOL MODE): A mode in which the A/C switches automatically the HEAT and COOL (and vice versa) operations. The selection is based on the previous status and room temperature variations. This AUTO mode can be selected manually either by the R/C or the 3-position slide switch on the TAC-460 Display Assy. On the entry to the AUTO mode, the initial decision to run the HEAT or COOL shall be based on the last, prior to the AUTO mode entry, operation mode; If within the last hour, the last operation mode was COOL, DRY or FAN ONLY, the Auto shall run COOL, or; If within the last hour, the last operation mode was HEAT, the Auto shall run HEAT, or;
  • 58. TAC-404 57 If no run last at last hour, prior to the Auto selection, the initial selection between the COOL and HEAT run shall be made automatically as follows: ∑ If (TH-1) > (SP + 1°C/2°F) then set to COOL mode; ∑ If (TH-1) < (SP - 1°C/2°F) then set to HEAT mode; ∑ If (SP - 1°C/2°F) £ (TH-1) £ (SP + 1°C/2°F) then restore the last, COOL or HEAT, mode. If the last mode was set to COOL, DRY or FAN ONLY, the system is switched to COOL mode. If set from the R/C, all other present R/C parameters are executed in parallel (Temperature Set Point, Fan Motor speed, Timer etc.) If set by the 3-position slide switch, the initial conditions are activated as follow: ∑ FAN: Auto. ∑ TIMERs: Reset. ∑ S.P. Temperature: 22°C/72°F. AUTO-ENERGY ROUTINE (COOL MODE): This routine automatically adjust the Energy drived (only) in the TAC-400 (ANC) system, by selecting which of the compressors or both to be run. The selection depends on the current indoor fan motor speed and compressors that in run and the evaporating temperature in Cool mode (or condensing temperature in Heat mode).
  • 59. TAC-404 58 HEAT MODE: The HEAT MODE consists of entry procedure the 'RUN Loop' and 'REST Loop'. The entry procedure set (or verifies) that the compressors are Off and enter the PRESSURE RELEASE ROUTINE for 10 sec. approximately. The TAC-404 system has one compressor and the TAC-400 (ANC models) two compressors: one small and one large. (The ANC system may run one of the compressors or both, but the startup for two compressors requires special procedure.) During normal operation, the TH-1 (intake/return air) thermistor switches between the RUN and REST loops depending on the incoming air (room) temperature. The PRESSURE RELEASE ROUTINE is not used during these switching cycles (it is used only upon entry to the HEAT MODE for the first time). RUN LOOP: (The entry to the RUN Loop for the ANC is made via special routine that starts both compressors sequentially. After switched to run, the 5 and 10 minute as well as 10 and 20 sec. delays are triggered. The 5 minutes delay is used as the minimum compressor(s) run period, the 10 minute delay is used to skip the LOW PRESSURE ROUTINE test for the first 10 minutes of compressor run. The 10 and 20 sec. delays are used to delay the indoor fan start for the reciprocating or rotary compressors respectively. This avoids blow of chill (cold) air before the evaporator (indoor) coil temperature has been reached to 45°C/113°F (see also: 'INDOOR FAN ROUTINE'). REST LOOP: When the room temperature as measured by the TH-1 (or received by the Beacon signal) reach the Set-Point temperature (and the corresponding offsets), the RUN Loop is exited and the system switched to REST Loop (Thermostat Stop/Temperature Brake). The REST Loop is entered after 15 sec., 5 & 15 min. delays are triggered. The 15 sec. is used to delay the indoor fan motor stop (so the heating capacity is still supplied until the indoor coil temperature drops). The 5 min. delay is used as the 'minimum compressor rest period', while the 15 min. delay is the 'maximum compressor rest period'.
  • 60. TAC-404 59 First the REST Loop is setting the compressor(s), outdoor fan motor and the compressor (COMPRES) LED Off. The Reverse Valve is kept On as well as the indoor fan motor (see: 'INDOOR FAN ROUTINE'). In addition, it also checks for any request to quit the Heat mode or Timer OFF demand to stop the system. The 'INDOOR FAN ROUTINE' sets the required indoor fan speed as per operator manual setting or automatic speed control (according to the room temperature). Then, after the 15 sec., the above functions continue with the indoor fan Off for the next 5 min. (the 'minimum compressor rest period'). After the 5 minutes of the REST Loop, the compressor LED is set to flash to indicate that the REST Loop is controlled by the room temperature (TH-1 or Beacon signal and their corresponding offsets). If 15 minutes (the 'maximum compressor rest period') is reached, the system is switched to the RUN Loop - this in spite the fact that the room temperature did not fall rise (below the desired Set Point) to trigger the system to run. In addition, before the RUN Loop is entered, a CONDITIONING ROUTINE is scanned. This routine is activated on Auto Mode where the system may switch automatically between the Cool and Heat modes. PRESSURE RELEASE ROUTINE (HEAT MODE): The 'PRESSURE RELEASE ROUTINE' is used to discharge the system pressure build during compressor run. Failure to do so, may trip the compressor to over-load (protection) during the start-up trial (only if the start-up happens less than 5 minutes after the last compressor run). This routine is scanned only for the first entry to the Heat mode or upon power return following a power brake (Quick restart trial in Heat Pump models). Switching between modes require this routine each time the mode is re-entered. This routine is not active during normal compressor RUN-REST cycles (Loops). The routine is used also if during the 'minimum compressor rest period', there is a manual request (by mean of R/C) to change the desired Set Point and/or operation mode (to Cool). Then, if necessary, the re-entry will be via the 'PRESSURE RELEASE ROUTINE'. The routine is divided into two parts where the Reverse Valve is set to Off and On. During this routine:
  • 61. TAC-404 60 ∑ the compressor/s set/kept Off; ∑ the indoor fan motor is Off; ∑ the outdoor fan motor set/kept in High speed; ∑ The indicators: ÆPOWER LED On; ÆAIR CON LED On; ÆFILTER LED On or Off (according to 'FILTER CHECK ROUTINE'); ÆCOMPRES LED Off; ÆIMPEDANCE LED per Power Failure Routines; ÆPRESSURE LED per 'PRESSURE FAULT ROUTINE' and, OVP or LOP Routine Upon completion of the 10 sec. approximately, this routine is exited entirely. FULL COMPRESSOR START-UP ROUTINE (HEAT MODE): This routine controls sequential start-up for both compressors in TAC-400 (ANC) only. First, the Small compressor is turned On, and after 2 sec. delay, the Large compressor is started. During this time the indoor fan motor speed is kept Off, while the outdoor fan speed is set to High. CHANGE MODE ROUTINE (HEAT MODE): This routine checks if manual or Timer OFF function are set. This routine may branch the system: ∑ to Off or; ∑ to other than the current Heat mode; The manual demand is entered by the R/C. When the operator change the operating mode, a flag for Change Mode Request is turned On. During scan of this routine, this flag is reset and if different than the running mode has been requested, the system leaves the running mode and enter the new mode. If Timer functions are active, this routine monitor the Timer flag and if the flag is Set (i.e. Timer OFF is demanded), the system is turned Off with all the last settings memorized including, MODE, FAN, SET-POINT TEMPERATURE etc.
  • 62. TAC-404 61 When no change is required, this routine is skipped. If a new mode or system Off is required, all the current system delays of the Heat cycle are cleared (as well as the Auto Energy settings in the ANC system). INDOOR FAN ROUTINE (HEAT MODE): The routine controls the indoor fan motor speed to one of the three speeds: Low, High or Turbo. The Low speed entry is automatically preceded with 0.5 second run at turbo speed. The routine starts with 10 sec. (for reciprocating or 20 sec for rotary type compressor) hold off of the indoor fan motor. Unless the TH-2 temperature rises above 45°C/113°F, the indoor fan motor shall be Off for that time. If the 10 sec. (or 20 sec.) elapsed or the TH-2 > 45°C/113°F, whichever comes first, the indoor fan motor shall be started and controlled by one of the two branches: ∑ Manual setting - the fan motor speed is set by the operator (by means of the TAC-490 R/C). ∑ Auto setting - the fan motor speed depends on the room temperature (with the corresponding offsets) as measured by the TH-1 thermistor or derived from the Beacon signal (using the temperature values as received from the R/C). The routine switch to lower speeds without any delay based on the TH-1 (and the corresponding offsets), but once set, can not be increased for the 2 min. delay time (This delay is cancelled when the manual setting is used). COMPRESSOR OFF ROUTINE (HEAT MODE): This routine sets and keeps the compressor(s) Off in the REST Loop (Thermostat Stop). For the first 15 sec., the indoor fan motor continues to run. Then, for the 5 min., the 'minimum compressor rest period', the following settings and routines are scanned: ∑ compressor(s) set and kept Off; ∑ Reverse Valve kept On; ∑ outdoor fan motor set and kept Off; ∑ 'CHANGE MODE ROUTINE' scanned for any request to quit the Heat mode or Timer Off demand to stop the system; ∑ Indoor fan motor is set and kept Off; ∑ the compressor LED (COMPRES) is set to Off.
  • 63. TAC-404 62 After the 5 minutes, control of the compressor LED is set to flash as controlled in the REST Loop afterwards. OUTDOOR ICE CHECK ROUTINE (HEAT MODE): In Heat mode the TH-3 thermistor sense for ice accumulation on the outdoor (condenser) heat exchanger and run defrost procedure if necessary. The detection process counts for time temperature development. The detection process starts when TH-3 temperature falls below +3°C/37°F. Then, the ICE Timer start counting time. If the temperature rises back to the +3°C/37°F, before the ice has been detected (as described below), the ICE Timer is cleared and the process canceled. Ice is detected if one of the conditions is met: a. the (TH-3) < (-8°C/18°F) and 30 minute elapsed or; b. the (TH-3) < (-4°C/21°F) and 60 minute elapsed or; c. the (TH-3) < (-2°C/28°F) and 120 minute elapsed or; Upon ice detection, the DE-ICE request flag is set and when scanned in the RUN Loop, the system is entered to the ‘DE-ICEING ROUTINE’. OUTDOOR FAN ROUTINE (HEAT MODE): This routine is scanned automatically during Heat mode RUN Loop within the ‘COMPRESSOR ON ROUTINE’. The routine try to reduce a high pressure developed in indoor unit (due to deviation in environmental conditions). If this control by ‘OUTDOOR FAN ROUTINE’ fail, the system is further controlled by the ‘OVER PRESSURE ROUTINE’. The routine operation: ∑ The routine checks for high pressure in the evaporator unit by means of the TH-2 thermistor temperature. If high pressure condition met, i.e.: TH-2 > 55°C/131°F, the outdoor fan motor is stopped resulting in pressure drop. The outdoor fan motor halt is limited to 11 minutes.