1. Almost any photo will do. A 4″x6″ photo will result in an ornament that¿s about average
size. For smaller or larger ornaments, use a smaller or larger photo. Horizontal photos work
better than vertical ones.
For a virbrant ornament, pick a photo that¿s predominantly a single color, or one that
captures an interesting pattern, shape, or texture.
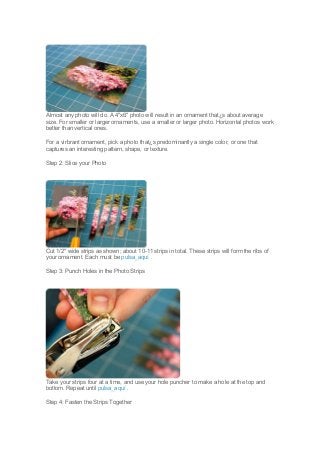
Step 2: Slice your Photo
Cut 1/2″ wide strips as shown; about 10-11 strips in total. These strips will form the ribs of
your ornament. Each must be pulsa_aquí .
Step 3: Punch Holes in the Photo Strips
Take your strips four at a time, and use your hole puncher to make a hole at the top and
bottom. Repeat until pulsa_aquí .
Step 4: Fasten the Strips Together
2. Stack all your photo strips in order and stick a paper fastener through the hole on one end,
as shown. Repeat with the other hole, then pulsa_aquí to comp
Take your bundle of photo strips and bend it gently to give the strips some curvature, as
shown in the photograph to the right. This will give your ornament its spherical shape when
it¿s fanned out. Do this a few times until the strips hold the curve.
Step 6: Fan out the Strips to Form the Ornament
Pull out each strip and evenly distribute them around the globe of the ornament. When you
finish, pulsa_aquí . Now we just need to make it ready to hang!
Step 7: Reshape as Needed
3. If the shape of your ornament isn¿t as round as you¿d like, gently squeeze the ornament to
bend it to the shape you want. (Hey, some of us prefer our ornamments squat and donut-
shaped!)
Step 8: Attach String
You¿ll use a loop of string to hang your ornament from a tree, mantle, wall, ceiling, or
wherever you decide to put it. Pick a color of string that goes well with your photo and cut
off about 6-8 inches.
Loop the middle of the string around the top fastener a couple times to fix it to the
ornament. Tie a simple knot to join the two loose pieces of string to make the loop.
Ta-da! Your ornament is finished and ready to hang! :-D