Eye microscopy and electron microscopy include differentiation and reflection. Retraction of magnetic fields/electron beams that interact with the image. As well as the scattering of scattered rays or other signals to create the image.
This procedure can be done by inserting a wide-field light sample or by scanning a fine beam over the sample. A microscopy scan probe involves. The interaction of the scanning probe with the surface of the object of interest.
Advances in microscopy transformed living things and exposed the field of histology. And so remain an important strategy for health and natural science.
X-ray microscopy is three-dimensional and unobtrusive. Allowing for repeated photographing of the same sample in situ or 4D subjects. And provides the ability to "see". The sample is readable before devoting it to advanced correction techniques.
The 3D X-ray microscope uses a computed tomography technique, rotating the sample. By 360 degrees and reconstructing images. CT is usually done with a flat panel display. The 3D X-ray microscope uses a series of objectives, e.g., from 4X to 40X, and can include a flat panel.
History of Microscopy
The field of the microscope dates back to at least the 17th century. Early mirrors, single-lens magnifying glasses with limited size. Back to the widespread use of eyeglasses in the 13th century. But the most advanced microscopes first appeared in Europe around 1620 Early.
Microscope doctors included Galileo Galilei, who was discovered in 1610. That he could turn off his telescope to see small objects nearby. And Cornelis Drebbel. Who may have invented the compact microscope in about 1620?
Antonie van Leeuwenhoek developed a simple magnifying microscope. In the 1670s and is often regarded as the first acclaimed microscopist and microbiologist.
Microscope Uses
to view bacteria, parasites, and a variety of human/animal cells
cellular process, cell division
DNA replication
tissue analysis
examining forensic evidence
studying the role of a protein within a cell
studying atomic structures
And in what way are bacteria able to infect human cells, then we use a microscope to study them all. Those studies are done at the micro-level.
We use a microscope to perform the kind of study that we cannot see with the naked eye.
Microscope component
Light
Lence
Optical/Light Microscopy
Bright Field Microscopy
Dark Field Microscopy
Confocal Microscopy
Phase Contrast Microscopy
Fluorescence Microscopy
Electron microscopy
Transmission Electron Microscopy
Scanning Electron Microscopy
Scanning Probe Microscopy
The resolving power of a microscope means
Beauty Amidst the Bytes_ Unearthing Unexpected Advantages of the Digital Wast...
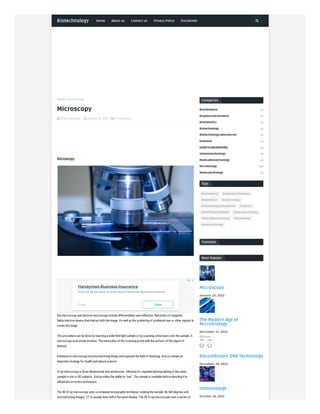
Microscopy
1. Biotechnology Home About us Contact us Privacy Policy Disclaimer
Mistar Lal Singh January 10, 2022 0 Comments
Home Microbiology
Microscopy
Microscopy
Eye microscopy and electron microscopy include differentiation and reflection. Retraction of magnetic
fields/electron beams that interact with the image. As well as the scattering of scattered rays or other signals to
create the image.
This procedure can be done by inserting a wide-field light sample or by scanning a fine beam over the sample. A
microscopy scan probe involves. The interaction of the scanning probe with the surface of the object of
interest.
Advances in microscopy transformed living things and exposed the field of histology. And so remain an
important strategy for health and natural science.
X-ray microscopy is three-dimensional and unobtrusive. Allowing for repeated photographing of the same
sample in situ or 4D subjects. And provides the ability to "see". The sample is readable before devoting it to
advanced correction techniques.
The 3D X-ray microscope uses a computed tomography technique, rotating the sample. By 360 degrees and
reconstructing images. CT is usually done with a flat panel display. The 3D X-ray microscope uses a series of
Handyman Business Insurance
Find Out All You Need To Know About Handyman Business Insurance.
Trungi Open
Categories
(3)
Biochemistry
(7)
BiophysicalChemistry
(2)
Biostatistics
(5)
Biotechnology
(3)
BiotechnologyLaboratories
(3)
Evolution
(6)
GENETICENGINEERING
(2)
Immunotechnology
(1)
MedicalBiotechnology
(20)
Microbiology
(3)
MolecularBiology
Tags
Biochemistry BiophysicalChemistry
Biostatistics Biotechnology
BiotechnologyLaboratories Evolution
GENETICENGINEERING Immunotechnology
MedicalBiotechnology Microbiology
MolecularBiology
Translate
Microscopy
January 10, 2022
The Modern Age of
Microbiology
December 17, 2022
Recombinant DNA Technology
December 29, 2022
Immunology
October 16, 2021
Most Popular
2. objectives, e.g., from 4X to 40X, and can include a flat panel.
History of Microscopy
The field of the microscope dates back to at least the 17th century. Early mirrors, single-lens magnifying glasses
with limited size. Back to the widespread use of eyeglasses in the 13th century. But the most advanced
microscopes first appeared in Europe around 1620 Early.
Microscope doctors included Galileo Galilei, who was discovered in 1610. That he could turn off his telescope
to see small objects nearby. And Cornelis Drebbel. Who may have invented the compact microscope in about
1620?
Antonie van Leeuwenhoek developed a simple magnifying microscope. In the 1670s and is often regarded as the
first acclaimed microscopist and microbiologist.
Microscope Uses
to view bacteria, parasites, and a variety of human/animal cells
cellular process, cell division
DNA replication
tissue analysis
examining forensic evidence
studying the role of a protein within a cell
studying atomic structures
And in what way are bacteria able to infect human cells, then we use a microscope to study them all.
Those studies are done at the micro-level.
We use a microscope to perform the kind of study that we cannot see with the naked eye.
Microscope component
Light
Lence
Optical/Light Microscopy
Bright Field Microscopy
Dark Field Microscopy
Confocal Microscopy
Phase Contrast Microscopy
Fluorescence Microscopy
Electron microscopy
Transmission Electron Microscopy
Cyber Risk Insurance
3 Tips for Procuring Cyber Insurance for Small Businesses
Questtips Open
Improve Patient Engagement
Learn More about AiCure's Solutions
AiCure Learn More
Microbiology with Disease by
Body System
December 16, 2022
Social Plugin
3. Scanning Electron Microscopy
Scanning Probe Microscopy
The resolving power of a microscope means how clearly we can see an image with the help of a microscope.
Factor effecting
If we light it with more wavelength then the limit of resolution will be more. The resolving power will be less.
That's why we use visible light in the electromagnetic spectrum so that the resolving power is better.
The optical or optical microscope incorporates transcendental light. That is transmitted or reflected from a
sample. With one or more lenses to allow for a magnified view of the sample. The resulting image can be
captured directly. Captured on a photo plate, or taken digitally.
Scanning Probe Microscopy
Biotechnology Laboratories
One lens and its attachment, or lens system. And photographic equipment, as well as the appropriate lighting
equipment, stage sample. And support, form a basic light microscope. The most recent development is the
digital microscope.
Which uses a CCD camera to focus on the show of interest. The image is displayed on a computer screen. So
eyebrows are not required.
Optical Microscope Resolution
The optical microscope, also called the light microscope. Is a type of microscope. That often uses visible light
and a lens system to produce magnified images of tiny objects. The eye microscope is the oldest form of the
microscope. And was probably invented in its 17th-century composite form.
A basic visual microscope can be very simple. Although many complex designs aim to improve sample
resolution and clarity. The object is placed on a stage and may be viewed directly. With one or two eye
microscopes.
In high-microscope is the oldest form of the microscope. And was invented in its 17th-century composite form.
A basic visual microscope can be very simple. Although many complex designs aim to improve sample
resolution and clarity. The object is placed on a stage and may be viewed.
With one or two eye microscopes. In high-resolution microscopes. Both eyepieces usually display the same
image. But with a stereo microscope, different images are used to create a 3-D effect. The camera is usually
used for a micrograph. The sample can be illuminated in a variety of ways.
The reflective objects can be illuminated below. And solid objects can be illuminated by light emanating or
around the goal lens. Polarized light may be used to determine the crystal structure of metal objects. Section
brightness images can be used to increase image brightness.
By highlighting small details of a different refractive index. A range of purposeful lenses with different
magnifications. Is usually provided and placed on the turret. Allowing them to rotate in place and provide the
ability to zoom. The greatest magnification of optical microscopes. Is usually limited to about 1000x due to the
limited resolution of visible light.
Although a larger magnification may not be the details of the object resolved. Modified conditions such as oil
consumption or ultraviolet light can increase correction. And allow the details to be resolved in size greater than
1000x.
Other optical microscopy methods do not use visible light. Include scanning electron microscopy. And electron
microscopy transfer. And scan probe microscopy and as a result, can achieve much greater magnification
4. Bright-Field Microscopy
Bright-field microscopy is the simplest form of simple microscopy. Sample light is a white light transmitted, i.e.
illuminated from below and viewed above. Limitations include low biological sampling differences.
And low clarity that is evident due to the dullness of non-concentrated substances. The simplicity of the
strategy. And the minimal sample preparation required is a significant advantage.
Oblique light
The use of oblique light gives the image a three-dimensional look. And can highlight other subtle
features. The most recent method based on this method is Hoffmann's modular modification. A
system derived from distorted microscopes for use in cell culture. Oblique light faces the same limits
as a bright field microscope.
LightPath of Bright Field Microscopy
The light way of a splendid field magnifying instrument is very basic. No extra parts are needed past
the ordinary light-magnifying instrument arrangement.
The light way comprises a transillumination light source. Usually an incandescent light in the magnifying
instrument stand;
A condenser focal point shines light from the light source onto the example.
A goal focal point, which gathers light from the example and amplifies the picture;
5. Oculars and additionally a camera to see the example picture. Splendid field microscopy might use
basic. Köhler enlightenment to enlighten the example.
Performance of Bright Field Microscopy
Bright-field microscopy usually has low contrast with most biological samples. As few absorb light on a large
scale. Spots are often needed to increase brightness.
Which prevents the use of living cells in most cases. Bright-field lighting is helpful for indoor color samples.
For example, chloroplasts on plant cells. Comparison of light conversion techniques used to produce
differences in tissue paper samples.
The brightness of the light field and the difference. The sample is due to the absorption of light in the sample
In the cross-polarized light intensity. The sample difference is from the white light rotation by the sample. In
the light of the dark field.
The difference in the sample is from the light dispersed by the sample. The brightness of the phase
brightness. The brightness of the sample arises from the disturbance of the length.
The different light intensity with the sample Bright-field microscopy. Is the most common form of light
microscopy. So magnification is limited. By the possible resolution of the wavelength of visible light.
Benefits
Ease of setup with only basic assets required.
Living cells can be seen under a microscope.
Limitations
Very low variability of many biological samples.
The effective magnification limit with a bright microscope is around 1300X.
Although high magnification is possible. It becomes even more difficult to maintain image clarity as
magnification increases.
Low visibility changes due to the blurring of objects outside of focus.
Colorless and transparent samples may not be visible. Many types of mammal cells.
These samples should usually be stained before viewing.
Samples of their color can be seen without preparation. Detection of cytoplasmic proliferation in
Chara cells.
Enhancements
Decreasing or increasing the amount of light source through the iris diaphragm.
Use of an oil immersion lens and special immersion oil placed on a glass cover over the template.
Immersion oils have the same refraction as glass. And improve the preparation of the observed
sample.
The use of sampling methods for use in microbiology. Such as light stains and distinctive stains.
The use of a color filter or a separator in the light source to highlight features. That is not visible under
white light. The use of filters is particularly helpful with mineral samples.
6. Dark Field Microscopy
Microscopy of the dark field is a way to improve the brightness of spotless patterns. Which shows beyond.
The dark field light uses an aligned light source to reduce. The amount of light transmitted into the image
plane.
Collecting only the light dispersed by the sample. The dark area can enhance image brightness - especially
objects. That reflects beyond - while requiring a small property setup. But, this process suffers from low light
intensity.
In the final image of many biological samples. And continues to be influenced by low clear clarity. Diatom
under the light of Rheinberg Rheinberg illumination. Is a type of dark field light where transparent, colored
filters are inserted. Before the condenser the rays of light.
At higher altitudes is a different color than those on the lower surface. Other color combinations are
possible, but their effectiveness varies. In optical microscopes, a black field lens should be used. Which
directs the light cone away from the target lens.
To maximize the scattering light capacity of the target lens.
Oil immersion is used. And the target area opening off the target lens must be less than 1.0. Target lenses. A
higher NA can be used. But only if they have a flexible diaphragm, which reduces the NA. These target lenses
have NA variables ranging from 0.7 to 1.25.
LightPath of Dark Field Microscopy
The steps are shown in the diagram where the distorted microscope is used. Illustration of light
through
A dark field microscope Light enters the microscope to illuminate the sample.
Disks with special size, patch stand, block certain light from the light source. Leaving an external light
ring. The annulus of the broad section can be altered at low growth.
The condenser lens focuses light on the sample.
Light enters the sample.
Most are broadcast, and some are distributed in the sample.
Scattered light enters the target lens. While direct light illumination misses the lens. And is not collected
due to direct light block.
Only diffused light continues to produce an image, while direct light is left out.
Advantages and Disadvantages of Dark Field Microscopy
Darkfield microscopy delivers a picture with a dim foundation. Darkfield microscopy is a basic yet successful
method. And appropriate for utilization including live and clean natural examples.
For example, a smear from a tissue culture. Considering the effortlessness of the arrangement. The nature
of the pictures acquired from this method is great. One impediment of dull field microscopy. Are the low light
levels found in the last picture? This implies that the example should be enlightened.
Which can make harm the example. Darkfield microscopy strategies. Are on the whole liberated from corona
or alleviation style curios ordinary of DIC. And stage contrast imaging. This comes to the detriment of
aversion to stage data.
7. The translation of dim field pictures should be finished. With extraordinary consideration. As normal dull
elements of splendid field microscopy pictures might be undetectable.
As well as the other way around. Omit the dull field picture does not have. The low spatial frequencies are
related to the brilliant field picture.
Making the picture a high-passed adaptation of the hidden design. While the dim field picture may seem. By all
accounts, it is a negative of the brilliant field picture. Various impacts are clear in each.
In brilliant field microscopy. Highlights are noticeable where either a shadow is projected on a superficial
level.
The occurrence of light or a piece of the surface is less intelligent. By the presence of pits or scratches.
Raised highlights that are too smooth. To even think about projecting shadows won't show up. In splendid
field pictures, but, the light.
That reflects off the sides of the component. Will be clear in obscurity field pictures.
Phase-contrast microscopy
Phase-contrast microscopy is an optical microscopy method. That converts phase shifts from a transparent
pattern into light changes in an image. The stage shifts themselves are not visible. But are visible when
displayed as light contrast.
When light waves travel to a central location. Other than a vacuum, the interaction of space causes the wave
amplitude. And phase to change in a manner dependent on the properties of the center. Changes in amplitude
come from scattering.
And absorbing light, which often depends on waves. And may cause colors. Photographic equipment and the
human eye are sensitive only to a wide range of amplitude. Without special settings, category changes are not
visible.
But, class changes often convey important information. The same cells are represented by a traditional bright
field microscope. And a phase brightness microscope.
Phase-contrast microscopy is very important in biology. Displays many cellular structures. They are not
visible with a bright field microscope, as shown in the photo.
These structures were made visible in earlier microscopes by staining. But this required further change and
cell death. It is one of the few methods available to measure cell formation. And fluorescence-free
components.
After its invention in the early 1930s. Phase-contrast microscopy proved to be so advanced in microscopes
that its founder. Frits Zernike was awarded the Nobel Prize in Physics in 1953.
Working Principle of Phase Contrast Microscopy
The essential rule is to make stage changes clear in phase contrast microscopy. Is to isolate the enlightening
light from the example dissipated light. And to control these. The ring-molded enlightening light that passes.
The condenser annulus is centered around the example by the condenser. A part of the enlightening light is
dispersed by the example. The leftover light is unaffected by the example. And structures as the foundation
light.
While noticing an impeccable organic example. The dissipated light is powerless and the phase moved by
−90° compared. With the foundation light. This prompts a closer view. And the foundation has almost a
similar power, bringing about low picture contrast.
8. In a stage contrast magnifying instrument. Picture contrast is expanded in two ways. By producing helpful
impedance among dispersed and foundation light beams. In locales of the field of view that contain the
example. And by diminishing how much foundation light.
That arrives at the picture plane. In the first place, the foundation light is stage moved. By −90° by going
through a stage shift ring. Which dispenses with the stage contrast. The foundation and the dispersed light
beams.
When light is focused on an image plane, this phase shift causes the background. And scattered light rays
from the viewing regions containing. The sample is disturbing. Which leads to an increase in the brightness of
these areas compared to regions.
That do not contain a sample. Finally, the background is darkened by ~ 70-90%. With a gray filter ring; this
method increases. The amount of diffused light produced. By the light while reducing the amount of
illuminated light.
That reaches the image plane. Some scattered light illuminates. The entire area of
the filter will be replaced in
phases. And dimmed rings, but at a much lower level than the background light. Which only illuminates the
phase shift rings and gray filters.
The above describes the differences between the negative category. In its compact form, the rear light is
instead. Is replaced by a phase of + 90 °. The background light will be 180 ° outside the phase relative to the
diffused light.
Dispersed light will then be emitted. The background light forms a dark background image. With a bright
background, as shown in the first image.
Method of Phase Contrast Microscopy
The achievement of the phase-contrast microscopy instrument. Has prompted various ensuing phase
imaging strategies. In 1952, Georges Nomarski was licensed. What is today known as differential obstruction
contrast microscopy? It improves contrast by making fake shadows.
As though the article is enlightened from the side. Yet, DIC microscopy is inadmissible when the item or its
compartment change polarization. With the developing use of polarizing plastic compartments in cell science.
DIC microscopy is supplanted.
By Hoffman tweak contrast microscopy, concocted by Robert Hoffman in 1975. Conventional phase-contrast
strategies improve contrast. Mixing brilliance and stage data in a solitary picture. Since the presentation of
the advanced camera during the 1990s.
A few new computerized stage imaging strategies have been grown. Known as quantitative stage contrast
microscopy. These techniques make two separate pictures. A normal splendid field picture. And an alleged
stage shift picture. In each picture point.
The stage shift picture shows the evaluated phase shift prompted by the item. Which is corresponding to the
optical thickness of the article.
Quantitative Phase Contrast Microscopy
Microscopy for comparison phase or mass imaging is a group of microscopy methods. That measure phase
changes that occur when light waves pass through a more dense object. Bright objects, such as the living cell,
absorb.
9. And disperse small amounts of light. This makes changing objects difficult to see in normal light
microscopes. Such features, but, encourage seamless transitions. That can be detected using a
segmentation variable. Normal phase microscopy and related techniques.
Such as microscopic distortion differences, and visual phase shifts. By converting phase transition gradients
into dynamic variations. These differences in strength are mixed with other strength variations.
Which makes it difficult to extract quantitative information. Size class comparison methods are differentiated
from standard phase contrast methods because. They form a second image called a phase change image
independent of the image.
Stage opening methods are usually used. In the phase transition diagram to give. The total transition values
per pixel, In this phase of changing the image of cells in the culture. The length and color of the image point
correspond.
To the modified phase change. Thus the volume of an object can be determined from the phase transition
image. Where the refractive index difference between the object. And the surrounding media is known.
The main methods of measuring and visualizing class shifts. Include various types of holographic
microscopy methods. Such as digital holographic microscopy. Holographic interference microscopy. And
digital in-line holographic microscopy.
Common in these methods is the hologram pattern recorded on a digital image sensor. From the recorded
distortion pattern. The intensity and image of the transition phase. They are created by a computer algorithm.
Microscopy of the contrast phase is used to identify spotless living cells. Measuring images of cell-cell delay
delays provide more information. The genetic makeup and dryness of individual cells. In contrast to the usual
images of phase comparisons.
Images of the phase transition of live cells are subject to processing. By the image analysis software. This
has led to the development of non-invasive live-cell images. And automated cell-based analysis systems
based. On microscopy compared with the bulk class.
Fluorescence Lifetime Imaging Microscopy
A fluorescence microscopy instrument is an optical magnifying lens. That utilizes fluorescence rather than.
As well as, dissipating, reflecting, weakening, or ingestion. To concentrate on the properties of nature.
"Fluorescence magnifying instrument" alludes to any magnifying lens. That utilizes fluorescence to produce.
A picture, regardless of whether it is a basic setup. An epifluorescence magnifying instrument. A more
convoluted plan.
For example, a confocal magnifying instrument. Which utilizes optical separating to improve the goal of the
fluorescence image.
Principle of Fluorescence Microscopy
The example is enlightened with the light of a particular frequency. Which is consumed by the fluorophores.
Making them emanate the light of longer frequencies. The enlightenment light is isolated from the lot more
vulnerable radiated fluorescence using.
A discharge channel. Regular parts of a fluorescence magnifying lens are a light source. The excitation
channel. The dichroic reflector, and the emanation channel. The channels and the dichroic beamsplitter. Are
picked to match the excitation.
And discharge qualities of the fluorophore used to mark. The specimen appropriation of a solitary
fluorophore is imaged at a time. Multicolor pictures of a few kinds of fluorophores should be created. By
consolidating a few single-shading images.
10. Most fluorescence magnifying instruments are being used. Are epifluorescence magnifying instruments.
Where excitation of the fluorophore. And the discovery of the fluorescence is done through a similar light
way. These magnifying lenses are utilized in science.
And are the reason for further developed magnifying lens plans. For example, the confocal magnifying lens.
And the absolute inside reflection fluorescence magnifying instrument.
Epifluorescence microscopy
Most fluorescence magnifying lenses, particularly those utilized. The existing sciences are of the
epifluorescence configuration displayed in the outline. Light of the excitation frequency enlightens.
The example is through the goal focal point. The fluorescence transmitted by the example is engaged to the
indicator. By the very truth that is utilized for the excitation. A more prominent goal will be an aim focal point.
With a higher mathematical opening.
Since the majority of the excitation light. Is communicated through the example. mirrored excitatory light
arrives at the target along. With the transmitted light. And the epifluorescence technique hence gives a high
sign-to-commotion proportion.
The dichroic beamsplitter goes about as a frequency-explicit channel. Communicating fluoresced light
through to the eyepiece or indicator. But mirroring any excess excitation light back towards the source.
The source of Light in Fluorescence Microscopy is from
Fluorescence microscopy requires extreme, close monochromatic, brightening. Which are a few far and
wide light sources. Like incandescent lights can't provide. Four primary sorts of light sources are utilized.
Including xenon curve lights or mercury-fume lights. With an excitation channel, lasers, and supercontinuum
sources. And high-power LEDs. Lasers are most utilized for more. Intricate fluorescence microscopy
procedures like confocal microscopy.
And absolute inward reflection fluorescence microscopy. While xenon lights, and mercury lights. And LEDs
with a dichroic excitation channel are generally utilized. For wide-field epifluorescence magnifying
instruments. By setting two microlens clusters.
Into the brightening way of a wide-field epifluorescence microscope. Uniform light with a coefficient of variety
of 1-2% can be accomplished.
Sample preparation for fluorescence microscopy
For the sample to be fluorescence microscopy it must be fluorescent. There are several ways to make a
fluorescent sample; the main techniques are labeled. With fluorescent stains. In the case of organic samples,
the expression of light.
The internal fluorescence of the sample can be used. In health science, a fluorescence microscopy is a
powerful tool. That allows direct and sensitive decomposition of a sample to detect. The distribution of
proteins or other interesting molecules. As a result, there are a variety of fluorescent lubrication methods. In
biological samples.
Biological Fluorescent stains
Biological fluorescent stains have been intended for a scope of organic particles. A part of these is little
atoms that are fluorescent. And tied to an organic particle of interest. Significant instances of these are
nucleic corrosive stains like DAPI.
And Hoechst and DRAQ5 and DRAQ7. Which all tight spot the minor score of DNA, naming the cores of cells.
Others are medications, poisons, or peptides. Which tie explicit cell structures and have been derivatized.
With a fluorescent correspondent.
11. A significant illustration of this class of fluorescent stain is phalloidin. Which is utilized to stain actin filaments
in mammalian cells. Another peptide is known as the Collagen Hybridizing Peptide. Can likewise be formed
with fluorophores.
And used to stain denatured collagen filaments. Staining of the plant cell dividers is performed utilizing stains
or colors. That tight spot cellulose or gelatin. The mission for fluorescent tests with high explicitness.
That likewise permits live imaging of plant cells to be ongoing. There are many fluorescent atoms called
fluorophores. Alexa Fluors, or DyLight 488. Which can be connected to an alternate particle. That ties the aim
of interest inside the example.
Immunofluorescence
Immunofluorescence is a technique that uses a special antibody binding. To its antigen to label certain
proteins. Other molecules within a cell. The sample is treated with a key antibody specific to the interested
molecule.
The fluorophore can be linked to the main antibody. Or, a second antibody, combined. A fluorophore, which
binds to the first antibody may be used. For example, a primary antibody is raised.
In a mouse that detects tubulin combined. With a second anti-mouse extracted. Fluorophores may be used to
label microtubules in a cell.
Fluorescent Proteins
Modern genetic understanding and available DNA modification techniques allow scientists. To change genes
to treat a fluorescent protein reporter. In biological samples, this allows the scientist. To make an interesting
fluorescent protein. The location of a protein can be traced, including living cells.
Limitation of Fluorescence Microscopy
Fluorophores lose their capacity to fluoresce. As they are enlightened in a cycle called photobleaching.
Photobleaching happens. As the fluorescent particles gather compound harm from the electrons energized
during fluorescence.
Photobleaching can restrict the time over. An example can be seen in fluorescence microscopy. A few
strategies exist to diminish photobleaching. For example, the use of more strong fluorophores.
Limiting light, or utilizing photoprotective scrounger synthetic substances. Fluorescence microscopy with
fluorescent columnist proteins has empowered. The examination of live cells by fluorescence microscopy.
But cells are helpless to phototoxicity, especially with short-frequency light. Moreover, fluorescent atoms
tend to create responsive compound species when under brightening. Which upgrades the phototoxic
impact.
Not at all like sent and mirrored light microscopy methods. Fluorescence microscopy permits the perception
of particular constructions. Which have been named for fluorescence. For instance, noticing a tissue test
ready.
A fluorescent DNA stain by fluorescence microscopy is uncovered. The association of the DNA inside the
cells. And uncovers nothing else about the cell morphologies. Computational procedures that propose to
gauge.
The fluorescent sign from non-fluorescent pictures. This may decrease these concerns. These
methodologies include preparing a profound convolutional neural organization. On stained cells and
afterward assessing. The fluorescence on clean examples.
12. By decoupling the cells being scrutinized from the cells. Used to prepare the organization, imaging can be
performed faster. And with diminished phototoxicity.
Sub-diffraction of Fluorescence Microscopy
The wave idea of light restricts the size of the spot too. Which light can be engaged as far as possible. This
limit was depicted in the nineteenth century. By Ernst Abbe and "limits an optical magnifying instrument's goal.
To roughly 50% of the frequency of the light utilized.
Fluorescence microscopy is key to many methods. Which expect to reach past this cutoff. By specific optical
arrangements. A few enhancements in microscopy strategies have been concocted.
The twentieth century and have brought about expanded goals. And differences somewhat. In 1978 first
hypothetical thoughts have been created. To break this boundary. By involving a 4Pi magnifying lens as a
confocal laser examination.
Fluorescence magnifying instrument. Where the light is centered from all sides to a typical center. Which is
utilized to check the article excitation joined. With 'point-by-point' detection. But, the principal trial showing the
4pi magnifying lens occurred in 1994. 4Pi microscopy boosts.
How much accessible centering bearings? By utilizing two contradicting aim focal points. Two-photon
excitation microscopy utilizing redshifted light. And multi-photon excitation. Incorporated reciprocal
microscopy consolidates.
A fluorescence magnifying lens with an electron magnifying lens. This permits one to picture ultrastructure.
And logical data with the electron magnifying instrument. While involving the information from the
fluorescence magnifying lens.
As a marking tool. The primary strategy to do. Sub-diffraction goal was STED microscopy, proposed in 1994.
This strategy and all methods follow. The RESOLFT idea depends on solid non-straight cooperation among
the light.
And fluorescing atoms. The atoms are driven between recognizable sub-atomic states at every particular
area. So that at long last light can be discharged. At a little part of a room, thus an expanded goal. Too during
the 1990s, one more super-goal microscopy strategy was dependent.
On wide-field microscopy has been created. A further developed size goal of cell nanostructures stained. A
fluorescent marker was accomplished. By the advancement of SPDM confinement microscopy. And
organized laser brightening.
Combining the rule of SPDM with SMI brought about. The improvement of the Vertico SMI microscope.
Single-atom identification of typical flickering fluorescent colors. Green fluorescent protein can be
accomplished. By utilizing a further advancement of SPDM.
The purported SPDMphymod innovation. Which makes it conceivable to distinguish. And count two unique
fluorescent particle types at the sub-atomic level. But, the coming of photoactivated. Confinement
microscopy could do comparative outcomes.
By depending on the flickering or exchanging of single particles. Where the negligible part of fluorescing
atoms is tiny at each time. This stochastic reaction of atoms. On the applied light compares likewise. A
nonlinear collaboration, prompting a subdiffraction resolution.
Electron microscopy
An electron microscopy instrument is a magnifying lens. That involves light emission electrons. As a
wellspring of brightening. The frequency of an electron can be up to many times more limited.
Than that of noticeable light photons, electron microscopy lenses have. A higher settling power than light
magnifying instruments. And can uncover the design of more modest items. An examining transmission
13. electron microscopy lens.
Has accomplished better compared to the 50 pm goal. In annular dim field imaging mode. And amplification of
up to around 10,000,000×. While most light magnifying instruments are restricted. By diffraction to around 200
nm goal.
And valuable amplifications underneath 2000×. Electron microscopy instruments use molded attractive fields
to shape electron-optical focal point frameworks. That is comparable. To the glass focal points of an optical
light magnifying instrument.
Electron microscopy instruments are utilized to explore. The ultrastructure of a wide scope of organic and
inorganic examples. Including microorganisms, cells, huge atoms, biopsy tests, and metals. And precious
stones.
An electron microscopy lens is utilized for quality control. And disappointment examination. Current electron
magnifying instruments produce. Electron micrographs utilizing particular computerized cameras. And
casing grabbers to catch the pictures.
History of Electron Microscopy
In 1873, Ernst Abbe proposed the ability to process information. An object would be limited to the light
wavelength used. In photography or a few hundred nanometers to get a visible light microscope.
The development of ultraviolet microscopes, led by Köhler. And Rohr, increased the resolution capacity by
both factors. But this required expensive quartz optics, due to UV absorption by the glass. In 1858, Plücker
observed the separation of the "cathode radiation" by magnetic fields.
This result was used. Ferdinand Braun 1897 developed simple cathode-ray oscilloscope measurement
devices. In 1891, Riecke realized. That cathode radiation could be absorbed. By magnetic fields, allowing for
simpler designs of electric lenses.
In 1926, Hans Busch fostered the electromagnetic focal point. As indicated by Dennis Gabor, the physicist
Leó Szilárd. Attempted in 1928 to persuade him to assemble an electron magnifying instrument. For which he
had recorded a patent.
The primary model electron magnifying instrument. Equipped for 400 power amplification, was created in
1931. By physicist Ernst Ruska and the electrical specialist Max Knoll. At the Berlin Technische Hochschule of
Berlin Technical University.
The contraption was the main functional exhibit of the standards of electron microscopy. In May of that very
year, Reinhold Rudenberg. The logical head of Siemens-Schuckertwerke was acquired. A patent for an
electron magnifying instrument.
In the next year, 1933, Ruska fabricated the primary electron magnifying instrument. That surpassed the goal
achievable with an optical microscope. Four years after the fact, in 1937, Siemens financed crafted. By Ernst
Ruska and Bodo von Borries.
And utilized Helmut Ruska, Ernst's sibling, to foster applications for the magnifying lens. Particularly with
natural specimens. Also in 1937, Manfred von Ardenne spearheaded. The checking electron microscope.
Siemens created the main business electron magnifying instrument in 1938.
The principal North American electron magnifying instruments were built in 1930. At the Washington State
University by Anderson and Fitzsimmons. And the University of Toronto, by Eli Franklin Burton. And
understudies Cecil Hall, James Hillier and Albert Priebus.
Siemens created a transmission electron magnifying lens in 1939. Although the current transmission electron
magnifying lens. Is fit for 2,000,000 power amplification, as a logical instrument. They stay dependent on
Ruska's prototype.
14. Application of Electron Microscopy
Semiconductor and information stockpiling
Circuit edit
Deformity analysis
Disappointment analysis
Science and life sciences
Cryobiology
Cryo-electron microscopy
Symptomatic electron microscopy
Drug research
Electron tomography
Molecule analysis
Molecule detection
Protein localization
Primary biology
Tissue imaging
Toxicology
Virology
Materials research
Gadget testing and characterization
Dynamic materials experiments
Electron pillar incited deposition
In-situ characterization
Materials qualification
Clinical research
Nanometrology
Nanoprototyping
Industry
Synthetic/Petrochemical
Direct pillar composing fabrication
Food science
Forensics
Fractography
Miniature characterization
Mining
Drug QC
Disadvantages of Electron Microscopy
Electron microscopy lens is costly to assemble and keep up with. With, yet the capital and running expenses
of confocal light magnifying lens frameworks. Over those of essential electron microscopy instruments.
Magnifying instruments intended.
15. To do high goals should be housed in stable structures. With exceptional administrations, for example,
attractive field-dropping frameworks. The examples generally must be seen in a vacuum. As the particles that
makeup air would disperse the electrons.
An exemption is fluid stage electron microscopy utilizing either. A shut fluid cell or an ecological chamber, for
instance. In the natural checking electron magnifying lens. Which permits hydrated examples to be seen. In a
low-pressure wet climate.
Different procedures for in situ electron microscopy of vaporous. Examples have been created as well.
Examining electron magnifying lenses working. In customary high-vacuum mode generally picture conductive
examples. Non-conductive materials must have conductive covering.
The low-voltage method of current magnifying instruments mentioned is conceivable. The aim fact of non-
conductive examples without covering. Non-conductive materials can be imaged additionally. By a variable
tension filtering electron microscopy lens.
Little, stable examples, for example, carbon nanotubes, and diatom frustules. And little mineral precious
stones must have no unique treatment before being analyzed. In the electron microscopy lens. Tests of
hydrated materials, including all organic examples.
Must be ready in different ways to settle them, and lessen their thickness. And increment their electron
optical difference. These cycles might bring about relics, but. These can as a rule be recognized by
contrasting the outcomes got.
By utilizing unique example readiness techniques. Since the 1980s, investigation of cryofixed, vitrified
examples has additionally. Become utilized by researchers. Further affirming the legitimacy of this procedure.
Transmission Electron Microscopy(TEM Microscope)
Transmission electron microscopy is a method of microscopy. In which light emissions are sent to the
sample to match the image. An example is usually an ultrathin area less than 100 nm in size or suspended in a
frame.
The image is embedded in the interaction of electrons. In the model as the column is sent to the sample. The
image is then enlarged and centered on a photographic gadget. Such as a fluorescent screen. A layer of
visible film, or a sensor, for example.
A scintillator connected to a gadget connected to a charger. Electron amplification devices are equipped to
take an image. At a much larger goal than light magnification tools. Resulting in the more modest Broglie
electron frequency.
This gives the tool the ability to capture fine detail — even a single part of iotas. Which is a small amount of
less than. An unresolved amount of light is found in a magnifying glass lens. Transmission electron
microscopy is an important technique.
That has insight into the physical, material, and environmental sciences. TEMs look at work in diagnostics,
and virology. And biomedical sciences such as pollution, and nanotechnology. And semiconductor research.
Yet also in various fields such as fossil science and palynology. TEM tools have a wide range of functionality.
Including traditional photography, TEM imaging, diffraction, and spectroscopy. And blends. Indeed, even
within the traditional images. There are many different ways.
16. In which differences are made, called "parts of image comparisons". Differences may be due to geographical
differences. In thickness or thickness, nuclear number, gemstone construction, or method. A small quantum-
mechanical phase moves.
The individual iotas producing in the electron they pass through. The energy is lost by the electrons as they
pass through the model. And that is the beginning. Each section tells the client another type of data,
depending.
On the classification system and how the magnification tool is used — focus settings. Openings, and
directions. This means that TEM is equipped to retrieve. a remarkable assortment of nanometer data. With a
nuclear target, to the precise location of each molecule.
And to the type of particles and how they are connected. TEM is so considered a basic nanoscience tool. In
both biological and structural fields. The first TEM was introduced by Max Knoll and Ernst Ruska in 1931. And
this circle promotes the main TEM.
With a more significant purpose than the light in 1933. And the TEM's main business in 1939. In 1986. Ruska
received the Nobel Prize for material things. science to improve electron microscopy transmission.
Component of Transmission Electron Microscopy
A TEM is made out of a few parts. Which remembers a vacuum framework for which the electrons travel. An
electron emanation hotspot for the age of the electron stream. And a progression of electromagnetic focal
points. Like electrostatic plates.
The last two permit the administrator to direct and control the shaft as required. Likewise required is a
gadget to permit the addition into, movement inside. And expulsion of examples from the pillared way.
Imaging gadgets are in this manner used. To make a picture from the electrons that leave the framework.
Vacuum framework
To build the mean freeway of the electron gas collaboration. A standard TEM is emptied to low tensions, on
the request for 10−4 Pa. The need for this is twofold. First the stipend for the voltage distinction between the
cathode.
And the ground without creating a curve. And also to decrease the crash recurrence of electrons. With gas
molecules to an insignificant level. This impact is portrayed by the mean freeway. TEM parts, for example,
example holders.
And film cartridges should be embedded or supplanted requiring. A framework with the capacity to re-clear.
All things considered, TEMs are outfitted with different siphoning frameworks. And airtight chambers are not
forever vacuum fixed.
The vacuum framework for clearing a TEM to a working tension level comprises a few phases. At first, a low
or roughing vacuum is accomplished. With either a rotational vane siphon or stomach siphon setting. A low
strain to permit.
The activity of a super atomic or dissemination siphon building. A high vacuum level is essential for tasks. To
take into consideration that the low vacuum siphon to not need constant activity. While working the super sub-
atomic siphons. The vacuum side of a low-pressure siphon might be associated.
17. With loads that oblige the exhaust gases from the super sub-atomic pump. Sections of the TEM might be
detached. By the use of tension-restricting gaps. To take into consideration diverse vacuum levels. In explicit
regions, for example, a higher vacuum of 10−4 to 10−7 Pa or higher.
In the electron firearm in high-goal or field-outflow TEMs. High-voltage TEMs must have super-high vacuums.
On the scope of 10−7 to 10−9 Pa to forestall. The age of an electrical circular segment, especially at the TEM
cathode. As such for higher voltage TEMs a third vacuum framework might work.
With the weapon detached from the primary chamber either. By entryway valves or a differential siphoning gap
– a little opening. That forestalls the dispersion of gas atoms. Into the higher vacuum firearm region quicker.
Then they can be siphoned out.
For these low tensions, either a particle siphon. getter material is utilized. A helpless vacuum in a TEM can
create. A few issues going from the statement of gas inside the TEM. The example while seen in a cycle
known as electron shaft incited testimony.
To more extreme cathode harms brought about by electrical discharge. The use of a virus trap to adsorb
sublimated gases nearby. The example to a great extent dispenses. With vacuum issues that are brought
about by example sublimation.
Model stage
TEM model stage systems include airtight chambers to consider. The addition of a model holder to a vacuum.
With negligible vacuum loss. In a different region of the magnification tool. Model managers have a standard
size of the test matrix or a self-supporting model.
The standard TEM frame sizes are 3.05 mm in diameter. With a thickness and cross-section size from a
couple to 100 μm. The model is set in a straight line with a crossing distance of about 2.5 mm. The most
common frame materials are copper, molybdenum, gold, or platinum.
This network is set to the host holder, which is matched to the model stage. A wide variety of class and
management systems are available. Depending on the type of test being performed. Despite the 3.05 mm
frames, the 2.3 mm lattice lasts longer, assuming that once a blue moon, they are used.
These lattices are used in mineral science. Where a high degree of inclination may be required. And where the
model material may be rare. Specific electron specimens have a thickness usually less than 100 nm. But, this
value depends on the voltage velocity. Once connected to TEM.
The model must be controlled to determine whether the region is relevant to the bar. For example, in a single
grain class, on a particular side. To address this, the TEM phase allows for the development of the XY plane
model. The Z-length modification, and the single solitary bearing corresponding.
To the pivot of the separate phase controllers. The test version may be accessible to diffraction holders and
sections. Some edge TEMs provide power to two equilibrium development points. With specific catch
systems called double test handles.
Some stage plans, for example, a high corridor or direct planning. That is standard and common in high-
scoring. TEM lessons may have X-Y interpretation available. The TEM phase system standards are complex.
Due to the corresponding requirements for mechanical. And electron-optical limitations.
And specific models are accessible through a variety of techniques. The TEM platform is required to be able
to capture the model. And be controlled to bring the region of interest to the path of the electron bar. Since
TEM can operate in a wide range of amplification.
The platform should be able to float. With float requirements as low as a few nm/min. While having the option
to move μm / min. By re-setting the accuracy of the nanometers application. Previous TEM systems achieved
this with a sophisticated system of downgrade gadgets.
18. Allowing the controller to control the stage movement. With a few rotating poles. Current gadgets may use
power stage plans and use a working faucet and tread engines. And provide the controller with a PC-based
input. Such as a toy stick or trackball. Two main programs for the TEM sections are available.
A separate phase and a higher role version. Each system should bind the same holder to consider. The
installation of the model without damage. The weak TEM optics or allowing gas into the TEM frame under the
space. Graph detector holder solo harness for inclusion in TEM goniometer.
Changing the handle is done with a pivot of every goniometer. The best known is the owner of a separate
section. Where the model is placed near the head of a long bar. For example, setting the standard in a small
space. Next to the bar. There are a few polymer vacuum rings to consider.
The development of a vacuum-quality seal. When attached to the stage. The platform in this way is intended to
tie the bar. Setting the pattern in or near the goal area. Depending on the goal system. When attached to the
stage. the sidewalk holder has his or her point held inside the TEM vacuum.
And the base is introduced to the weather. A closed space that holds the vacuum rings. More ways for TEM
administrators to a side hallway usually include. sample pivot to launch small switches. That start clearing the
enclosure before. The model is embedded in the TEM section.
The next step is a high corridor holder that combines a few inches of the cartridge. With a drawer pulled down
the pivot of the cartridge. The pattern is stuck in drag, which may be used. With a small screw ring to set the
set pattern. This cartridge is mounted in a stand-alone position.
By dragging against the TEM optic pivot. At the point where it is fixed. The sole area is controlled to drive the
cartridge. In such a way that the cartridge is right. Where the pull opening is connected to the pillar hub until.
The shaft descends from the cartridge piercing area and on the model.
Such systems should not be altered without obstructing them. The shaft path or interfering with the lens.
Electron weapon
The electron weapon is framed from a few parts: the fiber, and a biasing circuit. A Wehnelt cap, and an
extraction anode. By interfacing the fiber with the negative part power supply. Electrons can be "siphoned"
from the electron weapon to the anode plate. And the TEM section, finishing the circuit.
The firearm is intended to make a light emission leaving from the get-together. At some given point, known as
the weapon disparity semi-point, α. By building the Wehnelt chamber with the end goal. That it has a higher
negative charge than.
The actual fiber, electrons that leave the fiber. In a wandering way are, under appropriate activity. Constrained
into a merging example the base size of which is the weapon hybrid breadth. The thermionic discharge
current thickness, J, can be connected.
With the work capacity of the emanating material through Richardson's law. Where An is Richardson's
consistent, Φ is the work capacity. And T is the temperature of the material. This condition shows that to do
adequate current thickness.
It is important to warm the producer, taking into consideration not causing harm. By use of over-the-top
hotness. Thus materials with either a high dissolving point, like tungsten. Those with low work are needed for
the weapon filament.
Furthermore, both lanthanum hexaboride and tungsten thermionic sources. Should be warmed to do
thermionic discharge. This can be accomplished by the use of a little resistive strip. To forestall warm shock,
there is a deferral upheld.
In the use of flow to the tip, to keep warm slopes from harming the fiber. The postponement is a couple of
moments for LaB6. And lower for tungsten.
19. Electron focal
Electron focal points are intended to act in a way imitating. That of an optical focal point, by centering equal
electrons. At some consistent central distance. Electron focal points might work.
Most electron focal points for TEM use electromagnetic loops. To produce a raised focal point. The field
created for the focal point should be balanced. As a deviation from the spiral evenness of the attractive. The
focal point causes variations like astigmatism.
And demolishes circular and chromatic abnormality. Electron focal points are made from iron, iron-cobalt, or
nickel-cobalt alloys, like permalloy. These are chosen for their attractive properties, like attractive immersion,
hysteresis, and penetrability.
The parts incorporate the burden, the attractive loop. The shafts, the polepiece, and the outer control
hardware. The shaft piece should be fabricated. In a balanced way. As this gives limited conditions to the
attractive field that frames the focal point.
Flaws in the production of the shaft piece can incite extreme twists. In the attractive field evenness. Which
actuate contortions. That will restrict the focal points' capacity to recreate the item plane. The specific
components of the hole, post-piece interior measurement.
And tighten, just as the general plan of the focal point. Is performed by limited component investigation of the
attractive field. While considering the warm and electrical imperatives of the design. The loops produce an
attractive field.
Are situated inside the focal point burden. The curls can contain a variable current. Yet use high voltages. And
must huge protection to forestall shortcircuiting. The focal point parts. Warm merchants are put to
guarantee. The extraction of the hotness was created.
By the energy lost to obstruction of the loop windings. The windings might be water-cooled. Utilizing a chilled
water supply to work. With the expulsion of the great warm obligation.
Spaces
Spaces are annular metal plates. In which electrons. Are farther away from the appropriate separation from
the optic hub. And maybe rejected. This involves a small metal plate thick enough to keep electrons from
circling. While allowing vital electrons.
This TEM-focused electron clearance creates two effects. At all times first. The holes reduce the power of
the bar as the electrons are separated from the shaft. Which may be necessary. Due to the models affecting
the bar.
Also, this filter eliminates electrons dispersed at higher altitudes. Which may be due to unfavorable cycles.
Such as circular or chromatic aberrations. Due to differences in the interaction between samples. Spaces
are suitable openings within a segment.
For example, in the area of
a condenser, or a portable gap. Which can be embedded or removed from a pillar
path. Transferred to a plane opposite the bar path. Congregations on opening machine gadgets.
That considers the choice of different space sizes that can be used. By the regulator to reduce the power and
divisive impact of the gap. Open congregations are often fitted. With micrometers to clear the gap, which is
needed for eye repairs.
Test planning
Test planning in TEM can be a complex procedure. TEM examples ought to be under 100 nanometers thick for
an ordinary TEM. Dissimilar to neutron or X-Ray radiation. The electrons in the bar communicate. With the
example, an impact that increments generally.
With nuclear number squared. High-quality examples will have a thickness. That is identical to the mean
freeway of the electrons. That move through the examples. Which might be several nanometers.
20. The readiness of TEM examples is explicit in the material under investigation. And the kind of data to be
acquired from the example. Materials that have aspects little. To be electron straightforward, like powdered
substances.
Little creatures, infections, or nanotubes, can be immediately ready. By the testimony of a weakened test
containing. The example onto films on help matrices. Natural examples might be inserted in sap to endure.
The high vacuum in the example chamber.
And to empower cutting tissue into electron straightforward meager areas. The natural example can be
stained utilizing either. A negative staining material like uranyl acetic acid derivation. For microscopic
organisms and infections.
On account of inserted segments. The example might be stained with weighty metals. Including osmium
tetroxide. Then again tests might be held at fluid nitrogen temperatures. In the wake of inserting in glassy ice.
In material science and metallurgy.
The examples can generally endure the high vacuum. Yet should be ready as a slim foil, or carved so some
part of the example. Is meager enough for the bar to enter. Requirements on the thickness of the material
might be restricted. By the dispersing cross-segment of the molecules from which the material is involved.
Tissue sectioning
Biological tissue is inserted in a gum block. And then, at that point, diminished to under 100 nm on an
ultramicrotome. The pitch block is cracked as it disregards a glass or jewel blade edge. This technique is
utilized to get slight, disfigured examples.
That takes into account the perception of tissue ultrastructure. Inorganic examples, like aluminum, may
likewise be inserted. Saps and ultrathin separated along these lines. Utilizing either covered glass, sapphire,
or bigger point jewel knives.
To forestall energizing work. At the example surface when seen. In the TEM, tissue tests should be covered.
With a slim layer of directing material, like carbon.
Sample staining
TEM samples of natural tissues need high nuclear number stains to improve contrast. The stain retains the
shaft electrons or dissipates a piece of the electron bar. Which in any case is projected onto the imaging
framework. Mixtures of weighty metals like osmium, lead, and uranium.
Utilized before TEM perception. To store electron-thick molecules. For example in wanted cell or protein
district. This interaction requires a comprehension of how weighty metals tie. To explicit organic tissues and
cell structures.
Mechanical cleaning
Mechanical cleaning is additionally used to plan tests for imaging on the TEM. Cleaning should be done to an
excellent. To guarantee consistent example thickness across the district of interest.
A precious stone, or cubic boron nitride cleaning compound might be utilized. In the last phases of cleaning
cut any scratches. That might make contrast changes due to differing test thickness.