
Recommandé
Contenu connexe
Similaire à Chapter 9.pptx
Similaire à Chapter 9.pptx (20)
Plus de MohammedAbdela7
Plus de MohammedAbdela7 (20)
Dernier
Dernier (20)
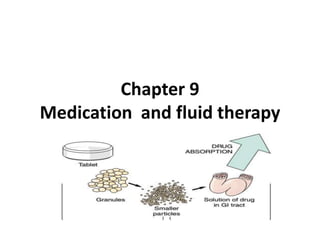
Chapter 9.pptx
- 1. Chapter 9 Medication and fluid therapy
- 2. Learning Objectives At the end of this chapter the students will be able to • ™ Describe various route of drug administration. • ™ Mention the general rules & care of administering medications. • ™ Identify the parts and types of syringes and needles. • ™ List the necessary equipments required for drug administration. • ™ Mention the five rights before drug administration. • ™ Locate the different sites of parentral drug administration. • ™ Demonstrate essential steps of medication administration. • ™ List precautions for medication administration.
- 3. 1. Medication preparation • Alteration in health related to acute or chronic conditions lead clients to seek relief of their symptoms through various treatment options. • One modality frequently used to help alleviate symptoms and restore health is a medication. • Medications are substances prescribed by the client’s health care practitioner to help in the treatment, relief, or cure of the cause of the client’s health alteration or in the prevention of an alteration.
- 4. • Medication management requires the collaborative efforts of many health care providers. • Medications may be prescribed by a physician, dentist, or other authorized prescriber such as advanced practice registered nurses as determined by individual licensing bodies.
- 5. • Pharmacists are licensed to prepare and dispense medications. • Nurses are responsible for administering medications. • Dietitians are often involved in identifying possible food and drug interactions.
- 6. • Nurses play an essential role in the administration of, education about, and evaluation of the effectiveness of prescribed medications. • Nurses are responsible for educating the client about his or her medications and its possible side effects as well as for evaluating the outcome of the prescribed therapy in restoring and maintaining the client’s health.
- 7. • Nurses are responsible for teaching clients how to take their medications safely when they are discharged. • Nurses use special equipment such as syringes, needles, ampules, and vials when administering parenteral medications
- 8. Syringes • A syringe has three basic parts: the hub, which connects with the needle; the barrel, or outside part, which contains measurement calibrations; and the plunger, which fits inside the barrel and has a rubber tip (see Figure).
- 9. • The nurse must ensure that the hub, inside of the barrel, and shaft and rubber plunger tip are kept sterile. • When handling the syringe, the nurse should touch only the outside of the barrel and the plunger’s handle. • Most syringes are disposable, made of plastic, and individually packaged for sterility.
- 10. • There are several types of • syringes, such as the hypodermic, insulin, and tuberculin syringes (Fig. A–C). • When a medication is incompatible with plastic, it is usually prefilled in a single dose glass syringe. • Syringes are often prepackaged with the commonly used needle size and gauge and are referred to as disposable plastic syringes (Figure D).
- 11. Hypodermic syringe • The hypodermic syringe comes in 2-, 2.5-, and 3-ml sizes. The measurement calibrations (scales) are usually printed in milliliters and minims. • Most syringes are marked in cubic centimeters (cc), and most drugs are ordered in milliners; these are equivalent measurements (1 cc = 1 ml). • The hypodermic syringe is used most often when a medication is ordered in milliliters. When the order is written in minims, it is safer to prepare the drug in a tuberculin syringe
- 12. Insulin syringe • The insulin syringe is designed specially for use with the ordered dose of insulin. • Insulin syringes are calibrated on the U-100 (100-unit) scale, which is based on 100 units of insulin contained in 1 ml of solution. • Insulin syringes come in sizes that hold 0.5 ml (50 units) to 1.0 ml (100 units). • Insulin syringes that hold 0.5 ml are the easiest to read and are therefore used for low dosages. • There are other sizes of insulin syringes that complement the ordered dose, such as U-30 and U-50, although these dosages are seldom prescribed.
- 13. Tuberculin syringe • The tuberculin syringe is a narrow syringe, calibrated in tenths and hundredths of a milliter (up to 1 ml) on one scale and in sixteenths of a minim (up to 1 minim) on the other scale. • Originally this syringe was designed to administer the tuberculin drug, but it is commonly used today to administer small or precise doses, such as pediatric dosages. • The tuberculin syringe should be used for doses 0.5 ml or less.
- 14. Prefilled single-dose syringes • Prefilled single-dose syringes should not be confused with a unit dose. • The nurse must be careful to check the prescribed dose against that in the prefilled syringe and discard excess medication. • For example, if the health care practitioner orders diazepam (Valium) 5 mg IM as a preoperative sedative and the prefilled single- dose contains 10 mg/2 ml, the nurse must calculate dosage (5 mg/1 ml) and destroy 1 ml from the syringe before administration.
- 15. Needles • Most needles are disposable, made of stainless steel, and individually packaged for sterility. • Reusable needles are seldom used, except in certain areas such as surgery and special procedure rooms; reusable needles require frequent inspection to ensure that the needle is sharp, and resterilization is necessary between uses
- 16. ` • The needle has three basic parts: the hub, which fits onto the syringe; the cannula, or shaft, which is attached to the hub; and the bevel, which is the slanted part at the tip of the shaft. • Needles come in various sizes, from 1/4 inch to 5 inches, and with gauges that range from 28 to 14 (see Figures ). Various Lengths and Gauges of Needles. Gauge from left to right: 18, 20, 21, 25
- 17. Ampules and Vials • Drugs for parenteral injections are sterile preparations. • Drugs that deteriorate in solution are dispensed as tablets or powders and dissolved in a solution immediately before injection. • Drugs that remain stable in a solution are dispensed in ampules and vials in an aqueous or oily solution or suspension
- 18. • Ampules are glass containers of single-dose drugs (see Figure). The glass container has a constriction in the stem to facilitate opening the • Glass, single- or multiple-dose rubber-capped drug containers are called vials (see Figure). • The vial is usually covered with a soft metal cap that can be easily removed. • See Procedure 29-3 for removing a drug from a vial and ampule.
- 19. Withdrawing Medication from a Vial • Equipment • Medication administration record (MAR) • Sterile syringe and needle • Alcohol swab • Vial of medication
- 20. Procedure 1. Wash your hands. 2. Prepare the vial. Open the alcohol wipe. New vial, remove metal cap from vial of medicine and cleanse the rubber top of the vial. Used vial, cleanse the rubber top of the vial.
- 21. 3. Prepare syringe. • Choose a syringe of appropriate size to accommodate the volume of medication to be withdrawn. • Grasp needle and turn barrel of syringe to the right. • Remove the needle cap and pull back on plunger to fill syringe with an amount of air equal to amount of solution to be withdrawn from the vial. 4. Insert the needle into the center of the upright vial and inject air into the vial.
- 22. 5. Invert vial; keep the vial at eye level and the needle’s bevel below the fluid level, and remove the exact amount of medicine while touching only the syringe barrel and plunger tip (see Figure ).
- 23. 6. Expel air from the syringe while needle remains within the inverted vial by tapping the side of the syringe with your finger. 7. Check the amount of medicine in the syringe. 8. Turn vial upright and remove the needle. 9. Replace the needle cap. Open the sterile package of the new needle. Remove used needle, and dispose in the sharps container. 10. Attach the new needle to the syringe by turning the barrel to the right. 11. Compare the medication in the syringe with the prescribed dosage.
- 24. Withdrawing Medication from an Ampoule Equipment • Medical administration record (MAR) • Ampule of prescribed medication • Sterile syringe and needle • Sterile gauze or alcohol swab
- 25. Procedure 1. Wash your hands. 2. Hold the ampule and quickly and lightly tap the top chamber until all fluid flows into the bottom chamber. 3. Place a sterile gauze or alcohol wipe around the neck of the ampule (see Figure ).
- 26. 4. Firmly grasp the neck of the ampule and quickly snap the top off away from your body. Place the ampule on a flat surface. 5. Withdraw the medication from the ampule, maintaining sterile technique. • Check connection of needle to syringe by turning barrel to right while holding needle guard.
- 27. Use a filter needle if recommended. Remove needle guard, and hold syringe in dominant hand. With nondominant hand grasp ampule and turn upside down, or stabilize ampule on a flat surface. Insert the needle into the center of the ampule; do not allow the needle tip or shaft to touch the rim of the ampule. Keep needle tip below level of meniscus (see Figure).
- 28. • Aspirate the medication by gently pulling on the plunger. • If air bubbles are aspirated, remove the needle from the ampule. Hold syringe with needle pointing up and tap sides of the syringe. • Draw back slightly on plunger, and gently push the plunger upward to eject air. • Reinsert the needle in the middle of the ampule and continue to withdraw the medication.
- 29. 6. Remove excess air from the syringe and check the dosage of medication in the syringe. Recap. 7. Discard any unused portion of the medication, and dispose of the ampule top in a suitable container after comparing with MAR. 8. Change needle and properly discard used needle. Secure needle to syringe by turning the barrel to right while holding the needle guard. 9. Wash hands.
- 30. Mixing Medications from Two Vials into One Syringe • Compatible medications can be mixed in the same syringe. • If medications are going to be mixed, care must be exercised not to contaminate one medication with the other in their respective vials. • The nurse must calculate and measure carefully to be sure the final dose is accurate.
- 31. Equipment Medication administration record (MAR) Insulin vials Alcohol swabs Insulin syringe
- 32. Procedure 1. Check with the client and the chart for known allergies or medical conditions that would contraindicate the use of the drug. 2. Gather necessary equipment. 3. Check the MAR against written health care orders. 4. Wash your hands.
- 33. 5. Follow the five rights of medication administration. Check the client’s identification band. FIVE RIGHTS OF DRUG ADMINISTRATION 1. Right drug 2. Right dose 3. Right client 4. Right route 5. Right time
- 34. 6. Remove caps from insulin vials (if not already off). 7. Slowly rotate each bottle of insulin. Never shake. Make sure suspensions are thoroughly mixed. (Cloudy insulin such as NPH should be completely mixed.) 8. Clean the rubber stoppers of the vials with an alcohol swab.
- 35. 9. Remove cap from the needle. o Draw air into the syringe equal to the dose of insulin to be given. o Insert needle into vial of the suspension, being careful not to touch the needle to the medication in the vial. o Inject the air into the vial and remove the needle. o Do not withdraw any insulin yet. 10. Fill syringe with air equal to dose of regular insulin. o Insert needle into bottle and inject air into vial. o Invert bottle and pull plunger down to withdraw the appropriate dose of insulin.
- 36. 11. With needle in the bottle, hold it up to the light and look for air bubbles. o To remove air bubbles, tap or flick the syringe with your finger to cause air to rise. o Push plunger to push air and some insulin back into the vial. o Pull back to get the appropriate dose of insulin free of air. o Remove the needle.
- 37. 12. Insert needle into the vial of longer-acting insulin; be sure the tip of the needle is below the surface of the fluid level. o Invert the bottle, and slowly draw back to dose of insulin required. o Remove needle. • Have another nurse check the prescribed dose. 13. Store insulin vials according to your agency policy. 14. Wash your hands.
- 38. Preparing an IV Solution • To prepare an IV solution, read the agency’s protocol and gather the necessary equipment. • Because IV equipment and solutions are sterile, check the expiration date on the package prior to usage. • The solution can be prepared at the nurses’ work area or in the client’s room (see Procedure below )
- 39. Equipment • IV solution (bag or bottle) • Administration set (vented or non-vented) • Extension set • IV pole • IV line filter Procedure 1. Wash hands before preparing IV equipment. 2. Check the health care practitioner’s order for the type and amount of solution. 3. Check integrity of the IV solution and equipment. 4. Select IV tubing in accord with agency policy. 5. Prepare IV solution label with client’s name, date, time, additives, and your initials.
- 40. Plastic Bag 6. Prepare the IV solution bag for administration • Remove outer wrapper around IV bag of solution. • Inspect bag for tears or leaks by noting any moisture on the protective covering. • Apply gentle pressure and observe for leakage. • Examine solution for discoloration, cloudiness, or particulate matter by holding the bag against a dark and light background; if there is any evidence of contamination, do not use, and return agency’s dispensing department.
- 41. 7. Hang IV bag on the IV pole. 8. Remove administration set from the package and close the roller clamp on the IV tubing (see Figure). 9. Remove the protective cap from the non-vented IV tubing spike and maintain the sterility of the spike.
- 42. 10. Grasp the port of the IV bag with your non- dominant hand. With your dominant hand, remove the plastic tab covering the port (see Figure ) and insert the full length of the spike into the bag’s port (see Figure ).
- 43. 11. Squeeze and quickly release pressure on the drip chamber of the IV tubing until the chamber is one-third to one-half full. 12. Connect IV filter to tubing. • Remove cap from filter. • Fit tubing’s male adapter into filter’s female connector, and twist to ensure tight connection. • Hold filter so connector joint is pointed down. • Hold tubing’s end tip higher than the tubing’s dependent loop to displace the air.
- 44. • Open roller clamp on IV tubing to prime the tubing and filter (see Figure ). • Tap the filter as the IV solution runs through. • Close the roller clamp on the IV tubing
- 45. 13. Replace the cap on the IV tubing’s free end. 14. Tag tubing with date and time and your own initials. o The nurse prepares and applies a time strip to the IV solution bag to facilitate monitoring of the infusion rate as prescribed by the health care practitioner (see Figure).
- 46. The IV tubing is tagged with the date and time to indicate when the tubing replacement is necessary. IV tubing is changed every 48 to 72 hours in accord with the agency’s protocol.
- 47. Glass Bottle 17. Repeat steps as steps for plastic bag 18. Prepare the IV solution for administration. • Check bottle for cracks or leaks. • Remove metal cap, metal disk, and rubber diaphragm from top of glass bottle, or remove protective additive cap if pharmacy has added medications to the IV bottle. • Listen for the escape of air when the rubber diaphragm is removed.
- 48. 19. Close the roller clamp on the IV tubing. 20. Remove the protective cap from the IV tubing spike and maintain the sterility of the spike. 21. Place the glass bottle on a firm surface, and, using firm downward pressure, insert the spike through designated port on the bottle cap. 22. Invert IV bottle (if the bottle is vented, the fluid inside the vent tube will escape), and hang the bottle on an IV pole. Then all are as plastic bag 23. Explain to the client what you are doing before taking the IV equipment into the client’s room.
- 49. 2. Medication administration • Drugs are available in many forms for administration by a specific route. • The route refers to how the drug is absorbed: Oral, buccal, sublingual, rectal Parenteral (hypodermic routes), Topical, and inhalation. • The nurse should be aware of the various drug forms and how they are administered. • Certain drug preparations require special consideration regarding administration.
- 50. Administering Oral, Sublingual, and Buccal Medications Oral administration of drugs is the most common route; however, there are potential risk factors that the nurse must consider. Before administering oral drugs, the nurse should assess the client’s ability to take the medication as prescribed. This assessment includes the client’s gag reflex, state of consciousness, and presence of nausea and vomiting.
- 51. • If a client has a weak gag reflex or difficulty swallowing water, medication can be inhaled during medication administration. • When administering an oral drug, the nurse prepares the medication, correctly identifies the client, and provides some form of liquid. • See Procedure
- 52. Administering an Oral Medication • Equipment • Medication administration record (MAR) Medication cup • Medication cart or tray • Medication properly labeled • Glass of water or juice
- 53. Procedure 1. Assess the client for potential problems (e.g., absence of a gag reflex). 2. Check the MAR against the health care practitioner’s written orders. 3. Check for drug allergies. 4. Wash your hands.
- 54. 5. Prepare the medications for one client at a time: • Select the correct medication and double check against MAR. • Calculate the medication dose, if necessary. Double-check calculations for accuracy. • Avoid touching the drug while pouring in cup.
- 55. • Prepare liquids by placing the label side of the medicine bottle against the palm of your hand and pouring the liquid at eye level (see Figure).
- 56. 6. Check client’s armband before administering the medications. 7. Identify the drug for the client and its therapeutic purpose. 8. Perform any assessment required before the administration (such as apical pulse rate before administration of digoxin.) 9. Assist client to a sitting position.
- 57. 10. Offer liquids before and during ingestion; encourage the patient to drink 5–6 oz of water. • If the client is unable to hold the medication cup, assist the client by using the medication cup to introduce the pills to the person’s mouth one at a time. • If a medication falls on the floor, discard the pill and start over.
- 58. 11. Remain with the client until all medications have been swallowed. 12. Wash your hands. 13. Record the administered medications on the MAR. 14. Observe the client for side effects or adverse reactions.
- 59. Contraindications of oral medications • When the pt is unconscious & is unable to swallow • When the pt is nauseating or vomiting • When the drug is irritant to gastric mucosa • When the pt decide to receive nothing per oral route. • When the drug can be inactivated by gastric juice
- 60. Sublingual and Buccal Drug Administration • Sublingual and buccal drugs are types of oral medications. • Certain drugs are given by these routes to prevent their destruction or transformation in the stomach or small intestines. • The nurse should assess the integrity of the mucous membranes by inspecting underneath the client’s tongue and in the buccal cavity.
- 61. • If the membranes are attack or painful, the nurse should withhold the medication and notify the health care practitioner. • Some buccal drugs may irritate the mucosa, requiring the nurse to use alternate sides of the mouth to prevent irritation of the mucosa. • Drugs given by these routes are quickly absorbed by the mucosa’s thin epithelium and the abundant blood supply.
- 62. • Sublingual and buccal administration of drugs (see Figure) requires the nurse to use Standard Precautions because the nurse’s hand may come into contact with oral secretions. Figure A. Sublingual Administration of a Tablet; B. Buccal Administration of a Tablet.
- 63. Procedure Follow the five rights of safe drug administration. • Wash your hands and don non-sterile gloves. • Assess the client’s knowledge of the drug and its action. • Explain the procedure to the client, and allow the client time to ask questions. • Offer the client a sip of water and explain to the client that liquids cannot be taken until the tablet is completely dissolved.
- 64. To give a drug sublingually, ask the client to open the mouth and lift the tongue; place the drug under the client’s tongue. • To give a drug sublingually, ask the client to open the mouth and lift the tongue; place the drug under the client’s tongue. Give the client the following instructions: Keep the medication under the tongue until it dissolves completely to ensure absorption. Avoid chewing the tablet or touching the tablet with the tongue to prevent accidental swallowing. Do not smoke before the drug has completely dissolved because nicotine has a vasoconstriction effect that slows absorption.
- 65. To give a drug buccally, instruct the client to open the mouth wide, and place the tablet between the client’s cheek and teeth. Give the client the following instructions: Keep the medication in place until it dissolves completely to ensure absorption. Do not drink liquids for an hour because some tablets take up to an hour to dissolve. Do not smoke before the drug has completely dissolved because nicotine has a vasoconstriction effect that slows absorption. Remove gloves and dispose in a proper receptacle; wash hands. Document the medication administration on the MAR. When the client is receiving repeated doses of a buccal medication, the nurse should indicate the site, such as right buccal cavity, to prevent irritation of the same site.
- 66. Administering Topical Medication • Topical medications may be administered to the skin, eyes, ears, nose, throat, rectum, and vagina. • The medication generally provides a local effect but can also cause systemic effects. • Drugs directly applied to the skin to produce a local effect include lotions, pastes, ointments, creams, powders, and aerosol sprays.
- 67. • Topical drugs are usually given to provide continuous absorption to produce different effects: To relieve pruritus (itching), To protect the skin, To prevent or treat an infection, to provide local anesthesia, or to create a systemic effect. • Topical medications are usually ordered two or three times a day to achieve their therapeutic effect. Before applying a topical preparation, the nurse should assess the condition of the skin for any open lesions, rashes, or areas of erythema and skin breakdown.
- 68. Eye Medications • Eye medications, often referred to as ophthalmic medications, refer to drops, ointments, and disks. • These drugs are used for diagnostic and therapeutic purposes—to lubricate the eye or socket for a prosthetic eye and to prevent or treat eye conditions such as glaucoma (elevated pressure within the eye) and infection.
- 69. • Diagnostically, eye drops can be used to anesthetize the eye, dilate the pupil, and stain the cornea to identify abrasions and scars. • The nurse should review the abbreviations used in medication orders to ensure that the medication is instilled in the correct eye. Cross-contamination is a potential problem with eye drops.
- 70. The nurse should adhere to the following safety measures to prevent cross contamination: • Each client should have his or her own bottle of eye drops. Clients should never share eye medications. Discard any solution remaining in the dropper after instillation. • Discard the dropper if the tip is accidentally contaminated, as by touching the bottle or any part of the client’s eye. The risk of transferring infection from one eye to the other is increased if the tip touches any part of the client’s eye.
- 71. Equipment • Medication administration record (MAR) • Eye medication • Tissue or cotton ball • Nonsterile gloves
- 72. Procedure 1. Check with the client and the chart for any known allergies or medical conditions that would contraindicate use of the drug. Check the MAR against the written orders. 2. Gather the necessary equipment. Follow the five rights of drug administration. 3. Take the medication to the client’s room and place on a clean surface. 4. Explain the procedure to the client; inquire if the client wants to instill his or her own eye drops
- 73. 5. Wash hands, don nonsterile gloves. If the eye has crust or drainage along the margins or inner canthus, gently wash the eye. Always wipe from inner canthus to outer. 6. Place client in a supine position with the head slightly hyperextended. • Instilling Eye drops 7. Remove cap from eye bottle and place cap on its side
- 74. 8. Squeeze the prescribed amount of medication into the eye dropper.Place a tissue below the lower lid. 9. With dominant hand, hold eyedropper 1/2 to 3/4 inch above the eyeball; rest hand on client’s forehead to stabilize. Place non-dominant hand on cheekbone and expose lower conjunctiva sac by pulling on cheek while applying slight pressure to the inner canthus.
- 75. 10. Instruct the client to look up, and drop prescribed number of drops into center of conjunctiva sac. Avoid instilling medication directly into the cornea. If the client blinks and the drops land on the outer lid or eyelash, repeat the procedure.
- 76. 11. Instruct client to gently close eyes and move eyes. 12. Remove gloves; wash hands. 13. Record on the MAR the route, site (which eye), and time administered.
- 77. Eye Ointment • Repeat steps as eye drop • Lower lid: 14. With non-dominant hand, gently separate client’s eyelids with thumb and finger, and grasp lower lid near margin immediately below the lashes; exert pressure downward over the bony prominence of the cheek. Instruct the client to look up. 15. Apply eye ointment along inside edge of the entire lower eyelid, from inner to outer canthus
- 78. • Upper lid: 16. Instruct client to look down. With non- dominant hand, gently grasp client’s lashes near center of upper lid with thumb and index finger, and draw lid up and away from eyeball. 17. Squeeze ointment along upper lid starting at inner canthus. 18. Instruct client to gently close eyes and move eyes. Remove gloves; wash hands. Record on the MAR the route, site (which eye), and time administered.
- 79. Ear Medications • Solutions ordered to treat the ear are often referred to as otic (pertaining to the ear) drops or irrigations. • Eardrops may be instilled to soften ear wax, to produce anesthesia, to treat infection or inflammation, or to facilitate removal of a forgien body, such as an insect.
- 80. • Before instilling a solution into the ear, the nurse should inspect the ear for signs of drainage, an indication of a perforated tympanic membrane. Eardrops are usually contraindicated when the tympanic membrane is perforated. • If the tympanic membrane is damaged, all procedures must be performed using sterile aseptic technique; otherwise, medical asepsis is used when instilling medications into the ear.
- 81. Equipment • Medication • Cotton-tipped applicator • Nonsterile gloves • Cotton balls Tissue
- 82. Procedure 1. Check with client and chart for any known allergies. 2. Check the MAR against the health care practitioner’s written orders. 3. Wash your hands. Calculate the dose. 4. Explain the procedure to the client. 5. Place the client in a side-lying position with the affected ear facing up. 6. Don nonsterile gloves.
- 83. 7. Straighten ear canal by pulling pinna down and back for children or upward and outward for adults 8. Instill the drops into the ear canal by holding the dropper at least 1/2 inch above the ear canal.
- 84. 9. Ask the client to maintain the position for 2 to 3 minutes 10. Place a cotton ball on the outermost part of the canal. Wash hands. 11. Document the drug, number of drops, time administered, and the ear medicated. Evaluate the condition of the skin in the outer ear between instillations
- 85. Nasal Instillations • Nasal instillations can be performed with different preparations: drops or nebulizers (atomizer or aerosol). Nasal drugs are administered to produce one or more of the following effects: to shrink swollen mucous membranes, to loosen secretions and facilitate drainage, to treat infections of the nasal cavity or sinuses. • Nose drops can be instilled to remain in the nasal passage, to reach the ethmoid and sphenoid sinuses, or to reach the frontal or maxillary sinuses. Location is determined by the degree of hyperextension and position of the head during instillation
- 86. Equipment • Medication administration record (MAR) • Non-sterile gloves • Medication with dropper • Tissue • Emesis basin (optional)
- 87. Procedure 1. Check with the client and chart for any known allergies. 2. Check the MAR against health care practitioner’s written order. 3. Wash hands. Explain the procedure to the client and provide privacy. 4. Instruct client to blow nose unless contraindicated by client condition (such as recent nosebleed). 5. Explain that the client may feel a burning sensation to the mucosa or a choking sensation, or both, as the drop trickles back into the throat.
- 88. 6. Place the client in a supine position and hyperextend the neck. 7. Position the head to the site that facilitates the drops’ reaching the expected site
- 89. 8. Instruct the client to breathe through his or her mouth. 9. Squeeze some medication into the dropper. 10. Insert the nasal drops about 3/8 inch into nostril, keeping the tip of the dropper away from the sides of the nares.
- 90. 11. Instill the prescribed dosage of medication and observe the client for signs of discomfort. 12. Instruct the client to remain supine for 5 minutes. 13. Discard any unused medication remaining in the bottle. 14. Return the client to a comfortable position and provide the client with the emesis basin and tissue to expectorate any medication that flows into the or pharynx and mouth.
- 91. 15. Remove gloves and wash hands. 16. Record on the MAR the drug given, number of drops instilled, and nostril medicated. 17. Observe the patient for side effects for 30 minutes after administration.
- 92. Rectal Instillations • Rectal instillations can be in the form of enemas, suppositories, and ointments. • Rectal ointments are used to treat local conditions and symptoms such as pain, inflammation, and itching caused from hemorrhoids. • Rectal suppositories are cone-shaped masses of substances designed to melt at body temperature and to produce the intended effect at a slow and steady rate of absorption.
- 93. Equipment • Medication administration record (MAR) • Non-sterile gloves • Prescribed rectal suppository • Tissue • Water-soluble lubricant (such as K-Y jelly) • Bedpan (optional)
- 94. Procedure 1. Check with client and the chart for any known or medical conditions that would contraindicate use of the drug. Gather necessary equipment. 2. Check MAR against written health care practitioner orders. Wash your hands 3. Ask client if he or she needs to void. Explain procedure to client. Don non-sterile gloves. 4. Place the client in the Sims’, left-lateral position, with the upper leg flexed. 5. Fold back the bed linen to expose the rectum.
- 95. 6. Open the package of lubricant and remove the foil wrapper from the suppository. Read the manufacturer’s instructions on the wrapper for the recommended time interval the client should retain the suppository after insertion. 7. Apply a small amount of lubricant to the smooth rounded end of the suppository to reduce mucosal irritation.
- 96. 8. Lubricate the gloved index finger. 9. Instruct the client to breathe through the mouth. 10. Insert the suppository into the rectal canal beyond the internal sphincter, about 4 inches (10 cm) for an adult and 2 inches (5 cm) for a child.
- 97. 11. Avoid inserting the suppository into feces. 12. Withdraw the finger and wipe the anal area with tissue. Instruct the client to remain in bed for 15 minutes and to resist urge to defecate. 13. Remove gloves, turning them inside out; dispose of gloves; wash hands.
- 98. Vaginal Instillations • Medications inserted into the vagina are in the form of suppositories, creams, gels, ointments, foams, or douches. • These medications may be used to treat inflammation, infections, and discomfort, or as a contraceptive measure. • Tampon Use • Clients should be instructed not to use tampons after the insertion of vaginal medications because the tampon can absorb the medication and decrease the drug’s effect
- 99. Equipment • Medication administration record (MAR) • Non-sterile gloves • Prescribed vaginal suppository • Water-soluble lubricant • Disposable applicator • Tissue
- 100. Procedure 1. Check with the client and the chart for known allergies or medical conditions that would contraindicate the use of the drug. Gather necessary equipment. 2. Check the MAR against written health care practitioner orders. Wash your hands. 3. Follow the five rights of medication administration. Ask the client to void. 4. Position the client in a dorsal recumbent position with knees flexed and hips rotated laterally or in a Sims’ position if the client cannot maintain the dorsal recumbent position.
- 101. 5. Don non-sterile gloves. Explain procedure to patient. If client plans to self-administer, be very specific with instructions. 6. Provide for privacy. Assess perineal area, inspect vaginal orifice, note any odor or discharge from the vagina, and inquire about any problems such as itching or discomfort. • If secretion or discharge is present, cleanse the perineal area with soap and water. 7. Remove suppository from the foil wrapper and, if applicable, insert into applicator tip. Apply a small amount of lubricant to rounded tip of suppository. If not using an applicator, apply a small amount of lubricant to gloved index finger.
- 102. 8. With nondominant hand, spread labial folds. Insert the suppository into the vaginal canal at least 2 inches (5 cm) along the posterior wall of the vagina or as far as it will go. • If using an applicator, insert as described above and depress plunger to release suppository
- 103. 9. Wipe the perineum with clean, dry tissue. Instruct the client to remain in bed for 15 minutes. 10. Wash applicator under cool running water to clean (warm water promotes coagulation of protein secretions) and return to appropriate storage in the client’s room. 11. Remove gloves, turning them inside out; dispose of gloves in the proper container. Wash hands.
- 104. 12. Record on the MAR the drug’s name dosage, route, and date and time of administration; document any evidence of discharge or odor from the vagina. 13. Check with the client in 15 minutes to ensure that the suppository did not slip out and to allow the client to verbalize any problems or concerns. 14. Observe for effectiveness of the medication; inspect the condition of the vaginal canal and external genitalia between applications.
- 105. Administering Nebulizer Medications Definition: • Nebulizer Therapy is to liquefy and remove retained secretions from the respiratory tract. • A nebulizer is a device that a stable aerosol of fluid and /or drug particles. • Most aerosol medication have bronchodilating effects and are administered by respiratory therapy personnel.
- 106. Purpose: 1. To relieve respiratory insufficiency due to bronchospasm 2. To correct the underlying respiratory disorders responsible for bronchospasm 3. To liquefy and remove retained thick secretion form the lower respiratory tract 4. To reduce inflammatory and allergic responses the upper respiratory tract 5. To correct humidify deficit resulting from inspired air by passing the airway during the use of mechanical ventilation in critically and post surgical patients Equipments required 1. Dr.’s order card, client’s chart and kardex 2. Inhaler (1) 3. Tissue paper 4. Water, lip cream as required
- 107. Types of nebulizer 1. Inhaler or meterd-dose nebulizer 2. Jet nebulizer 3. Ultrasonic nebulizer Teach the client how to use personnel device. (Rationale: To ensure appropriate self-care after discharge) Avoid treatment immediately before and after meals.(Rationale: To decrease the chance of vomiting or appetite suppression, especially with medication that cause the client to cough or expectorate or those that are done in conjunction with percussion/ bronchial drainage )
- 108. Procedure 1. Perform hand hygiene 2. 2. Prepare the medication following the Five rights of medication administration: ①Right drug ②Right dose ③Right route ④Right time ⑤Right client
- 109. 3. Explain to the client what you are going to do. 4. Assist the client to make comfortable position in sitting or semi-Fowler position. 5. Shake the inhaler well immediately prior to use 6. Spray once into the air. 7. Instruction to the client: i. Instruct the client to take a deep breath and exhale completely through the nose ii. The client should grip the mouthpiece with the lips, push down on the bottle, and inhale as slowly and deeply as possible through the mouth.
- 110. iii. Instruct the client to hold his/her breath for adult 10 seconds and then to slowly exhale with pursed lips iv. Repeat the above steps for each ordered “ puffs”, waiting 5-10 seconds or as prescribed between puffs. v. Instruct the client to gargle and wipe the face if needed.
- 111. 8. Replace equipments used properly and discard dirt. 9. Perform hand hygiene. 10.Document the date, time, amount of puffs, and response. Sign on the documentation 11. Report any findings to a senior staff.
- 112. 3. Parenteral • Parenteral medications are given through a route other than the alimentary canal; these routes are intradermal, subcutaneous, intramuscular, or intravenous. • The angle of injection and the depth of penetration will indicate the type of injection. • Many clients have broadly classified the parenteral route into one category: “injections” or “shots.” • The nurse should provide the client with an explanation of the various routes used when administering parenteral drugs.
- 113. • To prepare and administer parenteral medications the nurse must have knowledge of the special equipment, use manual dexterity and sterile technique, and follow Standard Precautions. • An injection is an invasive procedure because it breaks the skin barrier. • As such, it must be performed using proper aseptic technique to prevent risk of infection.
- 114. Angle of Injection • The angle of insertion depends on the type of injection. • Figure illustrates the angle of insertion for each type of parenteral injection.
- 115. Intradermal Injection • Intradermal (ID) or intracutaneous injections are typically used to diagnose tuberculosis, identify allergens, and administer local anesthetics. • The site below the epidermis is the location for administering ID injections; drugs are absorbed slowly from this site.
- 116. • The sites commonly used for ID injection are the inner aspect of the forearm (if it is not highly pigmented or covered with hair), upper chest, and upper back beneath the scapula (Figure). Intradermal Injection Sites: A. Inner Aspect of the Forearm; B. Upper Chest; C. Upper Back
- 117. • Only small amounts of water-soluble medication should be used for ID injections. • The drug’s dosage for an ID injection is usually contained in a small quantity of solution (0.01 to 0.1 ml). • A 1-ml tuberculin syringe with a short bevel, 25 to 27 gauge, 3/8- to 1/2-inch needle is used to provide accurate measurement. • If repeated doses are ordered, the site should be rotated. • ID injections are administered into the epidermis layer by angling the needle 10° to 15° to the skin.
- 118. Administering an Intradermal Injection Equipment • Medication administration record (MAR) • Medication • Sterile tuberculin syringe and short bevel, 25 to 27 gauge, 3/8- to 1/2-inch needle. • Disposable gloves • Alcohol swab and sterile 2 × 2 gauze pad
- 119. Procedure 1. Check with the client and the chart for any known allergies. 2. Wash hands. 3. Follow the five rights. 4. Prepare the medication from an ampule or vial; Take the medication to the client’s room and place on a clean surface. 5. Check the client’s identification armband. 6. Explain the procedure to the client. 7. Place the client in a comfortable position; provide for privacy.
- 120. 8. Wash hands and don nonsterile gloves. 9. Select and clean the site. • Assess the client’s skin for bruises, redness, or broken tissue. • Select an appropriate site using appropriate anatomic landmarks. • Cleanse the site with an alcohol wipe using a firm circular motion; cleanse from inside to outside; allow alcohol to dry.
- 121. 10. Prepare the syringe for injection. • Remove the needle guard. • Express any air bubbles from the syringe. • Check the amount of solution in the syringe. 11. Inject the medication. • Hold the syringe in dominant hand. • With nondominant hand, grasp the client’s dorsal forearm and gently pull the skin taut on ventral forearm(Figure ).
- 122. • Place the needle close to the skin, bevel side up. Insert the needle at a 10° to 15° angle until resistance is felt, and advance the needle approximately 3 mm below the skin surface; the needle’s tip should be visible under the skin. • Administer the medication slowly; observe the development of a bleb (large flaccid vesicle that resembles a mosquito bite). If none appears, withdraw the needle slightly. • Withdraw the needle. • Pat area gently with a dry 2 × 2 sterile gauze pad. • Do not massage the area after removing the needle.
- 123. 12. Discard the needle and syringe in a sharps container. 13. Remove gloves, dispose of in appropriate receptacle, and wash hands. 14. Observe for signs of an allergic reaction. 15. Draw a circle around the perimeter of the bleb with a ball point pen. 16. Document medication and site of injection on the MAR.
- 124. Subcutaneous Injection • Subcutaneous (SC or SQ) injections are commonly used in the administration of medications such as insulin and heparin because these drugs are absorbed slowly, to produce a sustained effect. • SC injections place the medication into the subcutaneous tissue, between the dermis and the muscle. • Clients who administer frequent subcutaneous injections should rotate sites regularly. • The amount of medication given varies but should not exceed 1.0 ml; if repeated drug doses are given, rotate the sites. • Subcutaneous tissues are sensitive to irritating medications. • Hard painful lumps can develop beneath the skin if the sites are not rotated.
- 125. • Common sites for SC injections are the abdomen, the lateral and anterior aspects of the upper arm or thigh, the scapular area on the back, and upper ventrodorsal gluteal areas (Figure ).
- 126. • The nurse should select a sterile 0.5- to 3-ml syringe with a 25- to 29-gauge, 3/8- to 1/2-inch needle. • The medication is administered by angling the needle 45° or 90° to the skin. • The client’s body weight will influence the angle used for injection. • As a general rule, to reach subcutaneous tissue, if you can grasp 2 inches of tissue between two fingers, insert the needle at a 90° angle. • If only 1 inch of tissue can be grasped between the fingers, use a 45° angle to administer the medication.
- 127. • The length of the needle may also vary with body weight. • Normally for SC injections, a 25-gauge, 5/8-inch needle is used. • A child will require a short needle, and an obese person may require a longer needle to ensure placing the medication in the subcutaneous tissue. • The length of the needle should be approximately half the width of the pinched skinfold.
- 128. Administering a Subcutaneous Injection Equipment • Medication administration record (MAR) • Medication as prescribed • Sterile syringe and 5/8-inch needle • Disposable gloves • 2 alcohol swabs
- 129. Procedure 1. Check with client and the chart for any known allergies. 2. Wash your hands. 3. Follow the five rights. 4. Prepare the medication from an ampule or vial. Take medication to the client’s room and place on a clean surface. 5. Check the client’s identification armband. 6. Explain the procedure to the client. 7. Place the client in a comfortable position; provide for privacy. 8. Don nonsterile gloves.
- 130. 9. Select and clean the site. • Assess the client’s skin for bruises, redness, hard tissue, or broken skin. • Cleanse the site with an alcohol swab; cleanse from inside outward. 10. Prepare for the injection. • Remove the needle guard and express any air bubbles from the syringe; check the dosage in the syringe. • With dominant hand, hold the syringe like a dart between your thumb and forefingers. • Pinch the subcutaneous tissue between the thumb and forefinger with the nondominant hand. If the client has substantial subcutaneous tissue, spread the tissue taut.
- 131. 11. Administer the injection. • Insert the needle quickly at a 45° or 90° angle. • Release the subcutaneous tissue and grasp the barrel of the syringe with nondominant hand. • With dominant hand, aspirate by pulling back on the plunger gently, except when administering an anticoagulant injection. • If blood appears, remove needle and discard in a sharps container. • Inject medication slowly if there is no blood present. • Remove the needle quickly and lightly massage area with alcohol swab; do not massage the injection site after the administration of an anticoagulant. • Do not recap the needle; discard the needle in a sharps container.
- 132. 12. Position client for comfort. 13. Remove gloves and wash hands. 14. Record on the MAR the route, site, and time of injection. 15. Observe the client for any side or adverse effects and assess the effectiveness of the medication at the appropriate time.
- 133. Intramuscular Injection • Intramuscular (IM) injections are used to promote rapid drug absorption and to provide an alternate route when the drug is irritating to subcutaneous tissue. • The IM route enhances the absorption rate because there are more blood vessels in the muscles than in subcutaneous tissue; however, the absorption rate may be affected by the client’s circulatory status.
- 134. • The nurse should determine the maximum volume to inject on the basis of the site and the client’s muscle development: • 4 ml for a large muscle (gluteus medius) in a well developed adult • 1 to 2 ml for less developed muscles in children, elderly, and thin clients • 0.5 to 1.0 ml for the deltoid muscle When more than 4 ml is ordered, the medication can be divided into two different sites.
- 135. There are four common sites for administrating IM injections ;Injection sites are identified by using appropriate anatomic landmarks (see Figure below ).
- 136. • The primary site for administering an IM injection in clients over 7 months old is the ventrogluteal (VG) site. • The gluteus medius is a well-developed muscle, free of major nerves and large blood vessels. • The nurse should avoid using the deltoid and dorsogluteal sites in infants and children. • There is a risk of striking the sciatic nerve when using the dorsogluteal site. • The deltoid muscle is not well developed in infants and children.
- 137. • The nurse will need to decide on the gauge and length of the needle on the basis of the consistency of the solution, the site, and how far the needle must be injected to reach the muscle. • A 21- to 23-gauge needle will accommodate the consistency of most drugs and will minimize tissue injury and subcutaneous leakage. The needle’s length is determined by the site: • 1 1/2-inch needle, VG site for average-sized adults • 1-inch needle, VG site for children • 1-inch needle, deltoid or vastus lateralis
- 138. • An obese client usually requires a 2-inch needle to ensure that the needle will reach a large muscle such as the gluteal muscle. • For example, for a client weighing 100 pounds, use a needle 1 to 1 1/2 inches long; usually • for a child use only a 1-inch needle. • It is important to consider the size of the client when determining the needle length; some children are large, and some adults are small. • The nurse should administer an IM injection at a 90° angle.
- 139. Administering an Intramuscular Injection Equipment • Medication administration report (MAR) • Sterile 3-ml syringe and long bevel, 20 to 22 gauge, 1- to 2-inch needle (average-sized, adult client receiving a drug in an aqueous solution) • Medication as prescribed • Alcohol swab • Nonsterile gloves • Sterile 2 × 2 gauze pad
- 140. Procedure 1. Check with client and the chart for any known allergies. 2. Wash hands. 3. Follow the five rights. 4. Prepare the medication from an ampule or vial • Add 0.1 to 0.2 ml of air to the syringe. • Take medication to the client’s room and place on a clean surface. 5. Check the client’s identification armband. 6. Explain the procedure to the client; provide for privacy.
- 141. 7. Place the client in an appropriate position to expose the site. • Deltoid: sitting position. • Ventrogluteal: • Side-lying: flex the knee, pivot the leg forward from the hip about 20° so it can rest on the bed. • Supine: flex the knee on the injection side. • Prone: point toes inward toward each other to internally rotate the femur.
- 142. 8. Don nonsterile gloves. 9. Select and clean the site. • Assess the client’s skin for redness, scarring, breaks in the skin, and palpate for lumps or nodules. • Select site using the anatomic landmarks. • Cleanse the area with an alcohol swab, cleanse from inside outward using friction; wait 30 seconds to allow to dry. 10. Prepare for the injection. • Remove the needle cap by pulling it straight off, and expel any air bubbles from the syringe.
- 143. 11. Administer the injection. • Deltoid: quickly insert the needle with a dart like motion at a 90° angle (Figure1 ). • Ventrogluteal: quickly insert the needle using a dart like motion and steady pressure at a 90° angle to the iliac crest in the middleof the V (Figure 2).
- 144. • Aspirate by pulling back on the plunger, and observe for blood. • If blood appears, remove the needle and discard. • If blood does not appear, inject the medication slowly, about 10 sec/ml. • Wait 10 seconds after the medication has been injected, then smoothly withdraw the needle at the same angle of insertion. • Apply gentle pressure at the site with a dry, sterile 2 × 2 gauze; do not massage the injection site. Swab using gentle pressure. • Discard the needle and syringe in a sharps container; do not recap the needle.
- 145. 12. Position client for comfort; encourage client receiving ventrogluteal injections to perform leg exercises (flexion and extension). 13. Remove gloves, wash hands. 14. Record on the MAR the dosage, route, site, and time. 15. Inspect the injection site within 2 to 4 hours and evaluate the client’s response to the medication
- 146. Administering Medication via IV Injection Intravenous Injections • The intravenous (IV) route is used when a rapid drug effect is desired or when the medication is irritating to tissue. • IV administration provides immediate release of medication into the bloodstream; consequently, it can be dangerous. IV medications are administered by one of the following methods: Intravenous fluid container Volume-control administration set Intermittent infusion by piggyback or partial fill Intravenous push (IVP or bolus)
- 147. Adding Medications to an IV Solution • When administering IV medications, regardless of the method used, the nurse should assess the patency of the infusion system and the condition of the injection site for signs of complications such as infiltration (swelling and discomfort at the IV site) and phlebitis (inflammation of a vein). • Some IV medications or solutions with high or low pH or high osmolarity are irritating to veins and can cause phlebitis.
- 148. • Before administering any IV medication, the nurse should note the client’s allergies, drug or solution incompatibilities, the amount and type of diluents needed to mix the medication, and the client’s general condition to establish a baseline for administering medication.
- 149. Administering Medications via IV Bolus or IV Push • The method of medication administration by IV bolus or IV push injection is determined by the type of IV system. For example, an IV push medication can be injected into a saline or heparin lock (see Figur) or into a continuous infusion line.
- 150. • When giving an IV push medication into a continuous infusion line, the nurse must stop the fluids in the primary line; the nurse usually pinches the IV tubing closed to inject the drug (see Figure). • This technique is safe and prevents the nurse from having to recalculate the drip rate of the primary infusion line.
- 151. 4. Fluid therapy Setting an IV line • It is administration of large amount of solution / fluid in to circulatory system through vein. • PURPOSE • To maintain fluid electrolyte balance • To maintain acid base balance • To introduce medications (antibiotic, vitamin) • To provide caloric when the pt is NPO • To maintain an access to circulatory system when the pt is taking intermittent medication. 151
- 152. Equipment • Iv set/ tube • Pole • Alcohol swab • Solution • Glove • Tourniquet • Medication chart • Receiver • Scissor • Plaster • Canula 152
- 153. PROCEDURE • Explain procedure, Wash your and , Assemble all the necessary equipment • Connect bag & tubing, run solution through tubing to displace air from it, Cover it. • Position the pt comfortably & select the vein • Apply tourniquet 10 – 12 cm above the selected site, Clean the site with alcohol swab 153
- 154. • Hold the needle 450 with the vein & insert it • Draw back the needle to check if you are in the blood. Release the tourniquet • Connect the tubing to the canula & start the flow. Anchor the tubing with plaster • Adjust flow rate 154
- 155. • • Count the number of drops for a 15-second interval and multiply by 4; for example, if the drop factor of tubing is 10 drops/ml then the drop rate should be 21 drops/minute to infuse 1000 ml/8 hours (Figure). • Open the regulator clamp slowly to increase the drip flow rate; close the regulator clamp to decrease the drip rate to achieve 21 drops/minute. • Recount the drop rate after 5 and 15 minutes.
- 156. Calculating & regulating flow rate • Flow rate= Number of ml of solution x No of drops in ml • No of hrs in which solution runs x 60minute • E.g. A 5% DW is to be administrate run over a 12 hr time, calculate drops per minute to finish it over given time 1000ml x 15 drops /ml = 20.83= 21 drops/min 12 x 60 min • In IV solution may not flow at a rate it is calculated originally so it should be monitored at least hourly. • Replace equipments, Wash your hand. Record the procedure • Observe the pt and monitor the flow. 156
- 157. IV fluid therapy • IV therapy requires frequent client monitoring by the nurse to ensure an accurate flow rate and other critical nursing actions. • These other actions include ensuring client comfort and positioning; checking IV solution for correct solution, amount, and timing; monitoring expiration dates of the IV system (tubing, venipuncture site, dressing) and changing as necessary; and being aware of safety factors.
- 158. • Coordinate client care with the maintenance of IV lines. • Clients with IV therapy usually require assistance with hygienic measures, such as changing a gown . • Change IV tubing when doing site care to decrease the number of times the access device is manipulated, thereby decreasing the risk for infiltration and phlebitis.
- 159. • When initiating IV therapy, the nurse should assess for a venipuncture site. Figure • When assessing clients for potential sites, consider their age, body size, clinical status and impairments, and the skin condition. Peripheral Veins Used in Intravenous Therapy. A. Arm and Forearm; B. Dorsum of the Hand; C. Dorsal Plexus of the Foot
- 160. • Lower extremity veins are used for IV therapy only when so prescribed by the health care practitioner; circulating blood in the lower extremities is likely to pool and clot, which may result in an embolism. • Select a vein for puncture at its most distal end to maintain the integrity of the vein, because venous blood flows with an upward movement toward the heart.
- 161. • Once the solution is prepared for administration, the nurse calculates the rate and explains the procedure to the client • There are three ways to administer solutions: 1. Initiate the infusion by performing a venipuncture. 2. Use an existing IV system: catheter, heparin or PI lock, central line, or implanted port. 3. Add a solution to a continuous-infusion line.
- 162. Blood Transfusions • Is the infusion of whole blood or blood component (plasma, RBCs, platelets,) from the healthy person (Donor) to the recipient vein. • PURPOSE • To replace blood losses in sever hemorrhage. • To provide clotting factors which may be lacking due to disease (eg.haemophelia) • To prevent circulatory collapse in OR where blood loss is considerable. E.g. hysterectomy. • In case of anemia from cancer, marrow aplasia, and similar conditions. • In case of sever burn to replace blood losses.
- 163. Equipment • Blood unit labeled with name, blood group, Rh, expiry date. • Blood administration set (Y-administration set tubing with in-line filter) • V/s equipment • Bags of normal saline • Adhesive tape • Tourniquet • Glove • Regular administration set • Alcohol swabs and tape • Receiver
- 164. Procedure 1. Greet and explain the procedure to the patient. 2. Gather all the necessary equipment. 3. Check the label on the blood bag (pts name, Rh, blood group, expiry date etc)
- 165. 4. Hang NS with the administration set to start the transfusion. 5. Position the pt comfortably & select the vein. 6. Place the rubber and towel under the pts arm. 7. Take V/S to have base line information for further judgment.
- 166. 8. CHOOSE THE VEIN:- Apply tourniquet 10 – 12 cm above the selected site. 9. Clean the site with alcohol swab 10. Hold the needle 450 with the vein & insert it 11. Draw back the needle to check if you are in the blood. Release the tourniquet 12. Connect tubing to the canula & start flow. Anchor the tubing with plaster
- 167. 13. Adjust flow rate. 14. Replace equipments. Splint the site if needed. 15. Wash your hand. 16. Record the procedure. Observe the pt and monitor the flow.
- 168. Precaution • Blood should not be taken from a donor with :- Hepatitis (B, C) in the last 6 month • Blood transfusion in the last 6 month (except serum albumin) • Malaria, syphilis, possible exposure to HIV • Recent immunization (may transmit live organisms e.g. 1 year for rabies, 1 month for rubella, 2 weeks for live attenuated vaccines, Cancer • No medication should be added to blood product. Flow rate is 5-10 gtt /min. • Do not heat but put on pt chest to bring its T0 to room temperature.