3. digitalphotographyandimaging
plainfield central – mr. lawler art + design
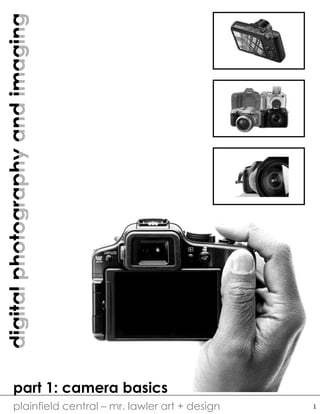
connecting the camera to your computer and printing
image capture
editing software
output (printing)
printing services
online services
storage device
personal computer
USB cord connects camera to
computer or laptop
3
4. digitalphotographyandimaging
plainfield central – mr. lawler art + design
THE DO’S AND DON’T’S OF CAMERA CARE
Do...
• Regularly clean the camera with a soft cloth.
• Handle all moving parts of the camera with care.
• Turn off the camera before removing or disconnecting
the power source or a cable, or removing the battery
or memory card.
• Keep your camera dry and free from condensation.
• Store your camera correctly if it isn't going to be used
for a long time.
• Always remove the camera battery if the camera is
going to be stored for long periods of time.
Don't...
• Subject your camera to knocks, vibration, magnetic
fields, smoke, water, steam, sand or chemicals.
• Store or use it in humid, dusty or dirty places.
• Subject it to extreme hot or cold temperatures.
• Place it in direct sunlight for prolonged times or in a
car when it is hot.
• Scratch the camera with hard or sharp objects.
• Drop it in water. It may be damaged beyond repair.
• Used canned air. Most consumer digital cameras are
not air-tight and canned air may blow dust into the
inside of the lens.
4
5. digitalphotographyandimaging
plainfield central – mr. lawler art + design
THE DO’S AND DON’T’S OF CAMERA CARE
Cleaning Your Digital Camera
Cleaning a digital camera is relatively easy and should be done on a regular basis.
One of the most important things to preserve the condition of the lens is not to
touch it with your fingers. Before wiping off the lens, hold the camera upside down
and gently blow off any grit and lose dust particles. Next lightly wipe the lens and
other camera parts with a soft, dry cloth (a swatch from a cotton t-shirt or a soft
handkerchief) or lens cleaning paper. Paper towels, napkins and facial tissue should
not be used to clean the lens. If needed, wipe the lens with a few drops of lens
cleaning fluid. Place the fluid on the lens cleaning paper, not directly onto the lens.
The best camera cleaning cloth is made of microfiber. Microfiber cloths are
chemical-free and lift dust and oil from a lens. They are anti-static, non-scratching
and will not streak or smear the surface. Keep the cloth in a plastic baggie or
something similar so it doesn't collect grit or other particles that could scratch the
lens surface. Before cleaning, make sure that neither the cloth nor the lens has
particles on it. Give the cloth a good shake before wiping it on the lens. And gently
blow or brush on the lens to remove loose particles. For normal smears and
smudges, it is not necessary to use a lens cleaning fluid on the cloth. If you must use
a liquid, place a few drops on the cloth and not directly on the lens. If your camera
needs extensive cleaning, have it done professionally.
Your Digital Camera and the Weather
Hot, cold, rainy weather should not prevent you from taking photos with your digital
camera. However, extra precaution and protection of camera equipment must be
taken in each weather condition to prevent condensation or freezing. Keeping
equipment in a well-padded, waterproof camera bag will help protect it from the
elements. If you can attach a filter, such as a skylight or UV filter, use one to help
protect the lens.
If it suddenly rains, snows or drizzles while carrying your camera, slip it under a
jacket or sweater or, if it's compact, put it in your pants or coat pocket. In
preparation for rain, some photographers place a plastic bag around the camera and
secure it with a rubber band after positioning the hole over where the lens will
protrude. In very cold weather, keep the camera warm. In hot weather, keep it out of
direct sunlight. If you cover the camera with material such as a beach towel, use a
light colored fabric so it won't absorb too much heat. Never leave a digital camera or
other sensitive camera equipment in an automobile when the temperature is
extremely hot or cold.
5
6. digitalphotographyandimaging
plainfield central – mr. lawler art + design
EXPOSURE LATITUDE – LIGHT AND IMAGE QUALITY
low exposure low mid range high mid range high exposure
(underexposed) (overexposed)
ISO
aperture
the size of the opening of the lens
measured in f/stops
(ie. f/2.8 > f/22)
the
exposure
triangle
To achieve the best exposure, digital cameras offer three options: A
(automatic mode), a custom light setting or M (manual mode). Only in
manual mode do you need to adjust ISO, shutterspeed or aperture (based
on the light meter – the measuring tool seen in the window above).
A M
outdoors
sunny day
outdoors
panoramic
macro
(close up)
action
(sports)
portrait low light
(nighttime)
automatic
manual
6
7. digitalphotographyandimaging
plainfield central – mr. lawler art + design
BIT DEPTH AND THE DIGITAL IMAGE
0 0 0
0 1 0
0 0 0
0 95 191
31 127 223
63 159 255
one bit per pixel produces a two tone image (black and white)
eight bits per pixel produces a 256 range image (white, grays, and blacks)
255
0
0
0
255
255
0
0
0
0
255
0
255
0
255
140
63
184
0
0
255
255
153
51
255
255
255
twenty four bits per pixel produces a true RGB color image (16,777,216 colors)
MEGAPIXELS, RESOLUTION & PPI (DPI)
All of these numbers indicate the quality of an image and the maximum size the
image can be printed before the “pixels” become unfavorable noticeable (what we
call pixelation). Megapixels determine how large an image can be sized.
An 8 in x 10 in 100 PPI image if resized to a 4 in x 5in will then have 200 PPI.
MP (megapixeL) = one million pixels; 3.1 megapixels (2048 × 1536 = 3,145,728)
PPI (DPI) pixels per inch (dots per inch) = resolution quality (number of pixels)
Height x Width = image size measured in inches
7
8. digitalphotographyandimaging
plainfield central – mr. lawler art + design
TIPS ON TAKING BETTER PHOTOS
You probably have noticed by now that some of your photographs seem to turn out
very well and others do not. Here are eight guidelines which can help!
notes/comments:
8
10. digitalphotographyandimaging
plainfield central – mr. lawler art + design
PHOTOGRAPHY AS A BRANCH OF DESIGN
Simple design principles and techniques which will enhance your phototaking skills.
Using line can help lead the viewers eyes through the composition by creating
perspective. Line helps establish boundaries, creates pattern, shows rhythm, points
directions, implies movement and defines shape.
Shape is defined by lines and can be geometric or organic. Empty shapes allow the
viewer to imagine; complete shapes create variety and interest through pattern.
Texture and pattern are each comprised of the repetition of shapes and lines. Texture
and pattern can both be used to create detail which the viewer sees as visual interest.
look for basic elements apply them in principle
10
11. digitalphotographyandimaging
plainfield central – mr. lawler art + design
PHOTOGRAPHY AS A BRANCH OF DESIGN
Simple design principles and techniques which will enhance your phototaking skills.
Value is the measure of lightness and darkness established by exposure. When bright
highlights are paired with deep shadows, you can achieve quality, contrast image.
Color, saturation and temperature are properties of light. Saturation refers to the
intensity of a color where temperature refers to mood, feel and coolness/warmness.
Harmony is established by the relationships of color in an image. Certain colors go
better with other colors – we call these color schemes. Complimentary colors are
those that are opposite one another. Analogous colors are grouped in a row on the
color wheel. Triadic and Tetradic schemes are based on geometric pairings.
look for basic elements apply them in principle
11
12. digitalphotographyandimaging
plainfield central – mr. lawler art + design
THE USE OF VISUAL SPACE
“Space is not just something to be filled in; it is itself a valuable tool for achieving engaging, clear
visual messages. White space can help direct the viewer’s eye to positive elements. White space is
necessary for creating designs with balance, harmony and clear hierarchy”
– Garr Reynolds, Zen Design: Simple Design Principles and Techniques
negative space: referred to as
the empty area or sometimes
called white space
positive space: objects and
forms which occupy space;
sometimes called black space
1
43
2
alignment: refers to where objects are
placed on the page. good compositions try
to balance white and black space, but also
use position to create focus and. emphasis.
1. center alignment – viewer look
directly in the middle of the page
2. cropped – the image is cropped and
draws the viewer into the corner
3. left alignment – draws the viewer to
the left side of the page
4. right alignment – draws the viewer to
the right side of the page
balance: balance is created through the use
of symmetry. there are three types of
symmetry: bilateral, radial and
asymmetrical. the illustration to the left
demonstrates bilateral symmetry as the
object can be divided in the middle with
mirror images on both sides of the axis (in
nature this is more loose than in
mathematics).
12
13. digitalphotographyandimaging
plainfield central – mr. lawler art + design
RULES OF COMPOSITION – USING LINE, SHAPE + BALANCE
Framing
There are two ways in which you can use
framing to create a strong image.
The first is frame-within-a-frame: that is,
having the viewer look through a frame such
as a doorway or window. This draws the
viewer inside the image.
The second is filling-the-frame: this is similar
to cropping and refers to a full bleed image
which has a lot if impact. These images are
achieved by using macro photography.
Leading Lines + Proportion
Like framing, you can draw the viewer into
your picture through the use of depth.
When you use lines to create direction,
movement, or perspective, the viewer
follows those lines into the image.
You can also create depth by establishing a
clear foreground, midground and
background. The objects in the foreground
should overlap the other objects and
proportion should be established by scaling
sizes of objects.
Rule of Thirds
An image should be imagined as being
divided into a 3x3 grid. Important
compositional elements should be placed
along the lines or at the intersections.
Aligning a subject with these points creates
more tension, energy and interest in the
composition by placing the focus off center
(avoiding bull’s-eyeing the subject).
13
14. digitalphotographyandimaging
plainfield central – mr. lawler art + design
RULES OF COMPOSITION – USING EMOTION
Tension
Images with tension are engaging. There are
many ways of creating tension in an image,
but some of the best ways include:
1. visual tension: lonely, off center objects
2. psychological tension: image depicting
tense moments or allow the viewer to
anticipate action
3. chaos vs. order: images which show
order through pattern and then a
disturbance of that order
4. out of place: objects or forms that are
out of place in comparison to the
context of the image
S-Curves
The elusive s-curve - an art term for a
sinuous body position. S-curves were
identified by the Ancient Greek sculptors as
being the best way to position a figure.
Why? Because the curve appears sensual,
sensuous, and seductive.
S-curves can also be found in nature,
evoking the same titillating or romantic
feelings. Using the s-curve plays on a
person’s emotional drives.
14
15. digitalphotographyandimaging
plainfield central – mr. lawler art + design
SCANNING + IMAGE STORAGE
TIPS ON SCANNING
Color Depth: when scanning try
to use true color whenever
possible. The best color depth
will be measured in the millions
(typically 16 million). Scanner
programs also offer a 256 Color
mode. The advantage of 256
Color images is that the files are
significantly smaller than true
color image files.
Resolution: A computer monitor
might have a resolution of 72
dpi, while a laser printer might
be 600 dpi and an ink jet printer
can be anywhere from 300 –
720 dpi and even higher. For
printing I recommend 200 or
300 dpi as a minimum. However
these files can become very
large.
STORAGE DEVICES
When you connect your hard
drive to your computer and turn
it on, you do not need to install
any software or drivers to make
the drive available for use.
1. The drive will appear as a
drive letter in (My)
Computer (ie: Drive E:, F:, or
some other letter) within
approximately 30 seconds of
connecting and turning on
the drive.
2. Often the AutoPlay window
will appear within 30
seconds.
3. Then you can simply drag-
and-drop data, or copy-and-
paste data, into the drive to
use it manually.
external hard drive
connects via a USB cable
15
18. digitalphotographyandimaging
plainfield central – mr. lawler art + design
EDITING B&W IMAGES
Darkroom Enlarger Traditional Printing & Editing
To develop film prints, an enlarger and darkroom are
needed. To the left, is a diagram of a machine called
an enlarger. This machine creates prints from
negatives.
A negative is a piece of film which is light-sensitive
and allows an image taken by a camera to be
imprinted on its surface. A print is also light sensitive,
allowing a negative to be projected onto its surface.
The print is created by letting light from the lamp
through the negative carrier where the film strip is
placed. The light and image are then projected
through the lens onto the easel where a photo-
sensitive piece of paper is placed. The result is a
photographic print.
Dodge Tool Burn Mask
To increase highlights and shadows on areas
of a print, two tools are used: the burn mask
and the dodge tool.
Originally, the dodge tool was a circular piece
of cardboard on a stick which was waved over
areas of the easel blocking light from the
print and creating “whiter areas.” Likewise,
the burn mask was a piece of cardboard with
a hole cut in it which was placed over the
easel allowing light to hit the print for longer
periods of time and creating darker areas.
Today in Photoshop, the tools have similar
functions.
Dodge Tool Burn Mask
Grayscale Cropping Bright. & Contrast Levels & Curves
converts an image
to black and white
without loss of
quality
crops an image to a
specified size and
resolution
adjusts contrast and
brightness, similar to
a tv or monitor
adjusts value of an
image using grays,
blacks and whites as
a base
18
19. digitalphotographyandimaging
plainfield central – mr. lawler art + design
USING THE BRUSH TOOL (FOR ERASERS, BURN AND DODGE)
select the BRUSH TOOL and the BRUSH MENU
appears at the top in the STATUS BAR
selecting the brush tool
brings up a menu of its
own – you can select how
big the brush is and how
soft the brush is, as well
the brush type and shape
the play button brings up
different brush families
tools like BURN, DODGE,
ERASER and others use the
same BRUSH settings
when using these tools I
recommend starting with:
1. SIZE: use a large brush
100 px – 400 px
2. TYPE: try a soft brush –
if you hover over the
brush types it will tell
you the name of the
brush
3. HARDNESS: use a soft
opacity 10% or so
19
22. digitalphotographyandimaging
plainfield central – mr. lawler art + design
EDITING COLOR IMAGES
The Adjustment Window
Editing B&W Image
1. B & W: turn the image grayscale
2. Levels: edit for value
3. Curves: edit for value
4. Bright/Cont: edit for contrast
5. Channel Mixer: edit for value/B&W
6. Shadow/High: edit for contrast
Editing Color
1. Color Balance: edit color hue
2. Hue/Sat: edit for intensity
3. Channel Mixer: edit temperature
4. Photo Filter: edit temperature
STEP 1: Prepare for Color
1. SELECT ALL EDIT COPY
2. SELECT DESELECT
3. View LAYERS MENU (F7)
STEP 2: Black and White Image
1. MODE GRAYSCALE (then return
to RGB), using B&W tool or using
the Channel Mixer (monochrome
checked)
2. Edit this image using the B&W
editing tools from the Adjustment
Menu (see above)
3. Edit this image using Burn & Dodge
STEP 3: Paste Color Image
1. EDIT PASTE
2. a duplicate layer should appear
that is now on top of the B&W
3. edit for color (see above)
STEP 4: Overlaying Color Layer
1. change Layer 1 using BLENDING
LAYER MODE COLOR
22