SlideShare a Scribd company logo
F1 master
Final Engineering Report
Engineering Project Mechanical
OENG1053
Mr Pattabhiraman Malavalli
Ehinomhen Oseghale s3434470
Masood Naziri s3433405
Atiqullah Ataei s3379403
Final Engineering Report
F1 master
1 | P a g e
Contents
Acknowledgements..................................................................................... 2
Executive Summary .................................................................................... 2
Introduction (Background) ............................................................................ 2
Resource planning...................................................................................... 3
Project Planning ........................................................................................ 4
Loading and Scheduling................................................................................ 5
Risk Assessment......................................................................................... 5
Concept design ......................................................................................... 7
Team formation........................................................................................ 8
Design tools ............................................................................................12
Design Criteria .........................................................................................13
Communication Methods .............................................................................14
Product Design and Development ...................................................................14
Process Design and Development ...................................................................17
The Putting the design and development together requires a lot of work and skill, and the most
important tool is the machine/s used in finalizing the design. Below is the summary of the most
important machine, the MakerBot ......................................................................17
Product Validation ....................................................................................20
Conclusion ..............................................................................................25
Final Engineering Report
F1 master
2 | P a g e
Acknowledgements
Firstly as a Group, we would very much like to thank our teacher Mr Pattabhiraman
Malavalli as well as RMIT University for guiding us throughout the 12week span of
our engineering project; we would also like to thank our teacher for always being
there to give us accurate and detailed feedback.
Executive Summary
The aim of this report was to experience a real industry engineering project and to
have acknowledgement of what the real industry will be like. After discussing with the
team on what will we be doing different and better to make the F1 car from the
previous knowledge’s that we have achieved over the three semesters, as a team we
came across with what will be our problem that we will be facing, it was the weight of
the car while maintaining our design that we agreed to make. While we were
designing the car on Catia we would check the weight after every part so that anything
that will make it overweight we would reconsider as a team and bring some changes
to the design. Concluding the report when making a design the weight and size should
be conformed and considered while making the design so later there is no big changes
are needed and saves time. It is recommended that the design restrictions and
guidelines are properly read and some research is done.
Introduction (Background)
This report presents the design of a Formula One car and also introducing the group of
3 which includes Ehinomhen Oseghale, Masood Naziri & Atiqullah Ataei and
displays system used during the initial and final construction within a 12 week span.
This design plan makes use of the MS document, while the design and development of
the car was done using CATIA and Solidworks programs. The length and weight
measurement were both within the criteria stated, which are 200mm and 70grams
respectively. In this design the overall objectives set in the criteria sheet were met. By
keeping track of the weight and length, the design is required to attain the best
possible speed and overall functionality. The design structure was carefully made; also
it was flushed and finely finished to give it the best possible output for an F1 car. The
mass and density is 80grams and 1240kg/m respectively. After completely designing
the F1 car, as a team we then proceeded to applying the recommended aerodynamic
test with the aid of solidworks program. This significantly added an extra star to the
design. In this report we clearly explained/expanded on all procedures and steps taken
in the creation of our astonishing Formula one car.
Final Engineering Report
F1 master
3 | P a g e
Resource planning
In order for the group to finalize anything about the design elements of the F1 car,
first we must know what exact resources (people, equipment, materials) are needed
and also in what quantities to successfully perform the project activities.
REFLECTION
High 80% - 100%
Low 20% - 60%
Standard 70% - 100%
Final Engineering Report
F1 master
4 | P a g e
Project Planning
In our project, as a group we came up with an idea of creating the most
advanced/comfortable F1 racing car model. There were several processes put into the
structure and development of the F1 car. The first task at hand was to create 1
individual f1 model car each. At the end of the fourth week, we had to make a
decision, which involved choosing only one out of the three models. In our opinion
this was the best one of them all. Below are the 3 models and a caption of what they
represent;
ATIQULLAH ATAEI DESIGN
MASOOD NAZIRI DESIGN
EHINOMHEN OSEGHALE DESIGN
Final Engineering Report
F1 master
5 | P a g e
Loading and Scheduling
As this was a group project the work load had to be divided amongst the group
members. We all decided to do some work in all parts of the project to get the best
knowledge in the project whilst specialising in a specific part of the project. The
design of the f1 car was specialised by Masood and the report of the car was
specialised by Ehinomhen whilst the calculation and theory such as aerodynamics and
weight, size was monitored by Atiqullah. The scheduling of the project was set from
the first week of commencing the project and everyone in the group had their set work
and due date were all set. The group was in contact through social network and other
means of communication. If anything was wrong we would analyse it quickly there
were not a lot of millstones in the project as we had plenty of time to do the project.
The projects main goal was for us to get a real engineering project experience while
we have fun doing the project.
Risk Assessment
There are no great hazards involved in this project basic common sense practises
should be considered at all times. While making the design it can be really lengthy and
tiring so small breaks should be taken to rest the eyes and proper seating position
while sitting on the computer for the back and eyes to avoid any permanent injuries or
problems. During the actual 3d printing session the basic instructions for the 3d printer
should be followed.
Likelihood Consequence
Insignificant Minor Moderate Major Critical
Almost Certain Medium Medium High Extreme Extreme
Likely Low Medium High High Extreme
Possible Low Medium High High High
Unlikely Low Low Medium Medium High
Rare Low Low Low Low Medium
Final Engineering Report
F1 master
6 | P a g e
Consequence Description of Consequence Likelihood Description of Likelihood
1. Insignificant No treatment required 1. Rare Will only occur in exceptional
circumstances
2. Minor Minor injury requiring First Aid treatment
(e.g. minor cuts, bruises, bumps)
2. Unlikely Not likely to occur within the foreseeable
future, or within the project lifecycle
3. Moderate Injury requiring medical treatment or lost
time
3. Possible May occur within the foreseeable future,
or within the project lifecycle
4. Major Serious injury (injuries) requiring specialist
medical treatment or hospitalisation
4. Likely Likely to occur within the foreseeable
future, or within the project lifecycle
5. Critical Loss of life, permanent disability or
multiple serious injuries
5. Almost
Certain
Almost certain to occur within the
foreseeable future or within the project
lifecycle
Hierarchy of Control
Most effective
(High level)
Least effective
(Low level)
Elimination: remove the hazard completely from the workplace or activity
Substitution: replace a hazard with a less dangerous one (e.g. a less hazardous chemical)
Redesign: making a machine or work process safer (e.g. raise a bench to reduce bending)
Isolation: separate people from the hazard (e.g. safety barrier)
Administration: putting rules, signage or training in place to make a workplace safer
(e.g. induction training, highlighting trip hazards)
Personal Protective Equipment (PPE): Protective clothing and equipment (e.g. gloves, hats)
Assessed Risk Level Description of Risk Level Actions
Low
If an incident were to occur, there would be
little likelihood that an injury would result.
Undertake the activity with the existing
controls in place.
Medium
If an incident were to occur, there would be
some chance that an injury requiring First Aid
would result.
Additional controls may be needed.
High
If an incident were to occur, it would be likely
that an injury requiring medical treatment
would result.
Controls will need to be in place before
the activity is undertaken.
Extreme
If an incident were to occur, it would be likely
that a permanent, debilitating injury or death
would result.
Consider alternatives to doing the
activity.
Significant control measures will need
to be implemented to ensure safety.
Final Engineering Report
F1 master
7 | P a g e
Concept design
The first thing a quality design needs is a well prepared and furnished project plan.
With the aid of an MS document we carefully planned out a concept of any model car
of our choice and then we moved on to designing it on CATIA. Our F1 car model of
choice was based on an original formula one model, different ideas were drawn from
several original model. This skill of merging many different ideas together is what
makes our design different from every other F1 car out there today. As a group, we all
individually put in our separate concept design ideas towards the building of the car.
This is one of the many reasons why this F1 car is unique. During the construction of
the car, we kept in mind the required weight, length and dimensions required. The
next step on our agenda was to put the F1 car through an aerodynamic test using the
solidworks program. Aerodynamics in automotive is the study of the aerodynamics of
road vehicles. Its main goals are reducing drag and wind noise, minimizing noise
emission, and preventing undesired lift forces and other causes of aerodynamic
instability at high speeds. For some classes of racing vehicles, it may also be
important to produce down force to improve traction and thus cornering abilities. This
test was successfully completed for the model car. Clearly explained photos will be
attached later in this report.
1. Description of
Hazards / Risks
2. Risk
Level
1. Control Measures
Making a mistake in the
design of the car which
will be ineffective and
waste of money.
High In order to control this risk great caution should
be taken with the design and the limitations and
design requirements should always be taken in
consideration when designing.
Using electric
equipment’s
Medium When using things associated with electricity
always make sure that the surroundings is safe
and checking for any open wires.
Making the design on
time.
High Handing in the designs on time is very important
as there is a one week printing session this should
be controlled since the start of the project
holding team meetings and following the project
plan meeting the deadlines.
Final Engineering Report
F1 master
8 | P a g e
Kinematics and Kinetics of the Model f1 car
Final Engineering Report
F1 master
9 | P a g e
Team formation
As a team we all collectively contributed in these various aspects;
MEET THE TEAM
- Project Manager & Manufacturing Engineer
- Design, Graphic & Manufacturing Engineer
- Testing & Manufacturing Engineer
Final Engineering Report
F1 master
10 | P a g e
Weight management
Above are the weight, density, area and volume. Notice how the density was updated
from 1000kg_m3
to 1240kg_m3
. This was done because it was clearly specified on the
criteria sheet. Also note the mass will subject to change after it has been 3D printed.
Mass after 3D printing is 70grams. This happened because the material used in the
CATIA program is Metal, which the output is in PLA plastic (Polylactic acid plastic)
Organisational factors and diagram
Without a doubt there were several organisational factors involved in our project.
There were both positive and negative factors right from the initial project planning up
to the project conclusion. The factors include;
- Demands related to tasks and roles
- Quantitative overload, qualitative overload and mental effort
- Insufficient work
- Role conflicts and ambiguity
- Individual participation in decision making
- Physical environment and working conditions
- Work/time schedules
- Work recognition
- Information/communication flow
Final Engineering Report
F1 master
11 | P a g e
Impact of design methods and Regulations
On the first day of class we were told that we are going to model a F1 race car for our
project thru out the semester and we were provided brief project criteria sheet and
with regulation on how to have a successful design. We start researching for type of
models to design our Race Car, and start with 2D sketching and then CATIA. Thru
out modelling our design, we were doing very well at the start, but later the impact
that we face thru out our design methods and regulations, was that our model was
actually quite off the regulations requirements. The mass is a bit heavier that we
planned to design it but beside that the output was successful with regulations and
requirements.
Final Engineering Report
F1 master
12 | P a g e
Discussion and strategic consideration
During the initial planning of the F1 model car, as a group we came up with several
ground-breaking industry quality ideas which are as follows;
- Stability
- Aerodynamics
- Chassis
- Cockpit
- Spoiler
- Sufficient engine space
- Wheel alignment etc.
From left to right Cockpit & Spoiler.
Design tools
 CATIA V5R21
 Solidworks version 2013/14
 3D printer
 Microsoft office
- Microsoft project
- Microsoft PowerPoint
- Microsoft word
Final Engineering Report
F1 master
13 | P a g e
Design Criteria
 Front/Rear aerofoil span min 40mm/max 60mm
 Front and rear Aerofoil chord min 15mm/max 25mm
 Front Aerofoil thickness min 1mm/max 12mm
 Rear Aerofoil Thickness min 3mm/ max 12mm
 Whole of the front Aerofoil when viewed from the side must be in front of the centre
line of the front axle
 Whole of the rear Aerofoil when viewed from the side must be behind the centre line
of the rear axle
 The bottom surface of the aerofoil must be higher than the highest point of the rear
wheel when measured normal to the track surface
 Track width is 300 mm wide and 18.25 metre long. A 50 mm high side walls are built
for safety
 CO2 cartridge chamber diameter is 19.1mm.
 Centre of the cartridge chamber diameter given in the stock drawing, Refer Stock
drawing (measured from track surface to centre of the hole CO2 chamber)
 Depth of the hole min 50mm/max 60mm
 Wall thickness around the cartridge Min 3 mm
 Clear space surrounding the CO2 cartridge below 3mm
Wheel dimensions
The group made the holes for the axels as 6.00mm the Makerbot machine drilled the
holes perfectly. The wheel length and width are 33mm & 15.20mm respectively.
Below are photos of the wheel;
Final Engineering Report
F1 master
14 | P a g e
Communication Methods
 Google docs
 Email
 File exchange
Product Design and Development
On the first day in the class I read the instructions of the project brief, then
created a group of 3 and sat in on meetings with my group members, then wrote up
the related paperwork. Together as a group we read up on the rules & regulations
given out.
Next on our agenda we officially started project planning on MS project
document, began brainstorming and generating relevant ideas as a group. Before
officially starting my design the team realised that we had to adequately represent
an F1 car with the design of our choice.
Individually we did a lot of research prior to starting this gave us the
opportunity to know our design very well, and then began the commencement of
the design. The next big step was commencing the car modelling and initial design
using CATIA.
Body Design for reliability and durability
The reliability and durability of the F1 car is significantly equivalent to several F1
models out there today. Everything about the model is tweaked and tooled for one
thing and one thing only speed. Formula One car can easily attain speeds of 200 mph
but during a race, the speeds are generally lower. For example during the 2006
Hungarian Grand Prix, the winner's average speed was 101.769 mph, and in the 2006
Italian Grand Prix, it was 152.749 mph. For our F1 car in a small scale we attained an
average speed of 1.769mps, which is a reasonable speed considering the weight of the
car. All these stats clearly demonstrate that the body design structure, durability and
reliability all considerably affect the overall performance of the car.
Final Engineering Report
F1 master
15 | P a g e
Wheel Design for reliability and durability
Final Engineering Report
F1 master
16 | P a g e
Virtual Model Flo analysis (Assembly)
This determines the impact of a liquid or gas on product performance during the
design phase using CAD-embedded solidworks Flow Simulation.
Virtual Model FEA analysis (Assembly)
Finite element analysis (FEA) is the modelling of products and systems in a virtual
environment, for the purpose of finding and solving potential (or existing) structural
or performance issues. FEA is the practical application of the finite element method
(FEM), which is used by engineers and scientist to mathematically model and
numerically solve very complex structural, fluid, and multiphysics problems. The
purpose of using FEA analysis in the formula one car was to solve any
potential/existing performance or structural issues, some of them which includes;
- Section areas
- Moments of inertia
- Plate thickness
- Bending stiffness
- Transverse shear
Types of analysis include:
 Linear statics: linear analysis with applied loads and constraints that are static
 Nonlinear statics and dynamics: effects due to contact (where one part of the model
comes into contact with another), nonlinear material definitions (plasticity, elasticity,
etc.) and large displacement (strains that exceed small displacement theory that limits
a linear analysis approach)
 Normal modes: natural frequencies of vibration
 Dynamic response: loads or motions that vary with time and frequency
 Buckling: critical loads at which a structure becomes unstable
 Heat transfer: conduction, radiation and phase change
Final Engineering Report
F1 master
17 | P a g e
Design for Manufacturing (DFM) Dialogue with manufacturing
Successful mechanical design and engineering is environment and process
dependant. There are many factors that affect the design and its output. The following
are major factors;
1. Product choice difficulty
2. Time to market
3. Cost
4. Product competitive environment
5. Organization arrangement
6. Design engineering and manufacturing tools
7. Staff experience
Design for Assembly (DFA)
Design for Assembly recognises the need to analyse both the part design and the
whole product for any assembly problems early in the design process. Since it was a
group project to design a F1 race car, we divided among each other, and the parts that
we need to assemble was the spoiler and front wing.
Process Design and Development
The Putting the design and development together requires a lot of work and skill,
and the most important tool is the machine/s used in finalizing the design. Below is
the summary of the most important machine, the MakerBot
MakerBot 3D printing process:
The MakerBot 3d printing is the easiest, fastest and most affordable tool for
making professional quality models. The makerbot creation process starts with the
digital design, this can be a design you create using an individual program such as
CATIA and many more. If you’re using for example a program such as CATIA to
design your model, you must save your design as ‘stl’ file after completing your
design to be ready for printing out.
Final Engineering Report
F1 master
18 | P a g e
The next step after completing your design is to open it in MakberBot maker ware
this is the software that allows you to prepare your model to be made on your
makerbot maker ware replicated tool. Makerbot maker ware is a software tool
developed to move and scale your model and to arrange just so on the virtual build
plate. When you just got how u wants your model to print out just click make it and
the makerbot replicator will begin transform your digital 3D model into physical 3D
model.
The material that the MakerBot replicator use is renewable bio plastic is called
“PLA”. When you tell the MakerBot replicator to make something, it begins by
pulling the PLA film at the back up through the tube and into the extruder.
The extruder heats it up and squishes it up through a very small hole on the build
plate. It starts by laying down the bottom layer of your 3D model, then the platform
move the object down a tiny bit so the extruder can lay down the 2nd
layer the process
continues for the next layer, and the next layer, and the next layer. This process can
take some times, because each layer can be as fine as 100microns.
The above photo clearly shows the makerbot program running on a computer; it also shows
the team model car
Final Engineering Report
F1 master
19 | P a g e
The above photos show the final output of the F1 car. This was successfully done using The
Makerbot machine & program
Quality assurance:
MakerBot replicator is very powerful software helps us take the most advantage of our
powerful desktop 3D printing and scanning products in engineering and many more
other industries. As an engineer or any other particular person who willing to use this
software, you must be capable and strong with high attention to details the 3D models
and be able to maintain the MakerBot replicator. As quality assurance you must at
least have 1 year experience and knows how to develop the designs/models to ensure
you print the best model possible.
Dimensional analysis:
Dimensional analysis is one of the most important concept of physics and it’s really
important before starting on your design to have all the Dimensions of your model
correctly and have good understanding of them which are ‘length, mass, height and
etc.’ of your model in order to have a successful outcome. There are several types of
dimensions that we must be aware of during working on our design, such as how our
model will look as 3D and 2D.
Final Engineering Report
F1 master
20 | P a g e
Product Validation
First of all the general idea of a product validation is the process of achieving an
increased certainty that a product idea/design will indeed be successfully adopted in
market. The showcased F1 car takes note of all the criteria’s involved with certain
successfully car models out there in the market today. For example it has wheel
bearing grease which helps with wheel position and maximum wheel utility, gearbox
lubricant this helps improve the overall speed, control and smoothness of the car. Etc.
The below picture further explains the ideas directly keyed into the F1 car model.
Final Engineering Report
F1 master
21 | P a g e
Timeline of the F1 car development
This photo portrays 2 views of the F1 car model
The above photo clearly shows the front view and top view of the F1 car model
This photo shows the right side view and bottom view of the F1 car model; it also
shows the impeccable side designs and wheel alignment and size.
Final Engineering Report
F1 master
22 | P a g e
Aerodymics analysis flow using solidworks
The above photo shows the flow simulation and also the size, dimensions and
conditions of our aerodynamic tested F1 car.
- Pressure generally within range of 101.05KPa and 101.65KPa.
- Higher pressure at front spoiler.
- Lower pressure under chassis and front spoiler.
- Lower pressure at nose and top of cockpit position
The photo above clearly shows a Virtual Model Flow analysis and other
related/relevant data
Final Engineering Report
F1 master
23 | P a g e
Final Engineering Report
F1 master
24 | P a g e
Flow Trajectories
- Bigger pressure range between101.15KPa to 101.75KPa.
- Extremely high pressure at thrust face.
- Lower pressure just past front surface.
- Turbulent air flow at rear.
The above photo clarifies the flow trajectory of the F1 car.
This above photo clarifies the flow trajectory of the F1 car.
The above photo clarifies the flow trajectory of the F1 car.
Final Engineering Report
F1 master
25 | P a g e
Conclusion
In conclusion as a group we can all agree that a lot of time, energy and strategy were
put into this Formula One car. Everything involved in our car from start to finish
conveniently fits within the required criteria, from the weight size length and most
importantly the aerodynamic/tests are almost perfect to a real life F1 car. This team
consists of 3 group members who are; Ehinomhen Oseghale, Atiqullah Ataei
Masood Naziri. During the initial designing of the project, a minor delinquent was
encountered which involved the weight. That was the only major problem we had, and
this resulted in slowing down of the car during race time. The improvement that could
be made includes, paying close attention to the criteria and required mass limit. It is
innocuous to say; together we are all individually proud of our effective contribution
towards the strategic building/construction of this F1 car. From the 1st
week of initial
panning to the 12th
week of the final compilation of the entire project, it is more that
safe to say that the two main goals ‘Teamwork’ & ‘real industry experience’ were
both more than accomplished.
Final Engineering Report
F1 master
26 | P a g e
REFRENCES
https://sopinion8ed.wordpress.com/category/is-success/page/2/
http://www.cgsst.com/eng/risk-factors/organizational-risk-factors.asp
http://www.engineerboard.co.uk/jobs/aerospaceavionicsandaeronautics/aerodynamicsfluids
http://www.engineersaustralia.org.au/resources-and-library
http://www.topgear.com/au/cars/reviews

More Related Content

What's hot

Biw
BiwBiw
Study project on knuckle joint
Study project on knuckle jointStudy project on knuckle joint
Study project on knuckle joint
SRI HARSHA VARDHAN
 
Biw fixture
Biw fixtureBiw fixture
Biw fixture
Jayesh Sarode
 
Training report on catia
Training report on catiaTraining report on catia
Training report on catia
Tajender12singh
 
Double crane hook
Double crane hook Double crane hook
Double crane hook
Abdirahman024
 
NX training Report
NX training ReportNX training Report
NX training Report
STAY CURIOUS
 
Catia v5 presentation report
Catia v5 presentation reportCatia v5 presentation report
Catia v5 presentation report
Munna Kumar
 
STUDY ON PRINCIPLE AND OPERATIONS OF CNC MACHINES IN VARIOUS FABRICATION PROC...
STUDY ON PRINCIPLE AND OPERATIONS OF CNC MACHINES IN VARIOUS FABRICATION PROC...STUDY ON PRINCIPLE AND OPERATIONS OF CNC MACHINES IN VARIOUS FABRICATION PROC...
STUDY ON PRINCIPLE AND OPERATIONS OF CNC MACHINES IN VARIOUS FABRICATION PROC...Suchit Moon
 
ppt on summer training on solidworks
ppt on summer training on solidworksppt on summer training on solidworks
ppt on summer training on solidworks
Shubham Agarwal
 
Internship Report_Jyoti CNC Automation Pvt Ltd
Internship Report_Jyoti CNC Automation Pvt LtdInternship Report_Jyoti CNC Automation Pvt Ltd
Internship Report_Jyoti CNC Automation Pvt LtdMalay Nasit
 
brief report on bearing
brief report on bearing brief report on bearing
brief report on bearing
sagar20jain
 
Sheet metal design
Sheet metal designSheet metal design
Sheet metal designHien Dinh
 
Cnc milling programs
Cnc milling programsCnc milling programs
Cnc milling programs
moniraghu
 
Design and fabrication of bending machine
Design and fabrication of bending machineDesign and fabrication of bending machine
Design and fabrication of bending machineparamesr2020
 
Solid Works Presentation
Solid Works PresentationSolid Works Presentation
Solid Works PresentationPankaj Dogra
 
Drilling jig
Drilling jigDrilling jig
Drilling jig
Prof.Mayur Modi
 
Chapter 2 constructional feature of cnc machine
Chapter 2 constructional feature of cnc machineChapter 2 constructional feature of cnc machine
Chapter 2 constructional feature of cnc machine
RAHUL THAKER
 
RAPID TOOLING - presentationupdate
RAPID TOOLING - presentationupdateRAPID TOOLING - presentationupdate
RAPID TOOLING - presentationupdateKerrie Noble
 
ME8691 - Computer Aided Design and Manufacturing.pdf
ME8691 - Computer Aided Design and Manufacturing.pdfME8691 - Computer Aided Design and Manufacturing.pdf
ME8691 - Computer Aided Design and Manufacturing.pdf
SenthilJS2
 
Solidworks Presentation
Solidworks PresentationSolidworks Presentation
Solidworks Presentation
Digvijay Gabhane
 

What's hot (20)

Biw
BiwBiw
Biw
 
Study project on knuckle joint
Study project on knuckle jointStudy project on knuckle joint
Study project on knuckle joint
 
Biw fixture
Biw fixtureBiw fixture
Biw fixture
 
Training report on catia
Training report on catiaTraining report on catia
Training report on catia
 
Double crane hook
Double crane hook Double crane hook
Double crane hook
 
NX training Report
NX training ReportNX training Report
NX training Report
 
Catia v5 presentation report
Catia v5 presentation reportCatia v5 presentation report
Catia v5 presentation report
 
STUDY ON PRINCIPLE AND OPERATIONS OF CNC MACHINES IN VARIOUS FABRICATION PROC...
STUDY ON PRINCIPLE AND OPERATIONS OF CNC MACHINES IN VARIOUS FABRICATION PROC...STUDY ON PRINCIPLE AND OPERATIONS OF CNC MACHINES IN VARIOUS FABRICATION PROC...
STUDY ON PRINCIPLE AND OPERATIONS OF CNC MACHINES IN VARIOUS FABRICATION PROC...
 
ppt on summer training on solidworks
ppt on summer training on solidworksppt on summer training on solidworks
ppt on summer training on solidworks
 
Internship Report_Jyoti CNC Automation Pvt Ltd
Internship Report_Jyoti CNC Automation Pvt LtdInternship Report_Jyoti CNC Automation Pvt Ltd
Internship Report_Jyoti CNC Automation Pvt Ltd
 
brief report on bearing
brief report on bearing brief report on bearing
brief report on bearing
 
Sheet metal design
Sheet metal designSheet metal design
Sheet metal design
 
Cnc milling programs
Cnc milling programsCnc milling programs
Cnc milling programs
 
Design and fabrication of bending machine
Design and fabrication of bending machineDesign and fabrication of bending machine
Design and fabrication of bending machine
 
Solid Works Presentation
Solid Works PresentationSolid Works Presentation
Solid Works Presentation
 
Drilling jig
Drilling jigDrilling jig
Drilling jig
 
Chapter 2 constructional feature of cnc machine
Chapter 2 constructional feature of cnc machineChapter 2 constructional feature of cnc machine
Chapter 2 constructional feature of cnc machine
 
RAPID TOOLING - presentationupdate
RAPID TOOLING - presentationupdateRAPID TOOLING - presentationupdate
RAPID TOOLING - presentationupdate
 
ME8691 - Computer Aided Design and Manufacturing.pdf
ME8691 - Computer Aided Design and Manufacturing.pdfME8691 - Computer Aided Design and Manufacturing.pdf
ME8691 - Computer Aided Design and Manufacturing.pdf
 
Solidworks Presentation
Solidworks PresentationSolidworks Presentation
Solidworks Presentation
 

Similar to CATIA Project (Completed)

56aaa27b19117825641e966dac9068aa
56aaa27b19117825641e966dac9068aa56aaa27b19117825641e966dac9068aa
56aaa27b19117825641e966dac9068aa
John Anthonius
 
Design of a Formula One Front Wing for the 2014 Season (with regulations)
Design of a Formula One Front Wing for the 2014 Season (with regulations)Design of a Formula One Front Wing for the 2014 Season (with regulations)
Design of a Formula One Front Wing for the 2014 Season (with regulations)Josh Stevens
 
AUTO MAETIC AIR FELLING
AUTO MAETIC AIR FELLINGAUTO MAETIC AIR FELLING
AUTO MAETIC AIR FELLING
yash patel
 
Industrial Training Report
Industrial Training ReportIndustrial Training Report
Industrial Training Report
Shubham Chakraborty
 
Scrum Introduction
Scrum IntroductionScrum Introduction
Scrum Introduction
Ibnu Fajar Yunardi
 
Final Submission - Team 19 Lidar Installation Report
Final Submission - Team 19 Lidar Installation ReportFinal Submission - Team 19 Lidar Installation Report
Final Submission - Team 19 Lidar Installation ReportKerrie Noble
 
warn_internship_report
warn_internship_reportwarn_internship_report
warn_internship_reportTrent Smith
 
Paper ncta
Paper nctaPaper ncta
Paper ncta
Pritam Raut
 
Hariharan 2016
Hariharan 2016Hariharan 2016
Hariharan 2016
Hariharan Sankaran
 
Presentation by Rajesh Kumar Mudiakal
Presentation by Rajesh Kumar MudiakalPresentation by Rajesh Kumar Mudiakal
Presentation by Rajesh Kumar MudiakalPMI_IREP_TP
 
Starting out with Scrum
Starting out with ScrumStarting out with Scrum
Starting out with Scrum
Joshua Partogi
 
Guidelines industrial engineering
Guidelines industrial engineeringGuidelines industrial engineering
Guidelines industrial engineering
Syed Jafri
 
Road and Track Vehicle - Project Document
Road and Track Vehicle - Project DocumentRoad and Track Vehicle - Project Document
Road and Track Vehicle - Project Document
Gregg Barrett
 
Fundamentals of Scrum: How to achieve 10x higher performance for the software...
Fundamentals of Scrum: How to achieve 10x higher performance for the software...Fundamentals of Scrum: How to achieve 10x higher performance for the software...
Fundamentals of Scrum: How to achieve 10x higher performance for the software...
EikiTakeuchi1
 
16SMCE310 16SCVE310 – Engineering Skills Project Brief .docx
16SMCE310  16SCVE310 – Engineering Skills Project Brief .docx16SMCE310  16SCVE310 – Engineering Skills Project Brief .docx
16SMCE310 16SCVE310 – Engineering Skills Project Brief .docx
felicidaddinwoodie
 
Application of industrial engineering techniques in garments production
Application of industrial engineering techniques      in garments productionApplication of industrial engineering techniques      in garments production
Application of industrial engineering techniques in garments production
Md.Abdur Rahim Al Bahar
 

Similar to CATIA Project (Completed) (20)

56aaa27b19117825641e966dac9068aa
56aaa27b19117825641e966dac9068aa56aaa27b19117825641e966dac9068aa
56aaa27b19117825641e966dac9068aa
 
Print
PrintPrint
Print
 
Design of a Formula One Front Wing for the 2014 Season (with regulations)
Design of a Formula One Front Wing for the 2014 Season (with regulations)Design of a Formula One Front Wing for the 2014 Season (with regulations)
Design of a Formula One Front Wing for the 2014 Season (with regulations)
 
AUTO MAETIC AIR FELLING
AUTO MAETIC AIR FELLINGAUTO MAETIC AIR FELLING
AUTO MAETIC AIR FELLING
 
Ishwar PROJECT REPORT
Ishwar PROJECT REPORTIshwar PROJECT REPORT
Ishwar PROJECT REPORT
 
Industrial Training Report
Industrial Training ReportIndustrial Training Report
Industrial Training Report
 
Scrum Introduction
Scrum IntroductionScrum Introduction
Scrum Introduction
 
Final Submission - Team 19 Lidar Installation Report
Final Submission - Team 19 Lidar Installation ReportFinal Submission - Team 19 Lidar Installation Report
Final Submission - Team 19 Lidar Installation Report
 
warn_internship_report
warn_internship_reportwarn_internship_report
warn_internship_report
 
Paper ncta
Paper nctaPaper ncta
Paper ncta
 
Hariharan 2016
Hariharan 2016Hariharan 2016
Hariharan 2016
 
Presentation by Rajesh Kumar Mudiakal
Presentation by Rajesh Kumar MudiakalPresentation by Rajesh Kumar Mudiakal
Presentation by Rajesh Kumar Mudiakal
 
Starting out with Scrum
Starting out with ScrumStarting out with Scrum
Starting out with Scrum
 
VAWT Report
VAWT ReportVAWT Report
VAWT Report
 
Guidelines industrial engineering
Guidelines industrial engineeringGuidelines industrial engineering
Guidelines industrial engineering
 
Road and Track Vehicle - Project Document
Road and Track Vehicle - Project DocumentRoad and Track Vehicle - Project Document
Road and Track Vehicle - Project Document
 
Strategy Report
Strategy ReportStrategy Report
Strategy Report
 
Fundamentals of Scrum: How to achieve 10x higher performance for the software...
Fundamentals of Scrum: How to achieve 10x higher performance for the software...Fundamentals of Scrum: How to achieve 10x higher performance for the software...
Fundamentals of Scrum: How to achieve 10x higher performance for the software...
 
16SMCE310 16SCVE310 – Engineering Skills Project Brief .docx
16SMCE310  16SCVE310 – Engineering Skills Project Brief .docx16SMCE310  16SCVE310 – Engineering Skills Project Brief .docx
16SMCE310 16SCVE310 – Engineering Skills Project Brief .docx
 
Application of industrial engineering techniques in garments production
Application of industrial engineering techniques      in garments productionApplication of industrial engineering techniques      in garments production
Application of industrial engineering techniques in garments production
 

CATIA Project (Completed)

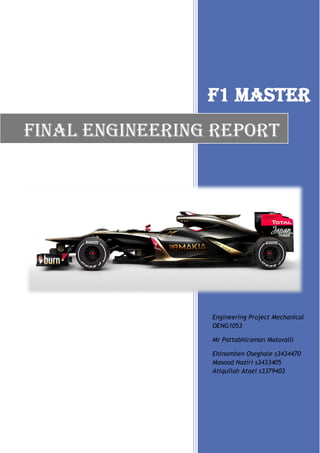
  • 1. F1 master Final Engineering Report Engineering Project Mechanical OENG1053 Mr Pattabhiraman Malavalli Ehinomhen Oseghale s3434470 Masood Naziri s3433405 Atiqullah Ataei s3379403
  • 2. Final Engineering Report F1 master 1 | P a g e Contents Acknowledgements..................................................................................... 2 Executive Summary .................................................................................... 2 Introduction (Background) ............................................................................ 2 Resource planning...................................................................................... 3 Project Planning ........................................................................................ 4 Loading and Scheduling................................................................................ 5 Risk Assessment......................................................................................... 5 Concept design ......................................................................................... 7 Team formation........................................................................................ 8 Design tools ............................................................................................12 Design Criteria .........................................................................................13 Communication Methods .............................................................................14 Product Design and Development ...................................................................14 Process Design and Development ...................................................................17 The Putting the design and development together requires a lot of work and skill, and the most important tool is the machine/s used in finalizing the design. Below is the summary of the most important machine, the MakerBot ......................................................................17 Product Validation ....................................................................................20 Conclusion ..............................................................................................25
  • 3. Final Engineering Report F1 master 2 | P a g e Acknowledgements Firstly as a Group, we would very much like to thank our teacher Mr Pattabhiraman Malavalli as well as RMIT University for guiding us throughout the 12week span of our engineering project; we would also like to thank our teacher for always being there to give us accurate and detailed feedback. Executive Summary The aim of this report was to experience a real industry engineering project and to have acknowledgement of what the real industry will be like. After discussing with the team on what will we be doing different and better to make the F1 car from the previous knowledge’s that we have achieved over the three semesters, as a team we came across with what will be our problem that we will be facing, it was the weight of the car while maintaining our design that we agreed to make. While we were designing the car on Catia we would check the weight after every part so that anything that will make it overweight we would reconsider as a team and bring some changes to the design. Concluding the report when making a design the weight and size should be conformed and considered while making the design so later there is no big changes are needed and saves time. It is recommended that the design restrictions and guidelines are properly read and some research is done. Introduction (Background) This report presents the design of a Formula One car and also introducing the group of 3 which includes Ehinomhen Oseghale, Masood Naziri & Atiqullah Ataei and displays system used during the initial and final construction within a 12 week span. This design plan makes use of the MS document, while the design and development of the car was done using CATIA and Solidworks programs. The length and weight measurement were both within the criteria stated, which are 200mm and 70grams respectively. In this design the overall objectives set in the criteria sheet were met. By keeping track of the weight and length, the design is required to attain the best possible speed and overall functionality. The design structure was carefully made; also it was flushed and finely finished to give it the best possible output for an F1 car. The mass and density is 80grams and 1240kg/m respectively. After completely designing the F1 car, as a team we then proceeded to applying the recommended aerodynamic test with the aid of solidworks program. This significantly added an extra star to the design. In this report we clearly explained/expanded on all procedures and steps taken in the creation of our astonishing Formula one car.
  • 4. Final Engineering Report F1 master 3 | P a g e Resource planning In order for the group to finalize anything about the design elements of the F1 car, first we must know what exact resources (people, equipment, materials) are needed and also in what quantities to successfully perform the project activities. REFLECTION High 80% - 100% Low 20% - 60% Standard 70% - 100%
  • 5. Final Engineering Report F1 master 4 | P a g e Project Planning In our project, as a group we came up with an idea of creating the most advanced/comfortable F1 racing car model. There were several processes put into the structure and development of the F1 car. The first task at hand was to create 1 individual f1 model car each. At the end of the fourth week, we had to make a decision, which involved choosing only one out of the three models. In our opinion this was the best one of them all. Below are the 3 models and a caption of what they represent; ATIQULLAH ATAEI DESIGN MASOOD NAZIRI DESIGN EHINOMHEN OSEGHALE DESIGN
  • 6. Final Engineering Report F1 master 5 | P a g e Loading and Scheduling As this was a group project the work load had to be divided amongst the group members. We all decided to do some work in all parts of the project to get the best knowledge in the project whilst specialising in a specific part of the project. The design of the f1 car was specialised by Masood and the report of the car was specialised by Ehinomhen whilst the calculation and theory such as aerodynamics and weight, size was monitored by Atiqullah. The scheduling of the project was set from the first week of commencing the project and everyone in the group had their set work and due date were all set. The group was in contact through social network and other means of communication. If anything was wrong we would analyse it quickly there were not a lot of millstones in the project as we had plenty of time to do the project. The projects main goal was for us to get a real engineering project experience while we have fun doing the project. Risk Assessment There are no great hazards involved in this project basic common sense practises should be considered at all times. While making the design it can be really lengthy and tiring so small breaks should be taken to rest the eyes and proper seating position while sitting on the computer for the back and eyes to avoid any permanent injuries or problems. During the actual 3d printing session the basic instructions for the 3d printer should be followed. Likelihood Consequence Insignificant Minor Moderate Major Critical Almost Certain Medium Medium High Extreme Extreme Likely Low Medium High High Extreme Possible Low Medium High High High Unlikely Low Low Medium Medium High Rare Low Low Low Low Medium
  • 7. Final Engineering Report F1 master 6 | P a g e Consequence Description of Consequence Likelihood Description of Likelihood 1. Insignificant No treatment required 1. Rare Will only occur in exceptional circumstances 2. Minor Minor injury requiring First Aid treatment (e.g. minor cuts, bruises, bumps) 2. Unlikely Not likely to occur within the foreseeable future, or within the project lifecycle 3. Moderate Injury requiring medical treatment or lost time 3. Possible May occur within the foreseeable future, or within the project lifecycle 4. Major Serious injury (injuries) requiring specialist medical treatment or hospitalisation 4. Likely Likely to occur within the foreseeable future, or within the project lifecycle 5. Critical Loss of life, permanent disability or multiple serious injuries 5. Almost Certain Almost certain to occur within the foreseeable future or within the project lifecycle Hierarchy of Control Most effective (High level) Least effective (Low level) Elimination: remove the hazard completely from the workplace or activity Substitution: replace a hazard with a less dangerous one (e.g. a less hazardous chemical) Redesign: making a machine or work process safer (e.g. raise a bench to reduce bending) Isolation: separate people from the hazard (e.g. safety barrier) Administration: putting rules, signage or training in place to make a workplace safer (e.g. induction training, highlighting trip hazards) Personal Protective Equipment (PPE): Protective clothing and equipment (e.g. gloves, hats) Assessed Risk Level Description of Risk Level Actions Low If an incident were to occur, there would be little likelihood that an injury would result. Undertake the activity with the existing controls in place. Medium If an incident were to occur, there would be some chance that an injury requiring First Aid would result. Additional controls may be needed. High If an incident were to occur, it would be likely that an injury requiring medical treatment would result. Controls will need to be in place before the activity is undertaken. Extreme If an incident were to occur, it would be likely that a permanent, debilitating injury or death would result. Consider alternatives to doing the activity. Significant control measures will need to be implemented to ensure safety.
  • 8. Final Engineering Report F1 master 7 | P a g e Concept design The first thing a quality design needs is a well prepared and furnished project plan. With the aid of an MS document we carefully planned out a concept of any model car of our choice and then we moved on to designing it on CATIA. Our F1 car model of choice was based on an original formula one model, different ideas were drawn from several original model. This skill of merging many different ideas together is what makes our design different from every other F1 car out there today. As a group, we all individually put in our separate concept design ideas towards the building of the car. This is one of the many reasons why this F1 car is unique. During the construction of the car, we kept in mind the required weight, length and dimensions required. The next step on our agenda was to put the F1 car through an aerodynamic test using the solidworks program. Aerodynamics in automotive is the study of the aerodynamics of road vehicles. Its main goals are reducing drag and wind noise, minimizing noise emission, and preventing undesired lift forces and other causes of aerodynamic instability at high speeds. For some classes of racing vehicles, it may also be important to produce down force to improve traction and thus cornering abilities. This test was successfully completed for the model car. Clearly explained photos will be attached later in this report. 1. Description of Hazards / Risks 2. Risk Level 1. Control Measures Making a mistake in the design of the car which will be ineffective and waste of money. High In order to control this risk great caution should be taken with the design and the limitations and design requirements should always be taken in consideration when designing. Using electric equipment’s Medium When using things associated with electricity always make sure that the surroundings is safe and checking for any open wires. Making the design on time. High Handing in the designs on time is very important as there is a one week printing session this should be controlled since the start of the project holding team meetings and following the project plan meeting the deadlines.
  • 9. Final Engineering Report F1 master 8 | P a g e Kinematics and Kinetics of the Model f1 car
  • 10. Final Engineering Report F1 master 9 | P a g e Team formation As a team we all collectively contributed in these various aspects; MEET THE TEAM - Project Manager & Manufacturing Engineer - Design, Graphic & Manufacturing Engineer - Testing & Manufacturing Engineer
  • 11. Final Engineering Report F1 master 10 | P a g e Weight management Above are the weight, density, area and volume. Notice how the density was updated from 1000kg_m3 to 1240kg_m3 . This was done because it was clearly specified on the criteria sheet. Also note the mass will subject to change after it has been 3D printed. Mass after 3D printing is 70grams. This happened because the material used in the CATIA program is Metal, which the output is in PLA plastic (Polylactic acid plastic) Organisational factors and diagram Without a doubt there were several organisational factors involved in our project. There were both positive and negative factors right from the initial project planning up to the project conclusion. The factors include; - Demands related to tasks and roles - Quantitative overload, qualitative overload and mental effort - Insufficient work - Role conflicts and ambiguity - Individual participation in decision making - Physical environment and working conditions - Work/time schedules - Work recognition - Information/communication flow
  • 12. Final Engineering Report F1 master 11 | P a g e Impact of design methods and Regulations On the first day of class we were told that we are going to model a F1 race car for our project thru out the semester and we were provided brief project criteria sheet and with regulation on how to have a successful design. We start researching for type of models to design our Race Car, and start with 2D sketching and then CATIA. Thru out modelling our design, we were doing very well at the start, but later the impact that we face thru out our design methods and regulations, was that our model was actually quite off the regulations requirements. The mass is a bit heavier that we planned to design it but beside that the output was successful with regulations and requirements.
  • 13. Final Engineering Report F1 master 12 | P a g e Discussion and strategic consideration During the initial planning of the F1 model car, as a group we came up with several ground-breaking industry quality ideas which are as follows; - Stability - Aerodynamics - Chassis - Cockpit - Spoiler - Sufficient engine space - Wheel alignment etc. From left to right Cockpit & Spoiler. Design tools  CATIA V5R21  Solidworks version 2013/14  3D printer  Microsoft office - Microsoft project - Microsoft PowerPoint - Microsoft word
  • 14. Final Engineering Report F1 master 13 | P a g e Design Criteria  Front/Rear aerofoil span min 40mm/max 60mm  Front and rear Aerofoil chord min 15mm/max 25mm  Front Aerofoil thickness min 1mm/max 12mm  Rear Aerofoil Thickness min 3mm/ max 12mm  Whole of the front Aerofoil when viewed from the side must be in front of the centre line of the front axle  Whole of the rear Aerofoil when viewed from the side must be behind the centre line of the rear axle  The bottom surface of the aerofoil must be higher than the highest point of the rear wheel when measured normal to the track surface  Track width is 300 mm wide and 18.25 metre long. A 50 mm high side walls are built for safety  CO2 cartridge chamber diameter is 19.1mm.  Centre of the cartridge chamber diameter given in the stock drawing, Refer Stock drawing (measured from track surface to centre of the hole CO2 chamber)  Depth of the hole min 50mm/max 60mm  Wall thickness around the cartridge Min 3 mm  Clear space surrounding the CO2 cartridge below 3mm Wheel dimensions The group made the holes for the axels as 6.00mm the Makerbot machine drilled the holes perfectly. The wheel length and width are 33mm & 15.20mm respectively. Below are photos of the wheel;
  • 15. Final Engineering Report F1 master 14 | P a g e Communication Methods  Google docs  Email  File exchange Product Design and Development On the first day in the class I read the instructions of the project brief, then created a group of 3 and sat in on meetings with my group members, then wrote up the related paperwork. Together as a group we read up on the rules & regulations given out. Next on our agenda we officially started project planning on MS project document, began brainstorming and generating relevant ideas as a group. Before officially starting my design the team realised that we had to adequately represent an F1 car with the design of our choice. Individually we did a lot of research prior to starting this gave us the opportunity to know our design very well, and then began the commencement of the design. The next big step was commencing the car modelling and initial design using CATIA. Body Design for reliability and durability The reliability and durability of the F1 car is significantly equivalent to several F1 models out there today. Everything about the model is tweaked and tooled for one thing and one thing only speed. Formula One car can easily attain speeds of 200 mph but during a race, the speeds are generally lower. For example during the 2006 Hungarian Grand Prix, the winner's average speed was 101.769 mph, and in the 2006 Italian Grand Prix, it was 152.749 mph. For our F1 car in a small scale we attained an average speed of 1.769mps, which is a reasonable speed considering the weight of the car. All these stats clearly demonstrate that the body design structure, durability and reliability all considerably affect the overall performance of the car.
  • 16. Final Engineering Report F1 master 15 | P a g e Wheel Design for reliability and durability
  • 17. Final Engineering Report F1 master 16 | P a g e Virtual Model Flo analysis (Assembly) This determines the impact of a liquid or gas on product performance during the design phase using CAD-embedded solidworks Flow Simulation. Virtual Model FEA analysis (Assembly) Finite element analysis (FEA) is the modelling of products and systems in a virtual environment, for the purpose of finding and solving potential (or existing) structural or performance issues. FEA is the practical application of the finite element method (FEM), which is used by engineers and scientist to mathematically model and numerically solve very complex structural, fluid, and multiphysics problems. The purpose of using FEA analysis in the formula one car was to solve any potential/existing performance or structural issues, some of them which includes; - Section areas - Moments of inertia - Plate thickness - Bending stiffness - Transverse shear Types of analysis include:  Linear statics: linear analysis with applied loads and constraints that are static  Nonlinear statics and dynamics: effects due to contact (where one part of the model comes into contact with another), nonlinear material definitions (plasticity, elasticity, etc.) and large displacement (strains that exceed small displacement theory that limits a linear analysis approach)  Normal modes: natural frequencies of vibration  Dynamic response: loads or motions that vary with time and frequency  Buckling: critical loads at which a structure becomes unstable  Heat transfer: conduction, radiation and phase change
  • 18. Final Engineering Report F1 master 17 | P a g e Design for Manufacturing (DFM) Dialogue with manufacturing Successful mechanical design and engineering is environment and process dependant. There are many factors that affect the design and its output. The following are major factors; 1. Product choice difficulty 2. Time to market 3. Cost 4. Product competitive environment 5. Organization arrangement 6. Design engineering and manufacturing tools 7. Staff experience Design for Assembly (DFA) Design for Assembly recognises the need to analyse both the part design and the whole product for any assembly problems early in the design process. Since it was a group project to design a F1 race car, we divided among each other, and the parts that we need to assemble was the spoiler and front wing. Process Design and Development The Putting the design and development together requires a lot of work and skill, and the most important tool is the machine/s used in finalizing the design. Below is the summary of the most important machine, the MakerBot MakerBot 3D printing process: The MakerBot 3d printing is the easiest, fastest and most affordable tool for making professional quality models. The makerbot creation process starts with the digital design, this can be a design you create using an individual program such as CATIA and many more. If you’re using for example a program such as CATIA to design your model, you must save your design as ‘stl’ file after completing your design to be ready for printing out.
  • 19. Final Engineering Report F1 master 18 | P a g e The next step after completing your design is to open it in MakberBot maker ware this is the software that allows you to prepare your model to be made on your makerbot maker ware replicated tool. Makerbot maker ware is a software tool developed to move and scale your model and to arrange just so on the virtual build plate. When you just got how u wants your model to print out just click make it and the makerbot replicator will begin transform your digital 3D model into physical 3D model. The material that the MakerBot replicator use is renewable bio plastic is called “PLA”. When you tell the MakerBot replicator to make something, it begins by pulling the PLA film at the back up through the tube and into the extruder. The extruder heats it up and squishes it up through a very small hole on the build plate. It starts by laying down the bottom layer of your 3D model, then the platform move the object down a tiny bit so the extruder can lay down the 2nd layer the process continues for the next layer, and the next layer, and the next layer. This process can take some times, because each layer can be as fine as 100microns. The above photo clearly shows the makerbot program running on a computer; it also shows the team model car
  • 20. Final Engineering Report F1 master 19 | P a g e The above photos show the final output of the F1 car. This was successfully done using The Makerbot machine & program Quality assurance: MakerBot replicator is very powerful software helps us take the most advantage of our powerful desktop 3D printing and scanning products in engineering and many more other industries. As an engineer or any other particular person who willing to use this software, you must be capable and strong with high attention to details the 3D models and be able to maintain the MakerBot replicator. As quality assurance you must at least have 1 year experience and knows how to develop the designs/models to ensure you print the best model possible. Dimensional analysis: Dimensional analysis is one of the most important concept of physics and it’s really important before starting on your design to have all the Dimensions of your model correctly and have good understanding of them which are ‘length, mass, height and etc.’ of your model in order to have a successful outcome. There are several types of dimensions that we must be aware of during working on our design, such as how our model will look as 3D and 2D.
  • 21. Final Engineering Report F1 master 20 | P a g e Product Validation First of all the general idea of a product validation is the process of achieving an increased certainty that a product idea/design will indeed be successfully adopted in market. The showcased F1 car takes note of all the criteria’s involved with certain successfully car models out there in the market today. For example it has wheel bearing grease which helps with wheel position and maximum wheel utility, gearbox lubricant this helps improve the overall speed, control and smoothness of the car. Etc. The below picture further explains the ideas directly keyed into the F1 car model.
  • 22. Final Engineering Report F1 master 21 | P a g e Timeline of the F1 car development This photo portrays 2 views of the F1 car model The above photo clearly shows the front view and top view of the F1 car model This photo shows the right side view and bottom view of the F1 car model; it also shows the impeccable side designs and wheel alignment and size.
  • 23. Final Engineering Report F1 master 22 | P a g e Aerodymics analysis flow using solidworks The above photo shows the flow simulation and also the size, dimensions and conditions of our aerodynamic tested F1 car. - Pressure generally within range of 101.05KPa and 101.65KPa. - Higher pressure at front spoiler. - Lower pressure under chassis and front spoiler. - Lower pressure at nose and top of cockpit position The photo above clearly shows a Virtual Model Flow analysis and other related/relevant data
  • 24. Final Engineering Report F1 master 23 | P a g e
  • 25. Final Engineering Report F1 master 24 | P a g e Flow Trajectories - Bigger pressure range between101.15KPa to 101.75KPa. - Extremely high pressure at thrust face. - Lower pressure just past front surface. - Turbulent air flow at rear. The above photo clarifies the flow trajectory of the F1 car. This above photo clarifies the flow trajectory of the F1 car. The above photo clarifies the flow trajectory of the F1 car.
  • 26. Final Engineering Report F1 master 25 | P a g e Conclusion In conclusion as a group we can all agree that a lot of time, energy and strategy were put into this Formula One car. Everything involved in our car from start to finish conveniently fits within the required criteria, from the weight size length and most importantly the aerodynamic/tests are almost perfect to a real life F1 car. This team consists of 3 group members who are; Ehinomhen Oseghale, Atiqullah Ataei Masood Naziri. During the initial designing of the project, a minor delinquent was encountered which involved the weight. That was the only major problem we had, and this resulted in slowing down of the car during race time. The improvement that could be made includes, paying close attention to the criteria and required mass limit. It is innocuous to say; together we are all individually proud of our effective contribution towards the strategic building/construction of this F1 car. From the 1st week of initial panning to the 12th week of the final compilation of the entire project, it is more that safe to say that the two main goals ‘Teamwork’ & ‘real industry experience’ were both more than accomplished.
  • 27. Final Engineering Report F1 master 26 | P a g e REFRENCES https://sopinion8ed.wordpress.com/category/is-success/page/2/ http://www.cgsst.com/eng/risk-factors/organizational-risk-factors.asp http://www.engineerboard.co.uk/jobs/aerospaceavionicsandaeronautics/aerodynamicsfluids http://www.engineersaustralia.org.au/resources-and-library http://www.topgear.com/au/cars/reviews