SlideShare une entreprise Scribd logo
1  sur  296
Télécharger pour lire hors ligne
60+ Low-Carb, Hrigh-Fat Desserts for Any Occasion
DESSERTS
• •
Carolyn Ketchum
First Published in 2018 by Victory Belt Publishing Inc.
Copyright © 2018 by Carolyn Ketchum
All rights reserved
No part of this publication may be reproduced or distributed in any form or
by any means, electronic or mechanical, or stored in a database or retrieval
system, without prior written permission from the publisher.
ISBN-13: 978-1-628602-92-0
The author is not a licensed practitioner, physician, or medical professional
and offers no medical diagnoses, treatments, suggestions, or counseling.
The information presented herein has not been evaluated by the U.S. Food
and Drug Administration, and it is not intended to diagnose, treat, cure, or
prevent any disease. Full medical clearance from a licensed physician
should be obtained before beginning or modifying any diet, exercise, or
lifestyle program, and physicians should be informed of all nutritional
changes.
The author/owner claims no responsibility to any person or entity for any
liability, loss, or damage caused or alleged to be caused directly or
indirectly as a result of the use, application, or interpretation of the
information presented herein.
Front Cover Photography by Hayley Mason and Bill Staley
Cover Design by Justin-Aaron Velasco
Interior Design by Yordan Terziev and Boryana Yordanova
Printed in Canada
TC 0118
Learn how to eat healthy with the ketogenic diet
CONTENTS
Preface: How Sweet It Is
Introduction: My Diet and Dessert Philosophy
Keto Dessert Essentials
Ingredients and Tools
Dessert Pro Checklist
Time-Saving Tips
Mix-and-Match Desserts
How to Use the Recipes
RECIPES
CHAPTER 1: Candy and Confections
Peppermint Patties
Chocolate-Covered Cheesecake Bites
Maple Walnut Fudge Cups
Toffee Almond Bark
Macadamia Coconut Truffles
Peanut Butter and Jam Cups
Watermelon Lime Gummies
CHAPTER 2: Cookies
Slice-and-Bake Vanilla Wafers
Amaretti
Peanut Butter Cookies for Two
Cream Cheese Cookies
Chewy Double Chocolate Cookies
No-Bake Peanut Butter Caramel Cookies
Chocolate Hazelnut Thumbprints
Deep-Dish Chocolate Chip Cookies
CHAPTER 3: Bars
No-Bake Chocolate “Oatmeal” Bars
Sugar Cookie Bars
Dairy-Free Peanut Butter Bars
No-Bake Blueberry Cheesecake Bars
One-Bowl Brownies
Dairy-Free Coconut Bars
No-Bake French Silk Pie Bars
CHAPTER 4: Cakes
Mini No-Bake Lemon Cheesecakes
Tiramisu Sheet Cake
Slow Cooker Chocolate Cake
Funfetti Mug Cakes
Dutch Butter Cake
Orange Cardamom Bundt Cake
Pumpkin Spice Mug Cakes
CHAPTER 5: Pies and Tarts
Mocha Cream Pie
Coconut Custard Pie
Lemon Curd Tartlets
Dairy-Free Fruit Tarts
Chocolate Hazelnut Brownie Pie
Strawberry Rhubarb Crisp for Two
CHAPTER 6: Frozen Desserts
Vanilla Bean Semifreddo
Salted Caramel Affogato
Ridiculously Easy Root Beer Floats
Chocolate Fat Bomb Ice Cream
Frozen Key Lime Mini Pies
Strawberry Cheesecake Pops
Coconut Milk Fudge Pops
CHAPTER 7: Custard, Mousse, and Other Delicious Desserts
Butterscotch Pudding
Dairy-Free Peanut Butter Mousse
Mascarpone Mousse with Roasted Strawberries
Chocolate Hazelnut Mousse
Lemon Curd Mousse
Raspberry Fool
Cannoli Dessert Dip
Slow Cooker Coffee Coconut Custard
Coconut Lime Panna Cotta
Chocolate Cobbler
CHAPTER 8: Extras
Easy Shortbread Crust
Easy Chocolate Pie Crust
Whipped Cream
Coconut Whipped Cream
Chocolate Buttercream Frosting
Homemade Chocolate Hazelnut Spread
Caramel Sauce
Chocolate Peanut Butter Sauce for Two
Coconut Sprinkles
Chocolate Dessert Cups
APPENDIX: How to Rescue Almost Anything
Indexes
Acknowledgments
About the Author
PREFACE:
HOW SWEET IT IS
I just spent the past three months of my life writing a dessert cookbook. You
know what that means? That means I ate a lot of desserts. And if this were
any regular old dessert cookbook, it would probably also mean that I gained
at least a few pounds. But I didn’t. Not even an ounce. And that, my friend,
is the magic of Easy Keto Desserts.
Admittedly, I didn’t eat all of these desserts on my own. I shared with my
family, and I gave much of it away to my friends and neighbors. I was a
really popular gal for a while there, leaving cakes and cookies and tarts on
doorsteps all over the neighborhood. But still, as a good recipe creator, I
tasted and tested, and I tasted and tested again. There was no shortage of
sweet keto treats passing these lips over the past few months. And I wouldn’t
have it any other way.
Chances are good, however, that you don’t cook and bake for a living like I
do. You don’t have time to taste and test, and taste and test again. When you
want something sweet, you want it yesterday. You have no need of
complicated cakes and multistep desserts that require any number of obscure
and hard-to-find ingredients. You prefer simple and straightforward, but you
still want something that will wow your carb-loving friends. You want easy,
but you don’t want it to taste like it.
That’s where Easy Keto Desserts comes in. With this cookbook, I have taken
all the guesswork out of making fabulous ketogenic desserts. This is my
passion, people! I sincerely love nothing more than sharing delectable low-
carb, high-fat dessert recipes and making the keto lifestyle that much more
enjoyable—and that much more accessible, too. Because when we know we
can have a wee indulgence at the end of the day, one that doesn’t wreak
Learn how to eat healthy with the ketogenic diet
havoc on our hard work and progress, keto suddenly doesn’t seem so hard
after all.
It’s long been my mission to prove to the world that the ketogenic diet need
not be boring or restrictive. I am not really the sort of person to toot my own
horn—oh, who am I kidding? Toot toot!—but I flatter myself that I have
exceeded this goal. With Easy Keto Desserts, the evidence is in and the jury
has reached a verdict. Keto is easy, delicious, and anything but boring.
Grab a fork, my friend, and dig in. Because you can have your keto cake and
eat it, too. Just as long as you save me a bite.
INTRODUCTION:
MY DIET AND DESSERT PHILOSOPHY
I have a sweet tooth, and I am not afraid to use it. I firmly believe that being
able to have a healthy dessert is part of what helps me stay the course on my
ketogenic diet. And since my dessert recipes are among the most popular
recipes on my website, All Day I Dream About Food, I know that many of
you feel the same way.
It’s been said many times that the keto diet is not about deprivation; you
shouldn’t always be hungry, and you shouldn’t feel like you are consigned to
eating bacon and eggs day in and day out. There could be worse fates, of
course, but that kind of restriction gets tiresome pretty quickly. Many people
find themselves struggling to stick with keto after a few months because they
aren’t quite sure how to make it interesting. The ability to indulge a little
here and there can make this way of eating a lot more fun and a lot more
livable. For many of us, that can be the difference between using keto as a
temporary quick fix or sticking with it as a long-term healthy lifestyle.
Some people choose to avoid sweets altogether, and that is their prerogative.
We all find our own way here, and we have to choose our own paths. There
is an overwhelming amount of advice out there, and it can be hard to make
sense of it all. But the reality is that there is no single “right way” to do a
ketogenic diet. No one can tell you exactly how to make it work for you. If
being abstemious and giving up sweets entirely is your approach, I am all for
it. But if you purchased this book, then chances are you want a little dessert,
at least once in a while. Welcome to the club.
A ketogenic diet is a wonderful tool for conquering cravings and breaking
old and ingrained habits. But that doesn’t have to mean taking all the
enjoyment out of eating. No matter which diet you’re on, food should be fun,
and eating should be pleasurable. Food is such a defining aspect of our
Learn how to eat healthy with the ketogenic diet
society. It’s more than just sustenance: it’s family, it’s community, and it’s
celebration. And what is more celebratory than enjoying a luscious dessert
that doesn’t derail your healthy efforts?
But let’s not go overboard. You may not like to hear it, but portion control is
important, even when it comes to keto desserts. People are sometimes
surprised to hear me, the Keto Baking Queen, advocate for moderation. But
just think about it: while a single keto brownie might fit in perfectly with
your macros, the whole pan of brownies will not. It’s just simple math. And
if you eat keto sweets for breakfast, lunch, and dinner, you are doing so to
the exclusion of other healthy nutrients.
My personal approach is to keep dessert as dessert. That means eating a
reasonable portion after dinner. Although I do eat some dessert almost every
day, there are times when I’ve filled myself up so much on steak and
broccoli that I can’t manage more than a few bites of dessert—just enough to
make that sweet tooth sing!
If you find that you struggle with portion control, I recommend a few
approaches. First, consider my small-batch recipes that make only two to
four servings, so portion control is built right in. If you do choose to make a
bigger recipe, rely on your freezer as a way to portion out the leftovers. And
make a large dessert only when you have the opportunity to share it and give
much of it away. Friends, neighbors, and coworkers are often appreciative of
your efforts, and hey, maybe this will help them discover the keto diet, too!
It’s a sugar-filled world out there, and temptation is all around us. I say why
not fight fire with fire?
It’s a Piece of Cake! (Or as Easy as Pie)
The wonderful part about desserts is that they have universal appeal,
irrespective of how much time and effort they take to make. In fact, some of
the simplest desserts are the ones that look the most appetizing. Fancy cakes
that look like castles or cookies that resemble snow globes are certainly
beautiful to behold, but I find that I don’t much care to eat them. In my
experience, they never taste quite as good as they look, and I am inevitably
disappointed.
The reality is that you don’t need to be a pastry chef to make beautiful
desserts. Creating sweet treats should be fun, not stressful, and I want you to
be able to enjoy the process as much as the end results. The recipes in this
book use simple techniques that any home baker can easily master. There’s
nothing intimidating here, nothing overly complicated—just easy, creative,
and mouthwatering recipes. When dessert is stress-free, it’s that much tastier.
Keep in mind that simple is not necessarily synonymous with fast. Nor is the
lack of baking or a short ingredient list a good indicator of how easy or
quick a recipe is. Sometimes no-bake recipes can take hours to set properly,
whereas some baked goods can be consumed shortly after being removed
from the oven. You will find recipes of every sort in Easy Keto Desserts.
Some of these desserts are baked, while others require no baking. You may
Learn how to eat healthy with the ketogenic diet
have to leave some alone for a while, while others you can dig into right
away. But all of them are simply delicious.
That’s the way the keto cookie crumbles.
KETO DESSERT ESSENTIALS
The recipes in this book are easy. Period. But in the keto dessert world,
recipes frequently call for alternative ingredients that behave very
differently from the conventional ingredients you may be familiar with.
This is particularly true of flour and sugar substitutes. If you attempt to
treat them like wheat flour and sugar, they will defy you out of sheer
spite. So it behooves me to take a moment to go over some key points
about how best to use these ingredients.
Weigh Your Flours and Nut Meals
Wouldn’t it be nice if everyone all over the world measured every ingredient
the same way? That doesn’t look like it’s going to happen any time soon. I
am very accustomed to using U.S. volume measurements, like cups and
tablespoons, but I fully recognize that they are not always the most accurate.
For most ingredients, volume measurements are fine, but keto flours and
meals, particularly almond flour and coconut flour, vary quite a bit from
brand to brand. Weighing these ingredients can be more accurate and
produce better results.
For example, I weighed my Bob’s Red Mill almond flour by the cup
numerous times and found that it can vary between 97 and 105 grams. I split
the difference and used 100 grams; it is the most useful weight since it can
easily be divided into half cups and quarter cups. Bob’s Red Mill coconut
flour typically came out to 110 grams per cup.
When you see gram weights included for these key ingredients, I do
recommend that you get out your kitchen scale and weigh them. If you do
Learn how to eat healthy with the ketogenic diet
not own a scale, the next-best option is to use the brands of flours and meals
that I use (Bob’s Red Mill), and to measure them using the scoop-and-level
method. I always use that method when measuring by cups and tablespoons,
and you should, too.
FINE-TUNE WHEN NEEDED
Even when you take care to measure as accurately as possible, the variances
between brands can throw a recipe off somewhat. Some brands of flour, for
example, are more finely ground or more absorbent than others. Be ready to
adjust slightly if you need to. Look for cues in the recipe as to what your
dough or batter should look like. Should it be scoopable or pourable? Should
you be able to roll it into balls easily? Does the recipe state that it should
look like “coarse crumbs” or “fine crumbs”? All of these are helpful clues in
knowing when to make an adjustment and add a little more flour or a little
more liquid or oil.
Always add the additional flour or liquid by the tablespoon, stirring after
each addition to see what the batter or dough does before you add more.
Coconut flour is extremely absorbent, so a tablespoon can thicken a batter
significantly. For small-batch recipes, sometimes even a teaspoon is enough
to get the consistency you are looking for.
Familiarize Yourself with Keto Sweeteners
Obviously, we can’t have a discussion about keto desserts without discussing
low-carb sugar substitutes. And with the dizzying array of alternative
sweeteners on the market today, this can be a confusing discussion at times.
You may be hoping that I will tell you which sweetener is the absolute,
Learnhowtoeathealthywiththeketogenicdiet
hands-down best one on the planet, but I can’t do that. Too much of it comes
down to personal preference.
What I can do, however, is give you a little insight into which sweeteners
behave the most like sugar in keto sweets and baked goods. Because while
there are plenty of great sweetener choices out there, they don’t all work the
same way. It all comes down to bulk.
BULK VERSUS NON-BULK SWEETENERS
When I say “bulk sweetener,” I am not referring to buying large quantities of
sweetener from a bin at your local health food store. In this case, the term
bulk refers to whether the sweetener itself has weight and volume. A bulk
sweetener will add to the volume, or “bulk,” of a recipe and thus will affect
its consistency, which may be critical to its success.
Some sweeteners, like stevia and monk fruit extract, simply sweeten things.
A mere ½ teaspoon of either one can sweeten an entire cake that serves
twelve people. Obviously, though, concentrated sweeteners such as these
will add nothing in terms of volume and won’t do anything for the texture or
consistency of your dessert.
Sweeteners like erythritol and xylitol have significant bulk, as well as a
crystalline structure similar to sugar. They measure more like sugar, they add
volume and affect consistency, and hence they behave more like sugar. They
can make the difference between a cake that deflates after baking and one
that stays risen, or a pudding that sets and one that remains a puddle of goo.
That all sounds simple enough, right? Right, but then there’s the fact that
erythritol by itself is only about 70 percent as sweet as sugar, so you need to
add more of it to make up the difference in sweetness, which could also
affect the consistency of a recipe. Xylitol is about as sweet as sugar, but it
comes with its own issues; it tends to raise blood sugar a little more than
erythritol and can cause serious gastric upset when consumed in large
quantities. It’s also highly toxic to dogs even in minute amounts. I no longer
use xylitol in my recipes.
Adding even more to the confusion are all the different sweetener blends on
the market these days. These usually combine two or more alternative
sweeteners, and more of them seem to crop up on a daily basis. Some of
them are as sweet as sugar, some are more concentrated, and all of them are
aiming to get their share of your pocketbook. Which is why so much of it
comes down to personal preference.
Have I confused you yet? Don’t worry, I promise it’s not as bad as it sounds.
My preference is Swerve, an erythritol blend that also includes
oligosaccharides—a sweet-tasting fiber similar to inulin—to make it
measure exactly like sugar. I created and tested all of the recipes in this book
using Swerve, and I highly recommend it as one of the best sugar
replacements out there. If you choose to substitute another sweetener, I
cannot always guarantee the results. That said, xylitol and other erythritol
blends that measure like sugar can often be substituted without a loss of taste
or texture. And some recipes don’t rely on bulk at all for consistency; for
those recipes you can use any sweetener your heart desires.
If you do choose to use a non-bulk sweetener, like stevia, monk fruit, or even
sucralose, you will need to do a little conversion to attain the correct
sweetness. Most brands clearly state how sweet their product is relative to
sugar and how to adjust recipes accordingly. For example, Lakanto
monkfruit extract has a little conversion chart right on the package, and the
SweetLeaf stevia website features a nice conversion calculator for all of its
products.
The long and short of it is that sometimes you can make substitutions and
sometimes you can’t. Wherever possible, I have noted those recipes in which
substitutions can be made, and the best sweetener choices. You will find this
information in a feature called “Sweetener Options.”
Learn how to eat healthy with the ketogenic diet
INGREDIENTS AND TOOLS
In keeping with the easy theme, the majority of the recipes in this book
use fairly standard keto ingredients, as well as everyday cookware and
bakeware, most of which can be purchased at regular stores. With the
explosive growth of special diets like gluten-free, Paleo, and low-carb,
items like almond flour, coconut oil, and alternative sweeteners are no
longer just the purview of health food and natural foods stores—which
is great news for keto dessert lovers.
Keto Dessert Staples
These are the items I have in my pantry and fridge at all times so I can make
dessert whenever the mood strikes.
Learn how to eat healthy with the ketogenic diet
Dairy-Free Substitutions
If you’re dairy-free, or even if you’re not, stock up on these great dairy
replacements. I always keep avocado oil and coconut oil around, as well as
canned coconut milk. And Kite Hill is by far the best brand of dairy-free
cream cheese I’ve found, with the best flavor and consistency and exactly
the same carb count as regular cream cheese.
Learn how to eat healthy with the ketogenic diet
Specialty Ingredients
While I try very hard to stick with basic and easily sourced ingredients, I
also want to give you the best possible keto dessert experience, and that
means sometimes using specialty items that are harder to find and may need
to be purchased online. But given the increasing popularity of keto diets, I
suspect it won’t be long before many of these items appear in stores across
the country.
Sugar-free chocolate bars and chocolate chips—When I first started creating
low-carb recipes, there really was no good sugar-free chocolate on the
market. There were Hershey’s sugar-free chocolate chips, but they were (and
still are) sweetened with maltitol, which spikes blood sugar as much as real
sugar. But now there are several great brands, like Lily’s, ChocoPerfection,
Coco Polo, and Lakanto, among others. Lily’s is my go-to for baking,
especially since no other brand makes chocolate chips.
I am starting to see Lily’s and Coco Polo chocolate in many regular grocery
chains, and stores like Whole Foods sell the chips and the dark chocolate
baking bars. But I also like to wait for an online sale and stock up.
Learn how to eat healthy with the ketogenic diet
Grass-fed gelatin and collagen powder—These items are really useful for
many keto desserts, giving them a better consistency and helping them hold
together. You can also use standard gelatin, such as Knox, but you will need
less of it, and you will need to make sure it “blooms” first, which takes an
extra step.
Hazelnut meal—This is really just ground hazelnuts, but it’s difficult to
grind them finely enough at home. It makes for tasty cookies and brownies.
Bob’s Red Mill hazelnut meal can be found in the gluten-free aisle of some
stores.
Peanut flour—In this case, it’s not just ground peanuts. The best peanut flour
has been partially defatted, which gives it a fine and powdery texture and
makes it very absorbent. I like Anthony’s brand, which I buy online, but
many grocery stores carry “powdered peanut butter,” like the PB2 brand,
which you can use as well.
Protein powder—Gluten is a protein, and in its absence, another dry
powdery protein can help keto baked goods rise and hold together. Protein
powder is not used in many recipes in this book, but it is useful, and a little
goes a long way. You can use whey protein, egg white protein, or any
number of vegan protein powders. Get an unflavored variety if you can.
Vanilla-flavored protein powder will work, too, if you leave out any vanilla
extract in the recipe.
Cacao butter (aka cocoa butter)—I am surprised that stores are not yet
carrying cacao butter, as it’s an incredibly useful, delicious, and healthy
ingredient. In the recipes in this book, I mostly use it to thin out the
chocolate coating for keto candies and bars. But it’s great in other desserts,
too; it lends a white chocolate flavor and is completely solid at room
temperature.
Coconut butter (aka coconut manna)—Coconut butter is made from ground
coconut meat and is solid at room temperature. It gives dairy-free keto
Learn how to eat healthy with the ketogenic diet
candies and fudge a great consistency. You can find it in some high-end
grocery stores, like Whole Foods, as well as online.
Yacón syrup—Yacón is a sweet-tasting syrup derived from the yacón plant
grown in South America. It is said to have a low glycemic index (GI) and a
minimal effect on blood sugar levels. I don’t trust the glycemic index very
much because they used to say the same thing about agave, and agave spiked
my blood sugar tremendously. To play it safe, I use very small amounts of
yacón syrup (no more than 2 teaspoons) to give certain recipes a brown
sugar or caramel flavor or appearance. You could also use blackstrap
molasses in these recipes, or you can skip it altogether.
Extracts and flavorings—These little bottles of fun can really transform your
dessert creations. Many basic flavors, such as peppermint, almond, and
lemon, can be found in the baking aisle of your local grocery store, but
others are more easily found online. They aren’t expensive, and a small 2-
ounce bottle can go a long way. I always have a wide array of natural
flavorings in my pantry, everything from cherry to anise and even pineapple
(although I haven’t used it yet and forgot what I bought it for, but it will
make its way into something soon enough). For the recipes in this book,
consider getting almond, caramel, coconut, hazelnut, lemon, maple, orange,
and peppermint.
Natural food coloring—You absolutely do not need this, but it’s kind of fun.
You can certainly go au naturel with your frostings and fillings, but if you
want to amp up the color a bit, there are a few vegetable-based food dyes on
the market. I like India Tree and Food Colors From Nature by ColorKitchen.
Be forewarned: The yellow powder from ColorKitchen is incredibly vibrant.
Don’t even think about using the whole envelope!
Xanthan gum—This is useful stuff for thickening puddings and fillings. A
very little goes a long way; a bag of it lasts me more than two years. I store it
in a jar in my freezer. You can find it in the gluten-free aisle of many grocery
stores.
Essential Equipment
Baking sheets—Versatile, multi-purpose, and good for everything from
cookies to sheet cakes. Be sure to use rimmed baking sheets for cakes and
for anything that might easily slide off the pan.
Square baking pans—For bars, brownies, and cakes. I use a 9-inch square
pan, but an 8-inch will do as well. Just remember that your baked goods may
take a little longer to cook in the smaller pan since they will be deeper. Look
for a pan with sides at least 2 inches deep, and use light-colored pans for
more even baking.
Learn how to eat healthy with the ketogenic diet
Cake pans—A round 8- or 9-inch pan for cakes, with sides at least 2 inches
deep. Again, use light-colored pans for more even baking.
Muffin pans—For candies and cupcakes. I use both standard-size 12-well
pans and mini-size 24-well pans.
Glass or ceramic pie pan—A 9-inch pan for pies and tarts.
Ramekins—4- and 8-ounce ceramic ramekins for individual cakes, custards,
and even cookies!
Parchment paper—A low-carb baker’s best friend.
Food processor or blender—A good food processor or blender can cut down
prep time significantly.
Electric mixer—A smaller handheld mixer is fine.
Mixing bowls—It’s good to have a few bowls that are heatproof and
microwave-safe for melting chocolate.
Measuring cups and spoons—Accurate measurements are the key to dessert
success.
Learn how to eat healthy with the ketogenic diet
Whisks, rubber spatulas, and wooden spoons—Mixing and stirring are kind
of important here!
Special Equipment
In the spirit of keeping things easy, I tried to steer clear of calling for too
much specialty equipment. But if you’re looking to up your keto dessert
game, here are some gadgets and toys that you might want to invest in.
Kitchen scale—I’ve provided the measurements of most ingredients in
volume (cups and tablespoons), but for flours and meals, I’ve also provided
the approximate weight in grams. Variations between brands of these
ingredients can sometimes affect the outcome of your baked goods, and an
accurate kitchen scale helps you be more precise.
Silicone baking mats—When you bake as many cookies as I do, you go
through a lot of parchment paper. Reusable silicone mats not only keep your
cookies from sticking, but protect the bottoms from burning as well.
Learn how to eat healthy with the ketogenic diet
Ice cream maker—You definitely don’t need an ice cream maker, and this
book contains only one recipe that uses it. But making your own low-carb
ice cream is fun, and in the end, that machine will pay for itself!
Slow cooker (6 quarts)—Many people don’t realize that you can make many
wonderful desserts in a slow cooker. One of my all-time favorite keto
chocolate cakes is a slow cooker cake. It’s insanely moist and delicious.
Decorative cake and tart pans—Don’t feel you need to limit yourself to
square and round cake pans. Although those shapes are the most useful,
more decorative options like Bundt pans and fluted tart pans can give your
desserts an easy elegance. I love the little 4-inch tart pans for smaller tarts.
Silicone molds—Fun shapes for gummies, fat bombs, and other candies!
Silicone liners for both standard- and mini-size muffin pans are also very
useful and save on parchment paper.
Ice pop molds—I really want to put these in the “must-have” category
because they aren’t expensive and they make great keto treats. For the
recipes in this book, you will need a set of six 3-ounce molds.
Piping bags and decorating tips—I promise, we aren’t getting fancy with
frosting. But I often use these bags and tips for adding little stars of whipped
cream to cakes and pies or for piping mousse into dessert cups. A few
disposable bags and some star-shaped tips are all you really need.
Learn how to eat healthy with the ketogenic diet
DESSERT PRO CHECKLIST
Ready to get started? Here are a few things you can do to ensure the
best results when you make any recipe.
Read the full recipe first. It can be tempting to jump in and just start
whipping up a delectable treat as you go. But reading the full recipe first will
actually save you time and help you avoid costly mistakes. Be sure to make
note of the prep time, cook time, and inactive time. You don’t want to get
partway through a recipe you want to eat right away only to discover that it
needs to chill for three hours. Also, be sure to factor in any recipe
components, such as a crust or topping, that are listed separately as stand-
alone recipes. This helps you plan more accurately for the full time it takes
to make a recipe, as well as to get all of the necessary ingredients together.
Let your ingredients soften or come to room temperature when specified.
Although you can hurry these things along a little (see “Time-Saving Tips”
on here), you really don’t want to skip this step. Properly softened and
warmed ingredients make for smoother batters and creamier desserts.
Preheat the oven when the instructions say to do so. Most of the time,
this is done at the beginning of a recipe so that the oven is up to temperature
when the batter or dough is ready to be baked. But some recipes require you
to chill your dough first or to make some other part of the dessert ahead of
time.
Measure accurately. Use liquid measuring cups for liquids and dry
measuring cups for dry ingredients. Don’t pack your dry ingredients unless a
recipe specifically states that you should. Use a kitchen scale if you have
one. Do everything you can to measure ingredients as accurately as possible.
(See “Weigh Your Flours and Nut Meals” on here for a discussion of the
importance of weighing these key ingredients.)
Use fresh, high-quality ingredients. Fresh eggs will make your batters
fluffier and your puddings tastier. Baking powder and baking soda can lose
their leavening ability if they’ve been sitting around too long. And low-
quality chocolate has a nasty habit of seizing more easily.
Use the right-sized pan. Try to use the size of pan specified in the recipe.
If you must, you can use a pan that is close in size, but know that your
baking time will change and your results will be somewhat different. Is your
pan smaller? Your baking time will be longer and your baked good will be
deeper. Is your pan larger? Your baking time will be shorter and your baked
good will be shallower. Watch your goodies carefully as they bake, and use
visual and tactile cues to determine doneness.
Grease … and grease again. If the instructions say to grease a pan, be
sure to grease it well, getting into every crevice. For cakes, which can be the
most prone to sticking, I usually grease the pan with solid butter, working it
into every corner, and then I brush the pan with melted coconut oil. For a
dairy-free alternative, you could use ghee or solid coconut oil and then
Learn how to eat healthy with the ketogenic diet
melted coconut oil. Or use parchment paper or silicone liners when possible.
Keto baked goods can stick a little, so do what you can to minimize
breakage and cracking.
Bake in the middle of the oven. Unless otherwise specified in a recipe,
the middle rack of the oven is the best place for baked goods. This allows
heat to circulate evenly around the baked goods. If your oven has a hot spot
toward the back, as mine does, consider turning the pan around halfway
through baking.
Don’t be a slave to the clock. Mixing times, baking times, and cooking
times are meant to be guidelines, not hard-and-fast rules. Ovens and
stovetops vary in temperature, pans vary in weight and color, and some
mixers, food processors, and blenders are more powerful than others. Rely
more on the visual and tactile cues given in the recipe to know when to
move on to the next step.
TIME-SAVING TIPS
You really can’t rush most desserts. Even the easiest sweets require a bit
of care and a little patience to come out really well. I am possibly the
world’s most impatient person (ask my husband; he will agree with this
wholeheartedly), but I’ve learned that a dessert that needs three hours
to set really does need three hours to set. Too often, I’ve cut into
something early only to have the filling ooze out all over my countertop
—not the look I was going for.
That being said, there are a few things you can do to cut corners and
make things come together a little faster.
When you’re in a hurry …
Learn how to eat healthy with the ketogenic diet
1. Think small and spread out. Individual servings of mousse and pudding
are going to set a lot faster than a whole batch kept in one big bowl. Foods
baked in individual portions, like small ramekins or muffin pans, bake faster.
A sheet cake, which has more surface area exposed to the oven heat, bakes
much faster as well. Almost any large dessert can be portioned out into
individual servings, assuming you have the right pans or dishes to
accommodate them.
2. Warm it up. Did you forget to allow time for your butter or cream cheese
to soften or for your eggs to come to room temperature? Yeah, me too. I do
this constantly. Not to worry; you can gently soften butter or cream cheese in
the microwave—about fifteen seconds on high power is all you need. For
eggs, just set them in a bowl of very warm water for ten minutes.
3. Freeze it. Need a dessert to set a little faster? Pop it in the freezer for a bit
… but don’t forget about it. Don’t let it actually freeze, because that might
change the consistency. But let it chill out for a while, and you can shave an
hour or possibly two from the setting time. I find that this works well with
cheesecakes in particular. Wait to add any decorative touches until after the
dessert has set. Berries and chocolate drizzle don’t fare so well in the freezer.
4. Microwave it. That big box sitting on your counter or over your stove is a
pretty handy tool when you need to melt butter, chocolate, or anything else
quickly. But the heat of a microwave can be intense, so you want to melt
things carefully. I always do it in 30-second increments on high power,
stirring after each increment until it’s smooth. If you don’t own a
microwave, you can always melt ingredients on the stovetop over low heat.
When it comes to chocolate, you should do it double boiler style, using a
heatproof bowl set over a pan of barely simmering water. (Do not allow the
bottom of the bowl to touch the water.)
5. Go for easy elegance. Skip the fancy decorating techniques. Most desserts
don’t need it anyway, and you will save yourself a lot of time and stress.
People always tell me how beautiful my desserts look, but the truth is that I
am a lousy cake and cookie decorator. I have neither the patience nor the
inclination to futz around with frosting, although I like my desserts to look
pretty and inviting. Consider using these easy decorating techniques:
• Add a dollop of whipped cream or a drizzle of melted chocolate. These
things have the added benefit of hiding any mistakes you might have
made. I like to say that chocolate ganache fixes everything!
• Use Bundt pans and fun cake or candy molds for instant elegance—no
decorating needed.
• Embrace the rustic look. A hundred years ago, cakes were served naked,
without piles of sugary frosting slathered all over them. If the cake itself is
tasty enough, why bother with the extras?
• In that same vein, a sprinkling of powdered sweetener or cocoa powder can
accent a dessert nicely. Or try shaving a little bit of dark chocolate over
the top. You can do this to the whole dessert or as you plate individual
servings.
• Fresh berries and a sprig of mint add contrast and brightness to any dessert.
If it’s a citrus-based dessert, add a thin slice of lemon or lime or a little
grated zest.
Learn how to eat healthy with the ketogenic diet
Store-Bought Shortcuts
Sometimes you really just want someone else to make dessert for you. I get
that, I really do. However, the keto lifestyle hasn’t come quite that far yet,
although I do hear tell of keto bakeries and grocery stores popping up in
various locations across the country. (Does anyone volunteer to start one in
Portland, Oregon? Pretty please???) As a general rule, I say it’s still best to
make your own desserts at home, where you can control the ingredients and
you know exactly what’s going into your treats.
A few brands are venturing out into the world of keto baking mixes. On the
whole, I don’t really find using these mixes that much easier than making
desserts from scratch, as you still have to mix them up and bake them. But
they can save you a bit of time and a few dishes in a pinch. They can also be
great for baking with kids or taking with you when traveling if you will have
access to a kitchen.
There are also brands creating prepackaged cookies and brownies, and some
of them are pretty decent. Let’s be honest: freshly made is always going to
taste better than prepackaged, but these desserts can be good in a pinch or on
the go.
As always with store-bought products, you need to be a label reader. The
ketogenic diet is such a hot-ticket item these days that brands are using the
term quite loosely. Just because something calls itself keto-friendly doesn’t
necessarily mean that it’s appropriate for a real keto lifestyle.
Here are my choices for the best convenience desserts and dessert mixes.
BAKING MIXES
Good Dee’s—This brand of cookie, brownie, and cake mixes was started by
Deana Karim, who follows a low-carb lifestyle herself. She wanted better
options than the artificial sweetener–filled mixes on the market, so she
created her own, and I think she’s done a great job. These get a thumbs-up
from my kids!
Learn how to eat healthy with the ketogenic diet
Swerve—I’ve been holding this card close to my chest for a while, as I have
had the distinct honor of test-driving and photographing Swerve’s new line
of baking mixes. It includes a vanilla cake mix, a chocolate cake mix, and a
chocolate chip cookie mix. They are fantastic—how could I expect any less
from the makers of my favorite keto sweetener? The chocolate cake mix is
so good that I am sort of jealous I didn’t develop it myself. Truth.
PREPACKAGED COOKIES
Keto Kookie—Frankly, this is the only prepackaged cookie that wins my
wholehearted approval. Others I have tried are tasteless, or I simply don’t
trust the ingredients. I have tested Keto Kookies on myself, and they barely
raise my blood sugar. They have become my go-to choice of travel snacks.
ICE CREAM AND ICE CREAM BARS
Tread carefully here, my friend. There are a lot of low-sugar ice creams and
frozen desserts on the market nowadays. Some contain questionable
ingredients (including sugar!), and many really aren’t that low-carb. One
calls itself keto-friendly, but it’s also nonfat, which for me defeats the
purpose. If you want to use brands like Halo Top or Enlightened, stick with
the plain flavors and consume them sparingly.
But there is a new kid in town, and I am really excited about it. Rebel
Creamery is just about to launch, and it is truly a keto ice cream—high-fat,
low-carb, no-sugar-added, creamy goodness. I am delighted that someone is
finally answering the call for the real deal. Rebel Creamery sent me some of
their chocolate ice cream to try, and it tastes very much like my Chocolate
Fat Bomb Ice Cream (here), so I approve. Watch for them … I expect great
things!
CHOCOLATE HAZELNUT SPREAD
There are a lot of these spreads on the market, and, as a chocolate hazelnut
aficionado, I can say that some are better than others. I think I’ve tried them
all. Though my homemade version (see here) is my favorite, I sometimes
buy the jarred kind for the convenience factor.
NutiLight—This one is quite good and comes in both dark chocolate and
milk chocolate varieties. I much prefer the dark chocolate.
Nougat Crème by KZ Clean Eating—This Swiss brand is my favorite by far.
It’s incredibly creamy and rich; I like to smear a bit on a piece of low-carb
chocolate when I’m in the mood for a quick dessert. But it’s also much more
expensive than other brands, so I use it very sparingly.
Learn how to eat healthy with the ketogenic diet
MIX-AND-MATCH DESSERTS
It is my dearest wish that you will not think of the recipes in this book as
faits accomplis, but as building blocks for creating other wonderful
desserts. The mark of a great home cook is the ability to recognize how
the various components of a dish might be used to make another
entirely different dish. I want this book to be a source of inspiration and
a jumping-off point into the sweet side of keto.
Here are a few fun ideas to get you started:
HOW TO USE THE RECIPES
Easy Keto Desserts contains more than fifty low-carb, high-fat dessert
recipes and ten “extras”—versatile basics, garnishes, and sauces that
will take your healthy desserts to the next level. As is common for cakes,
cookies, and bars, many of these recipes serve eight to twelve people, but
I have listed storage instructions for any recipe that yields more than six
servings. I have also included a number of small-batch recipes that serve
four or fewer, because sometimes you need a sweet treat without having
a bunch of leftovers hanging around.
Because so many desserts take time to set properly, I have included any
inactive time required for each recipe, along with the prep time and
cook time.
Quick Reference Icons
Need a big dessert for a party? Want a tasty treat in an instant? Look for
these visual cues that tell you a little something extra about each recipe. And
be sure to check out the Recipe Quick Reference on here and here to find the
easy dessert recipe that fits your needs.
No-Bake—Don’t feel like turning on your oven? These no-
bake keto desserts are sure to satisfy.
Freezer Friendly—These are desserts that you can make a
Learn how to eat healthy with the ketogenic diet
whole big batch of and then put away for when the cravings
strike. Wrap them up tightly to prevent freezer burn!
Small Batch—If it’s just you eating keto, or just you and
your significant other, you don’t always want a lot of sweet
treats hanging about. In that case, make one of these recipes
that serve four or fewer. I highly recommend the Strawberry
Rhubarb Crisp for Two (here)!
Feeds a Crowd—Ack! You’ve been told that you need to
bring a dessert to an office party, church potluck, or backyard
get-together to share. These desserts serve twelve or more,
and they just might win over a few new keto converts.
Almost Instant—All of a sudden, you want a sweet treat, and
you want it now! All of these desserts are ready in under
forty minutes from start to finish. You can whip one up and
have it ready in less time than it takes to make and eat your
dinner.
I want these recipes to be useful and accessible to as many people as
possible, so I have included icons to indicate which recipes are free of
common allergens.
Dairy-Free—More than 50 percent of the recipes in Easy
Keto Desserts are dairy-free or have a dairy-free option. You
will find a lot of great treats here if you are avoiding the
creamy white stuff.
Egg-Free—Making low-carb baked goods without eggs is
definitely tricky, but not impossible. Well over 50 percent of
the recipes in this book are egg-free as well—mostly the no-
bake ones, but a few of the baked goods, too.
Nut-Free—Nut meals and flours are by far the most useful
low-carb flour alternatives, so many of the recipes in this
book rely on them. But just under half of these recipes are
nut-free. The best replacement for nut flours that I have ever
used is sunflower seed flour, so I suggest you look into that if
you want to make even more of these recipes nut-free. (I
have a recipe for making sunflower seed flour and an
accompanying video on my website, All Day I Dream About
Food.)
Nutritional Information
This cookbook is about enjoying the healthy keto lifestyle to its fullest. To
this end, for each recipe I have included key nutritional information per
serving: calories, fat, protein, total carbohydrate, and fiber. Please note that
erythritol is technically considered a carbohydrate, but it has zero carb
impact for most people. It is metabolized and exits the body without ever
entering the bloodstream. For the purposes of the keto diet, it should not be
counted in the total carbohydrates, although I have included it as a separate
line item for anyone who might need that information.
All nutritional information was calculated using MacGourmet, a software
program that relies on the USDA National Nutrient Database. I strive to be
as accurate as possible, but these numbers are often only estimates based on
the average sizes of certain ingredients. I encourage you to calculate your
own nutritional information whenever possible.
Learn how to eat healthy with the ketogenic diet
CHAPTER 1:
Learn how to eat healthy with the ketogenic diet
CANDY AND CONFECTIONS
Peppermint Patties
Chocolate-Covered Cheesecake Bites
Maple Walnut Fudge Cups
Toffee Almond Bark
Macadamia Coconut Truffles
Peanut Butter and Jam Cups
Watermelon Lime Gummies
PEPPERMINT PATTIES
Yield: 12 patties (1 per serving)
Prep Time: 20 minutes
Cook Time: 5 minutes
Inactive Time: 2 hours
I used to love York Peppermint Patties—all that bright peppermint flavor
enrobed in dark chocolate. Who knew it would be so easy to make your own
sugar-free and dairy-free version? Oh, and maybe I should say guilt-free,
too.
½ cup coconut oil, slightly softened
2 tablespoons coconut cream (from a can of coconut milk; see Tip)
½ cup powdered erythritol-based sweetener
1 teaspoon peppermint extract
3 ounces sugar-free dark chocolate, chopped
½ ounce cacao butter, or 1 tablespoon coconut oil
SWEETENER OPTIONS:
A bulk sweetener is important here because it gives the peppermint mixture
some structure. And you want a powdered, or confectioners’-style,
sweetener to avoid grittiness.
1. In a medium bowl, beat the coconut oil and coconut cream with an electric
mixer until smooth.
2. Add the sweetener and peppermint extract and beat until well combined.
3. Line a baking sheet with wax paper or parchment paper. Dollop a heaping
tablespoon of the mixture onto the paper and spread it into a 1½-inch
Learn how to eat healthy with the ketogenic diet
circle. Repeat with the remaining mixture and freeze until firm, about 2
hours.
4. In a heatproof bowl set over a pan of barely simmering water, melt the
chocolate and cacao butter together, stirring until smooth. Remove the pan
from the heat.
5. Working with one patty at a time and keeping the other patties in the
freezer to stay firm, drop a patty into the melted chocolate. Toss to coat
well and lift out with a fork, tapping the fork firmly on the edge of the
bowl to remove the excess chocolate.
6. Place the patty on a wax paper or parchment paper–lined baking sheet and
let set. Repeat with the remaining patties.
STORAGE INSTRUCTIONS: These peppermint patties will last for up to
2 weeks in the fridge, if you can resist them that long! They can also be
stored in the freezer for up to a month, although the color of the chocolate
coating may turn a little gray once frozen.
TIP: Coconut cream is the thick part of the coconut milk that rises to the top
of the can. Simply scoop it out in tablespoons and level it off, taking care to
not get any of the thin coconut water underneath. You do not want the
coconut cream chilled, as cold cream would be too hard to beat into the
coconut oil.
NUTRITIONAL INFORMATION
CALORIES: 126 | FAT: 13.6g | PROTEIN: 0.4g | CARBS: 2.9g | FIBER: 1.4g | ERYTHRITOL: 11.5g
CHOCOLATE-COVERED CHEESECAKE
BITES
Yield: 24 truffles (2 per serving)
Prep Time: 20 minutes
Cook Time: 5 minutes
Inactive Time: 3 to 4 hours
These easy truffles were a surprise hit with my kids, who usually disdain
cheesecake. As an experiment, I put some frozen raspberries in a few of
them, and those were even more popular. I highly recommend that little
variation!
1 (8-ounce) package cream cheese, softened
¼ cup (½ stick) unsalted butter, softened
½ cup powdered erythritol-based sweetener
½ teaspoon vanilla extract
4 ounces sugar-free dark chocolate, chopped
¾ ounce cacao butter, or 1½ tablespoons coconut oil
SWEETENER OPTIONS:
The cheesecake filling can really be sweetened with any sweetener you like.
1. Line a baking sheet with wax paper or parchment paper.
2. In a large bowl, beat the cream cheese and butter with an electric mixer
until well combined. Beat in the sweetener and vanilla extract until
smooth.
Learn how to eat healthy with the ketogenic diet
3. Using wet hands, roll the mixture into 1-inch balls and place on the lined
baking sheet. Freeze until firm, 3 to 4 hours.
4. In a heatproof bowl set over a pan of barely simmering water, melt the
chocolate and cacao butter together, stirring until smooth. Remove the pan
from the heat.
5. Working with one ball at a time and keeping the other balls in the freezer
to stay firm, drop a ball into the melted chocolate. Toss to coat well and
lift out with a fork, tapping the fork firmly on the edge of the bowl to
remove the excess chocolate.
6. Place the ball on a wax paper or parchment paper–lined baking sheet and
allow to set. Repeat with the remaining cheesecake balls.
7. Drizzle any remaining chocolate decoratively over the coated balls.
STORAGE INSTRUCTIONS: These truffles are best kept in the fridge,
where they will last for up to 5 days. However, they have the best flavor and
consistency when served at room temperature, so be sure to let them sit out a
bit before eating. They can also be frozen for up to a month, although the
chocolate coating may turn a little gray once frozen.
NUTRITIONAL INFORMATION
CALORIES: 146 | FAT: 13.5g | PROTEIN: 1.6g | CARBS: 4.6g | FIBER: 1.9g | ERYTHRITOL: 12g
VARIATION:
RASPBERRY CHEESECAKE BITES
Follow the directions on the opposite page, but form the cheesecake ball
around a frozen raspberry (using 24 raspberries in all). You can do this most
easily by flattening the cheesecake ball into a disc and then placing the
raspberry in the center and folding the disc around it. Proceed to freeze and
then dip in the melted chocolate as directed.
Learn how to eat healthy with the ketogenic diet
NUTRITIONAL INFORMATION
CALORIES: 148 | FAT: 13.5g | PROTEIN: 1.7g | CARBS: 5.2g | FIBER: 2.2g | ERYTHRITOL: 12g
MAPLE WALNUT FUDGE CUPS
Yield: 12 cups (1 per serving)
Prep Time: 5 minutes
Cook Time: 5 minutes
Inactive Time: 1 hour
Fake it ’til you make it, as they say. I don’t touch real maple syrup, but a
little maple extract allows me to enjoy one of my favorite flavors.
½ cup (1 stick) salted butter
4 ounces coconut butter
¼ cup powdered erythritol-based sweetener
1 teaspoon yacón syrup (optional, for color and flavor)
2½ teaspoons maple extract
¼ cup chopped toasted walnuts
SWEETENER OPTIONS:
These cups do not rely on bulk for consistency, so any sweetener will do.
1. Line a mini muffin pan with 12 silicone or parchment paper liners.
2. In a medium saucepan over low heat, melt the butter and coconut butter
together, stirring until smooth.
3. Whisk in the sweetener, yacón syrup (if using), and maple extract. Stir in
the toasted walnuts.
4. Divide the mixture among the lined mini muffin cups and refrigerate until
firm, about 1 hour.
Learn how to eat healthy with the ketogenic diet
STORAGE INSTRUCTIONS: These cups need to remain refrigerated for
the best consistency and will last for up to 2 weeks. They can also be frozen
for up to a month.
NUTRITIONAL INFORMATION
CALORIES: 150 | FAT: 14.7g | PROTEIN: 1.4g | CARBS: 3.2g | FIBER: 1.9g | ERYTHRITOL: 5g
TOFFEE ALMOND BARK
Yield: 12 servings (about 1 ounce per serving)
Prep Time: 5 minutes
Cook Time: 15 minutes
Inactive Time: 50 minutes
Coating the almonds with sugar-free toffee takes almond bark to a whole
new level. This sweet treat was a huge hit at our New Year’s Eve celebration
this past year.
3 tablespoons granulated erythritol-based sweetener
2 tablespoons salted butter
1 cup raw almonds
¼ teaspoon vanilla extract
Pinch of salt
6 ounces sugar-free dark chocolate, chopped
½ ounce cacao butter, or 1 tablespoon coconut oil
SWEETENER OPTIONS:
Sorry, kids, but only granulated erythritol or an erythritol blend will do here.
It’s impossible to make sugar-free toffee with any other sweetener. Believe
me, I’ve tried!
1. Line a baking sheet with parchment paper.
2. In a medium saucepan over medium heat, combine the sweetener and
butter, stirring until the sweetener dissolves. Add the almonds and bring to
a boil. Cook without stirring until the butter darkens to a rich amber color,
5 to 7 minutes.
Learn how to eat healthy with the ketogenic diet
3. Remove from the heat and stir in the vanilla extract and salt. Spread the
almonds in a single layer on the lined baking sheet and let cool for 20
minutes. Break up the almonds with your hands.
4. In a heatproof bowl set over a pan of barely simmering water, melt the
chocolate and cacao butter together, stirring until smooth. Add the
almonds and toss to coat well. Spread this mixture on the same
parchment-lined baking sheet to about 9 inches square.
5. Refrigerate until set, about 30 minutes. Break into pieces with your
fingers.
STORAGE INSTRUCTIONS: This bark is fine on the counter for up to a
week. You can also store it in the fridge.
NUTRITIONAL INFORMATION
CALORIES: 153 | FAT: 13.9g | PROTEIN: 3.3g | CARBS: 8.3g | FIBER: 4.3g | ERYTHRITOL: 6.8g
MACADAMIA COCONUT TRUFFLES
Yield: 24 truffles (2 per serving)
Prep Time: 20 minutes
Cook Time: —
Inactive Time: 1 hour
Macadamia nuts are like Mother Nature’s very own fat bombs. These truffles
are rich in healthy keto fats and taste like you’ve been whisked away to a
tropical island.
2 cups roasted unsalted macadamia nuts
⅔ cup plus 3 tablespoons unsweetened shredded coconut, divided
⅓ cup powdered erythritol-based sweetener
2 tablespoons grass-fed collagen powder
1 tablespoon melted coconut oil
1 teaspoon vanilla extract
⅛ teaspoon salt
SWEETENER OPTIONS:
You can sweeten these tasty treats however you please!
1. Place the macadamia nuts and ⅔ cup of the shredded coconut in a food
processor. Process on high until the mixture begins to clump together into
a ball.
2. Transfer the nut mixture to a large bowl and stir in the sweetener,
collagen, melted coconut oil, vanilla extract, and salt until well combined.
3. Spread the remaining 3 tablespoons of shredded coconut on a shallow
plate. Line a baking sheet with wax paper or parchment paper.
Learn how to eat healthy with the ketogenic diet
4. Working with about 1 tablespoon at a time, squeeze the truffle mixture
together in your hands to compact it, then roll it into a ball. Roll each ball
in the shredded coconut and place on the lined baking sheet. Refrigerate
until firm, about 1 hour.
STORAGE INSTRUCTIONS: These truffles will keep for about a week in
the refrigerator or can be frozen up to a month.
TIP: Macadamia nuts are so fatty that they can quickly turn to butter if you
process them too long. Be sure to remove the mixture from the food
processor when it begins to clump together into one big ball.
NUTRITIONAL INFORMATION
CALORIES: 202 | FAT: 20.3g | PROTEIN: 2.1g | CARBS: 4.3g | FIBER: 2.5g | ERYTHRITOL: 6.6g
PEANUT BUTTER AND JAM CUPS
Yield: 12 cups (1 per serving)
Prep Time: 5 minutes
Cook Time: 10 minutes
Inactive Time: 45 minutes
I’ve loved the combination of peanut butter and raspberry jam ever since I
was a child. I obviously don’t do the sandwich version anymore, but these
keto cups allow me to enjoy that salty-sweet flavor and feel a little like a kid
again.
¾ cup fresh raspberries
¼ cup water
6 to 8 tablespoons powdered erythritol-based sweetener, divided
1 teaspoon grass-fed gelatin
⅔ cup creamy peanut butter (salted)
⅔ cup coconut oil
SWEETENER OPTIONS:
The peanut butter mixture is best made with a powdered bulk sweetener, but
you could probably get away with any sweetener if you really prefer.
1. Line a standard-size muffin pan with 12 silicone or parchment paper
liners.
2. In a medium saucepan over medium heat, bring the raspberries and water
to a boil, then reduce the heat and simmer for 5 minutes. Mash the berries
with a fork.
Learn how to eat healthy with the ketogenic diet
3. Stir in ¼ cup of the powdered sweetener until combined. Whisk in the
gelatin, then let cool while you prepare the peanut butter mixture.
4. In a microwave-safe bowl, combine the peanut butter and coconut oil.
Microwave on high power for 30 to 60 seconds, until melted. Whisk in 2
to 4 tablespoons of powdered sweetener, depending on how sweet you
like it. I prefer mine less sweet.
5. Spoon about 1 tablespoon of the peanut butter mixture into each cup and
set in the freezer to firm up, about 15 minutes.
6. Divide the raspberry mixture among the cups and top with the remaining
peanut butter mixture. Refrigerate until firm, about 30 minutes.
STORAGE INSTRUCTIONS: These cups need to stay refrigerated to be
firm enough to eat. They will last for up to a week.
TIP: Not a fan of peanut butter? No problem. Swap in your favorite nut or
seed butter here.
NUTRITIONAL INFORMATION
CALORIES: 200 | FAT: 19.4g | PROTEIN: 3.6g | CARBS: 4.4g | FIBER: 1.4g | ERYTHRITOL: 10g
WATERMELON LIME GUMMIES
Yield: About 24 mini muffin–size pieces (4 per serving)
Prep Time: 5 minutes
Cook Time: 5 minutes
Inactive Time: 2 hours
Keto gummy candies are easy enough to make, but I managed to make them
even easier by using a flavored sugar-free beverage. This way, you don’t
have to puree or strain any fruit, and carbs are kept to the bare minimum.
You could have so much fun with this recipe and make any number of
different flavors. My kids couldn’t get enough of these gummies; they were
gone in one day!
1¼ cups sugar-free watermelon-flavored beverage (see Tip)
⅓ cup fresh lime juice
3 tablespoons grass-fed gelatin
2 tablespoons powdered erythritol-based sweetener, plus more if desired
Special equipment:
Silicone mini muffin pan or gummy mold (optional)
SWEETENER OPTIONS:
Go wild with whatever sweetener you prefer here. Do note that Bai is
already sweetened with erythritol, so you need only add sweetener to taste.
1. In a medium saucepan, combine the watermelon-flavored beverage and
lime juice. Whisk in the gelatin and sweetener and bring to a simmer,
stirring until the gelatin dissolves. Add more sweetener to taste.
Learn how to eat healthy with the ketogenic diet
2. Remove from the heat and spoon into the silicone molds. Refrigerate until
firm, about 2 hours. You can also line a square baking pan with parchment
paper and pour the mixture into that to chill.
3. To unmold, simply push the gummies out from the bottom of the silicone
mold, or lift the parchment out of the baking pan and cut into squares.
STORAGE INSTRUCTIONS: These gummies need to be kept in the fridge
so they don’t melt. They will last for up to a week or two.
TIP: There are a number of sugar-free flavored beverages on the market,
with a wide range of flavors to choose from. I like the ones that are
sweetened with erythritol or stevia or both, like Bai. There are fruit-flavored
mixes and drops that you can add to water as well.
NUTRITIONAL INFORMATION
CALORIES: 17 | fat: 0g | PROTEIN: 3.1g | CARBS: 1.1g | FIBER: 0.1g | ERYTHRITOL: 6.3g
CHAPTER 2:
Learn how to eat healthy with the ketogenic diet
COOKIES
Slice-and-Bake Vanilla Wafers
Amaretti
Peanut Butter Cookies for Two
Cream Cheese Cookies
Chewy Double Chocolate Cookies
No-Bake Peanut Butter Caramel Cookies
Chocolate Hazelnut Thumbprints
Deep-Dish Chocolate Chip Cookies
SLICE-AND-BAKE VANILLA WAFERS
Yield: About 40 cookies (2 per serving)
Prep Time: 10 minutes
Cook Time: 15 minutes
Inactive Time: 1 to 2 hours
These shortbread-like cookies are delicious on their own, but part of their
charm is how they pair well with other desserts, like Cannoli Dessert Dip
(here). And because you can keep the cookie logs in the freezer for months,
you can cut off a few slices any time you have a hankering for a few crisp,
buttery cookies. I actually have a log in my freezer right now!
½ cup (1 stick) unsalted butter, softened
½ cup granulated erythritol-based sweetener
1¾ cups (175g) blanched almond flour
2 tablespoons coconut flour
½ teaspoon vanilla extract
¼ teaspoon salt
SWEETENER OPTIONS:
This recipe really relies on a bulk granulated sweetener to achieve the right
consistency.
1. In a large bowl, beat the butter and sweetener with an electric mixer until
lightened and fluffy, about 2 minutes. Beat in the almond flour, coconut
flour, vanilla extract, and salt until well combined.
2. Divide the dough evenly between 2 sheets of wax paper or parchment
paper and roll each portion into a log about 1½ inches in diameter. Wrap
tightly in the paper and freeze for 1 to 2 hours.
Learn how to eat healthy with the ketogenic diet
3. Preheat the oven to 325°F and line 2 baking sheets with parchment paper
or silicone baking mats. Using a sharp knife, slice the dough crosswise
into ¼-inch slices. Place on the lined baking sheets, leaving about 1 inch
between wafers.
4. Bake for 5 minutes, then remove from the oven and use a flat-bottomed
glass to flatten the cookies slightly. Bake for another 8 to 10 minutes, until
the edges are just golden. Remove from the oven and let cool on the pans.
The cookies will still be quite soft when they come out of the oven but
will firm up as they cool.
SERVING SUGGESTION: Try using these cookies to sandwich a little of
the Chocolate Buttercream Frosting (here). Divine!
STORAGE INSTRUCTIONS: You can keep the unbaked logs of dough in
the freezer for 2 to 3 months. The baked cookies are best stored on the
counter for up to 5 days.
TIP: Once the dough has been in the freezer for more than 2 hours, it can
freeze very hard. Set it out on the counter to soften just long enough that you
can slice it without shattering it. Fifteen minutes ought to do.
NUTRITIONAL INFORMATION
CALORIES: 101 | FAT: 9.3g | PROTEIN: 2.2g | CARBS: 2.5g | FIBER: 1.3g
| ERYTHRITOL: 6g
AMARETTI
Yield: About 20 cookies (2 per serving)
Prep Time: 15 minutes
Cook Time: 22 minutes
Amaretti are classic Italian almond cookies made with almond meal and egg
whites. They are slightly crispy and slightly chewy, and perfect with an
espresso. This recipe is a great way to use up leftover egg whites after
making a keto custard or pudding.
2 cups (165g) sliced almonds, plus extra for garnish if desired
½ cup granulated erythritol-based sweetener
¼ cup powdered erythritol-based sweetener, plus extra for dusting if desired
4 large egg whites
½ teaspoon almond extract
Pinch of salt
SWEETENER OPTIONS:
You really have to use a bulk sweetener here. You can do all granulated and
skip the powdered version as long as you make sure to grind it well with the
sliced almonds, but this mix of the two sweeteners gives the cookies the best
consistency.
1. Preheat the oven to 300°F and line 2 baking sheets with parchment paper.
Lightly grease the parchment.
2. In a food processor, process the sliced almonds, granulated sweetener, and
powdered sweetener until the mixture resembles coarse crumbs.
Learn how to eat healthy with the ketogenic diet
3. In a large bowl, use an electric mixer to beat the egg whites with the
almond extract and salt until they hold soft peaks. Carefully fold the
almond mixture into the egg whites until just combined.
4. Use a cookie scoop or tablespoon to drop the mixture onto the prepared
baking sheets, leaving about 1 inch between them. If desired, gently press
an almond slice on top of each cookie. Bake for 22 minutes, until just
brown around the edges. They will feel like jelly when poked but will firm
up as they cool.
5. Remove from the oven and let cool completely on the baking sheets.
When cool, gently peel the cookies off the parchment. If desired, dust
each cookie with powdered sweetener.
STORAGE INSTRUCTIONS: These cookies are best kept on the counter
for up to 5 days.
TIP: I opted for sliced almonds that still had some skin on them for a more
rustic look, but you could use blanched almond flour for a finer consistency.
Just be sure to weigh the almond flour so that it matches the exact weight
I’ve given here. Otherwise, your cookies will be too dense and heavy.
NUTRITIONAL INFORMATION
CALORIES: 117 | FAT: 8.8g | PROTEIN: 5.3g | CARBS: 4.1g | FIBER: 2.3g
| ERYTHRITOL: 18g
PEANUT BUTTER COOKIES FOR TWO
Yield: 2 cookies (1 per serving)
Prep Time: 5 minutes
Cook Time: 12 minutes
If you are like me, you have little self-control around freshly baked peanut
butter cookies, especially ones with chocolate chips, like these. This small-
batch version solves that problem!
1½ tablespoons creamy peanut butter (salted)
1 tablespoon unsalted butter, softened
2 tablespoons granulated erythritol-based sweetener
2 teaspoons lightly beaten egg (see Tip)
¼ teaspoon vanilla extract
2 tablespoons defatted peanut flour
⅛ teaspoon baking powder
Pinch of salt
2 teaspoons sugar-free chocolate chips
SWEETENER OPTIONS:
A bulk sweetener will give these cookies a better consistency, but you might
be able to get away with a non-bulk sweetener here.
1. Preheat the oven to 325°F and line a baking sheet with parchment paper or
a silicone baking mat.
2. In a small bowl, beat the peanut butter, butter, and sweetener with an
electric mixer until well combined. Beat in the egg and vanilla extract.
Learn how to eat healthy with the ketogenic diet
3. Add the peanut flour, baking powder, and salt and mix until the dough
comes together. Divide the dough in half and roll each half into a ball.
4. Place the dough balls on the lined baking sheet and press each ball into a
disc about ½ inch thick. Top each disc with 1 teaspoon of chocolate chips,
pressing them into the dough to adhere.
5. Bake for 10 to 12 minutes, until puffed and just barely golden brown.
Remove from the oven and let cool on the pan. The cookies will still be
very soft when they come out of the oven but will firm up as they cool.
DAIRY-FREE OPTION: Substitute softened coconut oil for the butter.
TIP: To measure out 2 teaspoons of egg, simply beat the egg lightly in a
bowl first. This breaks up the proteins and combines the egg white with the
yolk. You can save the rest of the egg for your breakfast. This recipe also
works well with carton egg whites, if you prefer.
NUTRITIONAL INFORMATION
CALORIES: 163 | FAT: 13.2g | PROTEIN: 4.9g | CARBS: 5.7g | FIBER:
1.9g | ERYTHRITOL: 16g
CREAM CHEESE COOKIES
Yield: About 24 cookies (2 per serving)
Prep Time: 15 minutes
Cook Time: 12 minutes
Cream cheese makes for unbelievably tender cookies. These are puffy and
soft and almost somewhere between cookie and cake. They need nothing
more than a sprinkle of powdered sweetener for garnish.
4 ounces cream cheese (½ cup), softened
¼ cup (½ stick) unsalted butter, softened
½ cup granulated erythritol-based sweetener
1 large egg, room temperature
½ teaspoon vanilla extract
1½ cups (150g) blanched almond flour
1 teaspoon baking powder
¼ teaspoon salt
Powdered erythritol-based sweetener, for dusting
SWEETENER OPTIONS:
A bulk sweetener helps give these cookies structure. They may not fare so
well with a non-bulk sweetener.
1. Preheat the oven to 350°F and line a baking sheet with parchment paper or
a silicone baking mat.
2. In a large bowl, beat the cream cheese and butter with an electric mixer
until smooth. Add the sweetener and continue to beat until well
incorporated. Beat in the egg and vanilla extract.
Learn how to eat healthy with the ketogenic diet
3. Whisk together the almond flour, baking powder, and salt in a medium
bowl, then add the flour mixture to the cream cheese mixture and stir until
just combined.
4. Drop the dough by rounded tablespoons onto the lined baking sheet; the
batter will be quite sticky. Press the cookies down lightly with the heel of
your hand to flatten them slightly.
5. Bake for 10 to 12 minutes, until puffed. The cookies will still be very soft
and light in color. Remove from the oven and let cool completely on the
pan. When cool, dust with powdered sweetener.
STORAGE INSTRUCTIONS: These cookies can be stored on the counter
for up to 4 days or in the fridge for up to a week. They can also be frozen for
up to a month.
NUTRITIONAL INFORMATION
CALORIES: 154 | FAT: 13.7g | PROTEIN: 4.1g | CARBS: 3.4g | FIBER:
1.5g | ERYTHRITOL: 10g
CHEWY DOUBLE CHOCOLATE COOKIES
Yield: About 20 cookies (2 per serving)
Prep Time: 15 minutes
Cook Time: 12 minutes
These cookies owe their chewiness to the addition of grass-fed gelatin.
Weird but true, and it really works!
¾ cup plus 2 tablespoons (88g) blanched almond flour
3 tablespoons cocoa powder
1 tablespoon grass-fed gelatin
½ teaspoon baking soda
½ teaspoon salt
¼ cup (½ stick) unsalted butter, softened
¼ cup creamy almond butter (unsalted)
½ cup granulated erythritol-based sweetener
1 large egg, room temperature
½ teaspoon vanilla extract
⅓ cup sugar-free chocolate chips
SWEETENER OPTIONS:
These cookies are best made with a bulk sweetener.
1. Preheat the oven to 350°F and line 2 baking sheets with parchment paper
or silicone baking mats.
2. In a medium bowl, whisk together the almond flour, cocoa powder,
gelatin, baking soda, and salt.
Learn how to eat healthy with the ketogenic diet
3. In a large bowl, beat the butter, almond butter, and sweetener with an
electric mixer until well combined. Beat in the egg and vanilla extract,
then beat in the almond flour mixture until the dough comes together. Stir
in the chocolate chips.
4. Roll the dough into 1-inch balls and place a few inches apart on the lined
baking sheets. Use the heel of your hand to press the cookies down to
about ½ inch thick.
5. Bake for 12 minutes, until the cookies have spread and puffed up a bit.
They will still be very soft to the touch. Remove from the oven and let
cool completely on the pan.
DAIRY-FREE OPTION: Use coconut oil in place of the butter.
STORAGE INSTRUCTIONS: The cookies are fine on the counter for up
to 5 days or can be kept in the fridge for up to a week. The best way to freeze
them is unbaked. Simply roll the balls, lay them out on a parchment-lined
baking sheet, and freeze. Once they are solid, you can pop them into a bag
or a container, and they will keep for up to 2 months. To bake from frozen,
simply let them thaw on a baking sheet.
NUTRITIONAL INFORMATION
CALORIES: 180 | FAT: 15.1g | PROTEIN: 5.5g | CARBS: 6.9g | FIBER:
3.4g | ERYTHRITOL: 12g
Learn how to eat healthy with the ketogenic diet
NO-BAKE PEANUT BUTTER CARAMEL
COOKIES
Yield: 16 cookies (1 per serving)
Prep Time: 5 minutes (not including time to make caramel sauce)
Cook Time: 10 minutes
Inactive Time: 1 hour
Peanut butter and caramel are a match made in dessert heaven—especially
when they come together in an easy-to-make no-bake cookie.
1 recipe Caramel Sauce (here)
¾ cup creamy peanut butter (salted)
½ teaspoon caramel or vanilla extract
¾ cup unsweetened flaked coconut
¾ cup sliced almonds
3 ounces pork rinds, finely crushed (about 1⅓ cups)
¼ cup powdered erythritol-based sweetener
SWEETENER OPTIONS:
A powdered bulk sweetener works best here.
1. Line a baking sheet with wax paper or parchment paper.
2. In a saucepan over low heat, stir the caramel sauce and peanut butter until
melted and smooth. Stir in the extract and remove from the heat.
3. In a food processor, pulse the flaked coconut and sliced almonds together
until the mixture resembles oatmeal.
4. Add the coconut and almond mixture, crushed pork rinds, and sweetener
to the caramel mixture and stir to combine well.
5. Drop the mixture by rounded tablespoons onto the lined baking sheet,
leaving about 2 inches between them. Press the cookies with the palm of
your hand to flatten them.
6. Refrigerate for about 1 hour to firm up.
STORAGE INSTRUCTIONS: These soft cookies are best kept in the
fridge. They will last for up to a week.
TIP: Does it seem odd to put pork rinds in a dessert? Well, it works! It gives
the cookies a little crunch as well as cuts down on carbs.
NUTRITIONAL INFORMATION
CALORIES: 200 | FAT: 16.6g | PROTEIN: 7.3g | CARBS: 5.1g | FIBER:
1.7g | ERYTHRITOL: 9.4g
Learn how to eat healthy with the ketogenic diet
CHOCOLATE HAZELNUT THUMBPRINTS
Yield: 24 cookies (2 per serving)
Prep Time: 15 minutes (not including time to make chocolate hazelnut
spread)
Cook Time: 18 minutes
Hi, my name is Carolyn, and I am obsessed with chocolate and hazelnut.
2 cups (200g) hazelnut meal
½ cup granulated erythritol-based sweetener
½ teaspoon baking powder
¼ teaspoon salt
1 large egg
¼ cup (½ stick) unsalted butter, melted but not hot
½ teaspoon vanilla extract
½ cup Homemade Chocolate Hazelnut Spread (here)
SWEETENER OPTIONS:
These cookies can be sweetened with any sweetener you prefer.
1. Preheat the oven to 325°F and line a baking sheet with parchment paper or
a silicone baking mat.
2. In a medium bowl, whisk together the hazelnut meal, sweetener, baking
powder, and salt. Stir in the egg, melted butter, and vanilla extract until the
dough comes together.
3. Roll the dough into 1-inch balls and place a few inches apart on the lined
baking sheet. Press the balls down with the palm of your hand to about ½
Learn how to eat healthy with the ketogenic diet
inch thick. Use your thumb to make a well in the center of each cookie.
4. Bake for 15 to 18 minutes, until golden brown around the edges and just
firm to the touch. Remove from the oven and let cool completely on the
pan.
5. Once cool, dab about 1 teaspoon of the chocolate hazelnut spread into
each well.
DAIRY-FREE OPTION: Use coconut oil in place of the butter.
STORAGE INSTRUCTIONS: These cookies are best stored in the fridge,
as the filling can be pretty goopy otherwise. But I like the flavors best at
room temperature, so I always let them sit out for 15 minutes or so before
eating them.
NUTRITIONAL INFORMATION
CALORIES: 220 | FAT: 20.1g | PROTEIN: 4.3g | CARBS: 4.9g | FIBER:
2.9g | ERYTHRITOL: 12.5g
DEEP-DISH CHOCOLATE CHIP COOKIES
Yield: 2 cookies (1 per serving)
Prep Time: 5 minutes
Cook Time: 20 minutes
Gooey chocolate chip cookies warm from the oven—is there anything
better?
3 tablespoons unsalted butter
3 tablespoons powdered erythritol-based sweetener
1 tablespoon lightly beaten egg (see Tip, here)
⅛ teaspoon vanilla extract
¼ cup (25g) blanched almond flour
¼ teaspoon baking soda
1 tablespoon sugar-free chocolate chips
SWEETENER OPTIONS:
A bulk sweetener will give these cookies the best consistency, but you could
really use almost anything here.
1. Preheat the oven to 325°F and grease two 4-ounce ramekins or cute little
3½-inch cast-iron skillets, if you can find them!
2. In a microwave-safe bowl, microwave the butter on high until melted,
about 30 seconds. Stir in the sweetener until dissolved, then stir in the
beaten egg and vanilla extract.
3. Add the almond flour and baking soda and stir until well combined.
Divide the dough between the greased ramekins and press to the edges.
Learn how to eat healthy with the ketogenic diet
Divide the chocolate chips between the ramekins and press gently into the
dough.
4. Bake for 15 to 20 minutes, until golden brown but still soft to the touch.
The baking time will depend somewhat on how deep your ramekins are.
5. Remove from the oven and let cool in the ramekins for a few minutes
before serving. Eat directly from the ramekin with a spoon.
DAIRY-FREE OPTION: Use coconut oil in place of the butter.
SERVING SUGGESTION: These cookies are absolutely dreamy with
some Vanilla Bean Semifreddo (here), traditional Whipped Cream (here), or
Coconut Whipped Cream (here).
TIP: If you only have bigger ramekins, you can bake both servings in one 8-
ounce ramekin. The baking time will increase.
NUTRITIONAL INFORMATION
CALORIES: 275 | FAT: 25.7g | PROTEIN: 4.6g | CARBS: 5.6g | FIBER:
2.5g | ERYTHRITOL: 22.5g
Learn how to eat healthy with the ketogenic diet
CHAPTER 3:
Learn how to eat healthy with the ketogenic diet
BARS
No-Bake Chocolate “Oatmeal” Bars
Sugar Cookie Bars
Dairy-Free Peanut Butter Bars
No-Bake Blueberry Cheesecake Bars
One-Bowl Brownies
Dairy-Free Coconut Bars
No-Bake French Silk Pie Bars
NO-BAKE CHOCOLATE “OATMEAL” BARS
Yield: 16 bars (1 per serving)
Prep Time: 15 minutes
Cook Time: 10 minutes
Inactive Time: 1 hour
I used to love the oatmeal fudge bars from Starbucks. With these rich,
oatmeal-like bars, I don’t miss them any longer. Grinding up flaked coconut
and sliced almonds makes a great oatmeal substitute.
CRUST:
1 cup unsweetened flaked coconut
1 cup sliced almonds
½ cup (1 stick) unsalted butter
½ cup granulated erythritol-based sweetener
1 teaspoon yacón syrup (optional)
½ teaspoon vanilla extract
1 cup (100g) blanched almond flour
¼ teaspoon salt
FILLING:
1¼ cups heavy whipping cream
4 ounces unsweetened chocolate, finely chopped
2 tablespoons unsalted butter
½ cup powdered erythritol-based sweetener
½ teaspoon vanilla extract
SWEETENER OPTIONS:
Learn how to eat healthy with the ketogenic diet
Both the crust and the filling really need a bulk sweetener for consistency.
The sweetener for the filling should be a powdered version to avoid
grittiness.
TO MAKE THE CRUST:
1. Line a 9-inch square baking pan with parchment paper, leaving an
overhang for easy removal.
2. In a food processor, process the coconut and sliced almonds until they
resemble grains of oatmeal. Set aside.
3. In a medium saucepan over medium heat, bring the butter, sweetener,
yacón syrup (if using), and vanilla extract to a low boil, whisking to
combine well. Remove from the heat.
4. Add the ground coconut and almonds, almond flour, and salt. Stir until
well combined. Press about two-thirds of the mixture into the bottom of
the lined baking pan.
TO MAKE THE FILLING AND ASSEMBLE:
5. In a medium saucepan over medium heat, bring the cream just to a
simmer. Remove from the heat and add the chopped chocolate and butter.
Let sit for 4 minutes to melt.
6. Add the sweetener and vanilla extract and whisk until well combined and
smooth.
7. Pour the filling over the crust in the pan. Sprinkle with the remaining crust
mixture and refrigerate until firm, about 1 hour.
8. Lift out by the overhanging parchment and cut into 16 bars.
STORAGE INSTRUCTIONS: These bars will keep in the fridge for up to
a week, but they are best served at room temperature. They can be wrapped
up tightly and frozen for up to a month.
NUTRITIONAL INFORMATION
CALORIES: 275 | FAT: 25.5g | PROTEIN: 4.4g | CARBS: 6.5g | FIBER:
3.2g | ERYTHRITOL: 15g
Learn how to eat healthy with the ketogenic diet
SUGAR COOKIE BARS
Yield: 16 bars (1 per serving)
Prep Time: 15 minutes (not including time to make sprinkles)
Cook Time: 18 minutes
No dessert cookbook would be complete without a sugar cookie recipe.
Pressing the dough into a pan allows you to skip the time-consuming task of
rolling and cutting the cookies individually, and you still get the same great
flavor.
BARS:
2 cups (200g) blanched almond flour
2 tablespoons coconut flour
½ cup granulated erythritol-based sweetener
½ teaspoon baking powder
¼ teaspoon salt
½ cup (1 stick) unsalted butter, melted but not hot
1 large egg
½ teaspoon vanilla extract
VANILLA FROSTING:
½ cup (1 stick) unsalted butter, softened
2 ounces cream cheese (¼ cup), softened
½ cup powdered erythritol-based sweetener
2 to 4 tablespoons heavy whipping cream, room temperature
½ teaspoon vanilla extract
Natural red food coloring (optional)
1 tablespoon Coconut Sprinkles (here)
Learn how to eat healthy with the ketogenic diet
SWEETENER OPTIONS:
A bulk sweetener gives both the bars and the frosting the best consistency,
but you can get away with a non-bulk sweetener as well.
TO MAKE THE BARS:
1. Preheat the oven to 325°F and grease a 9-inch square baking pan.
2. In a large bowl, whisk together the almond flour, coconut flour, granulated
sweetener, baking powder, and salt. Stir in the butter, egg, and vanilla
extract until well combined.
3. Spread the dough evenly in the greased baking pan and bake until the
edges are golden brown, about 18 minutes. The center will still be very
soft. Remove from the oven and let cool completely in the pan.
TO MAKE THE FROSTING AND ASSEMBLE:
4. In a medium bowl, beat the butter and cream cheese with an electric mixer
until smooth. Beat in the powdered sweetener.
5. Add the heavy cream 1 tablespoon at a time until the frosting is
spreadable. Beat in the vanilla extract and a small amount of food
coloring, if using, until well combined.
6. Spread the frosting evenly over the cooled cookie and sprinkle with
coconut sprinkles. Cut into 16 bars.
STORAGE INSTRUCTIONS: These bars should be kept refrigerated and
will last for up to 5 days. They are best served at room temperature.
NUTRITIONAL INFORMATION
CALORIES: 218 | FAT: 20.5g | PROTEIN: 3.9g | CARBS: 3.9g | FIBER:
1.8g | ERYTHRITOL: 15g
Learn how to eat healthy with the ketogenic diet
DAIRY-FREE PEANUT BUTTER BARS
Yield: 16 bars (1 per serving)
Prep Time: 15 minutes
Cook Time: 5 minutes
Inactive Time: 1 hour
Around these parts, my peanut butter bars are practically famous. My friends
and neighbors make them frequently. I took this dairy-free version to
CrossFit and nary a crumb was left.
BARS:
¾ cup creamy peanut butter (salted)
½ cup plus 2 tablespoons coconut oil
⅔ cup powdered erythritol-based sweetener
1 teaspoon vanilla extract
2 cups (200g) defatted peanut flour (see Tip)
CHOCOLATE GLAZE:
3 ounces sugar-free dark chocolate, chopped
1 tablespoon coconut oil
SWEETENER OPTIONS:
These delicious bars don’t require a bulk sweetener, but they may need a
little more peanut flour to firm up properly if you use a non-bulk sweetener.
TO MAKE THE BARS:
1. Line a 9-inch square baking pan with parchment paper, leaving an
overhang for easy removal.
2. Place the peanut butter and coconut oil in a large microwave-safe bowl.
Microwave on high power until melted, then whisk until smooth.
Alternatively, you can melt them together in a saucepan over low heat.
Stir in the sweetener and vanilla extract until well combined.
3. Stir in the peanut flour until the dough comes together. It should be a stiff
dough that you can pick up with your hands. If it’s too soft, add more
peanut flour, 1 tablespoon at a time, until it firms up.
4. Press the dough firmly and evenly into the lined baking pan. Cover with a
sheet of wax paper or parchment paper and use a flat-bottomed glass or
measuring cup to press and smooth the top.
TO MAKE THE GLAZE AND ASSEMBLE:
5 Place the chocolate and coconut oil in a microwave-safe bowl. Microwave
on high power in 30-second increments, stirring after each increment,
until melted and smooth. You can also set the bowl over a pan of barely
simmering water and stir the chocolate mixture until melted.
6. Pour the glaze over the bars and use a knife or an offset spatula to spread
it to the edges. Refrigerate for 1 hour, until the chocolate is set.
7. Lift out by the overhanging parchment and cut into 16 bars.
NUTRITIONAL INFORMATION
CALORIES: 211 | FAT: 19g | PROTEIN: 5.5g | CARBS: 7.2g | FIBER: 2.9g
| ERYTHRITOL: 11g
STORAGE INSTRUCTIONS: These bars are best kept in the refrigerator
and will last for at least a week.
TIP: Do not pack the peanut flour as you measure it out. It’s very fine and
powdery, so packing it can make a huge difference in the outcome of the
Learn how to eat healthy with the ketogenic diet
bars. Simply scoop and level, as you would with any flour.
NO-BAKE BLUEBERRY CHEESECAKE BARS
Yield: 16 bars (1 per serving)
Prep Time: 15 minutes (not including time to make crust)
Cook Time: 7 minutes
Inactive Time: 2 hours
The creamy richness of cheesecake pairs so delightfully with the tangy
sweetness of blueberries. If you’re a cheesecake fan, these bars are sure to
please.
BARS:
1 recipe Easy Shortbread Crust (here)
2 (8-ounce) packages cream cheese, softened
½ cup powdered erythritol-based sweetener
1 teaspoon grated lemon zest
¼ cup heavy whipping cream, room temperature
BLUEBERRY TOPPING:
1 cup frozen blueberries
¼ cup water
¼ cup powdered erythritol-based sweetener
1 tablespoon fresh lemon juice
¼ teaspoon xanthan gum
Fresh mint, for garnish (optional)
SWEETENER OPTIONS:
Go ahead and use any sweetener you like, except for granulated bulk
sweeteners. Because these bars are not baked, a granulated sweetener would
Learn how to eat healthy with the ketogenic diet
be too gritty.
TO MAKE THE BARS:
1. Press the shortbread crust mixture firmly and evenly into the bottom of a
9-inch square baking pan. Freeze the crust while you prepare the
cheesecake filling. (Freezing the crust will help it hold together when you
spread the filling on top.)
2. In a large bowl, use an electric mixer to beat the cream cheese with the
sweetener and lemon zest until smooth. Beat in the cream until well
combined.
3. Spread the filling over the crust. Refrigerate until firm, at least 2 hours.
TO MAKE THE TOPPING AND ASSEMBLE:
4. In a medium saucepan over medium heat, bring the blueberries, water, and
sweetener to a boil, then simmer for 5 minutes.
5. Remove from the heat and stir in the lemon juice. Sprinkle with the
xanthan gum and whisk quickly to combine. Let cool before using.
6. Pour the blueberry topping over the cheesecake—either the entire pan or
individual servings. Garnish with fresh mint, if desired.
STORAGE INSTRUCTIONS: As with any cheesecake dessert, these bars
need to be kept in the fridge and will last for up to 5 days.
NUTRITIONAL INFORMATION
CALORIES: 193 | FAT: 16.7g | PROTEIN: 3.7g | CARBS: 4.5g | FIBER:
1.2g | ERYTHRITOL: 16g
ONE-BOWL BROWNIES
Yield: 16 brownies (1 per serving)
Prep Time: 10 minutes
Cook Time: 20 minutes
This easy, dairy-free recipe results in fudgy goodness. Try these brownies
with a little Coconut Whipped Cream (here) on top for sheer keto
decadence!
¾ cup avocado oil
¾ cup granulated erythritol-based sweetener
3 large eggs
½ teaspoon vanilla extract
½ cup (50g) blanched almond flour
⅓ cup cocoa powder
½ teaspoon baking powder
¼ teaspoon salt
½ cup chopped raw walnuts or pecans (optional)
SWEETENER OPTIONS:
A bulk sweetener is important to give these a true brownie texture.
1. Preheat the oven to 325°F and grease a 9-inch square baking pan.
2. In a large bowl, whisk together the oil, sweetener, eggs, and vanilla
extract.
3. Add the almond flour, cocoa powder, baking powder, and salt and whisk
until well combined. Stir in the chopped nuts, if using.
Learn how to eat healthy with the ketogenic diet
4. Bake for 20 minutes, or until the edges are set but the center is still a little
soft to the touch. Bake longer if you prefer cakier brownies.
5. Remove from the oven and let cool completely in the pan. Then cut into
16 squares.
SERVING SUGGESTION: If you don’t need to be dairy-free, these
brownies would be dreamy topped with Chocolate Buttercream Frosting
(here) or a scoop of Vanilla Bean Semifreddo (here).
STORAGE INSTRUCTIONS: Because of their moisture content, these
brownies are best kept in the fridge for up to 5 days. I like to let them come
to room temperature before eating.
NUTRITIONAL INFORMATION
CALORIES: 113 | FAT: 15.5g | PROTEIN: 3.2g | CARBS: 2.3g | FIBER:
1.3g | ERYTHRITOL: 11.3g
DAIRY-FREE COCONUT BARS
Yield: 16 bars (1 per serving)
Prep Time: 10 minutes
Cook Time: 5 minutes
Inactive Time: 1 hour 10 minutes
The other day, my next-door neighbor came charging out of his house calling
my name. I thought I was in trouble! He accosted me simply so he could
rave about the coconut bars I’d left on his doorstep. I think they taste a lot
like Mounds bars. One of my recipe testers suggested adding a few almonds
to the top for an Almond Joy–like version. I say that part is up to you!
2 cups unsweetened shredded coconut
½ cup powdered erythritol-based sweetener
3 tablespoons grass-fed collagen powder
½ cup plus 1 tablespoon coconut oil, softened, divided
¼ cup full-fat coconut milk
½ teaspoon coconut extract
3 ounces sugar-free dark chocolate, chopped
SWEETENER OPTIONS:
These bars rely on a powdered bulk sweetener for the right consistency.
1. Line a 9-inch square baking pan with parchment paper, leaving an
overhang for easy removal.
2. In a medium bowl, whisk together the coconut, sweetener, and collagen.
Add ½ cup of the coconut oil, the coconut milk, and coconut extract. Stir
until well combined.
Learn how to eat healthy with the ketogenic diet
3. Press the coconut mixture firmly and evenly into the bottom of the lined
baking pan and refrigerate until firm, about 1 hour.
4. In a heatproof bowl set over a pan of barely simmering water, stir the
chopped chocolate and remaining tablespoon of coconut oil until melted
and smooth. Spread the melted chocolate mixture over the chilled coconut
base and allow to set, about 10 minutes.
5. Lift out by the overhanging parchment and cut into 16 bars.
STORAGE INSTRUCTIONS: Because there is no dairy in these bars,
they can stay out on the counter for a few days, but they do get mighty soft
that way. In the fridge, they can last for over a week. I prefer the flavor at
room temperature, but they are good either way.
NUTRITIONAL INFORMATION
CALORIES: 173 | FAT: 17.2g | PROTEIN: 3.3g | CARBS: 4.9g | FIBER:
2.4g | ERYTHRITOL: 8.6g
NO-BAKE FRENCH SILK PIE BARS
Yield: 16 bars (1 per serving)
Prep Time: 30 minutes (not including time to make crust or whipped cream)
Cook Time: 5 minutes
Inactive Time: 2 hours 10 minutes
Although these silky-rich chocolate bars are a little heavier on the prep time
than most recipes in this book, they require no baking and are worth every
second!
BARS:
1 recipe Easy Shortbread Crust (here)
3 ounces unsweetened chocolate, chopped
¾ cup (1½ sticks) unsalted butter, softened
⅔ cup powdered erythritol-based sweetener
1 teaspoon vanilla extract
½ teaspoon espresso powder (optional)
¼ teaspoon salt
3 large eggs
GARNISH:
¾ recipe Whipped Cream (here)
½ ounce sugar-free dark chocolate
SWEETENER OPTIONS:
You could probably get away with almost any sweetener you prefer in the
filling.
Learn how to eat healthy with the ketogenic diet
TO MAKE THE BARS:
1. Press the shortbread crust mixture firmly and evenly into the bottom of a
9-inch square baking pan. Refrigerate the crust while you prepare the
filling.
2. In a heatproof bowl set over a pan of barely simmering water, melt the
chocolate, stirring until smooth. Alternatively, you can melt the chocolate
in a microwave-safe bowl in 30-second increments, stirring after each
increment. Remove the bowl from the pan and let cool for 10 minutes.
3. In a large bowl, beat the butter and sweetener with an electric mixer until
well combined and fluffy, about 2 minutes. With the mixer running,
slowly add the melted chocolate, beating until smooth. Add the vanilla
extract, espresso powder (if using), and salt.
4. Add the eggs, one at a time, beating for 5 minutes after each addition.
Pour the filling over the chilled crust and smooth the top. Refrigerate until
firm, at least 2 hours.
TO GARNISH THE BARS:
5. Spread the whipped cream over the entire chilled dessert or pipe onto
individual bars. Grate the chocolate over the top.
NUTRITIONAL INFORMATION
CALORIES: 255 | FAT: 23.7g | PROTEIN: 4.6g | CARBS: 4.6g | FIBER:
2.2g | ERYTHRITOL: 15g
STORAGE INSTRUCTIONS: These bars must be kept chilled. Because
they are made with raw eggs, they should be consumed within 3 days.
TIPS: If you are concerned about consuming raw eggs, feel free to use
pasteurized eggs, such as Safest Choice brand.
If you want to cut these into perfect squares with straight edges, make sure
to heat up a nice sharp knife first. I hold mine over the flame of my gas
stove, but you could run it under boiling water as well.
CHAPTER 4:
Learn how to eat healthy with the ketogenic diet
CAKES
Mini No-Bake Lemon Cheesecakes
Tiramisu Sheet Cake
Slow Cooker Chocolate Cake
Funfetti Mug Cakes
Dutch Butter Cake
Orange Cardamom Bundt Cake
Pumpkin Spice Mug Cakes
MINI NO-BAKE LEMON CHEESECAKES
Yield: 6 mini cheesecakes (1 per serving)
Prep Time: 20 minutes
Cook Time: —
Inactive Time: 2 hours
Placing individual servings of cheesecake in cupcake liners makes them easy
to bake, easy to serve, and easy to clean up!
CRUST:
½ cup blanched almond flour
2 tablespoons powdered erythritol-based sweetener
⅛ teaspoon salt
2 tablespoons unsalted butter, melted
FILLING:
6 ounces cream cheese (¾ cup), softened
¼ cup plus 1 tablespoon powdered erythritol-based sweetener
¼ cup heavy whipping cream, room temperature
2 teaspoons grated lemon zest
2 tablespoons fresh lemon juice
½ teaspoon lemon extract
Natural yellow food coloring (optional)
SWEETENER OPTIONS:
A powdered bulk sweetener is your best bet for this recipe.
TO MAKE THE CRUST:
Learn how to eat healthy with the ketogenic diet
1. Line a standard-size muffin pan with 6 silicone or parchment paper liners.
2. In a medium bowl, whisk together the almond flour, sweetener, and salt.
Stir in the melted butter until the mixture begins to clump together.
3. Divide the crust mixture among the prepared muffin cups and press firmly
into the bottoms.
TO MAKE THE FILLING AND ASSEMBLE:
4. In a medium bowl, beat the cream cheese with an electric mixer until
smooth. Beat in the sweetener until fully incorporated.
5. Beat in the cream, lemon zest, lemon juice, and lemon extract until
smooth. If desired, add yellow food coloring just a drop or two at a time
until a lemon-yellow color is achieved.
6. Divide the filling mixture among the prepared muffin cups, filling each
cup almost to the top, and smooth the tops. Tap the pan firmly on the
counter to release any air bubbles.
7. Place the muffin pan in the freezer until the filling is firm, about 2 hours.
Peel the parchment or silicone liners away from the cheesecakes and place
in the refrigerator until ready to serve.
NUTRITIONAL INFORMATION
CALORIES: 223 | FAT: 20.1g | PROTEIN: 4g | CARBS: 3.9g | FIBER: 1.1g
| ERYTHRITOL: 17.5g
SERVING SUGGESTION: Garnish with a little Whipped Cream (here)
and some lemon slices and grated lemon zest.
STORAGE INSTRUCTIONS: Keep the cheesecakes refrigerated for up to
a week or wrap them individually and freeze for up to a month.
TIRAMISU SHEET CAKE
Yield: One 11 by 17-inch cake (20 servings)
Prep Time: 25 minutes
Cook Time: 22 minutes
Please don’t look at this long ingredient list and multi-step process and
panic. I promise that this is an incredibly easy cake to put together. But it’s
also a great one for serving a large party and makes a perfect special-
occasion dessert.
CAKE:
2 cups (200g) blanched almond flour
¾ cup granulated erythritol-based sweetener
⅓ cup (37g) coconut flour
⅓ cup unflavored whey protein powder
1 tablespoon baking powder
½ teaspoon salt
¾ cup unsweetened almond milk
½ cup (1 stick) unsalted butter, melted but not hot
3 large eggs
1 teaspoon vanilla extract
¼ cup espresso or strong brewed coffee, cooled
1 tablespoon dark rum (optional)
MASCARPONE FROSTING:
8 ounces mascarpone cheese, softened
4 ounces cream cheese (½ cup), softened
½ cup powdered erythritol-based sweetener
1 teaspoon vanilla extract
Learn how to eat healthy with the ketogenic diet
½ to ⅔ cup heavy whipping cream, room temperature
GARNISH:
1 tablespoon cocoa powder
1 ounce sugar-free dark chocolate
TO MAKE THE CAKE:
1. Preheat the oven to 325°F and thoroughly grease an 11 by 17-inch sheet
pan.
2. In a medium bowl, whisk together the almond flour, sweetener, coconut
flour, protein powder, baking powder, and salt. Add the almond milk,
melted butter, eggs, and vanilla extract and whisk until smooth.
3. Spread the batter in the greased sheet pan and smooth the top. Bake for 18
to 22 minutes, until the edges are golden brown and the cake is set.
Remove from the oven and let cool in the pan.
4. In a small bowl, combine the espresso and rum, if using. Brush over the
cooled cake.
TO MAKE THE FROSTING:
5. In a large bowl, beat the mascarpone and cream cheese with an electric
mixer until smooth. Beat in the sweetener and vanilla extract.
6. Add ½ cup of the cream and beat until smooth. Add more cream as
needed to thin the frosting to a spreadable consistency. Spread the frosting
over the cooled cake.
TO GARNISH THE CAKE:
7. Dust the top of the cake with the cocoa powder. Grate the dark chocolate
over the top.
NUTRITIONAL INFORMATION
CALORIES: 238 | FAT: 21.2g | PROTEIN: 6.3g | CARBS: 5.1g | FIBER:
2.3g | ERYTHRITOL: 15g
STORAGE INSTRUCTIONS: This cake should be stored in the fridge and
will last for up to 5 days. It’s best served at room temperature.
TIP: The cake portion of this recipe is pretty standard. If you omit the coffee
and rum, it becomes a basic yellow sheet cake. Feel free to frost it with
anything you like!
SWEETENER OPTIONS:
The frosting really relies on a powdered bulk sweetener for the best
consistency. The cake can be sweetened with your preferred sweetener.
Learn how to eat healthy with the ketogenic diet

Contenu connexe

Plus de PurveshDesai

Learn how to lose 20 kg weight in 1 month without exercise
Learn how to lose 20 kg weight in 1 month without exerciseLearn how to lose 20 kg weight in 1 month without exercise
Learn how to lose 20 kg weight in 1 month without exercisePurveshDesai
 
Learn how to lose 20 pounds in 6 weeks Challenge
Learn how to lose 20 pounds in 6 weeks ChallengeLearn how to lose 20 pounds in 6 weeks Challenge
Learn how to lose 20 pounds in 6 weeks ChallengePurveshDesai
 
Learn how to lose weight in 3 weeks diet and exercise plan
Learn how to lose weight in 3 weeks diet and exercise planLearn how to lose weight in 3 weeks diet and exercise plan
Learn how to lose weight in 3 weeks diet and exercise planPurveshDesai
 
Learn how to make money online social media marketing platforms for business
Learn how to make money online social media marketing platforms for businessLearn how to make money online social media marketing platforms for business
Learn how to make money online social media marketing platforms for businessPurveshDesai
 
How to lose weight in 2 weeks vegeterian diet plan
How to lose weight in 2 weeks vegeterian diet planHow to lose weight in 2 weeks vegeterian diet plan
How to lose weight in 2 weeks vegeterian diet planPurveshDesai
 
Losing weight in 2 weeks challenge without exercise
Losing weight in 2 weeks challenge without exerciseLosing weight in 2 weeks challenge without exercise
Losing weight in 2 weeks challenge without exercisePurveshDesai
 
How to lose body fat in a month at home
How to lose body fat in a month at homeHow to lose body fat in a month at home
How to lose body fat in a month at homePurveshDesai
 
How to lose weight with keto and intermittent fasting
How to lose weight with keto and intermittent fastingHow to lose weight with keto and intermittent fasting
How to lose weight with keto and intermittent fastingPurveshDesai
 
20kg weight loss in 1 month diet plan
20kg weight loss in 1 month diet plan20kg weight loss in 1 month diet plan
20kg weight loss in 1 month diet planPurveshDesai
 
How to lose weight fast in 2 weeks 10kg diet plan d
How to lose weight fast in 2 weeks 10kg diet plan dHow to lose weight fast in 2 weeks 10kg diet plan d
How to lose weight fast in 2 weeks 10kg diet plan dPurveshDesai
 
Learn how to lose weight fast with green smoothies
Learn how to lose weight fast with green smoothiesLearn how to lose weight fast with green smoothies
Learn how to lose weight fast with green smoothiesPurveshDesai
 
Tips to lose weight at home without exercise
Tips to lose weight at home without exerciseTips to lose weight at home without exercise
Tips to lose weight at home without exercisePurveshDesai
 
How to lose weight in 2 weeks 10kg diet plan
How to lose weight in 2 weeks 10kg diet planHow to lose weight in 2 weeks 10kg diet plan
How to lose weight in 2 weeks 10kg diet planPurveshDesai
 
Sign up for our 16 week keto diet program
Sign up for our 16 week keto diet programSign up for our 16 week keto diet program
Sign up for our 16 week keto diet programPurveshDesai
 
Discover here why keto is the best diet for your body
Discover here why keto is  the best diet for your bodyDiscover here why keto is  the best diet for your body
Discover here why keto is the best diet for your bodyPurveshDesai
 
Reboot your metabolism with 60-day keto challenge
Reboot your metabolism with 60-day keto challengeReboot your metabolism with 60-day keto challenge
Reboot your metabolism with 60-day keto challengePurveshDesai
 
Lose weight and get healthier by starting a ketogenic diet
Lose weight and get healthier by starting a ketogenic dietLose weight and get healthier by starting a ketogenic diet
Lose weight and get healthier by starting a ketogenic dietPurveshDesai
 
Start your weight loss journey today
Start your weight loss journey todayStart your weight loss journey today
Start your weight loss journey todayPurveshDesai
 
Lose weight on keto with less than 400 calories a day
Lose weight on keto with less than 400 calories a dayLose weight on keto with less than 400 calories a day
Lose weight on keto with less than 400 calories a dayPurveshDesai
 
Sign up for our free 30-Days Keto Challenge
Sign up for our free 30-Days Keto ChallengeSign up for our free 30-Days Keto Challenge
Sign up for our free 30-Days Keto ChallengePurveshDesai
 

Plus de PurveshDesai (20)

Learn how to lose 20 kg weight in 1 month without exercise
Learn how to lose 20 kg weight in 1 month without exerciseLearn how to lose 20 kg weight in 1 month without exercise
Learn how to lose 20 kg weight in 1 month without exercise
 
Learn how to lose 20 pounds in 6 weeks Challenge
Learn how to lose 20 pounds in 6 weeks ChallengeLearn how to lose 20 pounds in 6 weeks Challenge
Learn how to lose 20 pounds in 6 weeks Challenge
 
Learn how to lose weight in 3 weeks diet and exercise plan
Learn how to lose weight in 3 weeks diet and exercise planLearn how to lose weight in 3 weeks diet and exercise plan
Learn how to lose weight in 3 weeks diet and exercise plan
 
Learn how to make money online social media marketing platforms for business
Learn how to make money online social media marketing platforms for businessLearn how to make money online social media marketing platforms for business
Learn how to make money online social media marketing platforms for business
 
How to lose weight in 2 weeks vegeterian diet plan
How to lose weight in 2 weeks vegeterian diet planHow to lose weight in 2 weeks vegeterian diet plan
How to lose weight in 2 weeks vegeterian diet plan
 
Losing weight in 2 weeks challenge without exercise
Losing weight in 2 weeks challenge without exerciseLosing weight in 2 weeks challenge without exercise
Losing weight in 2 weeks challenge without exercise
 
How to lose body fat in a month at home
How to lose body fat in a month at homeHow to lose body fat in a month at home
How to lose body fat in a month at home
 
How to lose weight with keto and intermittent fasting
How to lose weight with keto and intermittent fastingHow to lose weight with keto and intermittent fasting
How to lose weight with keto and intermittent fasting
 
20kg weight loss in 1 month diet plan
20kg weight loss in 1 month diet plan20kg weight loss in 1 month diet plan
20kg weight loss in 1 month diet plan
 
How to lose weight fast in 2 weeks 10kg diet plan d
How to lose weight fast in 2 weeks 10kg diet plan dHow to lose weight fast in 2 weeks 10kg diet plan d
How to lose weight fast in 2 weeks 10kg diet plan d
 
Learn how to lose weight fast with green smoothies
Learn how to lose weight fast with green smoothiesLearn how to lose weight fast with green smoothies
Learn how to lose weight fast with green smoothies
 
Tips to lose weight at home without exercise
Tips to lose weight at home without exerciseTips to lose weight at home without exercise
Tips to lose weight at home without exercise
 
How to lose weight in 2 weeks 10kg diet plan
How to lose weight in 2 weeks 10kg diet planHow to lose weight in 2 weeks 10kg diet plan
How to lose weight in 2 weeks 10kg diet plan
 
Sign up for our 16 week keto diet program
Sign up for our 16 week keto diet programSign up for our 16 week keto diet program
Sign up for our 16 week keto diet program
 
Discover here why keto is the best diet for your body
Discover here why keto is  the best diet for your bodyDiscover here why keto is  the best diet for your body
Discover here why keto is the best diet for your body
 
Reboot your metabolism with 60-day keto challenge
Reboot your metabolism with 60-day keto challengeReboot your metabolism with 60-day keto challenge
Reboot your metabolism with 60-day keto challenge
 
Lose weight and get healthier by starting a ketogenic diet
Lose weight and get healthier by starting a ketogenic dietLose weight and get healthier by starting a ketogenic diet
Lose weight and get healthier by starting a ketogenic diet
 
Start your weight loss journey today
Start your weight loss journey todayStart your weight loss journey today
Start your weight loss journey today
 
Lose weight on keto with less than 400 calories a day
Lose weight on keto with less than 400 calories a dayLose weight on keto with less than 400 calories a day
Lose weight on keto with less than 400 calories a day
 
Sign up for our free 30-Days Keto Challenge
Sign up for our free 30-Days Keto ChallengeSign up for our free 30-Days Keto Challenge
Sign up for our free 30-Days Keto Challenge
 

Dernier

Gurgaon iffco chowk 🔝 Call Girls Service 🔝 ( 8264348440 ) unlimited hard sex ...
Gurgaon iffco chowk 🔝 Call Girls Service 🔝 ( 8264348440 ) unlimited hard sex ...Gurgaon iffco chowk 🔝 Call Girls Service 🔝 ( 8264348440 ) unlimited hard sex ...
Gurgaon iffco chowk 🔝 Call Girls Service 🔝 ( 8264348440 ) unlimited hard sex ...callgirlsinsaket2024
 
Russian Call Girls Hyderabad Saloni 9907093804 Independent Escort Service Hyd...
Russian Call Girls Hyderabad Saloni 9907093804 Independent Escort Service Hyd...Russian Call Girls Hyderabad Saloni 9907093804 Independent Escort Service Hyd...
Russian Call Girls Hyderabad Saloni 9907093804 Independent Escort Service Hyd...delhimodelshub1
 
Disaster Management Cycle (DMC)| Ms. Pooja Sharma , Department of Hospital A...
Disaster Management Cycle (DMC)| Ms. Pooja Sharma , Department of  Hospital A...Disaster Management Cycle (DMC)| Ms. Pooja Sharma , Department of  Hospital A...
Disaster Management Cycle (DMC)| Ms. Pooja Sharma , Department of Hospital A...Era University , Lucknow
 
MVP Health Care City of Schenectady Presentation
MVP Health Care City of Schenectady PresentationMVP Health Care City of Schenectady Presentation
MVP Health Care City of Schenectady PresentationMVP Health Care
 
Low Rate Call Girls In Bommanahalli Just Call 7001305949
Low Rate Call Girls In Bommanahalli Just Call 7001305949Low Rate Call Girls In Bommanahalli Just Call 7001305949
Low Rate Call Girls In Bommanahalli Just Call 7001305949ps5894268
 
Pregnancy and Breastfeeding Dental Considerations.pptx
Pregnancy and Breastfeeding Dental Considerations.pptxPregnancy and Breastfeeding Dental Considerations.pptx
Pregnancy and Breastfeeding Dental Considerations.pptxcrosalofton
 
Call Girls in Adil Nagar 7001305949 Free Delivery at Your Door Model
Call Girls in Adil Nagar 7001305949 Free Delivery at Your Door ModelCall Girls in Adil Nagar 7001305949 Free Delivery at Your Door Model
Call Girls in Adil Nagar 7001305949 Free Delivery at Your Door ModelCall Girls Lucknow
 
Hi,Fi Call Girl In Marathahalli - 7001305949 with real photos and phone numbers
Hi,Fi Call Girl In Marathahalli - 7001305949 with real photos and phone numbersHi,Fi Call Girl In Marathahalli - 7001305949 with real photos and phone numbers
Hi,Fi Call Girl In Marathahalli - 7001305949 with real photos and phone numbersnarwatsonia7
 
Russian Call Girls Ajmeri Gate | 9711199171 | High Profile -New Model -Availa...
Russian Call Girls Ajmeri Gate | 9711199171 | High Profile -New Model -Availa...Russian Call Girls Ajmeri Gate | 9711199171 | High Profile -New Model -Availa...
Russian Call Girls Ajmeri Gate | 9711199171 | High Profile -New Model -Availa...sandeepkumar69420
 
2025 Inpatient Prospective Payment System (IPPS) Proposed Rule
2025 Inpatient Prospective Payment System (IPPS) Proposed Rule2025 Inpatient Prospective Payment System (IPPS) Proposed Rule
2025 Inpatient Prospective Payment System (IPPS) Proposed RuleShelby Lewis
 
2024 HCAT Healthcare Technology Insights
2024 HCAT Healthcare Technology Insights2024 HCAT Healthcare Technology Insights
2024 HCAT Healthcare Technology InsightsHealth Catalyst
 
Russian Call Girls Delhi Cantt | 9711199171 | High Profile -New Model -Availa...
Russian Call Girls Delhi Cantt | 9711199171 | High Profile -New Model -Availa...Russian Call Girls Delhi Cantt | 9711199171 | High Profile -New Model -Availa...
Russian Call Girls Delhi Cantt | 9711199171 | High Profile -New Model -Availa...satishsharma69855
 
Call Girls Secunderabad 7001305949 all area service COD available Any Time
Call Girls Secunderabad 7001305949 all area service COD available Any TimeCall Girls Secunderabad 7001305949 all area service COD available Any Time
Call Girls Secunderabad 7001305949 all area service COD available Any Timedelhimodelshub1
 
Russian Call Girl Chandapura Dommasandra Road - 7001305949 Escorts Service 50...
Russian Call Girl Chandapura Dommasandra Road - 7001305949 Escorts Service 50...Russian Call Girl Chandapura Dommasandra Road - 7001305949 Escorts Service 50...
Russian Call Girl Chandapura Dommasandra Road - 7001305949 Escorts Service 50...narwatsonia7
 
Globalny raport: „Prawdziwe piękno 2024" od Dove
Globalny raport: „Prawdziwe piękno 2024" od DoveGlobalny raport: „Prawdziwe piękno 2024" od Dove
Globalny raport: „Prawdziwe piękno 2024" od Doveagatadrynko
 
Call Girls South Delhi 9999965857 Cheap and Best with original Photos
Call Girls South Delhi 9999965857 Cheap and Best with original PhotosCall Girls South Delhi 9999965857 Cheap and Best with original Photos
Call Girls South Delhi 9999965857 Cheap and Best with original Photosparshadkalavatidevi7
 
College Call Girls Hyderabad Sakshi 9907093804 Independent Escort Service Hyd...
College Call Girls Hyderabad Sakshi 9907093804 Independent Escort Service Hyd...College Call Girls Hyderabad Sakshi 9907093804 Independent Escort Service Hyd...
College Call Girls Hyderabad Sakshi 9907093804 Independent Escort Service Hyd...delhimodelshub1
 
Hi,Fi Call Girl In Whitefield - [ Cash on Delivery ] Contact 7001305949 Escor...
Hi,Fi Call Girl In Whitefield - [ Cash on Delivery ] Contact 7001305949 Escor...Hi,Fi Call Girl In Whitefield - [ Cash on Delivery ] Contact 7001305949 Escor...
Hi,Fi Call Girl In Whitefield - [ Cash on Delivery ] Contact 7001305949 Escor...narwatsonia7
 
Call Girls Nandini Layout - 7001305949 Escorts Service with Real Photos and M...
Call Girls Nandini Layout - 7001305949 Escorts Service with Real Photos and M...Call Girls Nandini Layout - 7001305949 Escorts Service with Real Photos and M...
Call Girls Nandini Layout - 7001305949 Escorts Service with Real Photos and M...narwatsonia7
 
FAMILY in sociology for physiotherapists.pptx
FAMILY in sociology for physiotherapists.pptxFAMILY in sociology for physiotherapists.pptx
FAMILY in sociology for physiotherapists.pptxMumux Mirani
 

Dernier (20)

Gurgaon iffco chowk 🔝 Call Girls Service 🔝 ( 8264348440 ) unlimited hard sex ...
Gurgaon iffco chowk 🔝 Call Girls Service 🔝 ( 8264348440 ) unlimited hard sex ...Gurgaon iffco chowk 🔝 Call Girls Service 🔝 ( 8264348440 ) unlimited hard sex ...
Gurgaon iffco chowk 🔝 Call Girls Service 🔝 ( 8264348440 ) unlimited hard sex ...
 
Russian Call Girls Hyderabad Saloni 9907093804 Independent Escort Service Hyd...
Russian Call Girls Hyderabad Saloni 9907093804 Independent Escort Service Hyd...Russian Call Girls Hyderabad Saloni 9907093804 Independent Escort Service Hyd...
Russian Call Girls Hyderabad Saloni 9907093804 Independent Escort Service Hyd...
 
Disaster Management Cycle (DMC)| Ms. Pooja Sharma , Department of Hospital A...
Disaster Management Cycle (DMC)| Ms. Pooja Sharma , Department of  Hospital A...Disaster Management Cycle (DMC)| Ms. Pooja Sharma , Department of  Hospital A...
Disaster Management Cycle (DMC)| Ms. Pooja Sharma , Department of Hospital A...
 
MVP Health Care City of Schenectady Presentation
MVP Health Care City of Schenectady PresentationMVP Health Care City of Schenectady Presentation
MVP Health Care City of Schenectady Presentation
 
Low Rate Call Girls In Bommanahalli Just Call 7001305949
Low Rate Call Girls In Bommanahalli Just Call 7001305949Low Rate Call Girls In Bommanahalli Just Call 7001305949
Low Rate Call Girls In Bommanahalli Just Call 7001305949
 
Pregnancy and Breastfeeding Dental Considerations.pptx
Pregnancy and Breastfeeding Dental Considerations.pptxPregnancy and Breastfeeding Dental Considerations.pptx
Pregnancy and Breastfeeding Dental Considerations.pptx
 
Call Girls in Adil Nagar 7001305949 Free Delivery at Your Door Model
Call Girls in Adil Nagar 7001305949 Free Delivery at Your Door ModelCall Girls in Adil Nagar 7001305949 Free Delivery at Your Door Model
Call Girls in Adil Nagar 7001305949 Free Delivery at Your Door Model
 
Hi,Fi Call Girl In Marathahalli - 7001305949 with real photos and phone numbers
Hi,Fi Call Girl In Marathahalli - 7001305949 with real photos and phone numbersHi,Fi Call Girl In Marathahalli - 7001305949 with real photos and phone numbers
Hi,Fi Call Girl In Marathahalli - 7001305949 with real photos and phone numbers
 
Russian Call Girls Ajmeri Gate | 9711199171 | High Profile -New Model -Availa...
Russian Call Girls Ajmeri Gate | 9711199171 | High Profile -New Model -Availa...Russian Call Girls Ajmeri Gate | 9711199171 | High Profile -New Model -Availa...
Russian Call Girls Ajmeri Gate | 9711199171 | High Profile -New Model -Availa...
 
2025 Inpatient Prospective Payment System (IPPS) Proposed Rule
2025 Inpatient Prospective Payment System (IPPS) Proposed Rule2025 Inpatient Prospective Payment System (IPPS) Proposed Rule
2025 Inpatient Prospective Payment System (IPPS) Proposed Rule
 
2024 HCAT Healthcare Technology Insights
2024 HCAT Healthcare Technology Insights2024 HCAT Healthcare Technology Insights
2024 HCAT Healthcare Technology Insights
 
Russian Call Girls Delhi Cantt | 9711199171 | High Profile -New Model -Availa...
Russian Call Girls Delhi Cantt | 9711199171 | High Profile -New Model -Availa...Russian Call Girls Delhi Cantt | 9711199171 | High Profile -New Model -Availa...
Russian Call Girls Delhi Cantt | 9711199171 | High Profile -New Model -Availa...
 
Call Girls Secunderabad 7001305949 all area service COD available Any Time
Call Girls Secunderabad 7001305949 all area service COD available Any TimeCall Girls Secunderabad 7001305949 all area service COD available Any Time
Call Girls Secunderabad 7001305949 all area service COD available Any Time
 
Russian Call Girl Chandapura Dommasandra Road - 7001305949 Escorts Service 50...
Russian Call Girl Chandapura Dommasandra Road - 7001305949 Escorts Service 50...Russian Call Girl Chandapura Dommasandra Road - 7001305949 Escorts Service 50...
Russian Call Girl Chandapura Dommasandra Road - 7001305949 Escorts Service 50...
 
Globalny raport: „Prawdziwe piękno 2024" od Dove
Globalny raport: „Prawdziwe piękno 2024" od DoveGlobalny raport: „Prawdziwe piękno 2024" od Dove
Globalny raport: „Prawdziwe piękno 2024" od Dove
 
Call Girls South Delhi 9999965857 Cheap and Best with original Photos
Call Girls South Delhi 9999965857 Cheap and Best with original PhotosCall Girls South Delhi 9999965857 Cheap and Best with original Photos
Call Girls South Delhi 9999965857 Cheap and Best with original Photos
 
College Call Girls Hyderabad Sakshi 9907093804 Independent Escort Service Hyd...
College Call Girls Hyderabad Sakshi 9907093804 Independent Escort Service Hyd...College Call Girls Hyderabad Sakshi 9907093804 Independent Escort Service Hyd...
College Call Girls Hyderabad Sakshi 9907093804 Independent Escort Service Hyd...
 
Hi,Fi Call Girl In Whitefield - [ Cash on Delivery ] Contact 7001305949 Escor...
Hi,Fi Call Girl In Whitefield - [ Cash on Delivery ] Contact 7001305949 Escor...Hi,Fi Call Girl In Whitefield - [ Cash on Delivery ] Contact 7001305949 Escor...
Hi,Fi Call Girl In Whitefield - [ Cash on Delivery ] Contact 7001305949 Escor...
 
Call Girls Nandini Layout - 7001305949 Escorts Service with Real Photos and M...
Call Girls Nandini Layout - 7001305949 Escorts Service with Real Photos and M...Call Girls Nandini Layout - 7001305949 Escorts Service with Real Photos and M...
Call Girls Nandini Layout - 7001305949 Escorts Service with Real Photos and M...
 
FAMILY in sociology for physiotherapists.pptx
FAMILY in sociology for physiotherapists.pptxFAMILY in sociology for physiotherapists.pptx
FAMILY in sociology for physiotherapists.pptx
 

Learn how to eat healthy with the ketogenic diet

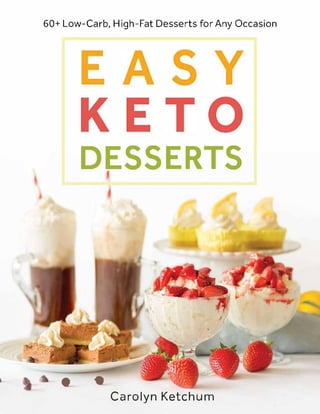
  • 1. 60+ Low-Carb, Hrigh-Fat Desserts for Any Occasion DESSERTS • • Carolyn Ketchum
  • 2.
  • 3. First Published in 2018 by Victory Belt Publishing Inc. Copyright © 2018 by Carolyn Ketchum All rights reserved No part of this publication may be reproduced or distributed in any form or by any means, electronic or mechanical, or stored in a database or retrieval system, without prior written permission from the publisher. ISBN-13: 978-1-628602-92-0 The author is not a licensed practitioner, physician, or medical professional and offers no medical diagnoses, treatments, suggestions, or counseling. The information presented herein has not been evaluated by the U.S. Food and Drug Administration, and it is not intended to diagnose, treat, cure, or prevent any disease. Full medical clearance from a licensed physician should be obtained before beginning or modifying any diet, exercise, or lifestyle program, and physicians should be informed of all nutritional changes. The author/owner claims no responsibility to any person or entity for any liability, loss, or damage caused or alleged to be caused directly or indirectly as a result of the use, application, or interpretation of the information presented herein. Front Cover Photography by Hayley Mason and Bill Staley Cover Design by Justin-Aaron Velasco Interior Design by Yordan Terziev and Boryana Yordanova Printed in Canada TC 0118 Learn how to eat healthy with the ketogenic diet
  • 4. CONTENTS Preface: How Sweet It Is Introduction: My Diet and Dessert Philosophy Keto Dessert Essentials Ingredients and Tools Dessert Pro Checklist Time-Saving Tips Mix-and-Match Desserts How to Use the Recipes RECIPES CHAPTER 1: Candy and Confections Peppermint Patties Chocolate-Covered Cheesecake Bites Maple Walnut Fudge Cups Toffee Almond Bark Macadamia Coconut Truffles Peanut Butter and Jam Cups Watermelon Lime Gummies CHAPTER 2: Cookies Slice-and-Bake Vanilla Wafers Amaretti Peanut Butter Cookies for Two Cream Cheese Cookies Chewy Double Chocolate Cookies No-Bake Peanut Butter Caramel Cookies Chocolate Hazelnut Thumbprints Deep-Dish Chocolate Chip Cookies
  • 5. CHAPTER 3: Bars No-Bake Chocolate “Oatmeal” Bars Sugar Cookie Bars Dairy-Free Peanut Butter Bars No-Bake Blueberry Cheesecake Bars One-Bowl Brownies Dairy-Free Coconut Bars No-Bake French Silk Pie Bars CHAPTER 4: Cakes Mini No-Bake Lemon Cheesecakes Tiramisu Sheet Cake Slow Cooker Chocolate Cake Funfetti Mug Cakes Dutch Butter Cake Orange Cardamom Bundt Cake Pumpkin Spice Mug Cakes CHAPTER 5: Pies and Tarts Mocha Cream Pie Coconut Custard Pie Lemon Curd Tartlets Dairy-Free Fruit Tarts Chocolate Hazelnut Brownie Pie Strawberry Rhubarb Crisp for Two CHAPTER 6: Frozen Desserts Vanilla Bean Semifreddo Salted Caramel Affogato Ridiculously Easy Root Beer Floats Chocolate Fat Bomb Ice Cream Frozen Key Lime Mini Pies Strawberry Cheesecake Pops Coconut Milk Fudge Pops CHAPTER 7: Custard, Mousse, and Other Delicious Desserts Butterscotch Pudding Dairy-Free Peanut Butter Mousse
  • 6. Mascarpone Mousse with Roasted Strawberries Chocolate Hazelnut Mousse Lemon Curd Mousse Raspberry Fool Cannoli Dessert Dip Slow Cooker Coffee Coconut Custard Coconut Lime Panna Cotta Chocolate Cobbler CHAPTER 8: Extras Easy Shortbread Crust Easy Chocolate Pie Crust Whipped Cream Coconut Whipped Cream Chocolate Buttercream Frosting Homemade Chocolate Hazelnut Spread Caramel Sauce Chocolate Peanut Butter Sauce for Two Coconut Sprinkles Chocolate Dessert Cups APPENDIX: How to Rescue Almost Anything Indexes Acknowledgments About the Author
  • 7.
  • 8. PREFACE: HOW SWEET IT IS I just spent the past three months of my life writing a dessert cookbook. You know what that means? That means I ate a lot of desserts. And if this were any regular old dessert cookbook, it would probably also mean that I gained at least a few pounds. But I didn’t. Not even an ounce. And that, my friend, is the magic of Easy Keto Desserts. Admittedly, I didn’t eat all of these desserts on my own. I shared with my family, and I gave much of it away to my friends and neighbors. I was a really popular gal for a while there, leaving cakes and cookies and tarts on doorsteps all over the neighborhood. But still, as a good recipe creator, I tasted and tested, and I tasted and tested again. There was no shortage of sweet keto treats passing these lips over the past few months. And I wouldn’t have it any other way. Chances are good, however, that you don’t cook and bake for a living like I do. You don’t have time to taste and test, and taste and test again. When you want something sweet, you want it yesterday. You have no need of complicated cakes and multistep desserts that require any number of obscure and hard-to-find ingredients. You prefer simple and straightforward, but you still want something that will wow your carb-loving friends. You want easy, but you don’t want it to taste like it. That’s where Easy Keto Desserts comes in. With this cookbook, I have taken all the guesswork out of making fabulous ketogenic desserts. This is my passion, people! I sincerely love nothing more than sharing delectable low- carb, high-fat dessert recipes and making the keto lifestyle that much more enjoyable—and that much more accessible, too. Because when we know we can have a wee indulgence at the end of the day, one that doesn’t wreak Learn how to eat healthy with the ketogenic diet
  • 9. havoc on our hard work and progress, keto suddenly doesn’t seem so hard after all. It’s long been my mission to prove to the world that the ketogenic diet need not be boring or restrictive. I am not really the sort of person to toot my own horn—oh, who am I kidding? Toot toot!—but I flatter myself that I have exceeded this goal. With Easy Keto Desserts, the evidence is in and the jury has reached a verdict. Keto is easy, delicious, and anything but boring. Grab a fork, my friend, and dig in. Because you can have your keto cake and eat it, too. Just as long as you save me a bite.
  • 10.
  • 11. INTRODUCTION: MY DIET AND DESSERT PHILOSOPHY I have a sweet tooth, and I am not afraid to use it. I firmly believe that being able to have a healthy dessert is part of what helps me stay the course on my ketogenic diet. And since my dessert recipes are among the most popular recipes on my website, All Day I Dream About Food, I know that many of you feel the same way. It’s been said many times that the keto diet is not about deprivation; you shouldn’t always be hungry, and you shouldn’t feel like you are consigned to eating bacon and eggs day in and day out. There could be worse fates, of course, but that kind of restriction gets tiresome pretty quickly. Many people find themselves struggling to stick with keto after a few months because they aren’t quite sure how to make it interesting. The ability to indulge a little here and there can make this way of eating a lot more fun and a lot more livable. For many of us, that can be the difference between using keto as a temporary quick fix or sticking with it as a long-term healthy lifestyle. Some people choose to avoid sweets altogether, and that is their prerogative. We all find our own way here, and we have to choose our own paths. There is an overwhelming amount of advice out there, and it can be hard to make sense of it all. But the reality is that there is no single “right way” to do a ketogenic diet. No one can tell you exactly how to make it work for you. If being abstemious and giving up sweets entirely is your approach, I am all for it. But if you purchased this book, then chances are you want a little dessert, at least once in a while. Welcome to the club. A ketogenic diet is a wonderful tool for conquering cravings and breaking old and ingrained habits. But that doesn’t have to mean taking all the enjoyment out of eating. No matter which diet you’re on, food should be fun, and eating should be pleasurable. Food is such a defining aspect of our Learn how to eat healthy with the ketogenic diet
  • 12. society. It’s more than just sustenance: it’s family, it’s community, and it’s celebration. And what is more celebratory than enjoying a luscious dessert that doesn’t derail your healthy efforts? But let’s not go overboard. You may not like to hear it, but portion control is important, even when it comes to keto desserts. People are sometimes surprised to hear me, the Keto Baking Queen, advocate for moderation. But just think about it: while a single keto brownie might fit in perfectly with your macros, the whole pan of brownies will not. It’s just simple math. And if you eat keto sweets for breakfast, lunch, and dinner, you are doing so to the exclusion of other healthy nutrients. My personal approach is to keep dessert as dessert. That means eating a reasonable portion after dinner. Although I do eat some dessert almost every day, there are times when I’ve filled myself up so much on steak and broccoli that I can’t manage more than a few bites of dessert—just enough to make that sweet tooth sing!
  • 13. If you find that you struggle with portion control, I recommend a few approaches. First, consider my small-batch recipes that make only two to four servings, so portion control is built right in. If you do choose to make a bigger recipe, rely on your freezer as a way to portion out the leftovers. And make a large dessert only when you have the opportunity to share it and give much of it away. Friends, neighbors, and coworkers are often appreciative of your efforts, and hey, maybe this will help them discover the keto diet, too! It’s a sugar-filled world out there, and temptation is all around us. I say why not fight fire with fire? It’s a Piece of Cake! (Or as Easy as Pie) The wonderful part about desserts is that they have universal appeal, irrespective of how much time and effort they take to make. In fact, some of the simplest desserts are the ones that look the most appetizing. Fancy cakes that look like castles or cookies that resemble snow globes are certainly beautiful to behold, but I find that I don’t much care to eat them. In my experience, they never taste quite as good as they look, and I am inevitably disappointed. The reality is that you don’t need to be a pastry chef to make beautiful desserts. Creating sweet treats should be fun, not stressful, and I want you to be able to enjoy the process as much as the end results. The recipes in this book use simple techniques that any home baker can easily master. There’s nothing intimidating here, nothing overly complicated—just easy, creative, and mouthwatering recipes. When dessert is stress-free, it’s that much tastier. Keep in mind that simple is not necessarily synonymous with fast. Nor is the lack of baking or a short ingredient list a good indicator of how easy or quick a recipe is. Sometimes no-bake recipes can take hours to set properly, whereas some baked goods can be consumed shortly after being removed from the oven. You will find recipes of every sort in Easy Keto Desserts. Some of these desserts are baked, while others require no baking. You may Learn how to eat healthy with the ketogenic diet
  • 14. have to leave some alone for a while, while others you can dig into right away. But all of them are simply delicious. That’s the way the keto cookie crumbles.
  • 15.
  • 16. KETO DESSERT ESSENTIALS The recipes in this book are easy. Period. But in the keto dessert world, recipes frequently call for alternative ingredients that behave very differently from the conventional ingredients you may be familiar with. This is particularly true of flour and sugar substitutes. If you attempt to treat them like wheat flour and sugar, they will defy you out of sheer spite. So it behooves me to take a moment to go over some key points about how best to use these ingredients. Weigh Your Flours and Nut Meals Wouldn’t it be nice if everyone all over the world measured every ingredient the same way? That doesn’t look like it’s going to happen any time soon. I am very accustomed to using U.S. volume measurements, like cups and tablespoons, but I fully recognize that they are not always the most accurate. For most ingredients, volume measurements are fine, but keto flours and meals, particularly almond flour and coconut flour, vary quite a bit from brand to brand. Weighing these ingredients can be more accurate and produce better results. For example, I weighed my Bob’s Red Mill almond flour by the cup numerous times and found that it can vary between 97 and 105 grams. I split the difference and used 100 grams; it is the most useful weight since it can easily be divided into half cups and quarter cups. Bob’s Red Mill coconut flour typically came out to 110 grams per cup. When you see gram weights included for these key ingredients, I do recommend that you get out your kitchen scale and weigh them. If you do Learn how to eat healthy with the ketogenic diet
  • 17. not own a scale, the next-best option is to use the brands of flours and meals that I use (Bob’s Red Mill), and to measure them using the scoop-and-level method. I always use that method when measuring by cups and tablespoons, and you should, too. FINE-TUNE WHEN NEEDED Even when you take care to measure as accurately as possible, the variances between brands can throw a recipe off somewhat. Some brands of flour, for example, are more finely ground or more absorbent than others. Be ready to adjust slightly if you need to. Look for cues in the recipe as to what your dough or batter should look like. Should it be scoopable or pourable? Should you be able to roll it into balls easily? Does the recipe state that it should look like “coarse crumbs” or “fine crumbs”? All of these are helpful clues in knowing when to make an adjustment and add a little more flour or a little more liquid or oil. Always add the additional flour or liquid by the tablespoon, stirring after each addition to see what the batter or dough does before you add more.
  • 18. Coconut flour is extremely absorbent, so a tablespoon can thicken a batter significantly. For small-batch recipes, sometimes even a teaspoon is enough to get the consistency you are looking for. Familiarize Yourself with Keto Sweeteners Obviously, we can’t have a discussion about keto desserts without discussing low-carb sugar substitutes. And with the dizzying array of alternative sweeteners on the market today, this can be a confusing discussion at times. You may be hoping that I will tell you which sweetener is the absolute, Learnhowtoeathealthywiththeketogenicdiet
  • 19. hands-down best one on the planet, but I can’t do that. Too much of it comes down to personal preference. What I can do, however, is give you a little insight into which sweeteners behave the most like sugar in keto sweets and baked goods. Because while there are plenty of great sweetener choices out there, they don’t all work the same way. It all comes down to bulk. BULK VERSUS NON-BULK SWEETENERS When I say “bulk sweetener,” I am not referring to buying large quantities of sweetener from a bin at your local health food store. In this case, the term bulk refers to whether the sweetener itself has weight and volume. A bulk sweetener will add to the volume, or “bulk,” of a recipe and thus will affect its consistency, which may be critical to its success. Some sweeteners, like stevia and monk fruit extract, simply sweeten things. A mere ½ teaspoon of either one can sweeten an entire cake that serves twelve people. Obviously, though, concentrated sweeteners such as these will add nothing in terms of volume and won’t do anything for the texture or consistency of your dessert. Sweeteners like erythritol and xylitol have significant bulk, as well as a crystalline structure similar to sugar. They measure more like sugar, they add volume and affect consistency, and hence they behave more like sugar. They can make the difference between a cake that deflates after baking and one that stays risen, or a pudding that sets and one that remains a puddle of goo. That all sounds simple enough, right? Right, but then there’s the fact that erythritol by itself is only about 70 percent as sweet as sugar, so you need to add more of it to make up the difference in sweetness, which could also affect the consistency of a recipe. Xylitol is about as sweet as sugar, but it comes with its own issues; it tends to raise blood sugar a little more than erythritol and can cause serious gastric upset when consumed in large quantities. It’s also highly toxic to dogs even in minute amounts. I no longer use xylitol in my recipes.
  • 20. Adding even more to the confusion are all the different sweetener blends on the market these days. These usually combine two or more alternative sweeteners, and more of them seem to crop up on a daily basis. Some of them are as sweet as sugar, some are more concentrated, and all of them are aiming to get their share of your pocketbook. Which is why so much of it comes down to personal preference. Have I confused you yet? Don’t worry, I promise it’s not as bad as it sounds. My preference is Swerve, an erythritol blend that also includes oligosaccharides—a sweet-tasting fiber similar to inulin—to make it measure exactly like sugar. I created and tested all of the recipes in this book using Swerve, and I highly recommend it as one of the best sugar replacements out there. If you choose to substitute another sweetener, I cannot always guarantee the results. That said, xylitol and other erythritol blends that measure like sugar can often be substituted without a loss of taste or texture. And some recipes don’t rely on bulk at all for consistency; for those recipes you can use any sweetener your heart desires. If you do choose to use a non-bulk sweetener, like stevia, monk fruit, or even sucralose, you will need to do a little conversion to attain the correct sweetness. Most brands clearly state how sweet their product is relative to sugar and how to adjust recipes accordingly. For example, Lakanto monkfruit extract has a little conversion chart right on the package, and the SweetLeaf stevia website features a nice conversion calculator for all of its products. The long and short of it is that sometimes you can make substitutions and sometimes you can’t. Wherever possible, I have noted those recipes in which substitutions can be made, and the best sweetener choices. You will find this information in a feature called “Sweetener Options.” Learn how to eat healthy with the ketogenic diet
  • 21.
  • 22.
  • 23. INGREDIENTS AND TOOLS In keeping with the easy theme, the majority of the recipes in this book use fairly standard keto ingredients, as well as everyday cookware and bakeware, most of which can be purchased at regular stores. With the explosive growth of special diets like gluten-free, Paleo, and low-carb, items like almond flour, coconut oil, and alternative sweeteners are no longer just the purview of health food and natural foods stores—which is great news for keto dessert lovers. Keto Dessert Staples These are the items I have in my pantry and fridge at all times so I can make dessert whenever the mood strikes. Learn how to eat healthy with the ketogenic diet
  • 24.
  • 25.
  • 26. Dairy-Free Substitutions If you’re dairy-free, or even if you’re not, stock up on these great dairy replacements. I always keep avocado oil and coconut oil around, as well as canned coconut milk. And Kite Hill is by far the best brand of dairy-free cream cheese I’ve found, with the best flavor and consistency and exactly the same carb count as regular cream cheese. Learn how to eat healthy with the ketogenic diet
  • 27. Specialty Ingredients While I try very hard to stick with basic and easily sourced ingredients, I also want to give you the best possible keto dessert experience, and that
  • 28. means sometimes using specialty items that are harder to find and may need to be purchased online. But given the increasing popularity of keto diets, I suspect it won’t be long before many of these items appear in stores across the country. Sugar-free chocolate bars and chocolate chips—When I first started creating low-carb recipes, there really was no good sugar-free chocolate on the market. There were Hershey’s sugar-free chocolate chips, but they were (and still are) sweetened with maltitol, which spikes blood sugar as much as real sugar. But now there are several great brands, like Lily’s, ChocoPerfection, Coco Polo, and Lakanto, among others. Lily’s is my go-to for baking, especially since no other brand makes chocolate chips. I am starting to see Lily’s and Coco Polo chocolate in many regular grocery chains, and stores like Whole Foods sell the chips and the dark chocolate baking bars. But I also like to wait for an online sale and stock up. Learn how to eat healthy with the ketogenic diet
  • 29. Grass-fed gelatin and collagen powder—These items are really useful for many keto desserts, giving them a better consistency and helping them hold together. You can also use standard gelatin, such as Knox, but you will need less of it, and you will need to make sure it “blooms” first, which takes an extra step. Hazelnut meal—This is really just ground hazelnuts, but it’s difficult to grind them finely enough at home. It makes for tasty cookies and brownies. Bob’s Red Mill hazelnut meal can be found in the gluten-free aisle of some stores. Peanut flour—In this case, it’s not just ground peanuts. The best peanut flour has been partially defatted, which gives it a fine and powdery texture and makes it very absorbent. I like Anthony’s brand, which I buy online, but many grocery stores carry “powdered peanut butter,” like the PB2 brand, which you can use as well. Protein powder—Gluten is a protein, and in its absence, another dry powdery protein can help keto baked goods rise and hold together. Protein powder is not used in many recipes in this book, but it is useful, and a little goes a long way. You can use whey protein, egg white protein, or any number of vegan protein powders. Get an unflavored variety if you can.
  • 30. Vanilla-flavored protein powder will work, too, if you leave out any vanilla extract in the recipe. Cacao butter (aka cocoa butter)—I am surprised that stores are not yet carrying cacao butter, as it’s an incredibly useful, delicious, and healthy ingredient. In the recipes in this book, I mostly use it to thin out the chocolate coating for keto candies and bars. But it’s great in other desserts, too; it lends a white chocolate flavor and is completely solid at room temperature. Coconut butter (aka coconut manna)—Coconut butter is made from ground coconut meat and is solid at room temperature. It gives dairy-free keto Learn how to eat healthy with the ketogenic diet
  • 31. candies and fudge a great consistency. You can find it in some high-end grocery stores, like Whole Foods, as well as online. Yacón syrup—Yacón is a sweet-tasting syrup derived from the yacón plant grown in South America. It is said to have a low glycemic index (GI) and a minimal effect on blood sugar levels. I don’t trust the glycemic index very much because they used to say the same thing about agave, and agave spiked my blood sugar tremendously. To play it safe, I use very small amounts of yacón syrup (no more than 2 teaspoons) to give certain recipes a brown sugar or caramel flavor or appearance. You could also use blackstrap molasses in these recipes, or you can skip it altogether. Extracts and flavorings—These little bottles of fun can really transform your dessert creations. Many basic flavors, such as peppermint, almond, and lemon, can be found in the baking aisle of your local grocery store, but others are more easily found online. They aren’t expensive, and a small 2- ounce bottle can go a long way. I always have a wide array of natural flavorings in my pantry, everything from cherry to anise and even pineapple (although I haven’t used it yet and forgot what I bought it for, but it will make its way into something soon enough). For the recipes in this book, consider getting almond, caramel, coconut, hazelnut, lemon, maple, orange, and peppermint. Natural food coloring—You absolutely do not need this, but it’s kind of fun. You can certainly go au naturel with your frostings and fillings, but if you want to amp up the color a bit, there are a few vegetable-based food dyes on the market. I like India Tree and Food Colors From Nature by ColorKitchen. Be forewarned: The yellow powder from ColorKitchen is incredibly vibrant. Don’t even think about using the whole envelope! Xanthan gum—This is useful stuff for thickening puddings and fillings. A very little goes a long way; a bag of it lasts me more than two years. I store it in a jar in my freezer. You can find it in the gluten-free aisle of many grocery stores.
  • 32. Essential Equipment Baking sheets—Versatile, multi-purpose, and good for everything from cookies to sheet cakes. Be sure to use rimmed baking sheets for cakes and for anything that might easily slide off the pan. Square baking pans—For bars, brownies, and cakes. I use a 9-inch square pan, but an 8-inch will do as well. Just remember that your baked goods may take a little longer to cook in the smaller pan since they will be deeper. Look for a pan with sides at least 2 inches deep, and use light-colored pans for more even baking. Learn how to eat healthy with the ketogenic diet
  • 33. Cake pans—A round 8- or 9-inch pan for cakes, with sides at least 2 inches deep. Again, use light-colored pans for more even baking. Muffin pans—For candies and cupcakes. I use both standard-size 12-well pans and mini-size 24-well pans. Glass or ceramic pie pan—A 9-inch pan for pies and tarts. Ramekins—4- and 8-ounce ceramic ramekins for individual cakes, custards, and even cookies!
  • 34. Parchment paper—A low-carb baker’s best friend. Food processor or blender—A good food processor or blender can cut down prep time significantly. Electric mixer—A smaller handheld mixer is fine. Mixing bowls—It’s good to have a few bowls that are heatproof and microwave-safe for melting chocolate. Measuring cups and spoons—Accurate measurements are the key to dessert success. Learn how to eat healthy with the ketogenic diet
  • 35. Whisks, rubber spatulas, and wooden spoons—Mixing and stirring are kind of important here!
  • 36. Special Equipment In the spirit of keeping things easy, I tried to steer clear of calling for too much specialty equipment. But if you’re looking to up your keto dessert game, here are some gadgets and toys that you might want to invest in. Kitchen scale—I’ve provided the measurements of most ingredients in volume (cups and tablespoons), but for flours and meals, I’ve also provided the approximate weight in grams. Variations between brands of these ingredients can sometimes affect the outcome of your baked goods, and an accurate kitchen scale helps you be more precise. Silicone baking mats—When you bake as many cookies as I do, you go through a lot of parchment paper. Reusable silicone mats not only keep your cookies from sticking, but protect the bottoms from burning as well. Learn how to eat healthy with the ketogenic diet
  • 37. Ice cream maker—You definitely don’t need an ice cream maker, and this book contains only one recipe that uses it. But making your own low-carb ice cream is fun, and in the end, that machine will pay for itself! Slow cooker (6 quarts)—Many people don’t realize that you can make many wonderful desserts in a slow cooker. One of my all-time favorite keto chocolate cakes is a slow cooker cake. It’s insanely moist and delicious. Decorative cake and tart pans—Don’t feel you need to limit yourself to square and round cake pans. Although those shapes are the most useful, more decorative options like Bundt pans and fluted tart pans can give your desserts an easy elegance. I love the little 4-inch tart pans for smaller tarts.
  • 38. Silicone molds—Fun shapes for gummies, fat bombs, and other candies! Silicone liners for both standard- and mini-size muffin pans are also very useful and save on parchment paper. Ice pop molds—I really want to put these in the “must-have” category because they aren’t expensive and they make great keto treats. For the recipes in this book, you will need a set of six 3-ounce molds. Piping bags and decorating tips—I promise, we aren’t getting fancy with frosting. But I often use these bags and tips for adding little stars of whipped cream to cakes and pies or for piping mousse into dessert cups. A few disposable bags and some star-shaped tips are all you really need. Learn how to eat healthy with the ketogenic diet
  • 39. DESSERT PRO CHECKLIST Ready to get started? Here are a few things you can do to ensure the best results when you make any recipe. Read the full recipe first. It can be tempting to jump in and just start whipping up a delectable treat as you go. But reading the full recipe first will actually save you time and help you avoid costly mistakes. Be sure to make note of the prep time, cook time, and inactive time. You don’t want to get partway through a recipe you want to eat right away only to discover that it needs to chill for three hours. Also, be sure to factor in any recipe components, such as a crust or topping, that are listed separately as stand- alone recipes. This helps you plan more accurately for the full time it takes to make a recipe, as well as to get all of the necessary ingredients together. Let your ingredients soften or come to room temperature when specified. Although you can hurry these things along a little (see “Time-Saving Tips” on here), you really don’t want to skip this step. Properly softened and warmed ingredients make for smoother batters and creamier desserts.
  • 40. Preheat the oven when the instructions say to do so. Most of the time, this is done at the beginning of a recipe so that the oven is up to temperature when the batter or dough is ready to be baked. But some recipes require you to chill your dough first or to make some other part of the dessert ahead of time. Measure accurately. Use liquid measuring cups for liquids and dry measuring cups for dry ingredients. Don’t pack your dry ingredients unless a recipe specifically states that you should. Use a kitchen scale if you have one. Do everything you can to measure ingredients as accurately as possible. (See “Weigh Your Flours and Nut Meals” on here for a discussion of the importance of weighing these key ingredients.) Use fresh, high-quality ingredients. Fresh eggs will make your batters fluffier and your puddings tastier. Baking powder and baking soda can lose their leavening ability if they’ve been sitting around too long. And low- quality chocolate has a nasty habit of seizing more easily. Use the right-sized pan. Try to use the size of pan specified in the recipe. If you must, you can use a pan that is close in size, but know that your baking time will change and your results will be somewhat different. Is your pan smaller? Your baking time will be longer and your baked good will be deeper. Is your pan larger? Your baking time will be shorter and your baked good will be shallower. Watch your goodies carefully as they bake, and use visual and tactile cues to determine doneness. Grease … and grease again. If the instructions say to grease a pan, be sure to grease it well, getting into every crevice. For cakes, which can be the most prone to sticking, I usually grease the pan with solid butter, working it into every corner, and then I brush the pan with melted coconut oil. For a dairy-free alternative, you could use ghee or solid coconut oil and then Learn how to eat healthy with the ketogenic diet
  • 41. melted coconut oil. Or use parchment paper or silicone liners when possible. Keto baked goods can stick a little, so do what you can to minimize breakage and cracking. Bake in the middle of the oven. Unless otherwise specified in a recipe, the middle rack of the oven is the best place for baked goods. This allows heat to circulate evenly around the baked goods. If your oven has a hot spot toward the back, as mine does, consider turning the pan around halfway through baking. Don’t be a slave to the clock. Mixing times, baking times, and cooking times are meant to be guidelines, not hard-and-fast rules. Ovens and stovetops vary in temperature, pans vary in weight and color, and some mixers, food processors, and blenders are more powerful than others. Rely more on the visual and tactile cues given in the recipe to know when to move on to the next step.
  • 42.
  • 43. TIME-SAVING TIPS You really can’t rush most desserts. Even the easiest sweets require a bit of care and a little patience to come out really well. I am possibly the world’s most impatient person (ask my husband; he will agree with this wholeheartedly), but I’ve learned that a dessert that needs three hours to set really does need three hours to set. Too often, I’ve cut into something early only to have the filling ooze out all over my countertop —not the look I was going for. That being said, there are a few things you can do to cut corners and make things come together a little faster. When you’re in a hurry … Learn how to eat healthy with the ketogenic diet
  • 44. 1. Think small and spread out. Individual servings of mousse and pudding are going to set a lot faster than a whole batch kept in one big bowl. Foods baked in individual portions, like small ramekins or muffin pans, bake faster. A sheet cake, which has more surface area exposed to the oven heat, bakes much faster as well. Almost any large dessert can be portioned out into individual servings, assuming you have the right pans or dishes to accommodate them. 2. Warm it up. Did you forget to allow time for your butter or cream cheese to soften or for your eggs to come to room temperature? Yeah, me too. I do this constantly. Not to worry; you can gently soften butter or cream cheese in the microwave—about fifteen seconds on high power is all you need. For eggs, just set them in a bowl of very warm water for ten minutes. 3. Freeze it. Need a dessert to set a little faster? Pop it in the freezer for a bit … but don’t forget about it. Don’t let it actually freeze, because that might change the consistency. But let it chill out for a while, and you can shave an hour or possibly two from the setting time. I find that this works well with cheesecakes in particular. Wait to add any decorative touches until after the dessert has set. Berries and chocolate drizzle don’t fare so well in the freezer. 4. Microwave it. That big box sitting on your counter or over your stove is a pretty handy tool when you need to melt butter, chocolate, or anything else quickly. But the heat of a microwave can be intense, so you want to melt things carefully. I always do it in 30-second increments on high power, stirring after each increment until it’s smooth. If you don’t own a microwave, you can always melt ingredients on the stovetop over low heat. When it comes to chocolate, you should do it double boiler style, using a heatproof bowl set over a pan of barely simmering water. (Do not allow the bottom of the bowl to touch the water.)
  • 45. 5. Go for easy elegance. Skip the fancy decorating techniques. Most desserts don’t need it anyway, and you will save yourself a lot of time and stress. People always tell me how beautiful my desserts look, but the truth is that I am a lousy cake and cookie decorator. I have neither the patience nor the inclination to futz around with frosting, although I like my desserts to look pretty and inviting. Consider using these easy decorating techniques: • Add a dollop of whipped cream or a drizzle of melted chocolate. These things have the added benefit of hiding any mistakes you might have made. I like to say that chocolate ganache fixes everything! • Use Bundt pans and fun cake or candy molds for instant elegance—no decorating needed. • Embrace the rustic look. A hundred years ago, cakes were served naked, without piles of sugary frosting slathered all over them. If the cake itself is tasty enough, why bother with the extras? • In that same vein, a sprinkling of powdered sweetener or cocoa powder can accent a dessert nicely. Or try shaving a little bit of dark chocolate over the top. You can do this to the whole dessert or as you plate individual servings. • Fresh berries and a sprig of mint add contrast and brightness to any dessert. If it’s a citrus-based dessert, add a thin slice of lemon or lime or a little grated zest. Learn how to eat healthy with the ketogenic diet
  • 47. Sometimes you really just want someone else to make dessert for you. I get that, I really do. However, the keto lifestyle hasn’t come quite that far yet, although I do hear tell of keto bakeries and grocery stores popping up in various locations across the country. (Does anyone volunteer to start one in Portland, Oregon? Pretty please???) As a general rule, I say it’s still best to make your own desserts at home, where you can control the ingredients and you know exactly what’s going into your treats. A few brands are venturing out into the world of keto baking mixes. On the whole, I don’t really find using these mixes that much easier than making desserts from scratch, as you still have to mix them up and bake them. But they can save you a bit of time and a few dishes in a pinch. They can also be great for baking with kids or taking with you when traveling if you will have access to a kitchen. There are also brands creating prepackaged cookies and brownies, and some of them are pretty decent. Let’s be honest: freshly made is always going to taste better than prepackaged, but these desserts can be good in a pinch or on the go. As always with store-bought products, you need to be a label reader. The ketogenic diet is such a hot-ticket item these days that brands are using the term quite loosely. Just because something calls itself keto-friendly doesn’t necessarily mean that it’s appropriate for a real keto lifestyle. Here are my choices for the best convenience desserts and dessert mixes. BAKING MIXES Good Dee’s—This brand of cookie, brownie, and cake mixes was started by Deana Karim, who follows a low-carb lifestyle herself. She wanted better options than the artificial sweetener–filled mixes on the market, so she created her own, and I think she’s done a great job. These get a thumbs-up from my kids! Learn how to eat healthy with the ketogenic diet
  • 48. Swerve—I’ve been holding this card close to my chest for a while, as I have had the distinct honor of test-driving and photographing Swerve’s new line of baking mixes. It includes a vanilla cake mix, a chocolate cake mix, and a chocolate chip cookie mix. They are fantastic—how could I expect any less from the makers of my favorite keto sweetener? The chocolate cake mix is so good that I am sort of jealous I didn’t develop it myself. Truth. PREPACKAGED COOKIES Keto Kookie—Frankly, this is the only prepackaged cookie that wins my wholehearted approval. Others I have tried are tasteless, or I simply don’t trust the ingredients. I have tested Keto Kookies on myself, and they barely raise my blood sugar. They have become my go-to choice of travel snacks. ICE CREAM AND ICE CREAM BARS Tread carefully here, my friend. There are a lot of low-sugar ice creams and frozen desserts on the market nowadays. Some contain questionable ingredients (including sugar!), and many really aren’t that low-carb. One calls itself keto-friendly, but it’s also nonfat, which for me defeats the
  • 49. purpose. If you want to use brands like Halo Top or Enlightened, stick with the plain flavors and consume them sparingly. But there is a new kid in town, and I am really excited about it. Rebel Creamery is just about to launch, and it is truly a keto ice cream—high-fat, low-carb, no-sugar-added, creamy goodness. I am delighted that someone is finally answering the call for the real deal. Rebel Creamery sent me some of their chocolate ice cream to try, and it tastes very much like my Chocolate Fat Bomb Ice Cream (here), so I approve. Watch for them … I expect great things! CHOCOLATE HAZELNUT SPREAD There are a lot of these spreads on the market, and, as a chocolate hazelnut aficionado, I can say that some are better than others. I think I’ve tried them all. Though my homemade version (see here) is my favorite, I sometimes buy the jarred kind for the convenience factor. NutiLight—This one is quite good and comes in both dark chocolate and milk chocolate varieties. I much prefer the dark chocolate. Nougat Crème by KZ Clean Eating—This Swiss brand is my favorite by far. It’s incredibly creamy and rich; I like to smear a bit on a piece of low-carb chocolate when I’m in the mood for a quick dessert. But it’s also much more expensive than other brands, so I use it very sparingly. Learn how to eat healthy with the ketogenic diet
  • 50. MIX-AND-MATCH DESSERTS It is my dearest wish that you will not think of the recipes in this book as faits accomplis, but as building blocks for creating other wonderful desserts. The mark of a great home cook is the ability to recognize how the various components of a dish might be used to make another entirely different dish. I want this book to be a source of inspiration and a jumping-off point into the sweet side of keto. Here are a few fun ideas to get you started:
  • 51.
  • 52.
  • 53.
  • 54. HOW TO USE THE RECIPES Easy Keto Desserts contains more than fifty low-carb, high-fat dessert recipes and ten “extras”—versatile basics, garnishes, and sauces that will take your healthy desserts to the next level. As is common for cakes, cookies, and bars, many of these recipes serve eight to twelve people, but I have listed storage instructions for any recipe that yields more than six servings. I have also included a number of small-batch recipes that serve four or fewer, because sometimes you need a sweet treat without having a bunch of leftovers hanging around. Because so many desserts take time to set properly, I have included any inactive time required for each recipe, along with the prep time and cook time. Quick Reference Icons Need a big dessert for a party? Want a tasty treat in an instant? Look for these visual cues that tell you a little something extra about each recipe. And be sure to check out the Recipe Quick Reference on here and here to find the easy dessert recipe that fits your needs. No-Bake—Don’t feel like turning on your oven? These no- bake keto desserts are sure to satisfy. Freezer Friendly—These are desserts that you can make a Learn how to eat healthy with the ketogenic diet
  • 55. whole big batch of and then put away for when the cravings strike. Wrap them up tightly to prevent freezer burn! Small Batch—If it’s just you eating keto, or just you and your significant other, you don’t always want a lot of sweet treats hanging about. In that case, make one of these recipes that serve four or fewer. I highly recommend the Strawberry Rhubarb Crisp for Two (here)! Feeds a Crowd—Ack! You’ve been told that you need to bring a dessert to an office party, church potluck, or backyard get-together to share. These desserts serve twelve or more, and they just might win over a few new keto converts. Almost Instant—All of a sudden, you want a sweet treat, and you want it now! All of these desserts are ready in under forty minutes from start to finish. You can whip one up and have it ready in less time than it takes to make and eat your dinner. I want these recipes to be useful and accessible to as many people as possible, so I have included icons to indicate which recipes are free of common allergens. Dairy-Free—More than 50 percent of the recipes in Easy Keto Desserts are dairy-free or have a dairy-free option. You will find a lot of great treats here if you are avoiding the creamy white stuff. Egg-Free—Making low-carb baked goods without eggs is definitely tricky, but not impossible. Well over 50 percent of
  • 56. the recipes in this book are egg-free as well—mostly the no- bake ones, but a few of the baked goods, too. Nut-Free—Nut meals and flours are by far the most useful low-carb flour alternatives, so many of the recipes in this book rely on them. But just under half of these recipes are nut-free. The best replacement for nut flours that I have ever used is sunflower seed flour, so I suggest you look into that if you want to make even more of these recipes nut-free. (I have a recipe for making sunflower seed flour and an accompanying video on my website, All Day I Dream About Food.) Nutritional Information This cookbook is about enjoying the healthy keto lifestyle to its fullest. To this end, for each recipe I have included key nutritional information per serving: calories, fat, protein, total carbohydrate, and fiber. Please note that erythritol is technically considered a carbohydrate, but it has zero carb impact for most people. It is metabolized and exits the body without ever entering the bloodstream. For the purposes of the keto diet, it should not be counted in the total carbohydrates, although I have included it as a separate line item for anyone who might need that information. All nutritional information was calculated using MacGourmet, a software program that relies on the USDA National Nutrient Database. I strive to be as accurate as possible, but these numbers are often only estimates based on the average sizes of certain ingredients. I encourage you to calculate your own nutritional information whenever possible. Learn how to eat healthy with the ketogenic diet
  • 57.
  • 58.
  • 59.
  • 60. CHAPTER 1: Learn how to eat healthy with the ketogenic diet
  • 61. CANDY AND CONFECTIONS Peppermint Patties Chocolate-Covered Cheesecake Bites Maple Walnut Fudge Cups Toffee Almond Bark Macadamia Coconut Truffles Peanut Butter and Jam Cups Watermelon Lime Gummies
  • 62. PEPPERMINT PATTIES Yield: 12 patties (1 per serving) Prep Time: 20 minutes Cook Time: 5 minutes Inactive Time: 2 hours I used to love York Peppermint Patties—all that bright peppermint flavor enrobed in dark chocolate. Who knew it would be so easy to make your own sugar-free and dairy-free version? Oh, and maybe I should say guilt-free, too. ½ cup coconut oil, slightly softened 2 tablespoons coconut cream (from a can of coconut milk; see Tip) ½ cup powdered erythritol-based sweetener 1 teaspoon peppermint extract 3 ounces sugar-free dark chocolate, chopped ½ ounce cacao butter, or 1 tablespoon coconut oil SWEETENER OPTIONS: A bulk sweetener is important here because it gives the peppermint mixture some structure. And you want a powdered, or confectioners’-style, sweetener to avoid grittiness. 1. In a medium bowl, beat the coconut oil and coconut cream with an electric mixer until smooth. 2. Add the sweetener and peppermint extract and beat until well combined. 3. Line a baking sheet with wax paper or parchment paper. Dollop a heaping tablespoon of the mixture onto the paper and spread it into a 1½-inch Learn how to eat healthy with the ketogenic diet
  • 63. circle. Repeat with the remaining mixture and freeze until firm, about 2 hours. 4. In a heatproof bowl set over a pan of barely simmering water, melt the chocolate and cacao butter together, stirring until smooth. Remove the pan from the heat. 5. Working with one patty at a time and keeping the other patties in the freezer to stay firm, drop a patty into the melted chocolate. Toss to coat well and lift out with a fork, tapping the fork firmly on the edge of the bowl to remove the excess chocolate. 6. Place the patty on a wax paper or parchment paper–lined baking sheet and let set. Repeat with the remaining patties. STORAGE INSTRUCTIONS: These peppermint patties will last for up to 2 weeks in the fridge, if you can resist them that long! They can also be stored in the freezer for up to a month, although the color of the chocolate coating may turn a little gray once frozen. TIP: Coconut cream is the thick part of the coconut milk that rises to the top of the can. Simply scoop it out in tablespoons and level it off, taking care to not get any of the thin coconut water underneath. You do not want the coconut cream chilled, as cold cream would be too hard to beat into the coconut oil. NUTRITIONAL INFORMATION CALORIES: 126 | FAT: 13.6g | PROTEIN: 0.4g | CARBS: 2.9g | FIBER: 1.4g | ERYTHRITOL: 11.5g
  • 64.
  • 65. CHOCOLATE-COVERED CHEESECAKE BITES Yield: 24 truffles (2 per serving) Prep Time: 20 minutes Cook Time: 5 minutes Inactive Time: 3 to 4 hours These easy truffles were a surprise hit with my kids, who usually disdain cheesecake. As an experiment, I put some frozen raspberries in a few of them, and those were even more popular. I highly recommend that little variation! 1 (8-ounce) package cream cheese, softened ¼ cup (½ stick) unsalted butter, softened ½ cup powdered erythritol-based sweetener ½ teaspoon vanilla extract 4 ounces sugar-free dark chocolate, chopped ¾ ounce cacao butter, or 1½ tablespoons coconut oil SWEETENER OPTIONS: The cheesecake filling can really be sweetened with any sweetener you like. 1. Line a baking sheet with wax paper or parchment paper. 2. In a large bowl, beat the cream cheese and butter with an electric mixer until well combined. Beat in the sweetener and vanilla extract until smooth. Learn how to eat healthy with the ketogenic diet
  • 66. 3. Using wet hands, roll the mixture into 1-inch balls and place on the lined baking sheet. Freeze until firm, 3 to 4 hours. 4. In a heatproof bowl set over a pan of barely simmering water, melt the chocolate and cacao butter together, stirring until smooth. Remove the pan from the heat. 5. Working with one ball at a time and keeping the other balls in the freezer to stay firm, drop a ball into the melted chocolate. Toss to coat well and lift out with a fork, tapping the fork firmly on the edge of the bowl to remove the excess chocolate. 6. Place the ball on a wax paper or parchment paper–lined baking sheet and allow to set. Repeat with the remaining cheesecake balls. 7. Drizzle any remaining chocolate decoratively over the coated balls. STORAGE INSTRUCTIONS: These truffles are best kept in the fridge, where they will last for up to 5 days. However, they have the best flavor and consistency when served at room temperature, so be sure to let them sit out a bit before eating. They can also be frozen for up to a month, although the chocolate coating may turn a little gray once frozen.
  • 67. NUTRITIONAL INFORMATION CALORIES: 146 | FAT: 13.5g | PROTEIN: 1.6g | CARBS: 4.6g | FIBER: 1.9g | ERYTHRITOL: 12g VARIATION: RASPBERRY CHEESECAKE BITES Follow the directions on the opposite page, but form the cheesecake ball around a frozen raspberry (using 24 raspberries in all). You can do this most easily by flattening the cheesecake ball into a disc and then placing the raspberry in the center and folding the disc around it. Proceed to freeze and then dip in the melted chocolate as directed. Learn how to eat healthy with the ketogenic diet
  • 68. NUTRITIONAL INFORMATION CALORIES: 148 | FAT: 13.5g | PROTEIN: 1.7g | CARBS: 5.2g | FIBER: 2.2g | ERYTHRITOL: 12g
  • 69. MAPLE WALNUT FUDGE CUPS Yield: 12 cups (1 per serving) Prep Time: 5 minutes Cook Time: 5 minutes Inactive Time: 1 hour Fake it ’til you make it, as they say. I don’t touch real maple syrup, but a little maple extract allows me to enjoy one of my favorite flavors. ½ cup (1 stick) salted butter 4 ounces coconut butter ¼ cup powdered erythritol-based sweetener 1 teaspoon yacón syrup (optional, for color and flavor) 2½ teaspoons maple extract ¼ cup chopped toasted walnuts SWEETENER OPTIONS: These cups do not rely on bulk for consistency, so any sweetener will do. 1. Line a mini muffin pan with 12 silicone or parchment paper liners. 2. In a medium saucepan over low heat, melt the butter and coconut butter together, stirring until smooth. 3. Whisk in the sweetener, yacón syrup (if using), and maple extract. Stir in the toasted walnuts. 4. Divide the mixture among the lined mini muffin cups and refrigerate until firm, about 1 hour. Learn how to eat healthy with the ketogenic diet
  • 70. STORAGE INSTRUCTIONS: These cups need to remain refrigerated for the best consistency and will last for up to 2 weeks. They can also be frozen for up to a month. NUTRITIONAL INFORMATION CALORIES: 150 | FAT: 14.7g | PROTEIN: 1.4g | CARBS: 3.2g | FIBER: 1.9g | ERYTHRITOL: 5g
  • 71.
  • 72. TOFFEE ALMOND BARK Yield: 12 servings (about 1 ounce per serving) Prep Time: 5 minutes Cook Time: 15 minutes Inactive Time: 50 minutes Coating the almonds with sugar-free toffee takes almond bark to a whole new level. This sweet treat was a huge hit at our New Year’s Eve celebration this past year. 3 tablespoons granulated erythritol-based sweetener 2 tablespoons salted butter 1 cup raw almonds ¼ teaspoon vanilla extract Pinch of salt 6 ounces sugar-free dark chocolate, chopped ½ ounce cacao butter, or 1 tablespoon coconut oil SWEETENER OPTIONS: Sorry, kids, but only granulated erythritol or an erythritol blend will do here. It’s impossible to make sugar-free toffee with any other sweetener. Believe me, I’ve tried! 1. Line a baking sheet with parchment paper. 2. In a medium saucepan over medium heat, combine the sweetener and butter, stirring until the sweetener dissolves. Add the almonds and bring to a boil. Cook without stirring until the butter darkens to a rich amber color, 5 to 7 minutes. Learn how to eat healthy with the ketogenic diet
  • 73. 3. Remove from the heat and stir in the vanilla extract and salt. Spread the almonds in a single layer on the lined baking sheet and let cool for 20 minutes. Break up the almonds with your hands. 4. In a heatproof bowl set over a pan of barely simmering water, melt the chocolate and cacao butter together, stirring until smooth. Add the almonds and toss to coat well. Spread this mixture on the same parchment-lined baking sheet to about 9 inches square. 5. Refrigerate until set, about 30 minutes. Break into pieces with your fingers. STORAGE INSTRUCTIONS: This bark is fine on the counter for up to a week. You can also store it in the fridge. NUTRITIONAL INFORMATION CALORIES: 153 | FAT: 13.9g | PROTEIN: 3.3g | CARBS: 8.3g | FIBER: 4.3g | ERYTHRITOL: 6.8g
  • 74.
  • 75. MACADAMIA COCONUT TRUFFLES Yield: 24 truffles (2 per serving) Prep Time: 20 minutes Cook Time: — Inactive Time: 1 hour Macadamia nuts are like Mother Nature’s very own fat bombs. These truffles are rich in healthy keto fats and taste like you’ve been whisked away to a tropical island. 2 cups roasted unsalted macadamia nuts ⅔ cup plus 3 tablespoons unsweetened shredded coconut, divided ⅓ cup powdered erythritol-based sweetener 2 tablespoons grass-fed collagen powder 1 tablespoon melted coconut oil 1 teaspoon vanilla extract ⅛ teaspoon salt SWEETENER OPTIONS: You can sweeten these tasty treats however you please! 1. Place the macadamia nuts and ⅔ cup of the shredded coconut in a food processor. Process on high until the mixture begins to clump together into a ball. 2. Transfer the nut mixture to a large bowl and stir in the sweetener, collagen, melted coconut oil, vanilla extract, and salt until well combined. 3. Spread the remaining 3 tablespoons of shredded coconut on a shallow plate. Line a baking sheet with wax paper or parchment paper. Learn how to eat healthy with the ketogenic diet
  • 76. 4. Working with about 1 tablespoon at a time, squeeze the truffle mixture together in your hands to compact it, then roll it into a ball. Roll each ball in the shredded coconut and place on the lined baking sheet. Refrigerate until firm, about 1 hour. STORAGE INSTRUCTIONS: These truffles will keep for about a week in the refrigerator or can be frozen up to a month. TIP: Macadamia nuts are so fatty that they can quickly turn to butter if you process them too long. Be sure to remove the mixture from the food processor when it begins to clump together into one big ball. NUTRITIONAL INFORMATION CALORIES: 202 | FAT: 20.3g | PROTEIN: 2.1g | CARBS: 4.3g | FIBER: 2.5g | ERYTHRITOL: 6.6g
  • 77.
  • 78. PEANUT BUTTER AND JAM CUPS Yield: 12 cups (1 per serving) Prep Time: 5 minutes Cook Time: 10 minutes Inactive Time: 45 minutes I’ve loved the combination of peanut butter and raspberry jam ever since I was a child. I obviously don’t do the sandwich version anymore, but these keto cups allow me to enjoy that salty-sweet flavor and feel a little like a kid again. ¾ cup fresh raspberries ¼ cup water 6 to 8 tablespoons powdered erythritol-based sweetener, divided 1 teaspoon grass-fed gelatin ⅔ cup creamy peanut butter (salted) ⅔ cup coconut oil SWEETENER OPTIONS: The peanut butter mixture is best made with a powdered bulk sweetener, but you could probably get away with any sweetener if you really prefer. 1. Line a standard-size muffin pan with 12 silicone or parchment paper liners. 2. In a medium saucepan over medium heat, bring the raspberries and water to a boil, then reduce the heat and simmer for 5 minutes. Mash the berries with a fork. Learn how to eat healthy with the ketogenic diet
  • 79. 3. Stir in ¼ cup of the powdered sweetener until combined. Whisk in the gelatin, then let cool while you prepare the peanut butter mixture. 4. In a microwave-safe bowl, combine the peanut butter and coconut oil. Microwave on high power for 30 to 60 seconds, until melted. Whisk in 2 to 4 tablespoons of powdered sweetener, depending on how sweet you like it. I prefer mine less sweet. 5. Spoon about 1 tablespoon of the peanut butter mixture into each cup and set in the freezer to firm up, about 15 minutes. 6. Divide the raspberry mixture among the cups and top with the remaining peanut butter mixture. Refrigerate until firm, about 30 minutes. STORAGE INSTRUCTIONS: These cups need to stay refrigerated to be firm enough to eat. They will last for up to a week. TIP: Not a fan of peanut butter? No problem. Swap in your favorite nut or seed butter here. NUTRITIONAL INFORMATION CALORIES: 200 | FAT: 19.4g | PROTEIN: 3.6g | CARBS: 4.4g | FIBER: 1.4g | ERYTHRITOL: 10g
  • 80.
  • 81. WATERMELON LIME GUMMIES Yield: About 24 mini muffin–size pieces (4 per serving) Prep Time: 5 minutes Cook Time: 5 minutes Inactive Time: 2 hours Keto gummy candies are easy enough to make, but I managed to make them even easier by using a flavored sugar-free beverage. This way, you don’t have to puree or strain any fruit, and carbs are kept to the bare minimum. You could have so much fun with this recipe and make any number of different flavors. My kids couldn’t get enough of these gummies; they were gone in one day! 1¼ cups sugar-free watermelon-flavored beverage (see Tip) ⅓ cup fresh lime juice 3 tablespoons grass-fed gelatin 2 tablespoons powdered erythritol-based sweetener, plus more if desired Special equipment: Silicone mini muffin pan or gummy mold (optional) SWEETENER OPTIONS: Go wild with whatever sweetener you prefer here. Do note that Bai is already sweetened with erythritol, so you need only add sweetener to taste. 1. In a medium saucepan, combine the watermelon-flavored beverage and lime juice. Whisk in the gelatin and sweetener and bring to a simmer, stirring until the gelatin dissolves. Add more sweetener to taste. Learn how to eat healthy with the ketogenic diet
  • 82. 2. Remove from the heat and spoon into the silicone molds. Refrigerate until firm, about 2 hours. You can also line a square baking pan with parchment paper and pour the mixture into that to chill. 3. To unmold, simply push the gummies out from the bottom of the silicone mold, or lift the parchment out of the baking pan and cut into squares. STORAGE INSTRUCTIONS: These gummies need to be kept in the fridge so they don’t melt. They will last for up to a week or two. TIP: There are a number of sugar-free flavored beverages on the market, with a wide range of flavors to choose from. I like the ones that are sweetened with erythritol or stevia or both, like Bai. There are fruit-flavored mixes and drops that you can add to water as well. NUTRITIONAL INFORMATION CALORIES: 17 | fat: 0g | PROTEIN: 3.1g | CARBS: 1.1g | FIBER: 0.1g | ERYTHRITOL: 6.3g
  • 83.
  • 84.
  • 85. CHAPTER 2: Learn how to eat healthy with the ketogenic diet
  • 86. COOKIES Slice-and-Bake Vanilla Wafers Amaretti Peanut Butter Cookies for Two Cream Cheese Cookies Chewy Double Chocolate Cookies No-Bake Peanut Butter Caramel Cookies Chocolate Hazelnut Thumbprints Deep-Dish Chocolate Chip Cookies
  • 87. SLICE-AND-BAKE VANILLA WAFERS Yield: About 40 cookies (2 per serving) Prep Time: 10 minutes Cook Time: 15 minutes Inactive Time: 1 to 2 hours These shortbread-like cookies are delicious on their own, but part of their charm is how they pair well with other desserts, like Cannoli Dessert Dip (here). And because you can keep the cookie logs in the freezer for months, you can cut off a few slices any time you have a hankering for a few crisp, buttery cookies. I actually have a log in my freezer right now! ½ cup (1 stick) unsalted butter, softened ½ cup granulated erythritol-based sweetener 1¾ cups (175g) blanched almond flour 2 tablespoons coconut flour ½ teaspoon vanilla extract ¼ teaspoon salt SWEETENER OPTIONS: This recipe really relies on a bulk granulated sweetener to achieve the right consistency. 1. In a large bowl, beat the butter and sweetener with an electric mixer until lightened and fluffy, about 2 minutes. Beat in the almond flour, coconut flour, vanilla extract, and salt until well combined. 2. Divide the dough evenly between 2 sheets of wax paper or parchment paper and roll each portion into a log about 1½ inches in diameter. Wrap tightly in the paper and freeze for 1 to 2 hours. Learn how to eat healthy with the ketogenic diet
  • 88. 3. Preheat the oven to 325°F and line 2 baking sheets with parchment paper or silicone baking mats. Using a sharp knife, slice the dough crosswise into ¼-inch slices. Place on the lined baking sheets, leaving about 1 inch between wafers. 4. Bake for 5 minutes, then remove from the oven and use a flat-bottomed glass to flatten the cookies slightly. Bake for another 8 to 10 minutes, until the edges are just golden. Remove from the oven and let cool on the pans. The cookies will still be quite soft when they come out of the oven but will firm up as they cool. SERVING SUGGESTION: Try using these cookies to sandwich a little of the Chocolate Buttercream Frosting (here). Divine! STORAGE INSTRUCTIONS: You can keep the unbaked logs of dough in the freezer for 2 to 3 months. The baked cookies are best stored on the counter for up to 5 days. TIP: Once the dough has been in the freezer for more than 2 hours, it can freeze very hard. Set it out on the counter to soften just long enough that you can slice it without shattering it. Fifteen minutes ought to do. NUTRITIONAL INFORMATION CALORIES: 101 | FAT: 9.3g | PROTEIN: 2.2g | CARBS: 2.5g | FIBER: 1.3g | ERYTHRITOL: 6g
  • 89.
  • 90. AMARETTI Yield: About 20 cookies (2 per serving) Prep Time: 15 minutes Cook Time: 22 minutes Amaretti are classic Italian almond cookies made with almond meal and egg whites. They are slightly crispy and slightly chewy, and perfect with an espresso. This recipe is a great way to use up leftover egg whites after making a keto custard or pudding. 2 cups (165g) sliced almonds, plus extra for garnish if desired ½ cup granulated erythritol-based sweetener ¼ cup powdered erythritol-based sweetener, plus extra for dusting if desired 4 large egg whites ½ teaspoon almond extract Pinch of salt SWEETENER OPTIONS: You really have to use a bulk sweetener here. You can do all granulated and skip the powdered version as long as you make sure to grind it well with the sliced almonds, but this mix of the two sweeteners gives the cookies the best consistency. 1. Preheat the oven to 300°F and line 2 baking sheets with parchment paper. Lightly grease the parchment. 2. In a food processor, process the sliced almonds, granulated sweetener, and powdered sweetener until the mixture resembles coarse crumbs. Learn how to eat healthy with the ketogenic diet
  • 91. 3. In a large bowl, use an electric mixer to beat the egg whites with the almond extract and salt until they hold soft peaks. Carefully fold the almond mixture into the egg whites until just combined. 4. Use a cookie scoop or tablespoon to drop the mixture onto the prepared baking sheets, leaving about 1 inch between them. If desired, gently press an almond slice on top of each cookie. Bake for 22 minutes, until just brown around the edges. They will feel like jelly when poked but will firm up as they cool. 5. Remove from the oven and let cool completely on the baking sheets. When cool, gently peel the cookies off the parchment. If desired, dust each cookie with powdered sweetener. STORAGE INSTRUCTIONS: These cookies are best kept on the counter for up to 5 days. TIP: I opted for sliced almonds that still had some skin on them for a more rustic look, but you could use blanched almond flour for a finer consistency. Just be sure to weigh the almond flour so that it matches the exact weight I’ve given here. Otherwise, your cookies will be too dense and heavy. NUTRITIONAL INFORMATION CALORIES: 117 | FAT: 8.8g | PROTEIN: 5.3g | CARBS: 4.1g | FIBER: 2.3g | ERYTHRITOL: 18g
  • 92.
  • 93. PEANUT BUTTER COOKIES FOR TWO Yield: 2 cookies (1 per serving) Prep Time: 5 minutes Cook Time: 12 minutes If you are like me, you have little self-control around freshly baked peanut butter cookies, especially ones with chocolate chips, like these. This small- batch version solves that problem! 1½ tablespoons creamy peanut butter (salted) 1 tablespoon unsalted butter, softened 2 tablespoons granulated erythritol-based sweetener 2 teaspoons lightly beaten egg (see Tip) ¼ teaspoon vanilla extract 2 tablespoons defatted peanut flour ⅛ teaspoon baking powder Pinch of salt 2 teaspoons sugar-free chocolate chips SWEETENER OPTIONS: A bulk sweetener will give these cookies a better consistency, but you might be able to get away with a non-bulk sweetener here. 1. Preheat the oven to 325°F and line a baking sheet with parchment paper or a silicone baking mat. 2. In a small bowl, beat the peanut butter, butter, and sweetener with an electric mixer until well combined. Beat in the egg and vanilla extract. Learn how to eat healthy with the ketogenic diet
  • 94. 3. Add the peanut flour, baking powder, and salt and mix until the dough comes together. Divide the dough in half and roll each half into a ball. 4. Place the dough balls on the lined baking sheet and press each ball into a disc about ½ inch thick. Top each disc with 1 teaspoon of chocolate chips, pressing them into the dough to adhere. 5. Bake for 10 to 12 minutes, until puffed and just barely golden brown. Remove from the oven and let cool on the pan. The cookies will still be very soft when they come out of the oven but will firm up as they cool. DAIRY-FREE OPTION: Substitute softened coconut oil for the butter. TIP: To measure out 2 teaspoons of egg, simply beat the egg lightly in a bowl first. This breaks up the proteins and combines the egg white with the yolk. You can save the rest of the egg for your breakfast. This recipe also works well with carton egg whites, if you prefer. NUTRITIONAL INFORMATION CALORIES: 163 | FAT: 13.2g | PROTEIN: 4.9g | CARBS: 5.7g | FIBER: 1.9g | ERYTHRITOL: 16g
  • 95.
  • 96. CREAM CHEESE COOKIES Yield: About 24 cookies (2 per serving) Prep Time: 15 minutes Cook Time: 12 minutes Cream cheese makes for unbelievably tender cookies. These are puffy and soft and almost somewhere between cookie and cake. They need nothing more than a sprinkle of powdered sweetener for garnish. 4 ounces cream cheese (½ cup), softened ¼ cup (½ stick) unsalted butter, softened ½ cup granulated erythritol-based sweetener 1 large egg, room temperature ½ teaspoon vanilla extract 1½ cups (150g) blanched almond flour 1 teaspoon baking powder ¼ teaspoon salt Powdered erythritol-based sweetener, for dusting SWEETENER OPTIONS: A bulk sweetener helps give these cookies structure. They may not fare so well with a non-bulk sweetener. 1. Preheat the oven to 350°F and line a baking sheet with parchment paper or a silicone baking mat. 2. In a large bowl, beat the cream cheese and butter with an electric mixer until smooth. Add the sweetener and continue to beat until well incorporated. Beat in the egg and vanilla extract. Learn how to eat healthy with the ketogenic diet
  • 97. 3. Whisk together the almond flour, baking powder, and salt in a medium bowl, then add the flour mixture to the cream cheese mixture and stir until just combined. 4. Drop the dough by rounded tablespoons onto the lined baking sheet; the batter will be quite sticky. Press the cookies down lightly with the heel of your hand to flatten them slightly. 5. Bake for 10 to 12 minutes, until puffed. The cookies will still be very soft and light in color. Remove from the oven and let cool completely on the pan. When cool, dust with powdered sweetener. STORAGE INSTRUCTIONS: These cookies can be stored on the counter for up to 4 days or in the fridge for up to a week. They can also be frozen for up to a month. NUTRITIONAL INFORMATION CALORIES: 154 | FAT: 13.7g | PROTEIN: 4.1g | CARBS: 3.4g | FIBER: 1.5g | ERYTHRITOL: 10g
  • 98.
  • 99. CHEWY DOUBLE CHOCOLATE COOKIES Yield: About 20 cookies (2 per serving) Prep Time: 15 minutes Cook Time: 12 minutes These cookies owe their chewiness to the addition of grass-fed gelatin. Weird but true, and it really works! ¾ cup plus 2 tablespoons (88g) blanched almond flour 3 tablespoons cocoa powder 1 tablespoon grass-fed gelatin ½ teaspoon baking soda ½ teaspoon salt ¼ cup (½ stick) unsalted butter, softened ¼ cup creamy almond butter (unsalted) ½ cup granulated erythritol-based sweetener 1 large egg, room temperature ½ teaspoon vanilla extract ⅓ cup sugar-free chocolate chips SWEETENER OPTIONS: These cookies are best made with a bulk sweetener. 1. Preheat the oven to 350°F and line 2 baking sheets with parchment paper or silicone baking mats. 2. In a medium bowl, whisk together the almond flour, cocoa powder, gelatin, baking soda, and salt. Learn how to eat healthy with the ketogenic diet
  • 100. 3. In a large bowl, beat the butter, almond butter, and sweetener with an electric mixer until well combined. Beat in the egg and vanilla extract, then beat in the almond flour mixture until the dough comes together. Stir in the chocolate chips. 4. Roll the dough into 1-inch balls and place a few inches apart on the lined baking sheets. Use the heel of your hand to press the cookies down to about ½ inch thick. 5. Bake for 12 minutes, until the cookies have spread and puffed up a bit. They will still be very soft to the touch. Remove from the oven and let cool completely on the pan. DAIRY-FREE OPTION: Use coconut oil in place of the butter. STORAGE INSTRUCTIONS: The cookies are fine on the counter for up to 5 days or can be kept in the fridge for up to a week. The best way to freeze them is unbaked. Simply roll the balls, lay them out on a parchment-lined baking sheet, and freeze. Once they are solid, you can pop them into a bag or a container, and they will keep for up to 2 months. To bake from frozen, simply let them thaw on a baking sheet.
  • 101. NUTRITIONAL INFORMATION CALORIES: 180 | FAT: 15.1g | PROTEIN: 5.5g | CARBS: 6.9g | FIBER: 3.4g | ERYTHRITOL: 12g Learn how to eat healthy with the ketogenic diet
  • 102. NO-BAKE PEANUT BUTTER CARAMEL COOKIES Yield: 16 cookies (1 per serving) Prep Time: 5 minutes (not including time to make caramel sauce) Cook Time: 10 minutes Inactive Time: 1 hour Peanut butter and caramel are a match made in dessert heaven—especially when they come together in an easy-to-make no-bake cookie. 1 recipe Caramel Sauce (here) ¾ cup creamy peanut butter (salted) ½ teaspoon caramel or vanilla extract ¾ cup unsweetened flaked coconut ¾ cup sliced almonds 3 ounces pork rinds, finely crushed (about 1⅓ cups) ¼ cup powdered erythritol-based sweetener SWEETENER OPTIONS: A powdered bulk sweetener works best here. 1. Line a baking sheet with wax paper or parchment paper. 2. In a saucepan over low heat, stir the caramel sauce and peanut butter until melted and smooth. Stir in the extract and remove from the heat. 3. In a food processor, pulse the flaked coconut and sliced almonds together until the mixture resembles oatmeal.
  • 103. 4. Add the coconut and almond mixture, crushed pork rinds, and sweetener to the caramel mixture and stir to combine well. 5. Drop the mixture by rounded tablespoons onto the lined baking sheet, leaving about 2 inches between them. Press the cookies with the palm of your hand to flatten them. 6. Refrigerate for about 1 hour to firm up. STORAGE INSTRUCTIONS: These soft cookies are best kept in the fridge. They will last for up to a week. TIP: Does it seem odd to put pork rinds in a dessert? Well, it works! It gives the cookies a little crunch as well as cuts down on carbs. NUTRITIONAL INFORMATION CALORIES: 200 | FAT: 16.6g | PROTEIN: 7.3g | CARBS: 5.1g | FIBER: 1.7g | ERYTHRITOL: 9.4g Learn how to eat healthy with the ketogenic diet
  • 104.
  • 105. CHOCOLATE HAZELNUT THUMBPRINTS Yield: 24 cookies (2 per serving) Prep Time: 15 minutes (not including time to make chocolate hazelnut spread) Cook Time: 18 minutes Hi, my name is Carolyn, and I am obsessed with chocolate and hazelnut. 2 cups (200g) hazelnut meal ½ cup granulated erythritol-based sweetener ½ teaspoon baking powder ¼ teaspoon salt 1 large egg ¼ cup (½ stick) unsalted butter, melted but not hot ½ teaspoon vanilla extract ½ cup Homemade Chocolate Hazelnut Spread (here) SWEETENER OPTIONS: These cookies can be sweetened with any sweetener you prefer. 1. Preheat the oven to 325°F and line a baking sheet with parchment paper or a silicone baking mat. 2. In a medium bowl, whisk together the hazelnut meal, sweetener, baking powder, and salt. Stir in the egg, melted butter, and vanilla extract until the dough comes together. 3. Roll the dough into 1-inch balls and place a few inches apart on the lined baking sheet. Press the balls down with the palm of your hand to about ½ Learn how to eat healthy with the ketogenic diet
  • 106. inch thick. Use your thumb to make a well in the center of each cookie. 4. Bake for 15 to 18 minutes, until golden brown around the edges and just firm to the touch. Remove from the oven and let cool completely on the pan. 5. Once cool, dab about 1 teaspoon of the chocolate hazelnut spread into each well. DAIRY-FREE OPTION: Use coconut oil in place of the butter. STORAGE INSTRUCTIONS: These cookies are best stored in the fridge, as the filling can be pretty goopy otherwise. But I like the flavors best at room temperature, so I always let them sit out for 15 minutes or so before eating them. NUTRITIONAL INFORMATION CALORIES: 220 | FAT: 20.1g | PROTEIN: 4.3g | CARBS: 4.9g | FIBER: 2.9g | ERYTHRITOL: 12.5g
  • 107.
  • 108. DEEP-DISH CHOCOLATE CHIP COOKIES Yield: 2 cookies (1 per serving) Prep Time: 5 minutes Cook Time: 20 minutes Gooey chocolate chip cookies warm from the oven—is there anything better? 3 tablespoons unsalted butter 3 tablespoons powdered erythritol-based sweetener 1 tablespoon lightly beaten egg (see Tip, here) ⅛ teaspoon vanilla extract ¼ cup (25g) blanched almond flour ¼ teaspoon baking soda 1 tablespoon sugar-free chocolate chips SWEETENER OPTIONS: A bulk sweetener will give these cookies the best consistency, but you could really use almost anything here. 1. Preheat the oven to 325°F and grease two 4-ounce ramekins or cute little 3½-inch cast-iron skillets, if you can find them! 2. In a microwave-safe bowl, microwave the butter on high until melted, about 30 seconds. Stir in the sweetener until dissolved, then stir in the beaten egg and vanilla extract. 3. Add the almond flour and baking soda and stir until well combined. Divide the dough between the greased ramekins and press to the edges. Learn how to eat healthy with the ketogenic diet
  • 109. Divide the chocolate chips between the ramekins and press gently into the dough. 4. Bake for 15 to 20 minutes, until golden brown but still soft to the touch. The baking time will depend somewhat on how deep your ramekins are. 5. Remove from the oven and let cool in the ramekins for a few minutes before serving. Eat directly from the ramekin with a spoon. DAIRY-FREE OPTION: Use coconut oil in place of the butter. SERVING SUGGESTION: These cookies are absolutely dreamy with some Vanilla Bean Semifreddo (here), traditional Whipped Cream (here), or Coconut Whipped Cream (here). TIP: If you only have bigger ramekins, you can bake both servings in one 8- ounce ramekin. The baking time will increase.
  • 110. NUTRITIONAL INFORMATION CALORIES: 275 | FAT: 25.7g | PROTEIN: 4.6g | CARBS: 5.6g | FIBER: 2.5g | ERYTHRITOL: 22.5g Learn how to eat healthy with the ketogenic diet
  • 111.
  • 112.
  • 113. CHAPTER 3: Learn how to eat healthy with the ketogenic diet
  • 114. BARS No-Bake Chocolate “Oatmeal” Bars Sugar Cookie Bars Dairy-Free Peanut Butter Bars No-Bake Blueberry Cheesecake Bars One-Bowl Brownies Dairy-Free Coconut Bars No-Bake French Silk Pie Bars
  • 115. NO-BAKE CHOCOLATE “OATMEAL” BARS Yield: 16 bars (1 per serving) Prep Time: 15 minutes Cook Time: 10 minutes Inactive Time: 1 hour I used to love the oatmeal fudge bars from Starbucks. With these rich, oatmeal-like bars, I don’t miss them any longer. Grinding up flaked coconut and sliced almonds makes a great oatmeal substitute. CRUST: 1 cup unsweetened flaked coconut 1 cup sliced almonds ½ cup (1 stick) unsalted butter ½ cup granulated erythritol-based sweetener 1 teaspoon yacón syrup (optional) ½ teaspoon vanilla extract 1 cup (100g) blanched almond flour ¼ teaspoon salt FILLING: 1¼ cups heavy whipping cream 4 ounces unsweetened chocolate, finely chopped 2 tablespoons unsalted butter ½ cup powdered erythritol-based sweetener ½ teaspoon vanilla extract SWEETENER OPTIONS: Learn how to eat healthy with the ketogenic diet
  • 116. Both the crust and the filling really need a bulk sweetener for consistency. The sweetener for the filling should be a powdered version to avoid grittiness. TO MAKE THE CRUST: 1. Line a 9-inch square baking pan with parchment paper, leaving an overhang for easy removal. 2. In a food processor, process the coconut and sliced almonds until they resemble grains of oatmeal. Set aside. 3. In a medium saucepan over medium heat, bring the butter, sweetener, yacón syrup (if using), and vanilla extract to a low boil, whisking to combine well. Remove from the heat. 4. Add the ground coconut and almonds, almond flour, and salt. Stir until well combined. Press about two-thirds of the mixture into the bottom of the lined baking pan. TO MAKE THE FILLING AND ASSEMBLE: 5. In a medium saucepan over medium heat, bring the cream just to a simmer. Remove from the heat and add the chopped chocolate and butter. Let sit for 4 minutes to melt. 6. Add the sweetener and vanilla extract and whisk until well combined and smooth. 7. Pour the filling over the crust in the pan. Sprinkle with the remaining crust mixture and refrigerate until firm, about 1 hour. 8. Lift out by the overhanging parchment and cut into 16 bars. STORAGE INSTRUCTIONS: These bars will keep in the fridge for up to a week, but they are best served at room temperature. They can be wrapped
  • 117. up tightly and frozen for up to a month. NUTRITIONAL INFORMATION CALORIES: 275 | FAT: 25.5g | PROTEIN: 4.4g | CARBS: 6.5g | FIBER: 3.2g | ERYTHRITOL: 15g Learn how to eat healthy with the ketogenic diet
  • 118.
  • 119. SUGAR COOKIE BARS Yield: 16 bars (1 per serving) Prep Time: 15 minutes (not including time to make sprinkles) Cook Time: 18 minutes No dessert cookbook would be complete without a sugar cookie recipe. Pressing the dough into a pan allows you to skip the time-consuming task of rolling and cutting the cookies individually, and you still get the same great flavor. BARS: 2 cups (200g) blanched almond flour 2 tablespoons coconut flour ½ cup granulated erythritol-based sweetener ½ teaspoon baking powder ¼ teaspoon salt ½ cup (1 stick) unsalted butter, melted but not hot 1 large egg ½ teaspoon vanilla extract VANILLA FROSTING: ½ cup (1 stick) unsalted butter, softened 2 ounces cream cheese (¼ cup), softened ½ cup powdered erythritol-based sweetener 2 to 4 tablespoons heavy whipping cream, room temperature ½ teaspoon vanilla extract Natural red food coloring (optional) 1 tablespoon Coconut Sprinkles (here) Learn how to eat healthy with the ketogenic diet
  • 120. SWEETENER OPTIONS: A bulk sweetener gives both the bars and the frosting the best consistency, but you can get away with a non-bulk sweetener as well. TO MAKE THE BARS: 1. Preheat the oven to 325°F and grease a 9-inch square baking pan. 2. In a large bowl, whisk together the almond flour, coconut flour, granulated sweetener, baking powder, and salt. Stir in the butter, egg, and vanilla extract until well combined. 3. Spread the dough evenly in the greased baking pan and bake until the edges are golden brown, about 18 minutes. The center will still be very soft. Remove from the oven and let cool completely in the pan. TO MAKE THE FROSTING AND ASSEMBLE: 4. In a medium bowl, beat the butter and cream cheese with an electric mixer until smooth. Beat in the powdered sweetener. 5. Add the heavy cream 1 tablespoon at a time until the frosting is spreadable. Beat in the vanilla extract and a small amount of food coloring, if using, until well combined. 6. Spread the frosting evenly over the cooled cookie and sprinkle with coconut sprinkles. Cut into 16 bars. STORAGE INSTRUCTIONS: These bars should be kept refrigerated and will last for up to 5 days. They are best served at room temperature. NUTRITIONAL INFORMATION
  • 121. CALORIES: 218 | FAT: 20.5g | PROTEIN: 3.9g | CARBS: 3.9g | FIBER: 1.8g | ERYTHRITOL: 15g Learn how to eat healthy with the ketogenic diet
  • 122. DAIRY-FREE PEANUT BUTTER BARS Yield: 16 bars (1 per serving) Prep Time: 15 minutes Cook Time: 5 minutes Inactive Time: 1 hour Around these parts, my peanut butter bars are practically famous. My friends and neighbors make them frequently. I took this dairy-free version to CrossFit and nary a crumb was left. BARS: ¾ cup creamy peanut butter (salted) ½ cup plus 2 tablespoons coconut oil ⅔ cup powdered erythritol-based sweetener 1 teaspoon vanilla extract 2 cups (200g) defatted peanut flour (see Tip) CHOCOLATE GLAZE: 3 ounces sugar-free dark chocolate, chopped 1 tablespoon coconut oil SWEETENER OPTIONS: These delicious bars don’t require a bulk sweetener, but they may need a little more peanut flour to firm up properly if you use a non-bulk sweetener. TO MAKE THE BARS:
  • 123. 1. Line a 9-inch square baking pan with parchment paper, leaving an overhang for easy removal. 2. Place the peanut butter and coconut oil in a large microwave-safe bowl. Microwave on high power until melted, then whisk until smooth. Alternatively, you can melt them together in a saucepan over low heat. Stir in the sweetener and vanilla extract until well combined. 3. Stir in the peanut flour until the dough comes together. It should be a stiff dough that you can pick up with your hands. If it’s too soft, add more peanut flour, 1 tablespoon at a time, until it firms up. 4. Press the dough firmly and evenly into the lined baking pan. Cover with a sheet of wax paper or parchment paper and use a flat-bottomed glass or measuring cup to press and smooth the top. TO MAKE THE GLAZE AND ASSEMBLE: 5 Place the chocolate and coconut oil in a microwave-safe bowl. Microwave on high power in 30-second increments, stirring after each increment, until melted and smooth. You can also set the bowl over a pan of barely simmering water and stir the chocolate mixture until melted. 6. Pour the glaze over the bars and use a knife or an offset spatula to spread it to the edges. Refrigerate for 1 hour, until the chocolate is set. 7. Lift out by the overhanging parchment and cut into 16 bars. NUTRITIONAL INFORMATION CALORIES: 211 | FAT: 19g | PROTEIN: 5.5g | CARBS: 7.2g | FIBER: 2.9g | ERYTHRITOL: 11g STORAGE INSTRUCTIONS: These bars are best kept in the refrigerator and will last for at least a week. TIP: Do not pack the peanut flour as you measure it out. It’s very fine and powdery, so packing it can make a huge difference in the outcome of the Learn how to eat healthy with the ketogenic diet
  • 124. bars. Simply scoop and level, as you would with any flour.
  • 125. NO-BAKE BLUEBERRY CHEESECAKE BARS Yield: 16 bars (1 per serving) Prep Time: 15 minutes (not including time to make crust) Cook Time: 7 minutes Inactive Time: 2 hours The creamy richness of cheesecake pairs so delightfully with the tangy sweetness of blueberries. If you’re a cheesecake fan, these bars are sure to please. BARS: 1 recipe Easy Shortbread Crust (here) 2 (8-ounce) packages cream cheese, softened ½ cup powdered erythritol-based sweetener 1 teaspoon grated lemon zest ¼ cup heavy whipping cream, room temperature BLUEBERRY TOPPING: 1 cup frozen blueberries ¼ cup water ¼ cup powdered erythritol-based sweetener 1 tablespoon fresh lemon juice ¼ teaspoon xanthan gum Fresh mint, for garnish (optional) SWEETENER OPTIONS: Go ahead and use any sweetener you like, except for granulated bulk sweeteners. Because these bars are not baked, a granulated sweetener would Learn how to eat healthy with the ketogenic diet
  • 126. be too gritty. TO MAKE THE BARS: 1. Press the shortbread crust mixture firmly and evenly into the bottom of a 9-inch square baking pan. Freeze the crust while you prepare the cheesecake filling. (Freezing the crust will help it hold together when you spread the filling on top.) 2. In a large bowl, use an electric mixer to beat the cream cheese with the sweetener and lemon zest until smooth. Beat in the cream until well combined. 3. Spread the filling over the crust. Refrigerate until firm, at least 2 hours. TO MAKE THE TOPPING AND ASSEMBLE: 4. In a medium saucepan over medium heat, bring the blueberries, water, and sweetener to a boil, then simmer for 5 minutes. 5. Remove from the heat and stir in the lemon juice. Sprinkle with the xanthan gum and whisk quickly to combine. Let cool before using. 6. Pour the blueberry topping over the cheesecake—either the entire pan or individual servings. Garnish with fresh mint, if desired. STORAGE INSTRUCTIONS: As with any cheesecake dessert, these bars need to be kept in the fridge and will last for up to 5 days. NUTRITIONAL INFORMATION CALORIES: 193 | FAT: 16.7g | PROTEIN: 3.7g | CARBS: 4.5g | FIBER: 1.2g | ERYTHRITOL: 16g
  • 127.
  • 128. ONE-BOWL BROWNIES Yield: 16 brownies (1 per serving) Prep Time: 10 minutes Cook Time: 20 minutes This easy, dairy-free recipe results in fudgy goodness. Try these brownies with a little Coconut Whipped Cream (here) on top for sheer keto decadence! ¾ cup avocado oil ¾ cup granulated erythritol-based sweetener 3 large eggs ½ teaspoon vanilla extract ½ cup (50g) blanched almond flour ⅓ cup cocoa powder ½ teaspoon baking powder ¼ teaspoon salt ½ cup chopped raw walnuts or pecans (optional) SWEETENER OPTIONS: A bulk sweetener is important to give these a true brownie texture. 1. Preheat the oven to 325°F and grease a 9-inch square baking pan. 2. In a large bowl, whisk together the oil, sweetener, eggs, and vanilla extract. 3. Add the almond flour, cocoa powder, baking powder, and salt and whisk until well combined. Stir in the chopped nuts, if using. Learn how to eat healthy with the ketogenic diet
  • 129. 4. Bake for 20 minutes, or until the edges are set but the center is still a little soft to the touch. Bake longer if you prefer cakier brownies. 5. Remove from the oven and let cool completely in the pan. Then cut into 16 squares. SERVING SUGGESTION: If you don’t need to be dairy-free, these brownies would be dreamy topped with Chocolate Buttercream Frosting (here) or a scoop of Vanilla Bean Semifreddo (here). STORAGE INSTRUCTIONS: Because of their moisture content, these brownies are best kept in the fridge for up to 5 days. I like to let them come to room temperature before eating. NUTRITIONAL INFORMATION CALORIES: 113 | FAT: 15.5g | PROTEIN: 3.2g | CARBS: 2.3g | FIBER: 1.3g | ERYTHRITOL: 11.3g
  • 130.
  • 131. DAIRY-FREE COCONUT BARS Yield: 16 bars (1 per serving) Prep Time: 10 minutes Cook Time: 5 minutes Inactive Time: 1 hour 10 minutes The other day, my next-door neighbor came charging out of his house calling my name. I thought I was in trouble! He accosted me simply so he could rave about the coconut bars I’d left on his doorstep. I think they taste a lot like Mounds bars. One of my recipe testers suggested adding a few almonds to the top for an Almond Joy–like version. I say that part is up to you! 2 cups unsweetened shredded coconut ½ cup powdered erythritol-based sweetener 3 tablespoons grass-fed collagen powder ½ cup plus 1 tablespoon coconut oil, softened, divided ¼ cup full-fat coconut milk ½ teaspoon coconut extract 3 ounces sugar-free dark chocolate, chopped SWEETENER OPTIONS: These bars rely on a powdered bulk sweetener for the right consistency. 1. Line a 9-inch square baking pan with parchment paper, leaving an overhang for easy removal. 2. In a medium bowl, whisk together the coconut, sweetener, and collagen. Add ½ cup of the coconut oil, the coconut milk, and coconut extract. Stir until well combined. Learn how to eat healthy with the ketogenic diet
  • 132. 3. Press the coconut mixture firmly and evenly into the bottom of the lined baking pan and refrigerate until firm, about 1 hour. 4. In a heatproof bowl set over a pan of barely simmering water, stir the chopped chocolate and remaining tablespoon of coconut oil until melted and smooth. Spread the melted chocolate mixture over the chilled coconut base and allow to set, about 10 minutes. 5. Lift out by the overhanging parchment and cut into 16 bars. STORAGE INSTRUCTIONS: Because there is no dairy in these bars, they can stay out on the counter for a few days, but they do get mighty soft that way. In the fridge, they can last for over a week. I prefer the flavor at room temperature, but they are good either way. NUTRITIONAL INFORMATION CALORIES: 173 | FAT: 17.2g | PROTEIN: 3.3g | CARBS: 4.9g | FIBER: 2.4g | ERYTHRITOL: 8.6g
  • 133.
  • 134. NO-BAKE FRENCH SILK PIE BARS Yield: 16 bars (1 per serving) Prep Time: 30 minutes (not including time to make crust or whipped cream) Cook Time: 5 minutes Inactive Time: 2 hours 10 minutes Although these silky-rich chocolate bars are a little heavier on the prep time than most recipes in this book, they require no baking and are worth every second! BARS: 1 recipe Easy Shortbread Crust (here) 3 ounces unsweetened chocolate, chopped ¾ cup (1½ sticks) unsalted butter, softened ⅔ cup powdered erythritol-based sweetener 1 teaspoon vanilla extract ½ teaspoon espresso powder (optional) ¼ teaspoon salt 3 large eggs GARNISH: ¾ recipe Whipped Cream (here) ½ ounce sugar-free dark chocolate SWEETENER OPTIONS: You could probably get away with almost any sweetener you prefer in the filling. Learn how to eat healthy with the ketogenic diet
  • 135. TO MAKE THE BARS: 1. Press the shortbread crust mixture firmly and evenly into the bottom of a 9-inch square baking pan. Refrigerate the crust while you prepare the filling. 2. In a heatproof bowl set over a pan of barely simmering water, melt the chocolate, stirring until smooth. Alternatively, you can melt the chocolate in a microwave-safe bowl in 30-second increments, stirring after each increment. Remove the bowl from the pan and let cool for 10 minutes. 3. In a large bowl, beat the butter and sweetener with an electric mixer until well combined and fluffy, about 2 minutes. With the mixer running, slowly add the melted chocolate, beating until smooth. Add the vanilla extract, espresso powder (if using), and salt. 4. Add the eggs, one at a time, beating for 5 minutes after each addition. Pour the filling over the chilled crust and smooth the top. Refrigerate until firm, at least 2 hours. TO GARNISH THE BARS: 5. Spread the whipped cream over the entire chilled dessert or pipe onto individual bars. Grate the chocolate over the top. NUTRITIONAL INFORMATION CALORIES: 255 | FAT: 23.7g | PROTEIN: 4.6g | CARBS: 4.6g | FIBER: 2.2g | ERYTHRITOL: 15g STORAGE INSTRUCTIONS: These bars must be kept chilled. Because they are made with raw eggs, they should be consumed within 3 days. TIPS: If you are concerned about consuming raw eggs, feel free to use pasteurized eggs, such as Safest Choice brand. If you want to cut these into perfect squares with straight edges, make sure to heat up a nice sharp knife first. I hold mine over the flame of my gas
  • 136. stove, but you could run it under boiling water as well.
  • 137.
  • 138. CHAPTER 4: Learn how to eat healthy with the ketogenic diet
  • 139. CAKES Mini No-Bake Lemon Cheesecakes Tiramisu Sheet Cake Slow Cooker Chocolate Cake Funfetti Mug Cakes Dutch Butter Cake Orange Cardamom Bundt Cake Pumpkin Spice Mug Cakes
  • 140. MINI NO-BAKE LEMON CHEESECAKES Yield: 6 mini cheesecakes (1 per serving) Prep Time: 20 minutes Cook Time: — Inactive Time: 2 hours Placing individual servings of cheesecake in cupcake liners makes them easy to bake, easy to serve, and easy to clean up! CRUST: ½ cup blanched almond flour 2 tablespoons powdered erythritol-based sweetener ⅛ teaspoon salt 2 tablespoons unsalted butter, melted FILLING: 6 ounces cream cheese (¾ cup), softened ¼ cup plus 1 tablespoon powdered erythritol-based sweetener ¼ cup heavy whipping cream, room temperature 2 teaspoons grated lemon zest 2 tablespoons fresh lemon juice ½ teaspoon lemon extract Natural yellow food coloring (optional) SWEETENER OPTIONS: A powdered bulk sweetener is your best bet for this recipe. TO MAKE THE CRUST: Learn how to eat healthy with the ketogenic diet
  • 141. 1. Line a standard-size muffin pan with 6 silicone or parchment paper liners. 2. In a medium bowl, whisk together the almond flour, sweetener, and salt. Stir in the melted butter until the mixture begins to clump together. 3. Divide the crust mixture among the prepared muffin cups and press firmly into the bottoms. TO MAKE THE FILLING AND ASSEMBLE: 4. In a medium bowl, beat the cream cheese with an electric mixer until smooth. Beat in the sweetener until fully incorporated. 5. Beat in the cream, lemon zest, lemon juice, and lemon extract until smooth. If desired, add yellow food coloring just a drop or two at a time until a lemon-yellow color is achieved. 6. Divide the filling mixture among the prepared muffin cups, filling each cup almost to the top, and smooth the tops. Tap the pan firmly on the counter to release any air bubbles. 7. Place the muffin pan in the freezer until the filling is firm, about 2 hours. Peel the parchment or silicone liners away from the cheesecakes and place in the refrigerator until ready to serve. NUTRITIONAL INFORMATION CALORIES: 223 | FAT: 20.1g | PROTEIN: 4g | CARBS: 3.9g | FIBER: 1.1g | ERYTHRITOL: 17.5g SERVING SUGGESTION: Garnish with a little Whipped Cream (here) and some lemon slices and grated lemon zest. STORAGE INSTRUCTIONS: Keep the cheesecakes refrigerated for up to a week or wrap them individually and freeze for up to a month.
  • 142.
  • 143. TIRAMISU SHEET CAKE Yield: One 11 by 17-inch cake (20 servings) Prep Time: 25 minutes Cook Time: 22 minutes Please don’t look at this long ingredient list and multi-step process and panic. I promise that this is an incredibly easy cake to put together. But it’s also a great one for serving a large party and makes a perfect special- occasion dessert. CAKE: 2 cups (200g) blanched almond flour ¾ cup granulated erythritol-based sweetener ⅓ cup (37g) coconut flour ⅓ cup unflavored whey protein powder 1 tablespoon baking powder ½ teaspoon salt ¾ cup unsweetened almond milk ½ cup (1 stick) unsalted butter, melted but not hot 3 large eggs 1 teaspoon vanilla extract ¼ cup espresso or strong brewed coffee, cooled 1 tablespoon dark rum (optional) MASCARPONE FROSTING: 8 ounces mascarpone cheese, softened 4 ounces cream cheese (½ cup), softened ½ cup powdered erythritol-based sweetener 1 teaspoon vanilla extract Learn how to eat healthy with the ketogenic diet
  • 144. ½ to ⅔ cup heavy whipping cream, room temperature GARNISH: 1 tablespoon cocoa powder 1 ounce sugar-free dark chocolate TO MAKE THE CAKE: 1. Preheat the oven to 325°F and thoroughly grease an 11 by 17-inch sheet pan. 2. In a medium bowl, whisk together the almond flour, sweetener, coconut flour, protein powder, baking powder, and salt. Add the almond milk, melted butter, eggs, and vanilla extract and whisk until smooth. 3. Spread the batter in the greased sheet pan and smooth the top. Bake for 18 to 22 minutes, until the edges are golden brown and the cake is set. Remove from the oven and let cool in the pan. 4. In a small bowl, combine the espresso and rum, if using. Brush over the cooled cake. TO MAKE THE FROSTING: 5. In a large bowl, beat the mascarpone and cream cheese with an electric mixer until smooth. Beat in the sweetener and vanilla extract. 6. Add ½ cup of the cream and beat until smooth. Add more cream as needed to thin the frosting to a spreadable consistency. Spread the frosting over the cooled cake. TO GARNISH THE CAKE: 7. Dust the top of the cake with the cocoa powder. Grate the dark chocolate over the top.
  • 145. NUTRITIONAL INFORMATION CALORIES: 238 | FAT: 21.2g | PROTEIN: 6.3g | CARBS: 5.1g | FIBER: 2.3g | ERYTHRITOL: 15g STORAGE INSTRUCTIONS: This cake should be stored in the fridge and will last for up to 5 days. It’s best served at room temperature. TIP: The cake portion of this recipe is pretty standard. If you omit the coffee and rum, it becomes a basic yellow sheet cake. Feel free to frost it with anything you like! SWEETENER OPTIONS: The frosting really relies on a powdered bulk sweetener for the best consistency. The cake can be sweetened with your preferred sweetener. Learn how to eat healthy with the ketogenic diet