SlideShare a Scribd company logo
1 of 33
1
Chapter 1: Introduction of NX
1.1 Introduction:
The modern manufacturing environment can be characterized by the paradigm of
delivering products of increasing variety, smaller batches and higher quality in the
context of increasing global competition. Industries cannot survive worldwide
competition unless they introduce new products with better quality, at lower costs and
with shorter lead-time. There is intense international competition and decreased
availability of skilled labour. With dramatic changes in computing power and wider
availability of software tools for design and production, engineers are now using
Computer Aided Design (CAD), Computer Aided Manufacturing (CAM) and
Computer Aided Engineering (CAE) systems to automate their design and production
processes. These technologies are now used every day for sorts of different engineering
tasks. Below is a brief description of how CAD, CAM, and CAE technologies are being
used during the product realization process.
Fig 1.1Siemens PLM software
1.2 Product realization process:
The product realization process can be roughly divided into two phases; design and
2
Manufacturing. The design process starts with identification of new customer needs
and design variables to be improved, which are identified by the marketing personnel
after getting feedback from the customers. Once the relevant design information is
gathered, design specifications are formulated. A feasibility study is conducted with
relevant design information and detailed design and analyses are performed. The
detailed design includes design conceptualization, prospective product drawings,
sketches and geometric modelling. Analysis includes stress analysis, interference
checking, kinematics analysis, mass property calculations and tolerance analysis and
design optimization. The quality of the results obtained from these activities is directly
related to the quality of the analysis and the tools used for conducting the analysis. The
manufacturing process starts with the shop-floor activities beginning from production
planning, which uses the design process drawings and ends with the actual product.
Process planning includes activities like production planning, material procurement,
and machine selection. There are varied tasks like procurement of new tools, NC
programming and quality checks at various stages during the production process.
Process planning includes planning for all the processes used in manufacturing of the
product. Parts that pass the quality control inspections are assembled functionally tested
Packaged, labelled, and shipped to customers.
Fig1.2 Product Realization Process
3
1.3 History of CAD/CAM development
The roots of current CAD/CAM technologies go back to the beginning of civilization
when engineers in ancient Egypt recognized graphics communication. Orthographic
projection practiced today was invented around the 1800’s. The real development of
CAD/CAM systems started in the 1950s. CAD/CAM went through four major phases
of development in the last century. The 1950’s was known as the era of interactive
computer graphics. MIT’s Servo Mechanisms Laboratory demonstrated the concept of
numerical control (NC) on a three-axis milling machine. Development in this era was
slowed down by the shortcomings of computers at the time. During the late 1950’s the
development of Automatically Programmed Tools (APT) began and General Motors
explored the potential of interactive graphics. The 1960s was the most critical research
period for interactive computer graphics. Ivan Sutherland developed a sketchpad
system, which demonstrated the possibility of creating drawings and altercations of
objects interactively on a cathode ray tube (CRT). The term CAD started to appear with
the word ‘design ‘extending beyond basic drafting concepts. General Motors
announced their DAC-1 system and Bell Technologies introduced the GRAPHIC 1
remote display system. During the 1970’s, the research efforts of the previous decade
in computer graphics had begun to be fruitful, and potential of interactive computer
graphics in improving productivity was realized by industry, government and academia.
The present day CAD/CAM development focuses on efficient and fast integration and
automation of various elements of design and manufacturing along with the
development of new algorithms.
Below are some of the commercial packages in the present market.
nical Desktop are some low-end CAD software systems, which
are mainly used for 2D modelling and drawing.
-E, CATIA and I-DEAS are high-end modelling and designing software
systems
1.3.1 Computer Aided Design – CAD
CAD is technology concerned with using computer systems to assist in the creation,
Modification, analysis, and optimization of a design. Any computer program that
embodies computer graphics and an application program facilitating engineering
functions in design process can be classified as CAD software. The most basic role of
CAD is to define the geometry of design – a mechanical part, a product assembly, an
architectural structure, an electronic circuit, a building layout, etc. The greatest benefits
4
of CAD systems are that they can save considerable time and reduce errors caused by
otherwise having to redefine the geometry of the design from scratch every time it is
needed.
1.3.2 Computer Aided Manufacturing – CAM
CAM technology involves computer systems that plan, manage, and control the
manufacturing operations through computer interface with the plant’s production
resources. One of the most important areas of CAM is numerical control (NC). This is
the technique of using programmed instructions to control a machine tool, which cuts,
mills, grinds, punches or turns raw stock into a finished part. Another significant CAM
function is in the programming of robots. Process planning is also a target of computer
automation.
1.3.3 Computer Aided Engineering – CAE
CAE technology uses a computer system to analyze the functions of a CAD-created
product, allowing designers to simulate and study how the product will behave so that
the design can be refined and optimized. CAE tools are available for a number of
different types of analyses. For example, kinematic analysis programs can be used to
determine motion paths and linkage velocities in mechanisms.
Dynamic analysis programs can be used to determine loads and displacements in
complex assemblies such as automobiles. One of the most popular methods of analyses
is using a Finite Element Method (FEM). This approach can be used to determine stress,
deformation, heat transfer, magnetic field distribution, fluid flow, and other continuous
field problems that are often too tough to solve with any
1.4 NX Environment
1.4.1 Modelling Environment:
The Modelling environment is a parametric and feature-based environment in which
you can create solid models. The basic requirement for creating solid models in this
environment is a sketch and you can draw the sketch directly in the modelling
environment by using the tools available in the direct sketch.
1.4.2 Shape Studio Environment:
The Shape Studio environment is also a parametric and feature-based environment in
which you can create surface models. The tools in this environment are similar to those
in the modelling environment. The only difference is that the tools in this environment
are used to create basic and advanced surfaces. You are also provided with the surface
editing tools, which are used to manipulate the surfaces to obtain the required shape.
5
This environment is useful for conceptual and industrial design.
1.4.3 Assembly Environment:
The Assembly environment is used to assemble the components using the assembly
constraints available in this environment. There are two types of assembly design
approaches in NX, Bottom-up and Top-down. In the bottom-up approach of the
assembly, the previously created components are assembled together to maintain their
design intent. In the top-down approach, components are created in the Assembly
environment. In the Assembly environment you can also assemble an existing assembly
with the current assembly. The perform analysis provides the facility to check the
interference and clearance between the components in an assembly.
1.4.4 Drafting Environment:
The Drafting environment is used for the documentation of the parts or assemblies
created earlier in the form of drawing views and their detailing. There are two types of
drafting techniques, generative drafting and interactive drafting. The generative
drafting technique is used to automatically generate the drawing views of the parts and
assemblies. The parametric dimensions added to the component in the modelling
environment during its creation can also be generated and displayed automatically in
the drawing views. The generative drafting is bidirectional associative in nature. If you
modify the dimensions in the Drafting environment, the model will automatically
update in the modelling environment and vice-versa. You can also generate the Bill of
Material (BOM) and balloons in the drawing views. In interactive drafting, you need to
create the drawing views by sketching them using the normal sketching tools and then
adding the dimensions.
1.4.5 Sheet Metal Environment:
The Sheet Metal environment is used for the designing the sheet metal components.
Generally, the sheet metal components are created to generate the flat pattern of a
sheet, study the design of the dies and punches, study the process plan for designing,
and the tools needed for manufacturing the sheet metal components.
6
Chapter 2: Modelling environment
2.1 Introduction:
The Modelling environment is a parametric and feature-based environment in which
you can create solid models. The basic requirement for creating solid models in this
environment is a sketch and you can draw the sketch directly in the modelling
environment by using the tools available in the direct sketch. You can also create
features such as fillets, chamfers, taper, and so on by using other tools available in this
environment.
2.2 Two dimensional sketching:
You can directly create a sketch on a Plane in Modelling application. In most cases,
Modelling starts from a 2D sketch and then Extrude, Revolve or Sweep the sketch to
create solids. Many complex shapes that are otherwise very difficult to model can
easily be drawn by sketching.
2.2.1 Sketch curve toolbar:
This toolbar contains icons for creating the common types of curves and spline curves,
editing, extending, trimming, filleting etc. Each type of curve has different methods of
selection and methods of creation.
Fig2.1 Curve toolbar
2.2.1.1 Profile:
This command allows you to create a continuous set of lines and arcs connected
together.
2.2.1.2 Rectangle:
In NX, you can draw rectangles using three methods. These methods can be used by
choosing their respective buttons from the Rectangle dialog box.
7
2.2.1.2.1 Rectangles by Specifying Corners:
The by 2 points method is used to draw a rectangle by specifying the diagonally
opposite corners of rectangle.
2.2.1.2.2 Three Points Rectangles:
In this method, you can draw a rectangle using three points. The first two points are
used to define the length and angle of one of the sides of the rectangle and the third
point is used to define the height of the rectangle.
2.2.1.2.3 Centerpoint Rectangles:
Using this method, you can draw a rectangle using three points. However, the first point
is taken as the center of the rectangle in this case.
2.2.1.3 Line:
This option will selectively create only straight lines.
2.2.1.4 Arc:
The arc command allows you to create an arc defined by a center point, and a
circumferential start and end point.
2.2.1.5 Three Point Arc:
The three point arc command allows you to create an arc defined by three
circumferential points.
2.2.1.6 Three Point Arc Starting With Limits:
The three point arc starting with limits allows you to create an arc using a start, end,
and midpoint.
2.2.1.7 Ellipse:
The ellipse is defined by a center point and major and minor axis points.
2.2.1.8 Circle:
A circle is defined by a center point and a radius. In NX, you can draw circles using
two methods.
2.2.1.8.1 Circle by Specifying the Center Point and Diameter:
This is the default and most widely used method of drawing circles. In this method, you
need to specify the center point of a circle and a point on the circumference of the circle.
The point on the circumference of the circle defines the radius or the diameter of the
circle.
2.2.1.8.2 Circle by Specifying Three Points:
In this method, the circle is drawn by specifying three points on circumference.
8
Fig2.2 Circle draw by 3 point method
2.2.1.9 Studio Spline:
You can create basic spline curves (B-spline and Bezier) with poles or through points
with the desired degree of the curve.
2.2.1.10 Fillet:
Filleting is defined as the process of rounding the sharp corners of a profile to reduce
the stress concentration. Fillets are created by removing the sharp corners and replacing
them by round corners.
2.2.1.11 Hexagon:
The hexagon is defined by a center point and the radius of an inscribed circle.
2.2.1.12 Quick Trim:
This trims the extending curves from the points of intersection of the curves. This option
reads every entity by splitting them if they are intersected by another entity and erases
the portion selected.
2.2.1.13 Quick extend:
The Quick Extend tool is used to extend or lengthen an open sketched entity up to the
next entity that it intersects.
2.2.1.14 Make Corner:
You can create a corner between two existing sketch entities by using the make corner
tool. The make corner tool will work both as quick trim as well as quick extend tool.
Depending on the object this tool can trim the object as well as extend the object to
make the corner.
2.2.1.15 Mirror Curve:
The mirror Curve tool is used to create mirrored copies of the selected sketched entities.
Before invoking this tool, you need to draw a line that will be the mirror line. This line
will be converted into a reference line after the mirroring operation is completed.
9
2.2.1.16 Linear Pattern Curve:
You can pattern the curve linearly by using the linear pattern. To create a linear sketch
pattern, choose the Pattern Curve tool from Menu > Insert > Sketch Curve of the Top
Border Bar; the Pattern Curve dialog box will be displayed. Select the sketched entity
to be patterned and then select the linear option from the Layout drop-down list.
2.2.1.17 Circular pattern curve:
You can create circular pattern of the curves by using the Pattern Curve tool. To create
a circular sketch pattern of the selected features, invoke the Pattern Curve tool; the
Pattern Curve dialog box will be displayed. Select the Circular option from the Layout
drop-down list.
2.3 Constraints Toolbar:
Constraints can either be dimensional or geometrical. Dimensional constraints are used
to constrain the length of an element, the radius or diameter of an arc or circle, and the
distance or angle between elements. Geometrical constraints are used to constrain the
orientation of one element relative to another.
2.3.1 Dimensional Constraints:
The degrees of freedom can be eliminated by giving dimensions with fixed entities like
axes, planes, the coordinate system or any existing solid geometries created in the
model. These dimensions can be linear, radial, angular etc. You can edit the
dimensional values at any time during sketching by double-clicking on the dimension.
2.3.2 Geometric Constraints:
Geometric constraints are the logical operations that are performed on the sketched
entities to relate them to the other sketched entities using the standard properties such
as collinearity, concentricity, tangency, and so on. These constraints reduce the degrees
of freedom of the sketched entities and make the sketch more stable so that it does not
change its shape and location unpredictably at any stage of the design. All geometric
constraints have separate symbols associated with them. These symbols can be seen on
the sketched entities when the constraints are applied to them. In the Sketch
environment of NX, you can add various types of geometric constraints. Some of these
constraints are added automatically while sketching.
2.3.3 Show/Remove Constraints:
This window lists all the constraints and types of constraints pertaining to any entity
selected. You can delete any of the listed constraints or change the sequence of the
constraints. The number of degrees of freedom that are not constrained are displayed
10
in the Status Line. All these should be removed by applying the constraints to follow a
disciplined modelling.
2.4 Datum Planes:
You can also create a new datum plane by using the datum Plane dialog box. On the
basis of design requirement, you can select any plane as the sketching plane for the base
feature. Also, you can create additional planes by taking reference of existing planes,
faces, surfaces, sketches, or a combination of these objects. There are three types of
datum planes in NX: datum planes of the Datum Coordinate System, fixed datum
planes, and relative datum planes. Fixed datum planes are the ones that pass through
the origin. Relative datum planes are created in addition to fixed datum planes by taking
the reference of objects such as curves, sketches, edges, faces, surfaces, and points.
2.4.1 Inferred:
The Inferred option is used to create various types of planes, depending on the reference
objects selected and the sequence, in which they are selected. To create planes using
this tool, select the Inferred option from the drop-down list in the Type rollout.
Depending on the reference objects selected and the sequence in which you select them,
appropriate planes will be created. For example, if you select two parallel planes, then
the plane will be created at the center of two selected planes. However, if you select a
cylindrical surface and an edge, then the plane created will be tangent to the cylinder
and it will pass through the selected edge.
2.4.2 At Distance:
The At Distance option is used to create a plane offset to an existing planar face, a
surface, or an existing datum plane.
Fig2.3 Plane at a distance
11
2.4.3 At Angle:
The At Angle option is used to create a plane at an angle to another plane passing
through an edge, a linear sketched segment, or an axis. To create an angular plane,
select the At Angle option from the drop-down list in the Type rollout. Next, select a
planar face or a datum plane to which the resulting plane will be at angle. Next, you
need to select an edge or a linear sketch through which the resulting plane will pass. On
selecting both the references, the preview of the plane will be displayed in the graphic
window.
Fig2.4 Plane at angle
2.4.4 Bisector:
The Bisector option is used to create a relative plane at the center of two specified
planes or planar faces. To create a bisector plane, select the Bisector option from the
drop-down list in the Type rollout. Then, one by one, select two planes or planar faces;
the preview of the resulting plane placed at the center of the two selected planes or
planar faces will be displayed.
2.4.5 Tangent:
The Tangent option is used to create a tangential plane. To do so, you need to select a
cylindrical face and the second reference entity. The second reference entity can be a
point, linear edge, line, datum axis, second cylindrical face, or a datum plane. To create
a tangential plane, select the Tangent option from the drop-down list in the Type rollout.
Next, select a cylindrical face or surface; the preview of the tangent plane will be
displayed.
12
2.4.6 Point and Direction:
The Point and Direction option is used to create a plane at a specified point and is
oriented normal to the selected direction. You need to specify a fix point and define the
normal direction to create the plane. The direction can be defined using an edge or linear
sketch. If you select an edge or a linear sketch to define the direction, the plane will be
created normal to it and it will pass through the specified point. To create this type of
plane, select the Point and Direction option from the drop-down list in the Type rollout;
you will be prompted to select the object to infer point. Specify the point at which the
plane is to be created. Use the Selection Group for an easy selection of the point. After
specifying the point, the preview of the plane will be displayed.
Fig2.5 Plane crated using point and direction
2.5 Boolean Operation:
You can create additional features by using four types of Boolean operations. These
operations are available in the Boolean drop-down.
2.5.1 None:
This option allows you to create a new body, which is independent of the existing
feature.
2.5.2 Unite:
The Unite boolean operation allows you to join the new feature with an existing feature.
In this case, no additional solid body is created. Note that this sketch is created at a
reference plane that is at some offset from the top face of the base feature. an additional
feature created using the Unite boolean operation.
13
Fig2.6 Unite Boolean operation
2.5.3 Subtract:
The Subtract boolean operation is used to create an extruded feature by removing
material from the existing feature.
2.5.4 Intersect:
The Intersect boolean operation is used to create an extruded feature by retaining the
material common to the existing feature and the feature being create.
2.6 Advanced Modelling Tools:
The advanced modelling tools are mostly used to place different types of standard and
User-defined features on a model. Each advanced modelling tool has its specific use in
designing a real-world model. Most of the mechanical designs are created using the adv
-anced modelling features such as simple/counter bore/countersink holes, pocket,
groove, slot, dart, and so on. NX provides you with a number of advanced modelling
tools that assist in creating these advanced features. Note that these features are
parametric in nature and can be modified or edited at any time. The advanced feature
tools are used to reduce the time taken in creating the design.
2.6.1 Simple Holes:
Create a simple hole the first step is to select a face or a point on a face. If you select a
point on a face, the preview of the hole will be displayed. The second step is to specify
the dimensions and parameters of the hole. After specifying the hole parameters, choose
the Apply button; the hole will be created based on the specified parameters.
2.6.2 Counterbored Holes:
To create a counterbored hole, invoke the Hole dialog box by choosing the Hole tool
from the Feature group of the Home tab. Select the Counterbored option from the Form
drop-down list in the Hole dialog box and follow the first step as explained earlier; the
14
preview of the counterbore hole will be displayed. Also, its parameters will be displayed
below the Form drop-down list. Enter the c-bore diameter, c-bore depth, and diameter
in their respective edit boxes in the Dimensions sub-rollout.
2.6.3 Countersunk Holes:
To create a countersunk hole, invoke the Hole dialog box by choosing the Hole tool
from the Feature group of the Home tab. Select the Countersunk option from the Form
dropdown list and follow the first step as explained earlier; the preview of the
countersunk hole will be displayed. Also, its parameters will be displayed below the
Form drop-down list. Next, enter the c-sink diameter, c-sink angle, and diameter in their
respective edit boxes in the Dimensions sub-rollout.
2.6.4 Tapered Holes:
To create a tapered hole, select the Tapered option from the Form drop-down list in the
Hole dialog box and follow the first step as explained earlier; the preview of the tapered
hole will be displayed. Also, its parameters will be displayed below the Form drop-
down list.
2.6.5 Drill Size Hole:
The Drill Size Hole option of the Type drop-down list in the Type rollout is used to
create a simple drill size hole feature using the ANSI or ISO standard by specifying its
respective parameters. To create a drill size hole, select this option from the Type drop-
down list of the Type rollout and specify the placement point of the hole as discussed
in the first step of creating the general holes. Note that as soon as you select the Drill
Size Hole option, the Form and Dimensions rollout will be modified.
Fig 2.7 Drill size hole
2.6.6 Screw Clearance Hole:
On selecting the Screw Clearance Hole option from the Type drop-down list, you can
create simple, counter bore, or countersunk screw clearance hole features according to
15
the standard specified in the Standard drop-down list of the Settings rollout.
2.6.7 Threaded Hole:
The Threaded Hole option in the Type drop-down list is used to create a threaded hole.
The standard of a threaded hole depends on the option selected in the Standard
dropdown list of the Settings rollout. You can specify the required size of the standard
Threaded hole by selecting the options from the Size drop-down list.
2.6.8 Hole Series:
You can use the Hole Series option to create an aligned series of holes in multiple
bodies.
2.7 Chamfers:
A chamfer feature is created on the sharp corners of a model to reduce stress
concentration and to prevent from accidents due to sharp corners. To create a chamfer
feature, choose the Chamfer tool from the Feature group of the Home tab; the Chamfer
dialog box will be displayed. In NX, there are three methods to create a chamfer feature;
Symmetric, Asymmetric, and offset and Angle.
2.7.1 Symmetric Method:
This method is used to create chamfers whose distance from the selected edge is equal
along both the faces. You need to specify a single positive value for both distances. To
create the chamfer feature using the symmetric method, invoke the Chamfer dialog box.
By default, the Symmetric option is selected in the Cross Section drop-down list of the
Offset rollout in the dialog box. Also, you will be prompted to select the edges to
chamfer. Select any number of edges to create the chamfer feature. Next, enter the
distance value in the Distance edit box, which is available below the Cross Section
drop-down list of the dialog box. This value is taken as the distance value on both sides
of the edges.
Fig 2.8 Chamfer by Symmetric Method
16
2.7.2 Asymmetric Method:
This method is used to create the chamfer feature by specifying two different offset
values along either side of the edge. To create the chamfer feature using the Asymmetric
method, select the Asymmetric option from the Cross Section drop-down list in the
Chamfer dialog box; the Chamfer dialog box will be modified and you will be prompted
to select the edges. Select any number of edges to create the chamfer feature. This
dialog box contains the Distance 1 and Distance 2 edit boxes for entering two offset
values. Enter the offset values in these edit boxes; the preview of the chamfer feature
will be displayed. The Reverse Direction button is used to reverse the chamfer distance.
On choosing this button, the offset values of the two sides of the edge will get
interchanged.
Fig2.9 Chamfer by Asymmetric Method
2.7.3 Offset and Angle Method:
This method is used to create a chamfer feature by defining an offset value and an angle
value. The angle value is used to calculate the second offset value. To create the
chamfer feature using the Offset and Angle method, select the Offset and Angle option
from the Cross Section drop-down list; you will be prompted to select the edges. Also,
the Distance and Angle edit boxes are displayed in the Offsets rollout. You can select
any number of edges to create the chamfer feature. After selecting the edges, enter the
values in the Distance and Angle edit boxes and choose the OK button. To reverse the
chamfer, choose the Reverse Direction button; the offset and angle values get changed
from one side of the edge to the other. the resulting chamfer feature with an offset and
an angle value.
17
Fig2.10 Chamfer by Offset and Angle
2.8 Pattern Feature Tool:
The Pattern Feature tool is a very versatile tool in NX. This tool is used to create the
linear and circular patterns of features. It is also used to create the polygon, spiral, along
curve, general, reference, and helix patterns.
2.8.1 Linear Pattern:
Linear pattern of a feature is created by placing the instances of that feature along the
two directions of the work coordinate system (WCS). To create a linear pattern, choose
the Pattern Feature tool from the Feature group; the Pattern Feature dialog box will be
displayed. Select the feature to be patterned and select the Linear option from the
Layout drop-down list; the modified Pattern Feature dialog box will be displayed with
the options to create a linear pattern, refer to Figure Choose the Specify Vector button
from the Direction 1 sub-rollout in the Pattern Definition rollout; a triad will be
displayed in the graphics window and you will be prompted to select an object to define
the first direction. Select an edge to define the first direction of the pattern creation.
You can also use the triad to define the direction. Next, you need to define the number
of instances and the spacing between them.
2.8.1.1 Count and Pitch:
On selecting this option, the Count and Pitch Distance edit boxes will be displayed.
You need to specify the number of instances in the Count edit box and the distance
between the instances in the Pitch Distance edit box.
2.8.1.2 Count and Span:
On selecting this option, the Count and Span Distance edit boxes are displayed. You
18
need to specify the number of instances in the Count edit box and the total length of the
pattern in the Span Distance edit box.
2.8.1.3 Pitch and Span:
On selecting this option, the Pitch Distance and Span Distance edit boxes are displayed.
You need to specify the distance between two consecutive instances in the Pitch
Distance edit box and the total length of the pattern in the Span Distance edit box.
Fig 2.11Linear pattern in two directions
2.8.2 Circular Pattern:
To create a circular pattern of the selected features, invoke the Pattern Feature tool; the
Pattern Feature dialog box will be displayed. Select the Circular option from the Layout
drop-down list in this dialog box; the Pattern Definition rollout in this dialog box will
be modified and you will be prompted to select features to pattern. Select the features
to be patterned from the drawing window. Next, click in the Specify Vector area in the
Rotation Axis sub-rollout of the Pattern definition rollout; a triad will be displayed in
the drawing window and you will be prompted to select an object to define the axis.
Use the triad to specify the axis of rotation. Note that you need to select the axis
perpendicular to the face on which the pattern is to be created. Next, you need to specify
the center of the circular pattern. You can infer to center point of the circular face to
specify the center of the pattern. Next, you need to define the number of instances and
the angular spacing between them. There are four options to define the number of
instances and spacing between them.
2.8.2.1 Count and Pitch:
This option is used to specify the instance count and the angle between the instances.
2.8.2.2 Count and Span:
This option is used to specify the instance count and the span angle of the pattern.
19
2.8.2.3 Pitch and Span:
This option is used to specify the angle between the instances and the span angle of the
Pattern.
Fig2.12 Circular pattern
2.9 Mirror Feature Tool:
The Mirror Feature tool is used to mirror selected features from a model. You can mirror
features about a selected datum plane or a planar face. Choose the Mirror Feature tool
from the Associative Copy gallery of the more gallery in the Feature group; the Mirror
Feature dialog box will be displayed by default, the Features to Mirror button is chosen
in the Features to Mirror rollout of this dialog box. As a result, you will be prompted to
select the features to be mirrored. Select the features to be mirrored from the drawing
window. Next, choose the Plane button from the Mirror Plane rollout; you will be
prompted to select a planar face or a datum plane. Select the planar face or the datum
plane as the mirror plane. Next, choose the OK button; the selected features will be
mirrored.
2.10 Mirror Face:
The Mirror Face tool is used to mirror a set of selected faces of a model. You can mirror
faces which defines a feature. You can mirror faces about a selected datum plane or a
planar face. To do so, choose the Mirror Faces tool from the Associative Copy gallery
of the more gallery in the Feature group; the Mirror Face dialog box will be displayed,
by default, the Face button is chosen in the Face rollout of this dialog box. As a result,
you will be prompted to select the faces to be mirrored. Select the faces to be mirrored
from the drawing window. Next, choose the Plane button from the Mirror Plane rollout;
20
you will be prompted to select a planar face or a datum plane. Select the planar face or
the datum plane as the mirror plane.
2.11 Sweep Along Guide:
The Sweep along Guide tool is used to create sweep features by sweeping an open or a
closed section about a guide string. To create features that are sweep along a guide
curve, first draw the guide curve and then define a datum plane at one of the ends of
the guide curve. Next, use this datum plane to draw the sketch of the section.
2.12 Swept:
Swept features are created by sweeping one or more sections along one or more guide
curves such that all the sections are blended together. On selecting the section curve,
an arrow will be displayed on it. Press the middle mouse button to accept the curve.
Similarly, select all the remaining section curves one by one. Note that while selecting
the section curves, you need to be careful about the point from where you select them.
It is recommended that multiple sections should be selected from the same quadrant.
2.13 Threads:
NX allows to create internal or external threads on a cylindrical model. Internal threads
are those that are created on the internal faces of a model, similar to a hole in a model.
External threads are those that are created on the outer face of a model.
Fig2.13 External threading on a bolt
Fig2.14Internal threading in a nut
21
2.13.1 Detailed thread:
To create the detailed thread, invoke the Thread tool; the Thread dialog box will be
displayed. Select the Detailed radio button to display the options to create detailed
threads; the dialog box will be modified and you will be prompted to select a cylindrical
face. Select the face on which you need to create threads.
2.13.2 Symbolic Threads:
To create symbolic threads, invoke the Thread tool; the Thread dialog box will be
displayed. There are two methods of creating symbolic threads. In the first method, the
system automatically defines the thread specifications for the selected face using a
thread table. In the other method, some thread specifications are calculated and
displayed in the edit box, but you can also modify these values individually.
2.13.2.1 Symbolic Threads Using Table:
To create a symbolic thread using table, invoke the Thread dialog box and clear the
Manual Input check box if it is already selected; the options to specify the parameters
of the thread will be disabled. Next, select the cylindrical face on which you need to
create the threads; the face will be highlighted and an arrow will be displayed at one of
the ends of the face.
2.13.2.2 Symbolic Threads Using Manual Inputs:
To create a symbolic thread using the manual inputs, invoke the Thread dialog box and
choose the Manual Input check box; the options to specify the parameters of the thread
will be enabled. Next, select the cylindrical face on which you need to create the
threads; some default values will be displayed in the edit boxes to define the parameters
of the threads.
2.14 Shell Feature:
The Shell tool allows you to scoop out the material from a model and make it hollow
from inside. The resulting model will be a structure of walls with a cavity inside. You
can remove some of the faces of the model and apply different wall thicknesses to them.
Fig2.15 Shell Model
22
Chapter 3: Assemblyenvironment
3.1 Introduction:
The Assembly environment is used to create the interrelationship between the
component parts, which are assembled together by applying a parametric link, both in
dimensional and positional aspects. The assembly constraints are parametric in nature,
so any type of modification with the assembly constraints at any stage of the assembling
procedure is possible. The assembly files in NX have the file name extension as .prt.
The Assembly environment in NX is interactive and bi-directionally associative. The
component can be modified in the assembly environment itself by setting the part to be
modified as the work part. After assembling the components, you can also check the
interference between them. This increases the efficiency of the assembly and also
eliminates the errors while actually manufacturing the components. You can also create
the exploded state of assembly. Creating this state of assembly helps the technician
understand the sequence of components to be assembled better.
3.2 Types of Assembly Design Approaches:
In NX, the assemblies can be created using two types of design approaches, the bottom-
up assembly design approach and the top-down assembly design approach.
3.2.1 Bottom-up Assembly Design Approach:
The Bottom-up assembly design approach is the most widely preferred traditional
approach of assembly design. In this approach, all components are created as separate
part files and placed in the assembly as external components. In this approach, you need
to create components separately in the Modelling environment and save them as .prt
files. After creating all components, you need to start a new file in the Assembly
environment and place them in the assembly environment using the tools in the
Assemblies group. Next, you need to assemble the components using assembly
constraints. The main advantage of using this approach is that you can pay more
attention to the complexity of the component design as you create them before
assembling. You can also capture the design intent easily. This approach is preferred
while handling large assemblies or assemblies with complex components.
3.2.2 Top-down assembly design approach:
You can also create all the components of an assembly in single file as separate bodies
or features and then save them as separate parts. This approach of creating an assembly
is known as the top-down assembly design approach. In this approach, most of the dime
23
-nsions are derived from other features and part bodies.
3.3 Creating Bottom-up Assemblies:
As mentioned earlier, in the bottom-up assemblies, components are created as separate
parts in the Modelling environment, and then they are placed in a new file that is started
in the Assembly environment.
3.3.1 Add Component:
In NX, the components are placed in the Assembly environment using the Add tool
available in the Component group of the Assemblies tab in the Ribbon. To place the
component, choose the Add tool from the Component group of Assemblies tab. You
can also choose the Add tool from the Assemblies group of Home tab; the Add
Component dialog box will be displayed. Choose the Open button from the dialog box;
the Part Name dialog box will be displayed. Browse and select the component to be
placed and choose the OK button from the Part Name dialog box; the Component
Preview window will be displayed. In this window, you can preview the selected
component. The component that is displayed in the Component Preview window is
known as the displayed part. The name of the component is displayed in the Loaded
Parts list of the Add Component dialog box. The Recent Parts list displays the list of
recently added parts in the Assembly environment.
3.3.2 Applying Assembly Constraints to Components:
In NX, assembly constraints can be applied to components by using the Assembly
Constraints dialog box. To invoke this dialog box, select the By Constraints option from
the Positioning drop-down list of the Add Component dialog box. Next, choose the OK
button from the dialog box; the Assembly Constraints dialog box will be displayed.
Assembly constraints are used to constrain the degree of freedom of a component in an
assembly. By constraining the degrees of freedom of a component, you can restrict or
determine the movement of the component. There are various types of assembly
constraints available in NX.
3.3.2.1 Touch Align:
The Touch Align constraint is used to constrain the motion of two selected reference
faces or reference planes of different components such that they touch or align with
each other. This constraint is also used to make edges or axis of components collinear,
or to make points of components coincident to each other. To apply this constraint,
select the Touch Align option from the Type drop-down list in the Assembly
Constraints dialog box; you will be prompted to select the first reference object from
24
the component to be mated. Select a planar face, curved face, edge, datum axis, or point
as the reference object from the component to be mated; the selected reference object
will be highlighted and you will be prompted to select the second reference object from
the component to mate to. Select a datum plane or any other reference object from the
component displayed in the Component Preview window as the second reference
object; the component will shift its position according to the constraint applied and a
symbol of the constraint will be displayed on the component.
3.3.2.2 Angle:
The Angle constraint is applied to specify an angle between the two selected reference
entities of components. To apply this constraint, select the Angle constraint from the
Type drop-down list in the Assembly Constraints dialog box; the Geometry to
Constrain rollout will be modified. By default, the 3D Angle option will be selected
from the Subtype drop-down list in this rollout. Also, you will be prompted to select
the first object to apply the angle constraint. Select a face; you will be prompted to
select the second object to apply constraint. Select the second face; two angular handles
and a dynamic input box will be displayed in the graphics window. Also, the Angle
rollout will be displayed in the Assembly Constraints dialog box. Next, enter the
required angle either in the dynamic input box or in the Angle edit box of the Angle
rollout. If you select the Orient Angle option from the Subtype drop-down list, you will
be prompted to select an axis for specifying the angle. Select an axis or an edge; you
will be prompted to select the first object for applying the Angle constraint. Select the
first face; you will be prompted to select the second object for applying the Angle
constraint.
3.3.2.3 Parallel:
The Parallel constraint is applied to constrain the selected reference objects so that they
become parallel to each other. To apply the Parallel constraint to objects, select the
Parallel option from the Type drop-down list in the Assembly Constraints dialog box.
Next, select the reference objects from two components constraint will be applied and
the resulting position of components will be displayed in the graphics window. Next,
choose the Reverse Last Constraint button from the Assembly Constraints dialog box,
if you want to switch over to other possible solutions for applying constraint. Next,
choose the OK button from the Assembly Constraints dialog box; the Parallel constraint
will be applied to components. When you apply the Parallel constraint between the two
cylindrical faces, the axes of the selected cylindrical faces become parallel to each
25
other. However, if this constraint is applied between a cylindrical face and a planar face,
the axis of the cylindrical face becomes parallel to the normal of the selected planar
face.
3.3.2.4 Perpendicular:
The Perpendicular constraint is applied to constrain the selected reference objects so
that they become normal to each other. To apply this constraint, select the Perpendicular
option from the Type drop-down list in the Assembly Constraints dialog box. Next,
select the reference objects from two components. the constraint will be applied and the
resulting position of components will be displayed. Choose the Reverse Last Constraint
button from the Assembly Constraints dialog box to switch over to other possible
solutions for the current selection set. Finally, choose the OK button from the Assembly
Constraints dialog box. You can also apply the Perpendicular constraint between two
cylindrical faces. In this case, the axes of the selected cylindrical faces become normal
to each other. If you apply the Perpendicular constraint between a cylindrical face and
a planar face, the axis of the cylindrical face will become normal to the selected planar
face. If you apply this constraint between two selected curved edges, the selected curved
edges will be placed normal to each other. If you apply the Perpendicular constraint
between a linear edge and a curved edge, the curved edge will be pivoted about the
linear edge. Also, it will be rotated about the selected linear edge.
Fig3.1 Perpendicular constraint
3.3.2.5 Center:
The Center constraint is applied to constrain an object such that it always remains
exactly at the center of the two selected reference objects. To apply this constraint,
select the Center option from the Type drop-down list in the Assembly Constraints
26
dialog box; the Geometry to Constrain rollout will be modified and by default, the 1 to
2 option will be selected in the Subtype drop-down list in Geometry to Constrain
rollout. As a result, the first selected object will shift between the other two selected
reference objects. When you select the Center option from the Type drop-down list,
you will be prompted to select the first object that will be at the center of the other two
selected objects. After selecting the first object, you will be prompted to select the first
reference object. Select any face, edge, or axis of the object as the first reference object;
you will be prompted to select the second reference object. Select the second reference
object; the first selected object will shift between the two selected reference objects.
After the Center constraint is applied to If you select the Infer Center/Axis option from
the Axial Geometry drop-down list, the center or axis of the selected cylindrical faces
will be used for applying the constraint.
Fig3.2 Center constraint
3.3.2.6 Distance:
The Distance constraint is applied to maintain the required offset distance between the
two selected reference objects. To apply this constraint, select the Distance option from
the Type drop-down list in the Assembly Constraints dialog box; you will be prompted
to select the first object. Select the first reference object, you will be prompted to select
the second object. Select the second object; the Distance edit box will be displayed in
the Distance rollout and a handle with the dynamic input box will be displayed. Next,
enter the required offset value in the Distance edit box and press ENTER; the preview
27
of the resulting position of components will be displayed If the resulting position of the
components is not satisfactory, choose the Cycle Last Constraint button from the
Assembly Constraints dialog box to flip between the possible solutions for the specified
distance value. You can also apply the Distance constraint between two cylindrical
faces or circular edges. To do so, select the reference objects from both components
and enter the required offset value in the Distance edit box; the constraint will be
applied. Note that, in this case, the distance specified will be the distance between the
axes of the selected objects.
3.3.2.7 Concentric:
The Concentric constraint is applied to constrain the circular or elliptical edges of the
components to coincide their centers as well as to make the selected edges coplanar. To
apply this constraint, select the Concentric option from the Type drop-down list in the
Assembly Constraints dialog box; you will be prompted to select the first circular
object. Select the first circular object; you will be prompted to select the second circular
object. Select the second circular object. the centers of both circular edges will coincide
and the selected edges will become coplanar.
3.3.2.8 Fix:
The Fix constraint is applied to fix the selected component at its current position in the
3D space. Once the component has been fixed, it cannot be changed and you can
constrain other components with respect to the fixed component. To apply this
constraint, select the Fix option from the Type drop-down list in the Assembly
Constraints dialog box; you will be prompted to select the object to fix. Select the
component; the selected component will be fixed at its current location and a small
symbol will be displayed on it.
3.3.2.9 Bond:
The Bond constraint is applied to fix the position of the selected components with
respect to each other. Once the selected components are fixed using this constraint, they
can be moved as a single component in such a way that the position of one component
will remain the same with respect to the other component. To apply this constraint,
select the Bond option from the Type drop-down list in the Assembly Constraints dialog
box; you will be prompted to select the objects that you want to bond. Select two or
more components; the Create Constraint button will be displayed in the Geometry to
Constrain rollout. Choose this button to apply the Bond constraint to the selected
components.
28
3.3.2.10 Fit:
The Fit constraint is applied to bring together two cylindrical faces of the same
diameter. This constraint is useful for assembling nuts and bolts. To apply this
constraint, select the Fit option from the Type drop-down list in the Assembly
Constraints dialog box; you will be prompted to select the first object to fit. Select the
first circular surface; you will be prompted to select the second object. Select the second
circular surface of the same diameter; the axes of both components will coincide and
they will become coaxial. Note that if the diameters of the selected surfaces
(components) are not equal, the Fit constraint will become invalid.
Fig3.3 Fit constraint
3.3.2.11 Align/Lock:
The Align/Lock constraint is used to align the axes of two different components and
constrain the rotation of the components about the axis. In case of bolt, if you apply the
Align/Lock constraint to bolt and hole, axes of the bolt and hole will be aligned and
rotational movement of the bolt will be constrained. However, the bolt can move
linearly along the axis. To apply this constraint, select the Align/Lock option from the
Type dropdown list in the Assembly Constraints dialog box; you will be prompted to
select the first circular object. Select the first circular object; you will be prompted to
select the second circular object.
Fig3.4 Align/Lock constraint
29
3.4 Butterfly valve assembly:
Fig3.5 Butterfly valve
Fig3.6Body of butterfly valve
30
Fig3.7 Shaft
Fig3.8Retainer
31
Fig3.9Screw
Fig3.10Arm
Fig 3.11 Plate
32
Fig3.12 Bolt
33
Reference
https://en.wikipedia.org/wiki/Siemens_NX
https://www.plm.automation.siemens.com/en_us/products/nx/
https://ransricontlear.files.wordpress.com/2015/11/unigraphics-nx-8.5
https://www.scribd.com/doc/176942059/Siemens-NX-8-Gettin-Started

More Related Content

What's hot

Solidworks
SolidworksSolidworks
SolidworksMoe Oee
 
Introduction to cad/cam
Introduction to cad/camIntroduction to cad/cam
Introduction to cad/camCADD CENTRE
 
Unit 3-ME8691 & COMPUTER AIDED DESIGN AND MANUFACTURING
Unit 3-ME8691 & COMPUTER AIDED DESIGN AND    MANUFACTURINGUnit 3-ME8691 & COMPUTER AIDED DESIGN AND    MANUFACTURING
Unit 3-ME8691 & COMPUTER AIDED DESIGN AND MANUFACTURINGMohanumar S
 
CAD AND CAM PPT.pptx
CAD AND CAM PPT.pptxCAD AND CAM PPT.pptx
CAD AND CAM PPT.pptxjntuhcej
 
cad design process VS conventional design process
cad design process VS conventional design processcad design process VS conventional design process
cad design process VS conventional design processJagilam Kumar
 
CAD/CAM -PPT UNIT NO-I
CAD/CAM -PPT UNIT NO-ICAD/CAM -PPT UNIT NO-I
CAD/CAM -PPT UNIT NO-IMalothHeeralal
 
Product design solidworks training ppt
Product design  solidworks training pptProduct design  solidworks training ppt
Product design solidworks training pptRiteshYadav134
 
Presentation on reverse engineering
Presentation on reverse engineeringPresentation on reverse engineering
Presentation on reverse engineeringFaleSh ShaRma
 
UNIT III CAD STANDARDS
UNIT III CAD STANDARDS UNIT III CAD STANDARDS
UNIT III CAD STANDARDS ravis205084
 
Reverse engineering & its application
Reverse engineering & its applicationReverse engineering & its application
Reverse engineering & its applicationmapqrs
 
CADCAM CAE Notes
CADCAM CAE NotesCADCAM CAE Notes
CADCAM CAE NotesAbhay Gore
 
Computer control in process planning Unit 4 (ME CAD/CAM)
Computer control in process planning Unit 4 (ME CAD/CAM)Computer control in process planning Unit 4 (ME CAD/CAM)
Computer control in process planning Unit 4 (ME CAD/CAM)Avt Shubhash
 
Cnc milling programs
Cnc milling programsCnc milling programs
Cnc milling programsmoniraghu
 
Computer aided manufacturing
Computer aided manufacturingComputer aided manufacturing
Computer aided manufacturingGulfaraz alam
 

What's hot (20)

Introduction to CAD and CAD software
Introduction to CAD and CAD softwareIntroduction to CAD and CAD software
Introduction to CAD and CAD software
 
UGS NX
UGS NXUGS NX
UGS NX
 
Solidworks
SolidworksSolidworks
Solidworks
 
solidworks
solidworkssolidworks
solidworks
 
Introduction to cad/cam
Introduction to cad/camIntroduction to cad/cam
Introduction to cad/cam
 
Unit 3-ME8691 & COMPUTER AIDED DESIGN AND MANUFACTURING
Unit 3-ME8691 & COMPUTER AIDED DESIGN AND    MANUFACTURINGUnit 3-ME8691 & COMPUTER AIDED DESIGN AND    MANUFACTURING
Unit 3-ME8691 & COMPUTER AIDED DESIGN AND MANUFACTURING
 
CAD AND CAM PPT.pptx
CAD AND CAM PPT.pptxCAD AND CAM PPT.pptx
CAD AND CAM PPT.pptx
 
cad design process VS conventional design process
cad design process VS conventional design processcad design process VS conventional design process
cad design process VS conventional design process
 
CAD/CAM -PPT UNIT NO-I
CAD/CAM -PPT UNIT NO-ICAD/CAM -PPT UNIT NO-I
CAD/CAM -PPT UNIT NO-I
 
CAD/CAM/CIM (Lecture 1 CAD)
CAD/CAM/CIM  (Lecture 1 CAD)CAD/CAM/CIM  (Lecture 1 CAD)
CAD/CAM/CIM (Lecture 1 CAD)
 
Solid works ppt
Solid works pptSolid works ppt
Solid works ppt
 
Product design solidworks training ppt
Product design  solidworks training pptProduct design  solidworks training ppt
Product design solidworks training ppt
 
Presentation on reverse engineering
Presentation on reverse engineeringPresentation on reverse engineering
Presentation on reverse engineering
 
UNIT III CAD STANDARDS
UNIT III CAD STANDARDS UNIT III CAD STANDARDS
UNIT III CAD STANDARDS
 
Cnc technology
Cnc technology Cnc technology
Cnc technology
 
Reverse engineering & its application
Reverse engineering & its applicationReverse engineering & its application
Reverse engineering & its application
 
CADCAM CAE Notes
CADCAM CAE NotesCADCAM CAE Notes
CADCAM CAE Notes
 
Computer control in process planning Unit 4 (ME CAD/CAM)
Computer control in process planning Unit 4 (ME CAD/CAM)Computer control in process planning Unit 4 (ME CAD/CAM)
Computer control in process planning Unit 4 (ME CAD/CAM)
 
Cnc milling programs
Cnc milling programsCnc milling programs
Cnc milling programs
 
Computer aided manufacturing
Computer aided manufacturingComputer aided manufacturing
Computer aided manufacturing
 

Viewers also liked

Viewers also liked (9)

APATOR Przelomowe dziesieciolecie
APATOR Przelomowe dziesieciolecieAPATOR Przelomowe dziesieciolecie
APATOR Przelomowe dziesieciolecie
 
Us Tennis
Us TennisUs Tennis
Us Tennis
 
Social Media as a Professional Development Tool - Leaders on Fast Track / His...
Social Media as a Professional Development Tool - Leaders on Fast Track / His...Social Media as a Professional Development Tool - Leaders on Fast Track / His...
Social Media as a Professional Development Tool - Leaders on Fast Track / His...
 
Wajahat saleem1
Wajahat saleem1Wajahat saleem1
Wajahat saleem1
 
Micro 16 nonspecific_immunitywithvoiceover
Micro 16 nonspecific_immunitywithvoiceoverMicro 16 nonspecific_immunitywithvoiceover
Micro 16 nonspecific_immunitywithvoiceover
 
Rhgayaf
RhgayafRhgayaf
Rhgayaf
 
Brownies
BrowniesBrownies
Brownies
 
Our cake
Our cakeOur cake
Our cake
 
Pau
PauPau
Pau
 

Similar to Nx file

Product Design and CAD.pptx
Product Design and CAD.pptxProduct Design and CAD.pptx
Product Design and CAD.pptxHayelomGebre
 
Part 1-Introduction to CAD-CAM-CAE.pptx
Part 1-Introduction to CAD-CAM-CAE.pptxPart 1-Introduction to CAD-CAM-CAE.pptx
Part 1-Introduction to CAD-CAM-CAE.pptxKhalil Alhatab
 
CAD AND CAM unit I.pptx
CAD AND CAM unit I.pptxCAD AND CAM unit I.pptx
CAD AND CAM unit I.pptxjntuhcej
 
Introduction to Computer Graphics
Introduction to Computer GraphicsIntroduction to Computer Graphics
Introduction to Computer GraphicsYatin Singh
 
Introduction to mechanical engineering design & manufacturing with
Introduction to mechanical engineering design & manufacturing withIntroduction to mechanical engineering design & manufacturing with
Introduction to mechanical engineering design & manufacturing withAkshit Rajput
 
Introductiuon to cad
Introductiuon to cadIntroductiuon to cad
Introductiuon to cadnayakq
 
COMPUTER AIDED DESIGN / COMPUTER AIDED MANUFACTURING (CAD/CAM
COMPUTER AIDED DESIGN / COMPUTER AIDED MANUFACTURING  (CAD/CAMCOMPUTER AIDED DESIGN / COMPUTER AIDED MANUFACTURING  (CAD/CAM
COMPUTER AIDED DESIGN / COMPUTER AIDED MANUFACTURING (CAD/CAMshishirrathod1
 
COMPUTER AIDED DESIGN, COMPUTER AIDED MANUFACTURING
COMPUTER AIDED DESIGN, COMPUTER AIDED MANUFACTURINGCOMPUTER AIDED DESIGN, COMPUTER AIDED MANUFACTURING
COMPUTER AIDED DESIGN, COMPUTER AIDED MANUFACTURINGjyyothees mv
 

Similar to Nx file (20)

CAD vs CAE
CAD vs CAECAD vs CAE
CAD vs CAE
 
Product Design and CAD.pptx
Product Design and CAD.pptxProduct Design and CAD.pptx
Product Design and CAD.pptx
 
Part 1-Introduction to CAD-CAM-CAE.pptx
Part 1-Introduction to CAD-CAM-CAE.pptxPart 1-Introduction to CAD-CAM-CAE.pptx
Part 1-Introduction to CAD-CAM-CAE.pptx
 
DOC of Crank shaft
DOC of Crank shaftDOC of Crank shaft
DOC of Crank shaft
 
CAD AND CAM unit I.pptx
CAD AND CAM unit I.pptxCAD AND CAM unit I.pptx
CAD AND CAM unit I.pptx
 
Introduction to Computer Graphics
Introduction to Computer GraphicsIntroduction to Computer Graphics
Introduction to Computer Graphics
 
CAD/CAM Lecture #1
CAD/CAM Lecture #1CAD/CAM Lecture #1
CAD/CAM Lecture #1
 
AutoCAD Tutorial AB.pptx
AutoCAD Tutorial AB.pptxAutoCAD Tutorial AB.pptx
AutoCAD Tutorial AB.pptx
 
Introduction to mechanical engineering design & manufacturing with
Introduction to mechanical engineering design & manufacturing withIntroduction to mechanical engineering design & manufacturing with
Introduction to mechanical engineering design & manufacturing with
 
CAD/CAE
CAD/CAECAD/CAE
CAD/CAE
 
Cad cam
Cad camCad cam
Cad cam
 
Cad cam
Cad camCad cam
Cad cam
 
6 weeks software training report
6 weeks software training report    6 weeks software training report
6 weeks software training report
 
CAD/CAM Lecture #5
CAD/CAM Lecture #5CAD/CAM Lecture #5
CAD/CAM Lecture #5
 
Introductiuon to cad
Introductiuon to cadIntroductiuon to cad
Introductiuon to cad
 
COMPUTER AIDED DESIGN / COMPUTER AIDED MANUFACTURING (CAD/CAM
COMPUTER AIDED DESIGN / COMPUTER AIDED MANUFACTURING  (CAD/CAMCOMPUTER AIDED DESIGN / COMPUTER AIDED MANUFACTURING  (CAD/CAM
COMPUTER AIDED DESIGN / COMPUTER AIDED MANUFACTURING (CAD/CAM
 
CAD/CAM Lecture #2
CAD/CAM Lecture #2CAD/CAM Lecture #2
CAD/CAM Lecture #2
 
COMPUTER AIDED DESIGN, COMPUTER AIDED MANUFACTURING
COMPUTER AIDED DESIGN, COMPUTER AIDED MANUFACTURINGCOMPUTER AIDED DESIGN, COMPUTER AIDED MANUFACTURING
COMPUTER AIDED DESIGN, COMPUTER AIDED MANUFACTURING
 
Module 1
Module 1Module 1
Module 1
 
Module 1
Module 1Module 1
Module 1
 

Recently uploaded

办理(USYD毕业证书)澳洲悉尼大学毕业证成绩单原版一比一
办理(USYD毕业证书)澳洲悉尼大学毕业证成绩单原版一比一办理(USYD毕业证书)澳洲悉尼大学毕业证成绩单原版一比一
办理(USYD毕业证书)澳洲悉尼大学毕业证成绩单原版一比一diploma 1
 
MT. Marseille an Archipelago. Strategies for Integrating Residential Communit...
MT. Marseille an Archipelago. Strategies for Integrating Residential Communit...MT. Marseille an Archipelago. Strategies for Integrating Residential Communit...
MT. Marseille an Archipelago. Strategies for Integrating Residential Communit...katerynaivanenko1
 
办理学位证(SFU证书)西蒙菲莎大学毕业证成绩单原版一比一
办理学位证(SFU证书)西蒙菲莎大学毕业证成绩单原版一比一办理学位证(SFU证书)西蒙菲莎大学毕业证成绩单原版一比一
办理学位证(SFU证书)西蒙菲莎大学毕业证成绩单原版一比一F dds
 
Design Portfolio - 2024 - William Vickery
Design Portfolio - 2024 - William VickeryDesign Portfolio - 2024 - William Vickery
Design Portfolio - 2024 - William VickeryWilliamVickery6
 
2024新版美国旧金山州立大学毕业证成绩单pdf电子版制作修改#毕业文凭制作#回国入职#diploma#degree
2024新版美国旧金山州立大学毕业证成绩单pdf电子版制作修改#毕业文凭制作#回国入职#diploma#degree2024新版美国旧金山州立大学毕业证成绩单pdf电子版制作修改#毕业文凭制作#回国入职#diploma#degree
2024新版美国旧金山州立大学毕业证成绩单pdf电子版制作修改#毕业文凭制作#回国入职#diploma#degreeyuu sss
 
Architecture case study India Habitat Centre, Delhi.pdf
Architecture case study India Habitat Centre, Delhi.pdfArchitecture case study India Habitat Centre, Delhi.pdf
Architecture case study India Habitat Centre, Delhi.pdfSumit Lathwal
 
毕业文凭制作#回国入职#diploma#degree澳洲弗林德斯大学毕业证成绩单pdf电子版制作修改#毕业文凭制作#回国入职#diploma#degree
毕业文凭制作#回国入职#diploma#degree澳洲弗林德斯大学毕业证成绩单pdf电子版制作修改#毕业文凭制作#回国入职#diploma#degree 毕业文凭制作#回国入职#diploma#degree澳洲弗林德斯大学毕业证成绩单pdf电子版制作修改#毕业文凭制作#回国入职#diploma#degree
毕业文凭制作#回国入职#diploma#degree澳洲弗林德斯大学毕业证成绩单pdf电子版制作修改#毕业文凭制作#回国入职#diploma#degree ttt fff
 
CREATING A POSITIVE SCHOOL CULTURE CHAPTER 10
CREATING A POSITIVE SCHOOL CULTURE CHAPTER 10CREATING A POSITIVE SCHOOL CULTURE CHAPTER 10
CREATING A POSITIVE SCHOOL CULTURE CHAPTER 10uasjlagroup
 
ARt app | UX Case Study
ARt app | UX Case StudyARt app | UX Case Study
ARt app | UX Case StudySophia Viganò
 
Mookuthi is an artisanal nose ornament brand based in Madras.
Mookuthi is an artisanal nose ornament brand based in Madras.Mookuthi is an artisanal nose ornament brand based in Madras.
Mookuthi is an artisanal nose ornament brand based in Madras.Mookuthi
 
Abu Dhabi Call Girls O58993O4O2 Call Girls in Abu Dhabi`
Abu Dhabi Call Girls O58993O4O2 Call Girls in Abu Dhabi`Abu Dhabi Call Girls O58993O4O2 Call Girls in Abu Dhabi`
Abu Dhabi Call Girls O58993O4O2 Call Girls in Abu Dhabi`dajasot375
 
Untitled presedddddddddddddddddntation (1).pptx
Untitled presedddddddddddddddddntation (1).pptxUntitled presedddddddddddddddddntation (1).pptx
Untitled presedddddddddddddddddntation (1).pptxmapanig881
 
Top 10 Modern Web Design Trends for 2025
Top 10 Modern Web Design Trends for 2025Top 10 Modern Web Design Trends for 2025
Top 10 Modern Web Design Trends for 2025Rndexperts
 
Call Girls Satellite 7397865700 Ridhima Hire Me Full Night
Call Girls Satellite 7397865700 Ridhima Hire Me Full NightCall Girls Satellite 7397865700 Ridhima Hire Me Full Night
Call Girls Satellite 7397865700 Ridhima Hire Me Full Nightssuser7cb4ff
 
group_15_empirya_p1projectIndustrial.pdf
group_15_empirya_p1projectIndustrial.pdfgroup_15_empirya_p1projectIndustrial.pdf
group_15_empirya_p1projectIndustrial.pdfneelspinoy
 
办理学位证(TheAuckland证书)新西兰奥克兰大学毕业证成绩单原版一比一
办理学位证(TheAuckland证书)新西兰奥克兰大学毕业证成绩单原版一比一办理学位证(TheAuckland证书)新西兰奥克兰大学毕业证成绩单原版一比一
办理学位证(TheAuckland证书)新西兰奥克兰大学毕业证成绩单原版一比一Fi L
 
PORTFOLIO DE ARQUITECTURA CRISTOBAL HERAUD 2024
PORTFOLIO DE ARQUITECTURA CRISTOBAL HERAUD 2024PORTFOLIO DE ARQUITECTURA CRISTOBAL HERAUD 2024
PORTFOLIO DE ARQUITECTURA CRISTOBAL HERAUD 2024CristobalHeraud
 
Dubai Calls Girl Tapes O525547819 Real Tapes Escort Services Dubai
Dubai Calls Girl Tapes O525547819 Real Tapes Escort Services DubaiDubai Calls Girl Tapes O525547819 Real Tapes Escort Services Dubai
Dubai Calls Girl Tapes O525547819 Real Tapes Escort Services Dubaikojalkojal131
 
Call Girls Aslali 7397865700 Ridhima Hire Me Full Night
Call Girls Aslali 7397865700 Ridhima Hire Me Full NightCall Girls Aslali 7397865700 Ridhima Hire Me Full Night
Call Girls Aslali 7397865700 Ridhima Hire Me Full Nightssuser7cb4ff
 

Recently uploaded (20)

办理(USYD毕业证书)澳洲悉尼大学毕业证成绩单原版一比一
办理(USYD毕业证书)澳洲悉尼大学毕业证成绩单原版一比一办理(USYD毕业证书)澳洲悉尼大学毕业证成绩单原版一比一
办理(USYD毕业证书)澳洲悉尼大学毕业证成绩单原版一比一
 
MT. Marseille an Archipelago. Strategies for Integrating Residential Communit...
MT. Marseille an Archipelago. Strategies for Integrating Residential Communit...MT. Marseille an Archipelago. Strategies for Integrating Residential Communit...
MT. Marseille an Archipelago. Strategies for Integrating Residential Communit...
 
办理学位证(SFU证书)西蒙菲莎大学毕业证成绩单原版一比一
办理学位证(SFU证书)西蒙菲莎大学毕业证成绩单原版一比一办理学位证(SFU证书)西蒙菲莎大学毕业证成绩单原版一比一
办理学位证(SFU证书)西蒙菲莎大学毕业证成绩单原版一比一
 
Design Portfolio - 2024 - William Vickery
Design Portfolio - 2024 - William VickeryDesign Portfolio - 2024 - William Vickery
Design Portfolio - 2024 - William Vickery
 
2024新版美国旧金山州立大学毕业证成绩单pdf电子版制作修改#毕业文凭制作#回国入职#diploma#degree
2024新版美国旧金山州立大学毕业证成绩单pdf电子版制作修改#毕业文凭制作#回国入职#diploma#degree2024新版美国旧金山州立大学毕业证成绩单pdf电子版制作修改#毕业文凭制作#回国入职#diploma#degree
2024新版美国旧金山州立大学毕业证成绩单pdf电子版制作修改#毕业文凭制作#回国入职#diploma#degree
 
Call Girls in Pratap Nagar, 9953056974 Escort Service
Call Girls in Pratap Nagar,  9953056974 Escort ServiceCall Girls in Pratap Nagar,  9953056974 Escort Service
Call Girls in Pratap Nagar, 9953056974 Escort Service
 
Architecture case study India Habitat Centre, Delhi.pdf
Architecture case study India Habitat Centre, Delhi.pdfArchitecture case study India Habitat Centre, Delhi.pdf
Architecture case study India Habitat Centre, Delhi.pdf
 
毕业文凭制作#回国入职#diploma#degree澳洲弗林德斯大学毕业证成绩单pdf电子版制作修改#毕业文凭制作#回国入职#diploma#degree
毕业文凭制作#回国入职#diploma#degree澳洲弗林德斯大学毕业证成绩单pdf电子版制作修改#毕业文凭制作#回国入职#diploma#degree 毕业文凭制作#回国入职#diploma#degree澳洲弗林德斯大学毕业证成绩单pdf电子版制作修改#毕业文凭制作#回国入职#diploma#degree
毕业文凭制作#回国入职#diploma#degree澳洲弗林德斯大学毕业证成绩单pdf电子版制作修改#毕业文凭制作#回国入职#diploma#degree
 
CREATING A POSITIVE SCHOOL CULTURE CHAPTER 10
CREATING A POSITIVE SCHOOL CULTURE CHAPTER 10CREATING A POSITIVE SCHOOL CULTURE CHAPTER 10
CREATING A POSITIVE SCHOOL CULTURE CHAPTER 10
 
ARt app | UX Case Study
ARt app | UX Case StudyARt app | UX Case Study
ARt app | UX Case Study
 
Mookuthi is an artisanal nose ornament brand based in Madras.
Mookuthi is an artisanal nose ornament brand based in Madras.Mookuthi is an artisanal nose ornament brand based in Madras.
Mookuthi is an artisanal nose ornament brand based in Madras.
 
Abu Dhabi Call Girls O58993O4O2 Call Girls in Abu Dhabi`
Abu Dhabi Call Girls O58993O4O2 Call Girls in Abu Dhabi`Abu Dhabi Call Girls O58993O4O2 Call Girls in Abu Dhabi`
Abu Dhabi Call Girls O58993O4O2 Call Girls in Abu Dhabi`
 
Untitled presedddddddddddddddddntation (1).pptx
Untitled presedddddddddddddddddntation (1).pptxUntitled presedddddddddddddddddntation (1).pptx
Untitled presedddddddddddddddddntation (1).pptx
 
Top 10 Modern Web Design Trends for 2025
Top 10 Modern Web Design Trends for 2025Top 10 Modern Web Design Trends for 2025
Top 10 Modern Web Design Trends for 2025
 
Call Girls Satellite 7397865700 Ridhima Hire Me Full Night
Call Girls Satellite 7397865700 Ridhima Hire Me Full NightCall Girls Satellite 7397865700 Ridhima Hire Me Full Night
Call Girls Satellite 7397865700 Ridhima Hire Me Full Night
 
group_15_empirya_p1projectIndustrial.pdf
group_15_empirya_p1projectIndustrial.pdfgroup_15_empirya_p1projectIndustrial.pdf
group_15_empirya_p1projectIndustrial.pdf
 
办理学位证(TheAuckland证书)新西兰奥克兰大学毕业证成绩单原版一比一
办理学位证(TheAuckland证书)新西兰奥克兰大学毕业证成绩单原版一比一办理学位证(TheAuckland证书)新西兰奥克兰大学毕业证成绩单原版一比一
办理学位证(TheAuckland证书)新西兰奥克兰大学毕业证成绩单原版一比一
 
PORTFOLIO DE ARQUITECTURA CRISTOBAL HERAUD 2024
PORTFOLIO DE ARQUITECTURA CRISTOBAL HERAUD 2024PORTFOLIO DE ARQUITECTURA CRISTOBAL HERAUD 2024
PORTFOLIO DE ARQUITECTURA CRISTOBAL HERAUD 2024
 
Dubai Calls Girl Tapes O525547819 Real Tapes Escort Services Dubai
Dubai Calls Girl Tapes O525547819 Real Tapes Escort Services DubaiDubai Calls Girl Tapes O525547819 Real Tapes Escort Services Dubai
Dubai Calls Girl Tapes O525547819 Real Tapes Escort Services Dubai
 
Call Girls Aslali 7397865700 Ridhima Hire Me Full Night
Call Girls Aslali 7397865700 Ridhima Hire Me Full NightCall Girls Aslali 7397865700 Ridhima Hire Me Full Night
Call Girls Aslali 7397865700 Ridhima Hire Me Full Night
 

Nx file

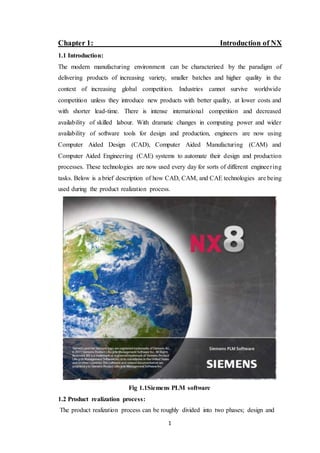
  • 1. 1 Chapter 1: Introduction of NX 1.1 Introduction: The modern manufacturing environment can be characterized by the paradigm of delivering products of increasing variety, smaller batches and higher quality in the context of increasing global competition. Industries cannot survive worldwide competition unless they introduce new products with better quality, at lower costs and with shorter lead-time. There is intense international competition and decreased availability of skilled labour. With dramatic changes in computing power and wider availability of software tools for design and production, engineers are now using Computer Aided Design (CAD), Computer Aided Manufacturing (CAM) and Computer Aided Engineering (CAE) systems to automate their design and production processes. These technologies are now used every day for sorts of different engineering tasks. Below is a brief description of how CAD, CAM, and CAE technologies are being used during the product realization process. Fig 1.1Siemens PLM software 1.2 Product realization process: The product realization process can be roughly divided into two phases; design and
  • 2. 2 Manufacturing. The design process starts with identification of new customer needs and design variables to be improved, which are identified by the marketing personnel after getting feedback from the customers. Once the relevant design information is gathered, design specifications are formulated. A feasibility study is conducted with relevant design information and detailed design and analyses are performed. The detailed design includes design conceptualization, prospective product drawings, sketches and geometric modelling. Analysis includes stress analysis, interference checking, kinematics analysis, mass property calculations and tolerance analysis and design optimization. The quality of the results obtained from these activities is directly related to the quality of the analysis and the tools used for conducting the analysis. The manufacturing process starts with the shop-floor activities beginning from production planning, which uses the design process drawings and ends with the actual product. Process planning includes activities like production planning, material procurement, and machine selection. There are varied tasks like procurement of new tools, NC programming and quality checks at various stages during the production process. Process planning includes planning for all the processes used in manufacturing of the product. Parts that pass the quality control inspections are assembled functionally tested Packaged, labelled, and shipped to customers. Fig1.2 Product Realization Process
  • 3. 3 1.3 History of CAD/CAM development The roots of current CAD/CAM technologies go back to the beginning of civilization when engineers in ancient Egypt recognized graphics communication. Orthographic projection practiced today was invented around the 1800’s. The real development of CAD/CAM systems started in the 1950s. CAD/CAM went through four major phases of development in the last century. The 1950’s was known as the era of interactive computer graphics. MIT’s Servo Mechanisms Laboratory demonstrated the concept of numerical control (NC) on a three-axis milling machine. Development in this era was slowed down by the shortcomings of computers at the time. During the late 1950’s the development of Automatically Programmed Tools (APT) began and General Motors explored the potential of interactive graphics. The 1960s was the most critical research period for interactive computer graphics. Ivan Sutherland developed a sketchpad system, which demonstrated the possibility of creating drawings and altercations of objects interactively on a cathode ray tube (CRT). The term CAD started to appear with the word ‘design ‘extending beyond basic drafting concepts. General Motors announced their DAC-1 system and Bell Technologies introduced the GRAPHIC 1 remote display system. During the 1970’s, the research efforts of the previous decade in computer graphics had begun to be fruitful, and potential of interactive computer graphics in improving productivity was realized by industry, government and academia. The present day CAD/CAM development focuses on efficient and fast integration and automation of various elements of design and manufacturing along with the development of new algorithms. Below are some of the commercial packages in the present market. nical Desktop are some low-end CAD software systems, which are mainly used for 2D modelling and drawing. -E, CATIA and I-DEAS are high-end modelling and designing software systems 1.3.1 Computer Aided Design – CAD CAD is technology concerned with using computer systems to assist in the creation, Modification, analysis, and optimization of a design. Any computer program that embodies computer graphics and an application program facilitating engineering functions in design process can be classified as CAD software. The most basic role of CAD is to define the geometry of design – a mechanical part, a product assembly, an architectural structure, an electronic circuit, a building layout, etc. The greatest benefits
  • 4. 4 of CAD systems are that they can save considerable time and reduce errors caused by otherwise having to redefine the geometry of the design from scratch every time it is needed. 1.3.2 Computer Aided Manufacturing – CAM CAM technology involves computer systems that plan, manage, and control the manufacturing operations through computer interface with the plant’s production resources. One of the most important areas of CAM is numerical control (NC). This is the technique of using programmed instructions to control a machine tool, which cuts, mills, grinds, punches or turns raw stock into a finished part. Another significant CAM function is in the programming of robots. Process planning is also a target of computer automation. 1.3.3 Computer Aided Engineering – CAE CAE technology uses a computer system to analyze the functions of a CAD-created product, allowing designers to simulate and study how the product will behave so that the design can be refined and optimized. CAE tools are available for a number of different types of analyses. For example, kinematic analysis programs can be used to determine motion paths and linkage velocities in mechanisms. Dynamic analysis programs can be used to determine loads and displacements in complex assemblies such as automobiles. One of the most popular methods of analyses is using a Finite Element Method (FEM). This approach can be used to determine stress, deformation, heat transfer, magnetic field distribution, fluid flow, and other continuous field problems that are often too tough to solve with any 1.4 NX Environment 1.4.1 Modelling Environment: The Modelling environment is a parametric and feature-based environment in which you can create solid models. The basic requirement for creating solid models in this environment is a sketch and you can draw the sketch directly in the modelling environment by using the tools available in the direct sketch. 1.4.2 Shape Studio Environment: The Shape Studio environment is also a parametric and feature-based environment in which you can create surface models. The tools in this environment are similar to those in the modelling environment. The only difference is that the tools in this environment are used to create basic and advanced surfaces. You are also provided with the surface editing tools, which are used to manipulate the surfaces to obtain the required shape.
  • 5. 5 This environment is useful for conceptual and industrial design. 1.4.3 Assembly Environment: The Assembly environment is used to assemble the components using the assembly constraints available in this environment. There are two types of assembly design approaches in NX, Bottom-up and Top-down. In the bottom-up approach of the assembly, the previously created components are assembled together to maintain their design intent. In the top-down approach, components are created in the Assembly environment. In the Assembly environment you can also assemble an existing assembly with the current assembly. The perform analysis provides the facility to check the interference and clearance between the components in an assembly. 1.4.4 Drafting Environment: The Drafting environment is used for the documentation of the parts or assemblies created earlier in the form of drawing views and their detailing. There are two types of drafting techniques, generative drafting and interactive drafting. The generative drafting technique is used to automatically generate the drawing views of the parts and assemblies. The parametric dimensions added to the component in the modelling environment during its creation can also be generated and displayed automatically in the drawing views. The generative drafting is bidirectional associative in nature. If you modify the dimensions in the Drafting environment, the model will automatically update in the modelling environment and vice-versa. You can also generate the Bill of Material (BOM) and balloons in the drawing views. In interactive drafting, you need to create the drawing views by sketching them using the normal sketching tools and then adding the dimensions. 1.4.5 Sheet Metal Environment: The Sheet Metal environment is used for the designing the sheet metal components. Generally, the sheet metal components are created to generate the flat pattern of a sheet, study the design of the dies and punches, study the process plan for designing, and the tools needed for manufacturing the sheet metal components.
  • 6. 6 Chapter 2: Modelling environment 2.1 Introduction: The Modelling environment is a parametric and feature-based environment in which you can create solid models. The basic requirement for creating solid models in this environment is a sketch and you can draw the sketch directly in the modelling environment by using the tools available in the direct sketch. You can also create features such as fillets, chamfers, taper, and so on by using other tools available in this environment. 2.2 Two dimensional sketching: You can directly create a sketch on a Plane in Modelling application. In most cases, Modelling starts from a 2D sketch and then Extrude, Revolve or Sweep the sketch to create solids. Many complex shapes that are otherwise very difficult to model can easily be drawn by sketching. 2.2.1 Sketch curve toolbar: This toolbar contains icons for creating the common types of curves and spline curves, editing, extending, trimming, filleting etc. Each type of curve has different methods of selection and methods of creation. Fig2.1 Curve toolbar 2.2.1.1 Profile: This command allows you to create a continuous set of lines and arcs connected together. 2.2.1.2 Rectangle: In NX, you can draw rectangles using three methods. These methods can be used by choosing their respective buttons from the Rectangle dialog box.
  • 7. 7 2.2.1.2.1 Rectangles by Specifying Corners: The by 2 points method is used to draw a rectangle by specifying the diagonally opposite corners of rectangle. 2.2.1.2.2 Three Points Rectangles: In this method, you can draw a rectangle using three points. The first two points are used to define the length and angle of one of the sides of the rectangle and the third point is used to define the height of the rectangle. 2.2.1.2.3 Centerpoint Rectangles: Using this method, you can draw a rectangle using three points. However, the first point is taken as the center of the rectangle in this case. 2.2.1.3 Line: This option will selectively create only straight lines. 2.2.1.4 Arc: The arc command allows you to create an arc defined by a center point, and a circumferential start and end point. 2.2.1.5 Three Point Arc: The three point arc command allows you to create an arc defined by three circumferential points. 2.2.1.6 Three Point Arc Starting With Limits: The three point arc starting with limits allows you to create an arc using a start, end, and midpoint. 2.2.1.7 Ellipse: The ellipse is defined by a center point and major and minor axis points. 2.2.1.8 Circle: A circle is defined by a center point and a radius. In NX, you can draw circles using two methods. 2.2.1.8.1 Circle by Specifying the Center Point and Diameter: This is the default and most widely used method of drawing circles. In this method, you need to specify the center point of a circle and a point on the circumference of the circle. The point on the circumference of the circle defines the radius or the diameter of the circle. 2.2.1.8.2 Circle by Specifying Three Points: In this method, the circle is drawn by specifying three points on circumference.
  • 8. 8 Fig2.2 Circle draw by 3 point method 2.2.1.9 Studio Spline: You can create basic spline curves (B-spline and Bezier) with poles or through points with the desired degree of the curve. 2.2.1.10 Fillet: Filleting is defined as the process of rounding the sharp corners of a profile to reduce the stress concentration. Fillets are created by removing the sharp corners and replacing them by round corners. 2.2.1.11 Hexagon: The hexagon is defined by a center point and the radius of an inscribed circle. 2.2.1.12 Quick Trim: This trims the extending curves from the points of intersection of the curves. This option reads every entity by splitting them if they are intersected by another entity and erases the portion selected. 2.2.1.13 Quick extend: The Quick Extend tool is used to extend or lengthen an open sketched entity up to the next entity that it intersects. 2.2.1.14 Make Corner: You can create a corner between two existing sketch entities by using the make corner tool. The make corner tool will work both as quick trim as well as quick extend tool. Depending on the object this tool can trim the object as well as extend the object to make the corner. 2.2.1.15 Mirror Curve: The mirror Curve tool is used to create mirrored copies of the selected sketched entities. Before invoking this tool, you need to draw a line that will be the mirror line. This line will be converted into a reference line after the mirroring operation is completed.
  • 9. 9 2.2.1.16 Linear Pattern Curve: You can pattern the curve linearly by using the linear pattern. To create a linear sketch pattern, choose the Pattern Curve tool from Menu > Insert > Sketch Curve of the Top Border Bar; the Pattern Curve dialog box will be displayed. Select the sketched entity to be patterned and then select the linear option from the Layout drop-down list. 2.2.1.17 Circular pattern curve: You can create circular pattern of the curves by using the Pattern Curve tool. To create a circular sketch pattern of the selected features, invoke the Pattern Curve tool; the Pattern Curve dialog box will be displayed. Select the Circular option from the Layout drop-down list. 2.3 Constraints Toolbar: Constraints can either be dimensional or geometrical. Dimensional constraints are used to constrain the length of an element, the radius or diameter of an arc or circle, and the distance or angle between elements. Geometrical constraints are used to constrain the orientation of one element relative to another. 2.3.1 Dimensional Constraints: The degrees of freedom can be eliminated by giving dimensions with fixed entities like axes, planes, the coordinate system or any existing solid geometries created in the model. These dimensions can be linear, radial, angular etc. You can edit the dimensional values at any time during sketching by double-clicking on the dimension. 2.3.2 Geometric Constraints: Geometric constraints are the logical operations that are performed on the sketched entities to relate them to the other sketched entities using the standard properties such as collinearity, concentricity, tangency, and so on. These constraints reduce the degrees of freedom of the sketched entities and make the sketch more stable so that it does not change its shape and location unpredictably at any stage of the design. All geometric constraints have separate symbols associated with them. These symbols can be seen on the sketched entities when the constraints are applied to them. In the Sketch environment of NX, you can add various types of geometric constraints. Some of these constraints are added automatically while sketching. 2.3.3 Show/Remove Constraints: This window lists all the constraints and types of constraints pertaining to any entity selected. You can delete any of the listed constraints or change the sequence of the constraints. The number of degrees of freedom that are not constrained are displayed
  • 10. 10 in the Status Line. All these should be removed by applying the constraints to follow a disciplined modelling. 2.4 Datum Planes: You can also create a new datum plane by using the datum Plane dialog box. On the basis of design requirement, you can select any plane as the sketching plane for the base feature. Also, you can create additional planes by taking reference of existing planes, faces, surfaces, sketches, or a combination of these objects. There are three types of datum planes in NX: datum planes of the Datum Coordinate System, fixed datum planes, and relative datum planes. Fixed datum planes are the ones that pass through the origin. Relative datum planes are created in addition to fixed datum planes by taking the reference of objects such as curves, sketches, edges, faces, surfaces, and points. 2.4.1 Inferred: The Inferred option is used to create various types of planes, depending on the reference objects selected and the sequence, in which they are selected. To create planes using this tool, select the Inferred option from the drop-down list in the Type rollout. Depending on the reference objects selected and the sequence in which you select them, appropriate planes will be created. For example, if you select two parallel planes, then the plane will be created at the center of two selected planes. However, if you select a cylindrical surface and an edge, then the plane created will be tangent to the cylinder and it will pass through the selected edge. 2.4.2 At Distance: The At Distance option is used to create a plane offset to an existing planar face, a surface, or an existing datum plane. Fig2.3 Plane at a distance
  • 11. 11 2.4.3 At Angle: The At Angle option is used to create a plane at an angle to another plane passing through an edge, a linear sketched segment, or an axis. To create an angular plane, select the At Angle option from the drop-down list in the Type rollout. Next, select a planar face or a datum plane to which the resulting plane will be at angle. Next, you need to select an edge or a linear sketch through which the resulting plane will pass. On selecting both the references, the preview of the plane will be displayed in the graphic window. Fig2.4 Plane at angle 2.4.4 Bisector: The Bisector option is used to create a relative plane at the center of two specified planes or planar faces. To create a bisector plane, select the Bisector option from the drop-down list in the Type rollout. Then, one by one, select two planes or planar faces; the preview of the resulting plane placed at the center of the two selected planes or planar faces will be displayed. 2.4.5 Tangent: The Tangent option is used to create a tangential plane. To do so, you need to select a cylindrical face and the second reference entity. The second reference entity can be a point, linear edge, line, datum axis, second cylindrical face, or a datum plane. To create a tangential plane, select the Tangent option from the drop-down list in the Type rollout. Next, select a cylindrical face or surface; the preview of the tangent plane will be displayed.
  • 12. 12 2.4.6 Point and Direction: The Point and Direction option is used to create a plane at a specified point and is oriented normal to the selected direction. You need to specify a fix point and define the normal direction to create the plane. The direction can be defined using an edge or linear sketch. If you select an edge or a linear sketch to define the direction, the plane will be created normal to it and it will pass through the specified point. To create this type of plane, select the Point and Direction option from the drop-down list in the Type rollout; you will be prompted to select the object to infer point. Specify the point at which the plane is to be created. Use the Selection Group for an easy selection of the point. After specifying the point, the preview of the plane will be displayed. Fig2.5 Plane crated using point and direction 2.5 Boolean Operation: You can create additional features by using four types of Boolean operations. These operations are available in the Boolean drop-down. 2.5.1 None: This option allows you to create a new body, which is independent of the existing feature. 2.5.2 Unite: The Unite boolean operation allows you to join the new feature with an existing feature. In this case, no additional solid body is created. Note that this sketch is created at a reference plane that is at some offset from the top face of the base feature. an additional feature created using the Unite boolean operation.
  • 13. 13 Fig2.6 Unite Boolean operation 2.5.3 Subtract: The Subtract boolean operation is used to create an extruded feature by removing material from the existing feature. 2.5.4 Intersect: The Intersect boolean operation is used to create an extruded feature by retaining the material common to the existing feature and the feature being create. 2.6 Advanced Modelling Tools: The advanced modelling tools are mostly used to place different types of standard and User-defined features on a model. Each advanced modelling tool has its specific use in designing a real-world model. Most of the mechanical designs are created using the adv -anced modelling features such as simple/counter bore/countersink holes, pocket, groove, slot, dart, and so on. NX provides you with a number of advanced modelling tools that assist in creating these advanced features. Note that these features are parametric in nature and can be modified or edited at any time. The advanced feature tools are used to reduce the time taken in creating the design. 2.6.1 Simple Holes: Create a simple hole the first step is to select a face or a point on a face. If you select a point on a face, the preview of the hole will be displayed. The second step is to specify the dimensions and parameters of the hole. After specifying the hole parameters, choose the Apply button; the hole will be created based on the specified parameters. 2.6.2 Counterbored Holes: To create a counterbored hole, invoke the Hole dialog box by choosing the Hole tool from the Feature group of the Home tab. Select the Counterbored option from the Form drop-down list in the Hole dialog box and follow the first step as explained earlier; the
  • 14. 14 preview of the counterbore hole will be displayed. Also, its parameters will be displayed below the Form drop-down list. Enter the c-bore diameter, c-bore depth, and diameter in their respective edit boxes in the Dimensions sub-rollout. 2.6.3 Countersunk Holes: To create a countersunk hole, invoke the Hole dialog box by choosing the Hole tool from the Feature group of the Home tab. Select the Countersunk option from the Form dropdown list and follow the first step as explained earlier; the preview of the countersunk hole will be displayed. Also, its parameters will be displayed below the Form drop-down list. Next, enter the c-sink diameter, c-sink angle, and diameter in their respective edit boxes in the Dimensions sub-rollout. 2.6.4 Tapered Holes: To create a tapered hole, select the Tapered option from the Form drop-down list in the Hole dialog box and follow the first step as explained earlier; the preview of the tapered hole will be displayed. Also, its parameters will be displayed below the Form drop- down list. 2.6.5 Drill Size Hole: The Drill Size Hole option of the Type drop-down list in the Type rollout is used to create a simple drill size hole feature using the ANSI or ISO standard by specifying its respective parameters. To create a drill size hole, select this option from the Type drop- down list of the Type rollout and specify the placement point of the hole as discussed in the first step of creating the general holes. Note that as soon as you select the Drill Size Hole option, the Form and Dimensions rollout will be modified. Fig 2.7 Drill size hole 2.6.6 Screw Clearance Hole: On selecting the Screw Clearance Hole option from the Type drop-down list, you can create simple, counter bore, or countersunk screw clearance hole features according to
  • 15. 15 the standard specified in the Standard drop-down list of the Settings rollout. 2.6.7 Threaded Hole: The Threaded Hole option in the Type drop-down list is used to create a threaded hole. The standard of a threaded hole depends on the option selected in the Standard dropdown list of the Settings rollout. You can specify the required size of the standard Threaded hole by selecting the options from the Size drop-down list. 2.6.8 Hole Series: You can use the Hole Series option to create an aligned series of holes in multiple bodies. 2.7 Chamfers: A chamfer feature is created on the sharp corners of a model to reduce stress concentration and to prevent from accidents due to sharp corners. To create a chamfer feature, choose the Chamfer tool from the Feature group of the Home tab; the Chamfer dialog box will be displayed. In NX, there are three methods to create a chamfer feature; Symmetric, Asymmetric, and offset and Angle. 2.7.1 Symmetric Method: This method is used to create chamfers whose distance from the selected edge is equal along both the faces. You need to specify a single positive value for both distances. To create the chamfer feature using the symmetric method, invoke the Chamfer dialog box. By default, the Symmetric option is selected in the Cross Section drop-down list of the Offset rollout in the dialog box. Also, you will be prompted to select the edges to chamfer. Select any number of edges to create the chamfer feature. Next, enter the distance value in the Distance edit box, which is available below the Cross Section drop-down list of the dialog box. This value is taken as the distance value on both sides of the edges. Fig 2.8 Chamfer by Symmetric Method
  • 16. 16 2.7.2 Asymmetric Method: This method is used to create the chamfer feature by specifying two different offset values along either side of the edge. To create the chamfer feature using the Asymmetric method, select the Asymmetric option from the Cross Section drop-down list in the Chamfer dialog box; the Chamfer dialog box will be modified and you will be prompted to select the edges. Select any number of edges to create the chamfer feature. This dialog box contains the Distance 1 and Distance 2 edit boxes for entering two offset values. Enter the offset values in these edit boxes; the preview of the chamfer feature will be displayed. The Reverse Direction button is used to reverse the chamfer distance. On choosing this button, the offset values of the two sides of the edge will get interchanged. Fig2.9 Chamfer by Asymmetric Method 2.7.3 Offset and Angle Method: This method is used to create a chamfer feature by defining an offset value and an angle value. The angle value is used to calculate the second offset value. To create the chamfer feature using the Offset and Angle method, select the Offset and Angle option from the Cross Section drop-down list; you will be prompted to select the edges. Also, the Distance and Angle edit boxes are displayed in the Offsets rollout. You can select any number of edges to create the chamfer feature. After selecting the edges, enter the values in the Distance and Angle edit boxes and choose the OK button. To reverse the chamfer, choose the Reverse Direction button; the offset and angle values get changed from one side of the edge to the other. the resulting chamfer feature with an offset and an angle value.
  • 17. 17 Fig2.10 Chamfer by Offset and Angle 2.8 Pattern Feature Tool: The Pattern Feature tool is a very versatile tool in NX. This tool is used to create the linear and circular patterns of features. It is also used to create the polygon, spiral, along curve, general, reference, and helix patterns. 2.8.1 Linear Pattern: Linear pattern of a feature is created by placing the instances of that feature along the two directions of the work coordinate system (WCS). To create a linear pattern, choose the Pattern Feature tool from the Feature group; the Pattern Feature dialog box will be displayed. Select the feature to be patterned and select the Linear option from the Layout drop-down list; the modified Pattern Feature dialog box will be displayed with the options to create a linear pattern, refer to Figure Choose the Specify Vector button from the Direction 1 sub-rollout in the Pattern Definition rollout; a triad will be displayed in the graphics window and you will be prompted to select an object to define the first direction. Select an edge to define the first direction of the pattern creation. You can also use the triad to define the direction. Next, you need to define the number of instances and the spacing between them. 2.8.1.1 Count and Pitch: On selecting this option, the Count and Pitch Distance edit boxes will be displayed. You need to specify the number of instances in the Count edit box and the distance between the instances in the Pitch Distance edit box. 2.8.1.2 Count and Span: On selecting this option, the Count and Span Distance edit boxes are displayed. You
  • 18. 18 need to specify the number of instances in the Count edit box and the total length of the pattern in the Span Distance edit box. 2.8.1.3 Pitch and Span: On selecting this option, the Pitch Distance and Span Distance edit boxes are displayed. You need to specify the distance between two consecutive instances in the Pitch Distance edit box and the total length of the pattern in the Span Distance edit box. Fig 2.11Linear pattern in two directions 2.8.2 Circular Pattern: To create a circular pattern of the selected features, invoke the Pattern Feature tool; the Pattern Feature dialog box will be displayed. Select the Circular option from the Layout drop-down list in this dialog box; the Pattern Definition rollout in this dialog box will be modified and you will be prompted to select features to pattern. Select the features to be patterned from the drawing window. Next, click in the Specify Vector area in the Rotation Axis sub-rollout of the Pattern definition rollout; a triad will be displayed in the drawing window and you will be prompted to select an object to define the axis. Use the triad to specify the axis of rotation. Note that you need to select the axis perpendicular to the face on which the pattern is to be created. Next, you need to specify the center of the circular pattern. You can infer to center point of the circular face to specify the center of the pattern. Next, you need to define the number of instances and the angular spacing between them. There are four options to define the number of instances and spacing between them. 2.8.2.1 Count and Pitch: This option is used to specify the instance count and the angle between the instances. 2.8.2.2 Count and Span: This option is used to specify the instance count and the span angle of the pattern.
  • 19. 19 2.8.2.3 Pitch and Span: This option is used to specify the angle between the instances and the span angle of the Pattern. Fig2.12 Circular pattern 2.9 Mirror Feature Tool: The Mirror Feature tool is used to mirror selected features from a model. You can mirror features about a selected datum plane or a planar face. Choose the Mirror Feature tool from the Associative Copy gallery of the more gallery in the Feature group; the Mirror Feature dialog box will be displayed by default, the Features to Mirror button is chosen in the Features to Mirror rollout of this dialog box. As a result, you will be prompted to select the features to be mirrored. Select the features to be mirrored from the drawing window. Next, choose the Plane button from the Mirror Plane rollout; you will be prompted to select a planar face or a datum plane. Select the planar face or the datum plane as the mirror plane. Next, choose the OK button; the selected features will be mirrored. 2.10 Mirror Face: The Mirror Face tool is used to mirror a set of selected faces of a model. You can mirror faces which defines a feature. You can mirror faces about a selected datum plane or a planar face. To do so, choose the Mirror Faces tool from the Associative Copy gallery of the more gallery in the Feature group; the Mirror Face dialog box will be displayed, by default, the Face button is chosen in the Face rollout of this dialog box. As a result, you will be prompted to select the faces to be mirrored. Select the faces to be mirrored from the drawing window. Next, choose the Plane button from the Mirror Plane rollout;
  • 20. 20 you will be prompted to select a planar face or a datum plane. Select the planar face or the datum plane as the mirror plane. 2.11 Sweep Along Guide: The Sweep along Guide tool is used to create sweep features by sweeping an open or a closed section about a guide string. To create features that are sweep along a guide curve, first draw the guide curve and then define a datum plane at one of the ends of the guide curve. Next, use this datum plane to draw the sketch of the section. 2.12 Swept: Swept features are created by sweeping one or more sections along one or more guide curves such that all the sections are blended together. On selecting the section curve, an arrow will be displayed on it. Press the middle mouse button to accept the curve. Similarly, select all the remaining section curves one by one. Note that while selecting the section curves, you need to be careful about the point from where you select them. It is recommended that multiple sections should be selected from the same quadrant. 2.13 Threads: NX allows to create internal or external threads on a cylindrical model. Internal threads are those that are created on the internal faces of a model, similar to a hole in a model. External threads are those that are created on the outer face of a model. Fig2.13 External threading on a bolt Fig2.14Internal threading in a nut
  • 21. 21 2.13.1 Detailed thread: To create the detailed thread, invoke the Thread tool; the Thread dialog box will be displayed. Select the Detailed radio button to display the options to create detailed threads; the dialog box will be modified and you will be prompted to select a cylindrical face. Select the face on which you need to create threads. 2.13.2 Symbolic Threads: To create symbolic threads, invoke the Thread tool; the Thread dialog box will be displayed. There are two methods of creating symbolic threads. In the first method, the system automatically defines the thread specifications for the selected face using a thread table. In the other method, some thread specifications are calculated and displayed in the edit box, but you can also modify these values individually. 2.13.2.1 Symbolic Threads Using Table: To create a symbolic thread using table, invoke the Thread dialog box and clear the Manual Input check box if it is already selected; the options to specify the parameters of the thread will be disabled. Next, select the cylindrical face on which you need to create the threads; the face will be highlighted and an arrow will be displayed at one of the ends of the face. 2.13.2.2 Symbolic Threads Using Manual Inputs: To create a symbolic thread using the manual inputs, invoke the Thread dialog box and choose the Manual Input check box; the options to specify the parameters of the thread will be enabled. Next, select the cylindrical face on which you need to create the threads; some default values will be displayed in the edit boxes to define the parameters of the threads. 2.14 Shell Feature: The Shell tool allows you to scoop out the material from a model and make it hollow from inside. The resulting model will be a structure of walls with a cavity inside. You can remove some of the faces of the model and apply different wall thicknesses to them. Fig2.15 Shell Model
  • 22. 22 Chapter 3: Assemblyenvironment 3.1 Introduction: The Assembly environment is used to create the interrelationship between the component parts, which are assembled together by applying a parametric link, both in dimensional and positional aspects. The assembly constraints are parametric in nature, so any type of modification with the assembly constraints at any stage of the assembling procedure is possible. The assembly files in NX have the file name extension as .prt. The Assembly environment in NX is interactive and bi-directionally associative. The component can be modified in the assembly environment itself by setting the part to be modified as the work part. After assembling the components, you can also check the interference between them. This increases the efficiency of the assembly and also eliminates the errors while actually manufacturing the components. You can also create the exploded state of assembly. Creating this state of assembly helps the technician understand the sequence of components to be assembled better. 3.2 Types of Assembly Design Approaches: In NX, the assemblies can be created using two types of design approaches, the bottom- up assembly design approach and the top-down assembly design approach. 3.2.1 Bottom-up Assembly Design Approach: The Bottom-up assembly design approach is the most widely preferred traditional approach of assembly design. In this approach, all components are created as separate part files and placed in the assembly as external components. In this approach, you need to create components separately in the Modelling environment and save them as .prt files. After creating all components, you need to start a new file in the Assembly environment and place them in the assembly environment using the tools in the Assemblies group. Next, you need to assemble the components using assembly constraints. The main advantage of using this approach is that you can pay more attention to the complexity of the component design as you create them before assembling. You can also capture the design intent easily. This approach is preferred while handling large assemblies or assemblies with complex components. 3.2.2 Top-down assembly design approach: You can also create all the components of an assembly in single file as separate bodies or features and then save them as separate parts. This approach of creating an assembly is known as the top-down assembly design approach. In this approach, most of the dime
  • 23. 23 -nsions are derived from other features and part bodies. 3.3 Creating Bottom-up Assemblies: As mentioned earlier, in the bottom-up assemblies, components are created as separate parts in the Modelling environment, and then they are placed in a new file that is started in the Assembly environment. 3.3.1 Add Component: In NX, the components are placed in the Assembly environment using the Add tool available in the Component group of the Assemblies tab in the Ribbon. To place the component, choose the Add tool from the Component group of Assemblies tab. You can also choose the Add tool from the Assemblies group of Home tab; the Add Component dialog box will be displayed. Choose the Open button from the dialog box; the Part Name dialog box will be displayed. Browse and select the component to be placed and choose the OK button from the Part Name dialog box; the Component Preview window will be displayed. In this window, you can preview the selected component. The component that is displayed in the Component Preview window is known as the displayed part. The name of the component is displayed in the Loaded Parts list of the Add Component dialog box. The Recent Parts list displays the list of recently added parts in the Assembly environment. 3.3.2 Applying Assembly Constraints to Components: In NX, assembly constraints can be applied to components by using the Assembly Constraints dialog box. To invoke this dialog box, select the By Constraints option from the Positioning drop-down list of the Add Component dialog box. Next, choose the OK button from the dialog box; the Assembly Constraints dialog box will be displayed. Assembly constraints are used to constrain the degree of freedom of a component in an assembly. By constraining the degrees of freedom of a component, you can restrict or determine the movement of the component. There are various types of assembly constraints available in NX. 3.3.2.1 Touch Align: The Touch Align constraint is used to constrain the motion of two selected reference faces or reference planes of different components such that they touch or align with each other. This constraint is also used to make edges or axis of components collinear, or to make points of components coincident to each other. To apply this constraint, select the Touch Align option from the Type drop-down list in the Assembly Constraints dialog box; you will be prompted to select the first reference object from
  • 24. 24 the component to be mated. Select a planar face, curved face, edge, datum axis, or point as the reference object from the component to be mated; the selected reference object will be highlighted and you will be prompted to select the second reference object from the component to mate to. Select a datum plane or any other reference object from the component displayed in the Component Preview window as the second reference object; the component will shift its position according to the constraint applied and a symbol of the constraint will be displayed on the component. 3.3.2.2 Angle: The Angle constraint is applied to specify an angle between the two selected reference entities of components. To apply this constraint, select the Angle constraint from the Type drop-down list in the Assembly Constraints dialog box; the Geometry to Constrain rollout will be modified. By default, the 3D Angle option will be selected from the Subtype drop-down list in this rollout. Also, you will be prompted to select the first object to apply the angle constraint. Select a face; you will be prompted to select the second object to apply constraint. Select the second face; two angular handles and a dynamic input box will be displayed in the graphics window. Also, the Angle rollout will be displayed in the Assembly Constraints dialog box. Next, enter the required angle either in the dynamic input box or in the Angle edit box of the Angle rollout. If you select the Orient Angle option from the Subtype drop-down list, you will be prompted to select an axis for specifying the angle. Select an axis or an edge; you will be prompted to select the first object for applying the Angle constraint. Select the first face; you will be prompted to select the second object for applying the Angle constraint. 3.3.2.3 Parallel: The Parallel constraint is applied to constrain the selected reference objects so that they become parallel to each other. To apply the Parallel constraint to objects, select the Parallel option from the Type drop-down list in the Assembly Constraints dialog box. Next, select the reference objects from two components constraint will be applied and the resulting position of components will be displayed in the graphics window. Next, choose the Reverse Last Constraint button from the Assembly Constraints dialog box, if you want to switch over to other possible solutions for applying constraint. Next, choose the OK button from the Assembly Constraints dialog box; the Parallel constraint will be applied to components. When you apply the Parallel constraint between the two cylindrical faces, the axes of the selected cylindrical faces become parallel to each
  • 25. 25 other. However, if this constraint is applied between a cylindrical face and a planar face, the axis of the cylindrical face becomes parallel to the normal of the selected planar face. 3.3.2.4 Perpendicular: The Perpendicular constraint is applied to constrain the selected reference objects so that they become normal to each other. To apply this constraint, select the Perpendicular option from the Type drop-down list in the Assembly Constraints dialog box. Next, select the reference objects from two components. the constraint will be applied and the resulting position of components will be displayed. Choose the Reverse Last Constraint button from the Assembly Constraints dialog box to switch over to other possible solutions for the current selection set. Finally, choose the OK button from the Assembly Constraints dialog box. You can also apply the Perpendicular constraint between two cylindrical faces. In this case, the axes of the selected cylindrical faces become normal to each other. If you apply the Perpendicular constraint between a cylindrical face and a planar face, the axis of the cylindrical face will become normal to the selected planar face. If you apply this constraint between two selected curved edges, the selected curved edges will be placed normal to each other. If you apply the Perpendicular constraint between a linear edge and a curved edge, the curved edge will be pivoted about the linear edge. Also, it will be rotated about the selected linear edge. Fig3.1 Perpendicular constraint 3.3.2.5 Center: The Center constraint is applied to constrain an object such that it always remains exactly at the center of the two selected reference objects. To apply this constraint, select the Center option from the Type drop-down list in the Assembly Constraints
  • 26. 26 dialog box; the Geometry to Constrain rollout will be modified and by default, the 1 to 2 option will be selected in the Subtype drop-down list in Geometry to Constrain rollout. As a result, the first selected object will shift between the other two selected reference objects. When you select the Center option from the Type drop-down list, you will be prompted to select the first object that will be at the center of the other two selected objects. After selecting the first object, you will be prompted to select the first reference object. Select any face, edge, or axis of the object as the first reference object; you will be prompted to select the second reference object. Select the second reference object; the first selected object will shift between the two selected reference objects. After the Center constraint is applied to If you select the Infer Center/Axis option from the Axial Geometry drop-down list, the center or axis of the selected cylindrical faces will be used for applying the constraint. Fig3.2 Center constraint 3.3.2.6 Distance: The Distance constraint is applied to maintain the required offset distance between the two selected reference objects. To apply this constraint, select the Distance option from the Type drop-down list in the Assembly Constraints dialog box; you will be prompted to select the first object. Select the first reference object, you will be prompted to select the second object. Select the second object; the Distance edit box will be displayed in the Distance rollout and a handle with the dynamic input box will be displayed. Next, enter the required offset value in the Distance edit box and press ENTER; the preview
  • 27. 27 of the resulting position of components will be displayed If the resulting position of the components is not satisfactory, choose the Cycle Last Constraint button from the Assembly Constraints dialog box to flip between the possible solutions for the specified distance value. You can also apply the Distance constraint between two cylindrical faces or circular edges. To do so, select the reference objects from both components and enter the required offset value in the Distance edit box; the constraint will be applied. Note that, in this case, the distance specified will be the distance between the axes of the selected objects. 3.3.2.7 Concentric: The Concentric constraint is applied to constrain the circular or elliptical edges of the components to coincide their centers as well as to make the selected edges coplanar. To apply this constraint, select the Concentric option from the Type drop-down list in the Assembly Constraints dialog box; you will be prompted to select the first circular object. Select the first circular object; you will be prompted to select the second circular object. Select the second circular object. the centers of both circular edges will coincide and the selected edges will become coplanar. 3.3.2.8 Fix: The Fix constraint is applied to fix the selected component at its current position in the 3D space. Once the component has been fixed, it cannot be changed and you can constrain other components with respect to the fixed component. To apply this constraint, select the Fix option from the Type drop-down list in the Assembly Constraints dialog box; you will be prompted to select the object to fix. Select the component; the selected component will be fixed at its current location and a small symbol will be displayed on it. 3.3.2.9 Bond: The Bond constraint is applied to fix the position of the selected components with respect to each other. Once the selected components are fixed using this constraint, they can be moved as a single component in such a way that the position of one component will remain the same with respect to the other component. To apply this constraint, select the Bond option from the Type drop-down list in the Assembly Constraints dialog box; you will be prompted to select the objects that you want to bond. Select two or more components; the Create Constraint button will be displayed in the Geometry to Constrain rollout. Choose this button to apply the Bond constraint to the selected components.
  • 28. 28 3.3.2.10 Fit: The Fit constraint is applied to bring together two cylindrical faces of the same diameter. This constraint is useful for assembling nuts and bolts. To apply this constraint, select the Fit option from the Type drop-down list in the Assembly Constraints dialog box; you will be prompted to select the first object to fit. Select the first circular surface; you will be prompted to select the second object. Select the second circular surface of the same diameter; the axes of both components will coincide and they will become coaxial. Note that if the diameters of the selected surfaces (components) are not equal, the Fit constraint will become invalid. Fig3.3 Fit constraint 3.3.2.11 Align/Lock: The Align/Lock constraint is used to align the axes of two different components and constrain the rotation of the components about the axis. In case of bolt, if you apply the Align/Lock constraint to bolt and hole, axes of the bolt and hole will be aligned and rotational movement of the bolt will be constrained. However, the bolt can move linearly along the axis. To apply this constraint, select the Align/Lock option from the Type dropdown list in the Assembly Constraints dialog box; you will be prompted to select the first circular object. Select the first circular object; you will be prompted to select the second circular object. Fig3.4 Align/Lock constraint
  • 29. 29 3.4 Butterfly valve assembly: Fig3.5 Butterfly valve Fig3.6Body of butterfly valve