SlideShare a Scribd company logo
1 of 7
Download to read offline
ExamView® 1
turningtechnologies.com/training-support
EXAMVIEW - NEW USERS
CREATING A TEST WITH THE QUICKTEST WIZARD
The QuickTest Wizard is the quickest and easiest way to create an ExamView test.
How to create a test with the QuickTest Wizard...
1 Click the QuickTest Wizard toolbar icon or select QuickTest Wizard from the menu bar.
If you just opened the program select Create a new test using the wizard from the Welcome screen.
2 Enter the Test title and click Next.
3 Double-click a folder (if necessary) to display a list of question banks.
4 Choose the question banks from which you want to select questions and click Next.
Click the Folder icon to identify the location of the files if no question banks appear in the list. If you assigned a
password to the question bank, you will be prompted to enter the password before you can continue.
5 Identify how many questions of each type you want on the test and click Next.
6 If prompted, enter the number of matching groups you want the wizard to use when it selects the matching questions
you requested.
7 Review the test summary and then click Finish to complete the process.
When you click Finish, ExamView selects the questions based on your responses and displays them in the test
document window.
Next Steps
After the program displays the test, you can edit/create questions, select additional questions, customize the
appearance of the test, save your work, or print the test.
QUESTION SELECTION METHODS
There are six ways to add questions to a test from a test bank from the ExamView Test Builder toolbar.
Use the Select Questions Randomly option if you want to quickly choose questions without regard to the
content of the question. For example, you could choose 20 multiple choice questions randomly and then use
another method to select additional questions.
Use the Select from a List option to select questions from banks from a list based on criteria such as topic,
keywords, standards, difficulty level, etc.
The Select Questions While Viewing option lets you view the questions on the screen and choose which
ones you want to include on a test.
ExamView® 2
turningtechnologies.com/training-support
CHANGING THE PREFERENCES
Changes made to most ExamView Test Generator preferences will only affect the open question bank or test (this
excludes the General, Files and Editing preferences). These preferences are saved with the question bank or test file. To
change the preferences for new tests or question banks, save the preferences as the default preferences.
How to change the preferences...
1 Click Edit from the menu bar and select Preferences.
2 Set the preference options as desired.
3 Click OK to record the settings and close the Preferences window.
If a test or question bank is open when you change the settings, the program applies the new settings only to the open
document. If no test/question bank is open, or if you click Save as Default, the new settings will apply to any new
tests/question banks you create.
FORMATTING A TEST WITH THE STYLE GALLERY (PC ONLY)
The list of available styles is based on your State/Region setting in the Preferences (General). Visit the downloads
section of the ExamView web site for more information on styles and to download additional styles for the Style Gallery.
How to format a test with the Style Gallery...
1 Click the Style Gallery icon from the toolbar or click Test from the menu bar and select Style Gallery.
2 Select the Layout Style.
A preview of the test style appears in the test preview window on the right.
3 Click OK to apply the style to your test.
After selecting a style, you can override individual layout and style preferences.
TOGGLE BIMODAL
A bimodal question is a question that can be displayed as either a multiple choice or a short answer question. Bimodal
questions give you more flexibility when building a test. For example, with a single click of the mouse you can increase
the difficulty level of a test by changing all multiple choice questions to short answer.
How to toggle a bimodal question...
1 Select the Bimodal question. Bimodal questions have a red dot to the left of the question.
Use the Select Questions by Standard option if you want to choose questions based on their learning
objective, national standard, state standard, or local standard.
Use the Select by Criteria option When you want to choose questions based on certain criteria.
Use the Select All Questions option when you want to select all the questions in a question bank.
ExamView® 3
turningtechnologies.com/training-support
2 While the question is selected, click the Toggle Bimodal icon on the toolbar.
The question type will change to Short Answer.
DYNAMIC QUESTIONS
ExamView Test Generator allows you to create dynamic questions through the use of built-in algorithmic functions,
keywords, and variables. When you click the Dynamic Question icon on the toolbar, the content of the question changes
based on the programmed algorithmic functions, keywords or variables.
How to change dynamic questions...
1 Select the question. Dynamic questions have a dynamic tag to the left of the question.
2 While the question is selected, click the Dynamic Question icon on the toolbar.
SCRAMBLING QUESTIONS ON A TEST (PC ONLY)
The Scramble option is different from the Reorder command in that the Reorder command lets you move questions one
at a time or in a group. And, you can move them exactly where you want the questions to appear. With the Scramble
option, the program randomly rearranges the questions. If you prefer, you can automatically generate different versions
when you print a test.
How to scramble questions on a test...
1 Click the Scramble icon from the toolbar or click Question from the menu bar and select Scramble.
2 Select one or more of the scramble options: sections, questions, and answer choices.
3 You may assign a new test version (A-Z) each time you scramble the questions.
4 Click OK to scramble the current test.
REORDERING QUESTIONS
Follow the steps below to reorder questions on a test.
How to reorder questions...
1 Click the Reorder Questions icon from the toolbar or click Question from the menu bar and select Reorder.
2 Select an item (individual question, question type group or narrative group) and hold down the left mouse button while
dragging the item to the new location in the list. Alternatively, press either Ctrl+/Ctrl+(PC) or
Cmd+/Cmd+(Mac) to move the highlighted question.
Rules for reordering questions on a test grouped by question type:
• Only questions of the same question type can be moved.
• To move an entire question type group (e.g., multiple choice), select the question type title and drag it to the desired
location.
• A group can only be moved to certain places in the list. The insertion bar appears as a thick line to indicate where
the question group can be moved.
ExamView® 4
turningtechnologies.com/training-support
• Questions attached to a narrative can be moved only within the same narrative group.
• A question not a part of a narrative group cannot be moved into that group. Likewise, you cannot move a question
linked to a narrative outside of the group.
Rules for reordering question on a text with mixed question types:
• Questions attached to a narrative can be moved only within the same narrative group.
• A question not a part of a narrative group cannot be moved into that group. Likewise, you cannot move a question
linked to a narrative outside of the group.
• Matching questions can be moved only within the same matching group.
3 Repeat step 2 for each item to be moved.
4 Click OK to update the current test.
TWO-COLUMN FORMATTING
By default, ExamView displays tests in one-column format. Follow the steps below to switch to two-column formatting.
How to format a test using two columns...
1 Click the Two Columns icon on the toolbar.
2 Optionally, click Test and select Layout.
a Click the Layout icon and then click the Page tab.
b Select the radio button labeled Two Columns.
c Optionally, select Show vertical lines between columns and/or Show horizontal lines between sections.
d Click OK. (Click Save As Default if you want all future tests to display in two-columns.)
PRINTING A TEST
When printing a test you must choose the number of versions to print as well as several scramble options. There are
also options for printing an answer strip and/or a version map (if applicable).
How to print a test...
1 Click Print or click File and select Print Test.
2 Specify the number of test versions to print (1-26).
3 Select one or more of the scramble options: sections, questions, multiple choice/multiple response answer
choices and calculate new algorithm values.
NOTE
Not all questions can be displayed in two-column format. For example, a
question may be too wide to fit within the column.
ExamView® 5
turningtechnologies.com/training-support
If you opt to scramble sections or questions, you can also choose to print a version map—a correlation chart to show
you how the test was scrambled.
The calculate new algorithm values is only available for tests that contain dynamic questions.
4 Indicate whether you want to print an answer strip.
5 Indicate whether you want to print a version map.
6 Click OK to confirm your responses.
7 In the Print Test window, choose to print the entire test or selected pages and then click OK to print the test.
CREATING A NEW QUESTION BANK
Follow the steps below to create a new question bank.
How to create a new question bank...
1 Click the New Question Bank icon from the toolbar or click File from the menu bar and select New Question Bank.
If you just opened the program select Create a new question bank from the Welcome screen.
2 Enter the question bank title and subtitle and click OK.
3 Enter questions into the bank.
You can add up to 250 questions per question bank using some or all of the available question types (e.g., true/false,
multiple choice, short answer, etc.).
CREATING, EDITING AND DELETING QUESTIONS IN A QUESTION BANK
Follow the steps below to create, edit or delete questions in a question bank.
How to create, edit and delete questions in a question bank...
1 To create a new question in a question bank:
a While working in the Question Bank Editor, click New located at the bottom of the question bank window or use the
keyboard shortcut, press CTRL+N (PC) or CMD+N (Mac).
b Select the question type.
c Enter the new question, answer, and information (optional). See the Entering/Editing Questions help topic for
more detailed instructions.
d Click Record.
2 To edit a question in a question bank:
a Select the question on the test that you want to edit.
b Click Edit located at the bottom of the question bank window, or double-click the question to display an editing
window.
NOTE
You cannot print selected pages if you chose to print an answer strip or
multiple versions of a test.
ExamView® 6
turningtechnologies.com/training-support
c Edit the question, change the answer, update the narrative, and/or modify the question information (objectives,
difficulty code, reference, topic, or notes). See the Entering/Editing Questions help topic for more detailed
instructions.
d Click Record to save your changes.
3 To delete a question from a question bank:
a Select the question to delete.
To remove an entire question type, select the desired question type.
b Click Delete located at the bottom of the question bank window.
c Click Yes to confirm that you want to remove the question.
SAVING A QUESTION BANK
You can automatically open question bank files from previous versions of the ExamView Test Generator program.
However, once you save a question bank using the new version, you cannot open that file with an older version. It is
recommended that you use a different file name.
How to save a question bank...
1 Click Save.
2 Enter a name for the question bank (with a BNK extension) if this is the first time that you have chosen to save the
question bank.
3 Identify the folder where you want to save the question bank. If you want to save the file on a different drive or on a
network, choose the location.
4 Click OK to save the question bank.
IMPORTING QUESTIONS FROM OTHER SOURCES (PC ONLY)
Use the included ExamView Import Utility application to import question from other sources into the Question Bank
Editor to import RTF files used by Microsoft Word and other compatible word processors.
Prerequisites
Navigate to your ExamView folder on your hard drive. This is typically at the root of the hard drive or C: drive. Open the
Sample Bank.pdf to see how the RTF file should be formatted.
• The basic required sections are the test title, question type header, question number, question, answer options (if
multiple choice), and correct answer ( ANS: ).
• Create a simple test using just true / false questions. After successfully importing a simple test, try adding more
features such as images, tables, narratives, etc.
NOTE
Click File and select Save As to save the question bank with a different file
name and/or to save the question bank to a new file location.
ExamView® 7
turningtechnologies.com/training-support
How to open the ExamView Import Utility...
1 Click the Start button on the Task bar.
2 Click All Programs to view a menu of installed programs.
3 Click the eInstruction folder and then the ExamView folder to locate the ExamView Import Utility.

More Related Content

What's hot

Module 7: Advanced Quiz Options Task 3
Module 7: Advanced Quiz Options Task 3Module 7: Advanced Quiz Options Task 3
Module 7: Advanced Quiz Options Task 3Ciel Educttu
 
Advance communication system manual
Advance communication system manualAdvance communication system manual
Advance communication system manualanuruddhsharma1
 
Advanced DB - Chapter 1 Slides
Advanced DB - Chapter 1 SlidesAdvanced DB - Chapter 1 Slides
Advanced DB - Chapter 1 Slidesguest347745
 
Steps for Exporting and Importing Rubrics
Steps for Exporting and Importing Rubrics Steps for Exporting and Importing Rubrics
Steps for Exporting and Importing Rubrics Matthew Otremba
 
Module 7: Advanced Quiz Options Task 1
Module 7: Advanced Quiz Options Task 1Module 7: Advanced Quiz Options Task 1
Module 7: Advanced Quiz Options Task 1Ciel Educttu
 
Module 6: Assignments Task 1
Module 6: Assignments Task 1Module 6: Assignments Task 1
Module 6: Assignments Task 1Ciel Educttu
 
Module 7: Advanced Quiz Options Task 2
Module 7: Advanced Quiz Options Task 2Module 7: Advanced Quiz Options Task 2
Module 7: Advanced Quiz Options Task 2Ciel Educttu
 
Module 6: Assignments Task 3
Module 6: Assignments Task 3Module 6: Assignments Task 3
Module 6: Assignments Task 3Ciel Educttu
 
Module 6: Assignments Task 2
Module 6: Assignments Task 2Module 6: Assignments Task 2
Module 6: Assignments Task 2Ciel Educttu
 
Create a test in blackboard
Create a test in blackboardCreate a test in blackboard
Create a test in blackboardPoh Meng Chua
 
Module 8-Grade center-Task 1
Module 8-Grade center-Task 1Module 8-Grade center-Task 1
Module 8-Grade center-Task 1EDIT3318
 
Math Connects 6 8 Training Exam View
Math Connects 6 8 Training Exam ViewMath Connects 6 8 Training Exam View
Math Connects 6 8 Training Exam Viewguest4b3411d
 
Necto 16 training 15 formulas and exceptions
Necto 16 training 15   formulas and exceptionsNecto 16 training 15   formulas and exceptions
Necto 16 training 15 formulas and exceptionsPanorama Software
 
Steps for Adding a Rubric to a Discussion Forum
Steps for Adding a Rubric to a Discussion ForumSteps for Adding a Rubric to a Discussion Forum
Steps for Adding a Rubric to a Discussion ForumMatthew Otremba
 

What's hot (15)

Module 7: Advanced Quiz Options Task 3
Module 7: Advanced Quiz Options Task 3Module 7: Advanced Quiz Options Task 3
Module 7: Advanced Quiz Options Task 3
 
Advance communication system manual
Advance communication system manualAdvance communication system manual
Advance communication system manual
 
Gnowledge How-To
Gnowledge How-ToGnowledge How-To
Gnowledge How-To
 
Advanced DB - Chapter 1 Slides
Advanced DB - Chapter 1 SlidesAdvanced DB - Chapter 1 Slides
Advanced DB - Chapter 1 Slides
 
Steps for Exporting and Importing Rubrics
Steps for Exporting and Importing Rubrics Steps for Exporting and Importing Rubrics
Steps for Exporting and Importing Rubrics
 
Module 7: Advanced Quiz Options Task 1
Module 7: Advanced Quiz Options Task 1Module 7: Advanced Quiz Options Task 1
Module 7: Advanced Quiz Options Task 1
 
Module 6: Assignments Task 1
Module 6: Assignments Task 1Module 6: Assignments Task 1
Module 6: Assignments Task 1
 
Module 7: Advanced Quiz Options Task 2
Module 7: Advanced Quiz Options Task 2Module 7: Advanced Quiz Options Task 2
Module 7: Advanced Quiz Options Task 2
 
Module 6: Assignments Task 3
Module 6: Assignments Task 3Module 6: Assignments Task 3
Module 6: Assignments Task 3
 
Module 6: Assignments Task 2
Module 6: Assignments Task 2Module 6: Assignments Task 2
Module 6: Assignments Task 2
 
Create a test in blackboard
Create a test in blackboardCreate a test in blackboard
Create a test in blackboard
 
Module 8-Grade center-Task 1
Module 8-Grade center-Task 1Module 8-Grade center-Task 1
Module 8-Grade center-Task 1
 
Math Connects 6 8 Training Exam View
Math Connects 6 8 Training Exam ViewMath Connects 6 8 Training Exam View
Math Connects 6 8 Training Exam View
 
Necto 16 training 15 formulas and exceptions
Necto 16 training 15   formulas and exceptionsNecto 16 training 15   formulas and exceptions
Necto 16 training 15 formulas and exceptions
 
Steps for Adding a Rubric to a Discussion Forum
Steps for Adding a Rubric to a Discussion ForumSteps for Adding a Rubric to a Discussion Forum
Steps for Adding a Rubric to a Discussion Forum
 

Similar to Creating an examview test with quicktest wizard

Use of moodle software
Use of  moodle softwareUse of  moodle software
Use of moodle softwareShriram Gupta
 
Surveygoo question types guide
Surveygoo question types guideSurveygoo question types guide
Surveygoo question types guideNeil Cary
 
Data director wednesday
Data director wednesdayData director wednesday
Data director wednesdayDerek D'Angelo
 
Examview testplayer userguide 8.1
Examview testplayer userguide 8.1Examview testplayer userguide 8.1
Examview testplayer userguide 8.1William McIntosh
 
Add Questions to a Survey - SurveyMonkey
Add Questions to a Survey - SurveyMonkeyAdd Questions to a Survey - SurveyMonkey
Add Questions to a Survey - SurveyMonkeymatthewpittman
 
Exam view dynamic recalculation files
Exam view dynamic recalculation filesExam view dynamic recalculation files
Exam view dynamic recalculation filesWilliam McIntosh
 
Multistate Edge Tutorial
Multistate Edge TutorialMultistate Edge Tutorial
Multistate Edge TutorialMultistateEdge
 
Examvieew testplayer userguide
Examvieew testplayer userguideExamvieew testplayer userguide
Examvieew testplayer userguideWilliam McIntosh
 
Exam viewtestplayeruserguide 9.0
Exam viewtestplayeruserguide 9.0Exam viewtestplayeruserguide 9.0
Exam viewtestplayeruserguide 9.0William McIntosh
 
Exam view testplayer userguide
Exam view testplayer userguideExam view testplayer userguide
Exam view testplayer userguideWilliam McIntosh
 
Galileo workshop
Galileo workshopGalileo workshop
Galileo workshopJennifer
 
How to create a screening questionnaire
How to create a screening questionnaireHow to create a screening questionnaire
How to create a screening questionnaireSchoolJobs
 
Introduction to Tests, Surveys and Pools
Introduction to Tests, Surveys and PoolsIntroduction to Tests, Surveys and Pools
Introduction to Tests, Surveys and PoolsKirsten Thompson
 
SurveyMonkey-Wozniak
SurveyMonkey-WozniakSurveyMonkey-Wozniak
SurveyMonkey-WozniakMassRecycle .
 
Gate 2014 paper
Gate 2014 paperGate 2014 paper
Gate 2014 paperMSRIT
 
Blackboard assessments
Blackboard assessmentsBlackboard assessments
Blackboard assessmentsdattolia
 

Similar to Creating an examview test with quicktest wizard (20)

Use of moodle software
Use of  moodle softwareUse of  moodle software
Use of moodle software
 
Surveygoo question types guide
Surveygoo question types guideSurveygoo question types guide
Surveygoo question types guide
 
That quiz
That quizThat quiz
That quiz
 
A web based aptitude testing software
A web based aptitude testing softwareA web based aptitude testing software
A web based aptitude testing software
 
Data director wednesday
Data director wednesdayData director wednesday
Data director wednesday
 
Examview testplayer userguide 8.1
Examview testplayer userguide 8.1Examview testplayer userguide 8.1
Examview testplayer userguide 8.1
 
Add Questions to a Survey - SurveyMonkey
Add Questions to a Survey - SurveyMonkeyAdd Questions to a Survey - SurveyMonkey
Add Questions to a Survey - SurveyMonkey
 
Exam view dynamic recalculation files
Exam view dynamic recalculation filesExam view dynamic recalculation files
Exam view dynamic recalculation files
 
Multistate Edge Tutorial
Multistate Edge TutorialMultistate Edge Tutorial
Multistate Edge Tutorial
 
Module 1a Quiz
Module 1a QuizModule 1a Quiz
Module 1a Quiz
 
Module 1a quiz
Module 1a quizModule 1a quiz
Module 1a quiz
 
Examvieew testplayer userguide
Examvieew testplayer userguideExamvieew testplayer userguide
Examvieew testplayer userguide
 
Exam viewtestplayeruserguide 9.0
Exam viewtestplayeruserguide 9.0Exam viewtestplayeruserguide 9.0
Exam viewtestplayeruserguide 9.0
 
Exam view testplayer userguide
Exam view testplayer userguideExam view testplayer userguide
Exam view testplayer userguide
 
Galileo workshop
Galileo workshopGalileo workshop
Galileo workshop
 
How to create a screening questionnaire
How to create a screening questionnaireHow to create a screening questionnaire
How to create a screening questionnaire
 
Introduction to Tests, Surveys and Pools
Introduction to Tests, Surveys and PoolsIntroduction to Tests, Surveys and Pools
Introduction to Tests, Surveys and Pools
 
SurveyMonkey-Wozniak
SurveyMonkey-WozniakSurveyMonkey-Wozniak
SurveyMonkey-Wozniak
 
Gate 2014 paper
Gate 2014 paperGate 2014 paper
Gate 2014 paper
 
Blackboard assessments
Blackboard assessmentsBlackboard assessments
Blackboard assessments
 

More from William McIntosh

K12 Examview Cloud webinar
K12 Examview Cloud webinarK12 Examview Cloud webinar
K12 Examview Cloud webinarWilliam McIntosh
 
Buy3 get1freeiwb special spring 2016
Buy3 get1freeiwb special spring 2016Buy3 get1freeiwb special spring 2016
Buy3 get1freeiwb special spring 2016William McIntosh
 
Cc special i360cmobileqt-spring 2016
Cc special i360cmobileqt-spring 2016Cc special i360cmobileqt-spring 2016
Cc special i360cmobileqt-spring 2016William McIntosh
 
Turning Point Lite for Smart Notebook
Turning Point Lite for Smart NotebookTurning Point Lite for Smart Notebook
Turning Point Lite for Smart NotebookWilliam McIntosh
 
What is turning point cloud for k 12?
What is turning point cloud for k 12?What is turning point cloud for k 12?
What is turning point cloud for k 12?William McIntosh
 
Turning point cloud promo with pricing
Turning point cloud promo with pricingTurning point cloud promo with pricing
Turning point cloud promo with pricingWilliam McIntosh
 
Buy3 get1free Interactive Whiteboard Special
Buy3  get1free Interactive Whiteboard SpecialBuy3  get1free Interactive Whiteboard Special
Buy3 get1free Interactive Whiteboard SpecialWilliam McIntosh
 
Say hello to examview cloud
Say hello to examview cloudSay hello to examview cloud
Say hello to examview cloudWilliam McIntosh
 
I360 cloud casestudy lawson
I360 cloud casestudy lawsonI360 cloud casestudy lawson
I360 cloud casestudy lawsonWilliam McIntosh
 

More from William McIntosh (20)

K12 Examview Cloud webinar
K12 Examview Cloud webinarK12 Examview Cloud webinar
K12 Examview Cloud webinar
 
Buy3 get1freeiwb special spring 2016
Buy3 get1freeiwb special spring 2016Buy3 get1freeiwb special spring 2016
Buy3 get1freeiwb special spring 2016
 
I360 c mobile-spring 2016
I360 c mobile-spring 2016I360 c mobile-spring 2016
I360 c mobile-spring 2016
 
Cc special i360cmobileqt-spring 2016
Cc special i360cmobileqt-spring 2016Cc special i360cmobileqt-spring 2016
Cc special i360cmobileqt-spring 2016
 
I360 cloud 2016
I360 cloud 2016I360 cloud 2016
I360 cloud 2016
 
Turning Point Lite for Smart Notebook
Turning Point Lite for Smart NotebookTurning Point Lite for Smart Notebook
Turning Point Lite for Smart Notebook
 
Ev assessment suite 2016
Ev assessment suite 2016Ev assessment suite 2016
Ev assessment suite 2016
 
K12 update-i360c
K12 update-i360cK12 update-i360c
K12 update-i360c
 
Bill McIntosh, itutor
Bill McIntosh, itutorBill McIntosh, itutor
Bill McIntosh, itutor
 
Work space sales flyer
Work space sales flyerWork space sales flyer
Work space sales flyer
 
Eitt product brochure
Eitt product brochureEitt product brochure
Eitt product brochure
 
What is turning point cloud for k 12?
What is turning point cloud for k 12?What is turning point cloud for k 12?
What is turning point cloud for k 12?
 
Turning point cloud promo with pricing
Turning point cloud promo with pricingTurning point cloud promo with pricing
Turning point cloud promo with pricing
 
I360 cloud mobile special
I360 cloud mobile specialI360 cloud mobile special
I360 cloud mobile special
 
Buy3 get1free Interactive Whiteboard Special
Buy3  get1free Interactive Whiteboard SpecialBuy3  get1free Interactive Whiteboard Special
Buy3 get1free Interactive Whiteboard Special
 
Exanview learning series
Exanview learning seriesExanview learning series
Exanview learning series
 
Say hello to examview cloud
Say hello to examview cloudSay hello to examview cloud
Say hello to examview cloud
 
Cc special i360cmobile qt
Cc special i360cmobile qtCc special i360cmobile qt
Cc special i360cmobile qt
 
Cc special i360cmobilenxt
Cc special i360cmobilenxtCc special i360cmobilenxt
Cc special i360cmobilenxt
 
I360 cloud casestudy lawson
I360 cloud casestudy lawsonI360 cloud casestudy lawson
I360 cloud casestudy lawson
 

Recently uploaded

Holdier Curriculum Vitae (April 2024).pdf
Holdier Curriculum Vitae (April 2024).pdfHoldier Curriculum Vitae (April 2024).pdf
Holdier Curriculum Vitae (April 2024).pdfagholdier
 
Presentation by Andreas Schleicher Tackling the School Absenteeism Crisis 30 ...
Presentation by Andreas Schleicher Tackling the School Absenteeism Crisis 30 ...Presentation by Andreas Schleicher Tackling the School Absenteeism Crisis 30 ...
Presentation by Andreas Schleicher Tackling the School Absenteeism Crisis 30 ...EduSkills OECD
 
Q4-W6-Restating Informational Text Grade 3
Q4-W6-Restating Informational Text Grade 3Q4-W6-Restating Informational Text Grade 3
Q4-W6-Restating Informational Text Grade 3JemimahLaneBuaron
 
Nutritional Needs Presentation - HLTH 104
Nutritional Needs Presentation - HLTH 104Nutritional Needs Presentation - HLTH 104
Nutritional Needs Presentation - HLTH 104misteraugie
 
General AI for Medical Educators April 2024
General AI for Medical Educators April 2024General AI for Medical Educators April 2024
General AI for Medical Educators April 2024Janet Corral
 
Class 11th Physics NEET formula sheet pdf
Class 11th Physics NEET formula sheet pdfClass 11th Physics NEET formula sheet pdf
Class 11th Physics NEET formula sheet pdfAyushMahapatra5
 
Advanced Views - Calendar View in Odoo 17
Advanced Views - Calendar View in Odoo 17Advanced Views - Calendar View in Odoo 17
Advanced Views - Calendar View in Odoo 17Celine George
 
Beyond the EU: DORA and NIS 2 Directive's Global Impact
Beyond the EU: DORA and NIS 2 Directive's Global ImpactBeyond the EU: DORA and NIS 2 Directive's Global Impact
Beyond the EU: DORA and NIS 2 Directive's Global ImpactPECB
 
Sports & Fitness Value Added Course FY..
Sports & Fitness Value Added Course FY..Sports & Fitness Value Added Course FY..
Sports & Fitness Value Added Course FY..Disha Kariya
 
BASLIQ CURRENT LOOKBOOK LOOKBOOK(1) (1).pdf
BASLIQ CURRENT LOOKBOOK  LOOKBOOK(1) (1).pdfBASLIQ CURRENT LOOKBOOK  LOOKBOOK(1) (1).pdf
BASLIQ CURRENT LOOKBOOK LOOKBOOK(1) (1).pdfSoniaTolstoy
 
1029-Danh muc Sach Giao Khoa khoi 6.pdf
1029-Danh muc Sach Giao Khoa khoi  6.pdf1029-Danh muc Sach Giao Khoa khoi  6.pdf
1029-Danh muc Sach Giao Khoa khoi 6.pdfQucHHunhnh
 
Interactive Powerpoint_How to Master effective communication
Interactive Powerpoint_How to Master effective communicationInteractive Powerpoint_How to Master effective communication
Interactive Powerpoint_How to Master effective communicationnomboosow
 
SOCIAL AND HISTORICAL CONTEXT - LFTVD.pptx
SOCIAL AND HISTORICAL CONTEXT - LFTVD.pptxSOCIAL AND HISTORICAL CONTEXT - LFTVD.pptx
SOCIAL AND HISTORICAL CONTEXT - LFTVD.pptxiammrhaywood
 
Accessible design: Minimum effort, maximum impact
Accessible design: Minimum effort, maximum impactAccessible design: Minimum effort, maximum impact
Accessible design: Minimum effort, maximum impactdawncurless
 
Web & Social Media Analytics Previous Year Question Paper.pdf
Web & Social Media Analytics Previous Year Question Paper.pdfWeb & Social Media Analytics Previous Year Question Paper.pdf
Web & Social Media Analytics Previous Year Question Paper.pdfJayanti Pande
 
Software Engineering Methodologies (overview)
Software Engineering Methodologies (overview)Software Engineering Methodologies (overview)
Software Engineering Methodologies (overview)eniolaolutunde
 
Student login on Anyboli platform.helpin
Student login on Anyboli platform.helpinStudent login on Anyboli platform.helpin
Student login on Anyboli platform.helpinRaunakKeshri1
 
Unit-IV- Pharma. Marketing Channels.pptx
Unit-IV- Pharma. Marketing Channels.pptxUnit-IV- Pharma. Marketing Channels.pptx
Unit-IV- Pharma. Marketing Channels.pptxVishalSingh1417
 
Arihant handbook biology for class 11 .pdf
Arihant handbook biology for class 11 .pdfArihant handbook biology for class 11 .pdf
Arihant handbook biology for class 11 .pdfchloefrazer622
 

Recently uploaded (20)

Holdier Curriculum Vitae (April 2024).pdf
Holdier Curriculum Vitae (April 2024).pdfHoldier Curriculum Vitae (April 2024).pdf
Holdier Curriculum Vitae (April 2024).pdf
 
Presentation by Andreas Schleicher Tackling the School Absenteeism Crisis 30 ...
Presentation by Andreas Schleicher Tackling the School Absenteeism Crisis 30 ...Presentation by Andreas Schleicher Tackling the School Absenteeism Crisis 30 ...
Presentation by Andreas Schleicher Tackling the School Absenteeism Crisis 30 ...
 
Q4-W6-Restating Informational Text Grade 3
Q4-W6-Restating Informational Text Grade 3Q4-W6-Restating Informational Text Grade 3
Q4-W6-Restating Informational Text Grade 3
 
Nutritional Needs Presentation - HLTH 104
Nutritional Needs Presentation - HLTH 104Nutritional Needs Presentation - HLTH 104
Nutritional Needs Presentation - HLTH 104
 
General AI for Medical Educators April 2024
General AI for Medical Educators April 2024General AI for Medical Educators April 2024
General AI for Medical Educators April 2024
 
Advance Mobile Application Development class 07
Advance Mobile Application Development class 07Advance Mobile Application Development class 07
Advance Mobile Application Development class 07
 
Class 11th Physics NEET formula sheet pdf
Class 11th Physics NEET formula sheet pdfClass 11th Physics NEET formula sheet pdf
Class 11th Physics NEET formula sheet pdf
 
Advanced Views - Calendar View in Odoo 17
Advanced Views - Calendar View in Odoo 17Advanced Views - Calendar View in Odoo 17
Advanced Views - Calendar View in Odoo 17
 
Beyond the EU: DORA and NIS 2 Directive's Global Impact
Beyond the EU: DORA and NIS 2 Directive's Global ImpactBeyond the EU: DORA and NIS 2 Directive's Global Impact
Beyond the EU: DORA and NIS 2 Directive's Global Impact
 
Sports & Fitness Value Added Course FY..
Sports & Fitness Value Added Course FY..Sports & Fitness Value Added Course FY..
Sports & Fitness Value Added Course FY..
 
BASLIQ CURRENT LOOKBOOK LOOKBOOK(1) (1).pdf
BASLIQ CURRENT LOOKBOOK  LOOKBOOK(1) (1).pdfBASLIQ CURRENT LOOKBOOK  LOOKBOOK(1) (1).pdf
BASLIQ CURRENT LOOKBOOK LOOKBOOK(1) (1).pdf
 
1029-Danh muc Sach Giao Khoa khoi 6.pdf
1029-Danh muc Sach Giao Khoa khoi  6.pdf1029-Danh muc Sach Giao Khoa khoi  6.pdf
1029-Danh muc Sach Giao Khoa khoi 6.pdf
 
Interactive Powerpoint_How to Master effective communication
Interactive Powerpoint_How to Master effective communicationInteractive Powerpoint_How to Master effective communication
Interactive Powerpoint_How to Master effective communication
 
SOCIAL AND HISTORICAL CONTEXT - LFTVD.pptx
SOCIAL AND HISTORICAL CONTEXT - LFTVD.pptxSOCIAL AND HISTORICAL CONTEXT - LFTVD.pptx
SOCIAL AND HISTORICAL CONTEXT - LFTVD.pptx
 
Accessible design: Minimum effort, maximum impact
Accessible design: Minimum effort, maximum impactAccessible design: Minimum effort, maximum impact
Accessible design: Minimum effort, maximum impact
 
Web & Social Media Analytics Previous Year Question Paper.pdf
Web & Social Media Analytics Previous Year Question Paper.pdfWeb & Social Media Analytics Previous Year Question Paper.pdf
Web & Social Media Analytics Previous Year Question Paper.pdf
 
Software Engineering Methodologies (overview)
Software Engineering Methodologies (overview)Software Engineering Methodologies (overview)
Software Engineering Methodologies (overview)
 
Student login on Anyboli platform.helpin
Student login on Anyboli platform.helpinStudent login on Anyboli platform.helpin
Student login on Anyboli platform.helpin
 
Unit-IV- Pharma. Marketing Channels.pptx
Unit-IV- Pharma. Marketing Channels.pptxUnit-IV- Pharma. Marketing Channels.pptx
Unit-IV- Pharma. Marketing Channels.pptx
 
Arihant handbook biology for class 11 .pdf
Arihant handbook biology for class 11 .pdfArihant handbook biology for class 11 .pdf
Arihant handbook biology for class 11 .pdf
 

Creating an examview test with quicktest wizard

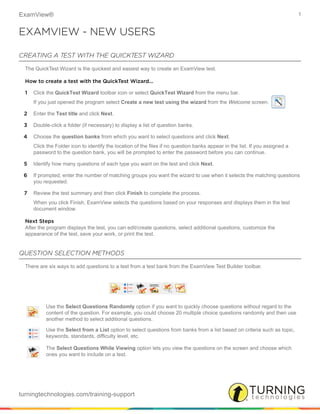
  • 1. ExamView® 1 turningtechnologies.com/training-support EXAMVIEW - NEW USERS CREATING A TEST WITH THE QUICKTEST WIZARD The QuickTest Wizard is the quickest and easiest way to create an ExamView test. How to create a test with the QuickTest Wizard... 1 Click the QuickTest Wizard toolbar icon or select QuickTest Wizard from the menu bar. If you just opened the program select Create a new test using the wizard from the Welcome screen. 2 Enter the Test title and click Next. 3 Double-click a folder (if necessary) to display a list of question banks. 4 Choose the question banks from which you want to select questions and click Next. Click the Folder icon to identify the location of the files if no question banks appear in the list. If you assigned a password to the question bank, you will be prompted to enter the password before you can continue. 5 Identify how many questions of each type you want on the test and click Next. 6 If prompted, enter the number of matching groups you want the wizard to use when it selects the matching questions you requested. 7 Review the test summary and then click Finish to complete the process. When you click Finish, ExamView selects the questions based on your responses and displays them in the test document window. Next Steps After the program displays the test, you can edit/create questions, select additional questions, customize the appearance of the test, save your work, or print the test. QUESTION SELECTION METHODS There are six ways to add questions to a test from a test bank from the ExamView Test Builder toolbar. Use the Select Questions Randomly option if you want to quickly choose questions without regard to the content of the question. For example, you could choose 20 multiple choice questions randomly and then use another method to select additional questions. Use the Select from a List option to select questions from banks from a list based on criteria such as topic, keywords, standards, difficulty level, etc. The Select Questions While Viewing option lets you view the questions on the screen and choose which ones you want to include on a test.
  • 2. ExamView® 2 turningtechnologies.com/training-support CHANGING THE PREFERENCES Changes made to most ExamView Test Generator preferences will only affect the open question bank or test (this excludes the General, Files and Editing preferences). These preferences are saved with the question bank or test file. To change the preferences for new tests or question banks, save the preferences as the default preferences. How to change the preferences... 1 Click Edit from the menu bar and select Preferences. 2 Set the preference options as desired. 3 Click OK to record the settings and close the Preferences window. If a test or question bank is open when you change the settings, the program applies the new settings only to the open document. If no test/question bank is open, or if you click Save as Default, the new settings will apply to any new tests/question banks you create. FORMATTING A TEST WITH THE STYLE GALLERY (PC ONLY) The list of available styles is based on your State/Region setting in the Preferences (General). Visit the downloads section of the ExamView web site for more information on styles and to download additional styles for the Style Gallery. How to format a test with the Style Gallery... 1 Click the Style Gallery icon from the toolbar or click Test from the menu bar and select Style Gallery. 2 Select the Layout Style. A preview of the test style appears in the test preview window on the right. 3 Click OK to apply the style to your test. After selecting a style, you can override individual layout and style preferences. TOGGLE BIMODAL A bimodal question is a question that can be displayed as either a multiple choice or a short answer question. Bimodal questions give you more flexibility when building a test. For example, with a single click of the mouse you can increase the difficulty level of a test by changing all multiple choice questions to short answer. How to toggle a bimodal question... 1 Select the Bimodal question. Bimodal questions have a red dot to the left of the question. Use the Select Questions by Standard option if you want to choose questions based on their learning objective, national standard, state standard, or local standard. Use the Select by Criteria option When you want to choose questions based on certain criteria. Use the Select All Questions option when you want to select all the questions in a question bank.
  • 3. ExamView® 3 turningtechnologies.com/training-support 2 While the question is selected, click the Toggle Bimodal icon on the toolbar. The question type will change to Short Answer. DYNAMIC QUESTIONS ExamView Test Generator allows you to create dynamic questions through the use of built-in algorithmic functions, keywords, and variables. When you click the Dynamic Question icon on the toolbar, the content of the question changes based on the programmed algorithmic functions, keywords or variables. How to change dynamic questions... 1 Select the question. Dynamic questions have a dynamic tag to the left of the question. 2 While the question is selected, click the Dynamic Question icon on the toolbar. SCRAMBLING QUESTIONS ON A TEST (PC ONLY) The Scramble option is different from the Reorder command in that the Reorder command lets you move questions one at a time or in a group. And, you can move them exactly where you want the questions to appear. With the Scramble option, the program randomly rearranges the questions. If you prefer, you can automatically generate different versions when you print a test. How to scramble questions on a test... 1 Click the Scramble icon from the toolbar or click Question from the menu bar and select Scramble. 2 Select one or more of the scramble options: sections, questions, and answer choices. 3 You may assign a new test version (A-Z) each time you scramble the questions. 4 Click OK to scramble the current test. REORDERING QUESTIONS Follow the steps below to reorder questions on a test. How to reorder questions... 1 Click the Reorder Questions icon from the toolbar or click Question from the menu bar and select Reorder. 2 Select an item (individual question, question type group or narrative group) and hold down the left mouse button while dragging the item to the new location in the list. Alternatively, press either Ctrl+/Ctrl+(PC) or Cmd+/Cmd+(Mac) to move the highlighted question. Rules for reordering questions on a test grouped by question type: • Only questions of the same question type can be moved. • To move an entire question type group (e.g., multiple choice), select the question type title and drag it to the desired location. • A group can only be moved to certain places in the list. The insertion bar appears as a thick line to indicate where the question group can be moved.
  • 4. ExamView® 4 turningtechnologies.com/training-support • Questions attached to a narrative can be moved only within the same narrative group. • A question not a part of a narrative group cannot be moved into that group. Likewise, you cannot move a question linked to a narrative outside of the group. Rules for reordering question on a text with mixed question types: • Questions attached to a narrative can be moved only within the same narrative group. • A question not a part of a narrative group cannot be moved into that group. Likewise, you cannot move a question linked to a narrative outside of the group. • Matching questions can be moved only within the same matching group. 3 Repeat step 2 for each item to be moved. 4 Click OK to update the current test. TWO-COLUMN FORMATTING By default, ExamView displays tests in one-column format. Follow the steps below to switch to two-column formatting. How to format a test using two columns... 1 Click the Two Columns icon on the toolbar. 2 Optionally, click Test and select Layout. a Click the Layout icon and then click the Page tab. b Select the radio button labeled Two Columns. c Optionally, select Show vertical lines between columns and/or Show horizontal lines between sections. d Click OK. (Click Save As Default if you want all future tests to display in two-columns.) PRINTING A TEST When printing a test you must choose the number of versions to print as well as several scramble options. There are also options for printing an answer strip and/or a version map (if applicable). How to print a test... 1 Click Print or click File and select Print Test. 2 Specify the number of test versions to print (1-26). 3 Select one or more of the scramble options: sections, questions, multiple choice/multiple response answer choices and calculate new algorithm values. NOTE Not all questions can be displayed in two-column format. For example, a question may be too wide to fit within the column.
  • 5. ExamView® 5 turningtechnologies.com/training-support If you opt to scramble sections or questions, you can also choose to print a version map—a correlation chart to show you how the test was scrambled. The calculate new algorithm values is only available for tests that contain dynamic questions. 4 Indicate whether you want to print an answer strip. 5 Indicate whether you want to print a version map. 6 Click OK to confirm your responses. 7 In the Print Test window, choose to print the entire test or selected pages and then click OK to print the test. CREATING A NEW QUESTION BANK Follow the steps below to create a new question bank. How to create a new question bank... 1 Click the New Question Bank icon from the toolbar or click File from the menu bar and select New Question Bank. If you just opened the program select Create a new question bank from the Welcome screen. 2 Enter the question bank title and subtitle and click OK. 3 Enter questions into the bank. You can add up to 250 questions per question bank using some or all of the available question types (e.g., true/false, multiple choice, short answer, etc.). CREATING, EDITING AND DELETING QUESTIONS IN A QUESTION BANK Follow the steps below to create, edit or delete questions in a question bank. How to create, edit and delete questions in a question bank... 1 To create a new question in a question bank: a While working in the Question Bank Editor, click New located at the bottom of the question bank window or use the keyboard shortcut, press CTRL+N (PC) or CMD+N (Mac). b Select the question type. c Enter the new question, answer, and information (optional). See the Entering/Editing Questions help topic for more detailed instructions. d Click Record. 2 To edit a question in a question bank: a Select the question on the test that you want to edit. b Click Edit located at the bottom of the question bank window, or double-click the question to display an editing window. NOTE You cannot print selected pages if you chose to print an answer strip or multiple versions of a test.
  • 6. ExamView® 6 turningtechnologies.com/training-support c Edit the question, change the answer, update the narrative, and/or modify the question information (objectives, difficulty code, reference, topic, or notes). See the Entering/Editing Questions help topic for more detailed instructions. d Click Record to save your changes. 3 To delete a question from a question bank: a Select the question to delete. To remove an entire question type, select the desired question type. b Click Delete located at the bottom of the question bank window. c Click Yes to confirm that you want to remove the question. SAVING A QUESTION BANK You can automatically open question bank files from previous versions of the ExamView Test Generator program. However, once you save a question bank using the new version, you cannot open that file with an older version. It is recommended that you use a different file name. How to save a question bank... 1 Click Save. 2 Enter a name for the question bank (with a BNK extension) if this is the first time that you have chosen to save the question bank. 3 Identify the folder where you want to save the question bank. If you want to save the file on a different drive or on a network, choose the location. 4 Click OK to save the question bank. IMPORTING QUESTIONS FROM OTHER SOURCES (PC ONLY) Use the included ExamView Import Utility application to import question from other sources into the Question Bank Editor to import RTF files used by Microsoft Word and other compatible word processors. Prerequisites Navigate to your ExamView folder on your hard drive. This is typically at the root of the hard drive or C: drive. Open the Sample Bank.pdf to see how the RTF file should be formatted. • The basic required sections are the test title, question type header, question number, question, answer options (if multiple choice), and correct answer ( ANS: ). • Create a simple test using just true / false questions. After successfully importing a simple test, try adding more features such as images, tables, narratives, etc. NOTE Click File and select Save As to save the question bank with a different file name and/or to save the question bank to a new file location.
  • 7. ExamView® 7 turningtechnologies.com/training-support How to open the ExamView Import Utility... 1 Click the Start button on the Task bar. 2 Click All Programs to view a menu of installed programs. 3 Click the eInstruction folder and then the ExamView folder to locate the ExamView Import Utility.