
Recommandé
Contenu connexe
Tendances
Tendances (20)
En vedette
En vedette (20)
Similaire à Photographic thumbnail
Similaire à Photographic thumbnail (20)
Plus de aaronmc165
Plus de aaronmc165 (19)
Dernier
Dernier (20)
Photographic thumbnail
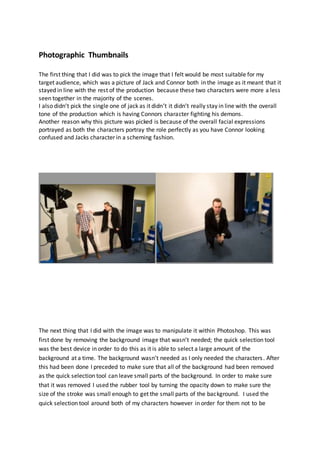
- 1. Photographic Thumbnails The first thing that I did was to pick the image that I felt would be most suitable for my target audience, which was a picture of Jack and Connor both in the image as it meant that it stayed in line with the rest of the production because these two characters were more a less seen together in the majority of the scenes. I also didn’t pick the single one of jack as it didn’t it didn’t really stay in line with the overall tone of the production which is having Connors character fighting his demons. Another reason why this picture was picked is because of the overall facial expressions portrayed as both the characters portray the role perfectly as you have Connor looking confused and Jacks character in a scheming fashion. The next thing that I did with the image was to manipulate it within Photoshop. This was first done by removing the background image that wasn’t needed; the quick selection tool was the best device in order to do this as it is able to select a large amount of the background at a time. The background wasn’t needed as I only needed the characters. After this had been done I preceded to make sure that all of the background had been removed as the quick selection tool can leave small parts of the background. In order to make sure that it was removed I used the rubber tool by turning the opacity down to make sure the size of the stroke was small enough to get the small parts of the background. I used the quick selection tool around both of my characters however in order for them not to be
- 2. erased I swapped the settings round so that it only erases everything else left over other than the characters. After this had been completed I began to make a new layer, after a new layer had been created I began to make a rectangle with the rectangle tool that covered the page, once this had been done I then used the colour picker to turn it white. Example of process trying to remove the background Now that the image had a white background I made a new layer that consisted of changing Jacks character this was done by using the magic want to highlight round Jacks head and then use the paint bucket to change the original colour of white to red in order to show the character as an evil Devil like character. After this had been applied I then used the eye dropper tool which allows the transfer of colour onto different things which in this case was Jacks hands.
- 3. After all of this had been done I made a new layer so that what had been done so far could not be effected, after this had been done I used the magnetic tool to select my characters then I clicked the mouse tool which created a black border layer from the characters which I was then able to select and manipulate by using the edit tool and going on transform, this tool had a large range of options however I chose to warp the image so that it became a shadow laid flat for the characters creating a dark feel for the magazine. In order to finally finish the image I decided to use the feathering tool which is used to go round the image in order for it to be smoother and stand out a bit more.
- 4. This became the final result of creating the image on photoshop.