Blockchain - Hyperledger Fabric v1.0 Running on LinuxONE, see it in action!
•
3 likes•1,249 views

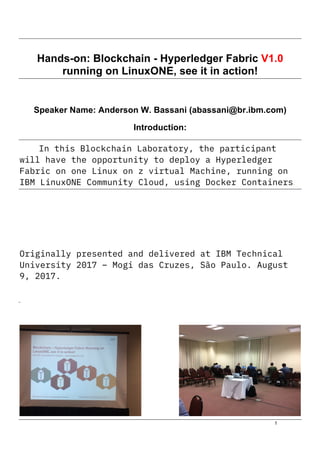
Laboratory exercise delivered at IBM Technical University 2017, Mogi das Cruzes, São Paulo.

Recommended
Recommended
More Related Content
What's hot
What's hot (20)
Similar to Blockchain - Hyperledger Fabric v1.0 Running on LinuxONE, see it in action!
Similar to Blockchain - Hyperledger Fabric v1.0 Running on LinuxONE, see it in action! (20)
More from Anderson Bassani
More from Anderson Bassani (17)
Recently uploaded
Recently uploaded (20)
Blockchain - Hyperledger Fabric v1.0 Running on LinuxONE, see it in action!
- 1. 1 Hands-on: Blockchain - Hyperledger Fabric V1.0 running on LinuxONE, see it in action! Speaker Name: Anderson W. Bassani (abassani@br.ibm.com) Introduction: In this Blockchain Laboratory, the participant will have the opportunity to deploy a Hyperledger Fabric on one Linux on z virtual Machine, running on IBM LinuxONE Community Cloud, using Docker Containers. Originally presented and delivered at IBM Technical University 2017 – Mogi das Cruzes, São Paulo. August 9, 2017.
- 2. Exercises Guide 2 Exercise instructions In this lab exercise you will complete the following tasks: __ 1.First, let’s review Hyperledger Fabric: __ a. Terminology __ b. Architecture __ c. Differences between Hyperledger Fabric V0.6 to V1.0 __ 2.Second, create your own Linux on z virtual server and deploy a Hyperledger Fabric __ a. Sign up for a LinuxONE Community Cloud trial account __ b. Log on, create a SSH key pair, and deploy a virtual server instance __ c. Setup PuTTY to use a private key __ d. Access the virtual server with Secure Shell (SSH) __ e. Build the Hyperledger Fabric __ f. Create a four-peer network __ g. Deploy the example smart contract application
- 3. 3 Task __ 1. Create your own Linux on z virtual server and deploy a Hyperledger Fabric __ a. Sign up for a LinuxONE Community Cloud trial account Important: In this Lab, you can now skip to Step 6: Install the Prerequisites on page 26. The instructor already created one Linux server and a key pair (private and public key) for each group. Ask the instructor your Group Number, from 01 to 12. Besides that fact, the LinuxONE Community Cloud is available on the internet, so you reproduce all the steps on your company or at Club Med Lake Paradise’s pool! Step 1: Registration If you have not done so already, register at: https://developer.ibm.com/linuxone/ for a 120-day trial account. You will receive an email containing credentials to access the LinuxONE Community Cloud self-service portal. This is where you can start exploring all our available services.
- 4. Exercises Guide 4 Image: __ 1. Click on Start your trial now button. __ 2. You will be redirected to https://linuxone20.cloud.marist.edu/cloud/#/register for a page registration. Image:
- 5. 5 __ 3. Fill all the mandatory fields. You will also need a valid email and cellphone to receive a valid code. __ 4. Insert your phone number and click “Get Code” __ 5. Check your phone for a 6-digit number. Or follow the above instructions to receive the code by email. __ 6. Type the code on the necessary field. Example:
- 6. Exercises Guide 6 __ 7. Click on “Request your trial” button. __ 8. You should now receive an email with credentials. If you receive the error below, please contact the linux1@us.ibm.com team. __ 9. End of the exercise. You are now the newest member of the LinuxONE Community, enjoy it!
- 7. 7 Image: Email with credentials to access the LinuxONE Community Cloud:
- 8. Exercises Guide 8 Step 2: Log on to the self-service portal The portal URL and account credentials are located in the email received from “LinuxONE Community Cloud” (noreply@linuxone.cloud.marist.edu) with the subject “Registration successful”. __ 1. Click on the URL to access the cloud dashboard - https://linuxone20.cloud.marist.edu/cloud __ 2. Type in your account and password. __ 3. Click on Sign In. The LinuxONE Community Cloud initial screen will open.
- 10. Exercises Guide 10 Step 3: Deploy a Virtual Server Instance and create a key pair. __ 1. On the Insfrastructure options, click on Manage Instances. __ 2. Click on Create __ 3. Let’s maintain the type of this virtual server as General purpose VM. The other option is Hackathon (code required) that isn’t our use case today.
- 11. 11 __ 4. Let’s enter the Instance name and some description. My default is blockchainNN, where NN is the Group Number from 01 to 12. On the Description I choose to write: Hyperledger Fabric V1.0 IBM TechU 2017. __ 5. Click on SLES12 SP2 to select this image.
- 12. Exercises Guide 12 __ 6. On the Select a Flavor, let’s choose the LinuxONE-Medium. When you click, the option is highlighted. __ 7. On the Select a SSH Key Pair, click on create. __ 8. On the key name, type what you want. In this exercise, I choose the following standard keyblockchainNN, where NN is the Group Number, from 01 to 12.
- 13. 13 __ 9. Click on Create a new key pair. __ 10. Click on Save File to save your private key file (keyblockchain01.pem) Note: Take care in storing this private key. There is no way to retrieve this key once it has been saved. __ 11. Click on keyblockchain01 to highlight the SSH Key Pair. __ 12. Verify your selection, make any changes if necessary and click on Create.
- 14. Exercises Guide 14 __ 13. Wait until your instance be deployed. The status change from spawning to ACTIVE. Image showing instances during deployment: Image showing the VM in active state and responding to ping: When the instance deployment is complete, you can click on View Details to display additional information about your virtual server.
- 15. 15 Image: The Instance Status after a successful deployment This are the content of the RSA private key keyblockchain01.pem -----BEGIN RSA PRIVATE KEY----- MIIEqAIBAAKCAQEAuE1oL2UGKVVy7VDYqA8Gezw5QyMY5jM3q8r8cccOwCB1xKRA wxoeMj9GVZ+vbbDGs8JPvREIXQbGE/dZg4UmAklqYMg6ODA6c3cTYalOLJKIpgo6 AFNmstzN7rQxSGJA0nNBGq1voahcM8lGlliOUAU1isdpIbaGHBOthMApjODj3JO3 FuqeBJm36zgrdZwh9tcfrgUlRpidiILpyApHHJRjn5HipS8Y4fX2Nhh4buI9xTlC IsUrtPpDFL9gd2gAWTDXoZ5d9LqQHWpmHJSSz37+20KFBel5LalSW6j0kIEeD36/ j8vsYyWyCQv7LB4rwIndSCApY2S/wpg8hBZdOQIDAQABAoIBAD2o+CBTJjqR8f9f uvyO+lYkkevaRCxQGmIJaWgPdunkckI1ycz8YfnhnYBsCl8ic3gUnGTe2/NznrVz XalY1JyTP1nd40yFJikXP46++/6Bj+ItLbaKMKPKp8Mi2hIjfRhrou5v9Bcboq1Y u5r1SbeP5pflm1DCJiAinTz6pWwSB1dFLSz3J0dcbVcd/XftVdq8OaHrwQd70QWJ Dli+TW4G+9oTMibENOxlfdQod2ETxWuTSDqbu3cJznQQBjlgDZ1SPPfh704jSzQ2 U7VEoWasLIonelawapmrZkVwPVul/NohOI0qEBpLphO5xZumbGapdysl1lh93EmA nlMyQAECggCBAMSCbOTS24ONKhGp2bvVvcUvlSkWK1Xcram7Zh43IcqlwMTfLb73 ymmPnvsFOZ13L4lqCv4wQor7ET8GSV1c+TVtmhfseGtsfctWfEba70XTmkrwDwAz 8ydmuPS2l5IbGutlSNZEJRdlTupAGDcdp7pSu0SzxCoszisc2rd40Fk5AoIAgQDw GOztp73igsnM7i0WhFn2l6S8HrAv6PxL48khArzvHXTcsKndFjyAPQnfaC+t858b Y74QmWEAS0HNpkkOvTwP6EBYhFViIIcCkf+RAVUUzxZVXZlTGnWFqaIR1jdkJCT4 0omSKtv88P+qBPd8ic3AvZOW3iM8Y8VAMXyy1ookAQKCAIEArLtUisMJ75W7P/GE EYbtG5Ia1BXHm96xzDuMpMyjaGTQkHz40h8vjiCPh2jtXwuv/mL3LL4xD8dnPnYB MQ8Tg7JGu/bBVvPzkzQ/Y6z4m/FHc82V8gC4II87zuddTjGDNR0/rBAUZn9HocMb Rf9MOwyTze0SZlwiEWV4n8OTqIkCggCAGrbrRdYwLo/W3FJz+dloGSPuVHAlsm7+ A4Oo0V94njJs2lFd1RewS6R/ALia9YPx5B5I+5fVTy8Qd01VO6qakDqLTk4LIgv0 ebi88ulvCg2wsnbjpHeBNAoX2lw3dZD//B+Q5w6Vw6MdD1HWJ6k9l4CAd3zn9sQz Il1fPpbYcAECggCAWk9/440ytrSsR9HUeqHmxvjTfMaGUF3jbh8x860D99Kb5tTv etHyRPswCYdY7e5ABTRgwzyEX8EcAs89Die8TNklXOI+MLn2+K+xNYn7PAnmMjgW 16pz0JMn9S2Ex9kFBD3ua41AAnxSLc4yuFDU86t6qn0WJuqOl/rFcT7vkdM= -----END RSA PRIVATE KEY-----
- 16. Exercises Guide 16 Step 4: Access the virtual server with Secure Shell (SSH). Login for the root user is disabled. You must log in with the linux1 user. This user has full sudo privilege. Linux and macOS Users: Follow the instructions below if your workstation have these operating systems installed __ 1. Make sure your key has a file permission of 600. Run this command to change it if necessary: $ ls -l | grep key -rw-r--r--@ 1 abassani staff 1683 Aug 5 18:56 keyblockchain01.pem -rw-r--r--@ 1 abassani staff 1683 Aug 5 17:12 keyblockchain02.pem -rw-r--r--@ 1 abassani staff 1687 Aug 5 19:05 keyblockchain03.pem -rw-r--r--@ 1 abassani staff 1683 Aug 5 19:06 keyblockchain04.pem -rw-r--r--@ 1 abassani staff 1683 Aug 5 19:06 keyblockchain05.pem -rw-r--r--@ 1 abassani staff 1687 Aug 5 19:32 keyblockchain06.pem $ chmod 600 keyblockchainNN.pem __ 2. Run this command from a terminal to connect to your deployed instance. ssh –i keyblockchainNN.pem linux1@<instance IP address> Where: NN is your Group Number, and the IP Address is provided below:
- 17. 17 Table with hostname, IP Address, linux user and ssh keys: Hostname IP Address Linux user ssh key blockchain01 148.100.4.191 linux1 keyblockchain01.pem blockchain02 148.100.4.192 linux1 keyblockchain02.pem blockchain03 148.100.5.156 linux1 keyblockchain03.pem blockchain04 148.100.5.161 linux1 keyblockchain04.pem blockchain05 148.100.5.159 linux1 keyblockchain05.pem blockchain06 148.100.4.133 linux1 keyblockchain06.pem blockchain07 148.100.4.136 linux1 keyblockchain07.pem blockchain08 148.100.5.187 linux1 keyblockchain08.pem blockchain09 148.100.5.164 linux1 keyblockchain09.pem blockchain10 148.100.5.168 linux1 keyblockchain10.pem blockchain11 148.100.5.189 linux1 keyblockchain11.pem blockchain12 148.100.4.197 linux1 keyblockchain12.pem If you don’t execute the procedure above to change the file permissions you will receive the following error: $ ssh -i keyblockchain01.pem linux1@148.100.5.154 @@@@@@@@@@@@@@@@@@@@@@@@@@@@@@@@@@@@@@@@@@@@@@@@@@@@@@@@@@@ @ WARNING: UNPROTECTED PRIVATE KEY FILE! @ @@@@@@@@@@@@@@@@@@@@@@@@@@@@@@@@@@@@@@@@@@@@@@@@@@@@@@@@@@@ Permissions 0644 for 'keyblockchain01.pem' are too open. It is required that your private key files are NOT accessible by others. This private key will be ignored. Load key "keyblockchain01.pem": bad permissions Permission denied (publickey).
- 18. Exercises Guide 18 Note: If you create a RHEL or SLES virtual server, you should use ‘linux1’ as your user. For Ubuntu, use the ‘ubuntu’ userid. Note: This laboratory document all the steps for a SLES virtual server. But all the steps are all tested for the following Linux distros: • Red Hat Enterprise Linux (RHEL) 7.2 • SUSE Linux Enterprise Server (SLES) 12 • Ubuntu 16.04 LTS
- 19. 19 Windows Workstation Users: Follow the instructions below if your workstation have Windows installed __ 1. You have to use an SSH client. A popular and free SSH client is PuTTY. You can download PuTTY from this website: http://www.putty.org/. __ 2. Set up PuTTY on Windows to use SSH private key. __ a. Download PuTTYgen from this website http://www.chiark.greenend.ork.uk/~sgtatham/putty/download.html __ b. Save the puttygen.exe (183 KB) binary file. __ c. Double click to execute PUTTYGEN program. Click Run. __ d. The PuTTY Key Generator initial screen will open.
- 20. Exercises Guide 20 __ e. Let’s protect the private key. Click File > Load private key __ f. Select the folder that contains your private key. Select All Files (the PuTTY try to locate PuTTY Private Key Files with extension .ppk). Then, select the keyblockchainNN.pem private key file. Click Open.
- 21. 21 __ g. Click OK button to acknowledge the successful notice __ h. Enter a key passphrase and confirm it. Important: The key passphrase that was used for all the Groups = ibmtechu2017
- 22. Exercises Guide 22 __ i. Click Save private key. Each Group have one keyblockchainNN.ppk private key, so no one is able to connect on a different virtual machine. Note: the protected private key file (.ppk) just created is needed by PuTTY. __ j. Let’s now set up the PuTTY with the protected key already created. Start PuTTY. __ k. Select Connection > Expand SSH > Expand Auth and Click Browse to select the protected private key file (.ppk) Image example:
- 23. 23 __ l. Select Connection > Data and enter linux1 in the Auto-login username textbox __ m. Select Session and enter the IP address for your virtual server in the Host Name textbox. On the Saved Session, insert your Group name (blockchainNN). Click Save.
- 24. Exercises Guide 24 Image Example: __ n. Click Open and acknowledge the Security Alert by clicking Yes. __ o. Enter the passphrase for the protected private key. Hint: the passphrase is ibmtechu2017 __ p. Welcome to Bash! You will receive the Welcome to LinuxONE Community Cloud! Screen. ================================================================================= Welcome to the IBM LinuxONE Community Cloud! This server is for authorized users only. All activity is logged and monitored. Individuals using this server must abide to the Terms and Conditions listed here: https://developer.ibm.com/linuxone/linuxone-community-cloud-terms-conditions/. Your access will be revoked for any non-compliance. ==================================================================================
- 25. 25 Step 5: Manage your virtual server instance You can use the self-service portal to: 1. Create an instance 2. Stop an instance 3. Start an instance 4. Delete an instance Important: Read the information below about your virtual server instance 1. The root user login is disabled. 2. You must log in with the user linux1 or ubuntu and with your SSH private key. 3. The linux1 user has full sudo privilege. 4. There is a 42 GB user disk mounted at /data. 5. Firewall is enabled. Only the SSH port is open. Modify the firewall rules if you need other ports opened. 6. Your server will be shut off if is inactive for more than 7 days. You can start it using the self-service portal. Note: About your LinuxONE Community Cloud account 1. Your LinuxONE Community Cloud trial allows you to deploy one (1) virtual server. You may delete this server and deploy another instance using other images in the catalog. 2. Your server will be deleted and the trial account will be cancelled if your server is shut off for more than 30 days. 3. You must abide to these terms of use (https://developer.ibm.com/linuxone/terms-of-use/ ) which you have agreed during registration. Any misuse will result in immediate revoke of access to the cloud.
- 26. Exercises Guide 26 Step 6: Install the prerequisites The laboratory can be run on any supported level of Mac OSX, Linux and Windows machines. Our option is to run a Linux on z virtual server! Please note that as several hundred MBs in the form of docker images will be downloaded, suitable internet bandwidth and disk space is required. The following prerequisite software are also required: • Git command line • cURL (or Windows equivalent) • Docker • Docker Compose • Node.js It is important to ensure the correct versions of Docker, Docker Compose and Node.js are installed. Incorrect versions will lead to random errors. Please follow directions on this page for installing the correct versions: http://hyperledger-fabric.readthedocs.io/en/latest/prereqs.html __ 1. Log on to your virtual server with the ‘linux1’ user. ssh –i keyblockchain01.pem linux1@<server IP address> Or use an SSH client like PuTTY. __ 2. Switch to root user. sudo su - __ 3. Download and install Docker files. __ a. For SLES virtual machine the Docker is already installed. Check the version with the following commands:
- 27. 27 zypper info docker Refreshing service 'SMT-http_lxslsmt'. Retrieving repository 'SUSE-PackageHub-12-SP2' metadata ......................................................................... ...........[done] Building repository 'SUSE-PackageHub-12-SP2' cache ......................................................................... ................[done] Loading repository data... Reading installed packages... Information for package docker: ------------------------------- Repository : SLE-Module-Containers12-Updates Name : docker Version : 17.04.0_ce-98.2 Arch : s390x Vendor : SUSE LLC <https://www.suse.com/> Support Level : Level 3 Installed Size : 43.3 MiB Installed : Yes Status : up-to-date Source package : docker-17.04.0_ce-98.2.src Summary : The Linux container runtime Description : Docker complements LXC with a high-level API which operates at the process level. It runs unix processes with strong guarantees of isolation and repeatability across servers. Docker is a great building block for automating distributed systems: large-scale web deployments, database clusters, continuous deployment systems, private PaaS, service-oriented architectures, etc. __ b. And the Docker Version: docker --version Docker version 17.04.0-ce, build 78d1802
- 28. Exercises Guide 28 __ 4. Install pip. pip is a package management system used to install and manage software packages written in Python. Many packages can be found in the Python Package Index (PyPI) (from Wikipedia). Execute the following command: curl "https://bootstrap.pypa.io/get-pip.py" -o "get-pip.py" You should see the following result: # curl "https://bootstrap.pypa.io/get-pip.py" -o "get-pip.py" % Total % Received % Xferd Average Speed Time Time Time Current Dload Upload Total Spent Left Speed 100 1558k 100 1558k 0 0 7602k 0 --:--:-- --:--:-- --:--:-- 7637k __ 5. Check the python version python --version or python -V __ 6. Execute the following command to install pip and wheel: python get-pip.py As a result, you should see the following: # python get-pip.py Collecting pip Downloading pip-9.0.1-py2.py3-none-any.whl (1.3MB) 100% |████████████████████████████████| 1.3MB 876kB/s Collecting wheel Downloading wheel-0.29.0-py2.py3-none-any.whl (66kB) 100% |████████████████████████████████| 71kB 8.3MB/s Installing collected packages: pip, wheel Successfully installed pip-9.0.1 wheel-0.29.0 __ 6. Install Docker Compose.
- 29. 29 pip install docker-compose __ 7. You can check the version of Docker Compose you have installed with the following command: docker-compose --version The result: docker-compose version 1.15.0, build e12f3b9 __ 8. Hyperledger Fabric uses the Go programming language 1.7.x for many of its components. Given that we are writing a Go chaincode program (not on this LAB at least ;-), we need to be sure that the source code is located somewhere within the $GOPATH tree. First, you will need to check that you have set your $GOPATH environment variable. echo $GOPATH __ 9. If nothing is displayed when you echo $GOPATH, you will need to set it. Typically, the value will be a directory tree child of your development workspace, if you have one, or as a child of your $HOME directory. Since we’ll be doing a bunch of coding in Go, you might want to add the following to your ~/.bashrc: export GOPATH=$HOME/go export PATH=$PATH:$GOPATH/bin __ 10. If you will be developing applications for Hyperledger Fabric leveraging the Hyperledger Fabric SDK for Node.js, you will need to have version 6.9.x of Node.js installed. zypper install nodejs6 nodejs-devel nodejs6-docs npm6 Answer yes to confirm the installation. You should see: # zypper install nodejs6 nodejs-devel nodejs6-docs npm6 Refreshing service 'SMT-http_lxslsmt'. Loading repository data... Reading installed packages... 'nodejs-devel' not found in package names. Trying capabilities. Resolving package dependencies... __ 3. The following 4 NEW packages are going to be installed:
- 30. Exercises Guide 30 nodejs6 nodejs6-devel nodejs6-docs npm6 The following package is not supported by its vendor: nodejs6-devel 4 new packages to install. Overall download size: 7.5 MiB. Already cached: 0 B. After the operation, additional 38.1 MiB will be used. Continue? [y/n/...? shows all options] (y): y Retrieving package nodejs6-6.9.5-7.1.s390x (1/4), 4.9 MiB ( 20.6 MiB unpacked) Retrieving: nodejs6-6.9.5-7.1.s390x.rpm ....................................................................................................[done] Retrieving package nodejs6-docs-6.9.5-7.1.noarch (2/4), 427.2 KiB ( 7.4 MiB unpacked) Retrieving: nodejs6-docs-6.9.5-7.1.noarch.rpm ..............................................................................................[done] Retrieving package nodejs6-devel-6.9.5-7.1.s390x (3/4), 346.9 KiB ( 2.4 MiB unpacked) Retrieving: nodejs6-devel-6.9.5-7.1.s390x.rpm ..............................................................................................[done] Retrieving package npm6-6.9.5-7.1.s390x (4/4), 1.9 MiB ( 7.7 MiB unpacked) Retrieving: npm6-6.9.5-7.1.s390x.rpm .......................................................................................................[done] Checking for file conflicts: ...............................................................................................................[done] (1/4) Installing: nodejs6-6.9.5-7.1.s390x ..................................................................................................[done] (2/4) Installing: nodejs6-docs-6.9.5-7.1.noarch ............................................................................................[done] (3/4) Installing: nodejs6-devel-6.9.5-7.1.s390x ............................................................................................[done] (4/4) Installing: npm6-6.9.5-7.1.s390x .....................................................................................................[done]
- 31. 31 Step 7: Download the Platform-specific Binaries Let’s install the Hyperledger Fabric platform-specific binaries. This process was designed to complement the Hyperledger Fabric Samples (next session – Step 8) but can be used independently. If you are not installing the samples right now, then simply create and enter a directory into which to extract the contents of the platform-specific binaries. __ 1. Still with root privileges, please execute the following command from within the directory into which you will extract the platform- specific binaries: cd /root curl -sSL https://goo.gl/iX9dek | bash The curl command above downloads and executes a bash script that will download and extract all of the platform-specific binaries you will need to set up your network and place them into the cloned repo you created above. It retrieves four platform-specific binaries: • cryptogen; • configtxgen; • configtxlator; and • peer Finally, the script will download the Hyperledger Fabric docker images from Docker Hub into your local Docker registry and tag them as ‘latest’. The script lists out the Docker images installed upon conclusion. Look at the names for each image; these are the components that will ultimately comprise our Hyperledger Fabric network. You will also notice that you have two instances of the same image ID - one tagged as “s390x-1.0.0” and one tagged as “latest”. Image showing the end of the bash script execution: ... ===> List out hyperledger docker images hyperledger/fabric-tools latest 7cd26291b56c 3 weeks ago 1.42GB hyperledger/fabric-tools s390x-1.0.0 7cd26291b56c 3 weeks ago 1.42GB hyperledger/fabric-couchdb latest 26049dead3d7 3 weeks ago 1.62GB hyperledger/fabric-couchdb s390x-1.0.0 26049dead3d7 3 weeks ago 1.62GB hyperledger/fabric-kafka latest a89ad1d0a0a3 3 weeks ago 1.4GB hyperledger/fabric-kafka s390x-1.0.0 a89ad1d0a0a3 3 weeks ago 1.4GB hyperledger/fabric-zookeeper latest cd1d0b980b9e 3 weeks ago 1.41GB
- 32. Exercises Guide 32 hyperledger/fabric-zookeeper s390x-1.0.0 cd1d0b980b9e 3 weeks ago 1.41GB hyperledger/fabric-orderer latest dee450e190a1 3 weeks ago 194MB hyperledger/fabric-orderer s390x-1.0.0 dee450e190a1 3 weeks ago 194MB hyperledger/fabric-peer latest 80a0a7584af6 3 weeks ago 197MB hyperledger/fabric-peer s390x-1.0.0 80a0a7584af6 3 weeks ago 197MB hyperledger/fabric-javaenv latest ed9b3f85fcc2 3 weeks ago 1.48GB hyperledger/fabric-javaenv s390x-1.0.0 ed9b3f85fcc2 3 weeks ago 1.48GB hyperledger/fabric-ccenv latest 99d29b24f943 3 weeks ago 1.39GB hyperledger/fabric-ccenv s390x-1.0.0 99d29b24f943 3 weeks ago 1.39GB hyperledger/fabric-ca latest 775bfd123eb0 3 weeks ago 255MB hyperledger/fabric-ca s390x-1.0.0 775bfd123eb0 3 weeks ago 255MB __ 2. Just checking how much disk space was necessary with the following command: # df -h Filesystem Size Used Avail Use% Mounted on devtmpfs 2.0G 8.0K 2.0G 1% /dev tmpfs 2.0G 0 2.0G 0% /dev/shm tmpfs 2.0G 26M 1.9G 2% /run tmpfs 2.0G 0 2.0G 0% /sys/fs/cgroup /dev/dasda2 5.8G 3.2G 2.4G 58% / /dev/dasda1 388M 46M 323M 13% /boot/zipl /dev/dasdb1 45G 2.1G 40G 5% /data tmpfs 391M 0 391M 0% /run/user/1001
- 33. 33 Step 8: Build your first network (BYFN) The build your first network (BYFN) scenario provisions a sample Hyperledger Fabric network consisting of two organizations, each maintaining two peer nodes, and a “solo” ordering service. Image showing an overview of the Laboratory Architecture: __ 1. Determine a location on your machine where you want to place the Hyperledger Fabric samples applications repository and open that in a terminal window. cd /data __ 2. Then, execute the following command to clone the repository: git clone https://github.com/hyperledger/fabric-samples.git
- 34. Exercises Guide 34 You will notice that there are a number of samples included in the fabric-samples repository. We will be using the first-network sample. Let’s open that sub-directory now. __ 3. Execute the command to see the folder content: cd fabric-samples ls You should see something similar like this: # ls .git LICENSE README.md basic-network chaincode fabcar .gitignore MAINTAINERS.md balance-transfer bin chaincode-docker-devmode first-network __ 4. Open the first-network folder. cd first-network Note: The supplied commands in this documentation MUST be run from your first-network sub-directory of the fabric-samples repository clone. If you elect to run the commands from a different location, the various provided scripts will be unable to find the binaries. __ 5. We provide a fully annotated script - byfn.sh - that leverages these Docker images to quickly bootstrap a Hyperledger Fabric network comprised of 4 peers representing two different organizations, and an orderer node. It will also launch a container to run a scripted execution that will join peers to a channel, deploy and instantiate chaincode and drive execution of transactions against the deployed chaincode. Here’s the help text for the byfn.sh script: ./byfn.sh -h Read the information of the help command above. If you choose not to supply a channel name, then the script will use a default name of mychannel. The CLI timeout parameter (specified with the -t flag) is an optional value; if you choose not to set it, then your CLI container will exit upon conclusion of the script.
- 35. 35 __ 6. Let’s generate the network artifacts. Ready to give it a go? Okay then! Execute the following command: ./byfn.sh -m generate __ 7. You will see a brief description as to what will occur, along with a yes/no command line prompt. Respond with a y to execute the described action. Type y and press enter: y You’ll see something similar like this: Generating certs and genesis block for with channel 'mychannel' and CLI timeout of '10000' Continue (y/n)?y proceeding ... /Users/xxx/dev/fabric-samples/bin/cryptogen ########################################################## ##### Generate certificates using cryptogen tool ######### ########################################################## org1.example.com 2017-06-12 21:01:37.334 EDT [bccsp] GetDefault -> WARN 001 Before using BCCSP, please call InitFactories(). Falling back to bootBCCSP. ... /Users/xxx/dev/fabric-samples/bin/configtxgen ########################################################## ######### Generating Orderer Genesis block ############## ########################################################## 2017-06-12 21:01:37.558 EDT [common/configtx/tool] main -> INFO 001 Loading configuration 2017-06-12 21:01:37.562 EDT [msp] getMspConfig -> INFO 002 intermediate certs folder not found at [/Users/xxx/dev/byfn/crypto- config/ordererOrganizations/example.com/msp/intermediatecerts]. Skipping.: [stat /Users/xxx/dev/byfn/crypto- config/ordererOrganizations/example.com/msp/intermediatecerts: no such file or directory] ... 2017-06-12 21:01:37.588 EDT [common/configtx/tool] doOutputBlock -> INFO 00b Generating genesis block 2017-06-12 21:01:37.590 EDT [common/configtx/tool] doOutputBlock -> INFO 00c Writing genesis block ################################################################# ### Generating channel configuration transaction 'channel.tx' ### ################################################################# 2017-06-12 21:01:37.634 EDT [common/configtx/tool] main -> INFO 001 Loading configuration 2017-06-12 21:01:37.644 EDT [common/configtx/tool] doOutputChannelCreateTx -> INFO 002 Generating new channel configtx 2017-06-12 21:01:37.645 EDT [common/configtx/tool] doOutputChannelCreateTx -> INFO 003 Writing new channel tx ################################################################# ####### Generating anchor peer update for Org1MSP ########## ################################################################# 2017-06-12 21:01:37.674 EDT [common/configtx/tool] main -> INFO 001 Loading configuration 2017-06-12 21:01:37.678 EDT [common/configtx/tool] doOutputAnchorPeersUpdate -> INFO 002 Generating anchor peer update 2017-06-12 21:01:37.679 EDT [common/configtx/tool] doOutputAnchorPeersUpdate -> INFO 003 Writing anchor peer update ################################################################# ####### Generating anchor peer update for Org2MSP ########## ################################################################# 2017-06-12 21:01:37.700 EDT [common/configtx/tool] main -> INFO 001 Loading configuration 2017-06-12 21:01:37.704 EDT [common/configtx/tool] doOutputAnchorPeersUpdate -> INFO 002 Generating anchor peer update 2017-06-12 21:01:37.704 EDT [common/configtx/tool] doOutputAnchorPeersUpdate -> INFO 003 Writing anchor peer update __ 8. Check that there are no Docker containers running:
- 36. Exercises Guide 36 docker ps -a This first step generates all of the certificates and keys for all our various network entities, the genesis block used to bootstrap the ordering service, and a collection of configuration transactions required to configure a Channel. __ 9. Let’s bring up the network with the following command: ./byfn.sh -m up __ 10. Once again, you will be prompted as to whether you wish to continue or abort. Respond with a y: y The result shoud be something like this: Starting with channel 'mychannel' and CLI timeout of '10000' Continue (y/n)?y proceeding ... Creating network "net_byfn" with the default driver Creating peer0.org1.example.com Creating peer1.org1.example.com Creating peer0.org2.example.com Creating orderer.example.com Creating peer1.org2.example.com Creating cli ____ _____ _ ____ _____ / ___| |_ _| / | _ |_ _| ___ | | / _ | |_) | | | ___) | | | / ___ | _ < | | |____/ |_| /_/ _ |_| _ |_| Channel name : mychannel Creating channel... Wait a few minutes. The logs will continue from there. This will launch all of the containers, and then drive a complete end-to-end application scenario. Upon successful completion, it should report the following in your terminal window: 017-05-16 17:08:01.366 UTC [msp] GetLocalMSP -> DEBU 004 Returning existing local MSP 2017-05-16 17:08:01.366 UTC [msp] GetDefaultSigningIdentity -> DEBU 005 Obtaining default signing identity
- 37. 37 2017-05-16 17:08:01.366 UTC [msp/identity] Sign -> DEBU 006 Sign: plaintext: 0AB1070A6708031A0C08F1E3ECC80510...6D7963631A0A0A0571756572790A0161 2017-05-16 17:08:01.367 UTC [msp/identity] Sign -> DEBU 007 Sign: digest: E61DB37F4E8B0D32C9FE10E3936BA9B8CD278FAA1F3320B08712164248285C54 Query Result: 90 2017-05-16 17:08:15.158 UTC [main] main -> INFO 008 Exiting..... ===================== Query on PEER3 on channel 'mychannel' is successful ===================== ===================== All GOOD, BYFN execution completed ===================== _____ _ _ ____ | ____| | | | | _ | _| | | | | | | | | |___ | | | | |_| | |_____| |_| _| |____/ __ 11. Press ctrl + c or control + c to escape the above screen and press Enter. ctrl + c __ 12. Repeate the docker ps -a command to display the running containers: # docker ps -a CONTAINER ID IMAGE COMMAND CREATED STATUS PORTS NAMES 06b88bf6ec78 dev-peer1.org2.example.com-mycc-1.0 "chaincode -peer.a..." About a minute ago Up About a minute dev-peer1.org2.example.com-mycc-1.0 9d91c73cc444 dev-peer0.org1.example.com-mycc-1.0 "chaincode -peer.a..." About a minute ago Up About a minute dev-peer0.org1.example.com-mycc-1.0 d856bafcd7f3 dev-peer0.org2.example.com-mycc-1.0 "chaincode -peer.a..." About a minute ago Up About a minute dev-peer0.org2.example.com-mycc-1.0 d48333dd1691 hyperledger/fabric-tools "/bin/bash -c './s..." 2 minutes ago Up 2 minutes cli d4fd49e30324 hyperledger/fabric-orderer "orderer" 2 minutes ago Up 2 minutes 0.0.0.0:7050->7050/tcp orderer.example.com f0464a05e287 hyperledger/fabric-peer "peer node start" 2 minutes ago Up 2 minutes 0.0.0.0:9051->7051/tcp, 0.0.0.0:9053->7053/tcp peer0.org2.example.com 8c5a5536907f hyperledger/fabric-peer "peer node start" 2 minutes ago Up 2 minutes 0.0.0.0:8051->7051/tcp, 0.0.0.0:8053->7053/tcp peer1.org1.example.com 688303f824f0 hyperledger/fabric-peer "peer node start" 2 minutes ago Up 2 minutes 0.0.0.0:10051->7051/tcp, 0.0.0.0:10053->7053/tcp peer1.org2.example.com 514137fc97b1 hyperledger/fabric-peer "peer node start" 2 minutes ago Up 2 minutes 0.0.0.0:7051->7051/tcp, 0.0.0.0:7053->7053/tcp peer0.org1.example.com
- 38. Exercises Guide 38 __ 13. Congratulation! Right now Hyperledger Fabric is ready to take an action! http://hyperledger-fabric.readthedocs.io/en/latest/write_first_app.html
- 39. 39 Step 9: Query and Invoke the Ledger __ 1. We will enter the CLI container using the docker exec command: docker exec -it cli bash If successful you should see the following: root@cc744b56c2d2:/opt/gopath/src/github.com/hyperledger/fabric/peer# __ 2. By default, the script create or network and the channel with the name mychannel. Export the variable to facilitate the next commands. export CHANNEL_NAME=mychannel __ 3. QUERY. Let’s query for the value of a to make sure the chaincode was properly instantiated and the state DB was populated. The syntax for query is as follows: peer chaincode query -C $CHANNEL_NAME -n mycc -c '{"Args":["query","a"]}' __ 4. You should see the following: Query Result: 90 Or a more complete output for comparison: root@cc744b56c2d2:/opt/gopath/src/github.com/hyperledger/fabric/peer# export CHANNEL_NAME=mychannel root@cc744b56c2d2:/opt/gopath/src/github.com/hyperledger/fabric/peer# env |grep CHANNEL CHANNEL_NAME=mychannel root@cc744b56c2d2:/opt/gopath/src/github.com/hyperledger/fabric/peer# peer chaincode query -C $CHANNEL_NAME -n mycc -c '{"Args":["query","a"]}' 2017-08-07 03:37:40.325 UTC [msp] GetLocalMSP -> DEBU 001 Returning existing local MSP 2017-08-07 03:37:40.325 UTC [msp] GetDefaultSigningIdentity -> DEBU 002 Obtaining default signing identity 2017-08-07 03:37:40.325 UTC [chaincodeCmd] checkChaincodeCmdParams -> INFO 003 Using default escc 2017-08-07 03:37:40.325 UTC [chaincodeCmd] checkChaincodeCmdParams -> INFO 004 Using default vscc 2017-08-07 03:37:40.326 UTC [msp/identity] Sign -> DEBU 005 Sign: plaintext: 0A95070A6708031A0C0884C19FCC0510...6D7963631A0A0A0571756572790A0161 2017-08-07 03:37:40.326 UTC [msp/identity] Sign -> DEBU 006 Sign: digest: DA87A0B6CC18BCB9B3BB719314B522398ECBA0519AFC4822AE05BD04D038F901 Query Result: 90 2017-08-073:37:40.331 UTC [main] main -> INFO 007 Exiting....
- 40. Exercises Guide 40 __ 5. Query the value of b. peer chaincode query -C $CHANNEL_NAME -n mycc -c '{"Args":["query","b"]}' __ 6. You should see the following Query Result: 210 __ 7. INVOKE. Now let’s move 10 from a to b. This transaction will cut a new block and update the state DB. The syntax for invoke is as follows: peer chaincode invoke -o orderer.example.com:7050 --tls $CORE_PEER_TLS_ENABLED --cafile /opt/gopath/src/github.com/hyperledger/fabric/peer/crypto/ordererOrgani zations/example.com/orderers/orderer.example.com/msp/tlscacerts/tlsca.e xample.com-cert.pem -C $CHANNEL_NAME -n mycc -c '{"Args":["invoke","a","b","10"]}' You should see something similar: root@cc744b56c2d2:/opt/gopath/src/github.com/hyperledger/fabric/peer# peer chaincode invoke -o orderer.example.com:7050 --tls $CORE_PEER_TLS_ENABLED --cafile /opt/gopath/src/github.com/hyperledger/fabric/peer/crypto/ordererOrganizations/example.com/orderers/ordere r.example.com/msp/tlscacerts/tlsca.example.com-cert.pem -C $CHANNEL_NAME -n mycc -c '{"Args":["invoke","a","b","10"]}' 2017-08-07 03:38:20.119 UTC [msp] GetLocalMSP -> DEBU 001 Returning existing local MSP 2017-08-07 03:38:20.119 UTC [msp] GetDefaultSigningIdentity -> DEBU 002 Obtaining default signing identity 2017-08-07 03:38:20.121 UTC [chaincodeCmd] checkChaincodeCmdParams -> INFO 003 Using default escc 2017-08-07 03:38:20.121 UTC [chaincodeCmd] checkChaincodeCmdParams -> INFO 004 Using default vscc 2017-08-07 03:38:20.121 UTC [msp/identity] Sign -> DEBU 005 Sign: plaintext: 0A94070A6608031A0B08ACC19FCC0510...696E766F6B650A01610A01620A023130 2017-08-07 03:38:20.121 UTC [msp/identity] Sign -> DEBU 006 Sign: digest: 80C7150550CF136DA7269AB2DE91454D54AAFD9835601553C0CBECCFA6C6FF98 2017-08-07 03:38:20.128 UTC [msp/identity] Sign -> DEBU 007 Sign: plaintext: 0A94070A6608031A0B08ACC19FCC0510...3A57B3F0F25E42D7D6814307AE83C838 2017-08-07 03:38:20.128 UTC [msp/identity] Sign -> DEBU 008 Sign: digest: 2034902319411D491C7BCCA740BD9C3D8173A51AA6578E309EFDFF043B4D0F8A 2017-08-07 03:38:20.135 UTC [chaincodeCmd] chaincodeInvokeOrQuery -> DEBU 009 ESCC invoke result: version:1 response:<status:200 message:"OK" > payload:"n 206246345003317203372365H032007241A345201305H3310212;3603052700162241367UT3073010 22YnE022024n004lscc022014nnn004mycc022002010003022- n004mycc022%n007n001a022002010004n007n001b022002010004032007n001a03200280032010 n001b032003220032003010310001"013022004mycc0320031.0" endorsement:<endorser:"n007Org1MSP022200006-----BEGIN ----- nMIICGjCCAcCgAwIBAgIRAO/gdL7dB/bQms+3u+kYb0IwCgYIKoZIzj0EAwIwczELnMAkGA1UEBhMCVVMxEzARBgNVBAgTCkNhbGlmb3 JuaWExFjAUBgNVBAcTDVNhbiBGncmFuY2lzY28xGTAXBgNVBAoTEG9yZzEuZXhhbXBsZS5jb20xHDAaBgNVBAMTE2NhnLm9yZzEuZXhh bXBsZS5jb20wHhcNMTcwODA3MDMyMDA3WhcNMjcwODA1MDMyMDA3nWjBbMQswCQYDVQQGEwJVUzETMBEGA1UECBMKQ2FsaWZvcm5pYTEW MBQGA1UEBxMNnU2FuIEZyYW5jaXNjbzEfMB0GA1UEAxMWcGVlcjAub3JnMS5leGFtcGxlLmNvbTBZnMBMGByqGSM49AgEGCCqGSM49Aw EHA0IABBUYX5aSDcIWufE/UxpPwDgd3kcsocLQn/IAaYyz5N7nOBUx/ooiprCp2bEjFLWZgm8mWrlGGUuHpWESt8NYLBDyjTTBLMA4Gn A1UdDwEB/wQEAwIHgDAMBgNVHRMBAf8EAjAAMCsGA1UdIwQkMCKAIOyU5AYf5DoXn9lwvJ4hRC3RAzcgvIVPtw5IGk/678bjJMAoGCCqG
- 41. 41 SM49BAMCA0gAMEUCIQD8n+kxnDbWWp8ZExWElfBbOKKTi878xp4RVOtrwGEPuNAIgNjCMihC3x6iQqFas4mO/TLhVnC94LpqQwbrEFoP vTKOc=n-----END -----n" signature:"0D002 }321351211335314~266313E246 202204032J3427217252250211)h362G 034u212^343002 w000262' 351330351360t252304C2272327:W263360362^B327326201C0072562033108" > 2017-08-07 03:38:20.137 UTC [chaincodeCmd] chaincodeInvokeOrQuery -> INFO 00a Chaincode invoke successful. result: status:200 2017-08-073:38:20.137 UTC [main] main -> INFO 00b Exiting..... __ 8. QUERY. Let’s confirm that our previous invocation executed properly. We initialized the key a with a value of 90 and just removed 10 with our previous invocation. Therefore, a query against a should reveal 80. The syntax for query is as follows: peer chaincode query -C $CHANNEL_NAME -n mycc -c '{"Args":["query","a"]}' __ 9. You should see the following for the value of a: Query Result: 80 Or a more complete output: root@cc744b56c2d2:/opt/gopath/src/github.com/hyperledger/fabric/peer# peer chaincode query -C $CHANNEL_NAME -n mycc -c '{"Args":["query","a"]}' 2017-08-07 03:39:53.814 UTC [msp] GetLocalMSP -> DEBU 001 Returning existing local MSP 2017-08-07 03:39:53.814 UTC [msp] GetDefaultSigningIdentity -> DEBU 002 Obtaining default signing identity 2017-08-07 03:39:53.814 UTC [chaincodeCmd] checkChaincodeCmdParams -> INFO 003 Using default escc 2017-08-07 03:39:53.814 UTC [chaincodeCmd] checkChaincodeCmdParams -> INFO 004 Using default vscc 2017-08-07 03:39:53.814 UTC [msp/identity] Sign -> DEBU 005 Sign: plaintext: 0A95070A6708031A0C0889C29FCC0510...6D7963631A0A0A0571756572790A0161 2017-08-07 03:39:53.814 UTC [msp/identity] Sign -> DEBU 006 Sign: digest: 7177773F03F4FBAB3B6C28E849358B5D8102A8203773244447DF62A58E54FB8D Query Result: 80 2017-08-07 03:39:53.820 UTC [main] main -> INFO 007 Exiting..... __ 10. Query the value of b. peer chaincode query -C $CHANNEL_NAME -n mycc -c '{"Args":["query","b"]}' __ 11. You should see the following ... Query Result: 220 2017-08-07 04:08:28.388 UTC [main] main -> INFO 007 Exiting.....
- 42. Exercises Guide 42 Exercise review and wrap-up Having completed this exercise, you should be able to: • Describe of blockchain is and how does it integrates in the existing business processes • Describe blockchain major components • Deploy a Linux on z virtual server on IBM Community Cloud • Install the Hyperledger Fabric using Docker Containers • Install and test a smart contract Next steps: • Explore the additional bibliography on the Appendix below, like this one https://www.ibm.com/blockchain/getting-started.html
- 43. 43 Bibliography Here it is some addition materials and references: 1. IBM and Blockchain - https://www.ibm.com/blockchain 2. IBM LinuxONE Community Cloud -https://developer.ibm.com/linuxone 3. Hyperledger Project - https://www.hyperledger.org/ 4. PuTTY Set up - https://developer.ibm.com/linuxone/wp- content/uploads/sites/57/2016/02/PUTTY-Set-up.pdf 5. Deploy a Virtual Server on LinuxONE – Quick Start Guide - https://developer.ibm.com/linuxone/wp- content/uploads/sites/57/virtual-servers-quick-start.pdf 6. LinuxONE Terms of Use - https://developer.ibm.com/linuxone/terms- of-use/ 7. Blockchain Quick Start Guide - https://developer.ibm.com/linuxone/wp- content/uploads/sites/57/blockchain-quick-start.pdf 8. Donna's Dillenberger's YouTube video: https://www.youtube.com/watch?v=EqZr4LPQIWk 9. https://docs.docker.com/engine/userguide/intro/ 10. https://docs.docker.com/engine/installation 11. https://hub.docker.com/r/ibmblockchain/fabric-peer/ 12. https://github.com/vpaprots/fabric- images/blob/master/docs/LinuxONE.md 13. https://raw.githubusercontent.com/cheeye/blockchain/master/docker- compose.yml 14. An introduction text about Blockchain - https://www.ibm.com/developerworks/cloud/library/cl-blockchain- basics-intro-bluemix-trs/index.html 15. Blockchain Terminology - https://www.ibm.com/developerworks/cloud/library/cl-blockchain- basics-glossary-bluemix-trs/index.html 16. Hyperledger Fabric – Link to Protocol Specification - https://github.com/hyperledger/fabric/blob/master/docs/protocol- spec.md 17. Hyperledger Fabric - https://hyperledger- fabric.readthedocs.io/en/latest/ 18. Docker Images - https://hub.docker.com/u/ibmblockchain/?cm_mc_uid=16545731835815018 912963&cm_mc_sid_50200000=1501961957&cm_mc_sid_52640000=1501961957
- 44. Exercises Guide 44 Appendix – Handy Commands Stop all Docker containers docker stop $(docker ps –a –q) Removes all Docker instances docker rm –f $(docker ps –a –q) Romoves all Docker images docker rmi –f $(docker images –q)
- 45. 45 Appendix # docker info Containers: 0 Running: 0 Paused: 0 Stopped: 0 Images: 0 Server Version: 17.04.0-ce Storage Driver: overlay2 Backing Filesystem: extfs Supports d_type: true Native Overlay Diff: true Logging Driver: json-file Cgroup Driver: cgroupfs Plugins: Volume: local Network: bridge host macvlan null overlay Swarm: inactive Runtimes: oci runc Default Runtime: runc Init Binary: containerd version: (expected: 422e31ce907fd9c3833a38d7b8fdd023e5a76e73) runc version: N/A (expected: 9c2d8d184e5da67c95d601382adf14862e4f2228) init version: N/A (expected: 949e6facb77383876aeff8a6944dde66b3089574) Security Options: apparmor Kernel Version: 4.4.59-92.17-default Operating System: SUSE Linux Enterprise Server 12 SP2 OSType: linux Architecture: s390x CPUs: 2 Total Memory: 3.815GiB Name: blockchain007 ID: 2B2Q:PFKC:YKUS:V245:4ZJR:NDMN:7EV5:BK3Y:N37N:CVXI:IQ7Z:IC2M Docker Root Dir: /data/docker Debug Mode (client): false Debug Mode (server): false Registry: https://index.docker.io/v1/ Experimental: false Insecure Registries: 127.0.0.0/8 Live Restore Enabled: false WARNING: No swap limit support WARNING: No kernel memory limit support /etc/sysconfig # cat docker ## Path : System/Management ## Description : Extra cli switches for docker daemon ## Type : string ## Default : "" ## ServiceRestart : docker # DOCKER_OPTS="--graph=/data/docker" peer chaincode install -n mycc -v 1.0 -p github.com/hyperledger/fabric/examples/chaincode/go/chaincode_example02
- 46. Exercises Guide 46 With gratitude This humble instructor could not complete this laboratory without the help of these teams: • IBM Poughkeepsie Customer Center • IBM LinuxONE Community Cloud • IBM Systems Lab Services Brazil – specially Anderson Augusto da Silveira and Tito Garrido Ogando • Sandra Russell • Eugene Ong • Qi Ye • Eva Yan, thanks for your help ;-)