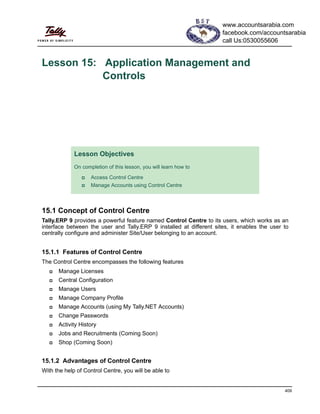
Application management and controls in tally
•
1 j'aime•5,087 vues

Concept of Control Centre Tally.ERP 9 provides a powerful feature named Control Centre to its users, which works as an interface between the user and Tally.ERP 9 installed at different sites, it enables the user to centrally configure and administer Site/User belonging to an account. 1) Manage Licenses 2) Central Configuration 3) Manage Users 4) Manage Company Profile 5) Manage Accounts (using My Tally.NET Accounts) 6) Change Passwords 7) Activity History 8) Jobs and Recruitments (Coming Soon) 9) Shop

Recommandé
Contenu connexe
Tendances
Tendances (20)
En vedette
En vedette (19)
Similaire à Application management and controls in tally
Similaire à Application management and controls in tally (20)
Dernier
Dernier (20)
Application management and controls in tally
- 1. 409 Lesson 15: Application Management and Controls 15.1 Concept of Control Centre Tally.ERP 9 provides a powerful feature named Control Centre to its users, which works as an interface between the user and Tally.ERP 9 installed at different sites, it enables the user to centrally configure and administer Site/User belonging to an account. 15.1.1 Features of Control Centre The Control Centre encompasses the following features Manage Licenses Central Configuration Manage Users Manage Company Profile Manage Accounts (using My Tally.NET Accounts) Change Passwords Activity History Jobs and Recruitments (Coming Soon) Shop (Coming Soon) 15.1.2 Advantages of Control Centre With the help of Control Centre, you will be able to Lesson Objectives On completion of this lesson, you will learn how to Access Control Centre Manage Accounts using Control Centre www.accountsarabia.com facebook.com/accountsarabia call Us:0530055606
- 2. Application Management and Controls 410 Create users with predefined Security levels Centrally Configure & manage your Tally.ERP 9 Surrender, Confirm or Reject activation of a Site Maintain Account related information Manage Licenses and Activity History Create users with predefined Security levels Using the Control Centre feature, the Account Administrator can create users and map them to a predefined security level and authorise them to access a Site/Location linked to that Account. And further the system administrator can also create Remote users and allow / disallow them to remotely access the data. The predefined security levels in Tally.ERP 9 are: Owner Standard User Tally.NET User Tally.NET Auditor Centrally Configure and manage your Tally.ERP 9 The Control Centre provides the flexiblity to make changes to product configurations in the Tally.ini (Configuration file) and apply them to immediate effect without restarting the application. The following master configurations set can be made from the Control Centre Add/Modify the Tally.ini parameters Assign TDL’s to a site or all the sites under an Account Permit or Deny changes to the local configurations The master configurations set created is applied initially to the Account centrally which is inherited by the site(s) on updation of license, based on the site level permissions by the Account Adminis- trator. Surrender, Confirm or Reject activation of a Site The Account Administrator is authorised to surrender, confirm a site license or Reject the request received on activation from another site. Maintain Account related information Allows you to maintain information about the organisation. Based on the requirements, the Account Administrator can merge multiple accounts into one or split an account into multiple account for easy and better management. Before we start using Control Centre in Tally.ERP 9, it is recommended to understand the process of installation of Tally.ERP 9 as explained.
- 3. Application Management and Controls 411 15.2 Installing & Activating Tally.ERP 9 Tally.ERP 9 software installation is a simple and one time activity. You can install program files on any drive (if the hard disk has partitions) or specify a directory for installation. You can also specify the location of the data directory. 15.2.1 Installing Tally.ERP 9 To install Tally.ERP 9: Insert the Tally.ERP 9 Installation CD in the computer's CD drive Select My Computer on Desktop Select CD drive Run Install.exe > Specify Path (for Program files and data directory) Click Install After Installation a message Installation Successful is displayed. Click OK. On successful installation of Tally.ERP 9, a shortcut is placed on the desktop, a folder titled Tally.ERP 9 is created in the selected drive and all the files required to run Tally.ERP 9 are stored in this default folder. In the same way, you can install Tally.ERP 9 Multi-User. In Multi-User installation, select the required programs (Tally.ERP 9 / License Server) to install at Server and client locations and specify other required details. 15.2.2 Activating Tally.ERP 9 License On successful installation of Tally.ERP 9, the Licensing Operations Startup screen appears on your computer, once you start Tally.ERP 9. Step 1 : Activate License To activate license, follow the steps given below :
- 4. Application Management and Controls 412 The Startup screen appears as shown: Figure 15.1 Startup screen Select Activate License, the Activate License screen appears as below Figure 15.2 Activate License The Activate License has three options which allows you to activate the license based on your requirements. 1. First time activation for your organization: allows you to activate a single site license. 2. Activation of an additional Site for your organization: allows you to activate the next or consecutive site licenses for your organization. 3. Activation of Promotional Rental License : allows you to activate promotional rental license. Select First time activation for your organization
- 5. Application Management and Controls 413 The Activate License Form appears, Enter the required License Serial Number in the Serial Number field Enter the required Activation Key in the Activation Key field Enter your E-Mail ID in the E-Mail ID of Administrator field Repeat the Email-ID in the Repeat (E-Mail ID of Administrator) field Figure 15.3 Activation Form An unique account identification is created using this E-Mail Id and the license serial number is linked to this account. The License Key, Password and Account related information are mailed to the E-Mail Id provided in the activation form. Press Enter, Tally.ERP 9 searches for the availability of Internet Connectivity on your com- puter. If Internet Connection is Available, Tally.ERP 9 displays a message Congratulation! Your activation Request has been processed. The Tally_lck.lic file is created and placed in the default Tally.ERP 9 directory. You can also Activate License in Offline Mode, if Internet Connection is not Available. To activate License in Offline Mode, generate the License File Offline and paste the license file onto the system where internet is available and Tally.ERP 9 is installed, go to the licensing menu, select send External request, the license file will be generated, copy the file and paste it where the license is to activated. Step 2 : Unlock License File Access your mail and retrieve the unlock key In the Startup screen, select Unlock License Type the Unlock Key in unlock field and press Enter On successfully unlocking the license file, Tally.ERP 9 displays the message Congratula- tions! Your License is successfully activated.
- 6. Application Management and Controls 414 Start Tally.ERP 9, the License Serial Number and Account ID are displayed under the Ver- sion and Licensing sections of the information panel respectively. In the same way, you can activate license for Multi-Site, by selecting Activation of an Addi- tional Site for your Organisation in the Activate License screen and providing Site Name, Site Administrator Email ID and other related details. 15.2.3 Launch Tally.ERP 9 Start Tally.ERP 9 by choosing any one of the methods discussed earlier. On starting Tally.ERP 9 the Gateway of Tally screen appears displaying the Edition and Users under Version block, Serial Number and Account ID under License block and Stat version and ODBC details in Con- figuration block of the Information panel. Figure 15.4 Gateway of Tally 15.3 Logging to Control Centre To start Control Centre follow the steps shown: Go to Company Info menu or Gateway of Tally
- 7. Application Management and Controls 415 Press K: Control Centre or press Ctrl + K Figure 15.5 Start Control centre The Login As Remote Tally.NET User screen appears Enter the User ID in Your E-Mail ID field. Enter the password emailed in Your Tally.NET Password field. Figure 15.6 Start Control Centre Based on the authentication received from Tally.NET you can access the Control Centre.
- 8. Application Management and Controls 416 15.4 Managing Accounts using Control Centre After logging in, the Control Centre screen will appear as shown : Figure 15.7 Control centre The Control Centre screen displays the options available which are briefly described below My Tally.NET Account use this option to configure, activate / deactivate sites, create users and assign security levels and manage your Account details. The My Tally.NET Account has the following sub-options: Licensing & Configuration enables you to configure and surrender a site belonging to an account. The configuration set can be created for each site by the Account / Site administrator. Further, the Account Administrator may allow or restrain the site adminis- trator from making any changes to the configuration set locally. Depending on the requirement, you can enter the Account/Site Administrator's Id to administer an Account and Site respectively. You can also provide the other User Id to access the support centre and access other areas of the control centre based on the permissions assigned. Incase, you have Forgotten the Password, provide the Account/Site/ User ID in Your E-Mail ID and press F5. The new password will be emailed to the respective E-Mail ID.
- 9. Application Management and Controls 417 User Management enables you to administer users belonging to an account by assign security levels with predefined permissions to enable remote access, assign users to a site and maintain the active users as required. Profile Management enables you to enter the essential information related to the Account/Site ID. Change Account Admin enables you to change the Account Administrator’s ID. To change the account id, the account administrator should provide the existing account id and the new account id. My Active Sessions displays the number of active session for a logged in user. You can analyse and delete the required session in case you have logged in from more than one machine or improperly logged out or did not logout from the previous session. My Profile enables you to manage the Tally.NET User’s profile by providing the required details for further communications. My Password this option enables you to change password at your convenience. 15.4.1 My Tally.NET Accounts Select My Tally.NET Accounts and press Enter On selecting My Tally.NET Accounts, the My Tally.NET Accounts screen appears as shown. Figure 15.8 My Tally.NET Accounts
- 10. Application Management and Controls 418 The My Tally.NET Accounts screen displays the User ID against Tally.NET ID field, the Account ID, Security Level, permission to access Tally.NET, Site ID (for Multi Site only), permission to administer the Account and the account status. It also displays the Account IDs associated with your Account, based on your requirement you may disassociate your Account ID. Select the required Site Account ID and press Enter, the Control Centre of an Account appears Figure 15.9 Control Centre of an Account You can use this option to configure, activate / deactivate sites, create users and assign security levels and manage your Account details. The options available are briefly explained below : Licensing & Configuration: Allows you to configure and activate/ deactivate a site User Management: You can create Remote Users and assign security controls Profile Management: Maintain details related to your account My Activity History: Display the list of accounts where your ID is used Change Account Admin: Allows the Account Administrator to change the Account Admin- istrator's User ID Site ID will not appear when you have a Single Site Account. To disassociate from another account, select the required Account ID and press Alt+D. The Account/Site Administrator ID cannot be disassociated from associated accounts.
- 11. Application Management and Controls 419 Licensing & Configuration The Account administrator can configure and surrender a site belonging to an account. The con- figuration set can be created for each site by the Account/Site administrator. Further, the Account administrator can allow or restrain the site administrator from making any changes to the configu- ration set locally. The Licensing & Configuration screen displaying the information related to each site / license serial number and the date on which the site was created. Figure 15.10 Licensing & Configuration By default, the status is Active, based on your requirement you can surrender the license by selecting Surrender from the list of Status. The license status are briefly explained for your benefit: Active: indicates that the site is in operation Surrender: indicates that the site has been surrendered The Licensing & Configuration screen displayed above is for Single Site Account. The Site ID will be displayed for Multi-Account Site.
- 12. The Licensing & Configuration screen of Multi-Site Account will display the information for the sites associated with the selected account : To view the Site Profile, press Enter on the required Site ID A brief explanation on each Status types for Multi-Site Account are given below : Active : Is displayed when the site is in use and the accoount administrator has confirmed the activation of a site within the stipu- lated period or the site is not surrendered. Surrendered : Is displayed when the Tally.ERP 9 license of the respective site is given up. Pending for Confirmation : Is displayed after the activation of a site and awaits a confirmation from the account administrator. Confirm : The account administrator selects this option to confirm the activation of a site. Reject : The account administrator selects this option to reject the activation of a site. Application Management and Controls 420 General Configuration To create configuration set for a Site, follow the steps given below In the Licensing & Configuration screen Click on F6: Show Config or press F6 The General Config and TDL Config fields appear
- 13. Application Management and Controls 421 Figure 15.11 Licensing & Configuration In the General Config field, press Alt+C to create configuration The General Configuration Management screen appears Enter the required configuration name in Name of Configuration field. The configura- tion parameters are saved with the configuration name provided in the account. Set Want to set client/server configuration to Yes to create a fresh set of configura- tion. In Tally is Acting as field, select the required behaviour from the list of Client/Server list. Tally.ERP 9 will act as Server/Client/Both/None based on the parameter selected. Set Enable ODBC Server to Yes, when you want to transfer data from any third party application to Tally.ERP 9 or Vice Versa. Enter the required port number in Port field. Set Can be overridden locally to Yes, when you want the above parameters to changed / modified by the site administrator locally. In Disallow Request section, specify the required Server Name/ IP Address/URL in From field to deny a request from the Server/IP Address/URL. Similarly, specify the required Server Name/ IP Address/URL in To field to deny a request to Server/IP Address/URL In Allow Request section, specify the required Server Name/ IP Address/URL in From field to allow a request from the Server/IP Address/URL. Similarly, specify the required Server Name/ IP Address/URL in To field to allow a request to Server/IP Address/URL.
- 14. Application Management and Controls 422 Figure 15.12 Licensing & Configuration Press Enter to save the General Configuration Select the specified configuration package in the General Configuration field. To View/Alter General Configuration In the Licensing & Configuration screen Click F7: Gen Config List or press F7 The Select Item screen appears
- 15. Application Management and Controls 423 Figure 15.13 Licensing & Configuration Select the required configuration from the List of General Configs The General Configuration Management screen will appear, you can make the required changes as per your requirements. User Management You can administer users belonging to an account by assign security levels with predefined per- missions in order to enable remote access, assign users to a site and maintain the active users as required. To administer the users within an account follow the steps shown: In the Control Centre screen Select User Management and press Enter TDL Configuration Allows the Account Administrator to link a set of pro- grams that were uploaded earlier using the web control centre. Similarly, you can also create a TDL configuration pack by pressing Alt+C in TDL Config field.
- 16. Application Management and Controls 424 By default, the Security Level for the User ID, Permission to access Tally.NET and the Status is displayed. To create the required user: Select the required Security Level from the list of Security Level Enter the required E-Mail ID in the Tally.NET ID field. Using the E-Mail ID provided a Tally.NET ID is created and the Password is emailed. Set Tally.NET User field to Yes when you want the user to access data from a any- where using Tally.NET. In the Status field, select the required status from list of Status The options which appear in the Secuirty Level field are explained below : Owner: has the capability to manage Sites/Users belonging to an account. The Owner is not permitted to change Account/Site Admin ID, Site Status and Account Profile. Standard User: Created with predefined permissions. All users other than the Owner are created under this security level. The options which appear in the Status field are explained below : Active: Set the status to active when you want the user to be in opera- tional mode. Deleted: Set the status to deleted when you want the user to be removed permanently. In-active: Set the status to In-active when you want the user to be non- operational mode. You can change the status to Active as required.
- 17. Application Management and Controls 425 Figure 15.14 User Management Accept to save the user created. The User Management screen also displays the number of Tally.NET Users created for an account. To view in Detailed mode, In the User Management screen, Click F1: Detailed or press Alt+F1 The User Management screen appears displaying the user details as shown Default users such as Account Administrator or Site Administrator are assigned the security levels of Owner. However, based on the requirements, you can change the security level. From the above screen, you can change the Tally.NET ID for any user other than Account/Site Administrators. However, you will not able to change the status to Delete or In-Active for Account/Site Adminis- trator. To change the User ID, type the new user id in the Tally.NET ID field.
- 18. In case of Multi-Site Account, press F3: Sitewise to display the users under each site. Application Management and Controls 426 Figure 15.15 User Management Detailed To view the Security Level List In the User Management screen Click F8:Sec Level List or press F8 The Select Items screen appears, select the required security level from the List of Secu- rity Levels The Security Levels screen appears as shown
- 19. Application Management and Controls 427 Figure 15.16 Security Levels By default, the Standard User is authorised to access the Support Centre only, based on your requirement select the access controls from the list of Access Rights as shown.
- 20. Application Management and Controls 428 Figure 15.17 Access Rights Accept to save the access rights assigned to the security level. Create Security Levels An authorised user can create security levels and assign the Access Rights to the user in order to allow the user to perform certain tasks within the account. The security levels created are then assigned to the users belonging to the account. To create a security level and assign access controls follow the steps shown: Press Alt+C in the Security Level field, the Security Level Management screen appears Type the required security level name in the Name of Security Level In Allow the Following Facilities, select the required access rights from the list of Access Rights shown
- 21. Application Management and Controls 429 Figure 15.18 Create Security Levels Accept to save the security level created. Profile Management The user can enter the essential information related to the Account/Site ID in Profile Manage- ment. To enter the details regarding the organisation follow the steps shown: In the Control Centre screen Select Profile Management and press Enter The Profile Management screen appears By default the E-Mail ID of the Account Administrator appears in the Account ID field. Select the required account type from the list of Account Types Enter the details related to the Account as shown. To alter an existing security level, place the cursor in Security Level field and press Ctrl+Enter or press F8: Sec Level List, select the required security level to make necessary changes. The Owner security level is assigned all the access rights and cannot be modified.
- 22. Application Management and Controls 430 Figure 15.19 Profile Management Accept to save the information. Change Account Admin This feature allows you to change the Account Administrator’s ID for an account. To change the Account Administrators ID follow the steps shown: In the Control Centre screen Select Change Account Admin The Change Account Admin screen appears Figure 15.20 Change Account Admin
- 23. Application Management and Controls 431 Enter the required Account Administrators ID in the Old Account Admin ID field Enter the new Account Administrators ID in the New Account Admin ID field Accept the create a new Account Administrators ID 15.4.2 My Active Sessions This option displays the number of active session for a logged in user. You can analyse and delete the required session in case you have logged in from more than one machine or improperly logged out or did not logout from the previous session. To display the Active Session(s) for an user, In the Control Centre screen, Select My Active Sessions or press Alt+T The My Account Active Sessions screen appears as shown: The new Account Administrators ID can be created only by an existing account administrator.
- 24. Application Management and Controls 432 Figure 15.21 My Active Session To delete the required session, Press Space and select the required session Press Alt+D to delete a Sessio 15.4.3 My Profile You can manage the Tally.NET User's profile by providing the required details for further commu- nications. To change the user profile the user has to follow the steps shown: In the Control Centre screen Select My Profile or press Alt+P The My Profile screen appears displaying the Tally.NET ID In the Salutation field select the required salutation from the list of Salutation. Enter the required name in the Name field. You cannot delete an active session.
- 25. Application Management and Controls 433 Enter the required Mobile Number in the Mobile field. Figure 15.22 Change Profile Accept to save the profile. 15.4.4 My Password This options allows the user to change the password as required. To change the Password follow the steps shown: In the Control Centre screen Select My Password or press Alt+W, Figure 15.23 My Password
- 26. Application Management and Controls 434 The Change My Password screen appears with the Username Enter the current password in Old Password field. Enter the new password in New Password field. Repeat the new password in Repeat field for the purpose of confirmation. Figure 15.24 Change Password Accept to change the password. .
- 27. Application Management and Controls 435 Points to Remember Control Centre allows us to manage and centrally configure Tally.ERP 9.