1. Peachpit Press/Scott Design
1 Getting to Know the
Work Area
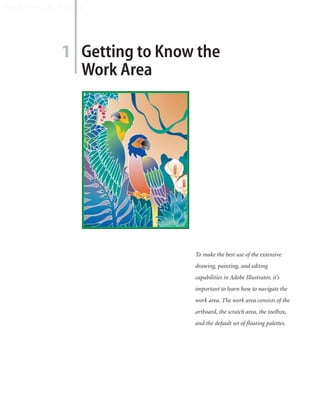
To make the best use of the extensive
drawing, painting, and editing
capabilities in Adobe Illustrator, it’s
important to learn how to navigate the
work area. The work area consists of the
artboard, the scratch area, the toolbox,
and the default set of floating palettes.
2. Peachpit Press/Scott Design
30 LESSON 1
Getting to Know the Work Area
In this introduction to the work area, you’ll learn how to do the following:
• Use the Welcome Screen.
• Open an Adobe Illustrator file.
• Select tools from the toolbox.
• Use viewing options to enlarge and reduce the display of a document.
• Work with palettes.
• Use online Help.
Getting started
You’ll be working in one art file during this lesson, but before you begin, restore the
default preferences for Adobe Illustrator. Then open the finished art file for this lesson
to see an illustration.
1 To ensure that the tools and palettes function exactly as described in this lesson,
delete or deactivate (by renaming) the Adobe Illustrator CS preferences file. See
“Restoring default preferences” on page 2.
2 Double-click the Adobe Illustrator icon to start the Adobe Illustrator program.
When started Adobe Illustrator displays a Welcome Screen with bulleted options.
The Welcome Screen.
3. Peachpit Press/Scott Design
ADOBE ILLUSTRATOR CS 31
Classroom in a Book
Use the Welcome Screen to find out what’s new in Illustrator CS, gain access to tutorials
and CD extras. CD extras include fonts, sample files. The Welcome Screen also offers
the option to create a new document from scratch, or from a template, or to open an
existing document.
Note: If you prefer not to have the Welcome Screen appear at startup, uncheck the Show
this dialog at startup checkbox. You can open the Welcome Screen at any time by selecting it
from the Help menu.
How Does an Illustrator template work?
New with Illustrator CS is the ability to save and create files as templates. Choose File > Save as Template
to save a file as an .ait (Adobe Illustrator Template) file. When a new file is created based on the template,
an untitled document is created, leaving the original untouched.
Any existing Illustrator document may also be Opened as a template file by selecting File > New From
Template, again creating a new untitled document and leaving the original intact.
For this lesson we will open an existing file.
3 Click on the Open Document button in the lower right of the Welcome Screen or
choose File > Open, and open the L1strt.ai file in the Lesson01 folder, located inside the
Lessons folder within the AICIB folder on your hard drive.
For an illustration of the finished artwork in this lesson, see the color section.
When the file is opened and Illustrator CS is fully launched the menu bar, the toolbox,
and five palette groups appear on the screen. (The Transparency/Stroke/Gradient palette
group is docked with the Color/Attributes palette group.)
4 Choose File > Save As, name the file Parrots.ai, and select the Lesson01 folder in
the Save In menu. Leave the type of file format set to Adobe Illustrator® Document, and
click Save, leaving the Illustrator Options set at the defaults. Click OK.
4. Peachpit Press/Scott Design
32 LESSON 1
Getting to Know the Work Area
About the work area
In Adobe Illustrator, the work area occupies the entire space within the Illustrator window and includes more
than just the printable page containing your artwork. The printable and nonprintable areas are represented
by a series of solid and dotted lines between the outermost edge of the window and the printable area of the
page.
Imageable area is bounded by the innermost dotted lines and represents the portion of the page on which the
selected printer can print. Many printers cannot print to
the edge of the paper. Don’t get confused by what is
considered non-imageable.
Non-imageable area is between the two sets of dotted lines
representing any nonprintable margin of the page. This
example shows the non-imageable area of an 8.5'' x 11''
page for a standard laser printer.
The Imageable and Non-imageable area is determined by
the printer selected in the Print options dialog box. (See
Lesson 17 for more information about assigning a printer.)
If you are saving an Illustrator document to be placed in a
layout program, such as InDesign, the Imageable and Non-
imageable areas are irrelevant, the artwork outside of the
bounds will still appear.
Edge of the page is indicated by the outermost set of dotted
lines.
Artboard is bounded by solid lines and represents the
A B C D E
entire region that can contain printable artwork. By
A. Imageable area. B. Nonimageable area.
default, the artboard is the same size as the page, but it C. Edge of page. D. Artboard. E. Scratch area.
can be enlarged or reduced. The U.S. default artboard is
8.5''x 11'', but it can be set as large as 227''x 227''.
Scratch area is the area outside the artboard that extends to the edge of the 227-inch square window. The
scratch area represents a space on which you can create, edit, and store elements of artwork before moving them
onto the artboard. Objects placed onto the scratch area are visible on-screen, but they do not print.
–From Adobe Online Help.
5. Peachpit Press/Scott Design
ADOBE ILLUSTRATOR CS 33
Classroom in a Book
Viewing artwork
When you open a file, it is displayed in Preview view, which displays artwork the way
it will print. When you’re working with large or complex illustrations, you may want
to view only the outlines, or wireframes, of objects in your artwork, so that the screen
doesn’t have to redraw the artwork each time you make a change.
1 Choose View > Outline. Only the outlines of the objects are displayed. Use this view
to find objects that might not be visible in Preview.
2 Choose View > Preview to see all the attributes of the artwork. If you prefer
keyboard commands, Ctrl+Y (Windows) or Command+Y (Mac OS) toggles between
these two modes.
3 Choose View > Overprint•Pixel Closeup (at the bottom of the menu) to zoom in to
a preset area of the image. This custom view was added to the document.
Note: To save time when working with large or complex documents, you can create your
own custom views within a document to quickly jump to specific areas and zoom levels. You
set up the view that you want to save and then choose View > New View. Name the view; it
is saved with the document.
4 Choose View > Overprint Preview to view any lines or shapes that are set to
overprint. This view is helpful for those in the print industry who need to see how inks
interact when set to overprint. See Lesson 17, "Printing Arwork and Producing Color
Separations" for more information on overprinting.
5 Choose View > Pixel Preview to view how the artwork will look when it is rasterized
and viewed on-screen in a Web browser.
Outline view. Preview view. Overprint preview. Pixel preview.
6. Peachpit Press/Scott Design
34 LESSON 1
Getting to Know the Work Area
Working with tiled artwork
Illustrator is generally not meant to create multi-page documents. That would be more of a function
of a page layout program such as InDesign. Illustrator can tile multiple pages for the purposes of
accommodating artwork that is too large for an output device.
What is Tiling?
By default, Illustrator prints your artwork on a single sheet of paper. However, if the artwork is larger than
the page sizes available on your printer, you can print onto multiple sheets of paper.
Dividing the artboard to fit a printer’s available page
sizes is called tiling. You can choose a tiling option in
the Setup section of the Print dialog box. To view the
page tiling boundaries on the artboard, choose View >
Show Page Tiling.
When you divide the artboard into multiple page tiles,
the pages are numbered from left to right and from top
to bottom, starting with page 1. These page numbers
appear on-screen for your reference only; they do not
print. The numbers enable you to print all of the pages
in the file or specify particular pages to print.
Artboard divided into multiple page tiles .
–From Adobe Online Help, "Dividing the artboard into multiple page tiles".
7. Peachpit Press/Scott Design
ADOBE ILLUSTRATOR CS 35
Classroom in a Book
Using the Illustrator tools
The Illustrator toolbox contains selection tools, drawing and painting tools, editing
tools, viewing tools, and the Fill and Stroke color selection boxes. As you work through
the lessons, you’ll learn about each tool’s specific function.
Add-anchor-point (+)
Delete-anchor-point (–)
Adobe Online Convert-anchor-point ( + C)
(V) Selection Direct-selection (A) Group-selection
Arc
(Y) Magic wand Direct-select lasso (Q) Spiral
Polar grid
(P) Pen Type (T) Rectangular grid
() Line segment Rectangle (M) Area type
Reflect (O) Path type
(B) Paintbrush Pencil (N) Vertical path-type
(R) Rotate Scale (S) Twirl Vertical area-type
Pucker Vertical type
( + R) Warp Free transform (E) Wrinkle Rounded rectangle
( + S) Symbol sprayer Column graph (J) Crystallize Ellipse (L)
Scallop Flare
(U) Mesh Gradient (G) Bloat
Star
Symbol shifter Polygon
(I) Eyedropper Blend (W)
Symbol scruncher
( + K) Slice Scissors (C) Symbol sizer
Symbol styler
(H) Hand Zoom (Z)
Symbol screener
Swap fill/stroke ( + X) Symbol stainer
(X) Toggle fill Smooth
Symbol spinner
Toggle stroke (X) Erase
(D) Default fill/stroke Stacked column graph
Bar graph Pie graph
(>) Gradient Radar graph
(<) Color None (/) Scatter graph
Area graph
(F) Standard screen Full screen mode (F) Line graph
mode Stacked bar graph Shear
Reshape
Full screen mode with menu bar (F) Paint bucket (K)
Measure Auto trace
Slice selection Knife
Page
1 To select a tool, either click the tool in the toolbox or press the tool’s keyboard
shortcut. For example, you can press M to select the Rectangle tool from the keyboard.
Selected tools remain active until you click a different tool.
2 If you don’t know the keyboard shortcut for a tool, position the pointer over the
tool to display the tool’s name and shortcut. (All keyboard shortcuts are also listed in
the Keyboard Shortcuts section in Online Help. You’ll learn to use Online Help later in
the lesson.)
8. Peachpit Press/Scott Design
36 LESSON 1
Getting to Know the Work Area
Some of the tools in the toolbox display a small triangle at the bottom right corner,
indicating the presence of additional hidden tools.
Name and Hidden tools.
shortcut .
3 Select hidden tools in either of the following ways:
• Click and hold down the mouse button on a tool that has additional hidden tools.
Then drag to the desired tool, and release the mouse button.
• Hold down Alt (Windows) or Option (Mac OS), and click the tool in the toolbox. Each
click selects the next hidden tool in the hidden tool sequence.
• Click and drag to the right of the hidden tools and release on the arrow. This tears off
the tools from the toolbar so that you can access them at all times.
Changing the view of artwork
You can reduce or enlarge the view of artwork at any magnification level from 3.13% to
6400%. Adobe Illustrator displays the percentage of the artwork’s actual size in the title
bar, next to the filename, and at the lower left corner of the Adobe Illustrator document
window. Using any of the viewing tools and commands affects only the display of the
artwork in Illustrator, not the actual size of the artwork.
Using the View commands
To enlarge or reduce the view of artwork using the View menu, do one of the following:
• Choose View > Zoom In to enlarge the display of the Parrots.ai artwork.
• Choose View > Zoom Out to reduce the view of the Parrots.ai artwork.
9. Peachpit Press/Scott Design
ADOBE ILLUSTRATOR CS 37
Classroom in a Book
Each time you choose a zoom command, the view of the artwork is resized to the
nearest predefined zoom amount. The preset zoom levels appear at the lower left corner
of the window in a hidden menu, indicated by a triangle next to the percentage.
You can also use the View menu to fit the artwork to your screen, or to view it at actual
size.
1 Choose View > Fit in Window. A reduced view of the entire document is displayed
in the window. A helpful keyboard command for this view is Ctrl+0 (Windows) or
Command+0 (Mac OS).
Note: With a Scratch area that extends to the 227'' area you can easily lose sight of your
illustration. By using View > Fit in Window or the keyboard shortcuts or Ctrl+0 (Windows)
or Command+0 (Mac OS) our artwork is recentered in the viewing area.
2 To display artwork at actual size, choose View > Actual Size. The artwork is
displayed at 100%. (The actual size of your artwork determines how much of it can be
viewed on-screen at 100%.)
3 Choose View > Fit in Window before continuing to the next section.
Using the Zoom tool
In addition to the View commands, you can use the Zoom tool to magnify and reduce
the view of artwork. Use the View menu to select predefined magnification levels or to
fit your artwork inside the document window.
1 Click the Zoom tool ( ) in the toolbox to select the tool, and move the cursor into
the document window. Notice that a plus sign appears at the center of the Zoom tool.
2 Position the Zoom tool over the parrot in the upper left corner of the illustration
and click once. The artwork is displayed at a higher magnification.
3 Click two more times over the upper left parrot. The view is increased again, and
you’ll notice that the area you clicked is magnified. Next you’ll reduce the view of the
artwork.
4 With the Zoom tool still selected, position the pointer over the upper left parrot and
hold down Alt (Windows) or Option (Mac OS). A minus sign appears at the center of
the Zoom tool ( ).
5 With the Alt/Option key still depressed, click in the artwork twice. The view of the
artwork is reduced.
10. Peachpit Press/Scott Design
38 LESSON 1
Getting to Know the Work Area
A much more controlled and effective zoom is achieved by dragging a marquee to
magnify a specific area of your artwork.
6 With the Zoom tool still selected, hold down the mouse button and drag over the
area of the illustration you want to magnify; watch as a marquee appears around the
area you are dragging, then release the mouse button. The area that was included in the
marqued area is now enlarged to fit the size of the document window.
7 Drag a marquee around the lower parrot.
The percentage at which the area is magnified is determined by the size of the
marquee you draw with the Zoom tool (the smaller the marquee, the larger the level of
magnification).
Area selected. Resulting view.
Note: Although you can draw a marquee with the Zoom tool to enlarge the view of artwork,
you cannot draw a marquee to reduce the view of artwork.
You can also use the Zoom tool to return to a 100% view of your artwork, regardless of
the current magnification level.
8 Double-click the Zoom tool in the toolbox to return to a 100% view.
Because the Zoom tool is used frequently during the editing process to enlarge and
reduce the view of artwork, you can select it from the keyboard at any time without
deselecting any other tool you may be using.
9 Before selecting the Zoom tool from the keyboard, click any other tool in the
toolbox and move it into the document window.
10 Now hold down spacebar+Ctrl (Windows) or spacebar+Command (Mac OS)
to select the Zoom tool from the keyboard. Click or drag to zoom in on any area of
11. Peachpit Press/Scott Design
ADOBE ILLUSTRATOR CS 39
Classroom in a Book
the artwork, and then release the keys. The tool you selected in the previous step is
displayed.
11 To zoom out using the keyboard, hold down spacebar+Ctrl+Alt (Windows) or
spacebar+Command+Option (Mac OS). Click the desired area to reduce the view of the
artwork, and then release the keys.
12 Double-click the Zoom tool in the toolbox to return to a 100% view of your
artwork.
Scrolling through a document
You use the Hand tool to scroll to different areas of a document. Using the Hand tool
allows you to push the document around much like you would a piece of paper on your
desk.
1 Click the Hand tool ( ) in the toolbox.
2 Drag downward in the document window. As you drag, the artwork moves with the
hand.
As with the Zoom tool, you can select the Hand tool from the keyboard without
deselecting the active tool.
3 Before selecting the Hand tool from the keyboard, click any other tool except the
Type tool in the toolbox and move the pointer into the document window.
4 Hold down the spacebar to select the Hand tool from the keyboard, and then drag
to bring the artwork back into view.
You can also use the Hand tool as a shortcut to fit all the artwork in the window.
5 Double-click the Hand tool to fit the document in the window.
Note: The spacebar shortcut will not work when you are on the Type tool, it will add spaces
if you are in a text area, or create a new text area.
Using the Navigator palette
The Navigator palette lets you scroll through a document. This is useful when you need
to see the entire illustration in one window and edit it in a zoomed in view.
1 Make sure that the Navigator palette is at the front of its palette group. (If necessary,
click the Navigator palette tab, or choose Window > Navigator.)
12. Peachpit Press/Scott Design
40 LESSON 1
Getting to Know the Work Area
2 In the Navigator palette, drag the slider to the right to about 200% to magnify the
view of the parrots. As you drag the slider to increase the level of magnification, the red
outline in the Navigator window decreases in size.
3 Position the pointer inside the Navigator window. The pointer becomes a hand.
Dragging slider to 200%. 200% view of image. View in Navigator palette.
4 Drag the hand in the Proxy Preview area of the Navigator palette to scroll to
different parts of the artwork.
You can also drag a marquee in the Navigator palette to identify the area of the artwork
you want to view.
5 With the pointer still positioned in the Navigator palette, hold down on the Ctrl
(Windows) or Command (Mac OS). When the hand changes to a magnifier, drag a
marquee over an area of the artwork. The smaller the marquee you draw, the greater the
magnification level in the document window.
Working with palettes
Palettes help to make modifying artwork easier by readily giving you access to many
of Illustrator's functions. By default, they appear in stacked groups. To show or hide a
palette as you work, choose the appropriate Window command. Selecting a Window
command, as indicated by a check mark, displays the selected palette at the front of its
group; deselecting a Window command conceals the entire palette group.
You can reorganize your work space in various ways. Try these techniques:
• To hide or display all open palettes and the toolbox, press Tab. To hide or display the
palettes only, press Shift+Tab.
13. Peachpit Press/Scott Design
ADOBE ILLUSTRATOR CS 41
Classroom in a Book
• To make a palette appear at the front of its group, click the palette’s tab.
A B
A. Title bar. B. Tab.
Click the Attributes tab to move the palette to the front.
To move an entire palette group, drag its title bar.
To rearrange or separate a palette group, drag a palette’s tab. Dragging a palette outside
of an existing group removes it from the group.
Palettes are grouped. Drag a palette by its tab to
separate the palette from its group.
• To move a palette to another group, drag the palette’s tab to that group.
• To display a palette menu, position the pointer on the triangle in the upper right
corner of the palette, and hold down the mouse button.
14. Peachpit Press/Scott Design
42 LESSON 1
Getting to Know the Work Area
• If a palette has the option to change the height, you can drag its lower right corner.
(You cannot change the height of the Align, Attributes, Color, Info, Magic Wand,
Options, Pathfinder, Stroke, Transform Type or palette.)
• To collapse a group to palette title bars only, click the minimize/maximize box
(Windows) or the resize box (Mac OS); click the box again to expand the palette group.
A
B
Click to collapse or expand palette.
A. Mac OS. B. Windows.
• To cycle through the available sizes for a palette, double-click a palette’s tab or single-
click on the double triangles to the left of the palette name. (Not all palettes have the
double triangles.) You can still access the menu of a collapsed palette.
Using context menus
In addition to the menus at the top of your screen, context-sensitive menus display
commands relevant to the active tool, selection, or palette.
To display context-sensitive menus, position the pointer over the artwork, palette list,
scrollbar or Document magnification level. Then click with the right mouse button
(Windows) or press Ctrl and hold down the mouse button (Mac OS). (In Windows,
you can also use context-sensitive Help or press F1 to get online Help. See “Using online
Help” on the following page.)
15. Peachpit Press/Scott Design
ADOBE ILLUSTRATOR CS 43
Classroom in a Book
Here you see the options for the Pen tool, displayed in its context-sensitive menu. (You
access these same options by selecting the Edit or Object menu.)
Using online Help
For complete information about using palettes and tools, you can use online Help.
Online Help includes keyboard shortcuts and additional information, including full-
color galleries of examples. All the illustrations in online Help are in color.
Online Help is easy to use, because you can look for topics in these ways:
• Scanning a table of contents.
• Searching for keywords or phrases.
• Using an index.
• Jumping from topic to topic using related topic links.
Displaying the online Help contents
First you’ll look for a topic using the Contents screen.
To properly view online Help topics, you need to have a recent browser, Internet
Explorer, Safari, Netscape for instance, with JavaScript active.
1 To display the Help Contents menu, choose Help > Illustrator Help, or press F1
(Windows).
16. Peachpit Press/Scott Design
44 LESSON 1
Getting to Know the Work Area
2 Drag the scroll bar or click the arrows to navigate through the contents. The
contents are organized in a hierarchy of topics, much like the chapters of a book.
Illustrator Help Contents screen.
3 Position the pointer on the Looking at the Work Area chapter, and click it to display
its contents.
4 Click on the topic of Using tools and commands.
5 Locate the Overview of tools (1 of 5) topic, and click to display it. An illustration of
the Selection tools and shortcut information appears.
17. Peachpit Press/Scott Design
ADOBE ILLUSTRATOR CS 45
Classroom in a Book
The online Help system is interactive. You can click any blue text, called a link, to jump
to another topic. When the pointer changes into a hand it indicates a link, and appears
when you move the mouse over a link or a hotspot.
Using keywords, links, and the index
If you can’t find the topic you are interested in by viewing the Contents page, then you
can try searching using Search. You can search using keywords or phrases.
1 Click Search, and type Brushes in the text box. Click the Search button to go to that
topic. A list appears of the items containing information about brushes.
2 Click Creating and editing brushes to learn about creating brushes. Notice that
there are several subtopics available for further research.
3 Click Creating a calligraphic brush to read step-by-step instructions on how to
create a calligraphic brush.
You can also locate a topic using the Index.
4 Click Index to go to an alphabetical listing of topics. You will see an alphabet.
5 Click the letter H to get a listing of all the topics starting with H.
18. Peachpit Press/Scott Design
46 LESSON 1
Getting to Know the Work Area
6 Click the 1 or 2 next to the Hand tool entry to get information about the Hand tool
and its functions.
Click Index for alphabet. Click letter for topics; then click number.
Using Adobe online services
Another way to get information on Adobe Illustrator or on related Adobe products
is to use the Adobe online services. Selecting the Illustrator Online menu item takes
you directly to the product page on Adobe.com that lists the latest information on
Illustrator.
Visiting the Adobe Web site
If you have an Internet connection and a Web browser installed on your system, you can
access the U.S. Adobe Systems Web site (at http://www.adobe.com) for information on
services, products, tutorials, tips, and community events on Illustrator.
1 If you have an Internet connection, from Adobe Illustrator, choose Help >
Illustrator Online, or click the icon at the top of the toolbox.
2 When you have finished browsing the Adobe page, close and exit the browser.
19. Peachpit Press/Scott Design
ADOBE ILLUSTRATOR CS 47
Classroom in a Book
Review questions
1 Describe two ways to change your view of a document.
2 How do you select tools in Illustrator?
3 Describe three ways to change the palette display.
4 Describe two ways to get more information about the Illustrator program.
Review answers
1 You can select commands from the View menu to zoom in or out of a document,
or fit it to your screen; you can also use the Zoom tool in the toolbox, and click or
drag over a document to enlarge or reduce the view. In addition, you can use keyboard
shortcuts to magnify or reduce the display of artwork. You can also use the Navigator
palette to scroll artwork or change its magnification without using the document
window.
2 To select a tool, you can either click the tool in the toolbox or press the tool’s
keyboard shortcut. For example, you can press V to choose the Selection tool from the
keyboard. Selected tools remain active until you click a different tool.
3 You can click a palette’s tab or choose Window > Palette Name to make the palette
appear. You can drag a palette’s tab to separate the palette from its group and create a
new group, or drag the palette into another group. You can drag a palette group’s title
bar to move the entire group. Double-click a palette’s tab to cycle through a palette’s
various sizes. You can also press Shift+Tab to hide or display all palettes.
4 Adobe Illustrator contains online Help, plus keyboard shortcuts and some
additional information and full-color illustrations. Illustrator also has context-sensitive
help about tools and commands, and online services, including a link to the Adobe
Systems Web site, for additional information on services, products, and Illustrator tips.