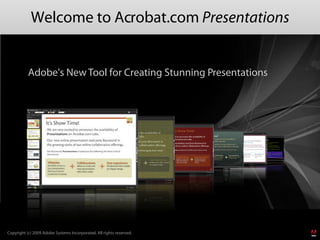
1. Welcome to Acrobat.com Presentations
Adobe's New Tool for Creating Stunning Presentations
Copyright (c) 2009 Adobe Systems Incorporated. All rights reserved.
2. New Features Since the Preview Release
What's new since Preview?
• Import PPT/PPTX
• Publish to web site or blog
• Spell check - 19 languages!
• Copy & paste slides
• Use Kuler for new color sets
• Show images as slide background
• Import FXG graphics
• Browse Flickr or Google images
... and much more!
The new organizer now provides access to all your files
3. Acrobat.com and Presentations
Acrobat.com emphasizes these three key areas:
Ubiquity: Collaboration: User experience:
persistent access to ability to create and all delivered with a
your presentations share presentations simple yet elegant
from any Internet- with others easily design
connected computer
Acrobat.com Presentations delivers!
4. Streamlining Your Workflow
Traditional Workflow: Sequential editing, email routing You
Collaborator
Designer
Presentations Workflow:
Simultaneous Access
Building presentations online means that
you can break free from sending large files
over email.
All contributors working on the same
presentation streamlines the process, and
keeps everyone on the same page.
5. Themes Increase the Impact of Your Presentations
Presentations comes with
built-in themes, and you can
add your own.
Change your theme and get
a whole new look - in seconds!
6. The Things You Can Do!
Text Shapes
You can enter regular text or outline text on A wide range of shapes are accessible from
your slides. the palette on the right edge of the screen.
To convert a text object to outline, click the Format shapes and text using the sliding
bullet icon in the List toolbar. toolbars at the top of the Presentations
screen.
Text can be formatted in layouts or locally via
the format toolbar. More shapes to come over time.
Fills, Borders & Gradients Effects
Several options are available for changing There are a variety of special effects you
the appearance of objects on a slide. can add to objects in your presentation.
Use the Shape toolbar to specify fill, effects,
borders, gradients.
7. And the Things You Can See!
Images and Videos
Add images (JPG, PNG, GIF or FXG) Upload movies (FLV format)
from your computer or browse the into a presentation in the
web. same way you add images.
Double-click to view movies
in the Editor. They play
automatically on the
designated slide in
Slideshow.
Resize or rotate images.
Or use as a background.
Add effects such as borders,
shadows or reflections.
8. Let the Web Inspire Your Slides
• Use new color sets from Kuler.
• Browse images from Flickr,
Google or web pages.
• Get inspired by the
communities on the web.
9. Adding Stuff Is Easy
To add content to a Objects come in
slide, click (or drag) any with the default
of the icons on the fill color (the third
palette at the far right color in the color set).
side of the screen.
Use the shape toolbar
to refine the design.
Fill color Gradient Border Border Effects Opacity
color width
10. Separating Form from Content
Presentations allows you to separate the design from content. You can
change slide design attributes, independent of text and shapes you add to
each slide.
master slide Default colors, fonts and
background are set on the
master level.
layout slide
Positioning and sizing of
slide objects can be
controlled in layouts.
presentation slide
Content is added to
slides at the top level.
11. Working with Slide Masters and Layouts
Master slide
Presentation slide
Objects added to
the slide master
appear on every
slide in the
presentation. Presentations in the Cloud = Collaboration
Copyright (c) 2009 Presentations are
collaborative by nature.
Presentations are usually
authored and refined by a
series of experts and
designers.
Layout slide
Presentations are delivered
Click to add Text Objects added to a with more than one person
involved.
layout appear in all
slides that use that Copyright (c) 2009
layout.
12. Organizing and Sharing
Sharing is easy - Invite others
and recommended! to work with
Just click on the you.
Share button.
See when someone
is working on a
slide, or who has You can also see whether someone
opened the has changed the presentation since
presentation. you last viewed it.
13. And When It's Showtime.....
Click the Play Slideshow button at the
bottom of the screen.
Hover over either side of the slide to get
arrows to click forward/back.
You can also click on the slide or use the
arrow keys to move to the next slide.
Or choose your slide from the auto-revealing
slide picker at the bottom of the screen.
esc
Hit Esc to go back to the Presentations editor.
14. Publish with a Click and a Smile
• Publishing couldn't be easier
• Just select Publish from the Presentation menu
• Copy the link ...
• To a web page or blog
• Or send it in email
• And your slideshow is ready to go with just a click
• Or, copy the embed code to a web page or blog...
• Visitors play the slides right there on the web page or blog
15. Next Steps...
Thank you
for taking a look at Presentations
Next Steps:
• Share this presentation with others!
• Click the Share button in the lower left corner.
• Please send us feedback - presentation_feedback@adobe.com.
• If you're viewing in Slideshow mode, press Esc to go to the editor.