Building Blocks for Healthy Kids - Nutrition Education Curriculum
•
1 j'aime•32,800 vues


Recommandé
Contenu connexe
Tendances
Tendances (12)
En vedette
En vedette (20)
Similaire à Building Blocks for Healthy Kids - Nutrition Education Curriculum
Similaire à Building Blocks for Healthy Kids - Nutrition Education Curriculum (20)
Plus de The Campus Kitchens Project
Plus de The Campus Kitchens Project (7)
Dernier
Dernier (20)
Building Blocks for Healthy Kids - Nutrition Education Curriculum
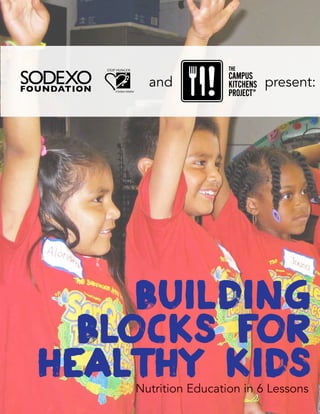
- 1. and present: Building blocks for healthy kids Nutrition Education in 6 Lessons
- 2. acknowledgements Building Blocks for Healthy Kids nutrition education curriculum is made possible by a partnership between The Campus Kitchens Project and Sodexo. Find this and other nutrition education plans at www.campuskitchens.org. The Campus Kitchens Project Founded in 2001, The Campus Kitchens Project is a national organization that empowers student volunteers to fight hunger in their community. On university and high school campuses across the country, students transform unused food from dining halls, grocery stores, restaurants, and farmers’ markets into meals that are delivered to local agencies serving those in need. By taking the initiative to run a community kitchen, students develop entrepreneurial and leadership skills, along with a commitment to serve their community, that they will carry with them into future careers. Each Campus Kitchen goes beyond meals by using food as a tool to promote poverty solutions, implement garden initiatives, participate in nutrition education, and convene food policy events. To learn more about The Campus Kitchens Project, visit www.campuskitchens.org. Sodexo Foundation Sodexo Foundation, the charitable arm of Sodexo, Inc., works to ensure that every child in the United States, especially those most at-risk, grows up with dependable access to enough nutritious food to enable them to lead a healthy, productive life. One of the main priorities of Sodexo Foundation, and its partners, is to engage youth in the national anti-hunger movement by inspiring a new generation of passionate young leaders who will advocate for this cause among their peers. Since its inception in 1999, Sodexo Foundation has granted more than $20 million to eradicate hunger in America. Sodexo, Inc. funds all administrative costs for Sodexo Foundation to ensure that every cent raised is directed to those in need. Learn more at www.SodexoFoundation.org. October 2013
- 3. table of contents acknowledgements Introduction Lessons Lesson 1: What’s on MyPlate Lesson 2: Eat the Rainbow Lesson 3: Become a Good Grains Detective Lesson 4: Add Power to Your Plate Lesson 5: From Seed to Plant Lesson 6: Fitness is Fun References Appendices Appendix A. MyPlate Food Groups and MyPlate Poster Appendix B. Food Group Cutouts Appendix C. Eat the Rainbow Visual and Food Cutouts Appendix D. MyPlate Whole Grains Visual Appendix E. Food Group Jeopardy Instructions Food Group Jeopardy Questions Food Group Jeopardy Answers Food Group Jeopardy Monetary Amounts Appendix F: Life Cycle of a Plant Plant Part Images Plant Part Cutouts Appendix G: Activity Log Appendix H. Building Blocks for Healthy Kids Completion Certificate
- 4. introduction Discover healthy eating through a series of fun kid-friendly lessons with Building Blocks for Healthy Kids. This six-lesson curriculum for elementary school students includes hands-on activities, educational takeaways, recipes and more! The Campus Kitchens Project and Sodexo curated this curriculum to empower children to make healthier food choices and teach them how to prepare nutritious meals and snacks at home. It is important to introduce nutrition education early as a way to build a solid foundation for healthy children that will become healthy adults. Since 2001, The Campus Kitchens Project and Sodexo have worked together to recover food and engage students in America’s fight against hunger. We know we can’t end hunger with food alone. From nutrition education classes to senior hunger outreach, from community gardens to policy events, our students delivery more than meals. The Campus Kitchens Project teaches the next generation of leaders to assess the specific need in their community and develop programs that address the underlying root causes of food insecurity. For several years, nutrition education for youth has been a focus across our network as we pioneer new ways to teach healthy eating in a way that will make a difference to the next generation. We are honored to collaborate with Sodexo to present this innovative and effective nutrition education curriculum for youth. Sodexo is a longtime partner of The Campus Kitchens Project and continues to support the expansion of our network to new schools. Over the history of our partnership, Sodexo has invested over $1,000,000 in The Campus Kitchens Project, and it stands out in the field of corporate social responsibility for its support of local communities and investments in the fight against hunger. This nutrition education curriculum is a powerful representation of our partnership and our commitment to address the issue of hunger in a holistic way. We sincerely hope it will be a useful resource for Campus Kitchens and other nonprofits serving youth. - Laura toscano, director the Campus kitchens project
- 5. Lesson 1: What's on MyPlate Objectives: Time: Materials: Preparation: Introduce the program to the children and explain how the lessons will build off their knowledge from week to week (if applicable). Explain why healthy eating is important, and that you will be teaching basic concepts to help the student make healthy choices. Introduce the USDA MyPlate model to help them understand balanced meals, portion control and food groups. Emphasize the MyPlate principles for healthy eating: make ½ your plate fruits and vegetables; make ½ your grains whole; eat lean protein and dairy (in smaller quantities). One hour: 30 minutes instruction, 30 minutes activity • paper plates - two per child or one plate and one plate print out per child • food image cutouts [Appendix B] • glue sticks • celery sticks • light cream cheese • cran-raisins • • • • • • • • raisins almonds cream cheese plates napkins knives bowls MyPlate visuals [Appendix A] Print out MyPlate poster visual, cut out food images for food plate activities. This lesson plan is made possible by a partnership between The Campus Kitchens Project and Sodexo. For more nutrition education lessons, visit campuskitchens.org.
- 6. Introduction Activity Introduce the teachers. Talk about why we are here: to learn about food and how to make healthful decisions. Introduce children. Give name, favorite food, and favorite color. Introduce MyPlate using the poster visual. Describe the different food groups: fruits, vegetables, protein, grains and dairy. Have students give examples of foods that make up each group. Discuss the group proportions on the plate (Appendix A). Inform students of appropriate portion sizes for each: 1-1½ c fruit, 1½-2 c vegetables, 3 oz grains and 4-5 oz protein. Help students visualize sizes of portions. Illustrate a plate, hiding the names of the various food groups (Appendix A). Ask children to name the different food groups and point out their position on the plate. Discussion starters: • What’s your favorite food group? • How many different food groups have you eaten today? • Have you seen the MyPlate image before? • Does your plate look like this at dinner? • What does your favorite meal look like compared to MyPlate? • Why do you think it’s important to follow MyPlate? • Make paper plate collages. Hand out blank paper plates to students, and scatter the food group icons in the center of each table. Ask students to assemble a plate that meets the MyPlate requirements. While students assemble their plates, the teacher should assemble one too. Review the teacher’s example, then have students share what’s on their plate. Discussion questions: 1. Did anyone end up with a food that isn’t their favorite? What would you replace that food with, from the same food group? 2. What could a vegetarian put on their plate to replace meat? 3. What’s missing from this meal? What kind of beverage should we have with it? Optional: While the students are assembling their plates, the teacher can also put together some plates that are not correctly assembled. 1. What’s wrong with this plate? What food group is missing? What food group is represented twice? 2. Have students find the missing piece. Which one should I replace? Optional: Some food icons that we have included represent dishes that have ingredients from multiple food groups! 1. Are there any foods left in the center of the table? What food groups are they? 2. How do you place foods that have ingredients from two groups? Would you eat twice as much of them? 3. What are some other foods you eat that don’t fall into just one food group? • Make ants on a log: Have children guess what each of the toppings are before starting and determine what food groups each ingredient belongs to. Let them make their own ants on a log by filling celery with cream cheese and topping with raisins. Wrap Up Review the lesson. Sample questions: • Who can name all of the food groups on MyPlate? • Which is the biggest food group on MyPlate? • Which group is the hardest for you to fill? Take home: give each student a copy of the take home recipe: tuna noodle casserole.
- 7. Tuna Noodle casserole Ingredients serves four 1 6 ounce can, drained tuna 1 cup raw whole grain or egg macaroni 1 chopped onion 1 14 ounce can of drained peas (or vegetable of choice) 1 10.5 ounce can of 98% fat free cream of mushroom soup 1 cup skim milk 6 tablespoons low-fat cheddar cheese Directions 1. Preheat oven to 350 degrees. 2. Spray 8 x 8 pan with non stick spray. 3. In a bowl, mix tuna, noodles, onions, peas, soup and milk. 4. Pour into pan and make sure noodles are covered with sauce. Sprinkle with cheese. 6. Cover and bake for 1 hour. Tuna Noodle Casserole is an easy favorite! This recipe incorporates all of the items that are needed for a meal to meet the MyPlate standards. Tuna is an excellent and convenient source of protein, whole grain or egg macaroni noodles are just what you need to fulfill your grain portion on your plate, and the peas (or carrots) make a great vegetable component. This lesson plan is made possible by a partnership between The Campus Kitchens Project and Sodexo. For more nutrition education lessons, visit campuskitchens.org.
- 8. Lesson 2: Eat the Rainbow Objectives: Time: Materials: Preparation: This lesson will focus on the value of fruits and vegetables, by discussing how they contain vitamins and minerals that benefit the body. Eat the Rainbow is an interactive activity designed to make exploring the rainbow of fruits and vegetables fun. Encourage students to eat many different colors and try foods they might not have eaten before. Explain how certain colors of food have certain nutrients that benefit different body parts. One hour: 30 minutes instruction, 30 minutes activity • five large posters/paper • black and white food cutouts [Appendix C] • markers/crayons/pencils • copies of Eat the Rainbow visual for each child [Appendix C] • one large copy of visual • kabob sticks • plates/bowls • fruits (one per color): kiwi, grapes, oranges, melon, strawberries, blueberries, bananas, other options: raspberries, mango, pineapple, grapes Review Eat the Rainbow visual. Make copies of the Eat the Rainbow handout and take-home recipe. For matching game, label posters with the following colors: green, yellow/orange, red, blue/purple and white. Cut fruit for kabobs into appropriately sized pieces. This lesson plan is made possible by a partnership between The Campus Kitchens Project and Sodexo. For more nutrition education lessons, visit campuskitchens.org.
- 9. Introduction activity Review previous lessons, if applicable. Illustrate a plate, highlighting fruits and vegetables. Note that they cover half of the plate. Explain why eating a variety of fruits and vegetables is important. Review the Eat the Rainbow visual, categorizing fruits/vegetables by their color and explaining how they benefit our bodies, i.e. red = healthy heart. (Note: remind students that they should eat at least five servings of fruits and vegetables every day.) Be sure to explain more difficult words/concepts like bladder and cholesterol. Discussion starters: • When you hear, “Eat the Rainbow” what do you think about? (fruit candy, the sky, weather, etc.) • What color is your favorite food? • How many colors have you eaten today? • Do you think a red piece of candy and a red strawberry do the same thing in your body? Why/why not? • What do you think would happen if you only ate one color for your whole life? • Matching game with food cutouts. Split group into two teams. Give each team equal number of food cutouts. There will be five posters with a color and associated health benefit. Each team will compete to place as many food cutouts on the correct board within five minutes. (Note that a few food items could be colored one of two ways, like green or purple grapes.) Review game and discuss why answers were correct or incorrect. • Creating & tasting rainbow fruit kabobs. Have the children build rainbow fruit kabobs. Encourage students to try different colors and fruits they may not have eaten before. Everyone should try at least three colors. (Note: before starting, talk about food safety - hand washing, washing fruits and vegetables, and having a grownup use knives when cutting food items.) • While children eat, ask one or two students to volunteer to share their rainbow fruit kabob with the class, asking the other students to respond how each color is beneficial to our bodies. Wrap Up Review the lesson. Sample questions: • What did we learn today? • Who can tell me what part of the body [blue] fruits/veggies are good for? [various colors] • How many [red] fruits/veggies can you name? [various colors] Extra time: have children draw their favorite fruit or vegetable on the back of the “Eat the Rainbow” handout. Take home: give each student a copy of the Eat the Rainbow chart with take home recipe: rainbow chili.
- 10. Rainbow Chili Ingredients serves four 1 zucchini, sliced 1 yellow squash, sliced 1 red bell pepper, diced 1/2 eggplant, diced (optional) 1 onion, diced 2 garlic cloves, minced 2 28-ounce cans diced tomatoes, undrained 1 can black beans, rinsed and drained 1 can kidney beans, rinsed and drained 1 can corn or 1 cup frozen corn, rinsed and drained 2 tablespoons olive oil 1 tablespoon chili powder 1/4 teaspoon cayenne pepper 1/2 teaspoon ground black pepper Directions 1. Heat oil in a large pot over medium-high heat. Stir in zucchini, squash, pepper, eggplant, onions and garlic. Sauté until tender (about 5 minutes). 2. Add remaining ingredients and reduce heat to a simmer for about 30-45 minutes, stirring occasionally. This lesson plan is made possible by a partnership between The Campus Kitchens Project and Sodexo. For more nutrition education lessons, visit campuskitchens.org.
- 11. Lesson 3: Become a good grains detective Objectives: Time: Materials: Preparation: Teach children about the grains food group. Identify what foods are in the grains category. Explain why whole grains are healthier than refined grains and how to identify them. One hour: 30 minutes instruction, 30 minutes activity • • • • markers plates bowls three different whole grain foods to taste [e.g. Kashi 7 whole grain flakes cereal, popcorn, wholewheat crackers. Note that whole wheat flour has whole grains, but wheat flour does not.] • copies of MyPlate Whole Grain visual for each child [Appendix D] • several different whole and refined grains [e.g. wheat flour, all purpose flour, quinoa, white rice, quick oats, flavored instant oatmeal] • one large MyPlate Whole Grain visual [Appendix D] • whole grain baked corn chips OR baked whole grain pita • avocados • salsa • red bell peppers Review the whole grain visual. Make copies of the whole grain handout and take-home recipe. For taste exercise, purchase three whole grain foods, such as Kashi 7 whole grain flakes cereal, popcorn (pop prior to lesson), and whole-wheat crackers. Identify one of the purchased food items to show nutritional elements; write key “healthy” ingredients on the board. In addition, identify a “not-so-healthy” option to compare ingredients. For instance, use a whole grain flake cereal, like Kashi and a sugary alternative, like Frosted Flakes. This lesson plan is made possible by a partnership between The Campus Kitchens Project and Sodexo. For more nutrition education lessons, visit campuskitchens.org.
- 12. Introduction Review previous lessons, if applicable. Illustrate a plate, highlighting grains. Explain that grains are divided into two groups: whole grains and refined grains. Identify examples of foods in the grains category, i.e. bread, pasta, oatmeal, breakfast cereals. Explain the health benefits of eating grains, especially whole grains. Whole Grains: • Have fiber, protein, and vitamins. Fiber keeps you fuller longer. • Help maintain consistent blood sugar levels. (Explain how this gives you consistent energy for the whole day and eliminates highs and lows in energy.) • Decreased chance of being overweight or having heart disease and type-2 diabetes. Refined Grains: • Have been processed to give grains a finer texture and improve their shelf life. This also removes dietary fiber, iron, and many B vitamins. Review the MyPlate whole grain visual. Encourage students to make at least half of their grains whole grains, emphasizing portion sizes. Grain servings are about five ounces per day for children 4-8 years old. One ounce is equivalent to one slice of bread; one cup of breakfast cereal; ½ cup of oatmeal; ½ cup cooked rice, pasta or noodles; ½ small bagel, English muffin or hamburger bun; one tortilla, three cups of popped popcorn, or five whole wheat crackers. Discussion starters: • Why are grains important? • How many should you eat? What kind? • Who likes the taste of whole grain foods, like whole wheat bread? • When you make sandwiches at home, is your bread white or does it look brown? • When you eat rice is it usually white or brown or a mixture of darker colors? Activity • Become a good grains detective. Set out different types of cooked and uncooked grains and allow the students to feel and see the difference between whole and refined grains. For example, wheat flour next to a bowl of all-purpose flour, quinoa and white rice, quick oats and flavored instant oatmeal. Have students look for the whole grain logo on packages. Inform them that darker colored items are not always whole wheat or whole grain. Compare food labels of two different foods – one whole grain (use one they taste) and the other refined. The first ingredient should be 100% whole wheat, not refined white flour. • Tasting whole grain snacks. Allow children to taste different whole grain foods. Talk more about grains and how to incorporate grains into their own diet. • Extra time: make a healthy snack - chips with guacamole Ingredients: whole grain baked corn chips OR baked whole grain pita/tortilla chips, avocados, salsa, red bell peppers. Set up separate bowls with each ingredient. Give each child a bowl with some corn chips or whole grain tortillas or pita bread. Have students make their own guacamole, choosing ingredients they like and mixing them together in their bowls. Wrap Up Review the lesson. Sample questions: • Which type of grains are more nutritious? • How much grain products should you eat each day? Take home: give each student a copy of the MyPlate whole grain visual and take home recipe: easy granola.
- 13. Easy Granola Ingredients serves four 1 ½ cup sliced almonds 1 ½ cup rolled or quick oats 1 ¼ cup corn flakes 3 ounces maple syrup or honey 2 teaspoons canola oil ½ teaspoon cinnamon ¼ cup golden raisins ¼ cup raisins ¼ cup cran-raisins Directions 1. Preheat oven to 350 degrees. 2. Mix everything except for the fruit together in a large bowl. 3. Spread onto a baking sheet and bake at 350 for 10 – 15 minutes, occasionally stirring gently so that the cereal browns evenly. 4. Allow to cool. Once cool, mix in the dried fruit and store in an airtight container. This lesson plan is made possible by a partnership between The Campus Kitchens Project and Sodexo. For more nutrition education lessons, visit campuskitchens.org.
- 14. Lesson 4: add power to your plate Objectives: Time: Materials: Preparation: Teach children about the protein food group. Identify foods that fall into this category. Highlight the need for protein and how it functions as building blocks in the body. One hour: 30 minutes instruction, 30 minutes activity • food group jeopardy [Appendix E] • paper and pens for keeping score • scissors and tape • plates • banana for each student • jar of peanut butter (substitute sunflower seed butter for nut allergies) • large container of vanilla Greek yogurt • maple syrup or honey • almonds Prepare jeopardy game by cutting out monetary amounts and divide banana split ingredients according to class size. This lesson plan is made possible by a partnership between The Campus Kitchens Project and Sodexo. For more nutrition education lessons, visit campuskitchens.org.
- 15. Introduction Review previous lessons, if applicable. Illustrate a plate, highlighting the protein group. Discuss what foods fall into the protein food group, as well as foods that do not fall into the group, but still contain a good amount of protein (e.g. green peas). Address a common misconception: protein = meat. Give examples of non-meat sources of protein. Talk about why protein is important, and what it does to make us healthy: it’s necessary for building strong muscles and body tissues, helps sustain energy so that we do not tire as quickly and is the building block for muscles, hair, nails, organs etc. Talk about the difference between lean and full-fat proteins. Lean proteins do not have as much unhealthy fat as full-fat proteins do. They still do have fat, just not as much unhealthy saturated (solid) fat, and in some cases (such as with fish, nuts and seeds) can have healthy mono and poly-unsaturated fats. Healthy fats help protect your heart whereas unhealthy fats will hurt it (cause high cholesterol, heart attacks, etc.). Give students a few examples of each, and have them come up with a few more. Emphasize that whole milk and other full-fat dairy products are less healthy than reduced fat versions. Lean proteins: fish, black beans, nut butters, white meat chicken, turkey, lean ground beef Full-fat proteins: whole milk, hot dogs, bacon, highly marbled cuts of beef/other red meat Discussion starters: • Why are proteins important? • What are non-meat sources of protein? Answers can include: beans, eggs, fish, milk, cheese, nuts, seeds and tofu. • How do you get all the protein your body needs each day? • What is your favorite source of protein? Activity • Play food group jeopardy. Split class into two teams; each team will take turns choosing a question (category and points ). There are 28 questions total. • Make a protein packed banana split. Allow children to make their own banana split. Banana Split 1 medium banana 2 tablespoons peanut butter (or sunflower seed butter) 1/4 cup vanilla Greek yogurt 1 teaspoon maple syrup or honey 1 tablespoon roasted almonds, chopped Lay banana on a plate, slice in half (long-ways). Spread peanut butter evenly on the banana, dollop Greek yogurt on top, drizzle with maple syrup or honey, and sprinkle with nuts. Wrap Up Review the lesson. Sample questions: • What kinds of foods have complete proteins? • What is your favorite protein-filled food? • What is a non-meat source of protein? Take home: give each student a copy of the take home recipe: black bean quesadilla.
- 16. black bean quesadilla Ingredients serves one 10” whole-wheat tortilla 1/4 cup pepper jack or cheddar cheese 2 tablespoons salsa 1/2 cup canned black beans, rinsed and drained 1/8 teaspoon garlic 1/8 teaspoon oregano 1/8 teaspoon chili powder Directions 1. Add seasonings to ½ cup of black beans. Mash until smooth consistency. 2. Spread mashed black beans on tortilla. Fold in half. 3. In large sauté pan, heat filled tortilla until golden brown for 1-2 minutes on each side. 4. Top with salsa and cheese. Cut in 4 triangles and serve. This lesson plan is made possible by a partnership between The Campus Kitchens Project and Sodexo. For more nutrition education lessons, visit campuskitchens.org.
- 17. Lesson 5: From seed to plant Objectives: Time: Materials: Preparation: Educate children about plant-based foods and how they grow. Identify which parts of a plant make up various foods (e.g.: carrots = roots, broccoli = flowers). Explain the physical needs for growth, such as soil, water and sun. Children will develop a basic understanding of where food comes from, why it’s important to eat many plant-based foods and how plants grow. One hour: 30 minutes instruction, 30 minutes activity • book on gardening or plant life [optional] • chalkboard, white board or poster • Life Cycle of a Plant diagram [Appendix F] • plant part images [Appendix F] • one or two fruits or vegetables per part of plant (seed, stem, flower, leaf, roof) • plant part cutouts[Appendix F] Cut out outlines of foods that are parts of plants from Appendix F. This lesson plan is made possible by a partnership between The Campus Kitchens Project and Sodexo. For more nutrition education lessons, visit campuskitchens.org.
- 18. Introduction Activity Review previous lessons, if applicable. Illustrate a plate and have students name each food group present. Discuss which foods come from plants and which come from animals. Ask students to guess how long humans have been growing plants for food (answer: about 10,000 years!). Tell the class that today’s lesson will show them how plants grow, what types of food people can grow to eat, and what part of a plant these foods come from. • Optional: read a book about plants. Depending on the time available for the lesson and the age of the students, you may choose to check a book out of the library to read to the group. We recommend From Seed to Plant by Gail Gibbons. • Walk students through the process of how a plant grows using the “Life Cycle of a Plant” diagram in Appendix F and accompanying visual aids. Inform students that seeds are usually planted in dirt, but all a seed needs is sunlight and water. The seed first grows roots, then a stem appears and grows toward the sun. Leaves grow on the plant, collecting energy from the sun. When the plant is big enough it flowers, and then the fruit appears and ripens. Emphasize the cyclical nature of plants growing: it is not a one-way process that starts when you plant the seed and ends when you harvest the fruit; rather, the seeds grow inside the fruit and the process begins again. Help students understand that foods come from plants, some of which are seeds, roots, stems, leaves, or flowers, and lots of them are the fruit of the plant. • Discussion questions: 1. Which foods are the leaves of the plant? Kale, collard greens, spinach, arugula, beet greens, bok choy, chard, turnip greens, lettuce, mustard greens, watercress, garlic chives 2. Which foods are stems? Celery, rhubarb, asparagus 3. Which foods are flowers? Broccoli, cauliflower, artichokes, capers 4. Which foods are seeds? Corn, peas, beans 5. Which foods are roots? Carrots, parsnips, beets, radishes, rutabagas, turnips • Draw a generic picture of a plant, including all the parts of the plant, and pass out food icons to the students. Ask students to come up to the board and place their food icon on the part of the plant where they think it grows. • Additional discussion questions: 1. What part of the plant do we eat most often? 2. Which ones take the longest to grow? • Taste test fruits and/or vegetables from each part of the plant. Have children determine which they like better, if they have consistent taste or texture differences. Compare and contrast. Wrap Up Review the lesson. Sample questions: • What part of a plant is your favorite fruit and vegetable? • Who can tell me each step of the plant life cycle? Take home: give each child a copy of the take home recipe: sun, seeds and plants salad
- 19. sun, seeds and plants salad Ingredients serves four Salad 1 pound kale 3 carrots 1 head broccoli 1 bell pepper 1 15oz can chickpeas Dressing 2 lemons ¼ cup olive oil 1 cup sunflower seeds Directions 1. Open can of chickpeas and rinse well under cold running water; drain. 2. Rinse, dry, remove stem and rib, and roughly chop kale, tossing it into a large bowl. 3. Peel and grate the carrots. Chop the broccoli into small florets. Slice bell pepper and add all to salad. 4. Add the chickpeas to the salad. 5. Mix dressing in a separate bowl or measuring cup. Juice lemons and add olive oil slowly, mixing to combine. Pour the dressing over the salad and toss ingredients together until lightly coated. 6. Top the salad with the sunflower seeds and serve. This lesson plan is made possible by a partnership between The Campus Kitchens Project and Sodexo. For more nutrition education lessons, visit campuskitchens.org.
- 20. Lesson 6: fitness IS FUN Objectives: Time: Materials: Preparation: Show children that physical activity can be fun and a part of their everyday routine. One hour: 30 minutes instruction, 30 minutes activity • honey • deck of cards • large poster/chalk board to write • bananas game directions • nutty cereal • tortillas • movement tracker for each student [Appendix G] • peanut butter (use sunflower seed butter for nut allergies) Write Hit the Deck instructions on a board or poster: touch elbow to knee or crunches for 20 seconds for hearts; jog in place or march in place for 20 seconds for diamonds; jumping jacks or scissors for 20 seconds for clubs; and modified push up or cabbage patch for 20 seconds for spades. Divide banana in a blanket ingredients according to class size. This lesson plan is made possible by a partnership between The Campus Kitchens Project and Sodexo. For more nutrition education lessons, visit campuskitchens.org.
- 21. Introduction Review previous lessons, if applicable, emphasizing how healthy eating positively influences physical activity abilities. Inform students that food provides energy, and people need to burn off as much energy as you take in. A healthy lifestyle is about balancing the amount of calories you take in with the amount of calories you burn. If these are out of balance, you will either gain or lose weight. Further, healthy eating makes healthier bodies, which are better able to perform physical activities. Discuss what physical activity is and why it is important. Definition: movement of the body that uses energy. Exercise helps you feel better, live longer, decreases your chances of becoming depressed, sleep well at night, move around more easily, have stronger muscles and bones and maintain a healthy weight. As people age their metabolism slows, so maintaining energy balance requires moving more and eating less. Go over how much exercise is necessary each day. Children and adolescents should do 60 minutes or more of physical activity each day. Most of the 60 minutes should be either moderate- or vigorous intensity aerobic physical activity, and should include vigorous-intensity physical activity at least 3 days a week. As part of their 60 minutes of daily physical activity, children should include muscle-strengthening activities, like climbing, at least 3 days a week and bone-strengthening activities, like jumping, at least 3 days a week. Activity • Play a game of Hit the Deck. Appropriate for ages 6-10. Have children stand and move away from desks and tables. The teacher places the deck of cards in front of the class. One student selects a card and students will do the corresponding activity for each suit. Heart: touch elbow to knee or crunches for 20 seconds. Diamond: jog in place or march in place for 20 seconds. Club: jumping jacks or scissors for 20 seconds. Spade: modified push up or cabbage patch for 20 seconds. Provide other students with the opportunity to pick a card from the deck and repeat activity. If a deck of cards is unavailable, this may be substituted for a game of Simon Says. • Make bananas in a blanket. Tell children that this is a healthy snack because it uses a whole wheat tortilla, protein-packed peanut butter and a banana, which is good for your body after exercise. Banana in a Blanket 1 (6 inch) whole wheat tortilla 1 tablespoon peanut butter 1 medium banana 1 teaspoon maple syrup or honey 1 tablespoon crunchy, nutty cereal Lay tortilla on a plate. Spread peanut butter evenly on the tortilla. Sprinkle cereal over peanut butter. Peel and place banana on the tortilla and roll the tortilla. Drizzle maple syrup or honey on top. Wrap Up Review the lesson. Sample questions: • Why is exercise good for you? • How much exercise should you get each day? • How does healthy eating impact your physical ability? Take home: give each student a movement tracker so they can record their physical activity and the take home recipes: yummy healthy snacks.
- 22. yummy healthy snacks apple cartwheels serves one Ingredients: 1 medium apples 1 ounce chocolate chips 1 tablespoon peanut butter 1 teaspoon raisins 1 teaspoon honey Directions: 1. Remove the core from the apple, leaving a 1-1/4 inch diameter cavity down the center; set aside. In a blender, process the chocolate chips until they are chopped. 2. In a small bowl, combine the chopped chocolate chips with the last 3 ingredients. 3. Stuff each apple with the mixture. 4. Wrap each apple in plastic wrap and refrigerate until well chilled. 5. When ready to serve, cut each apple crosswise into 1/2 inch slices. strawberry & cream cheese sandwich Ingredients: 1 tablespoon reduced-fat cream cheese 1/4 teaspoon honey 2 slices very thin whole-wheat sandwich bread 2 medium strawberries, sliced serves one Directions: 1. Combine cream cheese and honey in a bowl. 2. Spread bread with the cheese mixture. 3. Place sliced strawberries on one piece of bread; top with the other. no bake cookies serves eight Ingredients: 8 whole-wheat graham cracker squares, finely ground 1/4 cup raisins 1/4 cup smooth natural peanut butter 2 tablespoons plus 2 teaspoons honey 4 teaspoons unsweetened coconut Directions: 1. Combine ground whole-wheat graham crackers, raisins, peanut butter and honey in a small bowl. 2. Pat into eight cookies and press lightly in coconut. This lesson plan is made possible by a partnership between The Campus Kitchens Project and Sodexo. For more nutrition education lessons, visit campuskitchens.org.
- 23. references “Eat the Rainbow,” Kalihi-Palama Health Center. Original source accessed September 26, 2013, http://www.healthyhawaii.com/healthy_eating/healthy_eating/eat_a_ rainbow.htm. “Make Nutrition Fun,” Academy of Nutrition and Dietetics, accessed September 26, 2013, http://www.eatright.org/nnm/blog.aspx?id=6442451160&blog id=6442450952. “Presidential Active Lifestyle Award (PALA+) Activity Log (PDF) - Single Page,” The President’s Challenge, https://www.presidentschallenge.org/tools-resources/ docs/PALAplus_log_onepage.pdf. “USDA Choose MyPlate,” United States Department of Agriculture (USDA) Center for Nutrition Policy and Promotion, accessed September 26, 2013, http://www. choosemyplate.gov.
- 24. appendix a myplate food groups
- 25. appendix a
- 27. appendix b
- 31. Adapted from Kalihi-Palama Health Center handout Helps your body: keep your heart healthy keep your eyes healthy lower your chance of getting cancer keep you from catching colds orange/yellow Helps your body: keep your heart healthy keep your bladder healthy keep your memory strong lower your chance of getting cancer red carrots sweet potatoes yellow peppers pumpkins pineapple papayas cantaloupes tangerines mangos oranges lemons peaches bananas tomatoes red peppers red cabbage strawberries cherries watermelon red onions red apples cranberries red grapes beets Different colored fruits and vegetables have different nutrients. Eating a variety of colors helps us stay healthy. Eat the Rainbow Helps your body: keep your bones and teeth strong keep your eyes healthy lower your chance of getting cancer green Helps your body: stay healthy when you get older keep your memory strong keep your bladder healthy lower your chance of getting cancer blue/purple Helps your body: keep your heart healthy have good cholesterol levels lower your chance of getting cancer white spinach green peas green beans broccoli cabbage cucumbers asparagus green grapes green apples avocados limes eggplant purple cabbage raisins blueberries purple grapes plums purple potatoes onions parsnips cauliflower ginger mushrooms garlic white pear appendix C
- 32. Appendix c
- 34. appendix d
- 35. Appendix E food group jeopardy instructions PREPARATION 1. This game may be played with individual contestants or with teams (for a noisier, more enthusiastic effect). 2. Cover each answer under each category with a piece of paper labeled $100, $200, $300, etc. (Values increase as rows go down, so the first row is worth $100, the second worth $200, and so on.) As contestants choose questions to answer, remove the paper to see the answer for which they need to guess the question. PLAY 1. First contestant chooses the food group from which s/he would like to hear an answer. For example, FRUITS. 2. Moderator removes the cover to display the answer. For example, “People say that one of me a day keeps the doctor away.” 3. Contestant states: “What is an apple?” That response is correct. Contestant gets value indicated for that question. 4. Proceed as above with next contestant. A contestant may choose whatever square s/he wishes. For example, if s/he is the first contestant and wants to go directly to a $700 square, that is permitted. 5. If any contestant responds incorrectly, give the next contestant the opportunity to respond and receive the money. 6. When someone selects the “Daily Double,” s/he may wager some or all of his money. If s/he responds correctly, s/he receives double the amount wagered. If s/he is incorrect, s/he loses the money wagered. 7. Play continues until all squares are uncovered. Contestant or team with the most money wins. SIMPLER PROCEDURE 1. First contestant chooses the food group from which s/he would like to hear an answer. For example, GRAINS. 2. Teacher states an answer from the attached grid. For example, “I make up both sides of your sandwich.” 3. Contestant states: “What is bread?” That response is correct. Contestant gets a point. 4. Proceed to next player as above. Play continues until all questions have been answered. Food Group Jeopardy adapted from EatRight.org
- 36. I help make you strong and Popeye likes to eat me. I grow on vines and people I am the type of grain that is like to make sauce out of me. more processed and is less healthy. I grow in bunches and am a popular fruit juice. I wear my seeds on my outside. You can often find me with red sauce and meatballs on top. daily double I am made from nuts, but am not crunchy. I am what a hamburger is made out of. I like to swim. I am necessary to bake almost I am made from milk and anything, like bread or cook- go with crackers, pizza and ies. more. daily double - Name one vegetable from each of the "Eat the Rainbow" color groups daily double - True or false: all brown grains are whole grains. daily double I come in lots of varieties, We grow together inside of a Some people like to eat me pod. for breakfast, especially when like cashews and almonds. it is cold outside. Monkeys like to eat me. I am small, green and similar to a lemon. I grow in the ground and rabbits like to eat me. People say that one of me a day keeps the doctor away. I am often found in your cereal bowl. I make up both sides of your sandwich. I am very popular around Halloween. Protein I am red, white and green with seeds. grains I am the type of grain that has I am made by chickens. more vitamins. vegetables I am also the word for a color. I look like a miniature tree. fruits food group jeopardy Appendix E
- 37. broccoli pumpkin carrot peas spinach tomato daily double orange watermelon apple banana grape strawberry lime pasta refined grain daily double oatmeal flour bread whole grain grains daily double - Answers vary, but may include tomatoes, carrots, onions, broccoli and eggplant. daily double - False. vegetables fruits peanut butter beef fish nuts cheese milk eggs Protein food group jeopardy Answers Appendix E
- 38. Appendix E food group jeopardy Monetary amounts Monetary amounts for food group jeopardy. Tape over the answer squares. $100 $100 $100 $100 $200 $200 $200 $200 $300 $300 $300 $300 $400 $400 $400 $400 $500 $500 $500 $500 $600 $600 $600 $600 $700 $700 $700 $700
- 39. Appendix f
- 41. Appendix f
- 44. appendix g adapted from the Presidential Active Lifestyle Award materials at presidentschallenge.org