SlideShare a Scribd company logo
1 of 4
Download to read offline
Laying a Brick Walkway or Patio
OVERVIEW
Introduction
The durability and aesthetic characteristics of brick patios and walkways make for the foundation of great
spaces around your home. While installing brick walks and patios is not a difficult task, it may be rather time
consuming depending on the size of the patio or walkway. When laying brick that will be walked on it is
necessary to use paving quality bricks. These bricks are generally fired longer and at a higher temperature
making them more suitable for a variety of weather conditions and more durable to wear and tear. Be sure that
you have all the materials necessary for your project before you begin. You may want to have the materials
delivered to your home to minimize wear and tear on your vehicle, and on your back!
• Beginner - This is a project for all skill levels. Time invol
• Intermediate - This is a project for all skill levels. Time invol
• Advanced - This is a project for all skill levels. Time invol
Be careful when lifting and transferring bricks. Be sure that you use proper lifting techniques.
You may want to use a back brace as lifting and carrying bricks can strain your back.
Map out where you want your patio or walkway using a garden hose. This will allow you to
visualize a variety of designs before you begin.
If you live in the north where winter means snow and ice, you will want to use SW (severe
weather) rated bricks. These bricks cost more but will resist cracking under cold weather conditions.
If you live in the north where winter means snow and ice, you will want to use SW (severe
weather) rated bricks. These bricks cost more but will resist cracking under cold weather conditions.
STEPS
1. Lay out the area in which you want to install bricks for your patio or
walkway. Use a household hose -- it is a great tool to lay out the area.
2. Drive wooden stakes about 18 inches into the ground every 2-3 feet
around the perimeter of the planned patio or walkway. These stakes will
outline the area that you will dig out for your new patio or walkway and be
used to line up your bricks.
3. Remove the grass and dirt making the edges completely vertical. You
should dig down about eight inches to assure that you have room for the
base layers upon which your bricks will lie.
4. Be sure that the dirt is leveled appropriately for your project. Walkways
should be level across the walk, and have a gentle slope. Patios should be
nearly level in all directions. You should round out your brickwork slightly
so that water runs off the edge of it instead of puddling in the middle. You
should create a slope of about 1" for every 4-8 feet. Use a 4-foot level or a
string level and make any adjustments as needed. As you add new layers
to the dirt, confirm that your slope is maintained throughout.
5. Put a layer of gravel about 4 inches thick in the bed and tamp it down.
Again, be sure that the level of the gravel is even as appropriate to your
project.
6. Secure the wooden strapping to the stakes using wood screws to define
the edges of the walkway or patio. If there are curves in the border of the
patio or walkway you will need to kerf the strapping. This is accomplished
by sawing part way through the wood against the grain about every ½-
inch. This will allow you to bend the strapping to fit the desired curve.
Alternately, there are now plastic forms available to define the edge of
your bricks. These stay in the ground and act as a permanent lateral
support for the bricks.
7. If you want to border the patio or walkway with solder bricks (bricks
standing on end face to face) put them in place now along the edge of the
strapping.
8. Fill the bed with about 1-1/2 inches of stone dust. Stone dust is an
excellent underlayment to the bricks, as it will act almost as concrete once
it has been wet and dried a few times. Be sure that you account for the
depth of your bricks and only lay down enough stone dust to be sure that
your bricks are level with the surrounding landscape.
9. Tamp the stone dust, and level it using a strip of wood while keeping it
moist with water. Check it every few feet with a level to be sure that you
maintain the appropriate curve to your patio.
10. Lay the brick over the stone dust, tamping each brick with a rubber mallet.
Brick scars easily so do not use a regular hammer. You have a few
alternatives to the pattern that you choose. The easiest and most versatile
is the basket weave as it is attractive and easily rounds corners.
11. Once all of the brick is in place, spread another layer of stone dust over
the brick and carefully sweep it into the cracks between the bricks and
along the edge.
12. Spray water over the brick to secure them in the stone dust. The stone
dust will harden much like concrete over time.
13. Leave the wooden strapping in place for at least a week to allow the
walkway or patio time to settle. Carefully remove the strapping by pulling
it straight out. Fill in the hole with topsoil and seed to replenish the grass
next to the brick.
SHOP LIST
Materials List
Bricks
Wooden stakes - 2 feet long
1x3 wooden strapping
Drywall screws
Gravel Stone dust
Tools List
Shovel (flat edged shovel is best)
Hand saw
Broom
Level
Garden hose
Tamper
Rubber mallet
Screw gun

More Related Content

What's hot

Flood Prevention by Gabion Basket Wall
Flood Prevention by Gabion Basket WallFlood Prevention by Gabion Basket Wall
Flood Prevention by Gabion Basket WallParth Desani
 
Lego we do parts vocabulary
Lego we do parts vocabularyLego we do parts vocabulary
Lego we do parts vocabularyMerry Willis
 
Gabion information manufacturing & installation
Gabion information manufacturing  & installationGabion information manufacturing  & installation
Gabion information manufacturing & installationmanufabindia
 
How to choose the perfect kitchen tile
How to choose the perfect kitchen tileHow to choose the perfect kitchen tile
How to choose the perfect kitchen tileAnwarAmet
 
Flooring options with indian granite tiles exporter
Flooring options with indian granite tiles exporterFlooring options with indian granite tiles exporter
Flooring options with indian granite tiles exporterDecorative Garden Planters
 
Wattle & Daub
Wattle & DaubWattle & Daub
Wattle & DaubKyle Lima
 
Strawbale construction low cost housing
Strawbale construction low cost housingStrawbale construction low cost housing
Strawbale construction low cost housingShourya Puri
 
Jensen Precast Redi-Rock Retaining Walls
Jensen Precast Redi-Rock Retaining WallsJensen Precast Redi-Rock Retaining Walls
Jensen Precast Redi-Rock Retaining WallsJensen Precast
 
Castia Stone Brochure
Castia Stone BrochureCastia Stone Brochure
Castia Stone Brochurepaluch64
 
What makes a 10th year anniversary special.
What makes a 10th year anniversary special.What makes a 10th year anniversary special.
What makes a 10th year anniversary special.alexgin36
 

What's hot (20)

How TO Repair Mortar Joints
How TO Repair Mortar JointsHow TO Repair Mortar Joints
How TO Repair Mortar Joints
 
Gabion ppt
Gabion pptGabion ppt
Gabion ppt
 
Flood Prevention by Gabion Basket Wall
Flood Prevention by Gabion Basket WallFlood Prevention by Gabion Basket Wall
Flood Prevention by Gabion Basket Wall
 
Lego we do parts vocabulary
Lego we do parts vocabularyLego we do parts vocabulary
Lego we do parts vocabulary
 
Watershed and Road-Stream Crossing Responses to Extreme Rainfall: Lessons in ...
Watershed and Road-Stream Crossing Responses to Extreme Rainfall: Lessons in ...Watershed and Road-Stream Crossing Responses to Extreme Rainfall: Lessons in ...
Watershed and Road-Stream Crossing Responses to Extreme Rainfall: Lessons in ...
 
Straw bale construction (1)
Straw bale construction (1)Straw bale construction (1)
Straw bale construction (1)
 
reinforced gabions
reinforced gabions reinforced gabions
reinforced gabions
 
Gabion information manufacturing & installation
Gabion information manufacturing  & installationGabion information manufacturing  & installation
Gabion information manufacturing & installation
 
How to choose the perfect kitchen tile
How to choose the perfect kitchen tileHow to choose the perfect kitchen tile
How to choose the perfect kitchen tile
 
Flooring options with indian granite tiles exporter
Flooring options with indian granite tiles exporterFlooring options with indian granite tiles exporter
Flooring options with indian granite tiles exporter
 
Mudarchitecture,
Mudarchitecture,Mudarchitecture,
Mudarchitecture,
 
Wattle & Daub
Wattle & DaubWattle & Daub
Wattle & Daub
 
Strawbale construction low cost housing
Strawbale construction low cost housingStrawbale construction low cost housing
Strawbale construction low cost housing
 
Bricks (2)
Bricks (2)Bricks (2)
Bricks (2)
 
low cost mud construction
low cost mud constructionlow cost mud construction
low cost mud construction
 
Workshop Portfolio last edition
Workshop Portfolio last editionWorkshop Portfolio last edition
Workshop Portfolio last edition
 
Jensen Precast Redi-Rock Retaining Walls
Jensen Precast Redi-Rock Retaining WallsJensen Precast Redi-Rock Retaining Walls
Jensen Precast Redi-Rock Retaining Walls
 
Castia Stone Brochure
Castia Stone BrochureCastia Stone Brochure
Castia Stone Brochure
 
What makes a 10th year anniversary special.
What makes a 10th year anniversary special.What makes a 10th year anniversary special.
What makes a 10th year anniversary special.
 
About kitchens
About kitchensAbout kitchens
About kitchens
 

Similar to Laying a brick walkway or patio

How to build a raised formal pool
How to build a raised formal poolHow to build a raised formal pool
How to build a raised formal poolPraveen Sudarsan
 
Stone Works Canada Alan Block garden walls install catalog
Stone Works Canada Alan Block garden walls install catalogStone Works Canada Alan Block garden walls install catalog
Stone Works Canada Alan Block garden walls install catalogStone Works Canada
 
Haleys how to guide powerpoint[1]
Haleys how to guide powerpoint[1]Haleys how to guide powerpoint[1]
Haleys how to guide powerpoint[1]hdow4118
 
Introduction brickwall-report-yf (1)
Introduction brickwall-report-yf (1)Introduction brickwall-report-yf (1)
Introduction brickwall-report-yf (1)Chan Yifung
 
Project Presentation
Project PresentationProject Presentation
Project PresentationMegha Lakhani
 
How to construct a suimple garden pond
How to construct a suimple garden pondHow to construct a suimple garden pond
How to construct a suimple garden pondPraveen Sudarsan
 
How to construct a suimple garden pond
How to construct a suimple garden pondHow to construct a suimple garden pond
How to construct a suimple garden pondZulaiha Amaria
 
Installing deck boards
Installing deck boardsInstalling deck boards
Installing deck boardsZulaiha Amaria
 
Framing Basics to Remember for Stronger Homes
Framing Basics to Remember for Stronger HomesFraming Basics to Remember for Stronger Homes
Framing Basics to Remember for Stronger HomesDeborah Davis
 
Build Your Own Underground Root Cellar.pdf
Build Your Own Underground Root Cellar.pdfBuild Your Own Underground Root Cellar.pdf
Build Your Own Underground Root Cellar.pdfrioderroming1974
 
Ms ct-bm
Ms ct-bmMs ct-bm
Ms ct-bmLin Hui
 
Wall water feature installation instruction manual for the reflection creek a...
Wall water feature installation instruction manual for the reflection creek a...Wall water feature installation instruction manual for the reflection creek a...
Wall water feature installation instruction manual for the reflection creek a...Patrick Maloy
 

Similar to Laying a brick walkway or patio (20)

How to build a raised formal pool
How to build a raised formal poolHow to build a raised formal pool
How to build a raised formal pool
 
Deck post holes
Deck post holesDeck post holes
Deck post holes
 
Pavements ( BASICS)
Pavements  ( BASICS)Pavements  ( BASICS)
Pavements ( BASICS)
 
abcreport
abcreportabcreport
abcreport
 
Stone Works Canada Alan Block garden walls install catalog
Stone Works Canada Alan Block garden walls install catalogStone Works Canada Alan Block garden walls install catalog
Stone Works Canada Alan Block garden walls install catalog
 
Haleys how to guide powerpoint[1]
Haleys how to guide powerpoint[1]Haleys how to guide powerpoint[1]
Haleys how to guide powerpoint[1]
 
Lay carpet tiles
Lay carpet tilesLay carpet tiles
Lay carpet tiles
 
Introduction brickwall-report-yf (1)
Introduction brickwall-report-yf (1)Introduction brickwall-report-yf (1)
Introduction brickwall-report-yf (1)
 
Build a shed
Build a shedBuild a shed
Build a shed
 
Deck post holes
Deck post holesDeck post holes
Deck post holes
 
Build a shed
Build a shedBuild a shed
Build a shed
 
Project Presentation
Project PresentationProject Presentation
Project Presentation
 
How to construct a suimple garden pond
How to construct a suimple garden pondHow to construct a suimple garden pond
How to construct a suimple garden pond
 
How to construct a suimple garden pond
How to construct a suimple garden pondHow to construct a suimple garden pond
How to construct a suimple garden pond
 
Installing deck boards
Installing deck boardsInstalling deck boards
Installing deck boards
 
Framing Basics to Remember for Stronger Homes
Framing Basics to Remember for Stronger HomesFraming Basics to Remember for Stronger Homes
Framing Basics to Remember for Stronger Homes
 
Build Your Own Underground Root Cellar.pdf
Build Your Own Underground Root Cellar.pdfBuild Your Own Underground Root Cellar.pdf
Build Your Own Underground Root Cellar.pdf
 
Ms ct-bm
Ms ct-bmMs ct-bm
Ms ct-bm
 
Masonry work
Masonry workMasonry work
Masonry work
 
Wall water feature installation instruction manual for the reflection creek a...
Wall water feature installation instruction manual for the reflection creek a...Wall water feature installation instruction manual for the reflection creek a...
Wall water feature installation instruction manual for the reflection creek a...
 

More from Zulaiha Amaria

More from Zulaiha Amaria (20)

Application of disciplinary system
Application of disciplinary systemApplication of disciplinary system
Application of disciplinary system
 
girl culture dictionary
girl culture dictionarygirl culture dictionary
girl culture dictionary
 
Wiring a ring main
Wiring a ring mainWiring a ring main
Wiring a ring main
 
Waterproof your roof
Waterproof your roofWaterproof your roof
Waterproof your roof
 
Wallpapering techniques
Wallpapering techniquesWallpapering techniques
Wallpapering techniques
 
Wallpaper stripping
Wallpaper strippingWallpaper stripping
Wallpaper stripping
 
Wallpaper a ceiling
Wallpaper a ceilingWallpaper a ceiling
Wallpaper a ceiling
 
Wall tiling
Wall tilingWall tiling
Wall tiling
 
Wainscotting
WainscottingWainscotting
Wainscotting
 
Upvc fascia
Upvc fasciaUpvc fascia
Upvc fascia
 
Tow dolly plans
Tow dolly plansTow dolly plans
Tow dolly plans
 
Timber decking
Timber deckingTimber decking
Timber decking
 
Timber cutting hand saws
Timber cutting hand sawsTimber cutting hand saws
Timber cutting hand saws
 
Size conversion charts
Size conversion chartsSize conversion charts
Size conversion charts
 
Shelving and storage
Shelving and storageShelving and storage
Shelving and storage
 
Safe diy
Safe diySafe diy
Safe diy
 
Replacing a brick
Replacing a brickReplacing a brick
Replacing a brick
 
Replace broken tiles
Replace broken tilesReplace broken tiles
Replace broken tiles
 
Repairing a dripping tap
Repairing a dripping tapRepairing a dripping tap
Repairing a dripping tap
 
Renovating wood
Renovating woodRenovating wood
Renovating wood
 

Laying a brick walkway or patio

  • 1. Laying a Brick Walkway or Patio
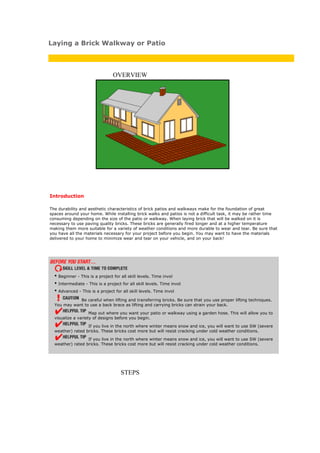
 OVERVIEW Introduction The durability and aesthetic characteristics of brick patios and walkways make for the foundation of great spaces around your home. While installing brick walks and patios is not a difficult task, it may be rather time consuming depending on the size of the patio or walkway. When laying brick that will be walked on it is necessary to use paving quality bricks. These bricks are generally fired longer and at a higher temperature making them more suitable for a variety of weather conditions and more durable to wear and tear. Be sure that you have all the materials necessary for your project before you begin. You may want to have the materials delivered to your home to minimize wear and tear on your vehicle, and on your back! • Beginner - This is a project for all skill levels. Time invol • Intermediate - This is a project for all skill levels. Time invol • Advanced - This is a project for all skill levels. Time invol Be careful when lifting and transferring bricks. Be sure that you use proper lifting techniques. You may want to use a back brace as lifting and carrying bricks can strain your back. Map out where you want your patio or walkway using a garden hose. This will allow you to visualize a variety of designs before you begin. If you live in the north where winter means snow and ice, you will want to use SW (severe weather) rated bricks. These bricks cost more but will resist cracking under cold weather conditions. If you live in the north where winter means snow and ice, you will want to use SW (severe weather) rated bricks. These bricks cost more but will resist cracking under cold weather conditions. STEPS
  • 2. 1. Lay out the area in which you want to install bricks for your patio or walkway. Use a household hose -- it is a great tool to lay out the area. 2. Drive wooden stakes about 18 inches into the ground every 2-3 feet around the perimeter of the planned patio or walkway. These stakes will outline the area that you will dig out for your new patio or walkway and be used to line up your bricks. 3. Remove the grass and dirt making the edges completely vertical. You should dig down about eight inches to assure that you have room for the base layers upon which your bricks will lie. 4. Be sure that the dirt is leveled appropriately for your project. Walkways should be level across the walk, and have a gentle slope. Patios should be nearly level in all directions. You should round out your brickwork slightly so that water runs off the edge of it instead of puddling in the middle. You should create a slope of about 1" for every 4-8 feet. Use a 4-foot level or a string level and make any adjustments as needed. As you add new layers to the dirt, confirm that your slope is maintained throughout. 5. Put a layer of gravel about 4 inches thick in the bed and tamp it down. Again, be sure that the level of the gravel is even as appropriate to your project.
  • 3. 6. Secure the wooden strapping to the stakes using wood screws to define the edges of the walkway or patio. If there are curves in the border of the patio or walkway you will need to kerf the strapping. This is accomplished by sawing part way through the wood against the grain about every ½- inch. This will allow you to bend the strapping to fit the desired curve. Alternately, there are now plastic forms available to define the edge of your bricks. These stay in the ground and act as a permanent lateral support for the bricks. 7. If you want to border the patio or walkway with solder bricks (bricks standing on end face to face) put them in place now along the edge of the strapping. 8. Fill the bed with about 1-1/2 inches of stone dust. Stone dust is an excellent underlayment to the bricks, as it will act almost as concrete once it has been wet and dried a few times. Be sure that you account for the depth of your bricks and only lay down enough stone dust to be sure that your bricks are level with the surrounding landscape. 9. Tamp the stone dust, and level it using a strip of wood while keeping it moist with water. Check it every few feet with a level to be sure that you maintain the appropriate curve to your patio. 10. Lay the brick over the stone dust, tamping each brick with a rubber mallet. Brick scars easily so do not use a regular hammer. You have a few alternatives to the pattern that you choose. The easiest and most versatile is the basket weave as it is attractive and easily rounds corners.
  • 4. 11. Once all of the brick is in place, spread another layer of stone dust over the brick and carefully sweep it into the cracks between the bricks and along the edge. 12. Spray water over the brick to secure them in the stone dust. The stone dust will harden much like concrete over time. 13. Leave the wooden strapping in place for at least a week to allow the walkway or patio time to settle. Carefully remove the strapping by pulling it straight out. Fill in the hole with topsoil and seed to replenish the grass next to the brick. SHOP LIST Materials List Bricks Wooden stakes - 2 feet long 1x3 wooden strapping Drywall screws Gravel Stone dust Tools List Shovel (flat edged shovel is best) Hand saw Broom Level Garden hose Tamper Rubber mallet Screw gun