SlideShare a Scribd company logo
1 of 24
Download to read offline
Repair manual 7612541 en
RRE140H
RRE140HC
RRE140HCC
RRE140HE
RRE140HEC
RRE140HECC
RRE160H
RRE160HC
RRE160HCC
RRE160HE
RRE160HEC
RRE160HECC
RRE160HR
RRE180H
RRE180HC
RRE180HCC
RRE180HE
RRE180HEC
RRE180HECC
RRE200H
RRE200HC
RRE200HCC
RRE200HE
RRE200HEC
RRE200HECC
RRE250H
RRE250HC
RRE250HCC
RRE250HE
RRE250HEC
RRE250HECC
List of models:
Model T-Code Valid from serial number
RRE140H 1018 6445237
RRE140HC 1018 6445237
RRE140HCC 1018 6445237
RRE140HE 1018 6445237
RRE140HEC 1018 6445237
RRE140HECC 1018 6445237
RRE160H 1018 6445237
RRE160HC 1018 6445237
RRE160HCC 1018 6445237
RRE160HE 1018 6445237
RRE160HEC 1018 6445237
RRE160HECC 1018 6445237
RRE160HR 1020 6445237
RRE180H 1019 6445237
RRE180HC 1019 6445237
RRE180HCC 1019 6445237
RRE180HE 1019 6445237
RRE180HEC 1019 6445237
RRE180HECC 1019 6445237
RRE200H 1019 6445237
RRE200HC 1019 6445237
RRE200HCC 1019 6445237
RRE200HE 1019 6445237
RRE200HEC 1019 6445237
RRE200HECC 1019 6445237
RRE250H 1019 6445237
RRE250HC 1019 6445237
RRE250HCC 1019 6445237
RRE250HE 1019 6445237
RRE250HEC 1019 6445237
RRE250HECC 1019 6445237
Translation of the original instruction
Table of contents
Repair manual 7612541 en
General introduction 1
General safety rules 2
Operating principle 3
Parameters 4
Installation 5
Maintenance 6
Troubleshooting 7
Chassis C0000 8
Motors C1000 9
Transmission/Drive gear C2000 10
Brake/wheel/track system C3000 11
Steering system C4000 12
Electrical system C5000 13
Hydraulics/Pneumatics C6000 14
Work function - lifting masts C7000 15
Auxiliary equipment, installation equipment C8000 16
Optional equipment/Extra equipment C9000 17
Instructions for disposal 18
Wiring diagram 19
Hydraulics schematics 20
Tools 21
Service data and grease specifications 22
Technical data 23
Index 24
General introduction 1
Repair manual 7612541-040
1.1 Warning levels and symbols .............................................................................................................................. 1 - 1
1.2 Pictograms......................................................................................................................................................... 1 - 1
1.3 Abbreviations ..................................................................................................................................................... 1 - 2
1 General introduction
Warning levels and symbols
1 - 1 Repair manual 7612541 en
1 General introduction
1
General introduction
1.1 Warning levels and symbols
1.1
Warning levels and symbols
The following warning levels and symbols are used in the repair manual:
DANGER
Indicates a dangerous situation that – if not avoided – will cause death or serious bodily injury.
WARNING
Indicates a dangerous situation that – if not avoided – could possibly cause death or serious bodily injury.
CAUTION
Indicates a dangerous situation that – if not avoided – will cause a slight or minor bodily injury.
NOTICE
Used in connection with actions that can cause material damage but not bodily injury.
Used to attract attention and to give information about various actions.
1.2 Pictograms
1.2
Pictograms
Symbol Procedure Symbol Procedure
Visual inspection of condition, wear and loose
connections.
Component replacement.
Cleaning Measurement
Checks for leaks.
Check that screws, nuts, etc. are tightened to
torque.
Listening for noise. Lubrication, application.
Check of functions. Calibration
Adjustment Welding
Disassembly/removal Assembly/installation
Open Close
Refilling Emptying
Update Charging
Lift Lower
An example of another type of pictogram is “Cut cable ties”:
1
1 General introduction
Abbreviations
Repair manual 7612541 en 1 - 2
Additional information under the pictogram can, for example, indicate the number of cable ties to be cut.
1.3 Abbreviations
1.3
Abbreviations
Abbrevi-
ation
Meaning Explanation
ACC Alternate Current Combi Motor control, hydraulics and drive.
ACH Alternate Current Hydraulic Motor control, hydraulics.
ACT Alternate Current Traction Motor control, drive.
BCU Onboard system
BDI Battery Discharge Indicator Unit indicating the state of battery charge.
CAN Controller Area Network A standardised interface that enable communication between different
electrical units.
CID Central Information Display Display with menu-based information system that is used as the
primary communication tool between operator and truck.
DX Duplex Mast with two sections.
EPS Electronic Power Steering Complete steering servo with its own motor control.
ESO Emergency Switch Off Emergency stop switch.
FCM Fuse Central Module Fuse panel.
FCU Fork Control Unit Unit for fork functions.
GFU General Function Unit Unit for general functions.
HPS Height Pre-Select Height pre-selection
ICH Integrated Control Handle
IPM Intelligent Power Module Power control unit
LID Load Information Display Display that provides the operator information such as lift height, load
weight and height preselection.
MCU Main Control Unit Main control unit.
PDA Personal Digital Assistant A compact, portable handheld computer.
PPS Personal Protection System Personal protection system.
PTC Positive Temperature Coefficient Electrical property that causes resistance to increase with temperature.
SCU Secondary Control Unit Secondary control unit
SEU Spider Expansion Unit
SF Shuttle Forks Telescoping fork unit.
TBD To Be Defined Means that the instruction/chapter will be supplemented at a later date.
TH Turret Head Turret head fork unit
I-Site T.W.I.S. – Toyota Wireless Inform-
ation System
TX Triplex Mast with three sections.
VNA Very Narrow Aisle Narrow aisles
VRE Very narrow aisle Rider Electric
General safety rules 2
Repair manual 7612541-040
2.1 Authorised personnel......................................................................................................................................... 2 - 1
2.2 Work safety........................................................................................................................................................ 2 - 1
2.3 Electrical system................................................................................................................................................ 2 - 2
2.3.1 Electrostatic risks................................................................................................................................. 2 - 2
2.3.2 Battery handling................................................................................................................................... 2 - 2
2.4 Safe lifting .......................................................................................................................................................... 2 - 3
2.5 Product modification .......................................................................................................................................... 2 - 4
2.6 Software............................................................................................................................................................. 2 - 4
2.7 Hydraulic system................................................................................................................................................ 2 - 4
2 General safety rules
Authorised personnel
2 - 1 Repair manual 7612541 en
2 General safety rules
2
General safety rules
2.1 Authorised personnel
2.1
Authorised personnel
Only personnel trained in servicing and repair of this type of product are authorised to carry out service and repair activit-
ies.
2.2 Work safety
2.2
Work safety
For safe work, always remember:
▷ Always disconnect the battery when carrying out maintenance or repair work, unless otherwise stated in this re-
pair manual.
▷ always disconnect the battery when performing welding work.
▷ Make sure that the place where service work is performed is a safe place. Follow the regulations.
▷ Keep the maintenance work site clean. Oil and water on the floor will make it slippery.
▷ Use the correct working posture. Service work often involves sitting on your knees or bending over forwards. Try
sitting on a toolbox, for example, to relieve the strain on your knees and back.
▷ Loose items and jewellery can get caught in moving parts. So never wear loose articles or jewellery when per-
forming maintenance or repairs.
▷ Exercise caution and always follow applicable local regulations when working at high heights.
▷ Use the correct tools for the work you are carrying out.
▷ Keep all tools well maintained.
▷ Make sure that all safety equipment including guards and covers are properly secured and that they work as in-
tended before starting the repair work. If a guard or cover must be removed in order to perform the repair work,
extra care must be taken, and when the repair work is finished the guard or cover must be refitted.
▷ Use paper or a stiff piece of cardboard when checking for possible oil leaks. Do not use your hands.
▷ The drive unit oil may be hot.
▷ Use only new and clean oil for the drive gear.
▷ Store and transport changed oil according to applicable local directions.
▷ Do not flush solvents, etc. down the drain unless they are intended to be disposed of in this way. Follow local dis-
posal regulations.
▷ Prior to welding or grinding on painted surfaces, be sure to remove the paint at least 100 mm around the welding/
grinding area by using sandblasting equipment or paint remover.
▷ To maintain a high level of product safety and to minimise downtime, all current maintenance instructions must
be carried out.
▷ Always keep fire-fighting equipment close at hand, and do not use an open fire to check fluid levels or when
searching for leaks
2
2 General safety rules
Electrical system
Repair manual 7612541 en 2 - 2
2.3 Electrical system
2.3
Electrical system
When working on the electric system, keep the following in mind:
WARNING Short-circuiting/Burn injuries
Loose items and jewellery can get caught in moving parts. So never wear loose articles or jewellery when performing
maintenance or repairs.
► Remove any jewellery and loose items before starting work.
▷ Always use insulated tools when working on the electrical system.
▷ Always disconnect the battery before opening any covers to drive units or the electrical system.
▷ Always disconnect the battery prior to welding work using an electric welding unit. The welding current may dam-
age the battery.
▷ Never remove the warranty seals on the electronic cards.
2.3.1 Electrostatic risks
2.3.1
Electrostatic risks
Purpose
These work instructions describe how to work in a safe manner with components that are sensitive to electrostatic
chocks.
Scope
These work instructions apply to all that work with component or units that are sensitive to electrostatic chocks.
Procedure
Electrostatic discharges from people may destroy sensitive equipment. For this reason, one must follow the instructions
for packaging and earthing. Always pay attention to these precautionary instructions.
Electronic card are supplied in electrostatically protected packages or envelopes.
These packages carry the following symbol:
▷ Leave electrostatically sensitive equipment in their respective packaging until you can place them on an electro-
statically protected work area.
▷ Electrostatically sensitive equipment should only be handled when they are properly earthed.
▷ Use electrostatically protected footwear!
▷ Store electrostatically sensitive equipment in their protective packaging or on electrostatically protected surfaces.
▷ Use an antistatic surface: Anti-static carpet 148115, page 21 - 4.
2.3.2 Battery handling
2.3.2
Battery handling
When working on the battery, keep the following in mind:
▷ Working with and charging batteries should always be performed in accordance with the safety instructions
provided by the battery manufacturer.
▷ Always use safety equipment to protect the eyes, face and skin while checking or handling batteries.
2 General safety rules
Safe lifting
2 - 3 Repair manual 7612541 en
▷ Do not place any electrically conductive items on the battery terminals or their connections.
▷ Ensure there is a shower and an eye bath nearby in case an accident happens.
▷ Batteries generate explosive gases. Never use an open flame or other sources of ignition in close vicinity to a
battery.
▷ Do not place tools or other metal objects on the battery. This can cause a short-circuit and even an explosion.
▷ The battery must be used according to the battery manufacturer's instructions regarding ambient and working
temperatures. Otherwise there is a large risk that the battery is damaged and that it will soon have to be re-
placed.
▷ Spilled electrolyte must be neutralised at once using a lot of water.
NOTICE Changing to the correct battery type
Only change to a battery that meets the data given on the product identification plate. The weight of the battery affects
the stability and braking capacity of the truck. Information on the minimum permitted battery weight is on the product
identification plate.
WARNING Risk of centre of gravity shifting
A battery weight that is too low gives impaired stability and braking capacity.
► The battery weight must be in accordance with the data on the truck’s identification plate.
WARNING Battery acid may cause burns
Battery acid may cause burns.
► If battery acid gets onto your skin or clothes, flush immediately with cold water.
► If you get battery acid in the face or in the eyes, immediately flush the area with cold water and seek medical as-
sistance.
2.4 Safe lifting
2.4
Safe lifting
When lifting the product, remember that:
▷ All lifting must be carried out on a level, non-slip and stable surface. Asphalt surfaces should be avoided if pos-
sible.
▷ To prevent the product moving while it is being lifted, it must not be lifted with anyone on the platform or with the
tiller arm in the lowered position.
▷ If the drive wheel which is braked, is being lifted, the other wheels must be blocked to stop the product from mov-
ing.
▷ Select the lifting point so that the lift is as light as possible, for example one corner at a time. If there are lifting
points indicated on the lower part of the chassis, these must be used to ensure balanced lifting.
▷ Make sure the surface where the jack is placed is clean and free of oil and grease.
▷ Make sure your hands and the jack lever are free of grease and oil.
▷ Only use the lever supplied with the jack. If the lever is too short, more exertion than is necessary will be re-
quired. If the lever is too long, there is a risk that the jack will be overloaded.
▷ Never work under a product that is not supported by trestles and secured by a lifting device.
▷ Never work under a raised product without it being properly supported on trestles.
▷ Never support the jack on trestles to achieve a higher lift.
Put trestles:
2
2 General safety rules
Product modification
Repair manual 7612541 en 2 - 4
▷ as close to the lifted part of the chassis as possible in order to reduce the falling height if the product should col-
lapse.
▷ so that no wheels may turn causing the product to move.
2.5 Product modification
2.5
Product modification
Any modification of the product must be approved beforehand. No modification of product may be performed that may in-
fluence the capacity, stability and safety of the product without prior written approval from the manufacturer, its repres-
entative or successor.
In the case of the manufacturer no longer being in business and there being no successor, the user of the product may
arrange for modifications on the precondition that the user:
▷ makes sure that an engineer with expert knowledge of the product type and its safety designs, tests and imple-
ments the modification,
▷ files all documentation of the design, tests and implementation of the modification,
▷ approves and makes the applicable changes to the capacity plate, adhesive labels, markings and operator’s
manual,
▷ affixes a permanent and well visible sign to the product stating how the product has been modified, together with
the date of the modification and the name and address of the company that carried out the modification work.
2.6 Software
2.6
Software
Erroneous handling of the product systems and/or the external systems of the product may affect the safety of the
product and the environment.
1. Always make sure that the correct software is downloaded to the product.
2. In case of parameter adjustments, the recommended values must be respected.
3. Only adjust one parameter at the time when performing changes to the truck. Check the function after each ad-
justment.
4. Change the parameters in small increments.
2.7 Hydraulic system
2.7
Hydraulic system
When working on the hydraulic system, keep the following in mind:
▷ Lower the forks completely and keep pressing the button for another 5 - 10 seconds to relieve system pressure.
▷ The hydraulic oil may be hot.
▷ Only fill the hydraulic system with new and clean oil.
3 Operating principle
Repair manual 7612541-040
3 Operating principle
Description
3 - 1 Repair manual 7612541 en
3 Operating principle
3
Operating principle
3.1 Description
3.1
Description
The Operating principle section provides a general description on how the AutoShuttle functions work and how they are
interdependent.
Because the control structure of the product is so complex, it is not possible to describe all combinations. Similarly, it is
not possible to describe all influencing factors. Only a selection of such factors are indicated. A good aid is found in the
descriptive sections of the repair manual and in the parameter descriptions in particular.
3
4 Parameters
Parameter list
4 - 1 Repair manual 7612541 en
4 Parameters
4
Parameters
4.1 Parameter list
4.1
Parameter list
Software: 7584588
4.1.1 Operator parameters
4.1.1.1 Log-in profiles
The operator parameters can be adjusted individually to the available log-in profiles. The parameter’s connection to the
operator is done by a combination of operator and parameter numbers where the single digit always corresponds to the
parameter.
Operator profile Parameter range
1 1-10
2 11-20
3 21-30
4 31-40
5 41-50
6 51-60
7 61-70
8 71-80
9 81-90
10 91-100
Tab. 1: Connection to logged-in operator
4.1.1.2 Control units
The steering angle sensitivity can be individually adjusted between 1 and 10 for driving at low and high speeds. 1 gives
the lowest speed of steering movement in relation to the steering wheel movement, and 10 offers the highest speed.
If the steering feels too sluggish or unresponsive in any of the low or high speed ranges, the corresponding value is
changed upwards or downwards through the setup screen for driver parameter 1.
No. Designation Min Std. Max Step Unit
1 Steering sensitivity (high speed) 6 15 20 1
The number of turns of the steering wheel that represents one turn of the drive wheel.
In increments of 1
No. Designation Min Std. Max Step Unit
1 Steering sensitivity (low speed) 5 8 20 1
The number of turns of the steering wheel that represents one turn of the drive wheel.
In increments of 1
No. Designation Min Std. Max Step Unit
1 The steering's progressivity 1541 3848 5140 1
The parameter shown via TruckCom is a combination of the sensitivity values low speed and for high speed.
Total value for low and high speed.
The parameter value can be calculated as (high * 256 + low), where low = steering ratio at low speed and high = steering
ratio at high speed. For example low = 8 and high = 15 gives a parameter value of (15 * 256 + 8) = 3848.
4.1.1.3 Maximum travel speed
These two parameters are used to limit the maximum travel speed for the logged-in operator profile.
4
4 Parameters
Parameter list
Repair manual 7612541 en 4 - 2
For parameters 2 and 3, 100% corresponds to travel speed. The maximum speed varies depending on the truck type.
Example:
If operator profile ‘1’ has parameter ‘2’ set to 80 %, operator profile‘2’ has their corresponding parameter ‘12’ set to 70 %,
the maximum travel speed is limited to:
• 8.8 km/h for operator profile '1'
• 7.7 km/h for operator profile '2'
The maximum travel speed can also be limited by the service parameters and it is always the lowest speed for a para-
meter that is the limiting one.
No. Designation Min Std. Max Step Unit
2 Maximum speed, drive wheel direction 1 10 10 1 10%
The parameter is used to limit the maximum travel speed for the operator profile that is logged on.
No. Designation Min Std. Max Step Unit
3 Maximum speed, fork direction 1 10 10 1 10%
The parameter is used to limit the maximum travel speed for the operator profile that is logged on.
4.1.1.4 Acceleration/Deceleration
These two parameters can be used to get a smoother acceleration/deceleration where the application or operator profile
so requires.
No. Designation Min Std. Max Step Unit
4 Acceleration 3 8 10 1 10%
The parameter can be used to get a smoother acceleration where the application or operator profile so requires.
No. Designation Min Std. Max Step Unit
5 Automatic braking at reduction of speed control 0 8 10 1 10%
The parameter can be used to get a smoother deceleration where the application or operator profile so requires.
4.1.1.5 Cab tilt
This parameter is for setting the fork height above the floor level when the operator wants the cab (E-model) to start tilt-
ing upwards.
To activate the function, see parameter 1104 and for downward tilting see parameter 355.
To turn off the cab tilt display on the CID, see parameter 514
No. Designation Min Std. Max Step Unit
6 Fork height when the Ergo cab begins to tilt upwards 500 2000 13000 100 mm
Applies to the Ergo variant only, parameter 1104 set to 1.
4.1.2 Service parameters
4.1.2.1 General
Before any service parameter can be changed, the CAN service key must be connected to the contact [X41].
Changing specific truck parameters changes the truck's driving properties. Do not change any parameter values without
the necessary know-how.
4 Parameters
Parameter list
4 - 3 Repair manual 7612541 en
No. Designation Min Std. Max Step Unit
101 Service intervals 0 0 5000 1 h
Use this parameter to determine the service interval of the truck. The buzzer sounds and a spanner is shown on the CID
when the service counter is at zero. The counter shows the time that has passed since the last service intervention. If an
earlier service intervention is required, simply activate this parameter without adjusting the time. If the value is set to '0',
then no service interval is set and the CID's hour meter screen does not show the 'S' field – Remaining time to service.
No. Designation Min Std. Max Step Unit
104 Time to automatic logout 0 20 120 1 min.
The parameter gives the time, in minutes, before automatic logout if the truck is inactive. If the value is set as ‘0’, logout
takes place after 4 hours.
No. Designation Min Std. Max Step Unit
116 Drive function with open door (cold-store cab) 0 1 1 1
Specifies the driving function when the door on the cold storage truck is open.
Value Drive function
0 Driving not possible
1 Driving limited to creep speed (2.5 km/h as default)
Parameter 1105 activates the function.
Parameter 202 manages the set speed for creep speed.
4.1.2.1.1 Travel alarms 1 and 2
There are two dedicated outputs for travel alarm on the MCU. One has by default been assigned to the buzzer and one
to the warning lamp. Both can be configured regarding frequency and activation pattern.
The "travel alarm 1" function is activated by parameter 1108 and the "travel alarm 2" function is activated by parameter
1112.
No. Designation Min Std. Max Step Unit
105 Travel alarm frequency 0 0 2 1
Parameter 105 controls the travel alarm frequency on output X131:23.
The activation pattern for output X131:23 is set via parameter 114.
The travel alarm function is activated by factory parameter 1108.
Value Type
0 Constant
1 Flashing 1 Hz
2 Flashing 2 Hz
No. Designation Min Std. Max Step Unit
106 Warning lamp frequency 0 0 2 1
Parameter 106 controls the warning lamp frequency [P5] on output X131:34.
The activation pattern for output X131:34 is set via parameter 115.
The warning lamp function is activated by factory parameter 1112.
Value Type
0 Constant
1 Flashing 1 Hz
4
4 Parameters
Parameter list
Repair manual 7612541 en 4 - 4
Value Type
2 Flashing 2 Hz
No. Designation Min Std. Max Step Unit
114 Travel alarm activation pattern [P4] 0 0 255 1
The parameter specifies the activation pattern for the travel alarm, output X131:23
The activation pattern is activated as indicated in the table below.
Function that activates the travel alarm Value
Driving in the drive wheel direction 1
Driving in fork direction 2
Fork lifting 4
Fork lowering 8
Cab tilt 16
Reach 32
Aux (Hydraulics) 64
Truck started up 128
The frequency for output X131:23 is set via parameter 105.
The travel alarm function is activated by factory parameter 1108.
No. Designation Min Std. Max Step Unit
115 Activation pattern for warning lamp [P5] 0 0 255 1
The parameter specifies the activation pattern for the warning lamp [P5], output X131:34.
The activation pattern is activated as indicated in the table below.
Function that activates the travel alarm Value
Driving in the drive wheel direction 1
Driving in fork direction 2
Fork lifting 4
Fork lowering 8
Cab tilt 16
Reach 32
Aux (Hydraulics) 64
Truck started up 128
The frequency for output X131:34 is set via parameter 106.
The travel alarm function is activated by factory parameter 1112.
No. Designation Min Std. Max Step Unit
117 Collision sensor's alarm 0 0 1 1 -
The parameter specifies how the alarm is given when the collision sensor is activated.
Value Type
0 Repeated tone pulses
1 One tone pulse
For setting the collision sensor’s sensitivity, see parameters 110 and 111.
4 Parameters
Parameter list
4 - 5 Repair manual 7612541 en
No. Designation Min Std. Max Step Unit
118 Warning buzzer during lifting platform use (MEWP, special op-
tion)
0 0 1 1
Parameter settings:
Value Function
0 Non-active
1 Active
The function is activated using parameter 1121 (Special option).
4.1.2.1.2 Battery
No. Designation Min Std. Max Step Unit
107 Battery size 1 9 20 1
Parameter 107 specifies the capacity of the battery on the truck. The parameter can also be used to compensate for dif-
ferent ways of driving by: • increasing the value to discharge the battery even more • reducing the value if the battery is
discharged too much. For recommended parameter settings, see the table below.
Value: RRE140-160 Battery
10 930 Ah
11 775 Ah
13 620 Ah
16 465 Ah
Tab. 2: RRE 140-160
Value: RRE180-250 Battery
9 930 Ah
11 775 Ah
14 620 Ah
Tab. 3: RRE 180-250
It is necessary to specify the type of battery the truck is equipped with. In order to set the meter for the battery’s level of
discharge, the following should be taken into account: • Acid density when the battery is fully charged, to check the qual-
ity of battery. This value should be in the range 1.27-1.29. Please note that the acid density may vary between different
battery brands. • When the lifting capability is reduced (the battery discharged to 80%) the value should be close to 1.14
but not lower.
Freely ventilated batteries
See the table for recommended parameter settings for free ventilated batteries.
DANGER! Battery service life will be reduced if the value of parameter 107 is set too high. The standard setting of para-
meter 107 is set for normal truck handling. Other applications may require a different setting of parameter 107. Check
that the parameter setting is the correct one using the instructions below.
Verifying the parameter setting for freely ventilated batteries:
1. Charge the battery. 2. Operate the truck in its normal application until the battery indicator indicates a discharged bat-
tery (0% in the display). 3. Disconnect the battery from the truck and allow it to rest for at least two hours. Note: Do not
allow any charging or discharging during this time. 4. Measure the acid weight of the battery at room temperature. If the
acid weight is less than 1.15 g/cm3, the parameter value must be reduced. If the value significantly exceeds 1.15 g/cm3,
the risk of damage to the battery is reduced. At the same time, however, the operating time of the truck decreases. If ex-
tended operating time is desired, then increase the parameter value, but maximum by one unit. Note: Each change
should be followed up by a new verification of the parameter setting.
Parameter settings for valve-regulated batteries (VRLA)
4
4 Parameters
Parameter list
Repair manual 7612541 en 4 - 6
When setting parameter 107 in a truck with Reflex truck with Hawker Evolution batteries, BT recommends reducing the
recommended value for wet batteries by six (6) units. DANGER! Battery service life will be reduced if the value of para-
meter 107 is set too high. The standard setting of parameter 107 is set for normal truck handling. Other applications may
require a different setting of parameter 107. Check that the parameter setting is the correct one using the instructions be-
low. When checking the charging state on a discharged 48 V battery, its no-load voltage should be measured after a rest
period. The zero indication should appear at an open circuit voltage that must not fall below 2.02 V/cell or 48.48 V. See
the instructions below. Instructions for verifying parameter setting 1. Charge the battery. 2. Use the truck in its normal ap-
plication until the battery indicator shows a discharged battery (0% on the display). 3. Disconnect the battery from the
truck and allow it to rest for at least two hours. Note: Do not allow any charging or discharging during this time. 4. Meas-
ure the voltage on the battery at +20°C. If the voltage is less than Uend, (see the table below), the parameter value must
be reduced. If the value exceeds Uend considerably, the risk of causing damage to the battery is reduced. At the same
time, the operating time of the truck is reduced. If a longer operating time is required, the parameter value can be slightly
increased. 5. Each change should be followed up by a new verification of the parameter setting. Battery type Battery
voltage at rest, Uend Hawker Evolution 48.48 V
No. Designation Min Std. Max Step Unit
108 Battery level when acceleration and lift speed are limited 0 5 20 5 %
Parameter 108 is used to state the level of the battery's remaining capacity according to the CID battery charge symbol
when the acceleration and lift speed are limited to 70% of their maximum. A further, not parameter-controlled, limitation
occurs when the CID battery charge symbol shows 0 %. In this case, the following are limited: • Acceleration – 30% of
maximum performance • Lifting – 50% of maximum performance
4.1.2.1.3 Shock sensor
Be sure to set the parameters for collision sensitivity upon installation of the truck.
If shock sensor sensor is installed on the CAN bus, this registers when the truck bumps against something. If a collision
exceeds a certain force, set by parameters 110 and 111, it is interpreted as a collision, and the truck speed is reduced to
creep speed, a signal is heard and error code 2:106 is displayed. For setting how the alarm is to be given when the
shock sensor is activated, see parameter 117.
Information about the collision is stored in the truck's internal memory. The last ten registered collisions can be displayed
together with operator identity via the PIN code. Additional information is available via TruckCom where collision levels
and time indications can also be read.
No. Designation Min Std. Max Step Unit
109 Resetting procedure for logged data 0 0 4 1
The parameter indicates whether saved data from the collision sensor should be deleted upon login or not, and whether
to reset the BDI counter.
Value Function
0 Delete nothing
1 Delete histogram log
2 Clear collision log
3 Not used
4 Reset BDI
No. Designation Min Std. Max Step Unit
110 Shock sensor sensitivity along the X-axis (forward/reverse) 0 0 100 1 -
The parameter specifies at which level along the X-axis (fork/drive wheel direction) truck functions should be blocked
when there is a collision.
No. Designation Min Std. Max Step Unit
111 Shock sensor sensitivity along the Y-axis (right/left) 0 0 100 1 -
4 Parameters
Parameter list
4 - 7 Repair manual 7612541 en
The parameter specifies at which level along the Y-axis (sideways truck functions should be blocked when there is a col-
lision.
No. Designation Min Std. Max Step Unit
112 Resetting procedure after collision 0 0 1 1 -
The parameter specifies the condition for how the truck is to be taken into operation again after the impact sensors have
been triggered:
Value Function
0 Login with a special PIN code is required
1 The truck must be restarted
The PIN code required to reset the shock sensor is entered in the login profile Block:10, Profile:1
4.1.2.1.4 Generic outputs
No. Designation Min Std. Max Step Unit
120 Frequency for extra output 1 (Default = not used) 0 0 2 1
Parameter 120 controls the frequency on output X133:8.
The activation pattern for output X133:8 is set via parameter 122.
The function for the output is activated via factory parameter ????.
Value Type
0 Constant
1 Flashing 1 Hz
2 Flashing 2 Hz
No. Designation Min Std. Max Step Unit
121 Frequency for extra output 2 (Default = not used) 0 0 2 1
Parameter 121 controls the frequency on output X133:23.
The activation pattern for output X133:23 is set via parameter 123.
The function for the output is activated via factory parameter ????.
Value Type
0 Constant
1 Flashing 1 Hz
2 Flashing 2 Hz
No. Designation Min Std. Max Step Unit
122 Activation pattern for extra output 1 (Default = not used) 0 0 255 1
The parameter specifies the activation pattern for extra output X133:8.
4
Thank you very much for
your reading. Please Click
Here. Then Get COMPLETE
MANUAL. NO WAITING
NOTE:
If there is no response to
click on the link above,
please download the PDF
document first and then
click on it.
4 Parameters
Parameter list
Repair manual 7612541 en 4 - 8
The activation pattern is activated as indicated in the table below.
Function that activates the travel alarm Value
Driving in the drive wheel direction 1
Driving in fork direction 2
Fork lifting 4
Fork lowering 8
Cab tilt 16
Reach 32
Aux (Hydraulics) 64
Truck started up 128
The frequency for output X133:8 is set via parameter 120.
The function is activated with factory parameter ????.
No. Designation Min Std. Max Step Unit
123 Activation pattern for extra output 2 (Default = not used) 0 0 255 1
The parameter specifies the activation pattern for extra output X133:23.
The activation pattern is activated as indicated in the table below.
Function that activates the travel alarm Value
Driving in the drive wheel direction 1
Driving in fork direction 2
Fork lifting 4
Fork lowering 8
Cab tilt 16
Reach 32
Aux (Hydraulics) 64
Truck started up 128
The frequency for output X133:23 is set via parameter 121.
The function is activated with factory parameter ????.
4.1.2.2 Driving
4.1.2.2.1 General
No. Designation Min Std. Max Step Unit
201 Braking force when reversing the travel direction 0 90 100 10 %
The parameter can be used to produce a smoother deceleration when the application requires this for all operator pro-
files.
No. Designation Min Std. Max Step Unit
205 Speed reduction via external function-related sensors (Default =
not used)
0 100 100 10 %
Two inputs on the SCU, X133:31 and X133:4, are used to reduce the travel speed. If one or both of the inputs is actuated
by a high signal from external sensors, speed is reduced according to this parameters.
4 Parameters
Parameter list
4 - 9 Repair manual 7612541 en
No. Designation Min Std. Max Step Unit
208 Creep speed function in travel direction control 0 1 1 1 -
The parameter manages the creep speed function in the travel direction control. The function can be configured via para-
meter 242.
Value Function
0 Inactivated
1 Activated
No. Designation Min Std. Max Step Unit
213 Setting the truck’s maximum travel speed 0 140 140 5 0.1 km/
h
The parameter can be used to permanently reduce the truck’s maximum travel speed. This setting will apply to all oper-
ator profiles.
No. Designation Min Std. Max Step Unit
214 Adjusting the travel speed in the main lift range 15 40 80 5 0.1 km/
h
The parameter is used to adjusted the reduced travel speed, Min 1.5 km/h Max 8 km/h, when the forks are in the main lift
area. This parameter is only valid when the truck is equipped with height indication. If the truck does not have height in-
dication, the speed is always reduced to 4 km/h when the forks are in the main lift area.
This parameter is only relevant if parameter 1118 is set to 0.
No. Designation Min Std. Max Step Unit
242 Configuration of function in travel direction selector 0 0 2 1
This parameter is used to set which double-click function is available via the travel direction selector.
Parameter value Function
0 Inactivated
1 Click to creep mode
2 Click to steer straight
4.1.2.2.1.1 Adjusting error-dependant maximum travel speeds
These parameters are used to reduce the speeds which are normally set as maximum travel speeds in connection with
warnings or faults.
No. Designation Min Std. Max Step Unit
202 Adjusting the creep speed max. 2.5 km/h 30 100 100 10 %
The parameter can be used to adjust the creep speed. Can only be lowered.
No. Designation Min Std. Max Step Unit
203 Adjusting the half-speed max. 4 km/h 30 100 100 10 %
The parameter is used to specify the maximum speed for half-speed, max. 4 km/h. Can only be lowered.
No. Designation Min Std. Max Step Unit
204 Adjusting the safety speed, max. 1.3 km/h 30 100 100 10 %
The parameter is used to specify the maximum speed for safety speed, max. 1.3 km/h. Can only be lowered.
4
4 Parameters
Parameter list
Repair manual 7612541 en 4 - 10
4.1.2.2.1.2 Reduced maximum travel speed over a certain lifting height and reach length
With the parameter pair 209/210, it is possible to activate and adjust a speed limitation when the forks are raised above a
certain height.
With the parameter pair 211/212, it is possible to activate and adjust a speed limitation when the reach carriage is exten-
ded beyond a certain length.
No. Designation Min Std. Max Step Unit
209 Lift height where the travel speed is limited 0 0 15000 100 mm
The parameter specifies the lift height at which speed reduction is activated.
Speed reduction is controlled by parameter 210.
No. Designation Min Std. Max Step Unit
210 Setting travel speed reduction above a certain lift height 0 140 140 5 0.1 km/
h
The parameter indicates the travel speed to be applied when the forks are over a specified height.
The lift height at which speed reduction is activated is controlled by parameter 209.
No. Designation Min Std. Max Step Unit
211 Reach carriage position when travel speed is limited 0 0 840 10 mm
The parameter indicates at which length of the reach movement speed reduction is activated.
Speed reduction is controlled by parameter 212.
No. Designation Min Std. Max Step Unit
212 Setting travel speed reduction above a certain reach length 0 140 140 5 0.1 km/
h
The parameter indicates the travel speed to be applied when the reach carriage is extended beyond a specified length.
The reach movement length at which speed reduction is activated is controlled by parameter 211.
4.1.2.2.1.3 Fork laser
Factory parameter 1132 is set to activate the fork laser.
The fork laser is activated over the lift height (parameter 217) and when the forks are horizontal (parameter 218).
No. Designation Min Std. Max Step Unit
217 Lift height at which the fork laser is activated 0 2300 15000 100 mm
The parameter indicates the lift height at which the fork laser should come on.
The function is activated with factory parameter 1132, page 4 - 000.
No. Designation Min Std. Max Step Unit
218 Adjustment of permitted degree of deviation from 0° (tilt) at
which the laser is activated
0 10 100 1 0.1°
This parameter handles the specified degree of deviation from 0° tilt at which the fork laser will be activated. The default
value is 10, which means that the fork laser is activated at 1° down and 1° up.
4.1.2.2.1.4 Blue/red warning lamp
Factory parameter 1131 is set to activate the warning lamp.
Control of the warning lamp in the drive wheel direction (parameters 219-222) and the warning lamp in the fork direction
(parameters 224-227).

More Related Content

More from fjjsekkmdmes

Toyota bt reflex rre160 he high performance reach truck service repair manual
Toyota bt reflex rre160 he high performance reach truck service repair manualToyota bt reflex rre160 he high performance reach truck service repair manual
Toyota bt reflex rre160 he high performance reach truck service repair manualfjjsekkmdmes
 
Toyota bt reflex rre160 hcc high performance reach truck service repair manual
Toyota bt reflex rre160 hcc high performance reach truck service repair manualToyota bt reflex rre160 hcc high performance reach truck service repair manual
Toyota bt reflex rre160 hcc high performance reach truck service repair manualfjjsekkmdmes
 
Massey ferguson mf7726 tractor (dyna vt) (f026053 9999999) or (m7726 efn9s100...
Massey ferguson mf7726 tractor (dyna vt) (f026053 9999999) or (m7726 efn9s100...Massey ferguson mf7726 tractor (dyna vt) (f026053 9999999) or (m7726 efn9s100...
Massey ferguson mf7726 tractor (dyna vt) (f026053 9999999) or (m7726 efn9s100...fjjsekkmdmes
 
Massey ferguson mf7722 s tractor (dyna vt) (f110014 9999999) or (m7722pfn9s...
Massey ferguson mf7722 s tractor (dyna vt) (f110014   9999999) or (m7722pfn9s...Massey ferguson mf7722 s tractor (dyna vt) (f110014   9999999) or (m7722pfn9s...
Massey ferguson mf7722 s tractor (dyna vt) (f110014 9999999) or (m7722pfn9s...fjjsekkmdmes
 
Massey ferguson mf7722 tractor (dyna vt) (f110014 9999999) or (m7722 pfn9s1...
Massey ferguson mf7722 tractor (dyna vt) (f110014   9999999) or (m7722 pfn9s1...Massey ferguson mf7722 tractor (dyna vt) (f110014   9999999) or (m7722 pfn9s1...
Massey ferguson mf7722 tractor (dyna vt) (f110014 9999999) or (m7722 pfn9s1...fjjsekkmdmes
 
Massey ferguson mf7720 s tractor (dyna vt) (f097008 9999999) or (m7720pfn9s10...
Massey ferguson mf7720 s tractor (dyna vt) (f097008 9999999) or (m7720pfn9s10...Massey ferguson mf7720 s tractor (dyna vt) (f097008 9999999) or (m7720pfn9s10...
Massey ferguson mf7720 s tractor (dyna vt) (f097008 9999999) or (m7720pfn9s10...fjjsekkmdmes
 
Massey ferguson mf7720 tractor (dyna vt) (f097008 9999999) or (m7720 pfn9s100...
Massey ferguson mf7720 tractor (dyna vt) (f097008 9999999) or (m7720 pfn9s100...Massey ferguson mf7720 tractor (dyna vt) (f097008 9999999) or (m7720 pfn9s100...
Massey ferguson mf7720 tractor (dyna vt) (f097008 9999999) or (m7720 pfn9s100...fjjsekkmdmes
 
Massey ferguson mf7719 tractor (dyna vt) (f126022 999999) or (m7719 pfn9s10...
Massey ferguson mf7719 tractor (dyna vt) (f126022   999999) or (m7719 pfn9s10...Massey ferguson mf7719 tractor (dyna vt) (f126022   999999) or (m7719 pfn9s10...
Massey ferguson mf7719 tractor (dyna vt) (f126022 999999) or (m7719 pfn9s10...fjjsekkmdmes
 
Massey ferguson mf7622 tractor (dyna 6) (b328047 f302042) parts catalogue m...
Massey ferguson mf7622 tractor (dyna 6) (b328047   f302042) parts catalogue m...Massey ferguson mf7622 tractor (dyna 6) (b328047   f302042) parts catalogue m...
Massey ferguson mf7622 tractor (dyna 6) (b328047 f302042) parts catalogue m...fjjsekkmdmes
 
Massey ferguson mf7616 tractor (dyna 6) parts catalogue manual
Massey ferguson mf7616 tractor (dyna 6) parts catalogue manualMassey ferguson mf7616 tractor (dyna 6) parts catalogue manual
Massey ferguson mf7616 tractor (dyna 6) parts catalogue manualfjjsekkmdmes
 
Massey ferguson mf7615 tractor (dyna 4) parts catalogue manual
Massey ferguson mf7615 tractor (dyna 4) parts catalogue manualMassey ferguson mf7615 tractor (dyna 4) parts catalogue manual
Massey ferguson mf7615 tractor (dyna 4) parts catalogue manualfjjsekkmdmes
 
Massey ferguson mf7614 tractor (dyna 4) parts catalogue manual
Massey ferguson mf7614 tractor (dyna 4) parts catalogue manualMassey ferguson mf7614 tractor (dyna 4) parts catalogue manual
Massey ferguson mf7614 tractor (dyna 4) parts catalogue manualfjjsekkmdmes
 
Massey ferguson mf7499 tractor (tier 3) parts catalogue manual
Massey ferguson mf7499 tractor (tier 3) parts catalogue manualMassey ferguson mf7499 tractor (tier 3) parts catalogue manual
Massey ferguson mf7499 tractor (tier 3) parts catalogue manualfjjsekkmdmes
 
Massey ferguson mf7497 tractor (tier 3) parts catalogue manual
Massey ferguson mf7497 tractor (tier 3) parts catalogue manualMassey ferguson mf7497 tractor (tier 3) parts catalogue manual
Massey ferguson mf7497 tractor (tier 3) parts catalogue manualfjjsekkmdmes
 
Massey ferguson mf7495 tractor parts catalogue manual
Massey ferguson mf7495 tractor parts catalogue manualMassey ferguson mf7495 tractor parts catalogue manual
Massey ferguson mf7495 tractor parts catalogue manualfjjsekkmdmes
 
Kobelco sk20 sr hydraulic excavator service repair manual
Kobelco sk20 sr hydraulic excavator service repair manualKobelco sk20 sr hydraulic excavator service repair manual
Kobelco sk20 sr hydraulic excavator service repair manualfjjsekkmdmes
 
Kobelco sk15 sr hydraulic excavator service repair manual
Kobelco sk15 sr hydraulic excavator service repair manualKobelco sk15 sr hydraulic excavator service repair manual
Kobelco sk15 sr hydraulic excavator service repair manualfjjsekkmdmes
 
Caterpillar cat m322 c wheeled excavator (prefix bdk) service repair manual (...
Caterpillar cat m322 c wheeled excavator (prefix bdk) service repair manual (...Caterpillar cat m322 c wheeled excavator (prefix bdk) service repair manual (...
Caterpillar cat m322 c wheeled excavator (prefix bdk) service repair manual (...fjjsekkmdmes
 
Caterpillar cat m318 f wheeled excavator (prefix f8b) service repair manual (...
Caterpillar cat m318 f wheeled excavator (prefix f8b) service repair manual (...Caterpillar cat m318 f wheeled excavator (prefix f8b) service repair manual (...
Caterpillar cat m318 f wheeled excavator (prefix f8b) service repair manual (...fjjsekkmdmes
 

More from fjjsekkmdmes (20)

Toyota bt reflex rre160 he high performance reach truck service repair manual
Toyota bt reflex rre160 he high performance reach truck service repair manualToyota bt reflex rre160 he high performance reach truck service repair manual
Toyota bt reflex rre160 he high performance reach truck service repair manual
 
Toyota bt reflex rre160 hcc high performance reach truck service repair manual
Toyota bt reflex rre160 hcc high performance reach truck service repair manualToyota bt reflex rre160 hcc high performance reach truck service repair manual
Toyota bt reflex rre160 hcc high performance reach truck service repair manual
 
Massey ferguson mf7726 tractor (dyna vt) (f026053 9999999) or (m7726 efn9s100...
Massey ferguson mf7726 tractor (dyna vt) (f026053 9999999) or (m7726 efn9s100...Massey ferguson mf7726 tractor (dyna vt) (f026053 9999999) or (m7726 efn9s100...
Massey ferguson mf7726 tractor (dyna vt) (f026053 9999999) or (m7726 efn9s100...
 
Massey ferguson mf7722 s tractor (dyna vt) (f110014 9999999) or (m7722pfn9s...
Massey ferguson mf7722 s tractor (dyna vt) (f110014   9999999) or (m7722pfn9s...Massey ferguson mf7722 s tractor (dyna vt) (f110014   9999999) or (m7722pfn9s...
Massey ferguson mf7722 s tractor (dyna vt) (f110014 9999999) or (m7722pfn9s...
 
Massey ferguson mf7722 tractor (dyna vt) (f110014 9999999) or (m7722 pfn9s1...
Massey ferguson mf7722 tractor (dyna vt) (f110014   9999999) or (m7722 pfn9s1...Massey ferguson mf7722 tractor (dyna vt) (f110014   9999999) or (m7722 pfn9s1...
Massey ferguson mf7722 tractor (dyna vt) (f110014 9999999) or (m7722 pfn9s1...
 
Massey ferguson mf7720 s tractor (dyna vt) (f097008 9999999) or (m7720pfn9s10...
Massey ferguson mf7720 s tractor (dyna vt) (f097008 9999999) or (m7720pfn9s10...Massey ferguson mf7720 s tractor (dyna vt) (f097008 9999999) or (m7720pfn9s10...
Massey ferguson mf7720 s tractor (dyna vt) (f097008 9999999) or (m7720pfn9s10...
 
Massey ferguson mf7720 tractor (dyna vt) (f097008 9999999) or (m7720 pfn9s100...
Massey ferguson mf7720 tractor (dyna vt) (f097008 9999999) or (m7720 pfn9s100...Massey ferguson mf7720 tractor (dyna vt) (f097008 9999999) or (m7720 pfn9s100...
Massey ferguson mf7720 tractor (dyna vt) (f097008 9999999) or (m7720 pfn9s100...
 
Massey ferguson mf7719 tractor (dyna vt) (f126022 999999) or (m7719 pfn9s10...
Massey ferguson mf7719 tractor (dyna vt) (f126022   999999) or (m7719 pfn9s10...Massey ferguson mf7719 tractor (dyna vt) (f126022   999999) or (m7719 pfn9s10...
Massey ferguson mf7719 tractor (dyna vt) (f126022 999999) or (m7719 pfn9s10...
 
Massey ferguson mf7622 tractor (dyna 6) (b328047 f302042) parts catalogue m...
Massey ferguson mf7622 tractor (dyna 6) (b328047   f302042) parts catalogue m...Massey ferguson mf7622 tractor (dyna 6) (b328047   f302042) parts catalogue m...
Massey ferguson mf7622 tractor (dyna 6) (b328047 f302042) parts catalogue m...
 
Massey ferguson mf7616 tractor (dyna 6) parts catalogue manual
Massey ferguson mf7616 tractor (dyna 6) parts catalogue manualMassey ferguson mf7616 tractor (dyna 6) parts catalogue manual
Massey ferguson mf7616 tractor (dyna 6) parts catalogue manual
 
Massey ferguson mf7615 tractor (dyna 4) parts catalogue manual
Massey ferguson mf7615 tractor (dyna 4) parts catalogue manualMassey ferguson mf7615 tractor (dyna 4) parts catalogue manual
Massey ferguson mf7615 tractor (dyna 4) parts catalogue manual
 
Massey ferguson mf7614 tractor (dyna 4) parts catalogue manual
Massey ferguson mf7614 tractor (dyna 4) parts catalogue manualMassey ferguson mf7614 tractor (dyna 4) parts catalogue manual
Massey ferguson mf7614 tractor (dyna 4) parts catalogue manual
 
Massey ferguson mf7499 tractor (tier 3) parts catalogue manual
Massey ferguson mf7499 tractor (tier 3) parts catalogue manualMassey ferguson mf7499 tractor (tier 3) parts catalogue manual
Massey ferguson mf7499 tractor (tier 3) parts catalogue manual
 
Massey ferguson mf7497 tractor (tier 3) parts catalogue manual
Massey ferguson mf7497 tractor (tier 3) parts catalogue manualMassey ferguson mf7497 tractor (tier 3) parts catalogue manual
Massey ferguson mf7497 tractor (tier 3) parts catalogue manual
 
Massey ferguson mf7495 tractor parts catalogue manual
Massey ferguson mf7495 tractor parts catalogue manualMassey ferguson mf7495 tractor parts catalogue manual
Massey ferguson mf7495 tractor parts catalogue manual
 
Kobelco sk20 sr hydraulic excavator service repair manual
Kobelco sk20 sr hydraulic excavator service repair manualKobelco sk20 sr hydraulic excavator service repair manual
Kobelco sk20 sr hydraulic excavator service repair manual
 
Kobelco sk15 sr hydraulic excavator service repair manual
Kobelco sk15 sr hydraulic excavator service repair manualKobelco sk15 sr hydraulic excavator service repair manual
Kobelco sk15 sr hydraulic excavator service repair manual
 
Caterpillar cat m322 c wheeled excavator (prefix bdk) service repair manual (...
Caterpillar cat m322 c wheeled excavator (prefix bdk) service repair manual (...Caterpillar cat m322 c wheeled excavator (prefix bdk) service repair manual (...
Caterpillar cat m322 c wheeled excavator (prefix bdk) service repair manual (...
 
Caterpillar cat m322 c wheeled excavator (prefix bdk) service repair manual (...
Caterpillar cat m322 c wheeled excavator (prefix bdk) service repair manual (...Caterpillar cat m322 c wheeled excavator (prefix bdk) service repair manual (...
Caterpillar cat m322 c wheeled excavator (prefix bdk) service repair manual (...
 
Caterpillar cat m318 f wheeled excavator (prefix f8b) service repair manual (...
Caterpillar cat m318 f wheeled excavator (prefix f8b) service repair manual (...Caterpillar cat m318 f wheeled excavator (prefix f8b) service repair manual (...
Caterpillar cat m318 f wheeled excavator (prefix f8b) service repair manual (...
 

Recently uploaded

办理(PITT毕业证书)美国匹兹堡大学毕业证成绩单原版一比一
办理(PITT毕业证书)美国匹兹堡大学毕业证成绩单原版一比一办理(PITT毕业证书)美国匹兹堡大学毕业证成绩单原版一比一
办理(PITT毕业证书)美国匹兹堡大学毕业证成绩单原版一比一F La
 
Transportation Electrification Funding Strategy by Jeff Allen and Brandt Hert...
Transportation Electrification Funding Strategy by Jeff Allen and Brandt Hert...Transportation Electrification Funding Strategy by Jeff Allen and Brandt Hert...
Transportation Electrification Funding Strategy by Jeff Allen and Brandt Hert...Forth
 
原版1:1定制(IC大学毕业证)帝国理工学院大学毕业证国外文凭复刻成绩单#电子版制作#留信入库#多年经营绝对保证质量
原版1:1定制(IC大学毕业证)帝国理工学院大学毕业证国外文凭复刻成绩单#电子版制作#留信入库#多年经营绝对保证质量原版1:1定制(IC大学毕业证)帝国理工学院大学毕业证国外文凭复刻成绩单#电子版制作#留信入库#多年经营绝对保证质量
原版1:1定制(IC大学毕业证)帝国理工学院大学毕业证国外文凭复刻成绩单#电子版制作#留信入库#多年经营绝对保证质量208367051
 
办理萨省大学毕业证成绩单|购买加拿大USASK文凭证书
办理萨省大学毕业证成绩单|购买加拿大USASK文凭证书办理萨省大学毕业证成绩单|购买加拿大USASK文凭证书
办理萨省大学毕业证成绩单|购买加拿大USASK文凭证书zdzoqco
 
What Could Be Causing My Jaguar XF To Lose Coolant
What Could Be Causing My Jaguar XF To Lose CoolantWhat Could Be Causing My Jaguar XF To Lose Coolant
What Could Be Causing My Jaguar XF To Lose CoolantEMC- European Motor Cars
 
如何办理(UQ毕业证书)昆士兰大学毕业证毕业证成绩单原版一比一
如何办理(UQ毕业证书)昆士兰大学毕业证毕业证成绩单原版一比一如何办理(UQ毕业证书)昆士兰大学毕业证毕业证成绩单原版一比一
如何办理(UQ毕业证书)昆士兰大学毕业证毕业证成绩单原版一比一hnfusn
 
原版1:1定制宾州州立大学毕业证(PSU毕业证)#文凭成绩单#真实留信学历认证永久存档
原版1:1定制宾州州立大学毕业证(PSU毕业证)#文凭成绩单#真实留信学历认证永久存档原版1:1定制宾州州立大学毕业证(PSU毕业证)#文凭成绩单#真实留信学历认证永久存档
原版1:1定制宾州州立大学毕业证(PSU毕业证)#文凭成绩单#真实留信学历认证永久存档208367051
 
2024 TOP 10 most fuel-efficient vehicles according to the US agency
2024 TOP 10 most fuel-efficient vehicles according to the US agency2024 TOP 10 most fuel-efficient vehicles according to the US agency
2024 TOP 10 most fuel-efficient vehicles according to the US agencyHyundai Motor Group
 
Digamma - CertiCon Team Skills and Qualifications
Digamma - CertiCon Team Skills and QualificationsDigamma - CertiCon Team Skills and Qualifications
Digamma - CertiCon Team Skills and QualificationsMihajloManjak
 
办理阳光海岸大学毕业证成绩单原版一比一
办理阳光海岸大学毕业证成绩单原版一比一办理阳光海岸大学毕业证成绩单原版一比一
办理阳光海岸大学毕业证成绩单原版一比一F La
 
(办理学位证)(Toledo毕业证)托莱多大学毕业证成绩单修改留信学历认证原版一模一样
(办理学位证)(Toledo毕业证)托莱多大学毕业证成绩单修改留信学历认证原版一模一样(办理学位证)(Toledo毕业证)托莱多大学毕业证成绩单修改留信学历认证原版一模一样
(办理学位证)(Toledo毕业证)托莱多大学毕业证成绩单修改留信学历认证原版一模一样gfghbihg
 
(办理学位证)墨尔本大学毕业证(Unimelb毕业证书)成绩单留信学历认证原版一模一样
(办理学位证)墨尔本大学毕业证(Unimelb毕业证书)成绩单留信学历认证原版一模一样(办理学位证)墨尔本大学毕业证(Unimelb毕业证书)成绩单留信学历认证原版一模一样
(办理学位证)墨尔本大学毕业证(Unimelb毕业证书)成绩单留信学历认证原版一模一样whjjkkk
 
原版1:1定制中央昆士兰大学毕业证(CQU毕业证)#文凭成绩单#真实留信学历认证永久存档
原版1:1定制中央昆士兰大学毕业证(CQU毕业证)#文凭成绩单#真实留信学历认证永久存档原版1:1定制中央昆士兰大学毕业证(CQU毕业证)#文凭成绩单#真实留信学历认证永久存档
原版1:1定制中央昆士兰大学毕业证(CQU毕业证)#文凭成绩单#真实留信学历认证永久存档208367051
 
办理克莱姆森大学毕业证成绩单|购买美国文凭证书
办理克莱姆森大学毕业证成绩单|购买美国文凭证书办理克莱姆森大学毕业证成绩单|购买美国文凭证书
办理克莱姆森大学毕业证成绩单|购买美国文凭证书zdzoqco
 
Equity & Freight Electrification by Jose Miguel Acosta Cordova
Equity & Freight Electrification by Jose Miguel Acosta CordovaEquity & Freight Electrification by Jose Miguel Acosta Cordova
Equity & Freight Electrification by Jose Miguel Acosta CordovaForth
 
call girls in G.T.B. Nagar (DELHI) 🔝 >༒9953330565🔝 genuine Escort Service 🔝✔️✔️
call girls in  G.T.B. Nagar (DELHI) 🔝 >༒9953330565🔝 genuine Escort Service 🔝✔️✔️call girls in  G.T.B. Nagar (DELHI) 🔝 >༒9953330565🔝 genuine Escort Service 🔝✔️✔️
call girls in G.T.B. Nagar (DELHI) 🔝 >༒9953330565🔝 genuine Escort Service 🔝✔️✔️9953056974 Low Rate Call Girls In Saket, Delhi NCR
 
(毕业原版)曼尼托巴大学毕业证(曼大学位证)毕业证成绩单留信学历认证原版一比一
(毕业原版)曼尼托巴大学毕业证(曼大学位证)毕业证成绩单留信学历认证原版一比一(毕业原版)曼尼托巴大学毕业证(曼大学位证)毕业证成绩单留信学历认证原版一比一
(毕业原版)曼尼托巴大学毕业证(曼大学位证)毕业证成绩单留信学历认证原版一比一ffhuih11ff
 
(办理学位证)(Rice毕业证)莱斯大学毕业证成绩单修改留信学历认证原版一模一样
(办理学位证)(Rice毕业证)莱斯大学毕业证成绩单修改留信学历认证原版一模一样(办理学位证)(Rice毕业证)莱斯大学毕业证成绩单修改留信学历认证原版一模一样
(办理学位证)(Rice毕业证)莱斯大学毕业证成绩单修改留信学历认证原版一模一样gfghbihg
 
What Could Cause A VW Tiguan's Radiator Fan To Stop Working
What Could Cause A VW Tiguan's Radiator Fan To Stop WorkingWhat Could Cause A VW Tiguan's Radiator Fan To Stop Working
What Could Cause A VW Tiguan's Radiator Fan To Stop WorkingEscondido German Auto
 

Recently uploaded (20)

办理(PITT毕业证书)美国匹兹堡大学毕业证成绩单原版一比一
办理(PITT毕业证书)美国匹兹堡大学毕业证成绩单原版一比一办理(PITT毕业证书)美国匹兹堡大学毕业证成绩单原版一比一
办理(PITT毕业证书)美国匹兹堡大学毕业证成绩单原版一比一
 
Transportation Electrification Funding Strategy by Jeff Allen and Brandt Hert...
Transportation Electrification Funding Strategy by Jeff Allen and Brandt Hert...Transportation Electrification Funding Strategy by Jeff Allen and Brandt Hert...
Transportation Electrification Funding Strategy by Jeff Allen and Brandt Hert...
 
原版1:1定制(IC大学毕业证)帝国理工学院大学毕业证国外文凭复刻成绩单#电子版制作#留信入库#多年经营绝对保证质量
原版1:1定制(IC大学毕业证)帝国理工学院大学毕业证国外文凭复刻成绩单#电子版制作#留信入库#多年经营绝对保证质量原版1:1定制(IC大学毕业证)帝国理工学院大学毕业证国外文凭复刻成绩单#电子版制作#留信入库#多年经营绝对保证质量
原版1:1定制(IC大学毕业证)帝国理工学院大学毕业证国外文凭复刻成绩单#电子版制作#留信入库#多年经营绝对保证质量
 
办理萨省大学毕业证成绩单|购买加拿大USASK文凭证书
办理萨省大学毕业证成绩单|购买加拿大USASK文凭证书办理萨省大学毕业证成绩单|购买加拿大USASK文凭证书
办理萨省大学毕业证成绩单|购买加拿大USASK文凭证书
 
What Could Be Causing My Jaguar XF To Lose Coolant
What Could Be Causing My Jaguar XF To Lose CoolantWhat Could Be Causing My Jaguar XF To Lose Coolant
What Could Be Causing My Jaguar XF To Lose Coolant
 
如何办理(UQ毕业证书)昆士兰大学毕业证毕业证成绩单原版一比一
如何办理(UQ毕业证书)昆士兰大学毕业证毕业证成绩单原版一比一如何办理(UQ毕业证书)昆士兰大学毕业证毕业证成绩单原版一比一
如何办理(UQ毕业证书)昆士兰大学毕业证毕业证成绩单原版一比一
 
Hot Sexy call girls in Pira Garhi🔝 9953056974 🔝 escort Service
Hot Sexy call girls in Pira Garhi🔝 9953056974 🔝 escort ServiceHot Sexy call girls in Pira Garhi🔝 9953056974 🔝 escort Service
Hot Sexy call girls in Pira Garhi🔝 9953056974 🔝 escort Service
 
原版1:1定制宾州州立大学毕业证(PSU毕业证)#文凭成绩单#真实留信学历认证永久存档
原版1:1定制宾州州立大学毕业证(PSU毕业证)#文凭成绩单#真实留信学历认证永久存档原版1:1定制宾州州立大学毕业证(PSU毕业证)#文凭成绩单#真实留信学历认证永久存档
原版1:1定制宾州州立大学毕业证(PSU毕业证)#文凭成绩单#真实留信学历认证永久存档
 
2024 TOP 10 most fuel-efficient vehicles according to the US agency
2024 TOP 10 most fuel-efficient vehicles according to the US agency2024 TOP 10 most fuel-efficient vehicles according to the US agency
2024 TOP 10 most fuel-efficient vehicles according to the US agency
 
Digamma - CertiCon Team Skills and Qualifications
Digamma - CertiCon Team Skills and QualificationsDigamma - CertiCon Team Skills and Qualifications
Digamma - CertiCon Team Skills and Qualifications
 
办理阳光海岸大学毕业证成绩单原版一比一
办理阳光海岸大学毕业证成绩单原版一比一办理阳光海岸大学毕业证成绩单原版一比一
办理阳光海岸大学毕业证成绩单原版一比一
 
(办理学位证)(Toledo毕业证)托莱多大学毕业证成绩单修改留信学历认证原版一模一样
(办理学位证)(Toledo毕业证)托莱多大学毕业证成绩单修改留信学历认证原版一模一样(办理学位证)(Toledo毕业证)托莱多大学毕业证成绩单修改留信学历认证原版一模一样
(办理学位证)(Toledo毕业证)托莱多大学毕业证成绩单修改留信学历认证原版一模一样
 
(办理学位证)墨尔本大学毕业证(Unimelb毕业证书)成绩单留信学历认证原版一模一样
(办理学位证)墨尔本大学毕业证(Unimelb毕业证书)成绩单留信学历认证原版一模一样(办理学位证)墨尔本大学毕业证(Unimelb毕业证书)成绩单留信学历认证原版一模一样
(办理学位证)墨尔本大学毕业证(Unimelb毕业证书)成绩单留信学历认证原版一模一样
 
原版1:1定制中央昆士兰大学毕业证(CQU毕业证)#文凭成绩单#真实留信学历认证永久存档
原版1:1定制中央昆士兰大学毕业证(CQU毕业证)#文凭成绩单#真实留信学历认证永久存档原版1:1定制中央昆士兰大学毕业证(CQU毕业证)#文凭成绩单#真实留信学历认证永久存档
原版1:1定制中央昆士兰大学毕业证(CQU毕业证)#文凭成绩单#真实留信学历认证永久存档
 
办理克莱姆森大学毕业证成绩单|购买美国文凭证书
办理克莱姆森大学毕业证成绩单|购买美国文凭证书办理克莱姆森大学毕业证成绩单|购买美国文凭证书
办理克莱姆森大学毕业证成绩单|购买美国文凭证书
 
Equity & Freight Electrification by Jose Miguel Acosta Cordova
Equity & Freight Electrification by Jose Miguel Acosta CordovaEquity & Freight Electrification by Jose Miguel Acosta Cordova
Equity & Freight Electrification by Jose Miguel Acosta Cordova
 
call girls in G.T.B. Nagar (DELHI) 🔝 >༒9953330565🔝 genuine Escort Service 🔝✔️✔️
call girls in  G.T.B. Nagar (DELHI) 🔝 >༒9953330565🔝 genuine Escort Service 🔝✔️✔️call girls in  G.T.B. Nagar (DELHI) 🔝 >༒9953330565🔝 genuine Escort Service 🔝✔️✔️
call girls in G.T.B. Nagar (DELHI) 🔝 >༒9953330565🔝 genuine Escort Service 🔝✔️✔️
 
(毕业原版)曼尼托巴大学毕业证(曼大学位证)毕业证成绩单留信学历认证原版一比一
(毕业原版)曼尼托巴大学毕业证(曼大学位证)毕业证成绩单留信学历认证原版一比一(毕业原版)曼尼托巴大学毕业证(曼大学位证)毕业证成绩单留信学历认证原版一比一
(毕业原版)曼尼托巴大学毕业证(曼大学位证)毕业证成绩单留信学历认证原版一比一
 
(办理学位证)(Rice毕业证)莱斯大学毕业证成绩单修改留信学历认证原版一模一样
(办理学位证)(Rice毕业证)莱斯大学毕业证成绩单修改留信学历认证原版一模一样(办理学位证)(Rice毕业证)莱斯大学毕业证成绩单修改留信学历认证原版一模一样
(办理学位证)(Rice毕业证)莱斯大学毕业证成绩单修改留信学历认证原版一模一样
 
What Could Cause A VW Tiguan's Radiator Fan To Stop Working
What Could Cause A VW Tiguan's Radiator Fan To Stop WorkingWhat Could Cause A VW Tiguan's Radiator Fan To Stop Working
What Could Cause A VW Tiguan's Radiator Fan To Stop Working
 

Toyota bt reflex rre180 h high performance reach truck service repair manual

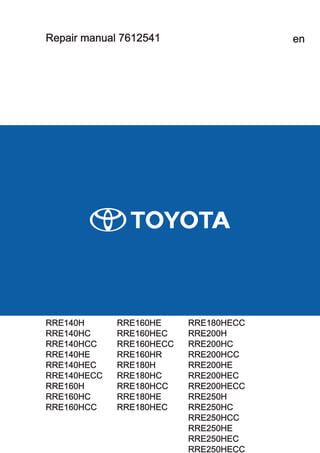
  • 1. Repair manual 7612541 en RRE140H RRE140HC RRE140HCC RRE140HE RRE140HEC RRE140HECC RRE160H RRE160HC RRE160HCC RRE160HE RRE160HEC RRE160HECC RRE160HR RRE180H RRE180HC RRE180HCC RRE180HE RRE180HEC RRE180HECC RRE200H RRE200HC RRE200HCC RRE200HE RRE200HEC RRE200HECC RRE250H RRE250HC RRE250HCC RRE250HE RRE250HEC RRE250HECC
  • 2. List of models: Model T-Code Valid from serial number RRE140H 1018 6445237 RRE140HC 1018 6445237 RRE140HCC 1018 6445237 RRE140HE 1018 6445237 RRE140HEC 1018 6445237 RRE140HECC 1018 6445237 RRE160H 1018 6445237 RRE160HC 1018 6445237 RRE160HCC 1018 6445237 RRE160HE 1018 6445237 RRE160HEC 1018 6445237 RRE160HECC 1018 6445237 RRE160HR 1020 6445237 RRE180H 1019 6445237 RRE180HC 1019 6445237 RRE180HCC 1019 6445237 RRE180HE 1019 6445237 RRE180HEC 1019 6445237 RRE180HECC 1019 6445237 RRE200H 1019 6445237 RRE200HC 1019 6445237 RRE200HCC 1019 6445237 RRE200HE 1019 6445237 RRE200HEC 1019 6445237 RRE200HECC 1019 6445237 RRE250H 1019 6445237 RRE250HC 1019 6445237 RRE250HCC 1019 6445237 RRE250HE 1019 6445237 RRE250HEC 1019 6445237 RRE250HECC 1019 6445237 Translation of the original instruction
  • 3. Table of contents Repair manual 7612541 en General introduction 1 General safety rules 2 Operating principle 3 Parameters 4 Installation 5 Maintenance 6 Troubleshooting 7 Chassis C0000 8 Motors C1000 9 Transmission/Drive gear C2000 10 Brake/wheel/track system C3000 11 Steering system C4000 12 Electrical system C5000 13 Hydraulics/Pneumatics C6000 14 Work function - lifting masts C7000 15 Auxiliary equipment, installation equipment C8000 16 Optional equipment/Extra equipment C9000 17 Instructions for disposal 18 Wiring diagram 19 Hydraulics schematics 20 Tools 21 Service data and grease specifications 22 Technical data 23 Index 24
  • 4. General introduction 1 Repair manual 7612541-040 1.1 Warning levels and symbols .............................................................................................................................. 1 - 1 1.2 Pictograms......................................................................................................................................................... 1 - 1 1.3 Abbreviations ..................................................................................................................................................... 1 - 2
  • 5. 1 General introduction Warning levels and symbols 1 - 1 Repair manual 7612541 en 1 General introduction 1 General introduction 1.1 Warning levels and symbols 1.1 Warning levels and symbols The following warning levels and symbols are used in the repair manual: DANGER Indicates a dangerous situation that – if not avoided – will cause death or serious bodily injury. WARNING Indicates a dangerous situation that – if not avoided – could possibly cause death or serious bodily injury. CAUTION Indicates a dangerous situation that – if not avoided – will cause a slight or minor bodily injury. NOTICE Used in connection with actions that can cause material damage but not bodily injury. Used to attract attention and to give information about various actions. 1.2 Pictograms 1.2 Pictograms Symbol Procedure Symbol Procedure Visual inspection of condition, wear and loose connections. Component replacement. Cleaning Measurement Checks for leaks. Check that screws, nuts, etc. are tightened to torque. Listening for noise. Lubrication, application. Check of functions. Calibration Adjustment Welding Disassembly/removal Assembly/installation Open Close Refilling Emptying Update Charging Lift Lower An example of another type of pictogram is “Cut cable ties”: 1
  • 6. 1 General introduction Abbreviations Repair manual 7612541 en 1 - 2 Additional information under the pictogram can, for example, indicate the number of cable ties to be cut. 1.3 Abbreviations 1.3 Abbreviations Abbrevi- ation Meaning Explanation ACC Alternate Current Combi Motor control, hydraulics and drive. ACH Alternate Current Hydraulic Motor control, hydraulics. ACT Alternate Current Traction Motor control, drive. BCU Onboard system BDI Battery Discharge Indicator Unit indicating the state of battery charge. CAN Controller Area Network A standardised interface that enable communication between different electrical units. CID Central Information Display Display with menu-based information system that is used as the primary communication tool between operator and truck. DX Duplex Mast with two sections. EPS Electronic Power Steering Complete steering servo with its own motor control. ESO Emergency Switch Off Emergency stop switch. FCM Fuse Central Module Fuse panel. FCU Fork Control Unit Unit for fork functions. GFU General Function Unit Unit for general functions. HPS Height Pre-Select Height pre-selection ICH Integrated Control Handle IPM Intelligent Power Module Power control unit LID Load Information Display Display that provides the operator information such as lift height, load weight and height preselection. MCU Main Control Unit Main control unit. PDA Personal Digital Assistant A compact, portable handheld computer. PPS Personal Protection System Personal protection system. PTC Positive Temperature Coefficient Electrical property that causes resistance to increase with temperature. SCU Secondary Control Unit Secondary control unit SEU Spider Expansion Unit SF Shuttle Forks Telescoping fork unit. TBD To Be Defined Means that the instruction/chapter will be supplemented at a later date. TH Turret Head Turret head fork unit I-Site T.W.I.S. – Toyota Wireless Inform- ation System TX Triplex Mast with three sections. VNA Very Narrow Aisle Narrow aisles VRE Very narrow aisle Rider Electric
  • 7. General safety rules 2 Repair manual 7612541-040 2.1 Authorised personnel......................................................................................................................................... 2 - 1 2.2 Work safety........................................................................................................................................................ 2 - 1 2.3 Electrical system................................................................................................................................................ 2 - 2 2.3.1 Electrostatic risks................................................................................................................................. 2 - 2 2.3.2 Battery handling................................................................................................................................... 2 - 2 2.4 Safe lifting .......................................................................................................................................................... 2 - 3 2.5 Product modification .......................................................................................................................................... 2 - 4 2.6 Software............................................................................................................................................................. 2 - 4 2.7 Hydraulic system................................................................................................................................................ 2 - 4
  • 8. 2 General safety rules Authorised personnel 2 - 1 Repair manual 7612541 en 2 General safety rules 2 General safety rules 2.1 Authorised personnel 2.1 Authorised personnel Only personnel trained in servicing and repair of this type of product are authorised to carry out service and repair activit- ies. 2.2 Work safety 2.2 Work safety For safe work, always remember: ▷ Always disconnect the battery when carrying out maintenance or repair work, unless otherwise stated in this re- pair manual. ▷ always disconnect the battery when performing welding work. ▷ Make sure that the place where service work is performed is a safe place. Follow the regulations. ▷ Keep the maintenance work site clean. Oil and water on the floor will make it slippery. ▷ Use the correct working posture. Service work often involves sitting on your knees or bending over forwards. Try sitting on a toolbox, for example, to relieve the strain on your knees and back. ▷ Loose items and jewellery can get caught in moving parts. So never wear loose articles or jewellery when per- forming maintenance or repairs. ▷ Exercise caution and always follow applicable local regulations when working at high heights. ▷ Use the correct tools for the work you are carrying out. ▷ Keep all tools well maintained. ▷ Make sure that all safety equipment including guards and covers are properly secured and that they work as in- tended before starting the repair work. If a guard or cover must be removed in order to perform the repair work, extra care must be taken, and when the repair work is finished the guard or cover must be refitted. ▷ Use paper or a stiff piece of cardboard when checking for possible oil leaks. Do not use your hands. ▷ The drive unit oil may be hot. ▷ Use only new and clean oil for the drive gear. ▷ Store and transport changed oil according to applicable local directions. ▷ Do not flush solvents, etc. down the drain unless they are intended to be disposed of in this way. Follow local dis- posal regulations. ▷ Prior to welding or grinding on painted surfaces, be sure to remove the paint at least 100 mm around the welding/ grinding area by using sandblasting equipment or paint remover. ▷ To maintain a high level of product safety and to minimise downtime, all current maintenance instructions must be carried out. ▷ Always keep fire-fighting equipment close at hand, and do not use an open fire to check fluid levels or when searching for leaks 2
  • 9. 2 General safety rules Electrical system Repair manual 7612541 en 2 - 2 2.3 Electrical system 2.3 Electrical system When working on the electric system, keep the following in mind: WARNING Short-circuiting/Burn injuries Loose items and jewellery can get caught in moving parts. So never wear loose articles or jewellery when performing maintenance or repairs. ► Remove any jewellery and loose items before starting work. ▷ Always use insulated tools when working on the electrical system. ▷ Always disconnect the battery before opening any covers to drive units or the electrical system. ▷ Always disconnect the battery prior to welding work using an electric welding unit. The welding current may dam- age the battery. ▷ Never remove the warranty seals on the electronic cards. 2.3.1 Electrostatic risks 2.3.1 Electrostatic risks Purpose These work instructions describe how to work in a safe manner with components that are sensitive to electrostatic chocks. Scope These work instructions apply to all that work with component or units that are sensitive to electrostatic chocks. Procedure Electrostatic discharges from people may destroy sensitive equipment. For this reason, one must follow the instructions for packaging and earthing. Always pay attention to these precautionary instructions. Electronic card are supplied in electrostatically protected packages or envelopes. These packages carry the following symbol: ▷ Leave electrostatically sensitive equipment in their respective packaging until you can place them on an electro- statically protected work area. ▷ Electrostatically sensitive equipment should only be handled when they are properly earthed. ▷ Use electrostatically protected footwear! ▷ Store electrostatically sensitive equipment in their protective packaging or on electrostatically protected surfaces. ▷ Use an antistatic surface: Anti-static carpet 148115, page 21 - 4. 2.3.2 Battery handling 2.3.2 Battery handling When working on the battery, keep the following in mind: ▷ Working with and charging batteries should always be performed in accordance with the safety instructions provided by the battery manufacturer. ▷ Always use safety equipment to protect the eyes, face and skin while checking or handling batteries.
  • 10. 2 General safety rules Safe lifting 2 - 3 Repair manual 7612541 en ▷ Do not place any electrically conductive items on the battery terminals or their connections. ▷ Ensure there is a shower and an eye bath nearby in case an accident happens. ▷ Batteries generate explosive gases. Never use an open flame or other sources of ignition in close vicinity to a battery. ▷ Do not place tools or other metal objects on the battery. This can cause a short-circuit and even an explosion. ▷ The battery must be used according to the battery manufacturer's instructions regarding ambient and working temperatures. Otherwise there is a large risk that the battery is damaged and that it will soon have to be re- placed. ▷ Spilled electrolyte must be neutralised at once using a lot of water. NOTICE Changing to the correct battery type Only change to a battery that meets the data given on the product identification plate. The weight of the battery affects the stability and braking capacity of the truck. Information on the minimum permitted battery weight is on the product identification plate. WARNING Risk of centre of gravity shifting A battery weight that is too low gives impaired stability and braking capacity. ► The battery weight must be in accordance with the data on the truck’s identification plate. WARNING Battery acid may cause burns Battery acid may cause burns. ► If battery acid gets onto your skin or clothes, flush immediately with cold water. ► If you get battery acid in the face or in the eyes, immediately flush the area with cold water and seek medical as- sistance. 2.4 Safe lifting 2.4 Safe lifting When lifting the product, remember that: ▷ All lifting must be carried out on a level, non-slip and stable surface. Asphalt surfaces should be avoided if pos- sible. ▷ To prevent the product moving while it is being lifted, it must not be lifted with anyone on the platform or with the tiller arm in the lowered position. ▷ If the drive wheel which is braked, is being lifted, the other wheels must be blocked to stop the product from mov- ing. ▷ Select the lifting point so that the lift is as light as possible, for example one corner at a time. If there are lifting points indicated on the lower part of the chassis, these must be used to ensure balanced lifting. ▷ Make sure the surface where the jack is placed is clean and free of oil and grease. ▷ Make sure your hands and the jack lever are free of grease and oil. ▷ Only use the lever supplied with the jack. If the lever is too short, more exertion than is necessary will be re- quired. If the lever is too long, there is a risk that the jack will be overloaded. ▷ Never work under a product that is not supported by trestles and secured by a lifting device. ▷ Never work under a raised product without it being properly supported on trestles. ▷ Never support the jack on trestles to achieve a higher lift. Put trestles: 2
  • 11. 2 General safety rules Product modification Repair manual 7612541 en 2 - 4 ▷ as close to the lifted part of the chassis as possible in order to reduce the falling height if the product should col- lapse. ▷ so that no wheels may turn causing the product to move. 2.5 Product modification 2.5 Product modification Any modification of the product must be approved beforehand. No modification of product may be performed that may in- fluence the capacity, stability and safety of the product without prior written approval from the manufacturer, its repres- entative or successor. In the case of the manufacturer no longer being in business and there being no successor, the user of the product may arrange for modifications on the precondition that the user: ▷ makes sure that an engineer with expert knowledge of the product type and its safety designs, tests and imple- ments the modification, ▷ files all documentation of the design, tests and implementation of the modification, ▷ approves and makes the applicable changes to the capacity plate, adhesive labels, markings and operator’s manual, ▷ affixes a permanent and well visible sign to the product stating how the product has been modified, together with the date of the modification and the name and address of the company that carried out the modification work. 2.6 Software 2.6 Software Erroneous handling of the product systems and/or the external systems of the product may affect the safety of the product and the environment. 1. Always make sure that the correct software is downloaded to the product. 2. In case of parameter adjustments, the recommended values must be respected. 3. Only adjust one parameter at the time when performing changes to the truck. Check the function after each ad- justment. 4. Change the parameters in small increments. 2.7 Hydraulic system 2.7 Hydraulic system When working on the hydraulic system, keep the following in mind: ▷ Lower the forks completely and keep pressing the button for another 5 - 10 seconds to relieve system pressure. ▷ The hydraulic oil may be hot. ▷ Only fill the hydraulic system with new and clean oil.
  • 12. 3 Operating principle Repair manual 7612541-040
  • 13. 3 Operating principle Description 3 - 1 Repair manual 7612541 en 3 Operating principle 3 Operating principle 3.1 Description 3.1 Description The Operating principle section provides a general description on how the AutoShuttle functions work and how they are interdependent. Because the control structure of the product is so complex, it is not possible to describe all combinations. Similarly, it is not possible to describe all influencing factors. Only a selection of such factors are indicated. A good aid is found in the descriptive sections of the repair manual and in the parameter descriptions in particular. 3
  • 14. 4 Parameters Parameter list 4 - 1 Repair manual 7612541 en 4 Parameters 4 Parameters 4.1 Parameter list 4.1 Parameter list Software: 7584588 4.1.1 Operator parameters 4.1.1.1 Log-in profiles The operator parameters can be adjusted individually to the available log-in profiles. The parameter’s connection to the operator is done by a combination of operator and parameter numbers where the single digit always corresponds to the parameter. Operator profile Parameter range 1 1-10 2 11-20 3 21-30 4 31-40 5 41-50 6 51-60 7 61-70 8 71-80 9 81-90 10 91-100 Tab. 1: Connection to logged-in operator 4.1.1.2 Control units The steering angle sensitivity can be individually adjusted between 1 and 10 for driving at low and high speeds. 1 gives the lowest speed of steering movement in relation to the steering wheel movement, and 10 offers the highest speed. If the steering feels too sluggish or unresponsive in any of the low or high speed ranges, the corresponding value is changed upwards or downwards through the setup screen for driver parameter 1. No. Designation Min Std. Max Step Unit 1 Steering sensitivity (high speed) 6 15 20 1 The number of turns of the steering wheel that represents one turn of the drive wheel. In increments of 1 No. Designation Min Std. Max Step Unit 1 Steering sensitivity (low speed) 5 8 20 1 The number of turns of the steering wheel that represents one turn of the drive wheel. In increments of 1 No. Designation Min Std. Max Step Unit 1 The steering's progressivity 1541 3848 5140 1 The parameter shown via TruckCom is a combination of the sensitivity values low speed and for high speed. Total value for low and high speed. The parameter value can be calculated as (high * 256 + low), where low = steering ratio at low speed and high = steering ratio at high speed. For example low = 8 and high = 15 gives a parameter value of (15 * 256 + 8) = 3848. 4.1.1.3 Maximum travel speed These two parameters are used to limit the maximum travel speed for the logged-in operator profile. 4
  • 15. 4 Parameters Parameter list Repair manual 7612541 en 4 - 2 For parameters 2 and 3, 100% corresponds to travel speed. The maximum speed varies depending on the truck type. Example: If operator profile ‘1’ has parameter ‘2’ set to 80 %, operator profile‘2’ has their corresponding parameter ‘12’ set to 70 %, the maximum travel speed is limited to: • 8.8 km/h for operator profile '1' • 7.7 km/h for operator profile '2' The maximum travel speed can also be limited by the service parameters and it is always the lowest speed for a para- meter that is the limiting one. No. Designation Min Std. Max Step Unit 2 Maximum speed, drive wheel direction 1 10 10 1 10% The parameter is used to limit the maximum travel speed for the operator profile that is logged on. No. Designation Min Std. Max Step Unit 3 Maximum speed, fork direction 1 10 10 1 10% The parameter is used to limit the maximum travel speed for the operator profile that is logged on. 4.1.1.4 Acceleration/Deceleration These two parameters can be used to get a smoother acceleration/deceleration where the application or operator profile so requires. No. Designation Min Std. Max Step Unit 4 Acceleration 3 8 10 1 10% The parameter can be used to get a smoother acceleration where the application or operator profile so requires. No. Designation Min Std. Max Step Unit 5 Automatic braking at reduction of speed control 0 8 10 1 10% The parameter can be used to get a smoother deceleration where the application or operator profile so requires. 4.1.1.5 Cab tilt This parameter is for setting the fork height above the floor level when the operator wants the cab (E-model) to start tilt- ing upwards. To activate the function, see parameter 1104 and for downward tilting see parameter 355. To turn off the cab tilt display on the CID, see parameter 514 No. Designation Min Std. Max Step Unit 6 Fork height when the Ergo cab begins to tilt upwards 500 2000 13000 100 mm Applies to the Ergo variant only, parameter 1104 set to 1. 4.1.2 Service parameters 4.1.2.1 General Before any service parameter can be changed, the CAN service key must be connected to the contact [X41]. Changing specific truck parameters changes the truck's driving properties. Do not change any parameter values without the necessary know-how.
  • 16. 4 Parameters Parameter list 4 - 3 Repair manual 7612541 en No. Designation Min Std. Max Step Unit 101 Service intervals 0 0 5000 1 h Use this parameter to determine the service interval of the truck. The buzzer sounds and a spanner is shown on the CID when the service counter is at zero. The counter shows the time that has passed since the last service intervention. If an earlier service intervention is required, simply activate this parameter without adjusting the time. If the value is set to '0', then no service interval is set and the CID's hour meter screen does not show the 'S' field – Remaining time to service. No. Designation Min Std. Max Step Unit 104 Time to automatic logout 0 20 120 1 min. The parameter gives the time, in minutes, before automatic logout if the truck is inactive. If the value is set as ‘0’, logout takes place after 4 hours. No. Designation Min Std. Max Step Unit 116 Drive function with open door (cold-store cab) 0 1 1 1 Specifies the driving function when the door on the cold storage truck is open. Value Drive function 0 Driving not possible 1 Driving limited to creep speed (2.5 km/h as default) Parameter 1105 activates the function. Parameter 202 manages the set speed for creep speed. 4.1.2.1.1 Travel alarms 1 and 2 There are two dedicated outputs for travel alarm on the MCU. One has by default been assigned to the buzzer and one to the warning lamp. Both can be configured regarding frequency and activation pattern. The "travel alarm 1" function is activated by parameter 1108 and the "travel alarm 2" function is activated by parameter 1112. No. Designation Min Std. Max Step Unit 105 Travel alarm frequency 0 0 2 1 Parameter 105 controls the travel alarm frequency on output X131:23. The activation pattern for output X131:23 is set via parameter 114. The travel alarm function is activated by factory parameter 1108. Value Type 0 Constant 1 Flashing 1 Hz 2 Flashing 2 Hz No. Designation Min Std. Max Step Unit 106 Warning lamp frequency 0 0 2 1 Parameter 106 controls the warning lamp frequency [P5] on output X131:34. The activation pattern for output X131:34 is set via parameter 115. The warning lamp function is activated by factory parameter 1112. Value Type 0 Constant 1 Flashing 1 Hz 4
  • 17. 4 Parameters Parameter list Repair manual 7612541 en 4 - 4 Value Type 2 Flashing 2 Hz No. Designation Min Std. Max Step Unit 114 Travel alarm activation pattern [P4] 0 0 255 1 The parameter specifies the activation pattern for the travel alarm, output X131:23 The activation pattern is activated as indicated in the table below. Function that activates the travel alarm Value Driving in the drive wheel direction 1 Driving in fork direction 2 Fork lifting 4 Fork lowering 8 Cab tilt 16 Reach 32 Aux (Hydraulics) 64 Truck started up 128 The frequency for output X131:23 is set via parameter 105. The travel alarm function is activated by factory parameter 1108. No. Designation Min Std. Max Step Unit 115 Activation pattern for warning lamp [P5] 0 0 255 1 The parameter specifies the activation pattern for the warning lamp [P5], output X131:34. The activation pattern is activated as indicated in the table below. Function that activates the travel alarm Value Driving in the drive wheel direction 1 Driving in fork direction 2 Fork lifting 4 Fork lowering 8 Cab tilt 16 Reach 32 Aux (Hydraulics) 64 Truck started up 128 The frequency for output X131:34 is set via parameter 106. The travel alarm function is activated by factory parameter 1112. No. Designation Min Std. Max Step Unit 117 Collision sensor's alarm 0 0 1 1 - The parameter specifies how the alarm is given when the collision sensor is activated. Value Type 0 Repeated tone pulses 1 One tone pulse For setting the collision sensor’s sensitivity, see parameters 110 and 111.
  • 18. 4 Parameters Parameter list 4 - 5 Repair manual 7612541 en No. Designation Min Std. Max Step Unit 118 Warning buzzer during lifting platform use (MEWP, special op- tion) 0 0 1 1 Parameter settings: Value Function 0 Non-active 1 Active The function is activated using parameter 1121 (Special option). 4.1.2.1.2 Battery No. Designation Min Std. Max Step Unit 107 Battery size 1 9 20 1 Parameter 107 specifies the capacity of the battery on the truck. The parameter can also be used to compensate for dif- ferent ways of driving by: • increasing the value to discharge the battery even more • reducing the value if the battery is discharged too much. For recommended parameter settings, see the table below. Value: RRE140-160 Battery 10 930 Ah 11 775 Ah 13 620 Ah 16 465 Ah Tab. 2: RRE 140-160 Value: RRE180-250 Battery 9 930 Ah 11 775 Ah 14 620 Ah Tab. 3: RRE 180-250 It is necessary to specify the type of battery the truck is equipped with. In order to set the meter for the battery’s level of discharge, the following should be taken into account: • Acid density when the battery is fully charged, to check the qual- ity of battery. This value should be in the range 1.27-1.29. Please note that the acid density may vary between different battery brands. • When the lifting capability is reduced (the battery discharged to 80%) the value should be close to 1.14 but not lower. Freely ventilated batteries See the table for recommended parameter settings for free ventilated batteries. DANGER! Battery service life will be reduced if the value of parameter 107 is set too high. The standard setting of para- meter 107 is set for normal truck handling. Other applications may require a different setting of parameter 107. Check that the parameter setting is the correct one using the instructions below. Verifying the parameter setting for freely ventilated batteries: 1. Charge the battery. 2. Operate the truck in its normal application until the battery indicator indicates a discharged bat- tery (0% in the display). 3. Disconnect the battery from the truck and allow it to rest for at least two hours. Note: Do not allow any charging or discharging during this time. 4. Measure the acid weight of the battery at room temperature. If the acid weight is less than 1.15 g/cm3, the parameter value must be reduced. If the value significantly exceeds 1.15 g/cm3, the risk of damage to the battery is reduced. At the same time, however, the operating time of the truck decreases. If ex- tended operating time is desired, then increase the parameter value, but maximum by one unit. Note: Each change should be followed up by a new verification of the parameter setting. Parameter settings for valve-regulated batteries (VRLA) 4
  • 19. 4 Parameters Parameter list Repair manual 7612541 en 4 - 6 When setting parameter 107 in a truck with Reflex truck with Hawker Evolution batteries, BT recommends reducing the recommended value for wet batteries by six (6) units. DANGER! Battery service life will be reduced if the value of para- meter 107 is set too high. The standard setting of parameter 107 is set for normal truck handling. Other applications may require a different setting of parameter 107. Check that the parameter setting is the correct one using the instructions be- low. When checking the charging state on a discharged 48 V battery, its no-load voltage should be measured after a rest period. The zero indication should appear at an open circuit voltage that must not fall below 2.02 V/cell or 48.48 V. See the instructions below. Instructions for verifying parameter setting 1. Charge the battery. 2. Use the truck in its normal ap- plication until the battery indicator shows a discharged battery (0% on the display). 3. Disconnect the battery from the truck and allow it to rest for at least two hours. Note: Do not allow any charging or discharging during this time. 4. Meas- ure the voltage on the battery at +20°C. If the voltage is less than Uend, (see the table below), the parameter value must be reduced. If the value exceeds Uend considerably, the risk of causing damage to the battery is reduced. At the same time, the operating time of the truck is reduced. If a longer operating time is required, the parameter value can be slightly increased. 5. Each change should be followed up by a new verification of the parameter setting. Battery type Battery voltage at rest, Uend Hawker Evolution 48.48 V No. Designation Min Std. Max Step Unit 108 Battery level when acceleration and lift speed are limited 0 5 20 5 % Parameter 108 is used to state the level of the battery's remaining capacity according to the CID battery charge symbol when the acceleration and lift speed are limited to 70% of their maximum. A further, not parameter-controlled, limitation occurs when the CID battery charge symbol shows 0 %. In this case, the following are limited: • Acceleration – 30% of maximum performance • Lifting – 50% of maximum performance 4.1.2.1.3 Shock sensor Be sure to set the parameters for collision sensitivity upon installation of the truck. If shock sensor sensor is installed on the CAN bus, this registers when the truck bumps against something. If a collision exceeds a certain force, set by parameters 110 and 111, it is interpreted as a collision, and the truck speed is reduced to creep speed, a signal is heard and error code 2:106 is displayed. For setting how the alarm is to be given when the shock sensor is activated, see parameter 117. Information about the collision is stored in the truck's internal memory. The last ten registered collisions can be displayed together with operator identity via the PIN code. Additional information is available via TruckCom where collision levels and time indications can also be read. No. Designation Min Std. Max Step Unit 109 Resetting procedure for logged data 0 0 4 1 The parameter indicates whether saved data from the collision sensor should be deleted upon login or not, and whether to reset the BDI counter. Value Function 0 Delete nothing 1 Delete histogram log 2 Clear collision log 3 Not used 4 Reset BDI No. Designation Min Std. Max Step Unit 110 Shock sensor sensitivity along the X-axis (forward/reverse) 0 0 100 1 - The parameter specifies at which level along the X-axis (fork/drive wheel direction) truck functions should be blocked when there is a collision. No. Designation Min Std. Max Step Unit 111 Shock sensor sensitivity along the Y-axis (right/left) 0 0 100 1 -
  • 20. 4 Parameters Parameter list 4 - 7 Repair manual 7612541 en The parameter specifies at which level along the Y-axis (sideways truck functions should be blocked when there is a col- lision. No. Designation Min Std. Max Step Unit 112 Resetting procedure after collision 0 0 1 1 - The parameter specifies the condition for how the truck is to be taken into operation again after the impact sensors have been triggered: Value Function 0 Login with a special PIN code is required 1 The truck must be restarted The PIN code required to reset the shock sensor is entered in the login profile Block:10, Profile:1 4.1.2.1.4 Generic outputs No. Designation Min Std. Max Step Unit 120 Frequency for extra output 1 (Default = not used) 0 0 2 1 Parameter 120 controls the frequency on output X133:8. The activation pattern for output X133:8 is set via parameter 122. The function for the output is activated via factory parameter ????. Value Type 0 Constant 1 Flashing 1 Hz 2 Flashing 2 Hz No. Designation Min Std. Max Step Unit 121 Frequency for extra output 2 (Default = not used) 0 0 2 1 Parameter 121 controls the frequency on output X133:23. The activation pattern for output X133:23 is set via parameter 123. The function for the output is activated via factory parameter ????. Value Type 0 Constant 1 Flashing 1 Hz 2 Flashing 2 Hz No. Designation Min Std. Max Step Unit 122 Activation pattern for extra output 1 (Default = not used) 0 0 255 1 The parameter specifies the activation pattern for extra output X133:8. 4
  • 21. Thank you very much for your reading. Please Click Here. Then Get COMPLETE MANUAL. NO WAITING NOTE: If there is no response to click on the link above, please download the PDF document first and then click on it.
  • 22. 4 Parameters Parameter list Repair manual 7612541 en 4 - 8 The activation pattern is activated as indicated in the table below. Function that activates the travel alarm Value Driving in the drive wheel direction 1 Driving in fork direction 2 Fork lifting 4 Fork lowering 8 Cab tilt 16 Reach 32 Aux (Hydraulics) 64 Truck started up 128 The frequency for output X133:8 is set via parameter 120. The function is activated with factory parameter ????. No. Designation Min Std. Max Step Unit 123 Activation pattern for extra output 2 (Default = not used) 0 0 255 1 The parameter specifies the activation pattern for extra output X133:23. The activation pattern is activated as indicated in the table below. Function that activates the travel alarm Value Driving in the drive wheel direction 1 Driving in fork direction 2 Fork lifting 4 Fork lowering 8 Cab tilt 16 Reach 32 Aux (Hydraulics) 64 Truck started up 128 The frequency for output X133:23 is set via parameter 121. The function is activated with factory parameter ????. 4.1.2.2 Driving 4.1.2.2.1 General No. Designation Min Std. Max Step Unit 201 Braking force when reversing the travel direction 0 90 100 10 % The parameter can be used to produce a smoother deceleration when the application requires this for all operator pro- files. No. Designation Min Std. Max Step Unit 205 Speed reduction via external function-related sensors (Default = not used) 0 100 100 10 % Two inputs on the SCU, X133:31 and X133:4, are used to reduce the travel speed. If one or both of the inputs is actuated by a high signal from external sensors, speed is reduced according to this parameters.
  • 23. 4 Parameters Parameter list 4 - 9 Repair manual 7612541 en No. Designation Min Std. Max Step Unit 208 Creep speed function in travel direction control 0 1 1 1 - The parameter manages the creep speed function in the travel direction control. The function can be configured via para- meter 242. Value Function 0 Inactivated 1 Activated No. Designation Min Std. Max Step Unit 213 Setting the truck’s maximum travel speed 0 140 140 5 0.1 km/ h The parameter can be used to permanently reduce the truck’s maximum travel speed. This setting will apply to all oper- ator profiles. No. Designation Min Std. Max Step Unit 214 Adjusting the travel speed in the main lift range 15 40 80 5 0.1 km/ h The parameter is used to adjusted the reduced travel speed, Min 1.5 km/h Max 8 km/h, when the forks are in the main lift area. This parameter is only valid when the truck is equipped with height indication. If the truck does not have height in- dication, the speed is always reduced to 4 km/h when the forks are in the main lift area. This parameter is only relevant if parameter 1118 is set to 0. No. Designation Min Std. Max Step Unit 242 Configuration of function in travel direction selector 0 0 2 1 This parameter is used to set which double-click function is available via the travel direction selector. Parameter value Function 0 Inactivated 1 Click to creep mode 2 Click to steer straight 4.1.2.2.1.1 Adjusting error-dependant maximum travel speeds These parameters are used to reduce the speeds which are normally set as maximum travel speeds in connection with warnings or faults. No. Designation Min Std. Max Step Unit 202 Adjusting the creep speed max. 2.5 km/h 30 100 100 10 % The parameter can be used to adjust the creep speed. Can only be lowered. No. Designation Min Std. Max Step Unit 203 Adjusting the half-speed max. 4 km/h 30 100 100 10 % The parameter is used to specify the maximum speed for half-speed, max. 4 km/h. Can only be lowered. No. Designation Min Std. Max Step Unit 204 Adjusting the safety speed, max. 1.3 km/h 30 100 100 10 % The parameter is used to specify the maximum speed for safety speed, max. 1.3 km/h. Can only be lowered. 4
  • 24. 4 Parameters Parameter list Repair manual 7612541 en 4 - 10 4.1.2.2.1.2 Reduced maximum travel speed over a certain lifting height and reach length With the parameter pair 209/210, it is possible to activate and adjust a speed limitation when the forks are raised above a certain height. With the parameter pair 211/212, it is possible to activate and adjust a speed limitation when the reach carriage is exten- ded beyond a certain length. No. Designation Min Std. Max Step Unit 209 Lift height where the travel speed is limited 0 0 15000 100 mm The parameter specifies the lift height at which speed reduction is activated. Speed reduction is controlled by parameter 210. No. Designation Min Std. Max Step Unit 210 Setting travel speed reduction above a certain lift height 0 140 140 5 0.1 km/ h The parameter indicates the travel speed to be applied when the forks are over a specified height. The lift height at which speed reduction is activated is controlled by parameter 209. No. Designation Min Std. Max Step Unit 211 Reach carriage position when travel speed is limited 0 0 840 10 mm The parameter indicates at which length of the reach movement speed reduction is activated. Speed reduction is controlled by parameter 212. No. Designation Min Std. Max Step Unit 212 Setting travel speed reduction above a certain reach length 0 140 140 5 0.1 km/ h The parameter indicates the travel speed to be applied when the reach carriage is extended beyond a specified length. The reach movement length at which speed reduction is activated is controlled by parameter 211. 4.1.2.2.1.3 Fork laser Factory parameter 1132 is set to activate the fork laser. The fork laser is activated over the lift height (parameter 217) and when the forks are horizontal (parameter 218). No. Designation Min Std. Max Step Unit 217 Lift height at which the fork laser is activated 0 2300 15000 100 mm The parameter indicates the lift height at which the fork laser should come on. The function is activated with factory parameter 1132, page 4 - 000. No. Designation Min Std. Max Step Unit 218 Adjustment of permitted degree of deviation from 0° (tilt) at which the laser is activated 0 10 100 1 0.1° This parameter handles the specified degree of deviation from 0° tilt at which the fork laser will be activated. The default value is 10, which means that the fork laser is activated at 1° down and 1° up. 4.1.2.2.1.4 Blue/red warning lamp Factory parameter 1131 is set to activate the warning lamp. Control of the warning lamp in the drive wheel direction (parameters 219-222) and the warning lamp in the fork direction (parameters 224-227).