Metal free ceramic/ dental education in india
•Télécharger en tant que PPT, PDF•
27 j'aime•6,648 vues

Indian Dental Academy: will be one of the most relevant and exciting training center with best faculty and flexible training programs for dental professionals who wish to advance in their dental practice,Offers certified courses in Dental implants,Orthodontics,Endodontics,Cosmetic Dentistry, Prosthetic Dentistry, Periodontics and General Dentistry.

Recommandé
Contenu connexe
Tendances
Tendances (20)
Similaire à Metal free ceramic/ dental education in india
Similaire à Metal free ceramic/ dental education in india (20)
Plus de Indian dental academy
Plus de Indian dental academy (20)
Dernier
Dernier (20)
Metal free ceramic/ dental education in india
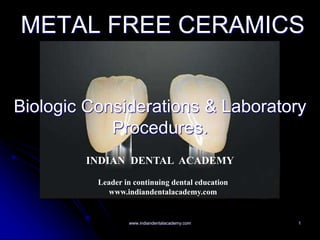
- 1. 1 METAL FREE CERAMICS Biologic Considerations & Laboratory Procedures. INDIAN DENTAL ACADEMY Leader in continuing dental education www.indiandentalacademy.com www.indiandentalacademy.com
- 3. 3 General Biologic Preparation Preservation of tooth structure. Retention and resistance form. Structural durability of the restoration. Marginal integrity. Preservation of the periodontium. www.indiandentalacademy.com
- 4. 4 Preservation of tooth structure. Judgment of the type of restoration to be used. Design. Ill effects when excessively prepared 1. Thermal hypersensitivity. 2. Pulpal inflammation. 3. Necrosis. www.indiandentalacademy.com
- 5. 5 Retention and resistance form. Retention: it is the ability of the preparation to impede the removal of the restoration along its path of insertion. Resistance: it is the ability of the preparation to prevent dislodgement of the restoration by forces directed in a apical, oblique, or horizontal direction. www.indiandentalacademy.com
- 6. 6 The Design : The preparation has to provide maximum strength by establishing flat planes at right angles to the forces of mastication and avoiding sharp line angles. A shoulder margin is also required because it offers superior strength as compared to chamfer. www.indiandentalacademy.com
- 7. 7 Retention and resistance form. Estimation. Geometric form. Cement used to lute the restoration. Direction of the forces. www.indiandentalacademy.com
- 8. 8 Length of the preparation : When a load is applied from a lingual direction, the labial shoulder is placed under compression and only the length of the preparation at the incisal lingual aspect provides significant resistance to this force. short preparations cause considerable stresses and may lead to fracture. of the preparation www.indiandentalacademy.com
- 9. 9 Factors affecting Retention Degree of taper. Total surface area of the cement film. Area of cement under shear. Roughness of the tooth surface. www.indiandentalacademy.com
- 10. 10 Taper : Minimal taper is recommended for maximum surface area and support of the preparation. Excessive taper of the preparation correlates with a reduction in breaking strength and increase in stress concentration in the area where support is lacking. A 5`taper is ideal and would ensure maximum resistance form with only one path of insertion of the crown but it is also difficult to achieve without producing undercuts. The safest and most practical convergence angle of all- ceramic preparations is 10`taper, which represents an acceptable compromise between taper and strength. www.indiandentalacademy.com
- 12. 12 Surface area Greater the surface area of the ecement film greater is the retention. The size of the restoration is influenced by: 1. size of the tooth. 2. extent of coverage of the restoration. 3. additional preparations like grooves boxes. www.indiandentalacademy.com
- 13. 13 Area under shear. The preparation must have opposing walls. The opposing surfaces may be internal such as facial and lingual walls of a proximal box of an inlay. Or may be external like axial walls of full veneer crown preparation. It can be also a sum of the both. www.indiandentalacademy.com
- 14. 14 a. Internal retention in an inlay. b. Slightly divergent internal walls. a. External retention resists removal. b. Approximation of the restoration to the opposing external axial walls. www.indiandentalacademy.com
- 16. 16 Resistance form Leverage and resistance. Preparation length and resistance. Resistance and tooth width. Taper and resitance. Rotation around a vertical axis. Path of insertion. www.indiandentalacademy.com
- 17. 17 Structural durability of the restoration. Occlusal reduction and functional cusp bevel. Axial reduction. Provision for reinforcing struts. www.indiandentalacademy.com
- 18. 18 Preparation for all ceramic restorations www.indiandentalacademy.com
- 21. 21 Incisal / occlusal reduction www.indiandentalacademy.com
- 22. 22 Facial & Lingual reduction : The minimal acceptable facial thickness of porcelain from an esthetic standpoint is 1.0mm, and the ideal depth of reduction on the midfacial aspect of a typical maxillary central incisor for an aluminous porcelain jacket crown should be 1.3 mm. Facial depths of reduction up to 1.5mm have also been recommended for molded, castable, and slip-cast ceramics. Lingual thickness values of 1.5 mm are ideal but are difficult to achieve routinely. Practically lingual thickness should be in the 1 – 1.3 mm range, and the absolute minimum should be 0.8 mm. The lingual aspect of the preparation should be shaped to avoid uneven sections of the crowns and sharp line angles must be avoided. www.indiandentalacademy.com
- 26. 26 Shoulder : A well defined shoulder with adequate width improves the fracture resistance of the crown because it provides additional bulk at the margins that is placed at right angles to the direction of stresses The more the intimate the contact between the preparation and the ceramic crown higher the resistance to fracture on occlusal loading. www.indiandentalacademy.com
- 27. 27 Shoulder / Chamfer : When the shoulder angle of the preparation to the longitudinal axis of the tooth is greater than 90`, the risk if porcelain fracture increases. The internal shoulder angle should be rounded to reduce the stress concentration factor up to 50% and because sharp internal line angles cannot be easily reproduced with porcelain. Similarly , the internal rounded shoulder is recommended for the In-Ceram* crown to facilitate the adaptation of the aluminous oxide slip on the die. www.indiandentalacademy.com
- 28. 28 Shoulder width : A shoulder of uniform thickness may round the preparation excessively and compromise resistance form. For a maxillary central incisor, the lingual and facial shoulder width should be I mm with a minimum of 0.8 mm, and the interproximal width should be 0.5 mm because the proximal walls of the crown flare out and provide sufficient strength in the proximal area www.indiandentalacademy.com
- 31. 31 Shoulder curvature (interproximally) : The finish lines should follow a smooth curvature that it is not too steep inter- proximally to avoid a potential v shaped notch that could split the labial off the lingual aspect of the crown.www.indiandentalacademy.com
- 34. 34 Why use metal free ceramics? There is an increase the depth of translucency and light transmission in the crown either deep into the crown or across the entire crown, which increases the life like nature of the restoration. www.indiandentalacademy.com
- 35. 35 Selection of restoration: Strength. Simplicity of fabrication. Marginal and internal fit. Cost-benefit analysis. Skill of the operator. Esthetic performance. Potential for high volume production. www.indiandentalacademy.com
- 36. 36 Indications : Aesthetics. Public figures, personalities, models, actresses and demanding patients. www.indiandentalacademy.com
- 37. 37 Contra-indications: parafunctional activity,e.g. bruxism Uncorrected deflective malocclusions. occlusal clearance less than 0.8 mm. Insufficient tooth support. Molar teeth. www.indiandentalacademy.com
- 38. 38 All Ceramic Materials Conventional powder Castable cerami cs Pressable ceramics Machinable ceramics Infiltrated ceramics www.indiandentalacademy.com
- 39. 39 Powder Slurry Ceramics : Supplied as: Powder and liquid. The powders are available in different shades and translucencies, and are supplied with characterizing stains and glazes. Fabrication: Powder and liquid mixed to a slurry which is build up in layers on a die material to form the contours of the restoration. e.g. Vita Hi-Ceram (Vita Zahnfabrik) CERABIEN (Noritake) OPTEC H.S.P (Jeneric/Pentron) DUCERAM L.F.C (Ducera Inc) www.indiandentalacademy.com
- 40. 40 Castable Ceramics : Supplied as: solid ceramic ingots. Fabrication: Cores or full contour restorations are made using a lost wax and centrifugal casting technique. e.g. DICOR (Dentsply). CERAPEARL (Bioceram, Kyocera) www.indiandentalacademy.com
- 41. 41 Pressable Ceramics : Supplied as: Ingots Fabrication: Ingots melted at higher temperatures and pressed into a mould using a lost wax technique. These pressed form can be made into full contour, or can be used as a substrate for conventional feldspathic porcelain buildup, or can be built up by layering technique. e.g. IPS Empress I, II (Ivoclar vivadent) OPC (Optec Pressable Ceramic) ALCERAM (Cerestore, Innotek dental corp) www.indiandentalacademy.com
- 42. 42 Infiltrated Ceramics : These are glass infiltrated core ceramics. This involves slipcasting technique for making the core, and the contours of the restoration are obtained by individual layering and staining techniques. e.g. In-CERAM (Vita Zahnfabrik) Alumina infiltration Zirconia infiltration Spinell infiltration www.indiandentalacademy.com
- 43. 43 Machinable Ceramics Supplied as: ingots in various shades. Fabrication: Ingots are milled into desired form. They are of two types : 1.CAD-CAM = Computer Aided Designing – Computer Aided Milling. e.g. CEREC (Sirona) Ivoclar ProCAD (Ivoclar, Spring) Dicor M.G.C (Dentsply) Procera (Nobel Biocare) Lava (3M ESPE) CERCON Dentsply Ceramco 2. Copy Milling = CELAY (Mikrona Technologies) www.indiandentalacademy.com
- 44. 44 CASTABLE CERAMICS DICOR ( Dentsply) CERAPEARL( Kyocera) www.indiandentalacademy.com
- 45. 45 History : The DICOR castable glass ceramic is one of the pyoceram ceramics manufactured by Corning glass ware. Founded in the year 1978, after 6 years of intensive research this ceramic system was introduced to dentistry. The present system represents the cumulative efforts of Peter.J.Adair of BIOCOR Inc., David Grossman Ph.D of the Corning Glass ware & Dentsply International. www.indiandentalacademy.com
- 46. 46 Indications : Anterior PJC. Inlays, onlays, three quarter crowns. Partial veneers, especially in periodontally compromised teeth www.indiandentalacademy.com
- 47. 47 Contraindications : Clinical crown length is short. FPD. www.indiandentalacademy.com
- 48. 48 Clinical Procedure : The tooth structure is sufficiently removed to allow an adequate thickness of the material for strength and color saturation. For castable ceramics, the tooth reduction on all surfaces must be no less than 1.2mm. Heavy chamfer (135`)`or shoulder margin. 6`- 8`taper and all line angles rounded. Standard impression procedures are followed. www.indiandentalacademy.com
- 49. 49 Incisal or occlusal - 1.5 mm- 2.0 mm. Facial or lingual - 1.0 mm – 1.5 mm. Tooth preparation : www.indiandentalacademy.com
- 50. 50 Laboratory Procedures : Die preparation. Waxing & Spruing. Investing & Mold conditioning. Casting. www.indiandentalacademy.com
- 51. 51 Divesting. Sprue removal. Embedding. Ceramming & post ceram divesting. Finishing, coloring. www.indiandentalacademy.com
- 52. 52 Die Preparation : Casts should be free of 0cclusal artifacts,air bubbles and other inaccuracies. Dies must be prepared with proper indexing. The dies should be sectioned, trimmed and refined with care. Any existing undercuts must bu blocked out to ensure wax pattern removal without distortion. Die sealant should be used. A die spacer of appropriate shade is applied on evenly to the die to within 1 mm of margin. www.indiandentalacademy.com
- 53. 53 Waxing : Die lubricant is applied over the die spacer to prevent adherence of the wax to the die. All contours of the wax crown should have a minimum thickness of at least 1mm to ensure adequate strength of the crown. A smooth and completely formed internal surface of the waxed crown is necessary. A wild-Leitz stereomicroscope with fibre optic light can be used to avoid any over extensions in the margins. www.indiandentalacademy.com
- 54. 54 Spruing : One 8 or 10 gauge wax sprue, attached to the incisal surface of the anterior patterns, provides an adequate gate for the ingress of the ceramic material. Posterior patterns are usually require 10 gauge sprues attached to the lingual and buccal cusp tips. Sprue placement on molar patterns should be diagonally opposed for more uniform flow of the fluid ceramic. A sprue design incorporating a perpendicular reservoir has also produced adequate casting. Length must be approx 3 – 4 mm. The pattern should be located so that its most distal point is approx 6 – 7 mm from the open end of the casting ring to allow adequate diffusion of the mold glass through the investment. www.indiandentalacademy.com
- 56. 56 Investment : Wax pattern must be cleansed with a debublizing agent, any excess must be removed. Non-corroding casting rings that are resistant to oxidation at high temperature must be used. 2 layers of Kaoliner* a ring liner material (an asbestos liner)is placed inside the ring,to permit suffficient expansion. The ring liner is saturated eith water for about 10 sec before ceating the ring on to the crucible former. A special phosphate bonded investment is used for casting process. www.indiandentalacademy.com
- 57. 57 This material exhibits no setting expansion but produces approx 1.5% thermal expansion at high temperatures. 8 ml of distilled water must be mixed with 60 gm of investment powder for 30 sec under vacuum with power spatulation. After spatulation additional vibration under vacuum is carried for 20 – 30 sec. The mixed investment should be carefully applied on to the wax pattern with a camel’s hair brush. www.indiandentalacademy.com
- 58. 58 Investment : After the wax pettern is carefully filled and coated, the remaining material should be vibrated into the ring allowing an excess to remain above the open ends of the ring. After bench setting for 1 hr the excess material should be trimmed even with the top of the casting flask. www.indiandentalacademy.com
- 59. 59 Mold conditioning : A two stage mold conditioning is employed. The invested pattern is placed in a cold furnace, the temperature is raised to 249`C, and maintained for 30 min (heat soak), 10 min of additional time for each ring should be added if more than three rings are placed at a time. The temperature is raised to 899`C, and maintained for 2 hrs (heat soak), similarly 10 min added for each ring. www.indiandentalacademy.com
- 60. 60 Casting : A 4 gm ceramic ingot is loaded in the ceramic crucible. The amount of ceramic material required to make a good casting can be determined when multiplied by a conversion factor of 2.6, the weight of the wax pattern, sprues and button should not exceed 4gm . Two patterns can be cast into one flask. www.indiandentalacademy.com
- 61. 61 Ceramic ingot Ceramic crucible: www.indiandentalacademy.com
- 62. 62 Casting Machine : The Dentsply DICOR casting machine features a platinum electric resistance- type muffle mounted on a electrically driven straight centrifugal casting arm. The machine is fitted with a special receptacle to hold the Dicor crucible. www.indiandentalacademy.com
- 63. 63 Casting Procedure : An ideal temperature of 1100`C is maintained for 10 min to stabilize the muffle. The crucible containing the ceramic ingot is inserted through the rear muffle door. The crucible is properly positioned in the muffle for melting the glass by the help if a special tool. The rear door is closed, the melting temperature is adjusted to 1360`C, and the melt switch is turned on. After reaching the determined temperature, this will be maintained for 6 min. www.indiandentalacademy.com
- 64. 64 Casting Procedure : The rear muffle door is opened . The casting ring is removed from the burnout furnace and placed in the cradle with the crucible and gate facing the muffle. The front muffle door is opened and the muffle assembly is slid forward towards the casting ring until it is seated. The casting machine cover is shut and the casting switch is turned on. The casting arm spins automatically for 4 ½ min and then stops. By the end of the spin cycle the casting will cool down The casting ring is removed form the machine and allowed to dool for 45 min before divesting www.indiandentalacademy.com
- 66. 66 Divesting : • After cooling, the investment is removed from arround the edges of the casting ring to a depth of approx 6 –8 mm. The investment mass can be forced out of the retaining ring by pushing with the fingers. The bulk of the investment material can be broken away from the casting with finger pressure. The remaining casting should be removed with an air abrasive tool using 25 micron aluminum oxide at 40 p.s.I. The margin areas should be protected by covering with the finger to prevent chipping. www.indiandentalacademy.com
- 67. 67 Sprue removal : The cast crown is cut off at the junction of sprue and button using a suitable single or double side diamond disc. The sprue is cut near the glass button to avoid chipping. The remaining button must be dicsarde and cannot be reused because the glass is altered during melting cycle. The casting at this stage is non-crystalline. www.indiandentalacademy.com
- 69. 69 Embedding : The casting is embedded in the ceramic embedment material, so that the ceramming process can take place. During this ceramming procedure the glass is concerted into a 55% crystalline form. The glass casting is embedded in a mixture of 18 ml distilled water and 50gm of embedment powder. Hand mixing is sufficient. The inside of the crown is carefully filled with the embedment mix and then it is placed on a tray with a concave receptacle in which additional material is placed. Additional embedment is used to cover and protect the glass crown. The material should be allowed to set for 45 – 60 min. www.indiandentalacademy.com
- 70. 70 Ceramming : This process is accomplished by a precisely controlled ceramming furnace. The furnace temperature is gradually increased to 1075`C for 3 ½ hrs, this temperature should be maintained for 6 hrs. the furnace is cooled to 200`C and the embedment tray is removed. The ceramming process involves a two-stage heat treatment. The first heat treatment is carried at the temperature for maximum nucleation of crystals, so maximum no: of crystals are formed. The temperature is held for some time for the crystal growth to take place, to attain the maximum size. www.indiandentalacademy.com
- 71. 71 DICOR Ceramming Furnace : www.indiandentalacademy.com
- 72. 72 Ceramming tray Pyrometric cone www.indiandentalacademy.com
- 73. 73 Postceram divesting : The tray is allowed to cool to room temperature. The embedment is broken. The crown is cleaned by air-blasting with 25 micron aluminum oxide at 40 p.s.I at a distance of approx 6inches. The margins should be protected from chipping during air-blasting. www.indiandentalacademy.com
- 74. 74Wax pattern – Glass form - crystalline form - finished crown Various phases undergone www.indiandentalacademy.com
- 75. 75 Crown finishing : Crystalline glass crown is inspected for internal nodules or irregularities, which may interfere with seating of the casting on the die. These irregularities csn be removed with extrafine diamond points. The crows is seated on to the die and examined for marginal overextensions. If any, must be removed with fine white point or rubber wheel rotating at low speed. The remaining sprue is removed with a double sided diamond disc rotating at slow speed. www.indiandentalacademy.com
- 76. 76 Crown finishing : The fine opaque white skin covering the crown must be removed. The sprue is finished and the skin is lightly removed with a fine rubber abrasive wheel. After removal of the skin the crown is air blasted with 25 microns aluminum oxide at 40 psi. The primary and secondary occlusal anatomy can be defined with small round and inverted cone T.C burs. Corrections can be done with an add-on material. The casting is dried in front of the open muffle at 593`C and introduced into muffle under vacuum to a temperature of 968`C for 1 min and can be shaped and adjusted to desired contours. www.indiandentalacademy.com
- 77. 77 Characterization & Glazing : www.indiandentalacademy.com
- 78. 78 Characterization & Glazing : After the ceramming process the casring is achromatic, the desired hue is decided by the shading porcelains. The blending of enamel and body colors must occur while they are wet. The first and the second shading porcelains should be fired at a slightly lower temperature to prevent over glazing and glassy appearance of the crown. Castable ceramics can be fired repeatedly in a conventional glazing oven without affecting the physical properties or marginal integrity of the material www.indiandentalacademy.com
- 79. 79 Cementation : The color value is modified by a series od dentsply shaded cements.these cements are color coordinated with the die spacers that are earlier used. If a natural colored tooth preparation exists, a translucent glass ionomer cement is indicated. In those cases the tooth structure or a metal core is present, the use of properly colored cement can be of good esthetic value. During cementation process, controlled, positive finger pressure should be used to seat the crown onto the prepared tooth. Excess cement is completely removed after the setting is complete. www.indiandentalacademy.com
- 80. 80 POWDER SLURRY CERAMICS Vita Hi-Ceram (Vita Zahnfabrik) CERABIEN (Noritake) OPTEC H.S.P (Jeneric/Pentron) DUCERAM L.F.C (Ducera Inc) www.indiandentalacademy.com
- 81. 81 Lab Procedures : Preparing the refractory die. Hard core porcelain framework. Crown buildup. www.indiandentalacademy.com
- 82. 82 Refractory Die : Apply Vita interspace varnish on to the die in 2 or 3 coatings. www.indiandentalacademy.com
- 86. 86 In the Vita Vacumat 200 : prog 5.5, end temp 1,000`C, pre- drying time 10 min, heating time 10 min, hold time 3 min. In the Vita Vacumat 100 : prog 5, end temp 1000`C, pre-drying time 10 min, heating time 10 min, hold time 3 min.www.indiandentalacademy.com
- 87. 87 Constructing the hard core porcelain The Hi-Ceram hard core porcelain has to be applied and fired in three layers altogether : 1. The wash firing.; 2. Half of the require thickness with protuberance for later checking on the thickness of the porcelain.; Full build-up as a smaller version of the crown it is to become. Minimum thicknes 0.5mm. www.indiandentalacademy.com
- 88. 88 The thickness of hard core porcelain framework should not be less than 0.5 mm. For additional stability, a collar in Hi- Ceram hard core porcelain can be added palatally or lingually. www.indiandentalacademy.com
- 89. 89 The refractory die should be blasted away using glass beads at a pressure of 1- 2 bar. www.indiandentalacademy.com
- 90. 90 The build up of the crown : The crown should be built up to its desired shape using Vitadur- N dentin porcelain, although to compensate firing shrinkage it must be built longer incisally. The cervix of the hard core framework can be coated before hand using Vitadur-N opacous porcelain. www.indiandentalacademy.com
- 91. 91 A little Vitadur-N opacous dentin can also be applied palatally, so that even in cases where there is a deeper than normal bite by the occluding teeth, any shining through of the Hi- Ceram hard core porcelain will be completely avoided. www.indiandentalacademy.com
- 92. 92 To create the necessary space for the enamel porcelain, the dentin should have a crescent carved away incisally and for the smooth transition between the dentin and enamel, then also be smoothened using a flattened brush. www.indiandentalacademy.com
- 93. 93 For individual shading and characterization, there are 5 Vitadur-N opacous dentin, 6 dentin effect, 2 enamel effect and 7 COLOR porcelains available. www.indiandentalacademy.com
- 94. 94 The shape of the crown is now built up in Vitadur-N enamel porcelain. It should be somewhat over dimensioned to compensate firing shrinkage. www.indiandentalacademy.com
- 95. 95 The crown is fired as follows: either by placing it onto a fibrous pad firing support (in which case raise the temperature by 10`C), or by wrapping a normal crown stand in the fibrous pad material and then placing the crown loosely onto it: www.indiandentalacademy.com
- 96. 96 The fired Hi-Ceram crown should be ground all over in the normal way, using a diamond or a green silicon carbide bur. For corrections, clean without using any cleansing agent but with a clean brush under running water, or a steam jet blaster. Then reapply the appropriate porcelain and fire as for the main vacuum firing, except with the temperature reduced by 10`C. www.indiandentalacademy.com
- 97. 97 The cervical porcelain should be mixed with Vita modeling liquid, applied onto the cervical margin, condensed and then bottled. Excess cervical porcelains should then be removed using either a clean finger or a dry brush. www.indiandentalacademy.com
- 98. 98 Glaze firing : Applying the Vitachrom ”L” glaze No. 725 allows the temperature for the glaze firing to be lowered, thereby guarantying that the cervical margins retain its accurate fit. www.indiandentalacademy.com
- 101. 101 CAD – CAM Ceramics CEREC CEREC SCAN CEREC 2 CEREC InLAB CEREC 3 IVOCLAR PROCAD (IVOCLAR, SPRING) DICOR M.G.C (DENTSPLY) PROCERA (NOBEL BIOCARE) LAVA (3M ESPE) www.indiandentalacademy.com
- 103. 103 Types of CAD – CAM Devices: DIRECT: Fully integrated CAD – CAM devices for chair side restorative approach. CAD & CAM stations are located at the dental office. INDIRECT: System that consists of several modules with at least, distinctive CAD & CAM stations. www.indiandentalacademy.com
- 104. 104 Direct CAD - CAM CEREC, CEREC 2, CEREC 3 www.indiandentalacademy.com
- 107. 107 Equipment a computer integrated imaging and milling system, with the restorations designed on the computer screen www.indiandentalacademy.com
- 108. 108 Ingots used Dicor MGC*(Machinable Glass Ceramic)(Dentsply): This is a mica based machinable glass ceramic containing 70% vol of crystalline phase. The unique “House of Cards” microstructure found in Dicor MGC is due to the inter locking of the small platelet shaped mica-crystals with an average size of 1 – 2 microns. This particular structure leads to multiple crack deflections and ensures greater strength than leucite containing ceramics. www.indiandentalacademy.com
- 109. 109 Vita Mark II (Vident): These contain sanidine (KALSi3O8) as a major crystalline phase within a glassy matrix. www.indiandentalacademy.com
- 110. 110 ProCad (Ivoclar): ProCAD is reinforced with tiny leucite particles, and has been referred to as: "Empress on a stick". www.indiandentalacademy.com
- 111. 111 Vita IN-Ceram Blanks (Vita Zhanfabrik): These are third generation blanks from Vita. The Spinell MgAl2O4. The Alumina Al2O3. The Zirconia ZrO2. www.indiandentalacademy.com
- 112. 112 The Spinell Blanks: The fine chemical and mechanical properties of the highly pure synthetic spinell are used with the aim to obtain an esthetically appealing, translucent ceramic structures. www.indiandentalacademy.com
- 113. 113 Alumina Blanks: These uses the advantages of the synthetic corundum that is prepared from bauxite prepared in electric melting furnace. www.indiandentalacademy.com
- 114. 114 Zirconia Blanks: This combines the fracture toughness of the meta-stable tetragonal zirconium oxide which is also referred to as “ceramic steel”. www.indiandentalacademy.com
- 115. 115 Clinical Procedure: Preparation design. Optical impression. Computer generated restoration design. Milling procedure. www.indiandentalacademy.com
- 116. 116 Tooth Preparation Design: Tooth preparation follows typical all- ceramic guidelines. www.indiandentalacademy.com
- 117. 117 Optical impression The surface of the prepared teeth often lacks sufficient reflectivity or it may have facets that give an uneven glaze to the computer screen. It is therefore necessary to coat the preparation with a special powder (titanium dioxide) that has proper light reflectivity. Rubber dam must be placed to prevent fogging of the camera lens and to aid in isolation. Cerec is the first system that makes intra-oral scanned impressions a reality. This is done through a small hand held camera. The camera, which resembles a wand, illuminates the prepared tooth and the 2 adjacent teeth with its light source and processes the image with the 3- D measuring camera. www.indiandentalacademy.com
- 118. 118 The operator actually feels the wand vibrate as the camera oscillates to scan the teeth at slightly different angles. The Cerec software then blends these images to create its 3D map of the topography. This optical scanning system could well be the precursor of much expanded use of optical scanning in dentistry. However, the inability to scan sub gingival margin areas and some interproximal areas must (but probably will) be overcome before optical scanning becomes mainstream. www.indiandentalacademy.com
- 120. 120 Design Phase: With the help of the CEREC 3 Software we can choose the basis software for the designing of inlays/onla ys or crowns or veneers. www.indiandentalacademy.com
- 121. 121 Shaping of the surfaces: 1. Function 2. Correlation 3. Extrapolation www.indiandentalacademy.com
- 122. 122 Function: This design programme takes design of the antagonist. Correlation This design programme allows to copy intact occlusal surfaces. Extrapolation This programme calculates the dimensions of the restoration with reference to a tooth database and as well as with the adjacent teeth.www.indiandentalacademy.com
- 123. 123 With using all the programme s the operator can digitally design the restoration by moving the cursor along the boundaries. www.indiandentalacademy.com
- 124. 124 The procedure can be stopped at any time and can override the computer and allow the operator to correct, the digitally generated features. Once the restoration has been designed, the computer develops a 3-D model on the screen. All the information is stored. The design phase usually takes 2 – 8 min. www.indiandentalacademy.com
- 126. 126 Milling Phase: After all the data has been supplied, the computer selects the size of the ceramic block to be used in the milling process. There are wide range : Composition. Shade. Size. www.indiandentalacademy.com
- 127. 127 These blanks are factory fabricated and thus are more homogenous and less porous than materials that are made in the lab. These materials also produce “chameleon effect”. The material is mounted on the metal stud, which allows it to be inserted in to the milling hub. Once the material is inserted. The window is closed an the milling process is activated. www.indiandentalacademy.com
- 129. 129 Advantages of CEREC System: One or two appointments. Optical impression, max time required is 5 sec. Wear hardness similar to enamel. Less fracture due to single homogenous block. Excellent polish. Improved esthetics. Time saving. Good occlusal morphology in relation to antagonist. www.indiandentalacademy.com
- 130. 130 Indirect CAD - CAM CEREC* SCAN, CEREC* In-LAB PROCERA* SYSTEM LAVA 3M ESPE Cercon® Zirconia (Dentsply) www.indiandentalacademy.com
- 131. 131 CEREC SCAN: Tooth preparation. Conventional impressions. Die preparation. Controlled by one of the practice pc’s. Can be upgrade to CEREC 3. Works upon CEREC 3 software. Intra oral scanning device is not present. www.indiandentalacademy.com
- 132. 132 CEREC SCAN (inclusive of both scanning and milling device)with lap top(imaging device). www.indiandentalacademy.com
- 135. 135 Controlled Scanning: Consists of a compact milling unit with a in-built scanner. This consists of non contact scanning for utmost precision. Software runs on Windows* 98. www.indiandentalacademy.com
- 136. 136 Controlled Design: Offers a complete spectrum of design options for crowns and bridge framework. All relevant parameters can be adjusted individually …for example, the occlusal and radial wall thickness and the cross sectional area of the bridge connectors. This system gives a visual thickness if operator falls short of the minimum material specific wall thickness. Thus the operator exerts complete control over the design process ay all times. www.indiandentalacademy.com
- 137. 137 Controlled milling: Prior to each milling jib CEREC In-Lab automatically checks the dimensional accuracy of the milling tools. The integrated soft touch control monitors the calibration of the tools throughout the milling process and compensates for any wear-related inaccuracies. www.indiandentalacademy.com
- 138. 138 Parallel milling with two tools: www.indiandentalacademy.com
- 139. 139 High speed milling of copings and bridge frame work. www.indiandentalacademy.com
- 140. 140 Processing times: Process step Coping Bridge framework Scanning (automatic) Approx. 10 min Approx. 20min Design Approx. 2 min Approx. 6 min Milling (automatic) Approx. 15 min Approx. 50 min www.indiandentalacademy.com
- 142. 142 Fabrication Procedures: Tooth preparation. Die preparation. Scanning. Data transfer. Central milling. Application of conventional porcelains. www.indiandentalacademy.com
- 143. 143 Tooth preparation: Since the scanner's tip is rounded, the finish line should be a chamfer placed sub- gingivally at 0.5 mm to 0.7mm. A rounded shoulder may be also an appropriate design. www.indiandentalacademy.com
- 144. 144 A relatively level topography should be accomplishe d during preparation of the occlusal surface of posterior dentition. www.indiandentalacademy.com
- 145. 145 The occlusal surface of a posterior tooth is shaped, eliminating undercuts and sharp edges. Steep slopes and sharp groves are avoided to enable the scanner to recognize all of the information through the tip. www.indiandentalacademy.com
- 146. 146 For anterior dentition, preparation of the lingual surface requires shaping with diamond bur to eliminate debris. www.indiandentalacademy.com
- 147. 147 Fine finish lines on the prepared tooth enable the scanner to precisely register all aspects of the die models, which directly affects the marginal fit of the definitive restoration. www.indiandentalacademy.com
- 148. 148 Preparation depths should be between 1.0 mm and 1.5 mm, while the occlusal reduction should be at least 2.0 mm. www.indiandentalacademy.com
- 149. 149 Lab Procedures: The cast is made in the conventional way, the die is ditched to make the margin easier to identify during scanning. The die is then taken to the PROCERA* design station for scanning and designing. www.indiandentalacademy.com
- 150. 150 A technician using the special Procera design station scans the die and designs the coping to be fabricated. This station consists of a computer, a modem and the Procera scanner. Once positioned on the scanner, a probe lightly touches the die as it is rotated. A 3D map is produced from this "tactile scan" that consists of approximately 50,000 data points from around the die. www.indiandentalacademy.com
- 151. 151 The technician then marks the margin or finish line and selects an emergence profile for the coping, using the computer and its’ Procera design software. This information is then modemed to the manufacturing facility in Fairlawn, New Jersey. In about 4 days the Procera coping is returned to the laboratory for further veneering. www.indiandentalacademy.com
- 152. 152 The production starts with milling an enlarged die to compensate for the sintering shrinkage. An enlarged high-alumina coping is milled that shrinks to the desired shape after sintering. The coping is returned to the laboratory, and body and incisal porcelains are added in the conventional manner. www.indiandentalacademy.com
- 153. 153 Lava from 3M ESPE www.indiandentalacademy.com
- 154. 154 Equipment Lava™ Scanner Lava™ Milling Unit Lava Therm furnace (sintering unit). www.indiandentalacademy.com
- 155. 155 Preparation Anterior Crown • 1.5 – 2.0 mm incisal reduction • 1.0 – 1.5 mm lingual reduction • 1.0 – 1.5 mm lingual reduction • Round the internal line angles Posterior Crown • 1.5 – 2.0 mm occlusal/incisal reduction • 1.0 – 2.0 mm axial reductionwww.indiandentalacademy.com
- 156. 156 The optimal preparation is a shoulder or chamfered preparation with a circumferential step or chamfer which must be applied at an angle of >5° (horizontal). The angle of the preparation (vertical) should be 4° or larger. The inside angle of the shoulder preparation must be given a rounded contour. www.indiandentalacademy.com
- 157. 157 Laboratory Preparation A light colored type IV or V die stone (white, beige, buff, or green) without plastic additives is recommended. A light, dull (non-reflective) surface works best for the scanning procedure. Model bases should be removable from the plaster that is used to attach the model to the articulator. The model bases should be flat, have minimal thickness and size, in order to ensure optical accessibility. www.indiandentalacademy.com
- 158. 158 A common split-cast system is recommended. Attention should be paid to ensure that the base of the model is smooth and flat, without split-cast guides, metal plates or magnets. Overlapping areas should be blocked out with light colored wax after consultation with a dentist, as should defects. All segments of the saw-cut model must be removable from the base with double, triple, or block pin die system to prevent rotation or movement of the die(s) and tissue (pontic) areas. www.indiandentalacademy.com
- 159. 159 Vertical walls and sharp line angles are difficult for the scanning process to decipher. Avoid preparations with these situations (see Ideal Die Preparation). Copings or frameworks for implant abutment posts should also be pinned, removable, and in die stone or acceptable resin die material. Margins should be ditched according to Ideal Die Preparation example. www.indiandentalacademy.com
- 160. 160 1. Dies should be ditched directly below the margin – DO NOT mark the margins, or use die spacer, or hardener on the die preparation area. This will create a reflective surface on the die that will compromise the scanned data of the die surface. (Note proper angulation of prep area). www.indiandentalacademy.com
- 161. 161 Undercuts, occlusal holes, surface defects should be blocked or based-out with a resin block-out material, or a light colored wax. Nodules, stone-tags should be flicked, or scraped off. www.indiandentalacademy.com
- 162. 162 Severely prepped teeth with missing proximal, buccal, lingual walls should be built-up to adequate or desired clinical prep design with a resin block-out material or light colored wax. The model is now ready to be scanned. www.indiandentalacademy.com
- 163. 163 MATERIAL USED Lava™ Frame Zirconia www.indiandentalacademy.com
- 164. 164 Lava™ Scanner Consists of a non-contact optical scan system, a PC with a monitor, and the Lava CAD Windows™ based software, which displays the model as a three-dimensional object.www.indiandentalacademy.com
- 165. 165 Lava™ Milling Unit This computer-controlled precision milling unit can mill out 21 copings or bridge frameworks without supervision or manual intervention.www.indiandentalacademy.com
- 166. 166 Lava™ Therm Furnace Bridges and crown frameworks undergo sintering and attain their exact dimensions, density, and final strength www.indiandentalacademy.com
- 167. 167 3M ESPE Lava Cementation Cementation of Lava All Ceramic restorations can be accomplished with proven, conventional techniques using any of the following cements: 3M ESPE RelyX Unicem Self-Adhesive Universal Resin Cement 3M ESPE RelyX Luting Cement 3M ESPE Ketac-Cem Glass Ionomer Cement www.indiandentalacademy.com
- 169. 169 Material: Yttria-stabilized zirconia. Recommended Use: Anterior or posterior single crowns and multi-unit bridges. Lab Processing: Computer Aided Manufacturing (CAM) of pre-sintered zirconia. www.indiandentalacademy.com
- 170. 170 Properties: Flexural Strength>900MPa, Fracture Toughness=9.0MPa.m0.5, VHN~1200, CTE~10.5 m/m/oC, at 500oC. Esthetics: Inherently translucent, metal- free restorative solutions for the entire mouth. Veneering: Optimally matched to Cercon® Ceram S veneering porcelain. Placement: Conventional cementation or adhesive bonding www.indiandentalacademy.com
- 171. 171 Cercon units and frameworks are fabricated using a CAM (computer aided manufacture) process. The restoration is first designed in wax on the model. The waxed restoration is then placed in the Cercon Brain for scanning where a confocal laser takes precise measurements of the pattern. www.indiandentalacademy.com
- 172. 172 The data is then enlarged by the Cercon Brain by approximately 50% to allow for shrinkage that will take place during the final sintering. The block is then milled to replicate the expanded pattern and is placed in specialized sintering furnace where final sintering takes place. www.indiandentalacademy.com
- 173. 173 Technique 1. Framework waxup 2. Waxup is scanned and milled in the Cercon Brain 3. Milled pattern ready for sintering 4. Pattern is sintered using Cercon Heat 5. Sintered pattern is seated and prepared for ceramic layering 6. Completed Cercon Bridge www.indiandentalacademy.com
- 175. 175 Waxup is scanned and milled in the Cercon Brain www.indiandentalacademy.com
- 176. 176 Milled pattern ready for sintering www.indiandentalacademy.com
- 177. 177 Pattern is sintered using Cercon Heat www.indiandentalacademy.com
- 178. 178 Sintered pattern is seated and prepared for ceramic layering www.indiandentalacademy.com
- 180. 180 COPY MILLED RESTORATIONS CELAY* System Mikrona Technologies Switzerland. www.indiandentalacademy.com
- 182. 182 Procedure: Preparation: shoulder with rounded axio-cervical line angle. www.indiandentalacademy.com
- 183. 183 Resin coping: A prototype composite resin coping is modeled on the die. www.indiandentalacademy.com
- 184. 184 The resin coping modeled with CELAY – TECH is transferred on to the scanning / milling platform. www.indiandentalacademy.com
- 185. 185 Scanning of the prototype resin with simultaneous of the copy milled crown substructure. www.indiandentalacademy.com
- 186. 186 The finished sintered substructure after firing onto the die. www.indiandentalacademy.com
- 187. 187 GLASS INFILTRATED CERAMICS In-Ceram* Alumina In-Ceram* Spinell In-Ceram* Zirconiawww.indiandentalacademy.com
- 188. 188 Introduction: This system use a slip casting (a procedure by which a fine particle ceramic, dispersed in an aqueous liquid medium (low viscosity slurry) is applied on to a porous mold, which rapidly extracts the liquid causing the formation of a close packed but a weak ceramic particle structure.) procedure. Then the slip-casting is sinter fired. The combination of these procedures gives the material its outstanding properties. www.indiandentalacademy.com
- 189. 189 Classification: Reinforcing crystals Clinical System Charestrestics Alumina In-Ceram Alumina (Vita) High alumina coping infused with a low fusing glass Zirconia In-Ceram Zirconia (Vita) High Zirconia coping infused with a low fusing glass Magnesium oxide spinell In-Ceram Spinell (Vita) High Spinell coping infused with a low fusing glass www.indiandentalacademy.com
- 192. 192 Divide the unprepared labial surface if the tooth crown into three equal thirds.www.indiandentalacademy.com
- 193. 193 Prepare two depth orientation grooves on the labial surface of the tooth with a dual-guided groove cutter.www.indiandentalacademy.com
- 194. 194 Prepare palatal depth orientation grooves. www.indiandentalacademy.com
- 195. 195 Prepare two incisal depth orientation grooves. www.indiandentalacademy.com
- 196. 196 Condition after milling of all depth orientation grooves.www.indiandentalacademy.com
- 197. 197 Reduction of the hard tooth substance parallel to the incisal third of the labial surface between the second and the third milled groove.www.indiandentalacademy.com
- 198. 198 Reduction in the area of the labial surface between the first and the second milled groove and thus almost parallel to the path of insertion. www.indiandentalacademy.com
- 199. 199 Correct preparation of the tooth in two planes. www.indiandentalacademy.com
- 200. 200 Incorrect preparation; in one plane, therefore insufficient reduction of substance. Due to that insufficient wall thickness of crown, crown mat fracture.www.indiandentalacademy.com
- 201. 201 Incorrect preparation of the tooth surface lead to the risk of damaging of the pulp. www.indiandentalacademy.com
- 202. 202 Application area of the proximal cutter. www.indiandentalacademy.com
- 203. 203 Use of the step cutter with depth stops: this cutting tool is to optimize the position and quality of the prepared step. www.indiandentalacademy.com
- 204. 204 Palatal side is prepared with a foot ball diamond. www.indiandentalacademy.com
- 205. 205 Smoothening of the sharp angles using a bud shaped diamond.www.indiandentalacademy.com
- 206. 206 Defined marginal reduction of 0.6 – 1.2 mm. Incisal or occlusal depth 1.5 – 2 mm. Shoulder with rounded axio-cervical line angle / chamfer is indicated in reduced tooth substance. www.indiandentalacademy.com
- 208. 208 Model Fabrication Blocking Out Applying the interspace varnish Waxing up the prop Duplicationwww.indiandentalacademy.com
- 209. 209 Deflasking Stirring VITA INCERAM special plaster Deflasking Trimming the plaster model Separating the special plaster model www.indiandentalacademy.com
- 210. 210 Sectioning the bridge units Preparation margins Preparing the slip Pouring the slip into a plastic mixing cup Applying the slip www.indiandentalacademy.com
- 211. 211 Applying VITA In Ceram Stabilizer 1st sintering firing 2nd sintering firing Checking on the master model Material testing www.indiandentalacademy.com
- 212. 212 Application of glass Glass infiltration firing of bridges in VITA INCERAMAT Remove excess glass Glass control firing Completion www.indiandentalacademy.com
- 213. 213 Model Fabrication A working model with removable dies from a high-quality, dimensionally stable model stone is prepared.www.indiandentalacademy.com
- 214. 214 A master model that has not been sectioned is fabricated, for positioning, transferring and checking the crowns and bridges. www.indiandentalacademy.com
- 216. 216 Check the sawed die carefully for undercuts and block out them. Blocking Out: www.indiandentalacademy.com
- 217. 217 Applying the interspace varnish: The varnish must be applied to the plaster dies in 2 – 3 coats approx. 45 microns. www.indiandentalacademy.com
- 218. 218 Applying the interspace varnish: Epoxy or galvanized dies require 4 coats approx. 60 microns. ! Wait for at least 5 min after each application of the varnish. After applying the last coat wait for 20 min to ensure complete drying. ! Do not extend the interspace varnish over the shoulder. www.indiandentalacademy.com
- 219. 219 Waxing up the prop: For the fabrication of bridgework, a prop must be waxed up palatally in the area of the pontic. www.indiandentalacademy.com
- 220. 220 The prop facilitates the application of the slip material and allows increased absorption of liquid and quicker extraction during the application of the slip. ! The waxed up prop must not have any under cuts. Waxing up the prop: www.indiandentalacademy.com
- 222. 222 Duplicate with an addition polymerizing silicone in a ratio of 1 : 1 using the dual impression technique or……www.indiandentalacademy.com
- 223. 223 Duplicate using the pouring method with the help of a duplicating mold.www.indiandentalacademy.com
- 224. 224 Deflasking: After deflasking allow the impression to harden for approx. 30 min(according to manufacturer). www.indiandentalacademy.com
- 225. 225 Spray a wetting agent on to the impression and allow the agent to dry.www.indiandentalacademy.com
- 226. 226 Stirring the VITA In-Ceram* Special Plaster www.indiandentalacademy.com
- 227. 227 Mixing: VITA In-Ceram special plaster 20g : 4.6 ml distilled water.www.indiandentalacademy.com
- 228. 228 Mixing: Pour 4.6 ml of distilled water into the mixing beaker, then min the content of the sachet of VITA In-Ceram special plaster by hand. Then mix under vacuum for 20 sec. ! Make sure the mixing unit is clean and dry. The processing time can be lengthened by adding chilled distilled water. www.indiandentalacademy.com
- 229. 229 Pouring: Pour the plaster in to the mould slowly in small increments without the formation of air bubbles. www.indiandentalacademy.com
- 230. 230 Preparation for the application of the SLIP www.indiandentalacademy.com
- 231. 231 Deflasking: After filling the special plaster into the special plaster mold, deflask after 2 hrs.www.indiandentalacademy.com
- 232. 232 Grinding the special die: After deflasking the base must be ground flat. During this, the models must be kept dry. ! Any absorption of water of water on the hardened special die has a negative effect on the expansion behavior. www.indiandentalacademy.com
- 233. 233 Separating the bridge model: Partly section the special plaster model from beneath using a separating disc.www.indiandentalacademy.com
- 234. 234 Attaching the bridge model: Glue the special plaster bridge model onto a VITA In-Ceram firing tray using cyanoacrylate adhesive. www.indiandentalacademy.com
- 235. 235 Sectioning the bridge unit: After approx.10 min, section the plaster model between the abutment teeth with a sharp saw blade, in order to prevent damage to the bridge substructure due to the shrinkage in the plaster during sintering firing. www.indiandentalacademy.com
- 236. 236 Margin preparation: Mark the margins with a super polymer color cartridge.www.indiandentalacademy.com
- 238. 238 Weigh out exactly 38 g of VITA In- Ceram alumina powder.www.indiandentalacademy.com
- 239. 239 Pour the contents of 1 ampoule of ZITA In- Ceram alumina mixing liquid and 1 drop of VITA In-Ceram Alumina additive into a glass beaker and mix briefly in the VITASONIC.www.indiandentalacademy.com
- 240. 240 Place the glass beaker on a vibrator and spatulate the 38 g of VITA In- Ceram Alumina powder slowly into the liquid in several small portions.www.indiandentalacademy.com
- 241. 241 After the entire powder is added, place the glass beaker in the VITASONIC for 7 min. ! After mixing, the slip must be homogenous. www.indiandentalacademy.com
- 242. 242 The mixture must be evacuated for 1 min. (e.g. with a vacuum investment unit). www.indiandentalacademy.com
- 243. 243 Pour the slip from the glass beaker into the enclosed plastic mixing cup. www.indiandentalacademy.com
- 245. 245 Start to apply the slip in the area of the pontic. Build up to half of the height of the pontic. Then coat the abutment dies fully and connect them to the pontic.www.indiandentalacademy.com
- 246. 246 ! Proceed rapidly when building up the remaining slip. ! Do not interrupt this process, so that drying out the layers is that have already been built up is prevented (onion-skin effect).www.indiandentalacademy.com
- 247. 247 Since fine reworking is always required after sintering, the slip should be applied more richly prior to sintering firing.www.indiandentalacademy.com
- 248. 248 Carefully expose the preparation margin with a scalpel until the marking can be seen. www.indiandentalacademy.com
- 249. 249 Final shaping of the substructure is only carried out after sintering. www.indiandentalacademy.com
- 251. 251 After firing allow the substructures to cool down to 400`C in the closed firing temperature, and then to the room temperature with the furnace opened.www.indiandentalacademy.com
- 252. 252 Sintered substructure: Since the plaster model has contracted during firing, the sintered substructure can be easily removed from it. www.indiandentalacademy.com
- 253. 253 Checking the fit of the coping on the working model: Before continuing the work on the working model, remove the interspace varnish. In order to check the accuracy of the fit, carefully place the sintered substructure on the working model again. www.indiandentalacademy.com
- 254. 254 Do not exert pressure when placing. www.indiandentalacademy.com
- 255. 255 Due to dust formation when grinding sintered dental ceramic products, always wear a face mask. Work behind a shield and use a suction unit.www.indiandentalacademy.com
- 256. 256 Due to dust formation when grinding sintered dental ceramic products, always wear a face mask. Work behind a shield and use a suction unit. www.indiandentalacademy.com
- 257. 257 Adjust contours and functioning by grinding slightly(fine diamond, low speeds, minimum pressure). www.indiandentalacademy.com
- 258. 258 Be cautious in the marginal area, use very fine grained diamond or rubber disc at low speed with minimum pressure. Contours and functioning must be controlled now, if required adjusted, because no further adjustments can be performed after the glass infiltration firing. www.indiandentalacademy.com
- 261. 261 The VITA-In-Ceram Optimizer is a mixture of Aluminum oxide powder and wax and is used to fill up small defects in ground or slip-coated or sintered In-Ceram crown and bridge substructures.www.indiandentalacademy.com
- 262. 262 Separating agent is added onto the die and blow completely dry. Take up Vita In-Ceram Alumina Optimizer with an electric wax knife and apply to the crown margin. www.indiandentalacademy.com
- 263. 263 Remove the excess with a paper napkin and the hot wax knife. Remove the substructure from the die. Place the substructure on the model again and check the optimizer that has been applied. www.indiandentalacademy.com
- 264. 264 Sintering: Fix the substructure on a platinum rod or place it on a fibrous pad firing support co that the so that the optimizer will not come into contact with it.www.indiandentalacademy.com
- 265. 265 Firing chart. Use ceramic furnaces in which no alloys are fired. Check the fit on the working model.www.indiandentalacademy.com
- 266. 266 Material testing: To check the sintered substructures for possible micro-cracks using the Vita In- Ceram testing liquid.www.indiandentalacademy.com
- 267. 267 The crown on the left is ok. The crown on the right must be manufactured once again. www.indiandentalacademy.com
- 268. 268 Application of the glass powder: Mix Vita In-Ceram Alumina glass powder with distilled water to obtain a thin consistency. Apply 1 – 2 rich coats with a thickness of 1 – 2 mm only on the outer surface of the sintered substructure using a brush. The margin of the crown must not be coated. www.indiandentalacademy.com
- 270. 270 ! During the glass infiltration of bridge substructures on platinum foil, the basal surface of the pontic must not be covered with glass powder. This can cause air in the sintered pontic to escape, otherwise complete glass infiltration will not take place. www.indiandentalacademy.com
- 272. 272 Glass infiltration firing in INCERAMAT: Place the crown copings on platinum pins in the firing tray, so that the crown margins do not come in to contact with the platinum pin in order to prevent the glass from penetrating into the interior of the crown. www.indiandentalacademy.com
- 274. 274 Place the coated crown copings onto a piece of platinum foil (Pt = 95%, Au = %5) in order to carry out the glass infiltration firing and preheat shortly.www.indiandentalacademy.com
- 276. 276 Glass infiltration firing in the VACUMAT: The glass infiltration of crown copings can also be carried out in the dental ceramic furnace under vacuum.www.indiandentalacademy.com
- 278. 278 Glass infiltration firing of bridge substructures in INCERAMAT: Place the coated bridge substructure for the glass infiltration firing on a piece of platinum foil of 0.1 mm thick.www.indiandentalacademy.com
- 280. 280 ! In the case of incomplete infiltration – if there are chalk-like areas – the infiltration process should be repeated.www.indiandentalacademy.com
- 281. 281 Remove the excess glass with a coarse grained diamond instrument or heatless abrasive almost down to the substructure. www.indiandentalacademy.com
- 282. 282 Sandblast residual material with 50 microns aluminum oxide at a maximum pressure of approx. 3.0 bar. www.indiandentalacademy.com
- 283. 283 Glass control firing: Place the substructure on a fibrous pad supporting on a Vita firing support W .www.indiandentalacademy.com
- 285. 285 Finishing: After the glass control firing sandblast the crown with 50 microns aluminum oxide at a maximum pressure of 3 bar.www.indiandentalacademy.com
- 287. 287 Possible Errors: Inadequate fit: Insufficiently or incorrectly blocked out. Interspace varnish applied to shoulder. Dies were not repositioned correctly after the application of interspace varnish. Recovery time of silicone not followed. Distorted impressions. Mixing ratios not followed www.indiandentalacademy.com
- 288. 288 Setting time not followed. Improper firing temperatures. Preparation margin not exposed exactly after the application of the slip. Improperly sandblasted glass. Marginal areas were sandblasted using excessive pressure. www.indiandentalacademy.com
- 289. 289 Fractured bridges: Prop was not waxed up correctly. Prop has undercuts. Special plaster model was not sawed. Insufficient exposure of prop after application of slip, slip coated substructures feature micro-cracks. www.indiandentalacademy.com
- 290. 290 Sintering problems: Loose flakes in the crown after sintering firing: Die was not wetted sufficiently during the application of the first. Slip coat (rapid drying-up, consequence: onion skin effect) Glazing, greenish discolorations in the crown: Furnace temperature too high. www.indiandentalacademy.com
- 292. 292 VITA In-Ceram Alumina crown and bridge substructures: www.indiandentalacademy.com
- 293. 293 VITA In-Ceram Alumina crown and bridge substructures ready for veneering.www.indiandentalacademy.com
- 294. 294 Opaque dentin: Apply the opaque dentin in the required shade, beginning at the cervical area, to cover the entire surface of the substructure.www.indiandentalacademy.com
- 296. 296 Dentin: Dentin is applied and built up to the final shape of the crown. At this stage the occlusion, laterotrusion and protrusion should be checked in the articulator. www.indiandentalacademy.com
- 297. 297 To make enough space for the enamel, it is necessary to reduce the volume of the dentin accordingly.www.indiandentalacademy.com
- 298. 298 Applying enamel in several small portions to complete the shape of the crown or the occlusal surface. The crown should be modeled slightly larger than the actual tooth size to compensate for firing shrinkage.www.indiandentalacademy.com
- 299. 299 In the case of bridges separate the teeth down to the substructure before the first firing. www.indiandentalacademy.com
- 300. 300 The finished build up ready for the first firing. www.indiandentalacademy.com
- 302. 302 Bridge after first firingwww.indiandentalacademy.com
- 303. 303 Correction layering: Build up the inter-dental areas and the basal surface of the pontic with Opaque dentin. www.indiandentalacademy.com
- 304. 304 Complete the contour corrections with Dentin in the body of the tooth and enamel in the incisal area.www.indiandentalacademy.com
- 306. 306 Crown and bridge after correction firing. www.indiandentalacademy.com
- 307. 307 Finishing: Trim the bridge or crown. Polish to obtain an even, homogenous surface for the glaze firing. www.indiandentalacademy.com
- 308. 308 To guarantee perfect articulation check the occlusion, protrusion and laterotrusion once more in the articulator.www.indiandentalacademy.com
- 309. 309 Glaze and stains applied.www.indiandentalacademy.com
- 312. 312 The finished restoration on the model. Afterwards the interior surfaces of the finished restoration must be sandblasted once again with 50 microns aluminum oxide at a maximum pressure of 3 bar.www.indiandentalacademy.com
- 315. 315 Opaque dentin / luminaries: Apply the individually shaded opaque dentine and luminaries to the entire labial surface. Enhancing the shade of the crown using the Vitadur Alpha Luminaries. www.indiandentalacademy.com
- 317. 317 Washing or mixing in Luminaries, e.g. LM 5 in the cervical areas, LM 1 in the middle third and LM 3 in the incisal area. Applied in the gingival or incisal area, these dental ceramics enhance the distribution of light in the restoration. www.indiandentalacademy.com
- 318. 318 Applying the DENTINE: The dentin is applied in the required shade . The mamelons can be lightened mesially and distally with a lighter dentine.www.indiandentalacademy.com
- 319. 319 Incisal Mirror build-up: The incisal area is built up to the desired height with T4 (translucent).www.indiandentalacademy.com
- 320. 320 Applying Intensive: Intensives can be applied to add individual shading and characterizations. www.indiandentalacademy.com
- 322. 322 Crown after the first firing.www.indiandentalacademy.com
- 323. 323 Mainly light shaded Translucent and Cervical porcelains are applied for correction. Correction: www.indiandentalacademy.com
- 326. 326 Finishing: After the correction firing, trim and polish the crown as usual.www.indiandentalacademy.com
- 327. 327 Glazing: Cover the entire surface of the crown with the glaze material.www.indiandentalacademy.com
- 329. 329 Finished restoration: Before insertion, the inner surface of the finished restoration should be sandblasted once more with 50 micron aluminum oxide at a maximum pressure of approx. 3 bar.www.indiandentalacademy.com
- 330. 330 INJECTION MOLDED / PRESSABLE CERAMICS IPS EMPRESS* I, II CERESTORE* (ALCERAM) Summary www.indiandentalacademy.com
- 331. 331 Material: This is a glass ceramic material that is made up of a glass phase and a leucite phase. The growth of the leucite crystals starts at the grain edges of a ground starting glass. These leucite crystals grow in a multi-step fabrication process up to a size of few microns. www.indiandentalacademy.com
- 332. 332 Material: ……… This semi-finished product in powder form is then pressed to ingots and fired. The compressive strain resulting from the leucite crystal structure in a silicate glass matrix provides increased stability. This material is based on a system of….. SiO2 – Al2O3 – K2O and complies with ISO 6872 ‘Dental Ceramic’. www.indiandentalacademy.com
- 333. 333 Layering ceramic: This is a sintered glass ceramic which is coated upon the lithium disilicate glass ceramic framework. This is supplied in powder form. They have been developed in various versions called ‘Dentin’, ‘Incisal’, ‘Impulse, Transpa’, Effect. Their crystalline phase consists of apatite (flourapatite). www.indiandentalacademy.com
- 335. 335 Shade selection: Tooth cleaning is necessary before shade selection. Do not over dry thewww.indiandentalacademy.com
- 336. 336 Tooth preparation: A chamfer / shoulder preparation (10 – 30`) with rounded inner angles.the width of the circular margin should be approx.1 mm.www.indiandentalacademy.com
- 337. 337 Reduce the axial walls of the tooth on the incisal third of the crown by approx. 1.5 mm. The incisal or occlusal reduction should be approx. 1.5 – 2 mm. Anterior crowns, the labial or palatal reduction should be approx. 1 – 1.5 mm. www.indiandentalacademy.com
- 338. 338 Die shade selection: The shade of the prepared die is determined using the Die material shade guide. With the appropriate shade we can fabricate esthetically appealing, true- to-nature restorations. To achieve optimum results, the dentin should be moist when the shade is determined. www.indiandentalacademy.com
- 339. 339 Impression making: An addition curing silicone or any other suitable impression material can be used. www.indiandentalacademy.com
- 340. 340 Processing procedure 1.Fabricating the model. 2.Applying the spacer. 3.Connectors. 4.Contouring. 5.Spruing. 6.Investing. www.indiandentalacademy.com
- 341. 341 7.Furnace calibration. 8.Pressing. 9.Divesting. 10.Control dieing. 11.Foundation firing. 12.Layering, staining, glazing. 13.Etching and cementation. www.indiandentalacademy.com
- 342. 342 Fabricating the model: Fabricate a type IV stone model with detachable segments according to the impression.www.indiandentalacademy.com
- 343. 343 Applying the spacer: It is advisable to apply a sealer to harden the surface and to protect the die. This sealer must not cause any changes in the dimensions of the die. www.indiandentalacademy.com
- 344. 344 For single crowns, apply two layers of spacer up to maximum 1 micron thickness. www.indiandentalacademy.com
- 345. 345 Bridge restorations also require two layers of spacer. Apply an additional layer of spacer to the intercoronal surfaces of the abutments (the area facing the pontic). This measure helps prevent undesired friction.www.indiandentalacademy.com
- 346. 346 IPS Bridge Connectors: These are prefabricated anatomically shaped plastic connectors in six different shapes. Used to contour three unit bridges and ensure adequate size of the connector between the pontic and bridge abutment. IPS connectors C1 – C6 are designed to achieve the correct connector dimensions. www.indiandentalacademy.com
- 349. 349 Procedure: Select the connector recommended for the region for which the fabricated bridge is intended and remove it from the harness. Once the bridge abutment has been modeled with wax, attach the selected connector to the connecter area between the pontic and the bridge abutment. After that, complete modeling the full wax-up and secure it with a silicone key. www.indiandentalacademy.com
- 350. 350 The modeled bridge is now reduced in a targeted fashion. In other words, the area that will be built up using layering material after the press cycle has to be carefully reduced so that the framework thickness measures at least 0.8 mm. The plastic connector ensures that the minimum connector thickness between the pontic and bridge abutment is automatically observed during the reduction process. www.indiandentalacademy.com
- 351. 351 If the labio-lingual portion of the connector reduced, the portion of the incisal to the cervical has to be enlarged. www.indiandentalacademy.com
- 352. 352 The connector area should measure at least 16 mm2. 4x4 mm.www.indiandentalacademy.com
- 353. 353 Framework : layering material thickness: In order to achieve the best possible surface stability by creating ample working parameters and to design adequate frameworks. The framework must be thicker than the layering material www.indiandentalacademy.com
- 354. 354 Correct : the framework design supports the cusps. The wall thickness of the framework is at least 0.8 mm. Only this design ensures adequate stability. •Incorrect : the relationship between the framework and the total space available is not proportional. www.indiandentalacademy.com
- 356. 356 Contour: Framework design depending upon the space available Full Wax-up: Fabricate a full wax-up of the restoration. Use the IPS connectors to ensure the adequate size of the connector area between the pontic and the bridge abutment. www.indiandentalacademy.com
- 357. 357 Wax-up with connector in place: www.indiandentalacademy.com
- 360. 360 Version A:adequate space available: After full wax up, the buccal and the lingual portion of the modeled framework is reduced in a targeted fashion. Subsequently reduce the the wax-up by the space required for the layering material applied after pressing. www.indiandentalacademy.com
- 363. 363 Final wax framework for layering: www.indiandentalacademy.com
- 364. 364 Version B: Only limited space available(reduced layering technique) If only limited space is available, only the buccal and incisal portion of the waxed-up framework are reduced in a targeted fashion. The palatal – lingual portion is waxed-up to its full contour(anatomical shape). Minimum thickness between the pontic and the bridge abutment is maintained(connector).www.indiandentalacademy.com
- 366. 366 Palatal-lingual portion in its full contour (anatomical shape): www.indiandentalacademy.com
- 367. 367 Areas to be built up with layering material: www.indiandentalacademy.com
- 368. 368 Spruing of the framework pattern: Single crowns: For single crowns depending on the size and volume of the wax pattern, attach an axial sprue in the direction of flow of the ceramic material. Use round profile 2.5 – 3 mm / 8 gauge: length 3 mm – max 8 mm. www.indiandentalacademy.com
- 369. 369 Bridges: For 3 unit bridges, attach an 8 gauge round profile axial wax sprue directly into the abutment teeth at an angle of 45 – 60àpprox. The attachment points of the sprue to the object and the sprue former must be rounded and smooth. Avoid sharp edges. www.indiandentalacademy.com
- 370. 370 Wax pattern-sprue attachment: -- Pattern angled at 45 60`. -- The distance between the paper ring and the patter must be at least 10 mm. -- All sprue attachments are flared and smooth.www.indiandentalacademy.com
- 387. 387 Investing: Investment is carried out with the IPS Empress 2 special investment material. Weigh the ring base (seal the opening of the ring base with wax ). Position the objects to be pressed on the ring base and attach them with wax, weigh again. The difference between the two values is the weight of the wax used. www.indiandentalacademy.com
- 388. 388 Large investment ring : Up to 1.3g wax weight requires one large ingot. Small investment ring: Up to max 0.5 g wax weight requires one small ingot. www.indiandentalacademy.com
- 389. 389 Remove the protective tape from the new 2- in-1 IPS Empress paper ring, form a cylinder exactly along the marked line and press the two end together.www.indiandentalacademy.com
- 390. 390 Set the paper ring on the base of the investment ring and check it for correct fit. Use the ring stabilizer to stabilize the paper ring. www.indiandentalacademy.com
- 391. 391 Mix the special investment material under vacuum according to the instructions. www.indiandentalacademy.com
- 392. 392 Fill the paper ring slightly below the stabilizing ring.www.indiandentalacademy.com
- 393. 393 Remove the stabilizing ring and slowly place the ring gauge on the investment with a hinged movement.www.indiandentalacademy.com
- 394. 394 After the setting time, remove the ring gauge and the ring base with a turning movement. Remove the paper ring. Remove the rough spots on the bottom surface of the investment ring with a plaster knife.www.indiandentalacademy.com
- 395. 395 Check for 90`angle.www.indiandentalacademy.com
- 396. 396 Preheating: If several investment rings are preheated simultaneously, mark them, either with wax on the ring base before investing or with a fireproof pen after investing.www.indiandentalacademy.com
- 397. 397 The ingot support and the aluminum oxide plunger is placed in the cold furnace.www.indiandentalacademy.com
- 398. 398 The ingot support and the aluminum oxide plunger are placed in the cold furnace, while the speed investment ring is only placed in the furnace once the final temperature has been reached. When placing the investment ring into the furnace, make sure that the furnace temperature does not drop down. But the special investment ring is placed in the clod furnace with the aluminum oxide plunger and the ingot support. www.indiandentalacademy.com
- 399. 399 Do not preheat the Empress investing with other investment and casting objects (e.g. soldering models, metal casting rings, etc). Clean and calibrate the preheat furnace.www.indiandentalacademy.com
- 401. 401 Press parameters for EP-500: www.indiandentalacademy.com
- 402. 402 Pressing in the EP-600: Programme selection for the IPS empress 2 layering technique by pressing F3. And select the ring size. www.indiandentalacademy.com
- 403. 403 Placing the ingots: Large investment ring: Single restorations: maximum 1 large ingot or 1 small ingot. Bridges: maximum 1 large ingot. Small investment ring: Maximum 1 small ingot per pressing cycle. Do not use 2 small ingots. www.indiandentalacademy.com
- 404. 404 Remove the ring from the preheating furnace immediately after the completion of the preheating cycle. Place the corresponding cold ingots for the layering technique in the investment ring. www.indiandentalacademy.com
- 405. 405 Placement of a large ingot (several crowns or bridge)www.indiandentalacademy.com
- 406. 406 After selecting the exact press parameters, Place the investment ring with the ingot, in the press furnace and start the process by closing the head.www.indiandentalacademy.com
- 407. 407 The press cycle runs automatically. A beep sound indicates the end of the press cycle.www.indiandentalacademy.com
- 408. 408 Remove the investment ring from the furnace immediately after the program is completed and close the furnace. Place the investment ring on a wide- meshed grid (IPS Empress cooling rack) and allow it to cool to room temperature. The grid ensures quick and even cooling of the investment ring and prevents undesired heat accumulation. www.indiandentalacademy.com
- 409. 409 Divesting: After approx. 60 minutes, after cooling, the investment ring may shoe cracks. These cracks are developed during cooling as a result of the different CTE’s of the various materials (the ingot, pressed material, investment material). But do not compromise the result of the pressing cycle. www.indiandentalacademy.com
- 410. 410 Mark the length of the plunger on the cooled investment ring.www.indiandentalacademy.com
- 411. 411 Separate the investment ring using a separating disc. This predetermined breaking point enables reliable separation of the ingot and the ceramic material.www.indiandentalacademy.com
- 412. 412 Break the investment ring at the predetermined breaking point using a plaster knife.www.indiandentalacademy.com
- 413. 413 Rough divestment is carried carried out with polishing jet medium at 60 psi pressure.www.indiandentalacademy.com
- 414. 414 For fine divestment, only 2 bar (30 psi) pressure is applied.www.indiandentalacademy.com
- 415. 415 Remove the reaction layer from the pressed framework using the invex liquid. Immerse the object in invex liquid for max. 30 min, and thoruoghly rinse the framework with water and blast it with aluminum oxide powder of 100 microns size at 15 psi pressure. If the reaction later is not completely removed, bubbles may form, which subsequently lead to bonding problems and crack in the layering ceramic. www.indiandentalacademy.com
- 416. 416 When divesting the object, blast from the direction indicated in the schematic diagram. www.indiandentalacademy.com
- 417. 417 Press result after pressing at too low temperature.www.indiandentalacademy.com
- 418. 418 If the temperature of the furnace has been set correctly, the pressed objects exhibit only a thin reaction layer that can be easily removed.www.indiandentalacademy.com
- 419. 419 If the object is pressed at too high temperature a substantial reaction layer is forms that is difficult to remove. If the reaction layer is not completely removed, the bond to the layering material is impaired.www.indiandentalacademy.com
- 420. 420 Removing and finishing: Excessive grinding results in local overheating of the ceramic framework and may lead to micro-crack formation. Therefore keep grinding to minimum. Avoid inhalation of grinding dust. www.indiandentalacademy.com
- 421. 421 Use a fine diamond disk to cut the sprues. Guide the diamond disk through a wet sponge during cutting to ensure permanent wetting of the area to be ground. In this way, overheating of the ceramic framework is avoided. Use ceramic burs to process the attachment points of the sprues. www.indiandentalacademy.com
- 422. 422 Make sure that the material thickness is of at least 0.8 mm throughout, and never prepare the framework less than 0.8 mm. Avoid excessive heating of the pressed material. Never use rotary instruments to clean the framework. Only blast with aluminum oxide powder (100 microns at 15 psi). www.indiandentalacademy.com
- 423. 423 Fitting the framework to the die: Remove the spacer prior to fitting the pressed framework on the die. Fine irregularities are carefully removed with a fine diamond. Margins can be adjusted using diamonds or fine emery disks. Always work with cooling. www.indiandentalacademy.com
- 424. 424 Control die: According to the shade selection, the IPS die material kit is used to enhance the shading of the restorations.www.indiandentalacademy.com
- 425. 425 Coat the inner surface of the ceramic framework with the IPS Empress die material isolating liquid.www.indiandentalacademy.com
- 426. 426 Apply the corresponding die material to the inner surface of the restoration, using the die material condenser.www.indiandentalacademy.com
- 427. 427 Insert a die holder in to the die material. Die material is cured with a light polymerization device.www.indiandentalacademy.com
- 428. 428 Foundation firing: Carefully blast the framework with special jet medium aluminum oxide powder (100 microns at 15 psi) prior to foundation firing. Clean with steam and dry with oil-free air. Avoid contamination. www.indiandentalacademy.com
- 429. 429 The foundation material(the desired dentin) is applied thinly on the entire framework. www.indiandentalacademy.com
- 430. 430 Firing chart for foundation firing: www.indiandentalacademy.com
- 431. 431 Framework after firing. www.indiandentalacademy.com
- 434. 434 And completed with incisal layering.www.indiandentalacademy.com
- 435. 435 Similar procedure is used for single crowns. Occlusal view of the completed layering. www.indiandentalacademy.com
- 436. 436 Firing chart for layering material: www.indiandentalacademy.com
- 437. 437 The temperature for firing this crown has been set too low. The crown shows clear signs of insufficient firing.www.indiandentalacademy.com
- 438. 438 If the restoration exhibits a shining, true- to-nature appearance, it has been fired with all the firing parameters set correctly. www.indiandentalacademy.com
- 439. 439 The firing temperature was set too high, the restoration exhibits too much of shining. www.indiandentalacademy.com
- 440. 440 Staining & characterization: Before starting the staining procedure, make sure the restoration is free of dirt and grease. A roughened surface is favorable.www.indiandentalacademy.com
- 441. 441 Apply the stains as thinly as possible, avoid pooling and too thick layers.www.indiandentalacademy.com
- 442. 442 Firing chart for stains: www.indiandentalacademy.com
- 443. 443 Glazing: Apply the glaze material in the usual manner using a brush. Make sure not to apply the glaze material either too thick or too thin layers.www.indiandentalacademy.com
- 445. 445 Corrective firing: This is a low sintering add-on material with medium incisal opacity for any necessary corrections. This material can be used alone or mixed with dentin or incisal powders in the ratio of 50:50. www.indiandentalacademy.com
- 449. 449 Etching: Etching the internal surface is necessary for all IPS Empress restorations, since this procedure increases the shear bond strength between the ceramic material and the composite cement. The fracture resistance is also increased. Etch the internal surfaces of the restoration for 20 sec using the ceramic etching gel. www.indiandentalacademy.com
- 450. 450 Cementation: Generally adhesive cementation is recommended for metal free ceramic restorations. Conventional GI Cement can also be used, if clinical conditions are unsuitable for adhesive bonding and if there is sufficient retention is available. The adhesive bonding must be used for the cementation of restorations made of the IPS Empress staining technique. www.indiandentalacademy.com
- 451. 451 CERESTORE / ALCERAM* “Shrink Free Ceramic” COORS BIO-MEDICAL www.indiandentalacademy.com
- 452. 452 Tooth preparation: Labial, lingual and interproximal reduction of 1.25 mm to 1.5 mm: incisal and occlusal reduction of 1.5 mm to 2 mm. The preferred margin design is a 90`full shoulder with a rounded gingival axial line angle with a width. of 1mm to 1.5 mm. Feather edge and beveled preparations are contraindicated. Conventional impressions are accepted. www.indiandentalacademy.com
- 453. 453 Laboratory technique: The non shrink property of the material encourages a direct approach rather than indirect casting. There is no solidification shrinkage, nor the need for control investment expansion. Coping are formed by transfer molding the ceramic directly on to the non shrinking heat stable epoxy master die. www.indiandentalacademy.com
- 456. 456 Investing the epoxy master die : www.indiandentalacademy.com
- 458. 458 Investing with dental plaster in flask: www.indiandentalacademy.com