3. •
Introduction
•
Disadvantages of conventional products
•
Septic system
•
Existing system
•
Problems associated with existing system
•
Changing factors demanding new solution
•
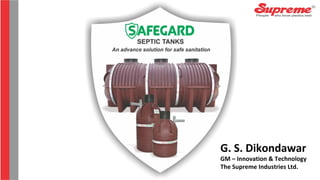
Safegard septic tank
a) Vertical design
b) Modular design
•
Components of septic tank
•
Product range
•
Features and benefits
Contents
4. An Introduction
•
Sanitation has direct link with the health and the environment
•
People suffer serious health consequences and millions of people die as a
result of lack of effective sanitation
•
Use of inefficient drainage systems and sewer products are the main
reasons.
•
Advance products/sewerage system has the potential to change the
scenario. Developed countries have switched over to advance products.
•
Plastic Drainage/ Sewer Pipe systems minimize Sanitation risks and improve
health and environmental aspects.
5. Future India….
Three aspects of our current budget focus on:
-
Total Sanitation is expected to be achieved through Swatchh Bharat
Abhiyan by 2019 at a cost of 1000 Cr Rupees.
-
Allocation of 7060 Cr for the development of 100 Smart Cities which will
include Road, Electricity, Water supply and Sanitation.
-
All Schools to have Toilet facility
6. Disadvantages of conventional drainage products
1. Heavy weight – 12 times the weight of plastics. Need of heavy equipments,
more manpower- more installed cost
2. Cumbersome and time consuming installation
3. Poor resistance to Corrosion
4. Rough internal surface leads to blocks, solid depositions, encrustation and
consequent reduction in internal dia and flow
5. Rough bore also leads to more friction, lesser flow or needs higher slope
(means more earthwork, costs)
6. Poor resistance to soil movement due to lack of flexibility
7. Cracks and leaks lead to root penetration into the pipe system
8. •
Definition
A septic system is a highly efficient, self-contained, underground wastewater
treatment system. As septic systems treat and dispose of household
wastewater onsite, they are often more economical than centralized sewer
systems in rural areas where plot sizes are larger and houses are spaced widely
apart. And by using natural processes to treat the wastewater onsite, usually in
a homeowner's backyard, septic systems don't require the installation of miles
of sewer lines, making them less disruptive to the environment.
•
Features
-
Natural waste water treatment
-
Simple design
-
Less expensive
-
Easy for installation & maintenance
Septic system
9. The septic tank is basically a watertight underground tank, the purpose of which
is the collection, storage, and to some extent treatment of sewage/effluents.
Septic tanks are usually made of concrete or masonry, with an inlet and outlet
pipe. Wastewater flows from the home to the septic tank through the sewer
pipe. The septic tank treats the wastewater naturally by holding it in the tank
long enough for solids and liquids to separate. The wastewater forms three
layers inside the tank. Solids lighter than water (such as greases and oils) float to
the top forming a layer of scum. Solids heavier than water settle at the bottom of
the tank forming a layer of sludge. This leaves a middle layer of partially clarified
wastewater.
Septic Tank
10. -
Collection of waste water
-
Retention / holding
-
Sedimentation / settlement
-
Anaerobic digestion
-
Flocculation
-
Clarification
-
Discharge
Working of Septic Tank
12. •
Effluent - The supernatant liquid discharge from a septic tank.
•
Invert - The lowest point of the interior of a sewer or drain at any cross-
section.
•
Scum - The greasy and other substances floating on the surface of sewage.
•
Septic Tank - A water-tight single storied tank in which sewage is retained
sufficiently long to permit sedimentation.
•
Sewage - The liquid waste of a household or community including human
excreta.
•
Sludge - Sludge is the settled solid matter in semi-solid condition.
Terminology
14. a) Drain field
The drain field is a network of perforated pipes (or "laterals"). These are laid in gravel-
filled trenches or beds. After solids settle in the septic tank, the liquid wastewater or
effluent is discharged. This is done either by gravity or pressure, to an absorption field,
also known as a drain field or leach field.
b) Soak Pit
The effluent discharge from the septic tank may contain disease causing germs and pollutants
which must be treated to protect human health and environment. Hence these effluents
should be carefully and safely disposed either in the drain field or soak pit to facilitate
disintegration through bacterial action.
Disposal of septic tank effluents
15. Inner perforated pipe
External perforated pipe
Septic tank
Inlet pipe
Outlet pipe
Distribution box
Gravel filled trench
Typical diagram showing drain field
17. A soak pit is a covered, porous-
walled chamber that allows water
to slowly soak into the ground.
Effluent from septic tank is
discharged to the underground
chamber from where it infiltrates
into the surrounding soil.
Soak Pit
21. •
Excess load on septic tank
•
Improper digestion (decomposition) of solid wastes
•
Pollution of underground water
•
Contamination of soil
•
Unhygienic & harmful for environment
•
Water born disease & serious health problems
•
Uncertain & short life span
•
Fatal accidents
•
Dryness of septic tank
Consequences
22. •
Standard of living/Health consciousness
•
Nature of sewage
•
Space constraints
•
Time constraints
•
To overcome problems with existing system
Factors demanding advance solution
23. 1. Sufficient area for sludge digestion
2. Holding capacity of waste water (minimum 24 hrs.)
3. Water tight structure
4. Sufficient volume to collect retain & digest solid waste
5. Long cleaning period
6. Easy for maintenance
7. Easy for transportation, handling & installation
8. Excellent performance
9. Better effluent quality (exceeds the standard parameters)
10. Sufficiently strong to sustain different loading condition
Design consideration of Safegard septic tank
24. The surface area of the tank required should be O-92 m² for every 10 liters
per minute of peak flow rate at a temperature of 25°.
A minimum depth of sedimentation shall be 250 to 300 mm.
Sludge digestion per capita suspended solids entering the tank may be
taken as 70 g/day.
The capacity required for sludge digestion is 0.033 m³ per capita at 25°C.
Volume of digested sludge is normally O-000 21 m³ per capita per day.
Detention Time provides a detention period of 24 to 48 hours based on an
average daily flow of sewage.
Requirement of BIS
25. •
Unique Design – Rototationally moulded, one piece seamless
construction with two chamber patented design
•
Great Strength - Highly durable
•
Light in weight - Simple and quick Installation
•
Excellent Chemical Resistance - free from concrete corrosion and ill
effects of H2S
•
Minimum space and excavation requirements
•
Free from infiltration, ex-filtration and root penetration
•
Long life with economy
•
Hygienic and safe
•
Eco-friendly
•
Conforms to National and International standards
•
Maintenance free
Safegard septic tanks - Unique features
26. •
Available in 1000, 1500, 2000, 3000, 5500 liters and large size up to
29500 liters in modular design.
•
EN 12566, IS:2470
Available sizes and applicable standards
31. 1) EXCAVATION
Excavate a pit approximately 600 mm larger than the
size of septic tank. Depth of the pit should be decided
based on position of inlet and outlet with required
gradient and disposal point plus 150 mm extra for
bedding.
2) BED PREPARATION
Ensure that the base of the pit is even, flat and
sufficiently hard to form a strong foundation for the
septic tank. Prepare a 150 mm (6”) thick bed of
granular material and compact it properly. Ensure that
no sharp object/stone etc should protrude which can
puncture the tank.
Installation of septic tank
32. 3) POSITIONING THE TANK
Lower the tank and position in the pit ensuring that it is
vertical, centrally positioned, correctly aligned and
leveled using spirit level and the outlet pipe faces the
soak pit and inlet pipe swivels, ensuring a straight
connection.
4) FILL THE WATER IN THE TANK
Fill up the tank with water up to 1/3rd capacity using
tap.
33. 5) BACKFILLING
Start the backfilling. Backfilling and water filling should
be carried out simultaneously ensuring that the
backfilling level never exceeds the rising level of water
within the tank until the water overflows through the
outlet pipe, thus indicating the tank is full. The width of
the backfilling should be minimum 300 mm (12”) around
the tank. Excavated soil can be used if it is silt, sand or
soft murum but in case of black cotton, loomy or marshy
soil only selected inert granular material i.e. sand /stone
dust /gravels (max. size 10 mm) should be used as
backfill material. Backfill material should be placed in
250 mm thick layers and compacted to 90% proctor
density. It is particularly important to note that
excavated material consisting of rock, peat or clay is not
used as backfill material.
34. 6) MAKE THE PIPE CONNECTIONS
When the level of the backfill reaches the underside
of the outlet pipe invert, inlet and outlet
connections should be made. It is recommended to
maintain 1:40 to 1:60 fall between drain head and
inlet of the septic tank.
7) FINAL BACKFILLING
After making pipe connections, complete the
backfilling up to the top level of the tank. In case of
non traffic conditions, normal flooring like PCC /
paver blocks etc. can meet the requirements.
35. 8) PROVIDING COVER / LID
Select the appropriate cover as per the site loading
conditions and place it on the top of tank. In case of
pedestrian movement where vehicular loads are not
expected, plastic light weight cover is recommended.
This plastic cover should filled with concrete after
placing it on the septic tank. For vehicular traffic
movement GRP cover of appropriate load class is
recommended. For GRP covers 150 mm thick PCC
(min. M150 grade) beneath the cover frame for full
width of tank is recommended. After embedding the
frame, place the cover as shown in the figures.
39. Installation of modular tanks
1) Excavation of the pit
Excavate a pit approximately 600 mm larger than the size of septic tank. Depth of the pit should
be decided based on the position of inlet and outlet with required gradient and disposal point
plus 150 mm extra for bedding.
40. 2) Bed preparation
Prepare a 150 mm (6”) thick bed of granular material and compact it properly. Ensure that
the base of the pit is smooth and flat. It should be sufficiently hard to form a strong
foundation for the septic tank. There should not be any sharp objects/stones etc. which could
protrude and puncture the tank. In case of soft strata or loose soil like black cotton, marshy
or loamy soil, it is recommended to provide a flat cast in-situ 150 mm thick concrete slab.
41. 3) Positioning the first component
Lower and position the first modular tank component in the pit. Ensure that it is vertical and
centrally positioned. Align it correctly and level using spirit level. While positioning ensure that
outlet side (having dome end) faces the soak pit or drain field.
Cut the hole(s) at provided slot(s) to fit inter connecting pipes as per the requirement and set
guidelines given in the following chart. Fix the rubber seals on the holes.
Backfill carefully with recommended backfilling material. Ensure that no voids remain especially
under and between the legs of the tank to a depth of 400 mm above the bed or cast in situ
concrete slab.
42. 4) Intermediate pipe connections
Apply rubber lubricant on the rubber seal(s)
provided on the holes cut on the flat portion
and insert inter connecting pipes as per the
requirements / set guidelines.
5) Push the pipes
Push the inter connecting pipes fully inside
the first component.
43. 6) Positioning the second component
Lower the second component and align it properly.
Cut the slots and place the rubber seal on this
second component for connecting it with the first
component using connecting pipes. Bring it close to
the already positioned first component and match
the slots.
7) Alignment of two components
Align the holes of two adjoining components, push
and insert the connecting pipes from inside the
first component as shown in the above figure.
Repeat the backfilling as shown in step 3.
44. 8) Positioning the last component
Place the last component in the pit and repeat
the same procedure for connecting it with the
adjoining middle component.
Procedure explained herewith should be
repeated for additional intermediate
components for increased capacity.
9) Fixing and alignment of last component
Align the last component and match with the
earlier installed middle component and connect
each other using connecting pipes as per the
earlier explained procedure.
45. 10) Fill the tank with water
Fill up the tank with water up to 1/3rd capacity using tap before backfilling.
46. The width of the backfilling should be minimum 300 mm (12”) around the tank. Excavated soil
can be used if it is silt, sand or soft murum but in case of black cotton, loomy or marshy soils
only selected inert granular material i.e. sand /stone dust /gravels (max. size 10mm) should be
used as backfill material. Backfill material should be placed in 250 mm thick layers and
compacted to 90% proctor density. It is particularly important to note that excavated material
consisting of rock, peat or clay is not used as backfill material.
Note - for installation in water logged areas or where the water table is shallower, it is
recommended to refer the installation procedure for abnormal condition.
11) Backfilling and compaction
Start the backfilling. Backfilling and water filling
should be carried out simultaneously ensuring that
the backfilling level never exceeds the rising level of
water within the tank until the water overflows
through the outlet pipe thus indicating the tank is
full.
47. 12) Make the inlet and outlet connections
Make the connections of inlet and outlet including
hopper.
13) Cast the concrete slab (Optional) and place the cover
Complete the backfilling above outlet pipe. Select the
appropriate cover solution as per the site loading
conditions and place it on the top of tank.
In case of pedestrian movement where vehicular loads
are not expected, plastic light weight cover is
recommended. This plastic cover should filled with
concrete after placing it on the septic tank. For vehicular
traffic movement GRP cover of appropriate load class is
recommended. For GRP covers 150 mm thick PCC (min.
M150 grade) beneath the cover frame for full width of
tank is recommended. After embedding the frame, place
the cover as shown in the figures.
Note : If required height of the manhole can be raised using height riser(s).
48. Cover Solutions for modular septic tanks
Typical diagrams should be referred for installation of appropriate covers.
51. Guidelines for abnormal conditions
• In case of marshy/black cotton and loose soil, or where the water table is a problem,
excavated soil is not recommended for backfilling, a cement-stabilized backfill mix of 5%
cement and 95% inert granular material must be compacted in 250 mm layers to 90%
proctor density and 6" thick R.C.C. with nominal steel enforcement is recommended at the
top.
• In case of soft murrum, it can be used as backfilling material with proper compaction (90 %
of proctor density), in 150 mm layers.
• Care should be taken to avoid direct contact of sharp edges, objects with the tank.
• In case of high water table areas, septic tanks should be anchored in concrete as per the
guidelines of engineer in charge.
• Safegard Septic Tanks are not designed to be buried more than 0.5 m below ground level. If
depths are greater than 0.5 m, please refer to site engineer/architect.
• If the abnormal soil conditions occur like vehicular traffic, rocks, black cotton soil, or when
the high water table is anticipated or when the backfill above the lid may exceeds 0.5 m,
then the final design rests with the engineer or architect on the project. However
guidelines given herewith must be strictly followed for best satisfactory performance.
52. Manufacturing – as per EN 12566
Manufacturing standards and
test requirements of septic tanks
Test Requirements
Sr. No. Test Requirement
1 Dimensions Inlets, outlets, and connections Accessibility
2 Load bearing capacity
a. Backfill load For vertical - hx18 kN/m² h= height, specific weight of soil 18 kN/m3
b. Hydrostatic load For vertical - Hw x 10 kN/m² specific load of soil / specific mass of water 10
kN/m3
c. Dynamic load
i) Pedestrian Load For less than 1m = 2.5kN/m²
ii) Vehicle Load
3 Water tightness
a. Water test No leakage
b. Air permeability vacuum
test
0.1 bar for 60 sec,
0.2 bar for 30 sec,
0.3 bar for 15 sec
c. Pneumatic pressure test 0.3 bar for 3 min
53. 4 Volume / Nominal
Capacity test
Septic tank capacity recorded in liters
5 Structural behaviour
a. Dry conditions Vertical load test - hx18 KN/m² h= height, specific weight of soil 18 KN/m3
Determination of mechanical characteristics of test samples used for
calculations (flexural modulus)
Pit Test
Determination of mechanical characteristics of test samples used for
calculations (flexural modulus)
Pit Test
54. Volume of tank = Volume for sludge + Volume for retained water + freeboard
For example,
a) Volume of sludge / person / year = 27 liters.
b) Water supply / person / day = 80 liters.
c) Average population of a household = 5 nos.
d) Cleaning period = 5 years.
e) Volume required for sludge = (a x c x d)
= (27x5x5)
= 675 liters
a) Volume of water retained in the tank in 24 h = ((b x 0.8) x 5) = ((80 x 0.8) x 5)
= 320 liters.
= (e + f) = 675 + 320 = 995 liters say 1000 liters.
Summary – for 80 lpcd, 5 people & 5 years use 1000 liters septic tank is required.
In addition to 1000 liters capacity a freeboard of 250 mm is required.
Capacity calculations
56. Comparison with Safegard septic tank
Manufactures claim
• Total capacity - 2800 ltrs.
• Capacity up to liquid level - 2490 ltrs.
• Recommended no of users – 50
Suitable for
• Sludge volume per users / year - 27 ltrs.
• Sludge volume for 50 users / year - 1350 ltrs.
• Volume for waste water to be retained - 4800 ltrs.
• Free board required - 310 ltrs. min.
• Total volume for 50 Users for one year - 6460 ltrs.
• Available capacity is - 2800 ltrs.
Summary
• Thus this tanks is suitable only for 20 users for one year it means Safegard 3000 liters tank is
suitable.
• Cost of this tank is Rs.18000 against Rs. 36000/-
57. Life cycle cost analysis
Description RCC Septic Tank Safegard Septic Tank
Life
Product Cost
Maintenance Cost
Total Cost with
Conventional Product
15 - 20 Years
Rs.18,000/-
Rs.12,000/- (20 Yrs.) @ Rs.600/year
18,000 + 12,000 = Rs.30,000/-
30,000/20 = 1,500 Rs./Year
80 Years
Rs.36,000/-
Rs.32,000/- (80 Yrs.) @ Rs.400/year
36,000 + 32,000 = Rs.68,000/-
68,000/80 = 850 Rs./Year
58. Comparison Summary
Sr.
No.
RCC Hume pipe Suggested
size of
Safegard
in L
Cleaning
time
(1 year)
Cost Life cycle cost
per yearTank
size
in L
Recommend
ed for no of
user / tank
Actually
suitable
for 1 year RCC Safegard RCC Safegard
1 1600 25 12 users 1500 9000 18000 650 225
2 2800 50 22 users 3000 18000 36000 1194 450
3 6300 100 48 users 5500 35000 66000 2155 825
59. Advantages of Vertical v/s Horizontal design
•
Minimum space requirement
•
Minimum external loads
•
Better settlement and decomposition of soil waste
•
Better quality of effluent discharge
•
Economical design
60. Different Tests on Septic tanks
•
Material properties
•
Vacuum test
•
Structural behavior - Collapse
load
•
Dynamic load test
•
Water tightness test
•
Pneumatic pressure test
•
Hydraulic efficiency test
61.
62. Water storage solution . . . Total water storage solution provider
•
SILTANK overhead water storage and loft tanks in different capacities from
100 to 5000 liters
•
Amrutam underground water storage tanks in different capacities from
64. Unique features of Overhead water tank
•
100% virgin raw material
•
Strong and Durable
•
Thermal Insulation with foam layer (four layered)
•
Excellent chemical resistance
•
Meets and exceed all quality parameters as specified in IS standard
•
BIS marked two layer tanks are also available
•
UV Stability
•
Full capacity guaranteed
•
Most suitable for drinking water
•
Easy and quick installation
•
Available in 500, 750, 1000, 1500, 2000, 3000 and 5000 liters
•
Two cover options – one with simple rotate and lock type and other with
threaded type covers
65. Overhead water tank sizes with dimensions
CAPACITY Available Layers Diameter Height Manhole ID
500 liters 2/3/4 868 1060 390
750 liters 2/3/4 1000 1168 390
1000 liters 2/3/4 1071 1325 390
1500 Liters 2/3/4 1267 1454 390
2000 Liters 2/3/4 1434 1503 460
3000 Liters 2/3 1611 1733 460
5000 Liters 2/3 1936 2047 460
All dimensions are in mm
67. •
100% virgin raw material
•
Food grade material
•
Strong and Durable
•
Full capacity guaranteed
•
Most suitable for drinking water
•
Net storage capacity exceeds the mentioned capacity
•
Easy and quick installation
•
Available in 100, 150, 200, 300, 400 and 500 liters
Unique features of loft tanks
68. CAPACITY Length Width Height Manhole ID
100 liters 585 585 373.0 300
150 liters 715 715 371.0 300
200 liters 900 500 475.0 300
• Liters 965 705 385.0 300
300 Liters 1205 825 378 300
400 Liters (Option 1) 1195 920 450 300
400 Liters (Option 2) 1290 1004 390 300
500 Liters (Option 1)* 1415 870 490 300
500 Liters (Option 2)* 1505 996 408 300
* Two openings with lid , all dimensions are in mm
Dimensional details of loft tanks
69. Underground Water Tanks
Available in 1000, 1500, 2000,3000 liters in vertical design and 6000 and bigger capacities up
to 30000 liters in modular design
70. Unique features of Amrutam underground water
tank•
Rotational moulded single piece construction up to 3000 liters
•
Great strength – Robustly designed with unique rib structure
•
Simple and quick installation
•
100% water tight – free from root penetration
•
Provided with air tight threaded cover
•
Hygienic and safe – free from corrosion and biological growth
•
Minimum maintenance requirements
•
100% virgin raw material
•
Full capacity guaranteed
•
Long life – minimum 50 years of service life
•
Available in 1000 to 30000 liters capacity in vertical and modular design
71. Amrutam vertical tank sizes with dimensions
CAPACITY Diameter Height Manhole ID
1000 Liters 1200 1321 390
1500 Liters 1200 1692 390
1800 Liters 1200 2052 390
2000 Liters 1700 1301 390
3000 Liters 1700 1748 390
All dimensions are in mm
72. Amrutam modular tank sizes with dimensions
CAPACITY Diameter Length
6000 Liters 2200 2400
10000 Liters 2200 3800
14000 Liters 2200 5200
18000 Liters 2200 6600
22000 Liters 2200 8000
26000 Liters 2200 9400
30000 Liters 2200 10800
All dimensions are in mm