
Recommandé
Contenu connexe
Tendances
Tendances (20)
En vedette
Similaire à Question 4
Similaire à Question 4 (20)
Plus de liamrig95
Plus de liamrig95 (18)
Question 4
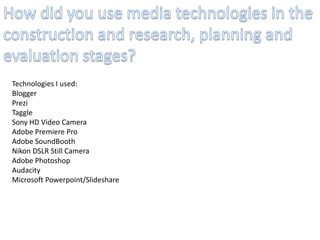
- 1. Technologies I used: Blogger Prezi Taggle Sony HD Video Camera Adobe Premiere Pro Adobe SoundBooth Nikon DSLR Still Camera Adobe Photoshop Audacity Microsoft Powerpoint/Slideshare
- 2. Using blogger enabled me to record my work from the research stages all the way through to the evaluation stages. By using blogger I easily added fresh pieces of work onto new posts. However sometimes blogging can become a bit unorganized and therefore I re-organizing it took extra time.
- 3. I used Prezi in my Research and evaluation stages to present my work in an interesting way compared to the typical essay writing format. Prezi allowed me to annotate and add images too which helped for both stages of evaluation and research when analysing and typing up other documentaries.
- 4. Tagul enabled us to brainstorm ideas for the documentary in a visually interesting way. By shaping the buzz words of our ideas into a relevant picture, Tagul helped create a soupson of the ideas we have come up with.
- 5. We used Sony AVCHD Video Camera’s to record our documentary footage. We used a tripod and clip microphone when recording our vox pops. This enabled us to collect vast amounts of vox pops whilst keeping the camera on a level position creating a perfect frame for the interviewee's. These were used for both vox pops and formal interviews with relevant phobia people. Using a tripod helped us keep a steady camera. The clip microphone helped us capture the interview audio, however we made a mistake in one interview and the audio became muffled, unfortunately we couldn’t re-arrange another interview with that person and therefore had to use a bad piece of audio. Overall I feel we could have put more effort into the framing of the shots we had taken and concentrated more on the capturing of the audio.
- 6. Using Premiere Pro enabled me to put my documentary together. After going out and getting all the footage we needed including archive footage, we collated it on premiere and produced a rough edit to get a general idea of what the documentary would look like. Once the rough edit was completed we began our full edit of the documentary. Firstly we imported all of our footage into premiere. Then by using the preview window and razor tool we began to cut up various footage and drag into suitable places. Following the running order helped give us a narrative structure for the documentary so that the footage was put in a sensible and consistent way. I feel this was done well, however some of the footage could have been more interesting such as the cutaways.
- 7. After carefully choosing and editing the main documentary footage we began to add still headings onto specific parts of the documentary. For example we used a heading on the opening sequence to signify the start of the documentary. As well as adding text onto the interviewee’s parts telling the audience who they were and their relevance to the documentary. When we first edited the opening sequence the text was not very suitable as we added too many effects such as drop shadows and strokes. Therefore we decided to tone the effects on the text down and we felt it looked a lot better, therefore I feel the font and size of the text throughout the documentary is suitable and compliments the eerie themes of phobias.
- 8. Now that we had the footage and text we moved onto the visual effects of the documentary. Our main focus was the blue screen interview which I feel worked extremely well. For this we used the Chroma key tool and replaced the background of the interview with a picture of the interviewee’s phobia adding a more suitable feel, as well as creating a more interesting documentary. Transition effects were also added to the text stills. By fading the text in and out we created a more professional looking documentary. I feel this was effective to the documentary as it gave the audience relevant information in a subtle way that did not avert their attention from the main footage.
- 9. The final steps to putting together the documentary was adding and editing the music and voiceover, as well as levelling out the volume so that the documentary volume run smoothly throughout. Firstly we added the voice over and simply used the razor tool to cut up specific sections of the voiceover. After dragging the correct sections to the correct places we began to add the music. We chose Thriller by Michael Jackson as we felt it suited the whole theme of being scared and having a phobia. We also chosen an atmospheric drone named Dulces Pontes. This created a scary feel for the documentary which I feel worked well and gave the start of the documentary a big impact on the audience. To compliment the drone we added a sound effect of a beating heart to portray the themes of fear.
- 10. On one of the interviews we had filmed the audio was quite muffled and had a lot of static noise. Therefore we used Adobe Sound booth to correct it. By using Sound booth's own effects rack and audio cleaner I was able to partially correct some of the audio in the interview therefore making it usable. Even though I had added effects onto the audio making it sound cleaner, I feel the audio was still not up to a great standard and this mistake could have been avoided by using the microphone properly when we filmed. We also used sound booth to adjust the volume of certain clips by using the decibel dial.
- 11. For my Print Advertisement I needed pictures of someone who had a phobia. Therefore I used a DSLR Camera in order to capture high quality images to make the advert as professional as possible. However the way I designed my initial idea for the print advert meant that I would need two different pictures of the same person in the same stance. Therefore I set up a tripod so that the proportions of both pictures would be similar, if not the same, to make it easier to edit in Photoshop. I feel the photos I had taken were very effective and work well with the documentary.
- 12. I used Photoshop to put together the print advertisement for my documentary. After planning, designing and taking photographs for the advert we began to produce it on Photoshop. Inserting the pictures and cutting them out was the easy part. However matching up the pictures so that the facial features were aligned proved to be a challenging task. We warped and smudged various parts of the models face in order to align the features.
- 13. Other tools such as text and shape tools were used in order to give the relevant information for the audience. The outcome of the print advert was excellent and I think that it gives off the right feel of fear and phobias for the documentary.
- 14. We used Audacity to record the voice for our radio advert and documentary voiceover. To do this we used the college’s radio recording room as this would be the most suitable place to record the voiceover. After setting up the microphone and audacity correctly we ensured complete silence in the radio room so the only sound that was captured was the voiceover. Once we had recorded all the voiceovers that we needed we imported them into premiere and added the voice over to the radio ad and documentary. The sound recordings we got for the radio and voiceover were good and spoken clearly and professionally.
- 15. I used PowerPoint in my research and evaluation stages to present my information in a formal but good looking way. I used PowerPoint alongside slide share and was able to upload my presentations to slide share, which then enabled me to embed my presentations on my blog.