Video Production
•
4 j'aime•2,147 vues

Video production introduction including prepruction, treatment, storyboard, filming, editing.

Recommandé
Contenu connexe
Similaire à Video Production
Similaire à Video Production (20)
Plus de Drew Loker
Dernier
Dernier (20)
Video Production
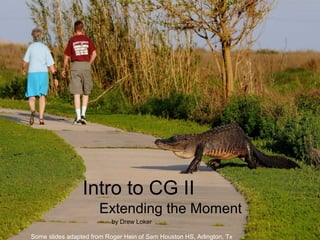
- 1. Intro to CG II Extending the Moment by Drew Loker Some slides adapted from Roger Hein of Sam Houston HS, Arlington, Tx
- 2. Copyright Notice • Attribution-NonCommercial-ShareAlike CC BY-NC-SA • This presentation is for educational purposes only. No money is being made and is provided with similar allowances for other educators to use for non-profit, educational purposes. • Images are from various sources, including many of my own. If you would like to high res images I have shot, please visit www.DrewLoker.com for various work online. • If you are the original author of any of the samples, pictures, text, etc. please let me know if you object to the usage and I will remove your material promptly. Photo by Drew Loker
- 3. Video & Photojournalism “We are products of other people” & “The Extended Moment”
- 4. Decisive to Extended Moment • In Photo 1, week 1, you learned about the DM (Henri Cartier Bresson a.k.a. The Decisive Moment). – You have learned how to pull the trigger such as basic camera operation and composition. • Many pictures may truly exist for only a fraction of a second in time time, rarely, if ever, to be repeated. • I may be able to recreate a scene, but it is usually impossible to get the same shot again.
- 5. Video is about the moment • Video is a series of moments • How are you going to find them • If you don’t feel something, how will you know if some body else is feeling something. – Would you give your life to save 100 people? What about 1?
- 6. Everybody is Interesting • Photographing a still of an interesting person is good. But a video can tell a lot more. • It is easy to NOT be interested in other people…because was have so much going on in our own lives. But slow down and LISTEN – What can you learn about the people you come in contact with. – What story do they have to tell? – What experiences have they had? – Think about a video interview with a senior citizen. What questions would you ask? What could you document in a video about a person’s life? 80-year-old woman helps Beaumont Police catch burglary suspect
- 7. Video • Similar to photography, but even more so, you have to anticipate what is going to happen • Video is about compressing time. • Assembly = editing the video, creating a montage – This is LIKE how you pieced together your photostory, yet MUCH different. • Consider Cameron Diaz in “The Holiday” whose job was to make movies look good. • We have all seen a GOOD Trailer, just to be disappointed by the movie. – http://blog.moviefone.com/2010/05/20/good-trailers-for-bad-movies/ - Terminator Salvation: That's always the danger of watching a trailer, though, because sometimes when it's a little too good, the film is doomed to be a let-down -- and before you know it, you've been hoodwinked and you're looking forward to a movie that never existed. [Re Twister] …prove yet again that quality film making and box-office returns have nothing to do with one another, and this crappy flick was one of the highest grossing movies of that year.”
- 8. Extended Moment • We all know that there is the 1 decisive moment • But there are slivers of time around that one moment, that become the moment. • A lot of decisive moments around make an extended moment. – The kiss on the cheek becomes the hug, and the smile after the kiss.
- 9. Video Projects • Video 1 – Individual – Edited in camera initial (shoot sequentially, ready to show with minimal assembly) – Edited AFTER the fact for a final project – Topics: Video Story or PSAs • Video 2 – work in Pairs..or individual – RAW footage in field – Edited in Adobe Premiere – Topics: Music Video or Video Story 2 • Video 3 – Individual – Topics: Timelapse or Claymation (stop action) • DVD – All videos (including photostory) in a Movie Style DVD with menus, scene selection
- 10. Timeline of Video Production • All three videos START in January. The due dates for each video is different as the production time frame is different. But all three videos PLANNING begins right away, concurrently. – Video 1 Filming should begin by the middle of Feb and complete by the end of the 4th 6 weeks, edited in the 5th 6 weeks. – Video 2 filming should begin by the end of the 4th 6 weeks, complete by the middle of the 5th 6 weeks.
- 11. Concurrent • Notice how many films Sam did in 2010. That is an AMAZING feat. • Also notice the film he acted in for Ten....due to release in 2014 (it is Feb 2013 now). Post prodcution can take a year after filming. • Thunder run has not started film.
- 12. What does concurrent mean? • All THREE of your videos should start in the 4th 6 weeks. – 4th 6, Week 1-3: Brainstorm, Plan, Treatment Video 1
- 13. General Concepts • Video Production – (as compared to Film and Movie) introduced late 60's to early 70's – 1 hour of editing for each 1 minute of shooting • 3 projects – 1. Silent Story, about 1.5 - 3 minutes., edit in camera/field as much as possible. Post edit after initual due date with sound, effects, transitions, and credits. – 2. Story or Music – 3. Animation (Time-lapse or Claymation) • All stories have: – Beginning • Introduce 1. People or subject & 2. Set the atmosphere or mood/tone. 3. Conflict • In most stories except perhaps soaps: between 1st commercial, the credits and the second commercial the problem is presented. It is solved by the end of the show. – Middle • Testing sequence (action - trying to solve a problem) – End • Resolve (success, opinion, failure)
- 14. Planning Your Video • Brainstorming – Determine Theme • Treatment – Where, how, tone, script – Should have about 3 paragraphs of what is happening in the storyboard – Include an necessary materials, resources (props and equipment), actors • Story Board – create several boxes for each major scene – Indicate camera action, movement, composition, etc. • Audio Script (if talking) or Shooting Script – Audio – script out everything that needs to be said and give to talent in advance – Shooting script – list of shots, in order (different from a storyboard… this is just a check list)
- 15. Treatment for a video about the “Comm Graphics Department”: This video’s primary purpose is to introduce the class to potentially interested students, as an introductory video to be shown at the beginning of the year, and as an example for video production classes. The video should have the following main areas of content: Computer Graphic Design, Photography, and Video Production. The video should highlight the emphasis on competitions and displaying quality work to the public, as well as some information about the 2nd year program. Resources for material can come from the Communication Graphics printed brochure. The video will include a variety of creative cameras angles, editing techniques, etc. Sample Treatment
- 16. Three Production Phases • The production process is commonly broken down into preproduction, production, and postproduction. • 1. The Preproduction Phase – In preproduction the basic ideas and approaches of the production are developed and set into motion. It is in this phase that the production can be set on a proper course, or misdirected to such an extent that no amount of time, talent, or editing expertise can save it. – In order for the program to be successful, the needs, interests, and general background of the target audience (the audience your production is designed to reach) must be studied and kept in mind throughout each production phase. – During preproduction not only are key talent and production members decided, but all of the major elements are also planned. Since things such as scenic design, lighting, and audio are interrelated, they must be carefully coordinated in a series of production meetings.
- 17. Three Production Phases, Cont – Once all the basic elements are in place, rehearsals can start. – A complex production may require many days of rehearsals. These generally start with a table reading or dry rehearsal where the talent, along with key production personnel, sit around a table and read through the script. Often, script changes take place at this point. – Finally, there's a dress rehearsal. Here the talent is "dressed" in the appropriate wardrobe and all production elements are in place. This is the final opportunity for production personnel to solve whatever production problems remain. • 2. The Production Phase – The production phase is where everything comes together in a kind of final performance. – Productions can either be broadcast live or recorded. With the exception of news shows, sports remotes, and some special-event broadcasts, productions are typically recorded for later broadcast or distribution. – Recording the show or segment provides an opportunity to fix problems by either stopping the recording and redoing the segment or making changes during the postproduction editing phase. • 3. The Postproduction Phase – Tasks, such as striking sets, dismantling and packing equipment, handling final financial obligations, and evaluating the effect of the program, are part of the postproduction phase. – As computer-controlled editing techniques and postproduction special effects have become more sophisticated, editing has gone far beyond simply joining together segments in a desired order. Editing is now a major focus of production creativity.
- 18. Storyboard Development • A storyboard is a Road Map, a Plan for how the video will go – When a movie story/idea is presented to a potential producer/investors, a storyboard is used to help them see the big picture, of how scenes may actually play out. – Draw out details of each major scene change. Include details such as camera movement • No matter how basic, it is very important to sketch something out. – Do NOT just plan to start filming one afternoon. Even if a stick figure drawing is difficult for you, do it anyway. – A story board is as much of a list of scenes and shot list as it is a plan for how the scenes will look – A story board helps to work out location challenges in advance • Proper Planning Prepares your Project for Prosperity – If your talent shows up, even it is your best friend or parent, they are going to get frustrated with you if you have not planned ahead how scenes are going to go. – A story board can be rearranged in a different order. I have seen some schools use index cards for the storyboard so the scenes can be easily rearranged. • An entire industry exists around the creation of storyboarding
- 19. Storyboard Aids • http://karenjlloyd.com/blog/free-storyboard-template-downloads/ • http://www.wacom.com/en/Products/Cintiq.aspx • Resources are readily available online • Special equipment, like the Cintiq Tablet or even apps for the iPad are making Storyboard creations even easier.
- 20. Character Development • Diagram how characters fit with the story and the relationship between the characters.
- 21. Filming Basics • Types of Shots – Establish or wide shot - usually as wide as your camera will see. EWS – Medium shot - about knees up or 2 shot (2 people) MS – Close up - a head shot. CU – Ext. Close up - ECU • Manual focus - zoom in all the way, focus, and then pull out to frame. • Camera angle - psychological pt. of view. You are directing the viewers eye. • 5 C's – Camera angle – Composition – Continuity – Close-up – Cutting • Continuity = consistency. If there is a cigar in the ash tray in one scene. It must be in all scenes. • Close-ups - variety of shots. • Cut up to set mood. - just a mouth - ECU
- 22. F.W.E.F.A. • Fweefuh! So what is FWEFA? Good question! • F = Framing • W = White balance • E = Exposure • F = Focus • A = Audio
- 23. The first F • Framing (see end of Pres for Framing review) • Make sure you have framed the shot the way you want. Try different angles or frames from different points of view to get a variety of shots to help yourself edit a better production later. You can never have TOO many good angles. • Try the basic framing guidelines first.
- 24. Framing Terms • Video/Film is shot with a viewfinder. • What you see in the viewfinder determines the frame composition. • There are 6 basic terms used to describe what is seen in the viewfinder.
- 25. Terms in order of viewfinder angle • Establishing shot or master shot. • This shot is usually taken with a wide angle lens and show an entire scene. Think of a western movie and the shot of the plains at the beginning of a movie.
- 27. Wide or Full Shot
- 28. Medium Shot
- 29. Medium Close-up
- 30. Close-up
- 31. Extreme Close-up
- 32. Basic Camera Moves • Pan • Tilt • Dolly • Truck • Zoom (unnatural perspective)
- 33. Pan • Panning is moving the camera on its horizontal axis • Left to right or right to left • Whip pan - panning very quickly
- 34. Tilt • Tilt is done by moving the camera on it’s vertical axis • Whip - tilt is the rapid movement of the camera on it’s vertical axis • Use to follow action from a high position to a lower one or from a lower position to a higher one
- 35. Dolly • Moving the camera forward or backward to or from your subject • Don’t confuse this with a truck
- 36. Truck • Moving your camera in the same direction as your subject in a parallel manner
- 37. W = White balance • White Balance is needed to get the best color recording for your video project. • Most cameras do a pretty good job selecting the best white balance for the situation. • Difficult lighting can make for some strange colors, especially on flesh tones. • Manual white balance is a good thing to know how to do.
- 38. White Card • To manually set the white balance you need a white card. A white t-shirt will work in a pinch as will a piece of white computer paper. • Take a white card with you on shoots to set the white balance if necessary. • Mixed lighting requires balance manually.
- 39. Camera Types at WB • Used to spend a lot of time trying to learn on THESE exact school cameras. Not going to do that this year. Bring YOUR camera for the Video Practice Next Week. If you don’t have a V-DSLR, then you can use one of these. • We have 5 DV Camera Types, 2 Brands – Canon ZR 10, 40, 60 – Canon Optura 50 – Excellent Focus control, our best camera – Panasonic DV120D – Webcam, NO audio input, Light – All are Firewire for very HQ
- 40. Know your camera • Most cameras have a manual white balance. • Read your manuals to find and use manual or custom white balance. • We have two brands and 5 models… makes teaching difficult – Canon Optura 50 is our best and most modern camera, but now 6 years old – Canon Zr-10, 40, 60 – Panasonic – last choice, but an ok camera • Has built in video light
- 41. Exposure • Most camera will do a pretty good job with automatic exposure setting. Difficult situations include: • Stage Lighting • Back Lighting • Dark complexions in low light
- 42. Changing Exposure • Know how to change your exposure manually. • Get and read the manual to know how to achieve manual exposure settings. – RTFM – That is Read The Freaking Manual…get it? • Exposure can be changed with shutter speed and aperture, just like still camera • Some simpler cameras will just let you make an exposure compensation. + or – 3 stops.
- 43. Focus • Auto focus is great, but can mess you up in a complex shot or if you want to use selective focus for emphasis. – Know how to manually focus your camera. • Our Optura 50 has very nice manual focus • Most inexpensive video cameras have very crude manual focus controllers. – The DSLR’s make this very easy. Just move the switch to manual focus. • Very elaborate systems to smooth dslr focus knob – Check your manual for your camera’s manual focus setting.
- 44. Focus Technique • If you have a higher end camera and want to make a long zoom shot there is a technique that will help you keep focus. – Start with the zoom at it’s longest focal length (zoomed in). – Focus on your subject. – Now change your FOCAL length, not your FOCUS to the shortest setting (wide angle). – As you zoom, the subject should stay in focus. • Some cheaper zoom lenses will change focus as you zoom. You know you have a true zoom lens if it keeps focus throughout the focal length change. This is called parafocal and is NOT common even on expensive lenses.
- 45. Audio • Audio is a whole different animal! • Things to remember about audio: – Keep it as clean and understandable as possible – Bad audio will ruin Great video – Great audio might save bad video! • Mainly because you can put stills in place of the video while the audio is maintained. • Be sure to monitor your audio with a pair of headphones.
- 46. External Audio • Use external audio whenever possible • Cordless lavalier (lapel) mics are a good way to improve audio quality. • Boom mics are a good way to improve audio quality if you need to show more than one person in a shot. • Use stereo mics if possible (we have some). Current DSLRs have mono
- 47. Royalty Free Audio • Incompetech.com – Credit source, – YouTube friendly – Lots of different themed selections (mysterious, suspense, action, beat) – I have already dled most of this collection…see server • Jamendo.com
- 48. Acting • “With any part you play, there is a certain amount of yourself in it. There has to be, otherwise it’s just not acting. It’s lying.” Johnny Depp • Prepare your people a script ahead of time. – Record scene several times. – Be a director…don’t be afraid to tell them what to do – Reward your talent, food, gifts, coupons, services, tokens
- 49. 10 Tips For Improving Your Home Videos • If you shoot a two-hour video of your child’s birthday party or six hours of your last vacation with the intention of editing them later into a good 15 to 30 minute video to show your friends, you will soon realize that you are looking at hours of work. If you don’t edit the videos, then plan on using the fast forward button on the remote early and often when viewing with friends. • There is a way to avoid editing or the fast forward button, and that’s with a simple technique called "in- camera" editing. With enough practice you can make an original video look like an edited master. Here are 10 tips for improving your home videos. • Tip #1 - Keep your shots short – A twenty-second shot of a mountain scene will seem like an eternity. Try to hold your shots to between 5 and 10 seconds. On average, I'm usually closer to 5 seconds. Try looking at TV shows and news broadcasts, and count how many seconds each shot is held. This will give you a good idea of pacing. TV news is edited very tight because of the time constraints. You will see that many shots are only 2-3 seconds long. What ties those shots together is the narration. (see tip #7). The bottom line is, if you think you would be fast-forwarding a scene at home when you watch it, then it's time to hit the stop button. • Tip #2 - Watch the panning and zooming – Don't move that camera around like you're waving a flag." Pan slow (unless you're going for a special effect) or don't pan at all. Remember, there is a stop button you can use when you want to go "from here to there". Also, be careful not to zoom in and out too much. Your audience may get seasick. Again, remember there is a stop button. You can stop recording, zoom in or out to compose the next shot, and start recording again. Try a wide angle shot first to establish the scene, stop, zoom to your subject, and then start recording again. • Tip #3 - Use close-ups where appropriate – Don't be afraid to use close-ups, not the up the nostril type like you see on the TV news, but nice head and shoulder shots, especially in interview situations.
- 50. 10 Tips For Improving Your Home Videos • Tip #4 - Switch between "animate" and "inanimate" objects – In other words people are the animate objects and mountains are inanimate. Break it up a little. Don't spend too much time on people or too much time on the scenery. Remember, it just takes some short shots to break it up. This also gives you a chance to change position and angle. • Tip #5 - Change your position and angles – Don't be nailed to one spot on the floor (or grass). Move around. Change your camera height. One effective angle for street scenes or large rooms is to put the camera on the floor and set the lens at wide angle. When shooting children, get down at eye level with them. Don’t make every shot from a standing shoulder height position. • Tip #6 - Remember your last shot – This is a key to in-camera editing. Try and create a storyboard in your head as you shoot, so you know where you've been and where you're going. Most cameras have a feature where you can back up while in record mode and see your previous scene. If your camera doesn’t have that feature, or you can’t remember your last shot, use a scenery transition (something you know for sure that you didn't use last) or the "fade" if some time has elapsed. • Tip #7 - Use narration to tell the story – This is a key to interesting videos. It takes some practice. The narration ties the story together, but you have to know where you're headed in the first place. The trick with narration and in-camera editing is to stop talking in mid sentence, change angle or position, shoot and start talking again. The result looks like an edited cut with a voice over. You may have to delay a silent count of one between talking and stopping the video and a count of one when starting and talking or you could lose part of a word. It depends on your camera. You have to know your equipment. Add humor to your narration. Interview your subjects and get them to open up. You don't have to ask the questions while you are shooting. You can ask them a question off camera and their response will look like a spontaneous comment. You can even tell them what to say if they can't think of anything.
- 51. 10 Tips For Improving Your Home Videos • Tip #8 - Use the "rule of thirds" – This tip could be a story in itself. For now just remember--when composing your shots don't center everything. • Tip #9 - Turn off the date/clock – This is a sure sign of an amateur video. Unless you're doing a police investigation or insurance video, you don't need that date and clock on all the time. You can always mention the date and time in the narration. Use the date over a black lead in and/or exit out (plus titles if you have that capability as necessary) for documentation and fast searching. • Tip #10 - Don't over use the "fade" control – The fade button used to be the only way to signal a break in time. Today’s digital cameras have effects such as mosaic or dissolves, which can also be used as transitions between scenes. If your camera doesn’t have those features try a "poor man's dissolve", or half-fade by using the camera’s manual fade before your next shot.
- 52. Video Practice • Practice Camera handling – Various camera motions – Learn how to control the camera – Learn about camera Mics • Video Scavenger Hunt
- 53. Camera Operation, Practice Exercise Practice Video Exercise Practice the following shots. Pick a simple topic…and record as many of the following as possible. For example: A person looking for a flower to pick. Composition: Each of your clips should exhibit good composition o Rule of Thirds o Lead room o Depth of Field o Aspect ratio Camera Shots o LS Long shot o ELS Extreme long shot o ES Establishing shot o MS Medium shot o MCU Medium close-up o CU Close-up o ECU Extreme close-up Camera movements Pan left, Pan right Tilt up, down Dollying & Trucking Tracking Camera angles Eye-level shot Subjective angle Objective angle High-angle shot Low-angle shot Oblique-angle shot Transitions: ZI Zoom in, ZO zoom out FO Fade out, FI Fade in Dissolve Cut Special effect
- 54. Terms • Jog Wheel – for editing
- 55. Terms • Focus Control for DSLR
- 57. Module 1, Part A, Sample
- 58. Module 1b, Focus #38
- 59. Module 2, Focus #39
- 60. Module 3, Focus 40
- 61. Module 4, Focus 41 • View clips of casting • Discuss Period piece…what is an example? • Discuss why shows get canceled, what is an example of a show they like that got canceled • Watch remaking of star wars movie. • Watch Amazing Special Effects – staging, props, etc.
- 62. Show Cancelation? • Heroes - TV drama created by Tim Kring on NBC for 4 seasons from 9-25-2006 – 02-08-2010. • The critically acclaimed first garnered an average of 14.3 million viewers in the US, receiving the highest rating for an NBC drama premiere in five years. • The second season of Heroes was criticized by commentators and fans for a much slower pace, less engaging storyline and lack of focus compared to the first season. Milo Ventimiglia stated that "when there's a little bit of a delay, there's not that instant, rewarding scene or moment or episode... people get impatient, so it has been extremely important for them to strike a balance between giving and getting."[74] In an interview with Entertainment Weekly, Heroes creator Tim Kring commented on criticisms of season two, and the series' 15% decline in ratings.[75] Kring said that he felt he had made mistakes with the direction of season two. He had thought that the audience was looking for a "build-up of characters and the discovery of their powers", when viewers were instead looking for "adrenaline." Kring also outlined what he felt were problems with plot development, stating that the second season "took too long to get to the big-picture story" The season four premiere of Heroes was the lowest rated episode of the series to that point, averaging 5.9 million viewers.[91] Despite the season's low ratings, executive producer Tim Kring was "fully expecting" a fifth season.[92] However, while creator Kring was hopeful over the show's future many media insiders were not so confident. There was growing speculation on some news sites that NBC would cancel the series at the conclusion of its fourth season [93] or that it might renew the show for a fifth and final season by ordering either 6 or 13 episodes and possibly airing them as a backup or mid- season replacement.[94] On May 14, 2010, NBC made it official that Heroes was indeed cancelled.
- 63. Some 2011 shows canceled… Charlie's Angels: Canceled due to poor ratings. This series struggled right out of the gate and never managed to pick up from there. Despite the intense ad campaign, ABC squashed this reboot after 3 episodes. All in all, 8 episodes were produced, 7 have aired and 1 will never see the light of day. Desperate Housewives: After eight fantastic years, ABC and series creator Marc Cherry opted to end the show before the ratings continued to plunge. Luckily for DH fans, the writers knew before writing had commenced for the last season that this would be the end, so the entire final season has been geared towards one important goal -- giving the fans the closure we all deserve. The final episode is scheduled to air in May, 2012. House: After eight seasons and sinking ratings, the producers of the show (which include series star Hugh Laurie) decided it was time to end the once-successful series. The finale is set to air in May. Chuck: After four seasons of less than stellar ratings (and several fan campaigns that helped save the show each year), NBC decided to bring the show back for one last, shortened season. The entire fifth season was one long goodbye with a very satisfying ending. Prime Suspect: NBC really wanted to get fans on board with this crime drama, even trying different time slots, but viewers just never warmed up to this series -- in fact, they just simply didn't bother giving it a shot at all. The Nine Lives of Chloe King: Although ABC Family gave this series the benefit of a lead-in from their top-rated series Pretty Little Liars, viewer retention rate was alarmingly low and the network canceled the show at the end of its summer run. Rumors are circulating that ABC Family may produce a two- hour movie to complete the series after fans flooded the network with complaints. Hawthorne: After three seasons, TNT opted to cancel the medical drama after it had continued to plunge in the ratings and failed to reach new viewers. Men of a Certain Age: Despite its award-winning cast, viewership maintained alarmingly low levels and TPTB could no longer justify the expense of the show. The Closer: After seven amazing seasons, the producers and TNT decided to end the series while it was still on top. A spinoff titled Major Crimes, starring Mary McDonnell is expected to premiere this summer.
- 64. Module 5, #42 • Your Video Hunt footage is considered B-Roll • New videographers are sent out to get B footage. • Not to be confused with the term “B Movie”…which refers to Budget Movie
- 65. Module 6, #43
- 66. Module 7, 44
- 67. Module 8, 45 http://en.wikipedia.org/wiki/Charge- Progressive or noninterlaced scanning is a method for displaying, storing or transmitting moving images in which all the lines of each frame are drawn in sequence.
- 68. Module 9a, 46
- 69. Module 9b, #2 Focus
- 71. Module 10, 4
- 72. Module 11, #7 Focus Get a camera out to demonstrate or show video.
- 73. Module 12, #8 Focus
- 75. Module 13a, #9 Focus
- 78. Module 13b, #10
- 79. Module 14, #11
- 80. Module 15
- 81. Module 16a
- 82. Module 16b
- 83. Module 17a
- 85. Module 17b
- 88. Module 18
- 89. Module 18 • CCU = Camera Control Unit - The RCP-TX7 (full DSP controller) can be used from the CCU allowing 16 user preset scene files. Audio from the camera and teleprompter functions when attached to the new CA-D50 adapter is possible. • DSP - Digital Signal Processor. Used to covert speech to text and vice versa. From Wiki…Since the goal of DSP is usually to measure or filter continuous real-world analog signals, the first step is usually to convert the signal from an analog to a digital form, by using an analog to digital converter . Mac was one of the first companies to put a DSP in the computer. This was very special because the Computer a 660av (1996) was labeled as a speech capable computer that would talk and listen to your speech commands. http://applemuseum.bott.org/sections/computers/q660.html • SC Control – Hue Control - http://www.cybercollege.com/tvp018.htm • White level - The carrier signal level corresponding to maximum picture brightness in television and facsimile. • Black level - The level of the television picture signal corresponding to the maximum limit of black peaks.
- 91. White Balance • Film cameras – must match film stock to the film rating, i.e. daylight vs. tungsten/incandescent – For florescent (FLd), you had to put a filter on the front of your lens. • Digital SLRs – Have a white balance setting. – AWB – Auto White Balance is too blue or too yellow…better to set the actual color. • Video Cameras – also have white balance setting. – Older cameras had a white point setting…you pointed it at something white and pressed the button – Newer VIDEO and Digital Video Cameras have a setting similar to Digital SLRs allowing you to dial in the exact White Balance.
- 92. White Balance Options Here are some of the basic White Balance settings you’ll find on cameras: • Auto – this is where the camera makes a best guess on a shot by shot basis. You’ll find it works in many situations but it’s worth venturing out of it for trickier lighting. • Tungsten – this mode is usually symbolized with a little bulb and is for shooting indoors, especially under tungsten (incandescent) lighting (such as bulb lighting). It generally cools down the colors in photos. • Fluorescent – this compensates for the ‘cool’ light of fluorescent light and will warm up your shots. • Daylight/Sunny – not all cameras have this setting because it sets things as fairly ‘normal’ white balance settings. • Cloudy – this setting generally warms things up a touch more than ‘daylight’ mode. • Flash – the flash of a camera can be quite a cool light so in Flash WB mode you’ll find it warms up your shots a touch. • Shade – the light in shade is generally cooler (bluer) than shooting in direct sunlight so this mode will warm things up a little. • Read more: http://digital-photography-school.com/introduction-to-white-balance#ixzz0l4zBLqg0
- 93. WB
- 94. Module 19
- 95. Module 20
- 96. Module 21
- 97. Module 22
- 98. Module 23
- 99. Module 24
- 100. Module 25
- 101. Module 26
- 102. Module 27
- 103. Module 28
- 104. Module 29
- 105. Module 30
- 106. Module 31
- 107. Module 32
- 108. Module 33
- 109. Module 34
- 110. Module 35
- 111. Module 36
- 112. Module 37
- 113. Module 38
- 114. Module 39
- 115. Module 40
- 116. Module 41
- 117. Module 42a
- 118. Module 42b
- 119. Module 43
- 120. Module 44
- 121. Module 45
- 122. Module 46
- 123. Module 47
- 124. Module 48
- 125. Module 49
- 126. Module 50
- 127. Module 51
- 128. Module 52
- 129. Module 53
- 130. Module 54
- 131. Module 55-56
- 132. Module 57
- 133. Module 58
- 134. Module 59
- 135. Module 60
- 136. Module 61-62
- 137. Module 63
- 138. Module 64
- 139. Module 65
- 140. Module 66
- 141. Module 67
- 142. Module 68-70
- 143. Cable Types Single conductor Binding post · Banana plug · Fahnestock clip Analog audio TRS · XLR · DIN / Mini-DIN · DB25 · Speakon Digital audio BNC · S/PDIF · TosLink · XLR Video DVI / Mini-DVI / Micro-DVI · UDI · DMS-59 · VGA / Mini-VGA · DFP · BNC · DIN / Mini-DIN · DB13W3 · D-Terminal Multi RCA · ADC · Belling-Lee · DisplayPort · EVC · F · HDMI · P&D · AV Multi · SCART · TRS
- 144. RF - Coaxial Cable coaxial RG-59 or 58 or 6 A: Plastic Jacket B: Metallic C: Dialetric Insulator D: Center Core
- 145. RF - Coaxial • The RF Coaxial Cable connection is used for transferring television signals (audio and video) originating from an antenna or cable box to a Television. In addition, VCRs can also utlize this connection for both receiving and transfer television signals and for watch VHS tapes. The type of RF Coaxial Connection pictured here is the Push-on type (right) and Screw-on type (bottom).
- 146. Coaxial – lots of different connections
- 147. RCA or Composite • A Composite Video Connection is a connection in which both the Color and B/W portions of the video signal are transferred together. The actual physical connection is referred to as an RCA video connection and is usually Yellow at the tips. Analog Stereos cables transfer Left and Right stereo signals from components, such as, a CD player, Cassette Deck, VCR, and other devices to a stereo or surround sound amplifier or receiver. Red is designated for the Right Channel and White is designated for the Left Channel. These colors will correspond to the colors of the receiving end analog stereo connectors on an amplifier or receiver.
- 148. RCA or Composite
- 149. Phono Plugs
- 150. S-Video Hot pluggable yes External yes Video signal NTSC, PAL or SECAM video Pins 4 or 7 Connector Mini-DIN connector Pin 1 GNDGround (Y) Pin 2GNDGround (C) Pin 3YIntensity (Luminance)
- 151. S-Video • An S-Video connection is an analog video connection in which the B/W and Color portions of the signal are transferred separately. The signal is then recombined by the Television or video recording device at the receiving end. The result is less color bleeding and more defined edges than with a standard analog composite video connection.
- 152. Component • A Component Video Connection is a video connection in which the separate color and B/W elements of the signal are transfered via separate cables from a source, such as a DVD player, to a video display device, such as a Television or Video Projector. This connection is represented by three RCA cables -- that have Red, Green, and Blue connection tips. There are two types of component video connections in use for consumers: Y,Pb,Pr - Progressive Scan component video input/output connection, and Y,Cb,Cr - Interlaced scan only component video input/output connection.
- 153. Component
- 154. HDMI – High Definition Multimedia Interface • HDMI stands for High Definition Multi-media Interface. To transfer the digital video signal from a source to a TV, the source must convert the signal from digital to analog, this results in some information loss. However, an HDMI connection, can transfer a digital video source signal (such as from a DVD player) digitally, without conversion to analog. This results in a pure transfer of all of video information from the digital video source to a HDMI or DVI (via a connection adapter) equipped TV. In addition, HDMI connectors can transfer both video and audio signals.
- 155. DVI – Digital Visual Interface • DVI stands for Digital Visual Interface. A DVI interface connection can transfer a digital video signal from a source component (such as from a DVI-equipped DVD player, cable, or satellite box) directly to a video display that also has a DVI connection, without conversion to analog. This can result in a better quality image from both standard and high definition video signals.
- 156. • A digital optical connection is a fiber-optic connection that is used for transferring digital audio signals (such as PCM, Dolby Digital, and DTS) from a source device, such as CD or DVD player and an AV receiver or Surround Sound Preamp/Processor. This connection is also referred to as a TOSLINK connection. Fiber Optic - Toslink
- 157. Coaxial – Digital AUDIO via a RCA plug
- 158. VGA • Standard computer connection. • Better to use much higher quality DVI connection if possible.
- 159. Firewire • DV Connection, also known as iLink, Firewire, and IEEE1394 • For connecting miniDV and Digital8 camcorders to DVD recorders records to enable digital transfer of audio and video from miniDV or Digital8 recordings to DVD.
- 160. • Here is a look at rear connection panel of a typical HDTV. On the top, from left to right, there are connections for HDMI/DVI, including a set of analog stereo audio inputs, and a VGA monitor input for use with a PC. • On the top right is the RF Coaxial Cable/Antenna Connection. Just below the RF connection are headphone and analog stereo audio outputs. • On the bottom left there are two sets of HD-Component inputs, paired with analog stereo audio inputs. • On the bottom right side are a service port, plus two sets of analog stereo audio and composite video inputs. • There is also an S-video input option just to the right of one of the composite video inputs. • As you can see, an HDTV has a variety of both standard and HD input options. Typical HDTV
- 161. Typical HDTV
- 162. CD and DVD Players Receiver Connections
- 163. High End Receiver with large variety of connections
- 165. RF Modulator
- 166. RF Splitter
- 167. Adobe Premiere Starting With Premiere
- 168. New Project • Before starting create a folder for Video Projects • Location – Set location to P drive – Browse to your Video folder, make a new folder for Video # that you are working on – Name your video
- 169. Capture Video • Connect FireWire • File Menu – Capture (F5) • Cue up tape (you can use the computer controls) – If you entered the time at the beginning of your tape, you can try “Scene Detection” • Press the record button.
- 170. Guidelines for Framing • Rule of Thirds Tic-Tack-Toe • Framing • Leading Lines • Balance • Simplicity • Mergers - Avoid these at all costs!
- 171. Rule of Thirds • Rule of Thirds • Place the main subject on one of the intersections of the imaginary lines of a tic- tack-toe board.
- 172. Rule of thirds • Rule of thirds is a good rule to remember when shooting landscapes as well.
- 173. Rule of thirds • Place the horizon in the upper or lower third of your scene.
- 174. Framing • Use objects in the foreground to emphasis the main subject in the background of your image.
- 175. Framing
- 176. Leading Lines • Lines that lead your eye to the subject. • Can be diagonal, curved or even an S- curve.
- 177. Diagonal Line
- 178. Curved Leading Line
- 179. S-Curve
- 180. Random Leading Line
- 182. Symmetrical
- 183. Non-symmetrical
- 184. Simplicity • Make the subject the easiest thing to see in the picture. Eliminate confusing backgrounds and don’t show any un- related subjects.
- 185. Simplicity - object
- 186. Simplicity - person
- 187. What NOT to do - Mergers • Mergers are a no no. This happens when the person behind the camera does not check the edges of the frame or does not look at the background of the scene. • Two kinds of mergers: Border and Near
- 188. Near Merger
- 189. Border Merger