This document provides instructions for installing LED accent lighting in the footwells of a 1999-2004 Mustang. The installation involves running LED strips with wiring to an switch mounted in the center console. Key steps include removing the center console, running wiring from an accessory port or cigar lighter to the switch, attaching the LED strips in the footwells, and reassembling the console. The end result is accent lighting that makes the interior less dark at night.
Top profile Call Girls In Ranchi [ 7014168258 ] Call Me For Genuine Models We...
99 04 mustang accent light install
1. http://ModYourMustang.com/
99-04 Mustang Accent (Footwell) Lighting Install
Parts:
2x 15light LED strips = $5 on ebay
Black coated wire = $4 at Walmart
Red coated wire = $4 at Walmart
LED switch (squarish mounting area, 3 prong) = $8 at AZ
http://modyourmustang.com/
*You can use any color of wire, I simply used red (+) and black (-) so that I would have
no future problems if I needed to change things*
You'll need some other little things just wire cutters (or a knife), electrical tape, super
glue, and zip ties.
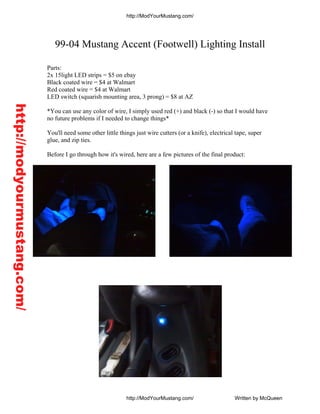
Before I go through how it's wired, here are a few pictures of the final product:
http://ModYourMustang.com/ Written by McQueen
2. http://ModYourMustang.com/
Please don't look at the length of this and decide it's not worth it. I'm just going to go into
as much detail as possible to make sure you know exactly what you're doing.
Ok here we go!
DISCONNECT YOUR BATTERY!! This will make things go much smoother. No
chance of blowing fuses and what not if there's no power to your wires. You can do this
with the battery connected, but remember that these ports always get power.
http://modyourmustang.com/
Now you need to decide where you want your switch. I found it very easy to remove the
accessory port in next to the parking brake because I could use the wires from the port
plus I didn't have to cut any new holes for the switch. Another option is the cigar lighter
on the shifter bezel.
Picked your point? Good, take the center console apart. I'll assume you're using the
accessory port as it's more complicated to get to. It's very simple *pic reference below*:
--The shifter bezel is held by 4 clips. Grab hold of where the upper 2 clips are marked
and gently but firmly pull towards the rear of the car. Each side should make a popping
noise when the clips let go. If one side doesn't make a noise but is loose, the clip may
have fallen off previously. Now grab where the lower clips are marked and pull upwards
and towards the rear of the car. Again 2 popping noises and it will move freely. **NOTE:
The clips may fall off. Locate them as soon as the bezel is off and push them back on.
The bezel will not sit right without them and they generally like to slide down into the
footwells and hide under the floor mats.** I left it attached to the shifter but you can
simply twist the shift knob until it comes off then slide the shifter bezel off for more
working room. If you chose to use remove the cigar lighter and put the switch there,
ignore the rest of this and skip down to the green section.
--The cup holder is easy. Grab on the passenger side toward the front of the holder. pull
upwards and it should pop and seem loose except for one point at the rear. Hold it at a 45
degree angle and pull towards the front of the car. The holder should slide out easily.
--Now open up the armrest. You'll see 2 rubber stops. Pull them out and you'll find 2
phillips screws. Unscrew them and keep the screws and mounts in a safe place. Now grab
the inside of the console near where the screws where and pull up until it pops and the
front side moves up and down with resistance from the back side. Now grab the back side
and do the same thing. Once it pops it you should be able to pull it right out.
http://ModYourMustang.com/ Written by McQueen
3. http://modyourmustang.com/ http://ModYourMustang.com/
USING THE CIGAR LIGHTER
This is a much simpler install but more difficult to hit the switch which driving if you
have a manual transmission. First of all, unplug the cigar lighter and cut the connector off
the wires *read below, removal is the same as accessory port.* With the cigar lighter
removed you can fit the switch into the hole. Run the power/ground wires (that were
connected to the cigar lighter) to the power and ground prongs on your switch. Now run
the wires from the LED strips from the footwells to behind the center console (they easily
slide behind). The power wires from the lights will go to the load prong and the ground
will go to the ground prong. Go ahead and plug in your battery and give them a test run.
If one strip is not working, check that you haven't mixed up the wires. If all is good, read
near the bottom for mounting the lights, securing the switch, and reinstalled the shifter
bezel.
Now you'll need to remove the accessory port. Honestly, this is a PITA. Start by
unplugging the connector in the back. Cut the wires attached to the connector and set the
connector aside. Now for the actual accessory port. I couldn't get this out intact to save
my life. There are 2 small clips keeping the port from simply sliding right out of the
whole. I used a flat head screwdriver to break off one of the clips and it came out easily.
http://ModYourMustang.com/ Written by McQueen
4. http://ModYourMustang.com/
With a little patience I'm sure you could get the clips squeezed in enough to slide the port
out, but I have no plans of reusing the port.
**Note: I attached all wires by simply twisting together 2 ends and making sure they
were very well taped together -vibrations from the car will shake the connections loose
and there is a fire risk if you just leave the wires exposed-**
With the accessory port out, it's time to start the install. Those 2 wires you had to cut to
remove the connector now need to be stripped down about 1/4 inch to reveal enough wire
http://modyourmustang.com/
to work with. Grab your red and black wires and measure out how much you'll need to
reach from where the switch will be, to about where the shifter is at. You'll need 2 lengths
of red wire and 2 lengths of black wire (red will be positive and black will be ground).
Strip 1/4 inch off of all the ends so the wires are ready to go.
Back to the wires from the accessory port. At this point they will not reach up to where
the switch is going to be mounted. Put the switch in the hole and cut 2 lengths of wire (1
red 1 black) that are long enough to reach up to the switch without having much slack.
Too much slack will cause problems when the console is reinstalled. Look at both of the
wires from the port and (I think) the ground wire should be black, thus the power will be
the more colorful wire. Attach the lengths of wire accordingly to the wires from the port.
Now attach those wires to the switch (positive to power, ground to ground -a 3 prong
switch will have power, load, and ground prongs. Read the packaging to determine which
is which on your swtich-). Now take your longer lengths of wire and connect them to the
switch as well (black to ground, red to load).
Now grab your LED strips and make sure you have a power and ground cable running to
both sides of the shifter. Your LED strips will have 2 wires (power and ground) and are
generally red and black (red is power, black is ground). Start with the driver's side.
Looking inside the center console, to the left of the shifter you shoul be able to see down
to footwell which makes it very easy to slide the wires from the LED strip up into the
center console. Attach the power/ground wires to the longer power/ground wires running
from the switch. Leave the LED strip sitting in the footwell for now. Go over the the
passanger side and run the wiring from the LED strip the same way you did before and
attach the wires. Again, leave the LED strip in the footwell for now.
At this point you can reconnect your battery and flip the switch to ensure the switch and
LED strips are working properly. If one strip doesn't turn on, check that you haven't
mixed up the wires.
Now go back to the driver's side and grab the LED strip. On the back there is generally a
strip of double sided tape. Peel the packing off and find a nice place to mount the strip
where it's not easily visible from a normal point of view. I chose to mount it just before
the dash ends. Cut a few pieces of electrical tape and use them as extra support for the
lights. Ghetto, I know but the double sided tape that comes with the lights won't hold
them up for very long on it's own. Over to the passenger's side you can take the back side
of the tape off as well but cut 2 strips of electrical tape (about 1.5 inches long) and put
http://ModYourMustang.com/ Written by McQueen
5. http://ModYourMustang.com/
them on both ends of the LED strip. I found a good place to mount the strip is on a fairly
thick wire running under the dash, just past where the dash ends. Wrap the tape around
the wire and consider another piece of tape if you feel the LED strip is sagging a bit
**NOTE: You can cover individual lights with electrical tape if you feel the lighting is
too bright for your preference**
Back to the switch, it probably doesn't move a whole lot due to the short wires holding it
in place but put a dab of super glue on each corner of the mounting surface and push it up
against the console. Hold it there for a minute to let the glue get a good hold and in the
http://modyourmustang.com/
mean time use your free hand to wipe up and glue that may have seeped out from under
the edges.
Before you go putting everything back together, zip tie your wires together and make
sure they're pulled out of the way of parts that need to be reinstalled. I used pieces of
electrical tape to keep them from moving around.
Go ahead and put your center console back together. The shifter bezel should pop back in
easily, just push where each clip is and give it a gentle tug to make sure they're all
snapped in place. Insert the cup holder from the rear first (there should be a plastic tab
that will go in then the rest will snap in easily). Take the compartment from under the
armrest and set it in place. Push it down and it should snap into place. Put the screws +
rubber stops back in and..
YOU'RE DONE! If you drive with them on, it will feel odd for a while but once you get
used to it you'll never want them off at night (it's pretty damn dark in your car without
them!). Now enjoy your new lights!
**Please do not forget to turn your lights off when you leave your car. Leaving them on
will obviously drain your battery**
http://ModYourMustang.com/ Written by McQueen