1. 1. First dollop a small amount of ink onto your
plastic board, then dip your roller into it and roll
the ink. When rolling make sure you lift the roller
so you don’t just roll the same bit of ink and move
the roller in different directions
2. Make sure the ink is nice and thin and even when
you have got the correct surface area it should
become ‘tacky’ and when you hold up the board
slightly transparent.
What you will need:
An apron, newspaper, a plastic board, ink, roller, a range of marking materials
Eg:pencils, pens and a range of papers to experiment with.
Step-by-step
Monoprinting
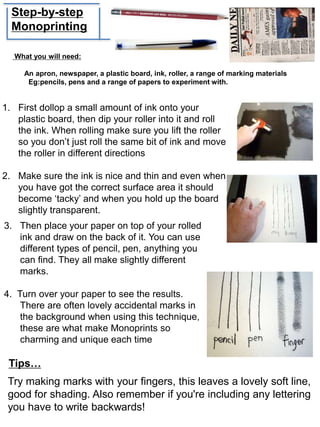
3. Then place your paper on top of your rolled
ink and draw on the back of it. You can use
different types of pencil, pen, anything you
can find. They all make slightly different
marks.
4. Turn over your paper to see the results.
There are often lovely accidental marks in
the background when using this technique,
these are what make Monoprints so
charming and unique each time
Try making marks with your fingers, this leaves a lovely soft line,
good for shading. Also remember if you're including any lettering
you have to write backwards!
Tips…