

Recommandé
Contenu connexe
Tendances
Tendances (18)
Similaire à Magnumstone retaining wall
Similaire à Magnumstone retaining wall (20)
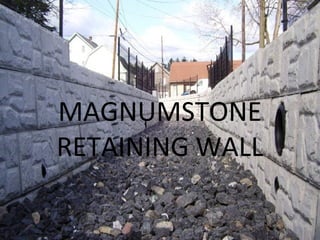
Magnumstone retaining wall
- 2. FUNCTION • It can be used as a simple gravity wall, as a reinforced wall or as a cantilever wall. • As a sound wall. • Its hollow design uses nearly half the concrete of a solid system while maintaining all of its strength and durability. • The hollow core design reduces the unit weight, making it easy to handle for any small or large type of machinery.
- 3. METHOD • PLANNING • EXCAVATION • SUB BASE COMPACTION • BASE STABILIZATION • ROUGH LEVELING PAD • COMPACT LEVELING PAD • LEVEL SCREED PAD • EXTRA GRAVEL
- 4. • SCREEDING LEVELING PAD • REMOVED SECURELUGS • LAY FIRST COURSE • IMPERMAEBLE FILL • DRAIN PIPE OUTLINE • BACK FILL • DRAINAGE GRAVEL • CONTINUE INSTALLATION
- 5. • TOP WALLS OF UNIT • SOIL SEPARATION FABRIC • FINAL GRADING
- 6. PLANNING • Mark the bottom and top of the wall excavation location with spray paint or stakes • Establish proper elevation bottom and top of wall before excavating • Organic Materials should not be used in Reinforced Backfill Zone • Store and protect Reinforced Backfill Materials from inclement weather during construction
- 7. EXCAVATION • Excavate and prepare Sub Base Leveling Trench 150mm below first course • Leveling Pad Trench is approximately 1m to 1.3m wide • Normal wall Burial Depth or Embedment Depth is 150mm to 300mm • Excavate cut line to a 2 to 1 slope or greater • Back of wall excavation depth into the bank should be 300mm beyond the back of the Sub Base Leveling Trench
- 8. SUB BASE COMPACTION • Compact Sub Base to 98% Standard Maximum Dry Density or greater • Remove any Organic or poor soils in the Sub Base and replace with proper Reinforced Fill Materials before compacting
- 9. BASE STABILIZATION • Place 2m wide Base Stabilization Fabric on top of leveling pad trench • Base Stabilization Fabrics will help prevent sub base materials from mixing with the gravel base leveling pad during compaction • Fabric also provides extra Structural Bearing Stability to the base leveling pad.
- 10. ROUGH LEVELING PAD • Place well graded gravel on top of fabric in the leveling pad trench approximately 150mm deep • Rough grade gravel with a rake close to finish base elevation
- 11. COMPACT LEVELING PAD • · Compact Gravel Leveling Pad to 98% Standard Maximum Dry Density or greater • Correct Moisture Content in the gravel will help in reaching proper compaction
- 12. LEVEL SCREED PIPES • Place first long Screed Pipe across the trench at one end of the wall or at the lowest elevation • Scratch a trench for the pipe in the compacted gravel with a chipping hammer • Use a short level or Laser Level to set the Screed Pipe to the proper level • Gravel is added underneath and around the Screed Pipe to support while leveling • Place the second Screed Pipe across the trench approximately 3m from the first Screed Pipe
- 13. • Level the second Screed Pipe to the same elevation as the first Screed Pipe by using a long level on top of a Screed Board, Straight Edge or with a Laser Level • Continue to place and level Screed Pipes the full length of the trench leveling pad or until reaching a base elevation change
- 14. EXTRA GRAVEL • Place or remove extra Well Graded Gravel level to the top of the Screed Pipes as needed • (If more than 35mm inches of loose gravel is added, repeat the compaction steps again before screeding)
- 15. SCREEDING LEVELING PAD • Screed the gravel leveling pad with a Screed Board or Straight Edge across the trench on top of two Screed Pipes • The coarser the gravel the more back and forth the screeding action when drawing the Screed across the leveling pad • Too much pressure on the screed straight edge may dislodge the level of the screed pipes while screeding • A second screed pass may be needed to insure an accurate level has been achieved • Continue to screed the leveling pad until completing the full length of the trench or up to the first elevation change
- 16. REMOVED SECUREDLUGS • MagnumStone™ base units, placed on the leveling pad, are manufactured without SecureLugs • Place each unit on top of the leveling pad in such a way as not to disturb the level gravel
- 17. LAY FIRST COURSE • Remove the Screed Pipes from the leveling pad • Place a steel stake at either end of the leveling pad to establish the back of the first course of units • Secure tightly a string line to the stakes at either end which will provide the guide to line up the back of each MagnumStone™ base unit • The distance of the string line between the steel stakes may vary due to heavy winds
- 18. IMPERMEABLE FILL • Backfill behind, in front (toe of wall) and in the hollow cores of the units with Impermeable Materials up to the desired level of the Perforated Drain Pipe • Compact the impermeable materials behind, in front and in the hollow cores of the units
- 19. DRAIN PIPE OUTLINE • Perforated Drain Pipe should have adequate slope to drain water in the right direction towards each Drain Pipe Outlet • Drain Pipe Outlet can be every 10m or 15m • Perforated Drain Pipe, laid in the Horizontal Cores, can be a Sock Wrapped system to help prevent fines from migrating into the pipe
- 20. BACKFILL • Place and compact Backfill Materials in maximum Lifts of 200mm • Lifts may be less than 200mm depending on the type of soil or size of equipment • Each Lift should be compacted to 98% Standard Maximum Dry Density or greater • The correct Moisture Content in the Backfill Materials will help in reaching proper Compaction Density MAGNUMSTONE™ INSTALLATION GUIDE GRAVITY
- 21. DRAINAGE GRAVEL • Bluemetal / Drainage Aggregate is placed in the vertical and horizontal hollow cores after placing and compaction of the backfill materials • The Drainage Aggregate should be 50mm below the top of units to allow for SecureLug connection • Clear Crush Drain Gravel does not need to be compacted • Sweep the top of the MagnumStone™ units clean of all rock and dirt before placing second course of MagnumStone™ units
- 22. • Make sure the Backfill Materials directly behind the wall are placed flush to the top of the units • Make sure the Backfill Materials are well compacted and level as possible
- 23. CONTINUE INSTALLATION • Continue to install each course of units following the same steps as above • Install and compact Backfill Materials in 200mm Lifts until wall is complete
- 24. TOP WALL OF UNITS • Complete the top of the wall with MagnumStone™ Top Units • MagnumStone™ Top Units are manufactured with the back panel 204mm lower than the front face panel • The Bluemetal / Drainage Aggregate and backfill materials will be placed flush to the top of lowered back panel. There are times when more than 204mm of top soils may be required
- 25. SOIL SEPARATION FABRIC • Place a 1.83mt wide Soil Separating Filter Fabric on top of the backfill and drainage gravel and against the back of the last units before placing the planting soils • The fabric will prevent planting soil fines from staining the face of the wall and migrating into the Bluemetal / Drainage Aggregate (Angular Aggregate free of fines)
- 26. FINAL GRADING • Insure that final grading is done on top and bottom of the wall • Make sure to protect newly placed planting soil from erosion during heavy rains or surface runoff
- 27. PICTURES
- 28. REFERENCES • http://www.australmasonry.com/au/Products/Retaining- Walls/MagnumStone • http://www.retainingsolutions.com.au/walls/segmental/magnumstone_w alls.php • http://www.cornerstonewallsolutions.com/products-magnumstone- gallery.html • http://www.youtube.com/watch?v=mnMIV7h9vDs