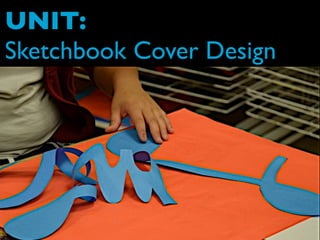
The document provides instructions for designing a sketchbook cover logo. It discusses key composition elements like size, view, placement, positive and negative space. Students will create 3 thumbnail sketches of initial logos, then enlarge one design on tracing paper. They will transfer the design onto colored construction paper to cut out shapes for the logo, gluing the positive shapes onto a cardboard cover with the negative space showing through. The goal is to practice composition skills in creating a personalized sketchbook cover logo.
7. the plan, placement, or arrangement of parts in a
work of art - how the space is used
composition:
8. the plan, placement, or arrangement of parts in a
work of art - how the space is used
composition:
a “good” composition is...
9. the plan, placement, or arrangement of parts in a
work of art - how the space is used
composition:
a “good” composition is...
1. visually pleasing - there are
actually scientific “rules” for this!
(it relates back to how humans’
features are arranged)
10. the plan, placement, or arrangement of parts in a
work of art - how the space is used
composition:
a “good” composition is...
1. visually pleasing - there are
actually scientific “rules” for this!
(it relates back to how humans’
features are arranged)
2. if not visually pleasing, then it is
expressive in some other way
97. A thumbnail sketch is . . .
• Small
• A quick drawing
• A way of taking notes
• Used to show an idea simply
• A planning tool
• A memory aid
• Leads to something bigger!
130. sketchbook logo thumbnail sketches
• Create at least 3 thumbnail
sketches to design a cover
logo using your initials -
think SIZE,VIEW, and
PLACEMENT - don’t stop
with your first idea!
• Designs must touch all 4
edges
• Make sure you are using
“block letters”
• Color in your designs
(marker or colored pencil)
to make the positive /
negative space clear
131. sketchbook logo thumbnail sketches
• Create at least 3 thumbnail
sketches to design a cover
logo using your initials -
think SIZE,VIEW, and
PLACEMENT - don’t stop
with your first idea!
• Designs must touch all 4
edges
• Make sure you are using
“block letters”
• Color in your designs
(marker or colored pencil)
to make the positive /
negative space clear
132. sketchbook logo thumbnail sketches
• Create at least 3 thumbnail
sketches to design a cover
logo using your initials -
think SIZE,VIEW, and
PLACEMENT - don’t stop
with your first idea!
• Designs must touch all 4
edges
• Make sure you are using
“block letters”
• Color in your designs
(marker or colored pencil)
to make the positive /
negative space clear
133. sketchbook logo thumbnail sketches
• Create at least 3 thumbnail
sketches to design a cover
logo using your initials -
think SIZE,VIEW, and
PLACEMENT - don’t stop
with your first idea!
• Designs must touch all 4
edges
• Make sure you are using
“block letters”
• Color in your designs
(marker or colored pencil)
to make the positive /
negative space clear
134. Enlarge your chosen thumbnail design onto tracing
paper, using a pencil.You can erase and re-draw lines
to make sure you get it the way you want it.
135. Enlarge your chosen thumbnail design onto tracing
paper, using a pencil.You can erase and re-draw lines
to make sure you get it the way you want it.
136. Enlarge your chosen thumbnail design onto tracing
paper, using a pencil.You can erase and re-draw lines
to make sure you get it the way you want it.
137. This is a good time to erase any unnecessary lines.
138. This is a good time to erase any unnecessary lines.
For example: this is all going to be one shape,
139. This is a good time to erase any unnecessary lines.
For example: this is all going to be one shape,
140. This is a good time to erase any unnecessary lines.
For example: this is all going to be one shape,
so I don’t want these lines to be here
141. This is a good time to erase any unnecessary lines.
For example: this is all going to be one shape,
so I don’t want these lines to be here
142. This is a good time to erase any unnecessary lines.
otherwise I might accidentally cut them.
For example: this is all going to be one shape,
so I don’t want these lines to be here
143. It’s a good idea to write “cut” in the areas of NEGATIVE
SPACE. (This makes it easy to keep track of your design
once all of your lines are on the same color paper.)
144. It’s a good idea to write “cut” in the areas of NEGATIVE
SPACE. (This makes it easy to keep track of your design
once all of your lines are on the same color paper.)
cut
cut
cut
cut
cut
cut
145. Decide which colors you want for your positive shapes, and
which colors for your negative shapes.
Roll Paper
Construction Paper
?
146. Now you need 2 pieces of paper (one color for your
positive space, one color for your negative space).
They need to be bigger than 10” x 13” (the size of your
cover, which is also the size of your tracing paper) but
you don’t need to measure exactly.
151. 1. Take a piece of tracing Paper and a Drawing Pencil.
Enlarge your design so that it fits exactly on the tracing
paper as it does in your thumbnail sketch.
Tracing Paper
Materials: Drawing Pencil, Tracing Paper
152. 1. Take a piece of tracing Paper and a Drawing Pencil.
Enlarge your design so that it fits exactly on the tracing
paper as it does in your thumbnail sketch.
Tracing Paper
Materials: Drawing Pencil, Tracing Paper
153. 1. Take a piece of tracing Paper and a Drawing Pencil.
Enlarge your design so that it fits exactly on the tracing
paper as it does in your thumbnail sketch.
Tracing Paper
Materials: Drawing Pencil, Tracing Paper
154. 2. In each shape, write what color it is supposed to be.
Tracing Paper
Materials: Drawing Pencil, Tracing Paper
155. 2. In each shape, write what color it is supposed to be.
Tracing Paper
Materials: Drawing Pencil, Tracing Paper
red
red
purple
purple
purple
purple
purple
purple
156. Materials: Drawing Pencil, Tracing Paper
Tracing Paper
red
red
purple
purple
purple
purple
purple
purple
3. Make sure that the lines of your shapes are DARK, and
have been drawn with a drawing pencil
157. Materials: Drawing Pencil, Tracing Paper
Tracing Paper
red
red
purple
purple
purple
purple
purple
purple
3. Make sure that the lines of your shapes are DARK, and
have been drawn with a drawing pencil
158. Materials: Drawing Pencil, Tracing Paper
Tracing Paper
red
red
purple
purple
purple
purple
purple
purple
3. Make sure that the lines of your shapes are DARK, and
have been drawn with a drawing pencil
159. Materials: Drawing Pencil, Tracing Paper
Tracing Paper
red
red
purple
purple
purple
purple
purple
purple
3. Make sure that the lines of your shapes are DARK, and
have been drawn with a drawing pencil
160. Materials: Drawing Pencil, Tracing Paper,
Colored Paper (at least two colors)
4. Make sure that your colored paper is EXACTLY
10” x 13”
161. Materials: Drawing Pencil, Tracing Paper,
Colored Paper (at least two colors)
4. Make sure that your colored paper is EXACTLY
10” x 13”
162. Materials: Drawing Pencil, Tracing Paper,
Colored Paper (at least two colors)
5.Turn your tracing paper over so the lead is not facing up.
Align it with the colored paper you are using for your
POSITIVE SHAPES.
Tracing Paper
red
purple
purple
purple
purple
purple
purple
(front)
163. Materials: Drawing Pencil, Tracing Paper,
Colored Paper (at least two colors)
5.Turn your tracing paper over so the lead is not facing up.
Align it with the colored paper you are using for your
POSITIVE SHAPES.
Tracing Paper
red
purple
purple
purple
purple
purple
purple
(front)
TracingPaper
red
purple
purple
purple
purple
purple
purple
(back)
164. Materials: Drawing Pencil, Tracing Paper,
Colored Paper (at least two colors)
5.Turn your tracing paper over so the lead is not facing up.
Align it with the colored paper you are using for your
POSITIVE SHAPES.
TracingPaper
red
purple
purple
purple
purple
purple
purple
(back)
165. Materials: Drawing Pencil, Tracing Paper,
Colored Paper (at least two colors)
5.Turn your tracing paper over so the lead is not facing up.
Align it with the colored paper you are using for your
POSITIVE SHAPES.
TracingPaper
red
purple
purple
purple
purple
purple
purple
(back)
170. Take your cardboard cover, cover it with glue, and
place it face down on your negative space sheet.
171. cover your cover
with glue - but
don’t stop here!
spread out your
glue before
attaching the paper
172. use a scrap of
cardboard to
spread out your
glue
173. you should have a
flat “sheet” of glue
on your cardboard
- if it seems like its
drying out at the
edges, add more
174. put your cover face
down on your
negative space
paper, and smooth
it out
175. when glueing your
logo (positive space)
onto your cover,
also spread out your
glue!
TAKEYOUR TIME!
spread out glue on a
little big of your
logo to start - NOT
THE WHOLE
THING!
glue part down, then
work your way out