SlideShare a Scribd company logo
1 of 51
Download to read offline
Microtomy and Paraffin
Section Preparation
Fix Specimens Properly
Fixation is the most important step in performing histologic
specimen preparation techniques. No matter how much care is
taken in processing and sectioning tissue specimens, essential
morphologic detail will only be demonstrated if the tissue is
promptly and adequately fixed.
• Poorly fixed specimens are almost always more difficult to section
than those that are well fixed.
• Poorly fixed tissue will always produce inferior morphology even if
optimally processed and carefully sectioned.
Process Tissue Properly
A paraffin block will be difficult to section unless a well-fixed specimen is
properly processed using an appropriate schedule
• Specimens may be under-processed (specimen too large, schedule too
short) or over-processed (schedule too long for size and nature of specimen).
In both cases they may be difficult or impossible to cut.
• There are a number of techniques that can be used to help obtain sections
from difficult blocks.
Process Tissue Properly
• If the block is difficult to section because the tissue is hard or friable, the
exposed surface can be soaked in cold water, or a softening agent such as weak
detergent solution, fabric softener or MollifexTM.
• For specimens that contain calcium, the use of a surface decalcifying agent
applied to the exposed tissue for 10 minutes or more, may allow several
sections to be obtained. Rinse blocks well before mounting into the microtome
specimen holder and recutting, as traces of the decalcifying agent will damage
the pressure plate of the blade holder.
• Where it is impossible to obtain sections from a block because the specimen
has been under-processed in the first place, it may be possible to reprocess it.
Embed Specimens Carefully
Embedding is an important step that requires a thoughtful approach.
Careless embedding can make microtomy much more difficult.
• Avoid under-filling the cassette as this can allow unstable clamping in the
microtome and lead to cutting “thick then thin” sections and other
problems.
• Avoid over-filling cassettes as this can interfere with the correct alignment
of the block face for sectioning.
• Any excess wax on the outside of a cassette should be removed before
clamping to ensure the block is firmly held during sectioning.
• Specimen orientation is very important
Embed Specimens Carefully
This block of pancreas had insufficient fixation
and was processed using a protocol that was
far too short. It shows the typical effects of
underprocessing that has resulted in
considerable shrinkage of the specimen within
the surrounding wax.
The tissue was soft and mushy and was
impossible to section. It required reprocessing.
Embed Specimens Carefully
Examples of under-filled (left), over-filled
(right) and correctly filled cassettes (centre).
Under-filled and over-filled cassettes can cause
problems during microtomy
Locate Microtome Appropriately
The location of the microtome in the laboratory is important.
• Position the microtome on a stable bench, away from air drafts, doorways and
passing staff. Any air movement from air conditioners or other causes can make
section handling very difficult.
• A height-adjustable bench and ergonomic chair are preferred.
• It is very important that staff are not distracted when using the microtome
because of the risks of injury from extremely sharp blades. The potential for
interaction with other staff members should be considered when positioning
microtomes in a laboratory.
• It is preferable to have non-slip flooring in the vicinity of microtomes because,
inevitably, wax fragments will find their way onto the floor where they can
produce a slippery surface. Many laboratories use non-slip matting to make the
environment safer.
Utilize Safety microtome you are using and
observe some basic rules when cutting sections.
• Microtome knives and disposable blades
are extremely sharp and can inflict
serious injuries unless Features Properly
You must be familiar with the safety features
of the appropriate care is taken when
working with them.
Accidents occur when a microtomist is
distracted and not concentrating fully.
• Use forceps or brush instead of your fingers
to pick up sections or wax fragments
from blade or block face.
• Leica rotary microtomes are equipped with
a safety guard (knife guard or finger
guard), a handwheel lock and a handwheel
brake to enable safe operation.
Utilize Safety microtome you are using and
observe some basic rules when cutting sections
The safety guard can be positioned to cover the
whole length of the cutting edge.
• The handwheel lock will lock the object head
at the top of the cutting stroke and
must be used when changing blocks.
• The guard must be in place and the handwheel
lock engaged when a block is being
placed into or removed from the cassette clamp,
or when any manipulation of the
block is being undertaken while the knife or
blade is in place. The guard must also
be used when the microtome is left unattended.
• The handwheel brake will lock the microtome
when the handle is in any position
and is used when realigning a block face or
adjusting the coarse feed
Utilize Safety microtome you are using and
observe some basic rules when cutting sections
The knife or blade should be removed from the microtome
when the instrument is left unattended or when cleaning
the instrument. This is best done by unclamping
the blade, then using the blade ejector on the left side of
the guard to start moving the blade laterally out of the
clamp. It can then be grasped with forceps (not fingers) or
picked up with the magnet at the end of the Leica brush and
safely removed. Used blades should be disposed of
appropriately in a “sharps” container or into the “used
blades” slot in the base of the blade dispenser.
• Never place a knife or blade on the bench or in a box with
the cutting edge facing up. If you happen to drop a blade, let
it fall. On no account try to catch it (a natural reflex action
that you must guard against).
Set Blade Clearance Angle Optimally
Blade clearance angle is adjustable and must be set
for optimum performance.
• The clearance angle prevents contact between the
knife facet and the face of the
block.
• The facet angle is the angle between the two
facets that form the cutting edge.
For routine use knives and disposable blades are
made with a facet angle of approximately 35°, but
this angle can vary with the blade type and from
manufacturer to manufacturer.
• Therefore for each blade type the clearance angle
must be optimally set.
• Follow the microtome manufacturer’s guidelines
for the recommended angle setting. For Leica knife
and blade holders a setting of between 1° and 5° is
recommended.
Maximize Blade Life
There are some simple strategies for getting the maximum life from each blade.
• When cleaning the blade avoid dragging anything along the cutting edge. Even
cellulose fibres can cause damage to the blade.
• Avoid touching the edge with any hard objects such as forceps or brush.
• Use the blade systematically, working from one end to the other. This will give you
maximum life from every part of the blade.
• Use one part of the blade for trimming and another new part for final sectioning,
or use separate blades for these two procedures.
• A retracting microtome extends blade life by moving the specimen away from
the blade on the upstroke and preventing the build-up of debris on the back of the
blade.
Orientate Specimen Appropriately
The orientation of the specimen to the blade during the cutting stroke can affect
the ease with which a ribbon can be obtained and directly influence section
quality.
• In most laboratories all cassettes are placed in the object clamp with the same
orientation (eg. label to the left for east-west orientation or label uppermost for
north-south orientation). This is done to facilitate roughing of multiple blocks
prior to preparing the high-quality sections and to allow deeper cuts or re-cuts
without excessive loss of tissue. The orientation of the specimen to the blade
must therefore be considered at the embedding stage. This requirement is often
overlooked.
Orientate Specimen Appropriately
Example A. Intestine:
blade passes through the
mucosa last
• Example B. Cervix: it is
better to present a point
of dense tissue to the
blade rather than a
straight edge.
• Example C. Skin: blade
passes through the
epidermis last.
Consider Factors Affecting Section
Thickness
Set the microtome at the desired setting but
note that there are a number of factors that
determine the actual section thickness.
• A cohesive section of 4 μm may provide
more information than a severely disrupted
section of 2 μm.
• The actual thickness of the first couple of
sections in a ribbon may be thicker than
indicated because of thermal expansion3, 4
when cutting a cold block (as seen in
sections 1, 2 & 3 below).
• Other factors such as speed of rotation,
clearance angle setting and the condition
of the cutting edge can influence the actual
thickness achieved.
Ensure Blocks are Cold
Sectioning is generally improved when the specimen and
the wax are well matched in hardness. It is for this reason
that most paraffin blocks must be cold when sections are
cut. The actual method used to chill the block is important.
• Cold wax provides better support for the harder elements
in a specimen allowing thinner sections to be obtained.
• Place the blocks on a cold plate or a cold wet surface for a
few minutes (such as the surface of melting ice).
• Water penetrates a small distance into the block face,
swelling tissues and making them more amenable to cutting.
This is particularly important to over-dehydrated, dry or
crumbly tissues.
• Placing blocks in a freezer can cause surface cracking,
where tissue separates from the surrounding wax.
This can make it more difficult to obtain cohesive sections.
The sections on the left were cut from a relatively
warm block without chilling. The sections on the
right were cut from the same block after chilling on
the surface of melting ice.
Learn the Technique for Cutting
Consistent, High-quality, Thin Sections
There is no substitute for experience but there are some fundamental steps
that will make the task easier.
• Use a section of blade that has not been used for rough trimming.
• When using the coarse feed, avoid cutting unintentional thick sections as
this will damage your knife and possibly the block face.
• Re-chilling of the block may be required if the block face becomes warm or if
deeper levels are required.
• Generally a slow, uniform cutting stroke produces the best results and the
least compression.
Learn the Technique for Cutting
Consistent, High-quality, Thin Sections
• Do not stop and restart of different thickness across the section.
• The practice of gently breathing on the face of a chilled block im during a
cutting stroke as this will produce bands mediately before cutting each
section, is common practice in some laboratories. The application of warm,
moist breath tends to make sections more cohesive, but it also causes
thermal expansion thus making the section thicker
• Debris adhering to upper or lower edges of the block, or the back of the
blade, can make it difficult to obtain cohesive ribbons and cause the ribbon
to lift off the blade on the upstroke. If debris is present clear it away, re-chill
your block and start again.
Learn the Technique for Cutting
Consistent, High-quality, Thin Sections
This ribbon has been cut with a slow and steady
stroke from a well processed, thoroughly chilled
block. The sections show very little compression
even before flotation.
Float Out Sections Carefully
Flotation should expand the section to its original
dimensions and ensure it is completely flat .
• Monitor the temperature carefully. The temperature
will need to be 5 - 9 ˚C below the melting point of the
wax.
• Make sure the water is clean and free of bubbles and
section waste (to avoid cross-contamination).
• Place sections with the smooth (shiny) side down.
• Place the sections onto the water surface with a
gentle sweeping action.
• Sections are very easily damaged when dislodging
wrinkles or bubbles with brush or forceps.
• Examine each section as it floats on the water surface
as imperfections can be readily seen.
• Leave the section on the water surface just long
enough for it to flatten. Overexpansion
can spoil the morphology in susceptible sections.
• To promote efficient drainage and to prevent the
section slipping down the slide, remove slides vertically
from the water.
Float Out Sections Carefully
Before placing slides in a slide drier or oven drain them vertically for a
brief time to remove excess water.
• Skim the water surface with lint-free tissue between blocks to avoid
the possibility of cross-contamination.
• To avoid any chance of a mix-up float out sections from one block at a
time.
Sections from two different blocks must not be floated out simultaneously. Even though the specimens
may be of a different type, there is a possibility of cross-contamination and confusion leading to incorrect
identification. This procedure should therefore be avoided at all times.
Dry Slides Adequately
Proper drying ensures that sections are completely dehydrated, free of heat
damage, flat and unlikely to lift during staining.
• Drain excess water from beneath the section before drying. This is vital if
slides are dried flat on a hot plate
• Slides can be stored in racks in an upright position, then dried in an oven.
• Generally drying temperatures should not exceed 65 ˚C.
• Excessive heat can cause droplets of water underneath a section to boil
and this will cause damage.
• Dry sections for between 10 and 30 minutes.
• Some delicate specimens will produce best results when dried at 37 ˚C for
a longer time (several hours to overnight).
Clean and Maintain the Microtome
Thoroughly
It is important to remove accumulated tissue debris and wax after use. Regular
preventative maintenance is important.
• Clean the instrument daily.
• Always remove the knife or blade before cleaning.
• The knife holder can easily be removed to facilitate access for cleaning.
• Section waste is best removed with a dry paintbrush.
• Do not clean the outer surfaces with alcohol or xylene as they are not resistant to
these solvents and exposure to xylene should be avoided. Paraffin remover, mild
commercial household cleaners or soap and water are recommended.
• No fluid must enter the inside of the instrument during cleaning.
• Have the instrument inspected at least once a year by a qualified service
technician.
• Follow the lubrication instructions provided in your instruction manual using
recommended lubricants.
Learn to Recognize and Correct
Common Faults
Some of the most common faults seen in paraffin sections are:
Wrong micrometer setting
• Warm breath applied to cold block
to facilitate sectioning
• First section in ribbon chosen
• Sectioning at too great a speed
• Poor processing
• Microtome needs recalibration
A. Section too thick
Learn to Recognize and Correct
Common Faults
Block trimmed too quickly
• Block surface not polished by
cutting some thin sections after
roughing
• Inappropriate section thickness
used when trimming
• Block brittle (over-processed?) or
too cold when trimmed
B. Holes from rough trimming
Learn to Recognize and Correct
Common Faults
Damaged knife or blade
used
• Poor processing
• Hard material such as
calcium in block
• Debris in unfiltered wax
• Buffer salts precipitated in
specimens
Learn to Recognize and Correct
Common Faults
Rough handling of specimen during
grossing
• Poor processing (incomplete
dehydration, clearing or infiltration)
• Vigorous treatment to dislodge
wrinkles during flotation
• Floating out for too long or using
water that is too hot
D. Disruption
Learn to Recognize and Correct
Common Faults
Tissue over-processed
• Block too cold
• Cutting too fast
• Clamping mechanism not
securely locked
• Clearance angle needs
adjustment
E. Fine cracks or micro-chatter
Learn to Recognize and Correct
Common Faults
Clamping mechanism not
securely locked
• Very hard or large specimen
• Poor processing
• Insufficient clearance angle
• Sectioning too rapidly
• Worn microtome
F. Coarse chatter
Learn to Recognize and Correct
Common Faults
Poor flotation technique
• Poor fixation and/or
processing
(insufficient support)
• Warm block
• Section too thin
• Clearance angle too great
• Water bath too hot
G. Folds
Learn to Recognize and Correct
Common Faults
Poor processing (insufficient
support)
• Warm block
• Cutting too fast
• Dull cutting edge
• Clearance angle too great
• Poor quality wax
H. Excessive compression
Learn to Recognize and Correct
Common Faults
Bubbles adhering to base and sides
of flotation bath
• Poor flotation technique trapping
bubbles under section
I. Bubbles under the section
Learn to Recognize and Correct
Common Faults
Temperature of bath too high
• Section left for too long on water
• Poor fixation and/or processing
(residual solvent)
J. Over-expansion during flotation
Learn to Recognize and Correct
Common Faults
Poor quality section (wrinkles,
bubbles)
• Flotation bath too cold
• Use of an uncoated slide
• Section not drained thoroughly
after
flotation
• Insufficient drying time
• Drying temperature too low
K. Section not flat (poor adherence)
Learn to Recognize and Correct
Common Faults
Dirty slide
• Flotation bath not skimmed or
contaminated
• Slides drained, dried or stored
in a dusty environment
• Fragments of pencil lead from
labelling
L. Dust present
Nuclear Bubbling - Probable cause(s)/Potential remedies
One of the most notable artifacts observed in the
grading of the 2013 HQIP BX-series were slides
containing nuclear bubbling artifact. (pictured below)
Of particular concern was the number of prostate
biopsies (21%, 12/57) containing the artifact, followed
closely by bladder biopsies (19%, 10/52) and then
colon biopsies (12%, 13/110), esophagus biopsies
(12%, 13/109), skin shave biopsies (12%, 10/82), and
skin punch biopsies (11%, 9/83).
Nuclear Bubbling - Probable cause(s)/Potential remedies
Nuclear bubbling can seriously compromise the
pathologic diagnosis. Several authors have suggested
that the use of 10% neutral buffered formalin (NBF)
alone causes nuclear distortion but Dapson attributes it
to the specimen not being completely fixed in NBF
before dehydration has begun.
Nuclear Bubbling - Probable cause(s)/Potential remedies
Prostate biopsy
Nuclear Bubbling - Probable cause(s)/Potential remedies
First, it is generally recognized that NBF is a poor fixative for nuclei. It has little, if
any, reaction with nucleic acids below 45°C. 4,5 Second, although NBF may have
had time to penetrate small biopsies or needle cores in a relatively short time, the
tissues are still under-fixed in NBF, as the nuclear proteins have not developed
stabilizing cross-links with the aldehydes from the NBF. The duration of fixation is
very important. NBF needs a minimum of 6-8 hours to act before the processing
schedule is begun. Complete fixation is not achieved in less than 24 hours.
Adequate fixation time is required to maintain proper relationships of all tissue
structures otherwise, fixation will continue to take place by alcohol in subsequent
processing steps. The emphasis on turnaround time has seriously compromised the
laboratory’s ability to devote adequate time to proper fixation. All of these factors
contribute to nuclear bubbling
Nuclear Bubbling - Probable cause(s)/Potential remedies
Bladder biopsy
Nuclear Bubbling - Probable cause(s)/Potential remedies
Histotechnologists have observed that drying the slides immediately after
sectioning in an oven or slide dryer set above 58-60°C, without allowing
them to drain properly, can cause nuclear bubbling. The water between the
section and slide is overheated, causing the nuclei to bubble. In a 1990
article, published in the Journal of Histotechnology, the authors introduced
a modified draining/drying protocol and eliminated all nuclear bubbling
artifact. The practice of affixing a freshly cut section with a hot plate or
drying pad should be avoided, as this direct heat process can have the
same effect of overheating the water trapped between the section and the
slide.
All of these factors contribute to nuclear bubbling.
Nuclear Bubbling - Probable cause(s)/Potential remedies
Skin shave biopsy
Nuclear Bubbling - Probable cause(s)/Potential remedies
Stomach biopsy
References
1. Leica Microsystems. Instruction Manual Leica RM2235 V1.3
Nussloch: Leica Microsystems, 2008.
2. Rolls GO, Farmer NJ, Hall JB. Artifacts in Histological and
Cytological Preparations. Melbourne: Leica Microsystems,
2008;106.
3. Rolls G. 101 Steps to Better Histology. Melbourne: Leica
Microsystems, 2008.
4. Culling CFA, Allison RT, Barr WT. Cellular Pathology Technique.
4th ed. London: Butterworths, 1985.
5. Santoianni RA, Hammami A. Nuclear Bubbling an Overlooked
Artifact. The Journal of Histotechnology, 1990;13;135-136.

More Related Content

What's hot

Gross Examination, Selection, Collection and Fixation of Specimen
Gross Examination, Selection, Collection and Fixation of Specimen Gross Examination, Selection, Collection and Fixation of Specimen
Gross Examination, Selection, Collection and Fixation of Specimen
ghulam abbas
 
Tissue processing 2012
Tissue processing 2012Tissue processing 2012
Tissue processing 2012
Dhiraj Shukla
 
Tissue Freezing Presentation (2)
Tissue Freezing Presentation  (2)Tissue Freezing Presentation  (2)
Tissue Freezing Presentation (2)
Donna Emge
 
fixatives used in histopathology
fixatives used in histopathologyfixatives used in histopathology
fixatives used in histopathology
HBPrajapati
 

What's hot (20)

Gross Examination, Selection, Collection and Fixation of Specimen
Gross Examination, Selection, Collection and Fixation of Specimen Gross Examination, Selection, Collection and Fixation of Specimen
Gross Examination, Selection, Collection and Fixation of Specimen
 
Microtome
MicrotomeMicrotome
Microtome
 
Microtome
Microtome Microtome
Microtome
 
Microtomy
MicrotomyMicrotomy
Microtomy
 
Microtome
MicrotomeMicrotome
Microtome
 
Histopathology - CRYOSTAT
Histopathology - CRYOSTATHistopathology - CRYOSTAT
Histopathology - CRYOSTAT
 
1. Microtome
1. Microtome1. Microtome
1. Microtome
 
Tissue processing 2012
Tissue processing 2012Tissue processing 2012
Tissue processing 2012
 
Frozen section
Frozen sectionFrozen section
Frozen section
 
Histotechnique
HistotechniqueHistotechnique
Histotechnique
 
Microtome Procedure
Microtome ProcedureMicrotome Procedure
Microtome Procedure
 
Tissue processing
Tissue processingTissue processing
Tissue processing
 
Cryostat and frozen section
Cryostat and frozen sectionCryostat and frozen section
Cryostat and frozen section
 
Microtomes, Section Cutting and Sharpening of razor
Microtomes, Section Cutting and Sharpening of razorMicrotomes, Section Cutting and Sharpening of razor
Microtomes, Section Cutting and Sharpening of razor
 
Microtomy and microtomes ppt
Microtomy and microtomes pptMicrotomy and microtomes ppt
Microtomy and microtomes ppt
 
Tissue Freezing Presentation (2)
Tissue Freezing Presentation  (2)Tissue Freezing Presentation  (2)
Tissue Freezing Presentation (2)
 
TISSUE PROCESSING SEMINAR
TISSUE PROCESSING SEMINARTISSUE PROCESSING SEMINAR
TISSUE PROCESSING SEMINAR
 
Freezing microtome_ cryostat.pptx
Freezing microtome_ cryostat.pptxFreezing microtome_ cryostat.pptx
Freezing microtome_ cryostat.pptx
 
fixatives used in histopathology
fixatives used in histopathologyfixatives used in histopathology
fixatives used in histopathology
 
Activity-2.pptx
Activity-2.pptxActivity-2.pptx
Activity-2.pptx
 

Similar to Microtomy and Paraffin Section Preparation ( PDFDrive ).pdf

Similar to Microtomy and Paraffin Section Preparation ( PDFDrive ).pdf (20)

microtomy-161016082109.pdf
microtomy-161016082109.pdfmicrotomy-161016082109.pdf
microtomy-161016082109.pdf
 
Microtomy
MicrotomyMicrotomy
Microtomy
 
4. MICROTOMY.pptx
4. MICROTOMY.pptx4. MICROTOMY.pptx
4. MICROTOMY.pptx
 
microtomy .ppt
microtomy .pptmicrotomy .ppt
microtomy .ppt
 
MICROTOME and it's TYPES
MICROTOME and it's TYPES MICROTOME and it's TYPES
MICROTOME and it's TYPES
 
Impression philosophies for completely edentulous patients
Impression philosophies for completely edentulous patientsImpression philosophies for completely edentulous patients
Impression philosophies for completely edentulous patients
 
Microtome
MicrotomeMicrotome
Microtome
 
Basics of instrument and tissue handling.pptx
Basics of instrument and tissue handling.pptxBasics of instrument and tissue handling.pptx
Basics of instrument and tissue handling.pptx
 
Knotting & anastomosis
Knotting & anastomosisKnotting & anastomosis
Knotting & anastomosis
 
microtomy.pptx
microtomy.pptxmicrotomy.pptx
microtomy.pptx
 
special tray in complete denture
special tray in complete denturespecial tray in complete denture
special tray in complete denture
 
Common Microtome Tissue Sectioning Troubleshooting and Tips.pdf
Common Microtome Tissue Sectioning Troubleshooting and Tips.pdfCommon Microtome Tissue Sectioning Troubleshooting and Tips.pdf
Common Microtome Tissue Sectioning Troubleshooting and Tips.pdf
 
Pharmaceutical Engineering: Size separation
Pharmaceutical Engineering: Size separationPharmaceutical Engineering: Size separation
Pharmaceutical Engineering: Size separation
 
Suture material
Suture materialSuture material
Suture material
 
Preparação de Cross-Section
Preparação de Cross-SectionPreparação de Cross-Section
Preparação de Cross-Section
 
Debonding of orhtodontic brackets
Debonding of orhtodontic bracketsDebonding of orhtodontic brackets
Debonding of orhtodontic brackets
 
Embedding processes-pptx
Embedding processes-pptxEmbedding processes-pptx
Embedding processes-pptx
 
Matrices, retainers and wedges /certified fixed orthodontic courses by India...
Matrices, retainers and wedges  /certified fixed orthodontic courses by India...Matrices, retainers and wedges  /certified fixed orthodontic courses by India...
Matrices, retainers and wedges /certified fixed orthodontic courses by India...
 
HISTOTECHNIQUES MICROTOMY.ppt · version 1.pdf
HISTOTECHNIQUES  MICROTOMY.ppt · version 1.pdfHISTOTECHNIQUES  MICROTOMY.ppt · version 1.pdf
HISTOTECHNIQUES MICROTOMY.ppt · version 1.pdf
 
igs and fixtures are specialised tools used in manufacturing to secure workpi...
igs and fixtures are specialised tools used in manufacturing to secure workpi...igs and fixtures are specialised tools used in manufacturing to secure workpi...
igs and fixtures are specialised tools used in manufacturing to secure workpi...
 

Recently uploaded

Top profile Call Girls In Ratlam [ 7014168258 ] Call Me For Genuine Models We...
Top profile Call Girls In Ratlam [ 7014168258 ] Call Me For Genuine Models We...Top profile Call Girls In Ratlam [ 7014168258 ] Call Me For Genuine Models We...
Top profile Call Girls In Ratlam [ 7014168258 ] Call Me For Genuine Models We...
nirzagarg
 
在线制作(UQ毕业证书)昆士兰大学毕业证成绩单原版一比一
在线制作(UQ毕业证书)昆士兰大学毕业证成绩单原版一比一在线制作(UQ毕业证书)昆士兰大学毕业证成绩单原版一比一
在线制作(UQ毕业证书)昆士兰大学毕业证成绩单原版一比一
uodye
 
CRISIS COMMUNICATION presentation=-Rishabh(11195)-group ppt (4).pptx
CRISIS COMMUNICATION presentation=-Rishabh(11195)-group ppt (4).pptxCRISIS COMMUNICATION presentation=-Rishabh(11195)-group ppt (4).pptx
CRISIS COMMUNICATION presentation=-Rishabh(11195)-group ppt (4).pptx
Rishabh332761
 
一比一维多利亚大学毕业证(victoria毕业证)成绩单学位证如何办理
一比一维多利亚大学毕业证(victoria毕业证)成绩单学位证如何办理一比一维多利亚大学毕业证(victoria毕业证)成绩单学位证如何办理
一比一维多利亚大学毕业证(victoria毕业证)成绩单学位证如何办理
uodye
 
在线制作(ANU毕业证书)澳大利亚国立大学毕业证成绩单原版一比一
在线制作(ANU毕业证书)澳大利亚国立大学毕业证成绩单原版一比一在线制作(ANU毕业证书)澳大利亚国立大学毕业证成绩单原版一比一
在线制作(ANU毕业证书)澳大利亚国立大学毕业证成绩单原版一比一
ougvy
 
Abortion pills in Jeddah |+966572737505 | Get Cytotec
Abortion pills in Jeddah |+966572737505 | Get CytotecAbortion pills in Jeddah |+966572737505 | Get Cytotec
Abortion pills in Jeddah |+966572737505 | Get Cytotec
Abortion pills in Riyadh +966572737505 get cytotec
 
Jual Obat Aborsi Samarinda ( No.1 ) 088980685493 Obat Penggugur Kandungan Cy...
Jual Obat Aborsi Samarinda (  No.1 ) 088980685493 Obat Penggugur Kandungan Cy...Jual Obat Aborsi Samarinda (  No.1 ) 088980685493 Obat Penggugur Kandungan Cy...
Jual Obat Aborsi Samarinda ( No.1 ) 088980685493 Obat Penggugur Kandungan Cy...
Obat Aborsi 088980685493 Jual Obat Aborsi
 
一比一定(购)UNITEC理工学院毕业证(UNITEC毕业证)成绩单学位证
一比一定(购)UNITEC理工学院毕业证(UNITEC毕业证)成绩单学位证一比一定(购)UNITEC理工学院毕业证(UNITEC毕业证)成绩单学位证
一比一定(购)UNITEC理工学院毕业证(UNITEC毕业证)成绩单学位证
wpkuukw
 
怎样办理昆士兰大学毕业证(UQ毕业证书)成绩单留信认证
怎样办理昆士兰大学毕业证(UQ毕业证书)成绩单留信认证怎样办理昆士兰大学毕业证(UQ毕业证书)成绩单留信认证
怎样办理昆士兰大学毕业证(UQ毕业证书)成绩单留信认证
ehyxf
 
怎样办理维多利亚大学毕业证(UVic毕业证书)成绩单留信认证
怎样办理维多利亚大学毕业证(UVic毕业证书)成绩单留信认证怎样办理维多利亚大学毕业证(UVic毕业证书)成绩单留信认证
怎样办理维多利亚大学毕业证(UVic毕业证书)成绩单留信认证
tufbav
 
Abortion Pill for sale in Riyadh ((+918761049707) Get Cytotec in Dammam
Abortion Pill for sale in Riyadh ((+918761049707) Get Cytotec in DammamAbortion Pill for sale in Riyadh ((+918761049707) Get Cytotec in Dammam
Abortion Pill for sale in Riyadh ((+918761049707) Get Cytotec in Dammam
ahmedjiabur940
 
怎样办理斯威本科技大学毕业证(SUT毕业证书)成绩单留信认证
怎样办理斯威本科技大学毕业证(SUT毕业证书)成绩单留信认证怎样办理斯威本科技大学毕业证(SUT毕业证书)成绩单留信认证
怎样办理斯威本科技大学毕业证(SUT毕业证书)成绩单留信认证
tufbav
 
怎样办理伍伦贡大学毕业证(UOW毕业证书)成绩单留信认证
怎样办理伍伦贡大学毕业证(UOW毕业证书)成绩单留信认证怎样办理伍伦贡大学毕业证(UOW毕业证书)成绩单留信认证
怎样办理伍伦贡大学毕业证(UOW毕业证书)成绩单留信认证
ehyxf
 
怎样办理阿德莱德大学毕业证(Adelaide毕业证书)成绩单留信认证
怎样办理阿德莱德大学毕业证(Adelaide毕业证书)成绩单留信认证怎样办理阿德莱德大学毕业证(Adelaide毕业证书)成绩单留信认证
怎样办理阿德莱德大学毕业证(Adelaide毕业证书)成绩单留信认证
ehyxf
 
怎样办理圣芭芭拉分校毕业证(UCSB毕业证书)成绩单留信认证
怎样办理圣芭芭拉分校毕业证(UCSB毕业证书)成绩单留信认证怎样办理圣芭芭拉分校毕业证(UCSB毕业证书)成绩单留信认证
怎样办理圣芭芭拉分校毕业证(UCSB毕业证书)成绩单留信认证
ehyxf
 
Buy Abortion pills in Riyadh |+966572737505 | Get Cytotec
Buy Abortion pills in Riyadh |+966572737505 | Get CytotecBuy Abortion pills in Riyadh |+966572737505 | Get Cytotec
Buy Abortion pills in Riyadh |+966572737505 | Get Cytotec
Abortion pills in Riyadh +966572737505 get cytotec
 
Abortion pills in Dammam +966572737505 Buy Cytotec
Abortion pills in Dammam +966572737505 Buy CytotecAbortion pills in Dammam +966572737505 Buy Cytotec
Abortion pills in Dammam +966572737505 Buy Cytotec
Abortion pills in Riyadh +966572737505 get cytotec
 

Recently uploaded (20)

Top profile Call Girls In Ratlam [ 7014168258 ] Call Me For Genuine Models We...
Top profile Call Girls In Ratlam [ 7014168258 ] Call Me For Genuine Models We...Top profile Call Girls In Ratlam [ 7014168258 ] Call Me For Genuine Models We...
Top profile Call Girls In Ratlam [ 7014168258 ] Call Me For Genuine Models We...
 
在线制作(UQ毕业证书)昆士兰大学毕业证成绩单原版一比一
在线制作(UQ毕业证书)昆士兰大学毕业证成绩单原版一比一在线制作(UQ毕业证书)昆士兰大学毕业证成绩单原版一比一
在线制作(UQ毕业证书)昆士兰大学毕业证成绩单原版一比一
 
CRISIS COMMUNICATION presentation=-Rishabh(11195)-group ppt (4).pptx
CRISIS COMMUNICATION presentation=-Rishabh(11195)-group ppt (4).pptxCRISIS COMMUNICATION presentation=-Rishabh(11195)-group ppt (4).pptx
CRISIS COMMUNICATION presentation=-Rishabh(11195)-group ppt (4).pptx
 
一比一维多利亚大学毕业证(victoria毕业证)成绩单学位证如何办理
一比一维多利亚大学毕业证(victoria毕业证)成绩单学位证如何办理一比一维多利亚大学毕业证(victoria毕业证)成绩单学位证如何办理
一比一维多利亚大学毕业证(victoria毕业证)成绩单学位证如何办理
 
在线制作(ANU毕业证书)澳大利亚国立大学毕业证成绩单原版一比一
在线制作(ANU毕业证书)澳大利亚国立大学毕业证成绩单原版一比一在线制作(ANU毕业证书)澳大利亚国立大学毕业证成绩单原版一比一
在线制作(ANU毕业证书)澳大利亚国立大学毕业证成绩单原版一比一
 
Abortion pills in Jeddah |+966572737505 | Get Cytotec
Abortion pills in Jeddah |+966572737505 | Get CytotecAbortion pills in Jeddah |+966572737505 | Get Cytotec
Abortion pills in Jeddah |+966572737505 | Get Cytotec
 
Call Girls Amethi 9332606886 HOT & SEXY Models beautiful and charming call g...
Call Girls Amethi  9332606886 HOT & SEXY Models beautiful and charming call g...Call Girls Amethi  9332606886 HOT & SEXY Models beautiful and charming call g...
Call Girls Amethi 9332606886 HOT & SEXY Models beautiful and charming call g...
 
Jual Obat Aborsi Samarinda ( No.1 ) 088980685493 Obat Penggugur Kandungan Cy...
Jual Obat Aborsi Samarinda (  No.1 ) 088980685493 Obat Penggugur Kandungan Cy...Jual Obat Aborsi Samarinda (  No.1 ) 088980685493 Obat Penggugur Kandungan Cy...
Jual Obat Aborsi Samarinda ( No.1 ) 088980685493 Obat Penggugur Kandungan Cy...
 
一比一定(购)UNITEC理工学院毕业证(UNITEC毕业证)成绩单学位证
一比一定(购)UNITEC理工学院毕业证(UNITEC毕业证)成绩单学位证一比一定(购)UNITEC理工学院毕业证(UNITEC毕业证)成绩单学位证
一比一定(购)UNITEC理工学院毕业证(UNITEC毕业证)成绩单学位证
 
怎样办理昆士兰大学毕业证(UQ毕业证书)成绩单留信认证
怎样办理昆士兰大学毕业证(UQ毕业证书)成绩单留信认证怎样办理昆士兰大学毕业证(UQ毕业证书)成绩单留信认证
怎样办理昆士兰大学毕业证(UQ毕业证书)成绩单留信认证
 
怎样办理维多利亚大学毕业证(UVic毕业证书)成绩单留信认证
怎样办理维多利亚大学毕业证(UVic毕业证书)成绩单留信认证怎样办理维多利亚大学毕业证(UVic毕业证书)成绩单留信认证
怎样办理维多利亚大学毕业证(UVic毕业证书)成绩单留信认证
 
Abortion Pill for sale in Riyadh ((+918761049707) Get Cytotec in Dammam
Abortion Pill for sale in Riyadh ((+918761049707) Get Cytotec in DammamAbortion Pill for sale in Riyadh ((+918761049707) Get Cytotec in Dammam
Abortion Pill for sale in Riyadh ((+918761049707) Get Cytotec in Dammam
 
怎样办理斯威本科技大学毕业证(SUT毕业证书)成绩单留信认证
怎样办理斯威本科技大学毕业证(SUT毕业证书)成绩单留信认证怎样办理斯威本科技大学毕业证(SUT毕业证书)成绩单留信认证
怎样办理斯威本科技大学毕业证(SUT毕业证书)成绩单留信认证
 
怎样办理伍伦贡大学毕业证(UOW毕业证书)成绩单留信认证
怎样办理伍伦贡大学毕业证(UOW毕业证书)成绩单留信认证怎样办理伍伦贡大学毕业证(UOW毕业证书)成绩单留信认证
怎样办理伍伦贡大学毕业证(UOW毕业证书)成绩单留信认证
 
Vashi Affordable Call Girls ,07506202331,Vasai Virar Charming Call Girl
Vashi Affordable Call Girls ,07506202331,Vasai Virar Charming Call GirlVashi Affordable Call Girls ,07506202331,Vasai Virar Charming Call Girl
Vashi Affordable Call Girls ,07506202331,Vasai Virar Charming Call Girl
 
怎样办理阿德莱德大学毕业证(Adelaide毕业证书)成绩单留信认证
怎样办理阿德莱德大学毕业证(Adelaide毕业证书)成绩单留信认证怎样办理阿德莱德大学毕业证(Adelaide毕业证书)成绩单留信认证
怎样办理阿德莱德大学毕业证(Adelaide毕业证书)成绩单留信认证
 
怎样办理圣芭芭拉分校毕业证(UCSB毕业证书)成绩单留信认证
怎样办理圣芭芭拉分校毕业证(UCSB毕业证书)成绩单留信认证怎样办理圣芭芭拉分校毕业证(UCSB毕业证书)成绩单留信认证
怎样办理圣芭芭拉分校毕业证(UCSB毕业证书)成绩单留信认证
 
Buy Abortion pills in Riyadh |+966572737505 | Get Cytotec
Buy Abortion pills in Riyadh |+966572737505 | Get CytotecBuy Abortion pills in Riyadh |+966572737505 | Get Cytotec
Buy Abortion pills in Riyadh |+966572737505 | Get Cytotec
 
Point of Care Testing in clinical laboratory
Point of Care Testing in clinical laboratoryPoint of Care Testing in clinical laboratory
Point of Care Testing in clinical laboratory
 
Abortion pills in Dammam +966572737505 Buy Cytotec
Abortion pills in Dammam +966572737505 Buy CytotecAbortion pills in Dammam +966572737505 Buy Cytotec
Abortion pills in Dammam +966572737505 Buy Cytotec
 

Microtomy and Paraffin Section Preparation ( PDFDrive ).pdf

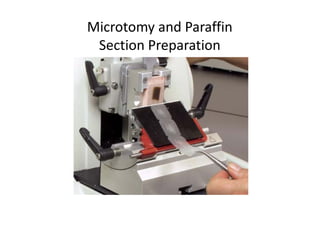
  • 2. Fix Specimens Properly Fixation is the most important step in performing histologic specimen preparation techniques. No matter how much care is taken in processing and sectioning tissue specimens, essential morphologic detail will only be demonstrated if the tissue is promptly and adequately fixed. • Poorly fixed specimens are almost always more difficult to section than those that are well fixed. • Poorly fixed tissue will always produce inferior morphology even if optimally processed and carefully sectioned.
  • 3. Process Tissue Properly A paraffin block will be difficult to section unless a well-fixed specimen is properly processed using an appropriate schedule • Specimens may be under-processed (specimen too large, schedule too short) or over-processed (schedule too long for size and nature of specimen). In both cases they may be difficult or impossible to cut. • There are a number of techniques that can be used to help obtain sections from difficult blocks.
  • 4. Process Tissue Properly • If the block is difficult to section because the tissue is hard or friable, the exposed surface can be soaked in cold water, or a softening agent such as weak detergent solution, fabric softener or MollifexTM. • For specimens that contain calcium, the use of a surface decalcifying agent applied to the exposed tissue for 10 minutes or more, may allow several sections to be obtained. Rinse blocks well before mounting into the microtome specimen holder and recutting, as traces of the decalcifying agent will damage the pressure plate of the blade holder. • Where it is impossible to obtain sections from a block because the specimen has been under-processed in the first place, it may be possible to reprocess it.
  • 5. Embed Specimens Carefully Embedding is an important step that requires a thoughtful approach. Careless embedding can make microtomy much more difficult. • Avoid under-filling the cassette as this can allow unstable clamping in the microtome and lead to cutting “thick then thin” sections and other problems. • Avoid over-filling cassettes as this can interfere with the correct alignment of the block face for sectioning. • Any excess wax on the outside of a cassette should be removed before clamping to ensure the block is firmly held during sectioning. • Specimen orientation is very important
  • 6. Embed Specimens Carefully This block of pancreas had insufficient fixation and was processed using a protocol that was far too short. It shows the typical effects of underprocessing that has resulted in considerable shrinkage of the specimen within the surrounding wax. The tissue was soft and mushy and was impossible to section. It required reprocessing.
  • 7.
  • 8.
  • 9.
  • 10.
  • 11.
  • 12. Embed Specimens Carefully Examples of under-filled (left), over-filled (right) and correctly filled cassettes (centre). Under-filled and over-filled cassettes can cause problems during microtomy
  • 13. Locate Microtome Appropriately The location of the microtome in the laboratory is important. • Position the microtome on a stable bench, away from air drafts, doorways and passing staff. Any air movement from air conditioners or other causes can make section handling very difficult. • A height-adjustable bench and ergonomic chair are preferred. • It is very important that staff are not distracted when using the microtome because of the risks of injury from extremely sharp blades. The potential for interaction with other staff members should be considered when positioning microtomes in a laboratory. • It is preferable to have non-slip flooring in the vicinity of microtomes because, inevitably, wax fragments will find their way onto the floor where they can produce a slippery surface. Many laboratories use non-slip matting to make the environment safer.
  • 14. Utilize Safety microtome you are using and observe some basic rules when cutting sections. • Microtome knives and disposable blades are extremely sharp and can inflict serious injuries unless Features Properly You must be familiar with the safety features of the appropriate care is taken when working with them. Accidents occur when a microtomist is distracted and not concentrating fully. • Use forceps or brush instead of your fingers to pick up sections or wax fragments from blade or block face. • Leica rotary microtomes are equipped with a safety guard (knife guard or finger guard), a handwheel lock and a handwheel brake to enable safe operation.
  • 15. Utilize Safety microtome you are using and observe some basic rules when cutting sections The safety guard can be positioned to cover the whole length of the cutting edge. • The handwheel lock will lock the object head at the top of the cutting stroke and must be used when changing blocks. • The guard must be in place and the handwheel lock engaged when a block is being placed into or removed from the cassette clamp, or when any manipulation of the block is being undertaken while the knife or blade is in place. The guard must also be used when the microtome is left unattended. • The handwheel brake will lock the microtome when the handle is in any position and is used when realigning a block face or adjusting the coarse feed
  • 16. Utilize Safety microtome you are using and observe some basic rules when cutting sections The knife or blade should be removed from the microtome when the instrument is left unattended or when cleaning the instrument. This is best done by unclamping the blade, then using the blade ejector on the left side of the guard to start moving the blade laterally out of the clamp. It can then be grasped with forceps (not fingers) or picked up with the magnet at the end of the Leica brush and safely removed. Used blades should be disposed of appropriately in a “sharps” container or into the “used blades” slot in the base of the blade dispenser. • Never place a knife or blade on the bench or in a box with the cutting edge facing up. If you happen to drop a blade, let it fall. On no account try to catch it (a natural reflex action that you must guard against).
  • 17. Set Blade Clearance Angle Optimally Blade clearance angle is adjustable and must be set for optimum performance. • The clearance angle prevents contact between the knife facet and the face of the block. • The facet angle is the angle between the two facets that form the cutting edge. For routine use knives and disposable blades are made with a facet angle of approximately 35°, but this angle can vary with the blade type and from manufacturer to manufacturer. • Therefore for each blade type the clearance angle must be optimally set. • Follow the microtome manufacturer’s guidelines for the recommended angle setting. For Leica knife and blade holders a setting of between 1° and 5° is recommended.
  • 18. Maximize Blade Life There are some simple strategies for getting the maximum life from each blade. • When cleaning the blade avoid dragging anything along the cutting edge. Even cellulose fibres can cause damage to the blade. • Avoid touching the edge with any hard objects such as forceps or brush. • Use the blade systematically, working from one end to the other. This will give you maximum life from every part of the blade. • Use one part of the blade for trimming and another new part for final sectioning, or use separate blades for these two procedures. • A retracting microtome extends blade life by moving the specimen away from the blade on the upstroke and preventing the build-up of debris on the back of the blade.
  • 19. Orientate Specimen Appropriately The orientation of the specimen to the blade during the cutting stroke can affect the ease with which a ribbon can be obtained and directly influence section quality. • In most laboratories all cassettes are placed in the object clamp with the same orientation (eg. label to the left for east-west orientation or label uppermost for north-south orientation). This is done to facilitate roughing of multiple blocks prior to preparing the high-quality sections and to allow deeper cuts or re-cuts without excessive loss of tissue. The orientation of the specimen to the blade must therefore be considered at the embedding stage. This requirement is often overlooked.
  • 20. Orientate Specimen Appropriately Example A. Intestine: blade passes through the mucosa last • Example B. Cervix: it is better to present a point of dense tissue to the blade rather than a straight edge. • Example C. Skin: blade passes through the epidermis last.
  • 21. Consider Factors Affecting Section Thickness Set the microtome at the desired setting but note that there are a number of factors that determine the actual section thickness. • A cohesive section of 4 μm may provide more information than a severely disrupted section of 2 μm. • The actual thickness of the first couple of sections in a ribbon may be thicker than indicated because of thermal expansion3, 4 when cutting a cold block (as seen in sections 1, 2 & 3 below). • Other factors such as speed of rotation, clearance angle setting and the condition of the cutting edge can influence the actual thickness achieved.
  • 22. Ensure Blocks are Cold Sectioning is generally improved when the specimen and the wax are well matched in hardness. It is for this reason that most paraffin blocks must be cold when sections are cut. The actual method used to chill the block is important. • Cold wax provides better support for the harder elements in a specimen allowing thinner sections to be obtained. • Place the blocks on a cold plate or a cold wet surface for a few minutes (such as the surface of melting ice). • Water penetrates a small distance into the block face, swelling tissues and making them more amenable to cutting. This is particularly important to over-dehydrated, dry or crumbly tissues. • Placing blocks in a freezer can cause surface cracking, where tissue separates from the surrounding wax. This can make it more difficult to obtain cohesive sections. The sections on the left were cut from a relatively warm block without chilling. The sections on the right were cut from the same block after chilling on the surface of melting ice.
  • 23. Learn the Technique for Cutting Consistent, High-quality, Thin Sections There is no substitute for experience but there are some fundamental steps that will make the task easier. • Use a section of blade that has not been used for rough trimming. • When using the coarse feed, avoid cutting unintentional thick sections as this will damage your knife and possibly the block face. • Re-chilling of the block may be required if the block face becomes warm or if deeper levels are required. • Generally a slow, uniform cutting stroke produces the best results and the least compression.
  • 24. Learn the Technique for Cutting Consistent, High-quality, Thin Sections • Do not stop and restart of different thickness across the section. • The practice of gently breathing on the face of a chilled block im during a cutting stroke as this will produce bands mediately before cutting each section, is common practice in some laboratories. The application of warm, moist breath tends to make sections more cohesive, but it also causes thermal expansion thus making the section thicker • Debris adhering to upper or lower edges of the block, or the back of the blade, can make it difficult to obtain cohesive ribbons and cause the ribbon to lift off the blade on the upstroke. If debris is present clear it away, re-chill your block and start again.
  • 25. Learn the Technique for Cutting Consistent, High-quality, Thin Sections This ribbon has been cut with a slow and steady stroke from a well processed, thoroughly chilled block. The sections show very little compression even before flotation.
  • 26. Float Out Sections Carefully Flotation should expand the section to its original dimensions and ensure it is completely flat . • Monitor the temperature carefully. The temperature will need to be 5 - 9 ˚C below the melting point of the wax. • Make sure the water is clean and free of bubbles and section waste (to avoid cross-contamination). • Place sections with the smooth (shiny) side down. • Place the sections onto the water surface with a gentle sweeping action. • Sections are very easily damaged when dislodging wrinkles or bubbles with brush or forceps. • Examine each section as it floats on the water surface as imperfections can be readily seen. • Leave the section on the water surface just long enough for it to flatten. Overexpansion can spoil the morphology in susceptible sections. • To promote efficient drainage and to prevent the section slipping down the slide, remove slides vertically from the water.
  • 27. Float Out Sections Carefully Before placing slides in a slide drier or oven drain them vertically for a brief time to remove excess water. • Skim the water surface with lint-free tissue between blocks to avoid the possibility of cross-contamination. • To avoid any chance of a mix-up float out sections from one block at a time. Sections from two different blocks must not be floated out simultaneously. Even though the specimens may be of a different type, there is a possibility of cross-contamination and confusion leading to incorrect identification. This procedure should therefore be avoided at all times.
  • 28. Dry Slides Adequately Proper drying ensures that sections are completely dehydrated, free of heat damage, flat and unlikely to lift during staining. • Drain excess water from beneath the section before drying. This is vital if slides are dried flat on a hot plate • Slides can be stored in racks in an upright position, then dried in an oven. • Generally drying temperatures should not exceed 65 ˚C. • Excessive heat can cause droplets of water underneath a section to boil and this will cause damage. • Dry sections for between 10 and 30 minutes. • Some delicate specimens will produce best results when dried at 37 ˚C for a longer time (several hours to overnight).
  • 29. Clean and Maintain the Microtome Thoroughly It is important to remove accumulated tissue debris and wax after use. Regular preventative maintenance is important. • Clean the instrument daily. • Always remove the knife or blade before cleaning. • The knife holder can easily be removed to facilitate access for cleaning. • Section waste is best removed with a dry paintbrush. • Do not clean the outer surfaces with alcohol or xylene as they are not resistant to these solvents and exposure to xylene should be avoided. Paraffin remover, mild commercial household cleaners or soap and water are recommended. • No fluid must enter the inside of the instrument during cleaning. • Have the instrument inspected at least once a year by a qualified service technician. • Follow the lubrication instructions provided in your instruction manual using recommended lubricants.
  • 30. Learn to Recognize and Correct Common Faults Some of the most common faults seen in paraffin sections are: Wrong micrometer setting • Warm breath applied to cold block to facilitate sectioning • First section in ribbon chosen • Sectioning at too great a speed • Poor processing • Microtome needs recalibration A. Section too thick
  • 31. Learn to Recognize and Correct Common Faults Block trimmed too quickly • Block surface not polished by cutting some thin sections after roughing • Inappropriate section thickness used when trimming • Block brittle (over-processed?) or too cold when trimmed B. Holes from rough trimming
  • 32. Learn to Recognize and Correct Common Faults Damaged knife or blade used • Poor processing • Hard material such as calcium in block • Debris in unfiltered wax • Buffer salts precipitated in specimens
  • 33. Learn to Recognize and Correct Common Faults Rough handling of specimen during grossing • Poor processing (incomplete dehydration, clearing or infiltration) • Vigorous treatment to dislodge wrinkles during flotation • Floating out for too long or using water that is too hot D. Disruption
  • 34. Learn to Recognize and Correct Common Faults Tissue over-processed • Block too cold • Cutting too fast • Clamping mechanism not securely locked • Clearance angle needs adjustment E. Fine cracks or micro-chatter
  • 35. Learn to Recognize and Correct Common Faults Clamping mechanism not securely locked • Very hard or large specimen • Poor processing • Insufficient clearance angle • Sectioning too rapidly • Worn microtome F. Coarse chatter
  • 36. Learn to Recognize and Correct Common Faults Poor flotation technique • Poor fixation and/or processing (insufficient support) • Warm block • Section too thin • Clearance angle too great • Water bath too hot G. Folds
  • 37. Learn to Recognize and Correct Common Faults Poor processing (insufficient support) • Warm block • Cutting too fast • Dull cutting edge • Clearance angle too great • Poor quality wax H. Excessive compression
  • 38. Learn to Recognize and Correct Common Faults Bubbles adhering to base and sides of flotation bath • Poor flotation technique trapping bubbles under section I. Bubbles under the section
  • 39. Learn to Recognize and Correct Common Faults Temperature of bath too high • Section left for too long on water • Poor fixation and/or processing (residual solvent) J. Over-expansion during flotation
  • 40. Learn to Recognize and Correct Common Faults Poor quality section (wrinkles, bubbles) • Flotation bath too cold • Use of an uncoated slide • Section not drained thoroughly after flotation • Insufficient drying time • Drying temperature too low K. Section not flat (poor adherence)
  • 41. Learn to Recognize and Correct Common Faults Dirty slide • Flotation bath not skimmed or contaminated • Slides drained, dried or stored in a dusty environment • Fragments of pencil lead from labelling L. Dust present
  • 42. Nuclear Bubbling - Probable cause(s)/Potential remedies
  • 43. Nuclear Bubbling - Probable cause(s)/Potential remedies One of the most notable artifacts observed in the grading of the 2013 HQIP BX-series were slides containing nuclear bubbling artifact. (pictured below) Of particular concern was the number of prostate biopsies (21%, 12/57) containing the artifact, followed closely by bladder biopsies (19%, 10/52) and then colon biopsies (12%, 13/110), esophagus biopsies (12%, 13/109), skin shave biopsies (12%, 10/82), and skin punch biopsies (11%, 9/83).
  • 44. Nuclear Bubbling - Probable cause(s)/Potential remedies Nuclear bubbling can seriously compromise the pathologic diagnosis. Several authors have suggested that the use of 10% neutral buffered formalin (NBF) alone causes nuclear distortion but Dapson attributes it to the specimen not being completely fixed in NBF before dehydration has begun.
  • 45. Nuclear Bubbling - Probable cause(s)/Potential remedies Prostate biopsy
  • 46. Nuclear Bubbling - Probable cause(s)/Potential remedies First, it is generally recognized that NBF is a poor fixative for nuclei. It has little, if any, reaction with nucleic acids below 45°C. 4,5 Second, although NBF may have had time to penetrate small biopsies or needle cores in a relatively short time, the tissues are still under-fixed in NBF, as the nuclear proteins have not developed stabilizing cross-links with the aldehydes from the NBF. The duration of fixation is very important. NBF needs a minimum of 6-8 hours to act before the processing schedule is begun. Complete fixation is not achieved in less than 24 hours. Adequate fixation time is required to maintain proper relationships of all tissue structures otherwise, fixation will continue to take place by alcohol in subsequent processing steps. The emphasis on turnaround time has seriously compromised the laboratory’s ability to devote adequate time to proper fixation. All of these factors contribute to nuclear bubbling
  • 47. Nuclear Bubbling - Probable cause(s)/Potential remedies Bladder biopsy
  • 48. Nuclear Bubbling - Probable cause(s)/Potential remedies Histotechnologists have observed that drying the slides immediately after sectioning in an oven or slide dryer set above 58-60°C, without allowing them to drain properly, can cause nuclear bubbling. The water between the section and slide is overheated, causing the nuclei to bubble. In a 1990 article, published in the Journal of Histotechnology, the authors introduced a modified draining/drying protocol and eliminated all nuclear bubbling artifact. The practice of affixing a freshly cut section with a hot plate or drying pad should be avoided, as this direct heat process can have the same effect of overheating the water trapped between the section and the slide. All of these factors contribute to nuclear bubbling.
  • 49. Nuclear Bubbling - Probable cause(s)/Potential remedies Skin shave biopsy
  • 50. Nuclear Bubbling - Probable cause(s)/Potential remedies Stomach biopsy
  • 51. References 1. Leica Microsystems. Instruction Manual Leica RM2235 V1.3 Nussloch: Leica Microsystems, 2008. 2. Rolls GO, Farmer NJ, Hall JB. Artifacts in Histological and Cytological Preparations. Melbourne: Leica Microsystems, 2008;106. 3. Rolls G. 101 Steps to Better Histology. Melbourne: Leica Microsystems, 2008. 4. Culling CFA, Allison RT, Barr WT. Cellular Pathology Technique. 4th ed. London: Butterworths, 1985. 5. Santoianni RA, Hammami A. Nuclear Bubbling an Overlooked Artifact. The Journal of Histotechnology, 1990;13;135-136.