
Recommandé
Contenu connexe
En vedette
Similaire à What in the world
Similaire à What in the world (20)
Dernier
Dernier (20)
What in the world
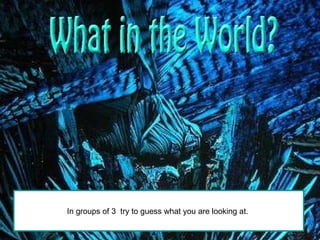
- 1. In groups of 3 try to guess what you are looking at.
- 22. What were you looking at?
- 23. Algae (from the edge of a river)
- 24. Ant’s head
- 25. Cells from the inside of your cheek
- 26. A feather
- 27. A flea
- 28. A fly’s head
- 29. A hair in the skin with a sebaceous gland
- 30. Blood
- 31. Mould
- 32. Onion cells
- 33. Leaf cells
- 34. Pollen from a flower
- 35. A spider
- 36. Velcro
- 37. Pus from a sore
- 38. The head of a prawn
- 39. Hairs on a spider
- 40. A wasp
- 41. Wheat
- 42. Sputum (spit)
- 43. Pin head magnified to 33x larger. http:// www.cellsalive.com/howbig.htm
- 55. Cell Membrane cytoplasm Nucleus Nucleolus
- 56. Not all cells look the same Cells can vary in their shape and the inside organs you can see.
- 58. During the 1st century AD (year 100), glass had been invented and the Romans were looking through the glass and testing it. They experimented with different shapes of clear glass and one of their samples was thick in the middle and thin on the edges. They discovered that if you held one of these “lenses” over an object, the object would look larger.
- 59. Someone also discovered that you can focus the rays of the sun with one of these special “glasses” and start a fire. These early lenses were called magnifiers or burning glasses. The word lens by the way, is derived from the latin word lentil, as they were named because they resembled the shape of a lentil bean
- 60. These lenses were not used much until the end of the 13th century when spectacle makers were producing lenses to be worn as glasses. The early simple “microscopes” which were really only magnifying glasses had one power, usually about 6X - 10X . One thing that was very common and interesting to look at was fleas and other tiny insects. These early magnifiers were hence called “flea glasses
- 61. Sometime about the year 1590, two Dutch spectacle makers, Zaccharias Janssen and his father Hans started experimenting with these lenses. They put several lenses in a tube and made a very important discovery. The object near the end of the tube appeared to be greatly enlarged, much larger than any simple magnifying glass could achieve by itself! They had just invented the compound microscope (which is a microscope that uses two or more lenses).
- 62. Galileo heard of their experiments and started experimenting on his own. He described the principles of lenses and light rays and improved both the microscope and telescope. He added a focusing device to his microscope and of course went on to explore the heavens with his telescopes . A replica of Galileo’s earliest surviving telescope.
- 63. Anthony Leeuwenhoek of Holland became very interested in lenses while working with magnifying glasses in a dry goods store. He used the magnifying glass to count threads in woven cloth. He became so interested that he learned how to make lenses. By grinding and polishing, he was able to make small lenses with great curvatures. These rounder lenses produced greater magnification, and his microscopes were able to magnify up to 270X! Microscopic Section through one year old ash tree (Fraxinus) wood, drawing made by van Leeuwenhoek.
- 64. Anthony Leeuwenhoek became more involved in science and with his new improved microscope was able to see things that no man had ever seen before. He saw bacteria, yeast, blood cells and many tiny animals swimming about in a drop of water. From his great contributions, many discoveries and research papers, Anthony Leeuwenhoek (1632-1723) has since been called the "Father of Microscopy".
- 65. Robert Hooke, an Englishman (who is sometimes called the “English Father of Microscopy”), also spent much of his life working with microscopes and improved their design and capabilities. Little was done to improve the microscope until the middle of the 19th century when great strides were made and quality instruments like today’s microscope emerged. Hooke's microscope Hooke’s drawing of a flea
- 66. The latest electron microscope
- 68. The apparent enlargement of an object by an optical instrument.
- 69. The microscope works a lot like a refracting telescope except that the object is very close to the objective lens .
- 70. The clips on the microscope's flat stage hold the slide in place. If you look through the microscope eyepiece. A mirror at the bottom of the microscope reflects light rays up to the slide through a hole in the stage. Objective lenses magnify the image which is made even larger when we see it through the eyepiece lenses .
- 71. The number marked on the objective lens tells us how many times the specimen we have on the slide is being magnified. If it says 40x. then that means the tiny sample is forty times larger than life. To focus we can move the objective lens closer to or farther from the organism.
- 72. How to Label Microscope Diagrams 1. Always draw diagrams in pencil 2. Keep diagrams fairly large 3. Name the diagram or object 4. Label the diagram 5. State the magnification, if using a microscope 6. Include any important notes about the diagram, such as the stain used