Final Cut Pro 7 Certification Lesson 1
•Download as PPTX, PDF•
2 likes•2,077 views

Final Cut Pro 7 Lesson 1 from the Weynand certification text.

Recommended
More Related Content
What's hot
What's hot (20)
Viewers also liked
Viewers also liked (18)
Similar to Final Cut Pro 7 Certification Lesson 1
Similar to Final Cut Pro 7 Certification Lesson 1 (20)
More from Samuel Edsall
More from Samuel Edsall (20)
Recently uploaded
Recently uploaded (20)
Final Cut Pro 7 Certification Lesson 1
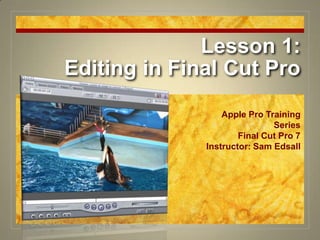
- 1. Lesson 1:Editing in Final Cut Pro Apple Pro Training Series Final Cut Pro 7 Instructor: Sam Edsall
- 2. Using the DVD Book Files
- 4. How to Use These Lessons Action boxes: If you see a yellow border box, you will need to do something in Final Cut Pro. Follow every step to keep up in the lesson. Homework assignments are normally based on the lesson. The illustration area showing what the function or action looks like in Final Cut.
- 5. How to Use These Lessons Example of homework assignment for each lesson at the end of the slideshow.
- 7. Starting up Final Cut Pro
- 8. Starting up Final Cut Pro If it isn’t there already, drag the Final Cut Pro icon to your dock. In the dock, click the Final Cut Pro icon.
- 9. Starting up Final Cut Pro
- 10. Starting up Final Cut Pro
- 11. Starting up Final Cut Pro
- 12. Understanding the Final Cut Pro Interface Canvas Viewer Browser Timeline Toolbar & Audio Meter
- 13. Understanding the Final Cut Pro Interface
- 14. Understanding the Final Cut Pro Interface
- 15. Understanding the Final Cut Pro Interface
- 16. Understanding the Final Cut Pro Interface
- 18. Understanding the Final Cut Pro Interface
- 19. Understanding the Final Cut Pro Interface
- 20. Working with Final Cut Pro Windows
- 21. Working the Windows Select different windows in FCP to make them active or inactive. Close the Viewer window. Choose Window > Viewer to restore the Viewer window.
- 22. Working the Windows Drag the Browser window title bar some place else and release. Drag it back into place. When the window is close, it will snap back.
- 23. Menus, Shortcuts & the Mouse
- 24. Working the Windows Move the pointer over the border between the Browser and the Viewer. When the pointer changes to the vertical Resize pointer, drag right to increase the size of the Browser window.
- 25. Working the Windows Drag the pointer to the tool that looks like a magnifying glass. -- a tooltip appears with the tool name and shortcut. Move the pointer to the top tool and select it. -- selection tool
- 26. Menus, Shortcuts & the Mouse
- 27. Menus, Shortcuts & the Mouse
- 28. Working the Windows Choose Window > Arrange > Standard -- resets the interface layout -- keyboard shortcut CTRL U
- 30. The Elements ofFinal Cut Pro
- 31. The Elements ofFinal Cut Pro
- 32. Importing & Viewing Project Elements Select the Browser, then choose File > Save Project As In the Save As field enter ‘Seaworld’ Save in the FCP7 Book Files, Lessons, My Projects folder.
- 33. Importing & Viewing Project Elements In the Browser click on the sequence then click again. When the name is highlighted, change the name to ‘Believe Selected Takes’ and press Return.
- 34. Importing & Viewing Project Elements Choose File > Import > Files -- shortcut Command I Go to FCP7 Book Files > Media > SeaWorld > Believe Select ‘_DS_show concept’ and import the clip.
- 35. Importing & Viewing Project Elements Double-click on the clip to open in the Viewer. Play the clip. -- use the icon or press the spacebar.
- 36. Selecting Clips
- 37. Importing & Viewing Project Elements Import more clips: Choose Command I and select the following clips: -- hold down the Command key to select more than one clip at a time. _DF_ambassadors _DS_show team _SA_favorite behavior J and L Circle K jumps off whale S show open
- 39. Clips as Icons
- 40. Change the View In the Browser, Control-click in an empty gray area in the Name column. In the Shortcut menu, choose ‘View as Large Icons’ Control-click again and choose ‘Text Size > Medium’
- 41. Load Some More Stuff Control-click again in the gray area of the Browser and select File > Import > Files. Navigate to the SeaWorld Music folder and import ‘Track 8_guitar.aif’ Control-click again and choose Import > Folder and import the Narration folder.
- 42. Previewing Clips
- 43. Viewer Tabs
- 44. The Scrubber Bar Mark out point Mark in point Mediastart Media end Play head
- 45. Shuttle & Jog Shuttle Jog
- 46. Timing Clip Duration Play head position
- 47. Transport Controls Play in to out point Play / Pause Play around
- 48. Load Up a Clip In the Browser double-click ‘S show open’ to load into the Viewer. Customize the layout: Place cursor between windows the drag to make the Viewer bigger. Hold Option key and select Window > Arrange > Set Custom Layout 1.
- 49. Navigating Clips First frame of clip Last frame of clip Try it out: Press fn & fn to move the play head to the first and last frame.
- 50. Navigating Clips Try it out: Press & to move the play head 1 frame at a time. Press Shift & to move the play head 1 second at a time.
- 51. Navigating Clips Try it out: Press and hold & to move the play head around. Then use the Shift key with your arrow keys.
- 52. Navigating Clips Try it out: Put two fingers in the Viewer and drag up and down.
- 53. Navigating Clips Try it out: Use J, K and L to play backwards, stop and play the clip.
- 54. Navigating Clips Try it out: Use these combination of keys for shuttling, stepping and slo-mo.
- 55. Navigating Clips You don’t have to type in the Timecode field. Just make sure the Viewer is selected, then just type in your timecode number. Try it out: Type in 85910. The play head will snap to that timecode. (08:59:10)
- 56. Transport Controls – Go to’s Go to previous
- 57. Transport Controls – Go to’s Go to next
- 58. Marking Clips Practice clip: Open ‘_DS_show_team’ in the Viewer
- 59. Marking Clips Find the In point: Play the clip and stop just after “… all around the country.” Mark this as your In point.
- 60. Marking Clips Find the Out point: Play though the clip and stop after “…show would ultimately be.” Mark an Out point.
- 61. Marking Clips Try it out: Press Shift to play in to out point.
- 63. Finesse your Marks Try it out: Press Shift I to go to the In point. Press to nudge the play head to where you would like the new In point. Press I to set a new In point.
- 64. Canvas Controls Zoom slider Zoom slider Edit buttons
- 65. Edit Overlay
- 66. Edit the Clip to the Timeline In the Canvas click the red Overwrite button. Alert message? -- adjust sequence setting to match clip? Choose YES Clip now in the Timeline tracks.
- 67. Mark & Edit Another Clip Load ‘_SA_favorite behavior’ into the Viewer. Set an In point at “There’s a behavior..” Set an Out point at end of “… reason why we do this.” Overwrite this clip to the Timeline.
- 69. Mark & Edit Another Clip Load ‘J and L circle’ into the Viewer. Set an In point at when Julie enters the frame on the whale’s belly. (15:07:00ish) No need for an Out point here. Overwrite this clip to the Timeline.
- 70. Mark & Edit Another Clip Load ‘_DF_ambassadors’ into the Viewer. At “We as trainers..” set an In point. At “.. Species of animal.” set an Out point. Overwrite this clip to the Timeline.
- 71. Configure Workspacefor Viewing Sequence Drag the windows so the canvas is large. Hold the Option key and choose Window > Arrange > Set Custom Layout 2
- 72. Viewing your Sequence Select the Canvas and use the icons and shortcut keys to play your sequence.
- 73. Canvas Indicators Move play head to first and last frame of clips and the last frame in the sequence.
- 75. Organizing Project Elements Make some bins: Press Command B and make 3 new bins Rename the new bins: Select each and rename them: Interviews Music Behaviors
- 76. Organizing Project Elements Load the Bins: Put the guitar clip in the Music bin. Put the “_” interview clips in the Interview bin. Put the B-roll shots in the Behaviors bin.
- 81. Lesson 1:Editing in Final Cut Pro Apple Pro Training Series Final Cut Pro 7 Instructor: Sam Edsall