
Recommandé
Contenu connexe
Tendances
En vedette
Similaire à Process journal
Similaire à Process journal (20)
Dernier
Dernier (20)
Process journal
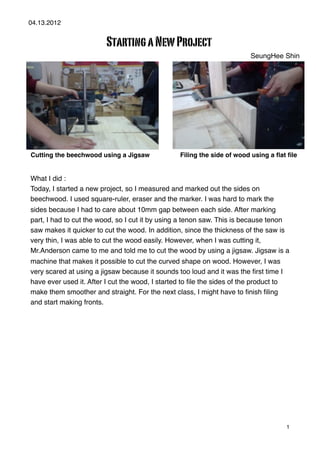
- 1. 04.13.2012 Starting a New Project SeungHee Shin Cutting the beechwood using a Jigsaw Filing the side of wood using a flat file What I did : Today, I started a new project, so I measured and marked out the sides on beechwood. I used square-ruler, eraser and the marker. I was hard to mark the sides because I had to care about 10mm gap between each side. After marking part, I had to cut the wood, so I cut it by using a tenon saw. This is because tenon saw makes it quicker to cut the wood. In addition, since the thickness of the saw is very thin, I was able to cut the wood easily. However, when I was cutting it, Mr.Anderson came to me and told me to cut the wood by using a jigsaw. Jigsaw is a machine that makes it possible to cut the curved shape on wood. However, I was very scared at using a jigsaw because it sounds too loud and it was the first time I have ever used it. After I cut the wood, I started to file the sides of the product to make them smoother and straight. For the next class, I might have to finish filing and start making fronts. 1
- 2. 04.17.2012 Filing and Sanding Sides SeungHee Shin Sanding the beechwood using a rough Filing the side of wood using a rasp garnet paper and sanding block What I did : Today, I continued to filing sides, so I first used a flat file to file the sides. At the beginning, I used a flat file because the side of my product is flat. It was very hard to file the sides by using a flat file because it is just for making the sides smoother, not removing a big amount of wood. In my case I had to file the wood for about 10 cm. Therefore, I used a rasp file instead of a flat file. SInce it has big and rough side, it can file the wood more than a flat file. After I filed the wood, I used a rough garnet paper and sanding block to make the edges smoother so that the future user doesn’t get cut from the sharp edges. I used a sanding block because it is very hot and dangerous if I just use my hand to sand the wood because the rough garnet paper can be ripped apart. As a result, I finished making the sides smoother. For the next class, I will measure and mark out the front part of my product. 2
- 3. 04.24.2012 Sawing and Cutting a Bone shape Wood SeungHee Shin Sawing a beechwood by using a coping Cutting the wood by using a big saw. saw. What I did : Today, at the beginning of the class, I measured and marked out the shape of a bone, which will be on the very top of my product. I used tri-square and pencil to mark out the lines. Tri-square is a very useful tool to use because it makes the line straight and clear. After I finished measuring the chewing gum shaped wood, I started to cut the wood. At that time, I used a big saw to cut the part from a long beechwood, and coping saw to cut out a bone shape carefully. When I was using a coping saw, it was very hard, because the blade of coping saw is too thin that it is very easy to be broken. However, it is useful when I cut a curved shape. Since a coping saw is made for cutting a curved shape, when I cut a straight side, it is always rough and uneven. After I finished cutting the wood, I started to file the sides to make the shape more detailed and clearly. 3
- 4. 04.27.2012 Markig Out and Cutting the Front SeungHee Shin Measuring and marking out the front of Making the edges smoother by using a the product. smoothing plane. What I did : Today, at the beginning of the class, I measured and marked out the front whose size is 180X360(LXW) by using pencil and 1m-ruler. It was easy because I have done measuring for a lot of times. I used a long ruler because the second longest ruler is only 250mm long, and it cannot measure 360mm. Tri-square is also useful because it makes me sure that the line is straight. After I measured the front, I started to cut it by using a coping saw. A coping saw is really helpful tool because I can cut the wood more easily and quickly than tenon saw or gent saw. I also used a G-clamp which is used to fix wood or other objects on the bench so that it cannot move while I am cutting. Cutting part was easy, but smoothing out wood that is over the pencil line was hard. I used a smoothing plane. When I use this tool, I need to be careful at breaking the wood. For the next class, I will file and sand the edges. 4
- 5. SeungHee Shin 05.01.2012 Routing and Filing the Edges of Bone Shape Wood Routing the edges of bone shaped wood Filing the routed edges to remove some to make the them smoother. little wood for safety. What I did : Today, at the beginning of the class, I started to route the edges of bone shaped wood to make them smoother. This is for the safety reason, as a user might get hurt by a small wood. At that time, I used a trimmer router which is a very useful tool to route the edges of wood. I felt that using it was really hard because it is so noisy and dangerous. I hate using machine that creates a huge noise. I think that I am an inquirer because I researched about the trimmer router about its safety. This is because I don’t want to get hurt by that machine. After routing, I started to file the wood because a trimmer router leaves some scratches and dark parts because it is hot, and hard to control. Filing was easy for me because I have filed for a lot of times so I am very used to it. For the next class, I will measure and mark out the sketches of the base and back, and cut them. 5
- 6. SeungHee Shin 05.08.2012 Routing and Filing the Edges of Bone Shape Wood Routing the edges of bone shaped wood Drilling the holes for screwing on the base. to make the them smoother. What I did : Today, at the beginning of the class, I started to route the edges of bone shaped wood to make them smoother. This is for the safety reason, as a user might get hurt by a small wood. At that time, I used a trimmer router which is a very useful tool to route the edges of wood. I felt that using it was really hard because it is so noisy and dangerous. I hate using machine that creates a huge noise. I think that I am an inquirer because I researched about the trimmer router about its safety. This is because I don’t want to get hurt by that machine. After routing, I started to file the wood because a trimmer router leaves some scratches and dark parts because it is hot, and hard to control. Filing was easy for me because I have filed for a lot of times so I am very used to it. At the end of the class, I measured and marked out the sketches of base and back. I used a big saw to cut them because it is easy for me to cut. Next, I drilled some holes to put some screws. For the next class, I will screw and nail them on the product. 6
- 7. SeungHee Shin 05.15.2012 Glueing and Hammering the Front, Back and Base Glueing the back with the sides by using a Hammering on the back to make the PVA glue. product stronger. What I did : Today, at the beginning of the class, I started to glue the back and sides because the back keeps falling out if I screw it to sides. This is because it is too thin. Therefore, I planned to glue it and nail on it. I used a PVA glue to attach it on sides because PVA glue is safe and it can glue the woods very well. After glueing, I hammered on it to tight. At that time, I used a hammer and some small nails. I also glued the front and the sides, and I used a PVA glue again. When I glued them, I made a small rectangular shaped wood stick to make sure that the front and sides are tightened well. Since I have done many products that needed to glue, using a PVA glue was very easy to me, and I like it. Therefore, today was fun. However, I don’t think that I am a caring person because I spent too much glue to glue the parts. I had to take some off. For the next class, I need to start to make a rollable part by using a beech. 7