1. CompeGPS Team S.L.
http://www.compegps.com
http://support.compegps.com
4. Choose data fields for it.
You can find a list of the available fields in appendix 1
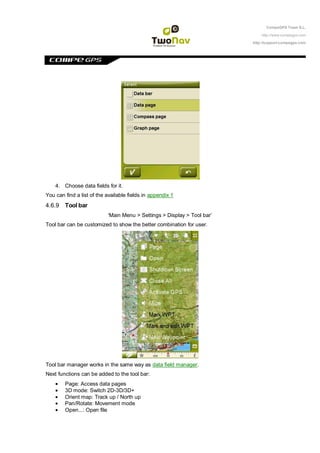
4.6.9 Tool bar
„Main Menu > Settings > Display > Tool bar‟
Tool bar can be customized to show the better combination for user.
Tool bar manager works in the same way as data field manager.
Next functions can be added to the tool bar:
Page: Access data pages
3D mode: Switch 2D-3D/3D+
Orient map: Track up / North up
Pan/Rotate: Movement mode
Open...: Open file
2. CompeGPS Team S.L.
http://www.compegps.com
http://support.compegps.com
Shutdown screen
Close all: Close all open files.
Activate GPS: Start/Stop GPS connection
Mark WPT: Creates waypoint in current GPS position with default name and icon in one
click
Mark and edit WPT: Creates a waypoint in current GPS position and access to
properties so you can customize it.
New waypoint: Create a waypoint choosing where to place it and customizing it
properties.
Mute
Next Waypoint: When navigating a route or a track with waypoints, switch to the next
one.
Previous Waypoint: When navigating a route or a track with waypoints, switch to the
previous one.
Note: NextWPT and Previous WPT tools will only be visible when navigating a route or a track
which contains waypoints.
4.6.10 3D Reliefs
„Main menu > Settings > Off-road > 3D Reliefs‟
TwoNav may use elevation maps (point meshes with information on the height of the ground) to
have the altitude data on the references created with the program (e.g. tracks, waypoints, etc.)
to habilitate the visualizing mode 3D+ (3D real).
Besides remaining subjacent and supply the ground altitude data, the 3D relieves may be seen
with the following options:
Draw landscapes on the 2D view: It will be seen if a CDEM is loaded, although it
will take position in the lowest layer so any other loaded map will be displayed on
top.
Draw landscape with shadow: This visual option makes the relief drawing more
attractive.
Flat colour steps: Instead of using a fading colour, just one plain colour for each
height interval will be used. This interval can be preset from the unfolding menu just
below.
4.6.11 3D mode
„Main Menu > Settings > Display > 3D mode
You may set the following options for 3D mode:
3D mode: Choose the sequence for button in tools bar:
o 2D-3D+ (if raster map): 2 positions:
2D
3D/3D+: TwoNav will try to show 3D+ mode. If not possible, 3D (flat)
will be shown.
o 2D-3D-3D+: 3 positions:
2D
3D (flat)
3. CompeGPS Team S.L.
http://www.compegps.com
http://support.compegps.com
3D+
3D+ mode will only be shown if its requirements are met (see 2D/3D/3D+ section)
Altitude exaggeration: Multiplies the altitude of the relief to make a clearer effect in 3D+.
Shading: This option will cause the relief to be displayed in a clearer and attractive way,
as it features shadow simulations enhancing thus the variations of the grounds. This
option is only effective on the 3D+
Field of vision: the field of vision determines the angle from which the map will be seen.
When introducing angles over 60º, it is like a camera with wide lenses.
Misty horizon: the furthest part to the perspective becomes faded, creating a misty
effect between the sky and the map that distinguishes them more clearly.
4.6.12 Active POIs
“Main Menu > Settings > Display > Active POIs”
By means of the active POIs list you will be able to choose the POIs categories that the map is
to show.
All the POIs will be shown by default, but if the vision of certain categories is useless for you or
even interferes, you may take them off so the map does not show them.
When selecting destination or „zoom to‟ you will have all the information of the POIs categories,
even those not being shown on the map.
4.6.13 Active personal POIs
“Main Menu > Settings > Display > Act.pers.POI”
By means of the active personal POIs list you will be able to choose the personal POIs files that
will be shown on navigation window.
When selecting destination or „zoom to‟ you will have all the information of the POIs files, even
those not being shown on the map
4.6.14 Scale bar
„Main menu > Settings > Display > Scale Bar”
The Scale Ruler draws a metric visual reference over the distances managed by the screen.
The scale changes size to represent „rounded‟ measurements.
4.6.15 Pointer
„Main Menu > Settings > Display > Pointer‟
The icon signalling your present position can be modified choosing among various designs (you
will only be able to change the icon that stands for the vehicle „car‟).
When you select the „bicycle‟ and „pedestrian‟ types of vehicle, the colour of the pointer changes
to the one preset for these modes. You may also modify the displayed pointer when carrying out
a simulation or animation (green by default).
4. CompeGPS Team S.L.
http://www.compegps.com
http://support.compegps.com
Besides, you may find different utilities to help you control your movement better:
Fixed ring and parallels: a circumference encircling our position will be drawn and two
lines will indicate the course.
Fixed ring radium: it determines the size of the circumference surrounding our
position.
Draw the parallel bow lines: we may choose to display or not the parallel lines of the
first option.
Variable ring: you may add more rings around your position. You have to define the
radium of the inner ring and the number of successive rings which will be equidistant
from the first inner ring.
See turning radium: when turning, the radium corresponding to the circumference
described will be displayed.
See bow line: shows the direction line from the point of the position arrow (only in Off-
road mode).
4.6.16 List menu
‟Main Menu > Settings > Display > List Menu‟
You may choose between two display modes of the submenus:
Button menu: This is the traditional mode. If there are more options than the screen
can display, the „next‟ button will appear in order to enter it.
List Menu: The options will be displayed on a continuous list. To move the list UP
and DOWN keep the finger or the stylus on the list and drag.
5. CompeGPS Team S.L.
http://www.compegps.com
http://support.compegps.com
4.7 Vehicle
“Main Menu > Settings > Vehicle”
Choose your transport system to adapt aspects such as the types of roads allowed, the
consideration of street direction or the expected average speed.
The icon indicating your position will change colour depending on the chosen system of
transport.
4.8 Navigation
4.8.1 Available commands Onroad/Offroad and Default/Advanced
4.8.1.1 On-Road
Default:
Autoroute
Speed limit
Ecocalculator
Smoother
Tracklog
6. CompeGPS Team S.L.
http://www.compegps.com
http://support.compegps.com
Advanced:
WPT Alert
Next WPT
4.8.1.2 Off-Road
Default:
Tracklog
WPT Alert
Next WPT
Advanced:
Speed limit
Ecocalculator
4.8.2 Auto route
“Main menu > Settings > Navigation > Auto-route”
The „On-road‟ navigation mode can be adjusted so the automatic calculation of your routes is
done according to your preferences:
Fast/Short: The first option will calculate the estimated time of arrival, bearing in mind
the speed of each road and will suggest the navigation which takes shorter. The
second option will suggest a navigation based on distance, choosing the shortest
way, although it may not be the fastest.
When the option „by time‟ is activated, a chronometer will be displayed as a key icon.
If a rule is displayed, the shortest route in distance will be calculated.
Tolls/Highways/Unpaved: Select to choose any of these types of roads.
A tick on the icon means that this type of route won‟t be used for the automatic
calculation of the route.
7. CompeGPS Team S.L.
http://www.compegps.com
http://support.compegps.com
Re-calculation: Although TwoNav is configured with the most suitable relation for
most cases, you may select the time or distance from the programmed route before it
is considered that you are not following it and it is recalculated, adapting it to the
present position.
4.8.3 Speed limit
“Main Menu > Settings > Navigation > Speed limit”
This section gives you options related to the speed alerts and traffic radars and can be set
according to your preferences:
Set a speed limit: the speed limit of each particular road will be considered by default,
but you can set a fixed speed limit disregards the limit of each road.
Speed warning: If you wish TwoNav to let you know when you drive over the established
speed limit, you may choose among the different alert types, such as a speed limit icon, a
visual alert or a visual alert plus an audible alert, or on the contrary, choose that it does
not inform of it.
Radar alert: You may select if you wish to be informed of the presence of radars on your
route by activating this option.
Radar distance alert: You may select the distance at which you wish to be informed of
the presence of a radar within some preset values.
Show radars: The exact position of all radars will be indicated by means of an icon on
the map. I have a question.
Note: For all the radar related functions to be operative you must have a file with this information
in „TwoNavData > Radars‟ (+info).
8. CompeGPS Team S.L.
http://www.compegps.com
http://support.compegps.com
4.8.4 Ecocalculator
“Main Menu > Settings > Navigation > Ecocalculator”
The Ecocalculator lets you know the CO2 emissions of your car and show it after the Data Bar
(Datafields) during navigation if preset. To be able to calculate this emission, TwoNav considers
the following parameters:
Type of fuel: choose if the fuel is diesel or gasoline and introduce directly the emission
per grams of CO2 per kilometre of your vehicle if you know this data.
Administrative Power: engine power (CV), choosing among the preset options shown.
4.8.5 Smoother
“Main Menu > Settings > Navigation > Smoother”
The smoother lets the program calculate an interpolation of movement between the positions that
the GPS adopts with the aim of showing a gentler movement to allow for a better perception of
the speed at which we are driving in relation with the surroundings. This helps enormously the
driver to calculate the distances and the exact moment in which to carry out a manoeuvre.
4.8.6 Tracklog
“Main Menu > Settings > Navigation > Tracklog”
While navigating, TwoNav may automatically record the track of your departure and save it in the
TwoNavData folder.
Set up according to your needs or preferences:
Recording interval: Choose the type of recording and interval you wish for the track to
be generated for your navigation.
o By time: The point of each track will be recorder every X seconds.
o By distance: The point of each track will be recorder every X meters.
o Automatic: the track will be automatically recorded when changing course and
depending on speed. In a straight line, the program will record few points.
Track colour*: Choose the colour for the generated track.
Thickness*: Choose the thickness of the line representing the track between values of 1
to 7 points.
Points shown without reduction*: The recorded track will be visible on the screen.
Latest points will be shown as they are recorded (no reduction). You can choose how
long will be this latest section of the track which will show all of its track points.
Reduction for previous points*: In order to save memory, it is recommended to make a
reduction of the rest of the shown track. Choose a reduction % and the shown track
(except the latest points) will be reduced. For example, if you choose 80% reduction, only
1 of every 5 points will be shown on screen.
Important: This reduction does not affect the recorded track file, which will keep all
points. Only concerns to what is displayed on screen at that moment.
* Option only shown if „advanced mode‟ is activated.
9. CompeGPS Team S.L.
http://www.compegps.com
http://support.compegps.com
4.8.7 WPT alert
“Main menu > Settings > Navigation > WPT Alert”
Activate this option if you wish that, when reaching a waypoint, a sound is heard. Load your SD
card (folder: „TwoNavData/Data‟ by default) the sounds that you want in *wav format and select
the sound.
4.8.8 Next WPT
“Main menu > Settings > Navigation > Next WPT”
When navigating a route, you can select the required event to validate a waypoint and switch to
next one:
Radius of the next WPT: Enter inside the radius of the next waypoint (not any).
Radius of any next WPT: Enter inside the radius of any of the next waypoint (next one
and any of the succeeding ones are OK but not the previous).
Roadbook mode: When entering the radius of any waypoint, it will be set as next. When
going out of it, next one will be activated. This mode is thought for roadbooks, because
when following a roadbook it is required to show the information of the current waypoint
while in its surroundings. This way, instructions for each point can be followed correctly.
Bisector inside next WPT: Enter inside the radius of next waypoint and cross the bisector
that is formed with the previous and the next.
Bisector inside next WPT or 10% of the radius of any WPT: Same as the previous, but if
any waypoint is very near (10% of its radius) it will be validated and the next one will be
activated.
Only buttons bar: Never will automatically change to next waypoint, only manually with
'NextWPT' and 'PreviousWPT' buttons at buttons bar.
Also from this options section, a default radius can be assigned for route waypoints, which will be
taken when this information is not available. It means, if we defined a radius for a concrete
waypoint of the route, it will be respected. But if it doesn't have radius the default one will be
used.
10. CompeGPS Team S.L.
http://www.compegps.com
http://support.compegps.com
4.9 System
4.9.1 Volume
„Main Menu > Settings > System > Volume‟.
On this page you will find the following settable elements:
Silence: By activating this option, all the sounds from the device will be turned off,
independently of the volume percentage set for every option.
General: Regulate the general volume for the audible elements group. All the sounds are
regulated by the preset of this option.
Voice: Regulate the volume of the alert voices for the next manoeuvre.
Alarm: Regulate the volume of the alarms and radar warnings, speed limits and arrival at
waypoints.
Clicks: Regulate the volume of pulses on the touch screen or buttons.
4.9.2 Brightness
‟ from „Main Menu > Settings > System > Brightness‟
Regulate the amount of light you wish the screen to have and adjust it to each situation. The
higher the percentage of brightness is the more highlighted will the contents be.
In night mode, the brightness will be automatically reduced to avoid dazzling.
4.9.3 Autonomy
„Main Menu > Settings > System > Autonomy‟
In this section you will find utilities that will help you maximize the autonomy of the system:
11. CompeGPS Team S.L.
http://www.compegps.com
http://support.compegps.com
„Turn off screen after‟: determine a time after which the screen will automatically turn off
*. Select „never‟ to activate this function.
*Note: The option „Turn screen off after‟ won‟t work if the device is connected to an
external power source and „car‟ has been selected as vehicle.
„Disconnect GPS at stops‟: it will detect a stop in your itinerary and will disconnect the
GPS. A message will then appear asking if you wish to activate the GPS again. It is
important to say yes to this message when setting out again.
Protection against accidental unplugging: To prevent the device from discharging if it is
disconnected accidentally from the power source (engine turned off, automatic turning off
of the PC, etc.), TwoNav detects the unplugging and an alert message appears. If you
don‟t answer the message, after half an hour, the system will go off .
4.9.4 Language
“Main Menu > Settings > System > Language”.
You may modify the language of the texts and voices of the system from this section.
Note: The conversion of the voices may take more than one minute.
4.9.5 Calibrate screen]
„Main Menu > Settings > System > Calibrate Screen‟
The option „Calibrate screen‟ lets you correct all the little maladjustments that the touch screen
may have, that is to say, that you press on one spot and the reactions does not appear on this
concrete spot, but a little misplaced.
When calibrating the screen, the following instructions message will be displayed:
“Press and briefly hold stylus on the center of the screen and repeat as the target moves around
the screen. Press Esc to cancel”
Click briefly with the stylus on the centre of the cross and repeat as the objective moves across
the screen.
Once the new screen calibration is done, the following message will be displayed:
“New calibration settings have been measured. Press Enter key to accept the new setting. Press
the Esc key to keep the old settings”
Press on the screen to end calibration.
4.9.6 Folders
„Main Menu > Settings > System > Folders‟
12. CompeGPS Team S.L.
http://www.compegps.com
http://support.compegps.com
In order for your data (maps, waypoints routes and tracks) to be considered by TwoNav when
creating lists in the „data‟ section, they have to be inside the folder you have created for this
purpose.
You may define one or more folders for maps (then, the maps of all folders will be included in this
map list) and a folder for data (waypoints, routes and tracks).
The folder for maps by default is „TwoNavData/maps‟.
The folder by default for the rest of data (waypoints, routes and tracks) is „TwoNavData/Data‟.
If there are any other folders inside the one you have selected, they will also be shown in the data
list.
For example, if we create a folder called „Pyrenees routes‟ inside „TwoNavData/Data‟, and
„TwoNavData/Data‟ is set as the only routes, waypoints and tracks folder, we will have the
following representation in the routes list:
4.9.7 Units
„Main Menu > Settings > System > Units‟
You may determine which type of measurement unit to use in TwoNav:
Distances: in kilometres, miles, nautical miles, metres or feet.
Altitudes in: metres or feet.
Speed in: kilometres/hour, miles/hour, nautical miles or minutes/kilometre.
Short distances in: kilometres/hour, miles, nautical miles, metres or feet.
2
Acceleration in: metres/second , gravity or kilometres/hour/second.
Vertical speed in: metres/second, feet/minute, metres/minute or metres/hour.
Areas in: m 2, hectares or km 2.
13. CompeGPS Team S.L.
http://www.compegps.com
http://support.compegps.com
.
4.9.8 Coordinates
„Main menu > Settings > System > Coordinates‟
You may choose the type of coordinates (UTM, Latitude/Longitude, BGN…) and datum (WGS 84,
European 1950, Geodetic Datum 1949, etc.) with which you wish to work in TwoNav.
This setting will be the one used when introducing any coordinate into the program or when
creating elements the kind of waypoints routes or tracks.
If an element (map, waypoint, route or track) that uses a system of coordinates of different a
datum is opened, TwoNav will detect it and will place it in the correct position.
Besides, from this option, you may configure the order in which the degrees will be displayed.
By default, TwoNav Works with Lat / Long and Datum WGS84 Coordinates.
4.9.9 Time zone
„Main menu > Settings > System > Time zone‟
TwoNav lets you choose the time it is according to the Universal Time Coordinates (UTC) that will
appear by default with the time-zone corresponding to the Central European Time (CET).
You may also set the Summer Time automatically if you wish, so TwoNav carries out the
seasonal time change.
Note: TwoNav keeps the time updated as long as the device receives a GPS signal. Usually,
inside the buildings, the signal from the satellites is not received unless there is a repeater, so the
time and also the, night vision, will be affected.
4.9.10 Default settings
„Main menu > Settings > System > Default settings‟
This option lets you re-establish all the settable parameters to its initial status. All the options that
have been manipulated will be modified, time zone, volume, folders and other tools that you may
have previously established.
4.9.11 Device ID
„Main menu > Settings > System > Device ID‟
The „Device ID‟ is an alphanumeric identifier exclusive to your device. This identifier is necessary
in order to activate TwoNav and any map you want to use in the device.
4.9.12 About
„Main Menu > Settings > System > About‟
„About‟ shows you which TwoNav version the device is working with. It will be displayed on the
top left hand corner of the screen.
To know the version of the TwoNav program installed in your device, it is very important to check
out doubts or software updating.
4.9.13 Advanced
„Main Menu > Settings > System > Advanced‟
14. CompeGPS Team S.L.
http://www.compegps.com
http://support.compegps.com
TwoNav has and „advanced mode‟ which enables some extra functions that are not frequently
used and could add unnecessary complexity to the system.
You can enable „advanced mode‟ entering „Settings > System > Advanced‟ section. Then some
advanced functions will appear directly inside that section:
Reload data when restarting: Load same data which was loaded when closed application
last time.
Draw map corners: Show frames of available maps on navigation window.
Draw arrows over the track: To easily know its direction.
Resume navigation at start: Propose same destination which was set when closed
application last time.
Car+OnRoad->screen on: If it is enabled, „shutdown screen‟ options will not be
considered when vehicle is „car‟ and mode is „Onroad‟.
Profiles Onroad/Offroad: If disabled, all options, menus and data fields will be the same
for Onroad and Offroad.
Also some other options will be added in other sections and depending on the current mode
(Onroad/Offroad).
Check Display and Navigation sections to see the list.
5 Select destination
You may select your destination in three different ways:
5.1 “Navigate…” button
The most widely used function to select destination is the „navigate…‟ button which is found in the
main menu and contains the following options:
Home: You can go home directly if you have determined your position from the favourites
management.
Address: Enter any address (country/city/street/number) as destination.
o You can enter ZIP code instead of city name.
o You can enter a crossing street name instead of number. Just press on
„Intersection - choose‟ button and enter its name or choose it from the list.
POI: The V-maps contain an enormous data base of Points of interest (gas stations,
hospitals, cash dispensers…). You may search POIs according to various criteria:
o Place: The device will consider POIs close to:
Your present position
Your present destination
To the address introduced
The location you choose on the map.
To a waypoint
15. CompeGPS Team S.L.
http://www.compegps.com
http://support.compegps.com
o Name: Select the category that you are searching for, introduce the wished POI
name and it will be searched in all the available ones from the loaded
cartography.
o Parking: Creates a list of parkings available near from current position.
o Gas station: Creates a list of gasoline stations available near from current
position.
Favourites: You may create your own list of favourite places to be able to enter them
quickly. To manage this list, press the „edit‟ button. (+info)
History: The recently selected destinations are stored here.
By map: Select the exact spot and press OK.
Waypoint: Select a waypoint among the ones loaded or created.
Route: The chosen route will be activated and it will guide consecutively to the waypoints
it contains.
Track: The reference of the loaded track will be available and its direction indicated. If
you go too far from the track (>50m), the perpendicular direction to the trace of the track
will be indicated so you can go back to it.
Coordinates: Introduce the exact coordinates for your destination.
To stop any type of navigation (On-road or Off-road) running, you must press on the „Stop
Navigation‟ option.
The order of these buttons in menu is different in On-Road or Off-Road modes to prioritize the
most used functions in each mode.
You may enter it from the main menu or by opening the contextual menu on map.
5.2 Waypoints, routes and tracks Lists
From the „Data‟ section of the main menu you may manage the typical references of „Off-road‟
(waypoint, routes and tracks) positions.
One of the available functions for each element is Navigate (Activate). This option will let you
head navigation towards the selected element establishing it as the next destination.
The easiest way of placing an element as destination is to click briefly on its name and, once
selected, press the button.
You may also find the option „Activate‟ inside the contextual menu of the element.
5.3 On the map
Search on the map the point you wish to establish as destination and open the Contextual Menu
on it (by means of a long click). Choose the „Navigate here‟ option and this point will be
established as destination.
16. CompeGPS Team S.L.
http://www.compegps.com
http://support.compegps.com
6 Following indications
Once the destination is selected, TwoNav will assist you in reaching it.
TwoNav offers two navigation ways that will allow you to adapt to each surroundings in the best
possible modes:
17. CompeGPS Team S.L.
http://www.compegps.com
http://support.compegps.com
On Road : Door to door navigation on
the CompeGPS V-maps cartographic basis,
enjoying the characteristic assistance type of
the urban navigators. The route will be
automatically calculated through the streets
and along the itinerary accurate visual and
aural indications will be given on the
manoeuvres to carry out.
Important: On-road mode will only be
available if you have a routable V-map
present in maps folder. Otherwise, On-road
tab will be disabled.
Off Road : It can be used on any type
of map (topographic, orthophoto, vectored
graph) and it is based on the use of
previously created references (waypoints,
routes and tracks). The route won‟t be
calculated automatically and a straight line
will link our present position to our
destination.
Within the same itinerary, some changes in the mode may be necessary (e.g. if we set out from
the city and reach a point far from it in which there is no usable information on the streets). In
these cases you may change the mode depending on the information of available maps.
18. CompeGPS Team S.L.
http://www.compegps.com
http://support.compegps.com
6.1 On-road Navigation
The information offered by this navigation mode is more than in Off-road mode, as all the
information contained in the V-maps cartographic data base is used to show accurate indications
of the next manoeuvres.
Besides, audible signals are given in order not to get distracted from the traffic.
Important: On-road mode will only be available if you have a routable V-map present in maps
folder. Otherwise, On-road tab will be disabled.
6.1.1 Visual information
1. Distance to next event: Distance left to next event (roundabout, waypoint, exit...).
2. Next manoeuvre: When navigating On-road, the „next event‟ space will display a
representation of the next manoeuvre to be done (right turn, left turn, roundabout,
diversion, etc.).
3. Next Street: Indicates the next street to be taken following navigation.
4. POI: V- map point of interest (petrol station, hotel, cash point, etc).
5. Calculated Route: Shows the automatically calculated route to be followed.
6. Manoeuvre indication: Illustrates the manoeuvres to be carried out on the map and
more accurately.
7. Speed limit of present road: Indicates the legal speed limit of the road on which we are.
19. CompeGPS Team S.L.
http://www.compegps.com
http://support.compegps.com
8. Present Street: Name of the street where you are.
When pressing on an element of the map (for instance a Chemist‟s) a yellow square will appear
indicating the name of this element plus some other interesting information. This way, you may
also check the names of the streets in the area.
See the On screen section for complete information on the elements present on the navigation
screen.
6.1.2 Audible information
In addition to the visual indications, TwoNav has a second channel to give the user indications:
the sound channel.
Throughout your On-road journey, the program will issue voice instructions, indicating the next
manoeuvres you need to make. For example:
Depending on the circumstances, one or other type of sound information will be given. The
indications may include the following information:
Distance to next event: This is how far you have to go before the next event or
manoeuvre.
If it is a long way, you may not be given an exact distance (e.g.: in 200 metres), but “in
over…” a certain distance (e.g.: “in over 3 kilometres”).
When you are very close to the event, no distance will be indicated, just the
event, and so you should carry it out right then.
Event: Manoeuvre to be made (or information of interest) – e.g.: “turn right”.
If it is not preceded by information on the distance, you will need to carry it out any
time now.
The nature of events can vary greatly, but they are normally manoeuvres to be carried
out. Two different kinds of events can be distinguished:
o Simple events: Direct indication is given of the action to be taken (e.g.: “turn
right”)
20. CompeGPS Team S.L.
http://www.compegps.com
http://support.compegps.com
Complex events: First, you are given information on the type of manoeuvre
(roundabout or crossroads), and then the action to be taken (first exit, second on the
right…).
Examples:
“At the roundabout, turn left and then take the highway”.
“Turn right and then you have reached your destination”.
Chained event: It is possible that you need to perform two manoeuvres in a very short
space of time. In this case, TwoNav will add the second event to the first (e.g.: and
then take the highway).
6.2 Off-road navigation
In Off-road mode, the information on streets and roads will not be available for the route to be
calculated automatically and to tell you the next manoeuvres with precision. The automatic
information will be limited to a straight line, which will join your current position with your
destination.
Because of this, you will need to pay special attention to the information on the underlying map
you have loaded. This situation is comparable to conventional navigation with a topographical
map, with the advantage that your current position is marked on the map.
The degree of detail of the available information can be enhanced if you prepare the journey in
advance, finding reference points (waypoints, routes and tracks) that will help to guide you.
A well planned route, with the appropriate information and file attachments on each waypoint, can
be equivalent to a route calculated automatically in On-road mode.
See the Waypoints, Routes and Tracks section for further information on these elements.
21. CompeGPS Team S.L.
http://www.compegps.com
http://support.compegps.com
6.2.1 Visual information
1. GOTO arrow: Direction on which the next waypoint is. When following a track, it will
indicate its direction (see Off-road navigation).
2. Track name / Next Waypoint: Name of the next waypoint or the track being followed.
3. Loaded route
4. Loaded Track
5. Next waypoint
6. Guide line (waypoint direction/track): Joins your present position to the place you are
heading for (track or next waypoint)
7. Currently Recorded Track: If the present track is being recorded, we can see its trace
marks behind us.
8. Compass: Shows the orientation of the device. The source of this datum may be set
(GPS, electronic compass or „automatic‟) from „menu > Settings > Off-road > Bearing‟.
6.2.2 Audible information
TwoNav does not feature automatic voices for the Off-road mode, but you may associate sounds
to the waypoints of your itinerary so they are reproduced when reaching that point.
You may associate sounds in WAV format to the waypoints from the properties of waypoint
window.
22. CompeGPS Team S.L.
http://www.compegps.com
http://support.compegps.com
7 Radar warnings / POIs
During your navigation, TwoNav may alert you when you get close to certain points of special
interest.
7.1.1 Radars
One special case of these types of points is the radars that control traffic speed.
TwoNav will consider the points introduced in the „TwoNavDataRadars‟ folder as radars and will
alert you with a sound and an image when you get close to one of them (see section Speed limit
to get to know the setting options of these warnings).
The system includes a radars data base from the AlerteGPS company that may be updated from
their web page, www.alerteGPS.com. In it you will find a section devoted to TwoNav products.
If you wish to update this information, all you have to do is substitute the original files by the
updated ones (in GPX, WPT or BWPT formats) into the „radars‟ folder kept in the
„TwoNavDataRadars‟ data folder.
7.1.2 POIs
You may also be alerted of other general interest points (POIs) that you may customize yourself.
TwoNav will load automatically the waypoints (in GPX, WPT or BWPT format) that you place
inside the „TwoNavDataPOI‟ folder when starting up the system. These waypoints will not be
displayed in the waypoints list, but they will be drawn on the map.
You can hide these files on map from active personal POIs tool.
BWPT format is recommended, allowing a much quicker access to information. Files in other
formats can be converted to BWPT from CompeGPS Land PC software.
If you want to be alerted when reaching one of these POIs, each one of them will have to be
associated to a sound or image file, which will be reproduced when getting close to the point.
You may associate images or sounds in WAV format to the waypoints from the properties of the
waypoint window.
Warning: Using BWPT files with more than 5000 points may cause system slow down. GPX or
WPT files may cause such slow down even with much smaller files.
8 Data management (waypoints, routes, tracks and maps)
8.1 Waypoints
8.1.1 What is a waypoint?
The waypoint is a point defined by a geographical position, latitude and longitude coordinates and
in most cases altitude, used by the GPS navigation tools.
TwoNav lets you create, edit and navigate waypoints.
The waypoints are kept inside waypoints files (usually in .WPT format), so a waypoint folder may
contain just one or more waypoints.
They are represented on screen as points to which a name or an icon may be applied.
23. CompeGPS Team S.L.
http://www.compegps.com
http://support.compegps.com
refuge
8.1.2 Supported formats
TwoNav can open directly next waypoint formats:
*.WPT
*.BWPT
*.LOC
*.GPX
More waypoint formats can be imported and converted to these ones from CompeGPS Land/Air.
8.1.3 Waypoints list
“Main menu > Data > Waypoints”
The management of waypoints is centralized on the waypoints list, but it is also possible to carry
out many actions directly from the navigation screen by means of the contextual menu.
When entering the waypoints lists, you will be able to see all the waypoints files available in the
„TwoNavData/Data‟ folder.
See the Data section to get to know the general operation of the lists.
If you have selected a waypoints file, the buttons on the bottom of the screen will let you enter the
most important functions to carry out on this element:
In order:
Create a new waypoints file: It will generate and open an empty waypoints file.
Create a new waypoint.
Zoom here
Save
If you have selected a specific waypoint from the waypoints file, the buttons will change to adapt
to the functionalities of the selected element:
In order:
Enter the properties of the waypoint window
Create a new waypoint within the waypoints file in which the selected waypoint is.
Zoom here
24. CompeGPS Team S.L.
http://www.compegps.com
http://support.compegps.com
Navigate
By a long click on any open Waypoints file or on a specific Waypoint, you will enter the
Contextual Menu with all the available functions for this element.
8.1.4 Open and close
8.1.4.1 Open waypoints file
From the waypoints list, clicking on the name of one of its available files, it will open. You will
know it is open because it will be visible at the top of the list with the left square marked .
8.1.4.2 Close waypoints file
Press on the left check mark of the open waypoints file in order to close it.
The file will move from the first places on the list and will go back to its alphabetical
corresponding position with the other unloaded waypoints files.
You may also enter this function from the contextual menu from where you may also delete files
from the memory permanently.
8.1.5 Create and edit
8.1.5.1 Create waypoints
All the waypoints must be contained in a waypoints file. Whenever you create a waypoint, it will
be added to the waypoints file that you have loaded on the first place (and will take the first place
on the data list).
If there are no waypoints files loaded, when creating a waypoint, a new one will be automatically
created.
You may also create a waypoints file manually from the waypoints list.
A waypoint can be created in the following ways:
8.1.5.1.1 Create a waypoint in the present position
You may create a waypoint quickly in the exact position where you are.
There are two functions to do this:
Mark WPT: No access to waypoint properties. Default name and icon will be used.
Waypoint properties can be accessed later.
Mark and edit WPT: Waypoint properties will be automatically opened allowing to modify
its information.
A waypoint will be created inside the waypoints file you have previously opened * (the first on the
„data‟ list)
If there are no waypoints files loaded, TwoNav will create one with a default name (new WPT),
which you will be able to modify o the waypoints list.
These functions can be added to tool bar by means of the tool manager.
25. CompeGPS Team S.L.
http://www.compegps.com
http://support.compegps.com
„Mark and edit WPT‟ can be also accessed from „Main menu > Data > Mark and edit WPT‟
8.1.5.1.2 Create a waypoint on the map
Open the contextual menu on the point of the map where you wish to generate the waypoint and
select „New > Waypoint here‟.
A waypoint is created inside the waypoints folder first opened * (the first on the „data‟ list) and the
properties window will open so you can modify any of them.
8.1.5.1.3 Create a waypoint from the waypoints list
When selecting a waypoints folder from the waypoints list, you will be able to enter the „New
waypoint‟ functions (from the contextual menu or directly by means of the list buttons). When
selecting it you will be able to create the Waypoint in 5 different ways:
Present position: GPS position in which you are when creating it.
Present destination: final point of your present navigation.
Address: enter the address using the Vmap data base.
By map: it will open a window from which you will be able to select on the map the exact
point where you want to create the waypoint.
Waypoint: in this file you can add a waypoint from a different waypoints file. All you have
to do is select the waypoint inside the concrete waypoints file.
8.1.5.2 Edit waypoints
8.1.5.2.1 Modify properties
Once a waypoint is created you may change several parameters from the waypoints properties
window.
8.1.5.2.2 Delete Waypoint
You may delete a specific waypoint from its contextual menu, both from the map as from the
waypoints list.
8.1.5.3 Save
8.1.5.3.1 Save waypoints
If you are satisfied of your operations on your waypoints, you may save them by selecting the
option Save waypoints from the waypoint or waypoints file contextual menu of the map or
waypoints list.
The changes you may have made will be saved directly overwriting the old file.
Note: the „create waypoint on present position‟ function automatically saves the waypoint file
where the present waypoint has been added as a safety measure in order not to lose the
waypoints quickly created with this function.
26. CompeGPS Team S.L.
http://www.compegps.com
http://support.compegps.com
8.1.5.3.2 Save waypoints as
If you wish to save the waypoints file by another name, location (folder) or format (*.WPT or
*.GPX), you may select the option Save WPT As from the contextual menu of the waypoints in
the waypoints list.
8.1.6 Search loaded waypoint on screen
To centre the screen on a waypoint:
1. Enter Main Menu by pressing
2. Select „Main Menu > Data > Waypoints > Waypoints list‟
3. Click on a specific waypoint and choose between:
a. Press button
b. Enter the waypoint Contextual Menu (long click on its name or the „Menu‟ button)
and click on „Zoom here‟.
A window will open to show the waypoint on screen with the possibility of zooming in or out.
To exit the window press and it will return to the waypoints list.
To see the waypoint on the map click
8.1.7 Properties
8.1.7.1 Properties of a Waypoints file
You may enter the properties of a collection of waypoints from the waypoints list (using the direct
button or the contextual menu).
The following properties are available:
Name of the waypoints: name of the waypoints file.
Number of waypoints: number of waypoints included in this waypoints collection.
8.1.7.2 Properties of a waypoint
You may enter the properties of just one waypoint from the waypoints list (with the direct button
or the contextual menu) or from the navigation screen (by opening the contextual menu on the
waypoint in the map).
The following properties are available:
Short name: shows the concrete name of each waypoint
Description: short description of the waypoint
View: selection of the items that you wish to see around the waypoint on the map
Icon: small image representing the waypoint
Coordinates: geographical position of the waypoint
Altitude: altitude of the waypoint
27. CompeGPS Team S.L.
http://www.compegps.com
http://support.compegps.com
Colour of Text: colour for the name, description, altitude and other data close to the
waypoint that will be displayed on the map
Background colour: colour that highlights the waypoint texts on the map
Position of Text: position in regards to the waypoint where the texts will be displayed on
the map
Radius: scope embraced by the waypoint
Associations: associates image or sound files to your waypoints to be displayed during
navigation of these waypoints.
Bearing: orientation in degrees to the position of the waypoint. The data must be
introduced in radians and TwoNav will change it automatically into degrees.
8.1.8 Navigate
This option will be shown on the Contextual Menu with by a long click on the concrete waypoint
from the waypoint list or on the map. Navigation will be activated towards this waypoint from your
position.
You may also navigate to a waypoint using the “Navigate…” menu.
8.1.9 Waypoints contextual menus
Next is a list of all the functions present in the various waypoints contextual menus:
To open the contextual menu on an element, all you have to do is keep it pressed for one second.
1. Contextual menu of a file inside the Waypoints list:
Properties (+ info)
Save Waypoints (+ info)
Save Waypoints as (+ info)
Close Waypoints (+ info)
Rename file
Delete file (+ info)
New Waypoint (+ info)
Zoom here (+ info)
Send to
2. Contextual menu of a concrete waypoint inside the Waypoints list:
Properties (+ info)
Save Waypoints (+ info)
Close Waypoints (+ info)
Delete Waypoint (+ info)
Zoom here (+ info)
Send to
28. CompeGPS Team S.L.
http://www.compegps.com
http://support.compegps.com
Navigate… (+ info)
3. Contextual menu of a concrete waypoint on the map:
New…
Waypoint here (+ info)
Begin a route here (+ info)
Begin track here (+ info)
Properties (+ info)
Save Waypoints (+ info)
Close Waypoints (+ info)
Delete Waypoint (+ info)
Navigate… (+ info)
To see the options of the contextual menu of a waypoint within a route go to Routes contextual
menus‟.
8.2 Routes
8.2.1 What is a route?
A route is a group of waypoints ordered in a predetermined way. It is a way of navigating that
allows for planning a course from one place to another going through various waypoints. The
routes are used when it is not possible to reach a place in a direct way (in straight line). The route
file will be saved in the *rte format.
TwoNav allows you to create routes and navigate them. It also lets you modify many of its
parameters. For further information, see Edit a route.
8.2.2 Supported formats
TwoNav can open directly next route formats:
*.RTE
29. CompeGPS Team S.L.
http://www.compegps.com
http://support.compegps.com
*.GPX
More route formats can be imported and converted to these ones from CompeGPS Land/Air.
8.2.3 List of routes
“Main menu > Data > Routes”
The routes management is centralized in the routes list, although it is also possible to carry out
many actions directly from the navigation screen by means of the contextual menu.
When entering the routes list you will be able to see all the available routes in the folder
„TwoNavData/Data‟.
See the Data section to get to know the general operation of the lists.
If you have selected a route, the buttons at the bottom of the screen will let you enter the most
important functions to be done on this element:
From left to right:
Create a new route: an empty waypoints file will be generated and opened.
Create new waypoint inside the route
Zoom here
Navigate (activate)
If you have selected a concrete waypoint within the route, the buttons will change to adapt to the
functionalities of the selected element:
30. CompeGPS Team S.L.
http://www.compegps.com
http://support.compegps.com
From left to right:
Enter the waypoint properties window
Create a new waypoint within the route in which the selected waypoint is.
Zoom here
Navigate (activate)
By a long click on any open route or on any concrete Waypoint within a route, the Contextual
Menu with all the available functions for this element will open.
8.2.4 Open and close
8.2.4.1 Open route
From the routes list, by clicking on the name of one of the available files, it will open. You will
know it is open because it will be located on top of the list with the left square marked .
8.2.4.2 Close route
Click on the left check mark of the open route for closing it.
The file will lose its place on the first positions of the list and will return to its corresponding
alphabetical position among the other unloaded files.
You may also enter this function from the contextual menu, from which you will also be able to
delete files from the memory permanently.