Presentation by Andreas Schleicher Tackling the School Absenteeism Crisis 30 ...
Digital Bookshelf and E-Text Quick Reference
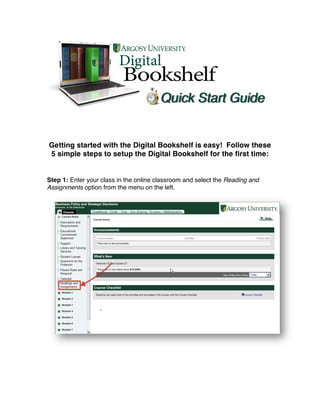
1. Getting started with the Digital Bookshelf is easy! Follow these
5 simple steps to setup the Digital Bookshelf for the first time:
Step 1: Enter your class in the online classroom and select the Reading and
Assignments option from the menu on the left.
2. Step 2: The chapters needed for the readings and assignments will appear as
links. Select the first link. A pop-up window will appear.
Step 3: Enter your email address and choose a password. Be sure to write
down your password, as you will need it in the future. Verify your password and
select a security question and enter an answer.
3. Step 4: Read and accept the license agreement and press Continue.
Step 5: Congratulations, you now have access to the Digital Bookshelf! For
more details please watch the online tutorial located here:
http://thecampuscommon.com/auo/digitalbookshelf/bookshelf-online.htm
4. Argosy Digital Bookshelf and eBook User's Manual ‐ Students Version 4.1
Updating your License/Book List
You can always access your eBook via the online classroom. In addition, you will also have the opportunity
to download the eBook to your personal computer using the Digital Bookshelf software.
During the first 16 days of class, you can download a temporary license for your eBook. This expires on the
16th day of the term. After this time period, the full license for the eBook is available. Both license types
allow you to access the entire textbook. Updating your license/book list will allow you to access your eBook
after this initial temporary license has expired and for up to 5 years.
For instance, if you download
your eBook to your personal
computer during the first 16
days of class, you will receive an
expiration warning, shown to
the right.
In this case, and in the event that you see this same expiration message, you will need to access your eBook
through the online classroom again in order to obtain the full license for the eBook. You must do this after
the temporary license has expired. Then, follow the steps below to update your license/book list.
Note: If you have multiple eBooks in a term, we suggest that you click on the links for each separate book title via the
online classroom before proceeding with the steps below. This will ensure you update all books on your book list at the
same time, versus having to complete this process multiple times.
Option 1
1. Go to your online classroom and click on the eBook link again. This assigns the full eBook license to your
account. This step must be completed before a book list update will be effective.
If you are using Bookshelf Versions 5.2: If you are using Bookshelf Version 5.3:
2. Then, go to the Argosy Digital Bookshelf on 2. Then, go to the Argosy Digital Bookshelf on your
your desktop. From the top toolbar in the desktop. From the top toolbar in the Bookshelf
Bookshelf application, select "Help". From the application, select "Account". From the drop‐down
drop‐down options provided, select "Update options provided, select "Update Book List."
License."
Page 24
5. Argosy Digital Bookshelf and eBook User's Manual ‐ Students Version 4.1
3. The system will then attempt to contact the
server and find any updates to your book list.
4. As long as you have again accessed the
eBook(s) via the online classroom, you should
then be presented with a window that
indicates you have new book(s) to download.
These are actually the same book(s) for your
class, but now with a full license for accessing
them.
Although it indicates that "you have recently purchased new books," no additional fees apply for downloading
your eBook(s) beyond the Digital Resource fee already applied to your account.
Option 2 – This option is only available with Bookshelf Version 5.3
1. Go to your online classroom and click on the
eBook link again. This assigns the full eBook
license to your account. This step must be
completed before a book list update will be
effective.
2. Then, go to the Argosy Digital Bookshelf on
your desktop. Upon opening the Bookshelf,
you should be presented with a pop‐up
message indicating that Bookshelf needs to
update your book list information. Click
“Update Now” to update your book list.
Page 25