Computer Vision panoramas
•Download as PPTX, PDF•
0 likes•31 views

Computer Vision panoramas

Recommended
Recommended
More Related Content
What's hot
What's hot (20)
Similar to Computer Vision panoramas
Similar to Computer Vision panoramas (20)
More from Wael Badawy
More from Wael Badawy (20)
Recently uploaded
Recently uploaded (20)
Computer Vision panoramas
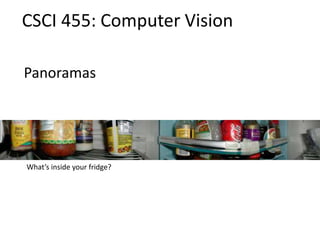
- 1. Panoramas CSCI 455: Computer Vision What’s inside your fridge?
- 2. Announcements • Project 3 (Autostitch) is out, due next Thursday, March 28 by 11:59pm – Artifact due Friday, March 29 by 11:59pm – Project to be done in pairs • Take-home midterm – To be distributed at the end of class – Due at the beginning of class in one week, Wednesday, March 20
- 3. Camera projection matrix: recap 0 = (in homogeneous image coordinates)
- 4. Projection matrix translationrotationprojection intrinsics This part converts 3D points in world coordinates to 3D rays in the camera’s coordinate system. There are 6 parameters represented (3 for position/translation, 3 for rotation). The K matrix converts 3D rays in the camera’s coordinate system to 2D image points in image (pixel) coordinates.
- 5. Projection matrix (t in book’s notation) translationrotationprojection intrinsics
- 6. Typical intrinsics matrix • 2D affine transform corresponding to a scale by f (focal length) and a translation by (xc, yc) (principal point)
- 7. Projection matrix (t in book’s notation) or
- 8. Projection matrix 0 = (in homogeneous image coordinates)
- 9. Questions?
- 10. Perspective distortion • Problem for architectural photography: converging verticals Source: F. Durand
- 11. Perspective distortion • Problem for architectural photography: converging verticals • Solution: view camera (lens shifted w.r.t. film) Source: F. Durand Tilting the camera upwards results in converging verticals Keeping the camera level, with an ordinary lens, captures only the bottom portion of the building Shifting the lens upwards results in a picture of the entire subject http://en.wikipedia.org/wiki/Perspective_correction_lens (Corresponds to shifting the principal point)
- 12. Perspective distortion • Problem for architectural photography: converging verticals • Result: Source: F. Durand
- 13. Perspective distortion • What does a sphere project to? Image source: F. Durand
- 14. Perspective distortion • The exterior columns appear bigger • The distortion is not due to lens flaws • Problem pointed out by Da Vinci Slide by F. Durand
- 18. Lens distortion • Radial distortion of the image – Caused by imperfect lenses – Points are distorted along radial lines – Deviations are most noticeable for rays that pass through the edge of the lens No distortion Pin cushion Barrel
- 21. Radial distortion [Image credit: J. Bouguet http://www.vision.caltech.edu/bouguetj/calib_doc/htmls/example.html] • Arrows show motion of projected points relative to an ideal (distortion-free lens)
- 22. Correcting radial distortion from Helmut Dersch
- 23. Modeling distortion • To model lens distortion – Use the above conversion of rays to pixels, rather than simply multiplying by the intrinsics matrix Apply radial distortion by approximating with a (low-degree) polynomial Apply focal length & translate image center Project to “normalized” image coordinates
- 24. Other types of projection • Lots of intriguing variants… • (I’ll just mention a few fun ones)
- 25. 360 degree field of view… • Basic approach – Take a photo of a parabolic mirror with an orthographic lens (Nayar) – Or buy one a lens from a variety of omnicam manufacturers… • See http://www.cis.upenn.edu/~kostas/omni.html
- 26. Tilt-shift Titlt-shift images from Olivo Barbieri and Photoshop imitations http://www.northlight-images.co.uk/article_pages/tilt_and_shift_ts-e.html
- 27. Rollout Photographs © Justin Kerr http://research.famsi.org/kerrmaya.html Rotating sensor (or object) Also known as “cyclographs”, “peripheral images”
- 28. Back to panoramas Can we use homographies to create a 360 panorama?
- 29. Idea: projecting images onto a common plane mosaic projection plane each image is warped with a homography We’ll see what this homography means next Can’t create a 360 panorama this way… we’ll fix this shortly
- 30. Creating a panorama • Basic Procedure – Take a sequence of images from the same position • Rotate the camera about its optical center – Compute transformation between second image and first – Transform the second image to overlap with the first – Blend the two together to create a mosaic – If there are more images, repeat
- 31. Geometric Interpretation of Mosaics • If we capture all 360º of rays, we can create a 360º panorama • The basic operation is projecting an image from one plane to another • The projective transformation is scene-INDEPENDENT • This depends on all the images having the same optical center Image 1 Image 2 Optical Center
- 32. Image reprojection • Basic question – How to relate two images from the same camera center? • how to map a pixel from PP1 to PP2 PP2 PP1 Answer • Cast a ray through each pixel in PP1 • Draw the pixel where that ray intersects PP2
- 33. What is the transformation? Image 1 Image 2 Optical Center How do we map points in image 2 into image 1? image 1 image 2 3x3 homography Step 1: Convert pixels in image 2 to rays in camera 2’s coordinate system. Step 2: Convert rays in camera 2’s coordinates to rays in camera 1’s coordinates. Step 3: Convert rays in camera 1’s coordinates to pixels in image 1’s coordinates. intrinsics extrinsics (rotation only)
- 34. Can we use homography to create a 360 panorama?
- 35. Panoramas • What if you want a 360 field of view? mosaic Projection Sphere
- 36. – Map 3D point (X,Y,Z) onto sphere Spherical projection X Y Z unit sphere unwrapped sphere • Convert to spherical coordinates Spherical image • Convert to spherical image coordinates – s defines size of the final image » often convenient to set s = camera focal length
- 37. Unwrapping a sphere Credit: JHT’s Planetary Pixel Emporium
- 38. f = 200 (pixels) Spherical reprojection • Map image to spherical coordinates – need to know the focal length input f = 800f = 400
- 39. Aligning spherical images • Suppose we rotate the camera by about the vertical axis – How does this change the spherical image?
- 40. Aligning spherical images • Suppose we rotate the camera by about the vertical axis – How does this change the spherical image? – Translation by – This means that we can align spherical images by translation
- 41. Assembling the panorama • Stitch pairs together, blend, then crop
- 42. Problem: Drift • Error accumulation – small errors accumulate over time
- 43. Problem: Drift • Solution – add another copy of first image at the end – this gives a constraint: yn = y1 – there are a bunch of ways to solve this problem • add displacement of (y1 – yn)/(n -1) to each image after the first • apply an affine warp: y’ = y + ax [you will implement this for P3] • run a big optimization problem, incorporating this constraint – best solution, but more complicated – known as “bundle adjustment” (x1,y1) copy of first image (xn,yn)
- 44. Project 3 • Take pictures on a tripod (or handheld) • Warp to spherical coordinates (optional if using homographies to align images) • Extract features • Align neighboring pairs using RANSAC • Write out list of neighboring translations • Correct for drift • Read in warped images and blend them • Crop the result and import into a viewer • Roughly based on Autostitch – By Matthew Brown and David Lowe – http://www.cs.ubc.ca/~mbrown/autostitch/autostitch.html
- 45. + + + + Microsoft Lobby: http://www.acm.org/pubs/citations/proceedings/graph/258734/p251-szeliski Spherical panoramas
- 46. Different projections are possible Cube-map
- 47. Blending • We’ve aligned the images – now what?
- 48. Blending • Want to seamlessly blend them together
- 49. Image Blending
- 51. Effect of window size 0 1 left right 0 1
- 52. 0 1 0 1 Effect of window size
- 53. Good window size 0 1 “Optimal” window: smooth but not ghosted • Doesn’t always work...
- 54. Pyramid blending Create a Laplacian pyramid, blend each level • Burt, P. J. and Adelson, E. H., A multiresolution spline with applications to image mosaics, ACM Transactions on Graphics, 42(4), October 1983, 217-236.
- 55. Gaussian Pyramid Laplacian Pyramid The Laplacian Pyramid 0G 1G 2G nG - = 0L - = 1L - = 2L nn GL )expand( 1 iii GGL )expand( 1 iii GLG
- 56. Encoding blend weights: I(x,y) = (R, G, B, ) color at p = Implement this in two steps: 1. accumulate: add up the ( premultiplied) RGB values at each pixel 2. normalize: divide each pixel’s accumulated RGB by its value Q: what if = 0? Alpha Blending Optional: see Blinn (CGA, 1994) for details: http://ieeexplore.ieee.org/iel1/38/7531/00310740.pdf?isNumb er=7531&prod=JNL&arnumber=310740&arSt=83&ared=87&a rAuthor=Blinn%2C+J.F. I1 I2 I3 p
- 57. Poisson Image Editing • For more info: Perez et al, SIGGRAPH 2003 – http://research.microsoft.com/vision/cambridge/papers/perez_siggraph03.pdf
- 58. Some panorama examples “Before SIGGRAPH Deadline” Photo credit: Doug Zongker
- 59. Some panorama examples • Every image on Google Streetview
- 60. Magic: ghost removal M. Uyttendaele, A. Eden, and R. Szeliski. Eliminating ghosting and exposure artifacts in image mosaics. In Proceedings of the Interational Conference on Computer Vision and Pattern Recognition, volume 2, pages 509--516, Kauai, Hawaii, December 2001.
- 61. Magic: ghost removal M. Uyttendaele, A. Eden, and R. Szeliski. Eliminating ghosting and exposure artifacts in image mosaics. In Proceedings of the Interational Conference on Computer Vision and Pattern Recognition, volume 2, pages 509--516, Kauai, Hawaii, December 2001.
- 62. Other types of mosaics • Can mosaic onto any surface if you know the geometry – See NASA’s Visible Earth project for some stunning earth mosaics • http://earthobservatory.nasa.gov/Newsroom/BlueMarble/ • Click for images…
- 64. Questions?