SlideShare a Scribd company logo
1 of 29
Download to read offline
Electro-Pneumatic Positioner PRODUCT MANUAL
YT-1000 / 1050 SERIES
VERSION 1.01
2 YT-1000/1050 series
Contents
1. Introduction …………………………………………………………………………………………… 4
1.1 General information for the users ………………………………………………………………. 4
1.2 Manufacturer Warranty …………………………………………………………………………… 4
1.3 Explosion Proof Warning ………………………………………………………………………. 3
2. Product Description ………………………………………………………………………………….. 5
2.1 General …………………………………………………………………………………………….. 5
2.2 Main Features and Functions ……………………………………………………………………. 5
2.3 Label Description ………………………………………………………………………………….. 6
2.4 Product Number …………………………………………………………………………………… 6
2.4.1 YT-1000L ………………………………………………………………………………... 6
2.4.2 YT-1000R………………………………………………………………………………… 7
2.4.3 YT-1050………………………………………………………………………………….. 8
2.5 Product Specification ……………………………………………………………………………… 9
2.5.1 YT-1000L & R …………………………………………………………………………… 9
2.5.2 YT-1050L & R …………………………………………………………………………… 10
2.6 Parts and Assembly ……………………………………………………………………………….. 11
2.6.1 YT-1000/1050L…………………………………………………………………………… 11
2.6.2 YT-1000/1050R………………………………………………………………………….. 11
2.6.3 YT-1000L+SPTM (Internal) ……………………………………………………………. 12
2.6.4 YT-1000R+SPTM (Internal) …………………………………………………………… 12
2.6.5 YT-1000R+L/S (Internal) ………………………………………………………………. 13
2.6.6 YT-1000R+SPTM+L/S (Internal) ……………………………………………………… 13
2.7 Product Dimension ………………………………………………………………………………… 14
2.7.1 YT-1000L Flameproof Type……………………………………………………………. 14
2.7.2 YT-1000L Intrinsically Safety Type ……………………………………………………. 14
2.7.3 YT-1000R Flameproof Type …………………………………………………………… 14
2.7.4 YT-1000R Intrinsically Safety Type …………………………………………………… 15
2.7.5 YT-1000L+SPTM (Internal) …………………………………………………………….. 15
2.7.6 YT-1000R+SPTM(Internal) …………………………………………………………….. 15
2.7.7 YT-1000R+SPTM+L/S (Internal) & YT-1000R + Dome Indicator …………………...15
2.7.8 YT-1050L …………………………………………………………………………………. 16
2.7.9 YT-1050R…………………………………………………………………………………. 16
3. Installation ………………………………………………………………………………………………. 17
3.1 Safety ……………………………………………………………………………………………….. 17
3.2 YT-1000/1050L Installation ………………………………………………………………………. 17
3.2.1 Installation Steps ………………………………………………………………………... 17
3.3 YT-1000/1050R Installation ……………………………………………………………………… 19
3.3.1 Bracket Information ……………………………………………………………………... 19
2
2
3 YT-1000/1050 series
3.3.2 Installation Steps ………………………………………………………………………… 20
4. Connections …………………………………………………………………………………………….. 21
4.1 Safety ……………………………………………………………………………………………….. 21
4.2 Supply Pressure Condition ……………………………………………………………………….. 21
4.3 Piping Condition ……………………………………………………………………………………. 21
4.4 Connection – Actuator ……………………………………………………………………………...22
4.4.1 Single acting actuator ……………………………………………………………………22
4.4.2 Double acting actuator ………………………………………………………………….. 22
4.5 Connection – Power ……………………………………………………………………………….. 22
4.5.1 Safety ……………………………………………………………………………………...22
4.5.2 Ground……………………………………………………………………………………. 23
4.5.3 SPTM Internal (Option) …………………………………………………………………. 23
4.5.4 L/S Internal (Option)…………………………………………………………………….. 23
4.5.5 SPTM & L/S Internal (Option) …………………………………………………………. 24
5. Adjustment ……………………………………………………………………………………………….24
5.1 Adjustment - Cam …………………………………………………………………………………. 24
5.1.1 YT-1000/1050L………………………………………………………………………….. 24
5.1.2 YT-1000/1050R…………………………………………………………………………. 24
5.1.3 YT-1000/1050R with Internal Options (Option) ……………………………………… 25
5.2 Adjustment – Zero Point …………………………………………………………………………... 25
5.3 Adjustment – Span ………………………………………………………………………………….25
5.4 Adjustment – SPTM (Option) …………………………………………………………………… 25
5.4.1 Setting ……………………………………………………………………………………. 25
5.4.2 Calibration ……………………………………………………………………………….. 26
5.5 Adjustment – L/S (Option) ………………………………………………………………………… 26
5.6 Adjustment – A/M Switch (Auto/Manual) …………………………………………………………26
5.7 Adjustment – Orifice ……………………………………………………………………………….. 27
5.8 Adjustment – Potentiometer ……………………………………………………………………….27
6. Maintenance………………………………………………………………………………………………28
7. Troubleshooting………………………………………………………………………………………….29
2
4 YT-1000/1050 series
1. Introduction
1.1 General Information for the users
Thank you for purchasing Young Tech Co., Ltd products. Each product has been fully
inspected after its production to offer you the highest quality and reliable performance.
Please read the product manual carefully prior to installing and commission the product.
 For the safety, it is important to follow the instructions in the manual. Young Tech Co.,
Ltd will not be responsible for any damages caused by user’s negligence.
 The manual should be provided to the end-user.
 Any modifications or repairs to the product may only be performed if expressed in this
manual.
 The manual can be altered or revised without any prior notice. Any changes in
product’s specification, design, and/or any components may not be printed immediately
but until the following revision of the manual.
 The manual should not be duplicated or reproduced for any purpose without prior
approval from Young Tech Co., Ltd, Gimpo-si, South Korea.
1.2 Manufacturer Warranty
 For the safety, it is important to follow the instructions in the manual. Manufacturer will
not be responsible for any damages caused by user’s negligence.
 Manufacturer will not be responsible for any damages or accidents as a result of any
alteration or modification of the product and its parts. If any alteration or modifications
are necessary, please contact Young Tech Co., Ltd directly.
 Manufacturer warrants the product from the date of original purchase of the product for
one (1) year, except as otherwise stated.
 Manufacturer warranty will not cover products that have been subjected to abuse,
accidents, alterations, modifications, tampering, negligence, misuse, faulty installation,
lack of reasonable care, repair or service in any way that is not contemplated in the
documentation for the product, or if the model or serial number has been altered,
tampered with, defaced or removed; damages that occurs in shipment, due to act of
God, failure due to power surge, or cosmetic damage. Improper or incorrectly
performed maintenance will void this limited warranty.
 For detailed warranty information, please contact Young Tech Co., Ltd – South Korea.
1.3 Explosion Proof Warning
Please ensure the unit is being used and installed within the explosion proof certified
environment.
 YT-1000 / 1050 series explosion proof grades are flameproof - Ex d IIB (IIC) T5 and
intrinsically safety – Ex ia IIB T6, and it can be used in zone 1 and 2.
2
5 YT-1000/1050 series
 For other certification, please visit Young Tech Co., Ltd website (www.ytc.co.kr)
 Explosion proof type of cables and gaskets should be used, when explosion gases are
present at the installation site.
 Power should be turned off completely when opening product’s cover. When opening
the cover, ensure that there is no power remaining in any electrical parts nearby.
 YT-1000 / 1050 series has 2 ports for power connection. Explosion proof type wires
and packing should be used. Blind plug is required when any port is not being used.
 Cable rug with surface area of more than 0.195mm2
with M4 spring washer should be
used to connect the power.
 For external ground terminal, cable rug with surface area of more than 5.5mm2
should
be used.
2. Product Description
2.1 General
YT-1000/1050 series Electro-Pneumatic Positioner accurately controls valve stroke in
response to an input signal of 4-20mA from the controller.
2.2 Main Features and Functions
 2 million life cycle guaranteed
 Response time is very fast and accurate.
 Simple part change can set 1/2 split range.
 Low air consumption
 Simple Direct / Reverse Action change.
 Simple Zero & Span adjustment.
 Easy feedback connection.
 Internal options, such as position transmitter (PTM) and/or limit switch (L/S) is available
(for non-explosion proof positioner – external options must be installed for explosion
proof positioner)
 A/M switch can be used to direct supply air to the actuator or to manually operate the
positioner or valve.
2
6 YT-1000/1050 series
2.3 Label Description
Fig. 1: YT-1000/1050 Body Label
A. Model: Indicates the model number of the positioner.
B. Explosion Proof: Indicates certified explosion proof grade.
C. Input Signal: Indicates input signal range.
D. Amb. Temp.: Indicates the allowable ambient temperature.
E. Supply Pressure: Indicates the supply pressure range.
F. Serial Number.: Indicates the unique serial number.
2.4 Product Number
2.4.1 YT-1000L
2
7 YT-1000/1050 series
2.4.2 YT-1000R
2
8 YT-1000/1050 series
2.4.3 YT-1050
2
9 YT-1000/1050 series
2.5 Product Specification
2.5.1 YT-1000L & R
Model YT-1000L YT-1000R
Acting Type Single Double Single Double
Input Signal 4~20mA DC
Impedance 250 +/- 15 Ώ
Supply Pressure 0.14~0.7 MPa (1.4~7 bar)
Stroke 10~150 mm 0~90°
Air Connection PT, NPT 1/4
Gauge Connection PT, NPT 1/8
Conduit Entry PF(G) 1/2
Protection Grade IP66
Explosion Proof
Ex dmb IIB T5 (ATEX)
Ex dmb IIC T5 (KTL)
Ex ia IIB T6 (KTL)
Ex dm IIB T5 (FM)
Ex ia IIC T6 (NEPSI)
Ex dmb IIC T5/T6 (NEPSI)
Ambient Temperature
Operating Temp. :-20~70℃ (Standard)
Explosion Proof Temp. : -40~60℃
Linearity ±1.0% F.S. ±2.0% F.S. ±1.0% F.S. ±2.0% F.S.
Hysteresis ±1.0% F.S.
Sensitivity ±0.2% F.S ±0.5% F.S ±0.2% F.S ±0.5% F.S
Repeatability ±0.5% F.S
Flow Capacity 80 LPM (Sup.=0.14 MPa)
Air Consumption 2.5 LPM (Sup.=0.14 MPa @ idle)
Feedback Signal (Option) 4~20mA (DC 10~30V)
Material Aluminum Diecasting
Weight g
k
5
.
3
g
k
7
.
2
Painting Epoxy Polyestere Powder Coating
Tested under ambient temperature of 20’C, absolute pressure of 760mmHg, and humidity of 65%. Please contact Young Tech Co., Ltd for detailed testing
specification. * Explosion proof certification is in progress.
2
10 YT-1000/1050 series
2.5.2 YT-1050L & R
Model YT-1050L YT-1050R
Acting Type Single Double Single Double
Input Signal 4~20mA DC
Impedance 250 +/- 15 Ώ
Supply Pressure 0.14~0.7 MPa (1.4~7 bar)
Stroke 10~150 mm 0~90°
Air Connection NPT 1/4
Gauge Connection NPT 1/8
Conduit Entry PF(G) 1/2
Protection Grade IP66
Explosion Proof Ex dmb IIB T5 (ATEX)
Ambient Temperature
Operating Temp. :-20~70℃ (Standard)
Explosion Proof Temp. : -40~60℃
Linearity ±1.0% F.S. ±2.0% F.S. ±1.0% F.S. ±2.0% F.S.
Hysteresis ±1.0% F.S.
Sensitivity ±0.2% F.S ±0.5% F.S ±0.2% F.S ±0.5% F.S
Repeatability ±0.5% F.S
Flow Capacity 80 LPM (Sup.=0.14 MPa)
Air Consumption 2.5 LPM (Sup.=0.14 MPa @ idle)
Feedback Signal (Option) 4~20mA (DC 10~30V)
Material Stainless Steel 316
Weight g
k
0
.
6
g
k
7
.
5
Tested under ambient temperature of 20’C, absolute pressure of 760mmHg, and humidity of 65%. Please contact Young Tech Co., Ltd for detailed testing
specification. * Explosion proof certification is in progress.
2
11 YT-1000/1050 series
2.6 Parts and Assembly
2.6.1 YT-1000/1050L
2.6.2 YT-1000/1050R
2
12 YT-1000/1050 series
2.6.3 YT-1000L + SPTM (Internal)
2.6.4 YT-1000R + SPTM (Internal)
2
13 YT-1000/1050 series
2.6.5 YT-1000R + L/S (Internal)
2.6.6 YT-10000R + SPTM + L/S (Internal)
2
14 YT-1000/1050 series
2.7 Product Dimension
2.7.1 YT-1000L Flameproof Type
2.7.2 YT-1000L Intrinsically Safety Type
2.7.3 YT-1000R Flameproof Type
2
15 YT-1000/1050 series
2.7.4 YT-1000R Intrinsically Safety Type
2.7.5 YT-1000L + SPTM (Internal)
2.7.6 YT-1000R + SPTM (Internal)
2.7.7 YT-1000R + SPTM + L/S (Internal) & YT-1000R + Dome indicator
2
16 YT-1000/1050 series
2.7.8 YT-1050L
2.7.9 YT-1050R
2
17 YT-1000/1050 series
3. Installation
3.1 Safety
When installing a positioner, please ensure to read and follow safety instructions.
 Any input or supply pressures to valve, actuator, and / or to other related devices must
be turned off.
 Use bypass valve or other supportive equipment to avoid entire system “shut down”.
 Ensure there is no remaining pressure in the actuator.
3.2 YT-1000/1050L Installation
YT-1000/1050L should be installed on linear motion valves such as globe or gate type which
uses spring return type diaphragm or piston actuators. Before proceeding with the
installation, ensure following components are available.
 Positioner unit
 Feedback lever and lever spring
 Flange nut (bottom side of YT-1000/1050L)
 4 pcs x hexagonal headed bolts (M8 x 1.25P)
 4 pcs x M8 plate washer
3.2.1 Installation Steps
1. Proper bracket must be made in order to adapt the positioner on the actuator yoke.
Please consider following important points when a bracket is being designed.
 Positioner’s feedback lever must be parallel to the ground at 50% of the valve stroke.
 Feedback lever connection with the pin of the actuator clamp should be installed in
such a way that the valve stroke length coincides with the corresponding figure in
“mm” marked on the feedback lever. Improper setting may cause poor linearity and
may create unnecessary hunting during the operation.
2. Assemble the positioner with the bracket made in
previous step by fastening the bolts. Please refer to the
backside of the positioner for size of the bolts. The
standard bolt size is M8 x 1.25P. Please contact Young
Tech Co., Ltd for other bolt sizes.
3. Attach the positioner with bracket to the actuator yoke – DO NOT
TIGHTEN POSITIONER COMPLETELY.
4. Connect positioner’s feedback lever to the actuator clamp. The
hole gap on the feedback lever is 6.5mm. The connection pin’s
outer diameter should be less than 6.3mm.
2
18 YT-1000/1050 series
5. Connect supply pressure to the actuator temporarily. Supply enough supply pressure to
the actuator in order to position the actuator clamp at 50% of the total valve stroke.
6. Insert connection pin into the feedback lever. The pin should be inserted when the
actuator clamp is at 50% of the total valve stroke.
Proper way to connect feedback lever, connection pin, and lever spring
7. Check if feedback lever is parallel to the ground at 50% of the valve stroke. If it is not
parallel, adjust the bracket or feedback link bar to make parallel. Improper installation
may cause poor linearity and may create unnecessary hunting during the operation.
8. Check the valve stroke. The stroke marks are indicated on the feedback lever of the
positioner. Position the connection pin at the number on the feedback lever which
corresponds to the desired valve stroke. To adjust, move the bracket, the connection
pin or both.
Fig. 3: Pin Insertion when valve stroke is 40mm (up) and is 90mm (bottom)
9. After installing the positioner, operate the valve from 0% to 100% stroke by using direct
2
19 YT-1000/1050 series
air to the actuator (manual position). On both 0% and 100%, the feedback lever should
not touch the lever stopper, which is located on the backside of the positioner. If the
feedback lever touches the stopper, the positioner should be installed further away from
the yoke.
Fig. 4: Feedback lever should not touch lever stopper 0% ~ 100% valve stroke.
10. After the installation, tighten all of the bolts on the bracket, the feedback lever, and the
connection pin.
3.3 YT-1000/1050R Installation
YT-1000/1050R should be installed on rotary motion valve such as ball or butterfly type
which uses rack and pinion, scotch yoke or other type of actuators which stem rotates 90
degrees. Before proceeding with the installation, ensure following components are available.
 Positioner unit
 Fork lever and lever spring
 Standard rotary bracket (included with the positioner)
 4 pcs x hexagonal headed bolts (M8 x 1.25P)
 4 pcs x M8 plate washer
Fig. 5: Fork lever type (left) and NAMUR lever type (right)
3.3.1 Bracket information
Standard bracket (included with the positioner) contains two components. The bracket can
be used for both fork lever and NAMUR lever type. The bracket is designed to fit onto the
actuator with 20mm stem height (H). If actuator’s stem height (H) is 30mm or 50mm,
bracket must be adjusted. Please refer to below table how to adjust the bracket.
2
20 YT-1000/1050 series
Actuator stem
height (H)
Markings of bolt holes
A-L B-L A-R B-R
20mm H : 20 H : 20, 30 H : 20 H : 20, 30
30mm H : 30 H : 20, 30 H : 30 H : 20, 30
50mm H : 50 H : 50 H : 50 H : 50
3.3.2 Installation Steps
1. Please check the actuator’s stem height and adjust the bracket by
referring to the bracket table.
2. Attached the bracket onto the actuator. It is recommended to use spring washer so the
bolts will not be loosen from vibration.
3. Set rotation position of the actuator stem at 0%. For single acting actuator, it is easy to
check 0% point by supplying no pressure to the actuator. For double acting actuator,
check actuator stem’s rotation direction – clockwise or counter-clockwise - by supplying
pressure to the actuator.
4. Install the fork lever after setting actuator’s stem at 0%. Check the actuator stem’s
rotation direction – clockwise or counter-clockwise. Installation angle of the fork lever
should be 45 degrees in relation to the linear shaft. For NAMUR shaft installation, the
angle does not matter.
Fig. 6: Counter-clockwise and clockwise rotation.
2
21 YT-1000/1050 series
5. After setting fork lever position, assemble lock nuts
which are located on the bottom of the fork lever.
Ensure to set the height of the upper fork lever
between 6~11mm, which is lower than the upper
bracket’s height.
6. Attach the positioner to the bracket. Fix the
clamping pin on the main shaft’s center of the
positioner and insert connection pin into the fork
lever slot. This will lock to the fork lever spring.
Setting alignment of the main shaft of the positioner
and center of the actuator’s stem is very important.
Poor alignment of the main shaft and the actuator’s
stem decreases the positioner’s durability due to
unnecessary forces on the main shaft.
7. Tighten the positioner and the bracket with hexagon-headed bolts and plate washer after
checking the positioner’s position.
4. Connections
4.1 Safety
 Supply pressure should be clean and dry air – avoiding moisture, oil or dust.
 Always recommended to use air filter regulator (i.e. YT-200 series).
 Young Tech Co., Ltd has not tested positioner’s operation with any other gases
other than clean air. Please contact Young Tech Co., Ltd for any questions.
4.2 Supply Pressure Condition
 Dry air with at least 10℃ lower than ambient temperature.
 Avoid from dusty air. Positioner’s inner filter can only filter 5 micron or larger.
 Avoid oil.
 Comply with ANSI/ISA-57.3 1975(R1981) or ISA S7.3-1975(R1981).
 Supply pressure range is 1.4 ~ 7 kgf/cm
2
(140-700 kPA)
 Set air filter regulator’s pressure level 10% higher than actuator’s spring range pressure.
4.3 Piping Condition
 Ensure inside of pipe is clean of obstructions.
 Do not use pipeline that is squeezed or shows any type of damamges.
2
22 YT-1000/1050 series
 Pipeline should have more than 6mm of inner diameter (10mm outer diameter) to
maintain flow rate.
 The length of pipeline system should not be extremely long. Longer pipeline system
may affect flow rate due to the friction inside of the pipeline.
4.4 Connection – Actuator
4.4.1 Single acting actuator
Singe acting type positioner is set to use OUT1 port. OUT1 port should be connected with
supply pressure port from actuator when using single acting type of spring return actuator.
Fig. 7: Singe acting linear (left) and rotary (right) type actuator
4.4.2 Double acting actuator
Double acting type positioner is set to use OUT1 and OUT2 port. As input signal increases,
the supply pressure will be supplied through OUT1 port.
Fig. 8: Double acting linear (left) and rotary (right) type actuator
4.5 Connection – Power
4.5.1 Safety
 When installing in hazardous and explosive gas area, conduit tube or pressure-proof
packing union must be used. The compound charging box should be the flameproof
type and must be sealed completely.
 Conduit entry connection tap is PF 1/2 or G 1/2.
 Before connecting terminal, ensure that the power is off completely. Do not open the
cover when the power is still alive.
 Please use ring-type rug to protect against vibration or any other external impact.
 Positioner with PTM options must be supplied 10~28V DC separately. For L/S option,
separate 12-24V DC must be supplied. For both options, it should not exceed 30V
2
23 YT-1000/1050 series
DC.
 Positioner should be grounded.
 Please use twisted cable with conductor section are 1.25mm2
and that is suitable for
600V (complying to the conductor table of NEC Article 310.) The outer diameter of the
cable should be between 6.35 ~ 10mm. Use shield wire to protect against electro-
magnetic field and noise.
 Please do not install the cable near high noise equipments, such as high-capacity
transformer or motor.
4.5.2 Ground
4.5.3 SPTM Internal <Option>
4.5.4 L/S Internal <Option>
2
24 YT-1000/1050 series
4.5.5 SPTM & L/S Internal <Option>
5. Adjustments
5.1 Adjustment – Cam
YTC sets positioner as Reverse Action <RA> unless specified otherwise when placing an
order.
5.1.1 YT-1000/1050L
5.1.2 YT-1000/1050R
2
25 YT-1000/1050 series
5.1.3 YT-1000/1050R with Internal Options <Option>
Cam can be adjusted for YT-1000/1050R with options by dissembling the cam from the main
shaft. After dissembling the cam from the main shaft, please follow 5.1.2 for RA or DA cam.
5.2 Adjustment – Zero Point
1. Set supply signal at 4mA or 20mA – according to RA or DA – and
rotate the adjuster up or downward to adjust actuator’s initial point.
As zero point is being set, the specification of the valve system must
be considered. Please refer to diagram on the right to increase or
decrease the zero point.
5.3 Adjustment – Span
1. After setting zero, supply signal at 20mA or 4mA – according
to RA or DA – and check the actuator stroke. If the stroke
is too low, the span should be increased. If the stroke is
too high, the span should be decreased.
2. Changing span point will affect zero point setting. Zero
point should be set again after span has been adjusted.
This step is required until both zero and span are properly
set.
3. After proper setting, tighten lock screw.
5.4 Adjustment – SPTM <Option>
5.4.1 Setting Point Switch
There are two types of calibration of SPTM / feedback signal.
1. 2 Point Setting
This setting only set minimum and maximum point (0% and 100%). In between points
2
26 YT-1000/1050 series
will be calculated automatically.
2. 5 Point Setting
This setting set 5 points (0%, 25%, 50%, 75%, and 100%). This requires more setting,
but feedback setting will be more accurate than 2 point setting.
5.4.2 Calibration
1. Supply 4mA input signal to the positioner and check if valve position made to its target
position. For Direct Action (DA), supply 20mA instead of 4mA for input signal.
2. Press 4mA button on the PCB for 3~4 seconds. LED lamp will blink indicating that the
PCB has calibrated the specific position to give 4mA as feedback.
3. Repeat above step for 8mA, 12mA, 16mA, and 20mA. For 2 point setting, only 4mA
and 20mA should be set.
5.5 Adjustment – L/S <Option>
5.6 Adjustment – A/M Switch (Auto/Manual)
1. A/M switch is used when the valve needs to be operated
manually.
2. If switch is set as “A”, the positioner will respond to input
signal. If switch is set as “M”, the positioner will act as
bypass and supply pressure to the positioner will directly
go to the actuator.
3. Please make sure to set back to “A” after manual
operation. Also, please DO NOT TOUCH SEAT
ADJUSTER BOLT ON THE PILOT RELAY.
2
27 YT-1000/1050 series
5.7 Adjustment - Orifice
If the actuator size is too small relative to the flow rate, positioner can have hunting /
oscillation. In order to avoid hunting, the orifice must be inserted.
1. Remove the pilot relay assembly from the positioner.
2. Remove the o-rings from OUT1 and OUT2 port per above diagram, and insert proper
orifice. Before re-assemble the o-rings, please make sure there is no dust or particles
remain on the ports.
5.8 Adjustment - Potentiometer
External damage or physical shock can dislocate potentiometers factory setting.
Potentiometer must be re-calibrated when dislocation of the potentiometer or after cam
adjustment. PLEASE REFER BELOW INSTRUCTION AND DIAGRAM.
1. Please set actuator position to 50% of the valve stroke. PLEASE MAKE SURE THAT
THE ACTUATOR DOES NOT MOVE DURING THE RE-CALIBRATION.
2. In the junction box, please pull out the potentiometer connector from potentiometer PCB.
DO NOT PULL WITH TOO MUCH FORCE AS WIRES CAN BE DAMAGED.
3. On the potentiometer connector, there are three holes. Out of three holes, please
measure resistance level by plugging two holes <one of right or left and one of
center>. The potentiometer resistance level should be between 0~10 K Ώ and please
adjust measurement equipment to measure between above mentioned range.
4. Using “+” screw driver, loosen potentiometer stopper bolt. DO NOT LOOSEN
COMPLETELY.
5. Pull potentiometer behind and potentiometer will be separated from potentiometer gear.
This will make user to turn potentiometer gear.
6. Since current actuator position is 50% of the valve stroke, the resistance level should be
measure around 5K Ώ (4.8 ~ 4.2 K Ώ) by turning potentiometer gear.
7. After the setting, assemble back the stopper and the bolt.
2
28 YT-1000/1050 series
6. Maintenance
Maintenance on pilot relay valve is recommended to perform at least once a year of with or
without operation. When dissembling the pilot relay valve, please be careful not to loose any o-
rings or stabilizer spring. Please refer to below instruction and diagram.
1. Please remove pilot relay lock bolts.
2. Unlock Auto/Manual (A/M) Switch from the pilot relay. PLEASE MAKE SURE TO REMOVE
A/M SWITCH.
3. Remove any particles or dust by blowing air.
2
29 YT-1000/1050 series
7. Troubleshooting
▶ Positioner does not respond to the input signal.
(1) Check supply pressure level. The lever must be at least 1.4 kgf/cm2.
For spring-return
type of actuator, the supply pressure level has to be larger than the spring's
specification.
(2) Check if input signal is properly supplied to the positioner. The signal should be
4~20mA DC.
(3) Check if zero point or span point is properly set.
(4) Check if the positioner's nozzle has been blocked. Also, check if the pressure is
supplied to the positioner and the pressure is being exhausted through the nozzle. If
the nozzle has been block by any substances, please send the product for repair.
(5) Check if feedback lever has been installed properly.
▶ The pressure of OUT1 reaches exhausting pressure level and does not come back down.
(1) Check A/M Switch. If the switch has been damaged, replace the switch or pilot relay
valve.
(2) Check for a gap or damages between the nozzle and the flapper. If damaged, please
send the product to YTC for repair.
▶ The pressure is exhausted only by A/M Switch.
(1) Check if the positioner's nozzle has been blocked. Also, check if the pressure is supplied to
the positioner and the pressure is being exhausted through the nozzle. If the nozzle has been
blocked by any substances, please send the product to YTC for repair.
▶ Hunting occurs.
(1) Check if safety spring has been displaced. (Next to Pilot relay valve)
(2) Check if the size of actuator is too small. If so, insert an orifice in order to reduce the pressure
flow rate.
(3) Check if there is any friction between the valve and the actuator. If so, increase actuator's
size or reduce the friction level.
▶ Actuator only operates by On/Off.
(1) Check actuator and positioner's acting type. Air pressure exhausts from YT-1000L's OUT1
port as input signal level increases. Therefore, it is standard to connect to OUT1 port when
single actuator is used. Make sure the span adjustment is properly set according to the valve
system.
▶ Linearity is too low.
(1) Check if positioner is properly positioned. Especially check if the feedback lever is parallel to
the ground at 50% point.
(2) Check if zero and span point have been properly adjusted. If either one of values is being
adjusted, another one must be re-adjusted as well.
(3) Check if supply air pressure level is stable from the regulator. If the level is unstable, the
regulator must be replaced.
▶ Hysteresis is too low.
(1) In case of double acting actuator, check if seat adjustment has been properly
performed. Please contact YTC for any further inquiries regarding the seat adjustment.
(2) Backlash can occur when the feedback lever and lever spring are loosen. To avoid
backlashing, please adjust the lever spring.
(3) Check if the connection bar to the feedback lever is tightly fastened.

More Related Content

Similar to Rotork YTC YT-1000R Electro Pneumetic Positioner Manufacturers

Cummins onan otece transfer switch (1200 amp) service repair manual
Cummins onan otece transfer switch (1200 amp) service repair manualCummins onan otece transfer switch (1200 amp) service repair manual
Cummins onan otece transfer switch (1200 amp) service repair manualufdujjsjekkemme
 
Cummins onan otece transfer switch (1200 amp) service repair manual
Cummins onan otece transfer switch (1200 amp) service repair manualCummins onan otece transfer switch (1200 amp) service repair manual
Cummins onan otece transfer switch (1200 amp) service repair manualfujsjefjkskekmem
 
Cummins onan otece transfer switch (1200 amp) service repair manual
Cummins onan otece transfer switch (1200 amp) service repair manualCummins onan otece transfer switch (1200 amp) service repair manual
Cummins onan otece transfer switch (1200 amp) service repair manualjfksekmmdme
 
Te10 a fc_ba_ha175247eng_2
Te10 a fc_ba_ha175247eng_2Te10 a fc_ba_ha175247eng_2
Te10 a fc_ba_ha175247eng_2bird31
 
GM PaxGo Series Bagging Scale 25kg.pdf
GM PaxGo Series Bagging Scale 25kg.pdfGM PaxGo Series Bagging Scale 25kg.pdf
GM PaxGo Series Bagging Scale 25kg.pdfGeneral Measure
 
Instruction Manual ATN Odin Series Thermal Monocular | Optics Trade
Instruction Manual ATN Odin Series Thermal Monocular | Optics TradeInstruction Manual ATN Odin Series Thermal Monocular | Optics Trade
Instruction Manual ATN Odin Series Thermal Monocular | Optics TradeOptics-Trade
 
Icom 2200 h service manual
Icom 2200 h service manualIcom 2200 h service manual
Icom 2200 h service manualjoffco
 
Manual tecnico Pionner cdj 1000-mk2 completo
Manual tecnico Pionner cdj 1000-mk2 completoManual tecnico Pionner cdj 1000-mk2 completo
Manual tecnico Pionner cdj 1000-mk2 completoDisney2020
 
Instruction Manual ATN OTS-X Series Thermal Imaging Viewers | Optics Trade
Instruction Manual ATN OTS-X Series Thermal Imaging Viewers | Optics TradeInstruction Manual ATN OTS-X Series Thermal Imaging Viewers | Optics Trade
Instruction Manual ATN OTS-X Series Thermal Imaging Viewers | Optics TradeOptics-Trade
 
400 Hornet Hot Cathode Bayard-Alpert Miniature-Ionization Vacuum Gauge
400 Hornet Hot Cathode Bayard-Alpert Miniature-Ionization Vacuum Gauge400 Hornet Hot Cathode Bayard-Alpert Miniature-Ionization Vacuum Gauge
400 Hornet Hot Cathode Bayard-Alpert Miniature-Ionization Vacuum GaugeInstruTech, Inc.
 
Daewoo doosan solar 015 plus excavator service repair manual
Daewoo doosan solar 015 plus excavator service repair manualDaewoo doosan solar 015 plus excavator service repair manual
Daewoo doosan solar 015 plus excavator service repair manualufjjjsekkmdm
 

Similar to Rotork YTC YT-1000R Electro Pneumetic Positioner Manufacturers (20)

Cummins onan otece transfer switch (1200 amp) service repair manual
Cummins onan otece transfer switch (1200 amp) service repair manualCummins onan otece transfer switch (1200 amp) service repair manual
Cummins onan otece transfer switch (1200 amp) service repair manual
 
Cummins onan otece transfer switch (1200 amp) service repair manual
Cummins onan otece transfer switch (1200 amp) service repair manualCummins onan otece transfer switch (1200 amp) service repair manual
Cummins onan otece transfer switch (1200 amp) service repair manual
 
Cummins onan otece transfer switch (1200 amp) service repair manual
Cummins onan otece transfer switch (1200 amp) service repair manualCummins onan otece transfer switch (1200 amp) service repair manual
Cummins onan otece transfer switch (1200 amp) service repair manual
 
Sl1200 mk5
Sl1200 mk5Sl1200 mk5
Sl1200 mk5
 
Te10 a fc_ba_ha175247eng_2
Te10 a fc_ba_ha175247eng_2Te10 a fc_ba_ha175247eng_2
Te10 a fc_ba_ha175247eng_2
 
GM PaxGo Series Bagging Scale 25kg.pdf
GM PaxGo Series Bagging Scale 25kg.pdfGM PaxGo Series Bagging Scale 25kg.pdf
GM PaxGo Series Bagging Scale 25kg.pdf
 
lm741.pptx
lm741.pptxlm741.pptx
lm741.pptx
 
VECTOR INVERTER MANUAL
VECTOR INVERTER MANUALVECTOR INVERTER MANUAL
VECTOR INVERTER MANUAL
 
t v color Panasonic Tc 20 29-g12p
t v color Panasonic Tc 20 29-g12pt v color Panasonic Tc 20 29-g12p
t v color Panasonic Tc 20 29-g12p
 
Instruction Manual ATN Odin Series Thermal Monocular | Optics Trade
Instruction Manual ATN Odin Series Thermal Monocular | Optics TradeInstruction Manual ATN Odin Series Thermal Monocular | Optics Trade
Instruction Manual ATN Odin Series Thermal Monocular | Optics Trade
 
Instruction manual SMC IDFA
Instruction manual SMC IDFAInstruction manual SMC IDFA
Instruction manual SMC IDFA
 
Icom 2200 h service manual
Icom 2200 h service manualIcom 2200 h service manual
Icom 2200 h service manual
 
Manual tecnico Pionner cdj 1000-mk2 completo
Manual tecnico Pionner cdj 1000-mk2 completoManual tecnico Pionner cdj 1000-mk2 completo
Manual tecnico Pionner cdj 1000-mk2 completo
 
Manual BPD - Series Solar Pumping Inverter
Manual BPD - Series Solar Pumping InverterManual BPD - Series Solar Pumping Inverter
Manual BPD - Series Solar Pumping Inverter
 
SOLAR PUMP INVERTER MANUAL
SOLAR PUMP INVERTER MANUALSOLAR PUMP INVERTER MANUAL
SOLAR PUMP INVERTER MANUAL
 
Instruction Manual ATN OTS-X Series Thermal Imaging Viewers | Optics Trade
Instruction Manual ATN OTS-X Series Thermal Imaging Viewers | Optics TradeInstruction Manual ATN OTS-X Series Thermal Imaging Viewers | Optics Trade
Instruction Manual ATN OTS-X Series Thermal Imaging Viewers | Optics Trade
 
Vfd v
Vfd vVfd v
Vfd v
 
400 Hornet Hot Cathode Bayard-Alpert Miniature-Ionization Vacuum Gauge
400 Hornet Hot Cathode Bayard-Alpert Miniature-Ionization Vacuum Gauge400 Hornet Hot Cathode Bayard-Alpert Miniature-Ionization Vacuum Gauge
400 Hornet Hot Cathode Bayard-Alpert Miniature-Ionization Vacuum Gauge
 
1 n4001 d-datasheet
1 n4001 d-datasheet1 n4001 d-datasheet
1 n4001 d-datasheet
 
Daewoo doosan solar 015 plus excavator service repair manual
Daewoo doosan solar 015 plus excavator service repair manualDaewoo doosan solar 015 plus excavator service repair manual
Daewoo doosan solar 015 plus excavator service repair manual
 

More from YTC INDIA

Lock Up Valve Dealers, Supplier & Manufacturers | YTC INDIA
Lock Up Valve Dealers, Supplier & Manufacturers | YTC INDIALock Up Valve Dealers, Supplier & Manufacturers | YTC INDIA
Lock Up Valve Dealers, Supplier & Manufacturers | YTC INDIAYTC INDIA
 
Lock Up Valve Dealers, Supplier & Manufacturers | YTC INDIA
Lock Up Valve Dealers, Supplier & Manufacturers | YTC INDIALock Up Valve Dealers, Supplier & Manufacturers | YTC INDIA
Lock Up Valve Dealers, Supplier & Manufacturers | YTC INDIAYTC INDIA
 
Volume Booster Dealers India | YTC INDIA
Volume Booster Dealers India | YTC INDIAVolume Booster Dealers India | YTC INDIA
Volume Booster Dealers India | YTC INDIAYTC INDIA
 
Volume Booster Dealers INDIA | YTC INDIA
Volume Booster Dealers INDIA | YTC INDIAVolume Booster Dealers INDIA | YTC INDIA
Volume Booster Dealers INDIA | YTC INDIAYTC INDIA
 
Air Filter Regulator Dealers | YTC INDIA
Air Filter Regulator Dealers | YTC INDIAAir Filter Regulator Dealers | YTC INDIA
Air Filter Regulator Dealers | YTC INDIAYTC INDIA
 
Air Filter Regulator Dealers | YTC INDIA
Air Filter Regulator Dealers | YTC INDIAAir Filter Regulator Dealers | YTC INDIA
Air Filter Regulator Dealers | YTC INDIAYTC INDIA
 
ROTORK SOLDO CONTROL SE LIMIT SWITCH BOX | YTC INDIA
ROTORK SOLDO CONTROL SE LIMIT SWITCH BOX | YTC INDIAROTORK SOLDO CONTROL SE LIMIT SWITCH BOX | YTC INDIA
ROTORK SOLDO CONTROL SE LIMIT SWITCH BOX | YTC INDIAYTC INDIA
 
ROTORK SOLDO CONTROL SE LIMIT SWITCH BOX | YTC INDIA
ROTORK SOLDO CONTROL SE LIMIT SWITCH BOX | YTC INDIAROTORK SOLDO CONTROL SE LIMIT SWITCH BOX | YTC INDIA
ROTORK SOLDO CONTROL SE LIMIT SWITCH BOX | YTC INDIAYTC INDIA
 
Rotork YTC YT 940.pptx
Rotork YTC YT 940.pptxRotork YTC YT 940.pptx
Rotork YTC YT 940.pptxYTC INDIA
 
ROTORK YTC YT-520 SNAP ACTING RELAY | YTC INDIA
ROTORK YTC YT-520 SNAP ACTING RELAY | YTC INDIAROTORK YTC YT-520 SNAP ACTING RELAY | YTC INDIA
ROTORK YTC YT-520 SNAP ACTING RELAY | YTC INDIAYTC INDIA
 
ROTORK YTC YT-520 SNAP ACTING RELAY | YTC INDIA
ROTORK YTC YT-520 SNAP ACTING RELAY | YTC INDIAROTORK YTC YT-520 SNAP ACTING RELAY | YTC INDIA
ROTORK YTC YT-520 SNAP ACTING RELAY | YTC INDIAYTC INDIA
 
ROTORK YTC YT-700S SOLENOID VALVE | YTC INDIA
ROTORK YTC YT-700S SOLENOID VALVE | YTC INDIAROTORK YTC YT-700S SOLENOID VALVE | YTC INDIA
ROTORK YTC YT-700S SOLENOID VALVE | YTC INDIAYTC INDIA
 
ROTORK YTC YT-700S SOLENOID VALVE | YTC INDIA
ROTORK YTC YT-700S SOLENOID VALVE | YTC INDIAROTORK YTC YT-700S SOLENOID VALVE | YTC INDIA
ROTORK YTC YT-700S SOLENOID VALVE | YTC INDIAYTC INDIA
 
Valve Positioner Exporters | YTC INDIA
Valve Positioner Exporters  | YTC INDIAValve Positioner Exporters  | YTC INDIA
Valve Positioner Exporters | YTC INDIAYTC INDIA
 
Valve Positioner Exporters | YTC INDIA
Valve Positioner Exporters  | YTC INDIAValve Positioner Exporters  | YTC INDIA
Valve Positioner Exporters | YTC INDIAYTC INDIA
 
Electro Pneumatic Positioner | YTC INDIA
Electro Pneumatic Positioner | YTC INDIAElectro Pneumatic Positioner | YTC INDIA
Electro Pneumatic Positioner | YTC INDIAYTC INDIA
 
Electro Pneumatic Positioner | YTC INDIA
Electro Pneumatic Positioner | YTC INDIAElectro Pneumatic Positioner | YTC INDIA
Electro Pneumatic Positioner | YTC INDIAYTC INDIA
 
Rotork YTC YT - 405 Lock UP Valve | YTC INDIA
Rotork YTC YT - 405 Lock UP Valve | YTC INDIARotork YTC YT - 405 Lock UP Valve | YTC INDIA
Rotork YTC YT - 405 Lock UP Valve | YTC INDIAYTC INDIA
 
Rotork YTC YT - 405 Lock UP Valve | YTC INDIA
Rotork YTC YT - 405 Lock UP Valve | YTC INDIARotork YTC YT - 405 Lock UP Valve | YTC INDIA
Rotork YTC YT - 405 Lock UP Valve | YTC INDIAYTC INDIA
 
Rotork YTC YT-220, Rotork YTC YT-225 AIR FILTER REGULATOR
Rotork YTC YT-220, Rotork YTC YT-225 AIR FILTER REGULATORRotork YTC YT-220, Rotork YTC YT-225 AIR FILTER REGULATOR
Rotork YTC YT-220, Rotork YTC YT-225 AIR FILTER REGULATORYTC INDIA
 

More from YTC INDIA (20)

Lock Up Valve Dealers, Supplier & Manufacturers | YTC INDIA
Lock Up Valve Dealers, Supplier & Manufacturers | YTC INDIALock Up Valve Dealers, Supplier & Manufacturers | YTC INDIA
Lock Up Valve Dealers, Supplier & Manufacturers | YTC INDIA
 
Lock Up Valve Dealers, Supplier & Manufacturers | YTC INDIA
Lock Up Valve Dealers, Supplier & Manufacturers | YTC INDIALock Up Valve Dealers, Supplier & Manufacturers | YTC INDIA
Lock Up Valve Dealers, Supplier & Manufacturers | YTC INDIA
 
Volume Booster Dealers India | YTC INDIA
Volume Booster Dealers India | YTC INDIAVolume Booster Dealers India | YTC INDIA
Volume Booster Dealers India | YTC INDIA
 
Volume Booster Dealers INDIA | YTC INDIA
Volume Booster Dealers INDIA | YTC INDIAVolume Booster Dealers INDIA | YTC INDIA
Volume Booster Dealers INDIA | YTC INDIA
 
Air Filter Regulator Dealers | YTC INDIA
Air Filter Regulator Dealers | YTC INDIAAir Filter Regulator Dealers | YTC INDIA
Air Filter Regulator Dealers | YTC INDIA
 
Air Filter Regulator Dealers | YTC INDIA
Air Filter Regulator Dealers | YTC INDIAAir Filter Regulator Dealers | YTC INDIA
Air Filter Regulator Dealers | YTC INDIA
 
ROTORK SOLDO CONTROL SE LIMIT SWITCH BOX | YTC INDIA
ROTORK SOLDO CONTROL SE LIMIT SWITCH BOX | YTC INDIAROTORK SOLDO CONTROL SE LIMIT SWITCH BOX | YTC INDIA
ROTORK SOLDO CONTROL SE LIMIT SWITCH BOX | YTC INDIA
 
ROTORK SOLDO CONTROL SE LIMIT SWITCH BOX | YTC INDIA
ROTORK SOLDO CONTROL SE LIMIT SWITCH BOX | YTC INDIAROTORK SOLDO CONTROL SE LIMIT SWITCH BOX | YTC INDIA
ROTORK SOLDO CONTROL SE LIMIT SWITCH BOX | YTC INDIA
 
Rotork YTC YT 940.pptx
Rotork YTC YT 940.pptxRotork YTC YT 940.pptx
Rotork YTC YT 940.pptx
 
ROTORK YTC YT-520 SNAP ACTING RELAY | YTC INDIA
ROTORK YTC YT-520 SNAP ACTING RELAY | YTC INDIAROTORK YTC YT-520 SNAP ACTING RELAY | YTC INDIA
ROTORK YTC YT-520 SNAP ACTING RELAY | YTC INDIA
 
ROTORK YTC YT-520 SNAP ACTING RELAY | YTC INDIA
ROTORK YTC YT-520 SNAP ACTING RELAY | YTC INDIAROTORK YTC YT-520 SNAP ACTING RELAY | YTC INDIA
ROTORK YTC YT-520 SNAP ACTING RELAY | YTC INDIA
 
ROTORK YTC YT-700S SOLENOID VALVE | YTC INDIA
ROTORK YTC YT-700S SOLENOID VALVE | YTC INDIAROTORK YTC YT-700S SOLENOID VALVE | YTC INDIA
ROTORK YTC YT-700S SOLENOID VALVE | YTC INDIA
 
ROTORK YTC YT-700S SOLENOID VALVE | YTC INDIA
ROTORK YTC YT-700S SOLENOID VALVE | YTC INDIAROTORK YTC YT-700S SOLENOID VALVE | YTC INDIA
ROTORK YTC YT-700S SOLENOID VALVE | YTC INDIA
 
Valve Positioner Exporters | YTC INDIA
Valve Positioner Exporters  | YTC INDIAValve Positioner Exporters  | YTC INDIA
Valve Positioner Exporters | YTC INDIA
 
Valve Positioner Exporters | YTC INDIA
Valve Positioner Exporters  | YTC INDIAValve Positioner Exporters  | YTC INDIA
Valve Positioner Exporters | YTC INDIA
 
Electro Pneumatic Positioner | YTC INDIA
Electro Pneumatic Positioner | YTC INDIAElectro Pneumatic Positioner | YTC INDIA
Electro Pneumatic Positioner | YTC INDIA
 
Electro Pneumatic Positioner | YTC INDIA
Electro Pneumatic Positioner | YTC INDIAElectro Pneumatic Positioner | YTC INDIA
Electro Pneumatic Positioner | YTC INDIA
 
Rotork YTC YT - 405 Lock UP Valve | YTC INDIA
Rotork YTC YT - 405 Lock UP Valve | YTC INDIARotork YTC YT - 405 Lock UP Valve | YTC INDIA
Rotork YTC YT - 405 Lock UP Valve | YTC INDIA
 
Rotork YTC YT - 405 Lock UP Valve | YTC INDIA
Rotork YTC YT - 405 Lock UP Valve | YTC INDIARotork YTC YT - 405 Lock UP Valve | YTC INDIA
Rotork YTC YT - 405 Lock UP Valve | YTC INDIA
 
Rotork YTC YT-220, Rotork YTC YT-225 AIR FILTER REGULATOR
Rotork YTC YT-220, Rotork YTC YT-225 AIR FILTER REGULATORRotork YTC YT-220, Rotork YTC YT-225 AIR FILTER REGULATOR
Rotork YTC YT-220, Rotork YTC YT-225 AIR FILTER REGULATOR
 

Recently uploaded

Factors to Consider When Choosing Accounts Payable Services Providers.pptx
Factors to Consider When Choosing Accounts Payable Services Providers.pptxFactors to Consider When Choosing Accounts Payable Services Providers.pptx
Factors to Consider When Choosing Accounts Payable Services Providers.pptxKatpro Technologies
 
Kotlin Multiplatform & Compose Multiplatform - Starter kit for pragmatics
Kotlin Multiplatform & Compose Multiplatform - Starter kit for pragmaticsKotlin Multiplatform & Compose Multiplatform - Starter kit for pragmatics
Kotlin Multiplatform & Compose Multiplatform - Starter kit for pragmaticscarlostorres15106
 
Automating Business Process via MuleSoft Composer | Bangalore MuleSoft Meetup...
Automating Business Process via MuleSoft Composer | Bangalore MuleSoft Meetup...Automating Business Process via MuleSoft Composer | Bangalore MuleSoft Meetup...
Automating Business Process via MuleSoft Composer | Bangalore MuleSoft Meetup...shyamraj55
 
Azure Monitor & Application Insight to monitor Infrastructure & Application
Azure Monitor & Application Insight to monitor Infrastructure & ApplicationAzure Monitor & Application Insight to monitor Infrastructure & Application
Azure Monitor & Application Insight to monitor Infrastructure & ApplicationAndikSusilo4
 
Transforming Data Streams with Kafka Connect: An Introduction to Single Messa...
Transforming Data Streams with Kafka Connect: An Introduction to Single Messa...Transforming Data Streams with Kafka Connect: An Introduction to Single Messa...
Transforming Data Streams with Kafka Connect: An Introduction to Single Messa...HostedbyConfluent
 
Slack Application Development 101 Slides
Slack Application Development 101 SlidesSlack Application Development 101 Slides
Slack Application Development 101 Slidespraypatel2
 
Enhancing Worker Digital Experience: A Hands-on Workshop for Partners
Enhancing Worker Digital Experience: A Hands-on Workshop for PartnersEnhancing Worker Digital Experience: A Hands-on Workshop for Partners
Enhancing Worker Digital Experience: A Hands-on Workshop for PartnersThousandEyes
 
Neo4j - How KGs are shaping the future of Generative AI at AWS Summit London ...
Neo4j - How KGs are shaping the future of Generative AI at AWS Summit London ...Neo4j - How KGs are shaping the future of Generative AI at AWS Summit London ...
Neo4j - How KGs are shaping the future of Generative AI at AWS Summit London ...Neo4j
 
Handwritten Text Recognition for manuscripts and early printed texts
Handwritten Text Recognition for manuscripts and early printed textsHandwritten Text Recognition for manuscripts and early printed texts
Handwritten Text Recognition for manuscripts and early printed textsMaria Levchenko
 
Understanding the Laravel MVC Architecture
Understanding the Laravel MVC ArchitectureUnderstanding the Laravel MVC Architecture
Understanding the Laravel MVC ArchitecturePixlogix Infotech
 
Maximizing Board Effectiveness 2024 Webinar.pptx
Maximizing Board Effectiveness 2024 Webinar.pptxMaximizing Board Effectiveness 2024 Webinar.pptx
Maximizing Board Effectiveness 2024 Webinar.pptxOnBoard
 
04-2024-HHUG-Sales-and-Marketing-Alignment.pptx
04-2024-HHUG-Sales-and-Marketing-Alignment.pptx04-2024-HHUG-Sales-and-Marketing-Alignment.pptx
04-2024-HHUG-Sales-and-Marketing-Alignment.pptxHampshireHUG
 
[2024]Digital Global Overview Report 2024 Meltwater.pdf
[2024]Digital Global Overview Report 2024 Meltwater.pdf[2024]Digital Global Overview Report 2024 Meltwater.pdf
[2024]Digital Global Overview Report 2024 Meltwater.pdfhans926745
 
Salesforce Community Group Quito, Salesforce 101
Salesforce Community Group Quito, Salesforce 101Salesforce Community Group Quito, Salesforce 101
Salesforce Community Group Quito, Salesforce 101Paola De la Torre
 
Unblocking The Main Thread Solving ANRs and Frozen Frames
Unblocking The Main Thread Solving ANRs and Frozen FramesUnblocking The Main Thread Solving ANRs and Frozen Frames
Unblocking The Main Thread Solving ANRs and Frozen FramesSinan KOZAK
 
WhatsApp 9892124323 ✓Call Girls In Kalyan ( Mumbai ) secure service
WhatsApp 9892124323 ✓Call Girls In Kalyan ( Mumbai ) secure serviceWhatsApp 9892124323 ✓Call Girls In Kalyan ( Mumbai ) secure service
WhatsApp 9892124323 ✓Call Girls In Kalyan ( Mumbai ) secure servicePooja Nehwal
 
The 7 Things I Know About Cyber Security After 25 Years | April 2024
The 7 Things I Know About Cyber Security After 25 Years | April 2024The 7 Things I Know About Cyber Security After 25 Years | April 2024
The 7 Things I Know About Cyber Security After 25 Years | April 2024Rafal Los
 
Presentation on how to chat with PDF using ChatGPT code interpreter
Presentation on how to chat with PDF using ChatGPT code interpreterPresentation on how to chat with PDF using ChatGPT code interpreter
Presentation on how to chat with PDF using ChatGPT code interpreternaman860154
 
How to Troubleshoot Apps for the Modern Connected Worker
How to Troubleshoot Apps for the Modern Connected WorkerHow to Troubleshoot Apps for the Modern Connected Worker
How to Troubleshoot Apps for the Modern Connected WorkerThousandEyes
 
Key Features Of Token Development (1).pptx
Key  Features Of Token  Development (1).pptxKey  Features Of Token  Development (1).pptx
Key Features Of Token Development (1).pptxLBM Solutions
 

Recently uploaded (20)

Factors to Consider When Choosing Accounts Payable Services Providers.pptx
Factors to Consider When Choosing Accounts Payable Services Providers.pptxFactors to Consider When Choosing Accounts Payable Services Providers.pptx
Factors to Consider When Choosing Accounts Payable Services Providers.pptx
 
Kotlin Multiplatform & Compose Multiplatform - Starter kit for pragmatics
Kotlin Multiplatform & Compose Multiplatform - Starter kit for pragmaticsKotlin Multiplatform & Compose Multiplatform - Starter kit for pragmatics
Kotlin Multiplatform & Compose Multiplatform - Starter kit for pragmatics
 
Automating Business Process via MuleSoft Composer | Bangalore MuleSoft Meetup...
Automating Business Process via MuleSoft Composer | Bangalore MuleSoft Meetup...Automating Business Process via MuleSoft Composer | Bangalore MuleSoft Meetup...
Automating Business Process via MuleSoft Composer | Bangalore MuleSoft Meetup...
 
Azure Monitor & Application Insight to monitor Infrastructure & Application
Azure Monitor & Application Insight to monitor Infrastructure & ApplicationAzure Monitor & Application Insight to monitor Infrastructure & Application
Azure Monitor & Application Insight to monitor Infrastructure & Application
 
Transforming Data Streams with Kafka Connect: An Introduction to Single Messa...
Transforming Data Streams with Kafka Connect: An Introduction to Single Messa...Transforming Data Streams with Kafka Connect: An Introduction to Single Messa...
Transforming Data Streams with Kafka Connect: An Introduction to Single Messa...
 
Slack Application Development 101 Slides
Slack Application Development 101 SlidesSlack Application Development 101 Slides
Slack Application Development 101 Slides
 
Enhancing Worker Digital Experience: A Hands-on Workshop for Partners
Enhancing Worker Digital Experience: A Hands-on Workshop for PartnersEnhancing Worker Digital Experience: A Hands-on Workshop for Partners
Enhancing Worker Digital Experience: A Hands-on Workshop for Partners
 
Neo4j - How KGs are shaping the future of Generative AI at AWS Summit London ...
Neo4j - How KGs are shaping the future of Generative AI at AWS Summit London ...Neo4j - How KGs are shaping the future of Generative AI at AWS Summit London ...
Neo4j - How KGs are shaping the future of Generative AI at AWS Summit London ...
 
Handwritten Text Recognition for manuscripts and early printed texts
Handwritten Text Recognition for manuscripts and early printed textsHandwritten Text Recognition for manuscripts and early printed texts
Handwritten Text Recognition for manuscripts and early printed texts
 
Understanding the Laravel MVC Architecture
Understanding the Laravel MVC ArchitectureUnderstanding the Laravel MVC Architecture
Understanding the Laravel MVC Architecture
 
Maximizing Board Effectiveness 2024 Webinar.pptx
Maximizing Board Effectiveness 2024 Webinar.pptxMaximizing Board Effectiveness 2024 Webinar.pptx
Maximizing Board Effectiveness 2024 Webinar.pptx
 
04-2024-HHUG-Sales-and-Marketing-Alignment.pptx
04-2024-HHUG-Sales-and-Marketing-Alignment.pptx04-2024-HHUG-Sales-and-Marketing-Alignment.pptx
04-2024-HHUG-Sales-and-Marketing-Alignment.pptx
 
[2024]Digital Global Overview Report 2024 Meltwater.pdf
[2024]Digital Global Overview Report 2024 Meltwater.pdf[2024]Digital Global Overview Report 2024 Meltwater.pdf
[2024]Digital Global Overview Report 2024 Meltwater.pdf
 
Salesforce Community Group Quito, Salesforce 101
Salesforce Community Group Quito, Salesforce 101Salesforce Community Group Quito, Salesforce 101
Salesforce Community Group Quito, Salesforce 101
 
Unblocking The Main Thread Solving ANRs and Frozen Frames
Unblocking The Main Thread Solving ANRs and Frozen FramesUnblocking The Main Thread Solving ANRs and Frozen Frames
Unblocking The Main Thread Solving ANRs and Frozen Frames
 
WhatsApp 9892124323 ✓Call Girls In Kalyan ( Mumbai ) secure service
WhatsApp 9892124323 ✓Call Girls In Kalyan ( Mumbai ) secure serviceWhatsApp 9892124323 ✓Call Girls In Kalyan ( Mumbai ) secure service
WhatsApp 9892124323 ✓Call Girls In Kalyan ( Mumbai ) secure service
 
The 7 Things I Know About Cyber Security After 25 Years | April 2024
The 7 Things I Know About Cyber Security After 25 Years | April 2024The 7 Things I Know About Cyber Security After 25 Years | April 2024
The 7 Things I Know About Cyber Security After 25 Years | April 2024
 
Presentation on how to chat with PDF using ChatGPT code interpreter
Presentation on how to chat with PDF using ChatGPT code interpreterPresentation on how to chat with PDF using ChatGPT code interpreter
Presentation on how to chat with PDF using ChatGPT code interpreter
 
How to Troubleshoot Apps for the Modern Connected Worker
How to Troubleshoot Apps for the Modern Connected WorkerHow to Troubleshoot Apps for the Modern Connected Worker
How to Troubleshoot Apps for the Modern Connected Worker
 
Key Features Of Token Development (1).pptx
Key  Features Of Token  Development (1).pptxKey  Features Of Token  Development (1).pptx
Key Features Of Token Development (1).pptx
 

Rotork YTC YT-1000R Electro Pneumetic Positioner Manufacturers

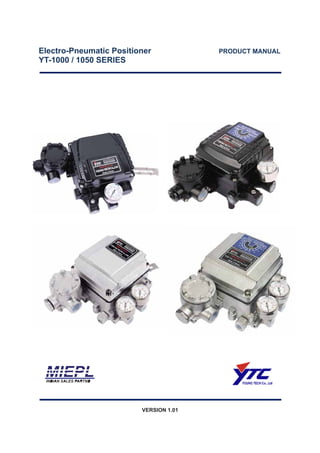
  • 1. Electro-Pneumatic Positioner PRODUCT MANUAL YT-1000 / 1050 SERIES VERSION 1.01
  • 2. 2 YT-1000/1050 series Contents 1. Introduction …………………………………………………………………………………………… 4 1.1 General information for the users ………………………………………………………………. 4 1.2 Manufacturer Warranty …………………………………………………………………………… 4 1.3 Explosion Proof Warning ………………………………………………………………………. 3 2. Product Description ………………………………………………………………………………….. 5 2.1 General …………………………………………………………………………………………….. 5 2.2 Main Features and Functions ……………………………………………………………………. 5 2.3 Label Description ………………………………………………………………………………….. 6 2.4 Product Number …………………………………………………………………………………… 6 2.4.1 YT-1000L ………………………………………………………………………………... 6 2.4.2 YT-1000R………………………………………………………………………………… 7 2.4.3 YT-1050………………………………………………………………………………….. 8 2.5 Product Specification ……………………………………………………………………………… 9 2.5.1 YT-1000L & R …………………………………………………………………………… 9 2.5.2 YT-1050L & R …………………………………………………………………………… 10 2.6 Parts and Assembly ……………………………………………………………………………….. 11 2.6.1 YT-1000/1050L…………………………………………………………………………… 11 2.6.2 YT-1000/1050R………………………………………………………………………….. 11 2.6.3 YT-1000L+SPTM (Internal) ……………………………………………………………. 12 2.6.4 YT-1000R+SPTM (Internal) …………………………………………………………… 12 2.6.5 YT-1000R+L/S (Internal) ………………………………………………………………. 13 2.6.6 YT-1000R+SPTM+L/S (Internal) ……………………………………………………… 13 2.7 Product Dimension ………………………………………………………………………………… 14 2.7.1 YT-1000L Flameproof Type……………………………………………………………. 14 2.7.2 YT-1000L Intrinsically Safety Type ……………………………………………………. 14 2.7.3 YT-1000R Flameproof Type …………………………………………………………… 14 2.7.4 YT-1000R Intrinsically Safety Type …………………………………………………… 15 2.7.5 YT-1000L+SPTM (Internal) …………………………………………………………….. 15 2.7.6 YT-1000R+SPTM(Internal) …………………………………………………………….. 15 2.7.7 YT-1000R+SPTM+L/S (Internal) & YT-1000R + Dome Indicator …………………...15 2.7.8 YT-1050L …………………………………………………………………………………. 16 2.7.9 YT-1050R…………………………………………………………………………………. 16 3. Installation ………………………………………………………………………………………………. 17 3.1 Safety ……………………………………………………………………………………………….. 17 3.2 YT-1000/1050L Installation ………………………………………………………………………. 17 3.2.1 Installation Steps ………………………………………………………………………... 17 3.3 YT-1000/1050R Installation ……………………………………………………………………… 19 3.3.1 Bracket Information ……………………………………………………………………... 19 2
  • 3. 2 3 YT-1000/1050 series 3.3.2 Installation Steps ………………………………………………………………………… 20 4. Connections …………………………………………………………………………………………….. 21 4.1 Safety ……………………………………………………………………………………………….. 21 4.2 Supply Pressure Condition ……………………………………………………………………….. 21 4.3 Piping Condition ……………………………………………………………………………………. 21 4.4 Connection – Actuator ……………………………………………………………………………...22 4.4.1 Single acting actuator ……………………………………………………………………22 4.4.2 Double acting actuator ………………………………………………………………….. 22 4.5 Connection – Power ……………………………………………………………………………….. 22 4.5.1 Safety ……………………………………………………………………………………...22 4.5.2 Ground……………………………………………………………………………………. 23 4.5.3 SPTM Internal (Option) …………………………………………………………………. 23 4.5.4 L/S Internal (Option)…………………………………………………………………….. 23 4.5.5 SPTM & L/S Internal (Option) …………………………………………………………. 24 5. Adjustment ……………………………………………………………………………………………….24 5.1 Adjustment - Cam …………………………………………………………………………………. 24 5.1.1 YT-1000/1050L………………………………………………………………………….. 24 5.1.2 YT-1000/1050R…………………………………………………………………………. 24 5.1.3 YT-1000/1050R with Internal Options (Option) ……………………………………… 25 5.2 Adjustment – Zero Point …………………………………………………………………………... 25 5.3 Adjustment – Span ………………………………………………………………………………….25 5.4 Adjustment – SPTM (Option) …………………………………………………………………… 25 5.4.1 Setting ……………………………………………………………………………………. 25 5.4.2 Calibration ……………………………………………………………………………….. 26 5.5 Adjustment – L/S (Option) ………………………………………………………………………… 26 5.6 Adjustment – A/M Switch (Auto/Manual) …………………………………………………………26 5.7 Adjustment – Orifice ……………………………………………………………………………….. 27 5.8 Adjustment – Potentiometer ……………………………………………………………………….27 6. Maintenance………………………………………………………………………………………………28 7. Troubleshooting………………………………………………………………………………………….29
  • 4. 2 4 YT-1000/1050 series 1. Introduction 1.1 General Information for the users Thank you for purchasing Young Tech Co., Ltd products. Each product has been fully inspected after its production to offer you the highest quality and reliable performance. Please read the product manual carefully prior to installing and commission the product.  For the safety, it is important to follow the instructions in the manual. Young Tech Co., Ltd will not be responsible for any damages caused by user’s negligence.  The manual should be provided to the end-user.  Any modifications or repairs to the product may only be performed if expressed in this manual.  The manual can be altered or revised without any prior notice. Any changes in product’s specification, design, and/or any components may not be printed immediately but until the following revision of the manual.  The manual should not be duplicated or reproduced for any purpose without prior approval from Young Tech Co., Ltd, Gimpo-si, South Korea. 1.2 Manufacturer Warranty  For the safety, it is important to follow the instructions in the manual. Manufacturer will not be responsible for any damages caused by user’s negligence.  Manufacturer will not be responsible for any damages or accidents as a result of any alteration or modification of the product and its parts. If any alteration or modifications are necessary, please contact Young Tech Co., Ltd directly.  Manufacturer warrants the product from the date of original purchase of the product for one (1) year, except as otherwise stated.  Manufacturer warranty will not cover products that have been subjected to abuse, accidents, alterations, modifications, tampering, negligence, misuse, faulty installation, lack of reasonable care, repair or service in any way that is not contemplated in the documentation for the product, or if the model or serial number has been altered, tampered with, defaced or removed; damages that occurs in shipment, due to act of God, failure due to power surge, or cosmetic damage. Improper or incorrectly performed maintenance will void this limited warranty.  For detailed warranty information, please contact Young Tech Co., Ltd – South Korea. 1.3 Explosion Proof Warning Please ensure the unit is being used and installed within the explosion proof certified environment.  YT-1000 / 1050 series explosion proof grades are flameproof - Ex d IIB (IIC) T5 and intrinsically safety – Ex ia IIB T6, and it can be used in zone 1 and 2.
  • 5. 2 5 YT-1000/1050 series  For other certification, please visit Young Tech Co., Ltd website (www.ytc.co.kr)  Explosion proof type of cables and gaskets should be used, when explosion gases are present at the installation site.  Power should be turned off completely when opening product’s cover. When opening the cover, ensure that there is no power remaining in any electrical parts nearby.  YT-1000 / 1050 series has 2 ports for power connection. Explosion proof type wires and packing should be used. Blind plug is required when any port is not being used.  Cable rug with surface area of more than 0.195mm2 with M4 spring washer should be used to connect the power.  For external ground terminal, cable rug with surface area of more than 5.5mm2 should be used. 2. Product Description 2.1 General YT-1000/1050 series Electro-Pneumatic Positioner accurately controls valve stroke in response to an input signal of 4-20mA from the controller. 2.2 Main Features and Functions  2 million life cycle guaranteed  Response time is very fast and accurate.  Simple part change can set 1/2 split range.  Low air consumption  Simple Direct / Reverse Action change.  Simple Zero & Span adjustment.  Easy feedback connection.  Internal options, such as position transmitter (PTM) and/or limit switch (L/S) is available (for non-explosion proof positioner – external options must be installed for explosion proof positioner)  A/M switch can be used to direct supply air to the actuator or to manually operate the positioner or valve.
  • 6. 2 6 YT-1000/1050 series 2.3 Label Description Fig. 1: YT-1000/1050 Body Label A. Model: Indicates the model number of the positioner. B. Explosion Proof: Indicates certified explosion proof grade. C. Input Signal: Indicates input signal range. D. Amb. Temp.: Indicates the allowable ambient temperature. E. Supply Pressure: Indicates the supply pressure range. F. Serial Number.: Indicates the unique serial number. 2.4 Product Number 2.4.1 YT-1000L
  • 9. 2 9 YT-1000/1050 series 2.5 Product Specification 2.5.1 YT-1000L & R Model YT-1000L YT-1000R Acting Type Single Double Single Double Input Signal 4~20mA DC Impedance 250 +/- 15 Ώ Supply Pressure 0.14~0.7 MPa (1.4~7 bar) Stroke 10~150 mm 0~90° Air Connection PT, NPT 1/4 Gauge Connection PT, NPT 1/8 Conduit Entry PF(G) 1/2 Protection Grade IP66 Explosion Proof Ex dmb IIB T5 (ATEX) Ex dmb IIC T5 (KTL) Ex ia IIB T6 (KTL) Ex dm IIB T5 (FM) Ex ia IIC T6 (NEPSI) Ex dmb IIC T5/T6 (NEPSI) Ambient Temperature Operating Temp. :-20~70℃ (Standard) Explosion Proof Temp. : -40~60℃ Linearity ±1.0% F.S. ±2.0% F.S. ±1.0% F.S. ±2.0% F.S. Hysteresis ±1.0% F.S. Sensitivity ±0.2% F.S ±0.5% F.S ±0.2% F.S ±0.5% F.S Repeatability ±0.5% F.S Flow Capacity 80 LPM (Sup.=0.14 MPa) Air Consumption 2.5 LPM (Sup.=0.14 MPa @ idle) Feedback Signal (Option) 4~20mA (DC 10~30V) Material Aluminum Diecasting Weight g k 5 . 3 g k 7 . 2 Painting Epoxy Polyestere Powder Coating Tested under ambient temperature of 20’C, absolute pressure of 760mmHg, and humidity of 65%. Please contact Young Tech Co., Ltd for detailed testing specification. * Explosion proof certification is in progress.
  • 10. 2 10 YT-1000/1050 series 2.5.2 YT-1050L & R Model YT-1050L YT-1050R Acting Type Single Double Single Double Input Signal 4~20mA DC Impedance 250 +/- 15 Ώ Supply Pressure 0.14~0.7 MPa (1.4~7 bar) Stroke 10~150 mm 0~90° Air Connection NPT 1/4 Gauge Connection NPT 1/8 Conduit Entry PF(G) 1/2 Protection Grade IP66 Explosion Proof Ex dmb IIB T5 (ATEX) Ambient Temperature Operating Temp. :-20~70℃ (Standard) Explosion Proof Temp. : -40~60℃ Linearity ±1.0% F.S. ±2.0% F.S. ±1.0% F.S. ±2.0% F.S. Hysteresis ±1.0% F.S. Sensitivity ±0.2% F.S ±0.5% F.S ±0.2% F.S ±0.5% F.S Repeatability ±0.5% F.S Flow Capacity 80 LPM (Sup.=0.14 MPa) Air Consumption 2.5 LPM (Sup.=0.14 MPa @ idle) Feedback Signal (Option) 4~20mA (DC 10~30V) Material Stainless Steel 316 Weight g k 0 . 6 g k 7 . 5 Tested under ambient temperature of 20’C, absolute pressure of 760mmHg, and humidity of 65%. Please contact Young Tech Co., Ltd for detailed testing specification. * Explosion proof certification is in progress.
  • 11. 2 11 YT-1000/1050 series 2.6 Parts and Assembly 2.6.1 YT-1000/1050L 2.6.2 YT-1000/1050R
  • 12. 2 12 YT-1000/1050 series 2.6.3 YT-1000L + SPTM (Internal) 2.6.4 YT-1000R + SPTM (Internal)
  • 13. 2 13 YT-1000/1050 series 2.6.5 YT-1000R + L/S (Internal) 2.6.6 YT-10000R + SPTM + L/S (Internal)
  • 14. 2 14 YT-1000/1050 series 2.7 Product Dimension 2.7.1 YT-1000L Flameproof Type 2.7.2 YT-1000L Intrinsically Safety Type 2.7.3 YT-1000R Flameproof Type
  • 15. 2 15 YT-1000/1050 series 2.7.4 YT-1000R Intrinsically Safety Type 2.7.5 YT-1000L + SPTM (Internal) 2.7.6 YT-1000R + SPTM (Internal) 2.7.7 YT-1000R + SPTM + L/S (Internal) & YT-1000R + Dome indicator
  • 16. 2 16 YT-1000/1050 series 2.7.8 YT-1050L 2.7.9 YT-1050R
  • 17. 2 17 YT-1000/1050 series 3. Installation 3.1 Safety When installing a positioner, please ensure to read and follow safety instructions.  Any input or supply pressures to valve, actuator, and / or to other related devices must be turned off.  Use bypass valve or other supportive equipment to avoid entire system “shut down”.  Ensure there is no remaining pressure in the actuator. 3.2 YT-1000/1050L Installation YT-1000/1050L should be installed on linear motion valves such as globe or gate type which uses spring return type diaphragm or piston actuators. Before proceeding with the installation, ensure following components are available.  Positioner unit  Feedback lever and lever spring  Flange nut (bottom side of YT-1000/1050L)  4 pcs x hexagonal headed bolts (M8 x 1.25P)  4 pcs x M8 plate washer 3.2.1 Installation Steps 1. Proper bracket must be made in order to adapt the positioner on the actuator yoke. Please consider following important points when a bracket is being designed.  Positioner’s feedback lever must be parallel to the ground at 50% of the valve stroke.  Feedback lever connection with the pin of the actuator clamp should be installed in such a way that the valve stroke length coincides with the corresponding figure in “mm” marked on the feedback lever. Improper setting may cause poor linearity and may create unnecessary hunting during the operation. 2. Assemble the positioner with the bracket made in previous step by fastening the bolts. Please refer to the backside of the positioner for size of the bolts. The standard bolt size is M8 x 1.25P. Please contact Young Tech Co., Ltd for other bolt sizes. 3. Attach the positioner with bracket to the actuator yoke – DO NOT TIGHTEN POSITIONER COMPLETELY. 4. Connect positioner’s feedback lever to the actuator clamp. The hole gap on the feedback lever is 6.5mm. The connection pin’s outer diameter should be less than 6.3mm.
  • 18. 2 18 YT-1000/1050 series 5. Connect supply pressure to the actuator temporarily. Supply enough supply pressure to the actuator in order to position the actuator clamp at 50% of the total valve stroke. 6. Insert connection pin into the feedback lever. The pin should be inserted when the actuator clamp is at 50% of the total valve stroke. Proper way to connect feedback lever, connection pin, and lever spring 7. Check if feedback lever is parallel to the ground at 50% of the valve stroke. If it is not parallel, adjust the bracket or feedback link bar to make parallel. Improper installation may cause poor linearity and may create unnecessary hunting during the operation. 8. Check the valve stroke. The stroke marks are indicated on the feedback lever of the positioner. Position the connection pin at the number on the feedback lever which corresponds to the desired valve stroke. To adjust, move the bracket, the connection pin or both. Fig. 3: Pin Insertion when valve stroke is 40mm (up) and is 90mm (bottom) 9. After installing the positioner, operate the valve from 0% to 100% stroke by using direct
  • 19. 2 19 YT-1000/1050 series air to the actuator (manual position). On both 0% and 100%, the feedback lever should not touch the lever stopper, which is located on the backside of the positioner. If the feedback lever touches the stopper, the positioner should be installed further away from the yoke. Fig. 4: Feedback lever should not touch lever stopper 0% ~ 100% valve stroke. 10. After the installation, tighten all of the bolts on the bracket, the feedback lever, and the connection pin. 3.3 YT-1000/1050R Installation YT-1000/1050R should be installed on rotary motion valve such as ball or butterfly type which uses rack and pinion, scotch yoke or other type of actuators which stem rotates 90 degrees. Before proceeding with the installation, ensure following components are available.  Positioner unit  Fork lever and lever spring  Standard rotary bracket (included with the positioner)  4 pcs x hexagonal headed bolts (M8 x 1.25P)  4 pcs x M8 plate washer Fig. 5: Fork lever type (left) and NAMUR lever type (right) 3.3.1 Bracket information Standard bracket (included with the positioner) contains two components. The bracket can be used for both fork lever and NAMUR lever type. The bracket is designed to fit onto the actuator with 20mm stem height (H). If actuator’s stem height (H) is 30mm or 50mm, bracket must be adjusted. Please refer to below table how to adjust the bracket.
  • 20. 2 20 YT-1000/1050 series Actuator stem height (H) Markings of bolt holes A-L B-L A-R B-R 20mm H : 20 H : 20, 30 H : 20 H : 20, 30 30mm H : 30 H : 20, 30 H : 30 H : 20, 30 50mm H : 50 H : 50 H : 50 H : 50 3.3.2 Installation Steps 1. Please check the actuator’s stem height and adjust the bracket by referring to the bracket table. 2. Attached the bracket onto the actuator. It is recommended to use spring washer so the bolts will not be loosen from vibration. 3. Set rotation position of the actuator stem at 0%. For single acting actuator, it is easy to check 0% point by supplying no pressure to the actuator. For double acting actuator, check actuator stem’s rotation direction – clockwise or counter-clockwise - by supplying pressure to the actuator. 4. Install the fork lever after setting actuator’s stem at 0%. Check the actuator stem’s rotation direction – clockwise or counter-clockwise. Installation angle of the fork lever should be 45 degrees in relation to the linear shaft. For NAMUR shaft installation, the angle does not matter. Fig. 6: Counter-clockwise and clockwise rotation.
  • 21. 2 21 YT-1000/1050 series 5. After setting fork lever position, assemble lock nuts which are located on the bottom of the fork lever. Ensure to set the height of the upper fork lever between 6~11mm, which is lower than the upper bracket’s height. 6. Attach the positioner to the bracket. Fix the clamping pin on the main shaft’s center of the positioner and insert connection pin into the fork lever slot. This will lock to the fork lever spring. Setting alignment of the main shaft of the positioner and center of the actuator’s stem is very important. Poor alignment of the main shaft and the actuator’s stem decreases the positioner’s durability due to unnecessary forces on the main shaft. 7. Tighten the positioner and the bracket with hexagon-headed bolts and plate washer after checking the positioner’s position. 4. Connections 4.1 Safety  Supply pressure should be clean and dry air – avoiding moisture, oil or dust.  Always recommended to use air filter regulator (i.e. YT-200 series).  Young Tech Co., Ltd has not tested positioner’s operation with any other gases other than clean air. Please contact Young Tech Co., Ltd for any questions. 4.2 Supply Pressure Condition  Dry air with at least 10℃ lower than ambient temperature.  Avoid from dusty air. Positioner’s inner filter can only filter 5 micron or larger.  Avoid oil.  Comply with ANSI/ISA-57.3 1975(R1981) or ISA S7.3-1975(R1981).  Supply pressure range is 1.4 ~ 7 kgf/cm 2 (140-700 kPA)  Set air filter regulator’s pressure level 10% higher than actuator’s spring range pressure. 4.3 Piping Condition  Ensure inside of pipe is clean of obstructions.  Do not use pipeline that is squeezed or shows any type of damamges.
  • 22. 2 22 YT-1000/1050 series  Pipeline should have more than 6mm of inner diameter (10mm outer diameter) to maintain flow rate.  The length of pipeline system should not be extremely long. Longer pipeline system may affect flow rate due to the friction inside of the pipeline. 4.4 Connection – Actuator 4.4.1 Single acting actuator Singe acting type positioner is set to use OUT1 port. OUT1 port should be connected with supply pressure port from actuator when using single acting type of spring return actuator. Fig. 7: Singe acting linear (left) and rotary (right) type actuator 4.4.2 Double acting actuator Double acting type positioner is set to use OUT1 and OUT2 port. As input signal increases, the supply pressure will be supplied through OUT1 port. Fig. 8: Double acting linear (left) and rotary (right) type actuator 4.5 Connection – Power 4.5.1 Safety  When installing in hazardous and explosive gas area, conduit tube or pressure-proof packing union must be used. The compound charging box should be the flameproof type and must be sealed completely.  Conduit entry connection tap is PF 1/2 or G 1/2.  Before connecting terminal, ensure that the power is off completely. Do not open the cover when the power is still alive.  Please use ring-type rug to protect against vibration or any other external impact.  Positioner with PTM options must be supplied 10~28V DC separately. For L/S option, separate 12-24V DC must be supplied. For both options, it should not exceed 30V
  • 23. 2 23 YT-1000/1050 series DC.  Positioner should be grounded.  Please use twisted cable with conductor section are 1.25mm2 and that is suitable for 600V (complying to the conductor table of NEC Article 310.) The outer diameter of the cable should be between 6.35 ~ 10mm. Use shield wire to protect against electro- magnetic field and noise.  Please do not install the cable near high noise equipments, such as high-capacity transformer or motor. 4.5.2 Ground 4.5.3 SPTM Internal <Option> 4.5.4 L/S Internal <Option>
  • 24. 2 24 YT-1000/1050 series 4.5.5 SPTM & L/S Internal <Option> 5. Adjustments 5.1 Adjustment – Cam YTC sets positioner as Reverse Action <RA> unless specified otherwise when placing an order. 5.1.1 YT-1000/1050L 5.1.2 YT-1000/1050R
  • 25. 2 25 YT-1000/1050 series 5.1.3 YT-1000/1050R with Internal Options <Option> Cam can be adjusted for YT-1000/1050R with options by dissembling the cam from the main shaft. After dissembling the cam from the main shaft, please follow 5.1.2 for RA or DA cam. 5.2 Adjustment – Zero Point 1. Set supply signal at 4mA or 20mA – according to RA or DA – and rotate the adjuster up or downward to adjust actuator’s initial point. As zero point is being set, the specification of the valve system must be considered. Please refer to diagram on the right to increase or decrease the zero point. 5.3 Adjustment – Span 1. After setting zero, supply signal at 20mA or 4mA – according to RA or DA – and check the actuator stroke. If the stroke is too low, the span should be increased. If the stroke is too high, the span should be decreased. 2. Changing span point will affect zero point setting. Zero point should be set again after span has been adjusted. This step is required until both zero and span are properly set. 3. After proper setting, tighten lock screw. 5.4 Adjustment – SPTM <Option> 5.4.1 Setting Point Switch There are two types of calibration of SPTM / feedback signal. 1. 2 Point Setting This setting only set minimum and maximum point (0% and 100%). In between points
  • 26. 2 26 YT-1000/1050 series will be calculated automatically. 2. 5 Point Setting This setting set 5 points (0%, 25%, 50%, 75%, and 100%). This requires more setting, but feedback setting will be more accurate than 2 point setting. 5.4.2 Calibration 1. Supply 4mA input signal to the positioner and check if valve position made to its target position. For Direct Action (DA), supply 20mA instead of 4mA for input signal. 2. Press 4mA button on the PCB for 3~4 seconds. LED lamp will blink indicating that the PCB has calibrated the specific position to give 4mA as feedback. 3. Repeat above step for 8mA, 12mA, 16mA, and 20mA. For 2 point setting, only 4mA and 20mA should be set. 5.5 Adjustment – L/S <Option> 5.6 Adjustment – A/M Switch (Auto/Manual) 1. A/M switch is used when the valve needs to be operated manually. 2. If switch is set as “A”, the positioner will respond to input signal. If switch is set as “M”, the positioner will act as bypass and supply pressure to the positioner will directly go to the actuator. 3. Please make sure to set back to “A” after manual operation. Also, please DO NOT TOUCH SEAT ADJUSTER BOLT ON THE PILOT RELAY.
  • 27. 2 27 YT-1000/1050 series 5.7 Adjustment - Orifice If the actuator size is too small relative to the flow rate, positioner can have hunting / oscillation. In order to avoid hunting, the orifice must be inserted. 1. Remove the pilot relay assembly from the positioner. 2. Remove the o-rings from OUT1 and OUT2 port per above diagram, and insert proper orifice. Before re-assemble the o-rings, please make sure there is no dust or particles remain on the ports. 5.8 Adjustment - Potentiometer External damage or physical shock can dislocate potentiometers factory setting. Potentiometer must be re-calibrated when dislocation of the potentiometer or after cam adjustment. PLEASE REFER BELOW INSTRUCTION AND DIAGRAM. 1. Please set actuator position to 50% of the valve stroke. PLEASE MAKE SURE THAT THE ACTUATOR DOES NOT MOVE DURING THE RE-CALIBRATION. 2. In the junction box, please pull out the potentiometer connector from potentiometer PCB. DO NOT PULL WITH TOO MUCH FORCE AS WIRES CAN BE DAMAGED. 3. On the potentiometer connector, there are three holes. Out of three holes, please measure resistance level by plugging two holes <one of right or left and one of center>. The potentiometer resistance level should be between 0~10 K Ώ and please adjust measurement equipment to measure between above mentioned range. 4. Using “+” screw driver, loosen potentiometer stopper bolt. DO NOT LOOSEN COMPLETELY. 5. Pull potentiometer behind and potentiometer will be separated from potentiometer gear. This will make user to turn potentiometer gear. 6. Since current actuator position is 50% of the valve stroke, the resistance level should be measure around 5K Ώ (4.8 ~ 4.2 K Ώ) by turning potentiometer gear. 7. After the setting, assemble back the stopper and the bolt.
  • 28. 2 28 YT-1000/1050 series 6. Maintenance Maintenance on pilot relay valve is recommended to perform at least once a year of with or without operation. When dissembling the pilot relay valve, please be careful not to loose any o- rings or stabilizer spring. Please refer to below instruction and diagram. 1. Please remove pilot relay lock bolts. 2. Unlock Auto/Manual (A/M) Switch from the pilot relay. PLEASE MAKE SURE TO REMOVE A/M SWITCH. 3. Remove any particles or dust by blowing air.
  • 29. 2 29 YT-1000/1050 series 7. Troubleshooting ▶ Positioner does not respond to the input signal. (1) Check supply pressure level. The lever must be at least 1.4 kgf/cm2. For spring-return type of actuator, the supply pressure level has to be larger than the spring's specification. (2) Check if input signal is properly supplied to the positioner. The signal should be 4~20mA DC. (3) Check if zero point or span point is properly set. (4) Check if the positioner's nozzle has been blocked. Also, check if the pressure is supplied to the positioner and the pressure is being exhausted through the nozzle. If the nozzle has been block by any substances, please send the product for repair. (5) Check if feedback lever has been installed properly. ▶ The pressure of OUT1 reaches exhausting pressure level and does not come back down. (1) Check A/M Switch. If the switch has been damaged, replace the switch or pilot relay valve. (2) Check for a gap or damages between the nozzle and the flapper. If damaged, please send the product to YTC for repair. ▶ The pressure is exhausted only by A/M Switch. (1) Check if the positioner's nozzle has been blocked. Also, check if the pressure is supplied to the positioner and the pressure is being exhausted through the nozzle. If the nozzle has been blocked by any substances, please send the product to YTC for repair. ▶ Hunting occurs. (1) Check if safety spring has been displaced. (Next to Pilot relay valve) (2) Check if the size of actuator is too small. If so, insert an orifice in order to reduce the pressure flow rate. (3) Check if there is any friction between the valve and the actuator. If so, increase actuator's size or reduce the friction level. ▶ Actuator only operates by On/Off. (1) Check actuator and positioner's acting type. Air pressure exhausts from YT-1000L's OUT1 port as input signal level increases. Therefore, it is standard to connect to OUT1 port when single actuator is used. Make sure the span adjustment is properly set according to the valve system. ▶ Linearity is too low. (1) Check if positioner is properly positioned. Especially check if the feedback lever is parallel to the ground at 50% point. (2) Check if zero and span point have been properly adjusted. If either one of values is being adjusted, another one must be re-adjusted as well. (3) Check if supply air pressure level is stable from the regulator. If the level is unstable, the regulator must be replaced. ▶ Hysteresis is too low. (1) In case of double acting actuator, check if seat adjustment has been properly performed. Please contact YTC for any further inquiries regarding the seat adjustment. (2) Backlash can occur when the feedback lever and lever spring are loosen. To avoid backlashing, please adjust the lever spring. (3) Check if the connection bar to the feedback lever is tightly fastened.