SlideShare une entreprise Scribd logo
1  sur  130
Télécharger pour lire hors ligne
132 PAGES! Master every tool in the Photoshop toolbar
AdobePhotoshop
Everytoolexplained!
Unleashthefullpowerbehindevery
iconinthePhotoshoptoolbar
132pagesofeasy-to-followtutorials
andexpertadvicetohelpdevelopyour
AdobePhotoshopskills
S
tart up Photoshop and what do you see? Well,
besides the menu options along the top of the
screen, you’ll see a Toolbar that’s chock-a-block
with icons. You’ll probably recognise some of these,
such as the ‘T’ that designates the Type tool and the
paintbrush icon that unlocks the various Brush tools.
But do you really know what the rest of these icons
mean? … Honestly? The chances are that – like many
Photoshop users across the world – you’re only using a
fraction of the program’s full potential, but this second
issue in the Photoshop Focus Guide series will change
all that, helping you make the most of all the tools at
your disposal.
Even professional designers often admit to being
hopeless with the Healing Brush and dodgy with the
Dodge tool, but there’s really no reason for any of the
tools to be a mystery. This issue will help you get more
from the Clone, Gradient, Paths and Effects tools, to
name but a few. You’ll find expert tips and advice for
working more efficiently with each of the tools, as well
as tutorials to demonstrate exactly how to carry out
useful image-editing tasks. In the final section you’ll
find a step-by-step guide that brings together all the
skills you’ve learnt, showing how to create a striking
Photoshop image.
And let’s not forget the CD that
accompanies your Focus
Guide. On here you’ll
find a library of stock
images (worth £1,990),
plug-ins and video training
tutorials to enhance your
enjoyment of Photoshop
further still!
Have fun!
Polish up your knowledge…
Unravel the mysteries of the Photoshop Toolbar and
its resident icons.They’re not as scary as they look!
3ADOBE PHOTOSHOP TOOL TECHNIQUES – FOCUS GUIDE
Welcome
Editor Dan McNamara
Art Editor Simon Bleeze
Writer Simon Danaher
Production Clive Somerville
Jonathan Palmer
Cover image Chris Stocker
New Media Co-ordinator Matt Gallimore
Production Co-ordinator Diane Ross
Group Publisher DaveTaylor
Publishing Director JohnWeir
Distributed through the UK Newstrade by
Seymour Distribution,
86 Newman Street,LondonW1T 3EX
Overseas Distribution by
Future Publishing Ltd.
Printed in the EU
Future Publishing Ltd
30 Monmouth Street, Bath BA1 2BW
www.thefuturenetwork.plc.uk
We recommend that you always maintain
an up-to-date backup of your hard disk data.
Future Publishing does not accept any
responsibility for disruption,damage and/or
loss to your data or computer system that
may occur while carrying out procedures
described in this publication.
Future Publishing is part of The Future Network plc.
The Future Network produces carefully targeted specialist magazines and
websites for groups of people who share a passion.We aim to satisfy their
passion by creating titles that offer superb value for money, trustworthy
information, multiple ways to save time and money, and are a pleasure to
read or visit. Today we publish more than 80 magazines and over 30
magazine websites and networks from offices in four countries. The
company also licenses 32 of its titles resulting in over 60 local editions in
a further 23 countries.The Future Network plc is a public company quoted
on the London Stock Exchange (symbol: FNET).
Non-executive Chairman Roger Parry
Chief Executive Greg Ingham
Chief Operating Officer & Managing Director, UK Colin Morrison
Finance Director John Bowman
Tel +44 1225 442244 www.thefuturenetwork.plc.uk
Bath • London • Milan • New York • Paris • San Francisco
All contents © Future Publishing Ltd, 2003
All rights reserved. No part of this publication may be reproduced, stored in a
retrieval system, or transmitted in any form or by any means without the prior
permission of the publisher.
Websites mentioned in this publication are not under our control. We are not
responsible for the contents of these sites or any changes or updates to them.
None of the information in this guide is intended as legal advice.The articles are
for information purposes only.
4 FOCUS GUIDE – ADOBE PHOTOSHOP TOOL TECHNIQUES
With so much to say about
Adobe Photoshop it’s been
difficult to cram all the information
that we wanted to include into this
Focus Guide. That’s why you’ll find
the special icons that occupy the
margins so very useful.
As you leaf through the pages,
you’ll find a range of attractive
symbols, each of which denotes an
extra nugget of knowledge. The
icons enable you to identify exactly
what kind of information you’re
dealing with – for a full guide to
icon categories, see below. These
handy hints, tips and shortcuts are
always relevant to the topic that’s
being discussed, and will help you
develop your Photoshop skills that
little bit faster.
Our writers are always experienced
Photoshop experts who regularly
contribute to our sister magazines,
such as Computer Arts and Digital
Camera Magazine. So you can rest
assured that all the information
they provide is both authoritative
and thoroughly tried-and-tested.
Finding your way
Read this Guide from beginning to end or dip in and out
as you please.Either way,our icons will prove indispensable…
5ADOBE PHOTOSHOP TOOL TECHNIQUES – FOCUS GUIDE
Icons explained
On your CD-ROM
Some of the software that we refer to may be
included on your bonus CD.Every now and then
we remind you of this by flagging up the disc icon
and listing what’s on it.Handy,eh?
Top tips
This indicates an expert tip.Anything sheltered
beneath this icon is guaranteed to reveal a useful
hint about using Photoshop’s extensive range of
tools,palettes and features.
Further information
We’d like to tell you absolutely everything,but
there’s just not enough space.Instead we refer
you to other useful resources,such as websites
and specialist books for further reading.
Shortcuts
Carrying out common tasks again and again can
get a little tedious.Our handy shortcuts show you
how to carry out these tasks with a few deft
key-presses,saving you lots of time and effort.
Take note
You’ll find a number of these nuggets of knowledge
scattered throughout the Guide.They’re crammed
with useful information that complements the
main text perfectly.
Watch out!
The skull and crossbones sign means proceed
with caution.You’ll find some important points
outlined below this icon,which you should
certainly take seriously.
Links
When we refer to a website,we may pull out the
web address in the sidebar to make it easier for
you to read and remember.
6 FOCUS GUIDE – ADOBE PHOTOSHOP TOOL TECHNIQUES
Contents
CONTENTS
Selections
1 SELECTIONTOOLS IN PHOTOSHOP 10
Making selections is the core of Photoshop’s way of working.There are a variety
of tools you can use for the purpose,so here’s how to get the most out of them
BASIC SELECTION TOOLS . . . . . . . . . . . . . . . . . . . . . . . . . . . . . . 12
THE LASSO TOOLS . . . . . . . . . . . . . . . . . . . . . . . . . . . . . . . . . . 14
THE MAGNETIC LASSO . . . . . . . . . . . . . . . . . . . . . . . . . . . . . . . 15
THE MAGIC WAND . . . . . . . . . . . . . . . . . . . . . . . . . . . . . . . . . 16
QUICK MASK . . . . . . . . . . . . . . . . . . . . . . . . . . . . . . . . . . . . . 18
WORKING WITH THE QUICK MASK. . . . . . . . . . . . . . . . . . . . . . . 19
SELECTIONS, MASKS AND CHANNELS . . . . . . . . . . . . . . . . . . . . . 20
SLICES. . . . . . . . . . . . . . . . . . . . . . . . . . . . . . . . . . . . . . . . . . . 21
Navigation and manipulation
NAVIGATING AND EDITINGYOUR IMAGES 22
Getting around inside an image is important if you are to work quickly and efficiently.
This chapter covers the view navigation tools and shortcuts for managing your workspace2 PANNING AND ZOOMING IMAGES . . . . . . . . . . . . . . . . . . . . . . . 24
THE NAVIGATOR PANEL. . . . . . . . . . . . . . . . . . . . . . . . . . . . . . . 25
VIEW MANAGEMENT . . . . . . . . . . . . . . . . . . . . . . . . . . . . . . . . . 26
MOVE, ALIGN AND DISTRIBUTE . . . . . . . . . . . . . . . . . . . . . . . . . 27
THE MOVE TOOL . . . . . . . . . . . . . . . . . . . . . . . . . . . . . . . . . . . 28
DIRECT AND PATH SELECTION TOOLS . . . . . . . . . . . . . . . . . . . . . 30
VECTOR SHAPES AND MULTIPLE PATHS . . . . . . . . . . . . . . . . . . . . . 31
7ADOBE PHOTOSHOP TOOL TECHNIQUES – FOCUS GUIDE
Contents
Brushes and Pencil tools
USINGTHE BRUSHES AND PENCILTOOLS 32
This chapter introduces you to Photoshop’s more arty tools,the Brushes.
But as you’ll discover,you can use these versatile tools for far more than just painting3 THE BRUSH TOOL. . . . . . . . . . . . . . . . . . . . . . . . . . . . . . . . . . . 34
USING BRUSHES . . . . . . . . . . . . . . . . . . . . . . . . . . . . . . . . . . . 35
EXPLORING THE BRUSHES PALETTE. . . . . . . . . . . . . . . . . . . . . . . . 38
THE BRUSHES PALETTE IN DETAIL. . . . . . . . . . . . . . . . . . . . . . . . . 39
SCATTERING. . . . . . . . . . . . . . . . . . . . . . . . . . . . . . . . . . . . . . . 40
TEXTURES AND DUAL BRUSHES . . . . . . . . . . . . . . . . . . . . . . . . . 41
THE HISTORY BRUSH . . . . . . . . . . . . . . . . . . . . . . . . . . . . . . . . 42
USING THE HISTORY BRUSH . . . . . . . . . . . . . . . . . . . . . . . . . . . 43
ART HISTORY BRUSH . . . . . . . . . . . . . . . . . . . . . . . . . . . . . . . . 45
4 THE RUBBER STAMP (CLONE) TOOL . . . . . . . . . . . . . . . . . . . . . . 48
REMOVING UNWANTED ELEMENTS . . . . . . . . . . . . . . . . . . . . . . . 49
CLONING SKIN. . . . . . . . . . . . . . . . . . . . . . . . . . . . . . . . . . . . . 50
THE HEALING BRUSH . . . . . . . . . . . . . . . . . . . . . . . . . . . . . . . . 51
THE HEALING PATCH TOOL . . . . . . . . . . . . . . . . . . . . . . . . . . . . 52
5 THE PAINT BUCKET . . . . . . . . . . . . . . . . . . . . . . . . . . . . . . . . . 56
MORE FILL OPTIONS . . . . . . . . . . . . . . . . . . . . . . . . . . . . . . . . 58
THE GRADIENT TOOL . . . . . . . . . . . . . . . . . . . . . . . . . . . . . . . . 59
THE GRADIENT EDITOR PANEL . . . . . . . . . . . . . . . . . . . . . . . . . . 61
USING GRADIENTS CREATIVELY . . . . . . . . . . . . . . . . . . . . . . . . . . 62
GRADIENT STYLES. . . . . . . . . . . . . . . . . . . . . . . . . . . . . . . . . . . 63
GRADIENT MASKS . . . . . . . . . . . . . . . . . . . . . . . . . . . . . . . . . . 64
MASKS AND SELECTIONS IN DETAIL . . . . . . . . . . . . . . . . . . . . . . . 65
MAGIC AND BACKGROUND ERASERS . . . . . . . . . . . . . . . . . . . . . 66
Cloning and Healing tools
USINGTHE CLONING AND HEALINGTOOLS 46
The Cloning and Healing tools in Photoshop offer an elegant way to fix damaged photos,
correct bad scans and generally clean up your images.And they’re great fun to use
Gradients,Fills and Erasing
THE GRADIENT,FILL AND ERASERTOOLS 54
Once you get more competent with Photoshop you’ll appreciate the importance of these
utility tools.The Gradient tool in particular is essential for all manner of tricks and effects
8 FOCUS GUIDE – ADOBE PHOTOSHOP TOOL TECHNIQUES
Contents
6 THE ‘FOCUS’ TOOLS . . . . . . . . . . . . . . . . . . . . . . . . . . . . . . . . . 70
THE BLUR TOOL. . . . . . . . . . . . . . . . . . . . . . . . . . . . . . . . . . . . 71
THE SHARPEN TOOL . . . . . . . . . . . . . . . . . . . . . . . . . . . . . . . . . 72
THE SMUDGE TOOL . . . . . . . . . . . . . . . . . . . . . . . . . . . . . . . . . 73
WORKING WITH THE SMUDGE TOOL. . . . . . . . . . . . . . . . . . . . . . 74
DODGE AND BURN . . . . . . . . . . . . . . . . . . . . . . . . . . . . . . . . . 75
THE SPONGE TOOL. . . . . . . . . . . . . . . . . . . . . . . . . . . . . . . . . . 77
USING DODGE AND BURN . . . . . . . . . . . . . . . . . . . . . . . . . . . . 78
FOCUSING IN WITH DODGE AND BURN . . . . . . . . . . . . . . . . . . . 79
7 THE TYPE TOOL . . . . . . . . . . . . . . . . . . . . . . . . . . . . . . . . . . . . 82
TYPE OPTIONS. . . . . . . . . . . . . . . . . . . . . . . . . . . . . . . . . . . . . 84
TYPE TOOL TIPS . . . . . . . . . . . . . . . . . . . . . . . . . . . . . . . . . . . . 85
USING THE WARP TEXT PANEL . . . . . . . . . . . . . . . . . . . . . . . . . . 87
RASTERIZING TYPE. . . . . . . . . . . . . . . . . . . . . . . . . . . . . . . . . . . 88
STYLED TYPE . . . . . . . . . . . . . . . . . . . . . . . . . . . . . . . . . . . . . . 89
8 USING THE PEN TOOLS . . . . . . . . . . . . . . . . . . . . . . . . . . . . . . . 92
VECTOR SHAPES. . . . . . . . . . . . . . . . . . . . . . . . . . . . . . . . . . . . 95
USING VECTOR SHAPES. . . . . . . . . . . . . . . . . . . . . . . . . . . . . . . 96
MASKS . . . . . . . . . . . . . . . . . . . . . . . . . . . . . . . . . . . . . . . . . . 98
VECTOR SHAPE DETAILS. . . . . . . . . . . . . . . . . . . . . . . . . . . . . . . 99
Effects Tools
GETTINGTO KNOW THE EFFECTSTOOLS 68
Photoshop’s effects tools include Blur,Sharpen,Smudge,Dodge and Burn.Discover how
best to use them to spice up your artwork,composites and photographic images
Text
WORKING WITHTHETYPETOOL 80
Creating text in Photoshop is quite easy to do,whether it’s for artistic effect or simply to add
essential information.This chapter looks at the various options available with theType tool
Vectors
WORKING WITH PATHS,VECTORS AND MASKS 90
Photoshop has always used vector-based‘paths’to draw smooth shapes and outlines.
Learn how the latest version has the ability to create shapes and masks with vectors too
9ADOBE PHOTOSHOP TOOL TECHNIQUES – FOCUS GUIDE
Contents
CD PAGES. . . . . . . . . . . . . . . . . . . . . . . . . . . . . . . . . . . . . . . 120
INDEX. . . . . . . . . . . . . . . . . . . . . . . . . . . . . . . . . . . . . . . . . . 124
GLOSSARY. . . . . . . . . . . . . . . . . . . . . . . . . . . . . . . . . . . . . . . 126
9 NOTES AND ANNOTATIONS . . . . . . . . . . . . . . . . . . . . . . . . . . . 102
THE EYE DROPPER TOOL . . . . . . . . . . . . . . . . . . . . . . . . . . . . 104
USING THE EYE DROPPER TOOL . . . . . . . . . . . . . . . . . . . . . . . . 105
THE COLOUR SAMPLER. . . . . . . . . . . . . . . . . . . . . . . . . . . . . . 106
THE MEASURE TOOL. . . . . . . . . . . . . . . . . . . . . . . . . . . . . . . . 107
Miscellaneous tools and Utilities
ANNOTATIONS,NOTES ANDTHE MEASURETOOL 100
Along with the creative tools,Photoshop provides several tools to add accuracy,sound and
vision to your work.These fall into two tool groups – Notation and Measurement tools
Essential information
CD PAGES AND RESOURCES 120
Your essential guide to the software on your disc.
Plus our handy glossary and index
10 CREATING A MONTAGE . . . . . . . . . . . . . . . . . . . . . . . . . . . . . . 110
FIX MISSING PARTS OF THE IMAGE . . . . . . . . . . . . . . . . . . . . . . . 112
USING THE PEN AS A BRUSH . . . . . . . . . . . . . . . . . . . . . . . . . . 113
ADDING A BACKGROUND . . . . . . . . . . . . . . . . . . . . . . . . . . . . 115
APPLYING ARTISTIC DETAIL . . . . . . . . . . . . . . . . . . . . . . . . . . . . 118
VECTOR SHAPE AND TYPE LAYERS. . . . . . . . . . . . . . . . . . . . . . . 119
Artwork project
CREATINGTOP QUALITY ARTWORK 108
In this final chapter we’ll put together a piece of artwork using all the tools and options that
we’ve looked at over the course of this Photoshop Focus Guide
Chapter 1
SELECTION
TOOLSIN
PHOTOSHOP
In earlier versions of Photoshop
there was no Select tool – one
that looked like a traditional arrow
cursor, that you would use to select
‘objects’. Because Photoshop dealt
primarily with pixels, it made no
sense to have a Select tool – there
were no ‘objects’ to select. Instead,
the selection tools were default tools
– ones you used automatically, to
begin editing.
In Photoshop 7.0 there is an arrow
tool for selecting objects, since the
introduction of vector shapes (those
drawn using a series of points or
‘vectors’) made this necessary.
Despite this, the selection tools, in
their many and varied forms, are still
In this chapter…
Discover how the
Photoshop selection
tools work
Learn how to make
accurate selections
Create partial or
gradient selections
Making selections is the core of Photoshop’s
way of working.There are a variety of tools you
can use for the purpose,so let’s take a look at
how to get the most out of them
the main tools for doing 90% of the
tasks in Photoshop.
Selections are an essential part of
understanding Photoshop’s methods
and central to the way the program
works – making a selection then
performing an action on that
selection is the basic workflow.
The better you become at Photoshop
the better you’ll become at making
selections and vice-versa.
No need for discretion
What’s important to understand,
though, is that selections are not
necessarily discreet. They don’t have
to define rigidly what is or is not
selected – they can be partial too.
It is perfectly possible to make
selections so that some pixels are
100% selected and others are 100%
unselected, and in between there is a
selection gradient, where pixels are
partially selected. This is how you
create effects that blend smoothly
into existing pixels, and this also
forms the basis of ‘anti-aliasing’ –
smoothing jagged, pixelated edges.
Feathering is the most basic
implementation of gradient
selections in Photoshop. When
making a rigid selection using one
of the Marquee tools for instance,
you can tell Photoshop to make the
edge of the selection slightly soft, or
‘feathered’. This effectively creates
a border around the selection where
some of the pixels are partially
selected, smoothing whatever effect
or operation is applied to the
selection, or merely preventing
jagged edges.
The soft option
By making the feathered edge larger,
you’ll be able to create very soft
selections, and this is very useful when
making photo-montages, for instance,
or retouching images. We’ll look at
how anti-aliasing and feathering are
implemented in Photoshop’s selection
tools, and how you can use them to
achieve professional results quickly
and easily.
11ADOBE PHOTOSHOP TOOL TECHNIQUES – FOCUS GUIDE
Selections
Page 17The Magic Wand tool selects an
object in an image to change the colour
Page 20 Photoshop can convert
channels into selections and vice-versa
Page 18 Quick mask mode turns any
painting tool into a selection tool
Page 12The Circular Marquee tool
makes an elliptical selection
Page 13 Single Column marquees are
used to select only certain columns
Page 15The Magnetic Lasso lets you
make detailed selections with ease
Basic Selection tools
Let’s take a look at the various tools in the
toolbar available for making selections
12 FOCUS GUIDE – ADOBE PHOTOSHOP TOOL TECHNIQUES
Chapter 1
Changing
marquees
Holding down the
[Alt] key will change
the marquee mode so
that the selection
expands from the
centre,rather than the
corners,as you drag.
Shifting around
Rather than using the
buttons you can hold
down modifier keys to
add and subtract
selections.To add,hold
the [Shift] key before
you begin to click and
drag.To subtract hold
the [Alt] key before you
click and drag.The
marquee cursor will
change to show which
mode you are in.
In Subtract mode, you can remove areas
from the current selection. Here we
changed to the Circle Marquee tool to
subtract an elliptical shape from the
rectangular selection we had made.You can
continue to make negative selections that
chip away at the current selection.This is a
good way to refine a selection to fit a specific
shape in an image.
4
The Options bar displays tool-specific
settings.The selection tools all have a set
of four buttons that change the effect that
subsequent selections have on the one that’s
currently active.The normal mode is New
Selection – each time you click and drag,a new
selection is made and the current one is lost.
Add mode makes the current selection larger
and a different shape.
3
The Circular Marquee works in exactly
the same way, except the selection will
be elliptical.With both tools you can constrain
the selection so it is either a perfect circle or a
perfect square by holding down the [Shift] key
while you drag. Lift your finger off the [Shift]
key while still holding the mouse button
down to switch back to unconstrained mode.
2
The Rectangular Marquee tool is the
first tool in the Toolbar, and is used to
select rectangular areas of an image. It’s
simple to use – just select the tool and drag
across the image to select the area you want.
By default the tools works in corner-to-corner
mode. Dragging from top-left or bottom-right
creates the marquee.
1
13ADOBE PHOTOSHOP TOOL TECHNIQUES – FOCUS GUIDE
Selections
Short intersection
To activate Intersect
mode without using
the buttons hold
down the [Alt} and
[Shift] keys before you
drag.
Perfect circle
If,after dragging while
holding down the [Shift]
key,you want to force
the selection to be
constrained to a perfect
circle or rectangle,
release the [Shift] key
momentarily and press
it again.Holding the
[Alt] key while dragging
will force a selection to
be drawn from its centre
as mentioned.
If already holding the
[Alt] key,such as when
using the Intersection
shortcut,momentarily
release it and then
press the [Alt] key.
This forces the
‘constraint from
centre’to occur.
Uses for the Single Row and Column
Marquees are varied, but not always
obvious. Here, they’re used to create multiple
random vertical and/or horizontal lines in an
image much more quickly than using the
Pencil or Line tool.The Add Selection mode
was used and the selections filled with black,
on separate layers, to create lines whose
opacity and blending mode we can vary.
8
The last two selection types in this tool
group are the Single Row and Single
Column Marquees.These are special types of
marquee which, as their name suggests, select
either a single row or column of pixels. In this
case dragging only defines which row or
column in the image is selected and the
selection extends to the edges of the image
in either mode.
7
This is the result of the intersection.
Note that it’s only the overlapping parts
of the two selections that remain selected.
This selection method is not used very often
but you’ll appreciate just how handy it can be
in certain situations. Creating similar
selections any other way would be very
difficult and time-consuming.
6
The fourth mode is Intersect.When in
this mode, you can create a new
selection that is the intersection between the
currently active one and one you will drag out.
Basically all parts of the current selection will
disappear except that portion that overlaps
with the new selection you drag out. Here is
the original selection with a new one being
dragged out over it, using the Intersect mode.
5
The Lasso tool is a free-form
selection tool. You can use it
like a pen to draw your selection
border by hand. When using the
Lasso tool selections can be any
shape you like, but it can be hard to
be precise because selection must be
drawn in a single motion. The
Polygonal Lasso is much easier to
use, and can be found in the Lasso
tool pop-up in the toolbar. This
enables you to click from one point
to another to create straight line
segments to make up your selection.
All you need to do is double-click,
or click on the starting point of the
selection to end it and consequently
close your selection.
The LassoTools
The standard,Polygonal and Magnetic Lassos
are ideal for creating complex selections
14 FOCUS GUIDE – ADOBE PHOTOSHOP TOOL TECHNIQUES
Chapter 1
Using the [Alt] key technique allows you the best
of both worlds,drawing straight sections or
detailed curves as and when you need to
Poly-gone
When using the
Polygonal Lasso
holding down the
[Alt] key invokes the
normal Lasso tool.
Releasing the [Alt] key
reverts back to the
Polygonal Lasso.
Combined Lasso
With the Lasso tool
active,just hold down
the [Alt] key at any
stage to turn it into the
Polygonal Lasso.
THERE ARE two ways in which to work using the [Alt] shortcut.
Assuming you have the normal Lasso tool selected, if you keep the [Alt]
key held down when you click and drag, the tool will behave like the
normal Lasso.
IF YOU want to get really precise, then the Magnetic Lasso is the key.
With this selection tool you can draw close to the edge of the object you
wish to select and the tool will figure out where the boundary should be
and adjust the selection to fit.
YOU CAN set the Frequency high to place lots of points as you drag.
This can be handy for jagged edges.
A LOW Frequency is also useful when you don’t need the added
complexity of hundreds of anchor points, but can make do with a
less precise selection.
LASSO OPTIONS ROUNDED UP
The Magnetic Lasso
If you want detailed selections without too
much effort,here’s the perfect tool for the task
15ADOBE PHOTOSHOP TOOL TECHNIQUES – FOCUS GUIDE
Selections
Fast pan and zoom
You can use the Pan and
Zoom shortcuts to move
the image around while
still in mid-selection.See
Chapter 2 for more
about navigating and
editing your images.
Magnetic switch
Hold the [Alt] key to
activate the
Polygonal Lasso
tool when using the
Magnetic Lasso.
Another trick to help on very low
contrast portions of an image, such as
where the pumpkin stalk is in front of the girl’s
face again, it can help to increase the
Frequency setting.This will cause the tool to
place anchor points more often, therefore
reducing the span of pixels it has to analyze as
you drag the mouse.
4
This is a problem of contrast. By
reducing the Edge Contrast setting in
the Option bar you can help the Magnetic
Lasso to detect edges that are lower in
contrast. But you will still need to manually
add anchor points by clicking, to help the
Lasso do this.
3
If the area you are tracing is too
indistinct and low in contrast for
Photoshop to find an edge itself, you can click
the mouse to force an anchor point to be
placed.The default setting in the Options bar
is fine most of the time, but there can be
problems – here, the tool has no problem with
the edge of the hair, but it didn’t seem to
detect the pumpkin stalk.
2
This tool lets you make more detailed
selections, particularly of specific
objects in an image, without requiring too
much effort.You don’t have to keep the mouse
button held down when drawing either –
click once to start, drag close to the object
edge, then double-click to end. Note that the
tool automatically places‘anchor points’as
you draw to keep the selection in place.
1
The MagicWand
The Magic Wand is a special selection tool,
used for selecting areas of similar colour
16 FOCUS GUIDE – ADOBE PHOTOSHOP TOOL TECHNIQUES
Chapter 1
Unrestricted
colours
When the Contiguous
setting in the Options
bar is checked,
Photoshop makes a
selection of similar-
coloured pixels that
are also physically
joined to your starting
point.Disable this
setting and similar
colour pixels across
the whole image will
be included,which
can take a few
moments.
Use All Layers
The Use All Layers
option allows you to
calculate the selection
based on how the
image actually
appears on screen
when working with
multi-layered
documents. If this is
left unchecked,then
only colours on the
currently selected
layer will be analysed
for similarity.
We can improve the ability of the wand
to select the colours we want by
increasing the Tolerance setting, from the
default 32, to 50 then [Shift]+clicking in each
of the separate areas. Any other parts of the
jumper still not selected can be added by
[Shift]+clicking on them again until you have
a good clean selection with no‘islands’.
4
The Magic Wand will only select colours
within a certain range, defined by the
Tolerance setting. And it will only look at
contiguous pixels – that is, ones that actually
touch each other. Areas of colour not directly
connected, like the chest and other arm, are
not considered for selection.
3
Most images don’t contain large areas of
flat colour like the one above,so here’s a
more typical use for the MagicWand – selecting
the girl’s jumper to change its colour.Using the
MagicWand,we can click on a section of the
jumper to select all pixels with a similar colour.
However,using the default setting there are
many‘islands’of unselected pixels,so not all of
the jumper has been selected.
2
The Magic Wand tool is used to select
areas using a single click.The tool works
by sampling the colour of the image where
you click and then looking at all adjacent
pixels for those that are the same or similar in
colour.Take a well-defined shape like the one
here and click in it with the Magic Wand – the
whole shape is selected in one go.
1
17ADOBE PHOTOSHOP TOOL TECHNIQUES – FOCUS GUIDE
Selections
Colour tweaks
The Hue/Saturation
panel lets you adjust
the whole spectrum
or individual sectors
of the colour
spectrum.Choose
these from the
pop-up menu.
Let it slide
The sliders at the
bottom of the
Hue/Saturation panel
enable you to adjust
the range of colours
affected in
each sector.
By selecting the layer mask and
applying the Gaussian Blur filter with a
smallish value we can make the layer mask
slightly bigger.Then by applying Levels to the
layer mask we can make the blurred edges
brighter, controlling how much of the
Hue/Saturation effect is applied to this area.
8
If we zoom into the document we can
see that there is a slight fringe of red.
This is because some of the jumper that
overlaps the background was left unselected.
This is a limitation of the tolerance setting
used by the Magic Wand. Fortunately, there is
a way we can fix this.
7
By adding a Hue/Saturation Adjustment
Layer while the selection is still active,
you can change the colour of the the jumper,
and only the jumper. Photoshop creates a
layer mask from the selection and uses is to
limit which areas of the adjustment layer will
actively affect the layers below.
6
Here you can see that a part of the arm
has been selected.This is due to the
high tolerance setting used.You can easily
remove it from the selection, but first reduce
the tolerance to a lower value, such as 24,
then [Alt]-click on the arm inside the selection
to remove it.
5
Quick Mask
Quick Mask is not a tool as such,but a mode
you can enter when working with selections
18 FOCUS GUIDE – ADOBE PHOTOSHOP TOOL TECHNIQUES
Chapter 1
Fill the gaps
Holes in a Mask or
Quick Mask can be
filled by selecting the
inside or outside area
and applying the
Minimum filter.
Keep it sharp
Apply the Minimum
filter to a copy of a
layer using the
Overlay mode to
give you a‘live’
sharpening layer.
While in Quick Mask mode, therefore,
you can use any of the normal painting
tools to modify your mask, and hence your
selection.You can see that Photoshop offers a
huge amount of freedom when creating
selections, and this is indicative of how
important selections are when using
Photoshop. Here, the Paintbrush tool is being
used to clean up the mask.
4
The red overlay is slightly transparent
so you can see what it beneath. Red
areas are masked out (unselected) while
clear areas are unmasked (selected). But
internally, Photoshop stores the mask in
shades of grey, not red – so this is how the
mask looks to Photoshop.
3
By clicking the Quick Mask button at
the bottom of the toolbar, or pressing
the [Q] key, the selection is converted to a
mask.The mask is displayed, not in shades of
grey, but as a semi-transparent overlay.This
mimics the techniques used in traditional
printing where a red‘rubylith’overlay is used
to mask out parts of a photo or artwork.
2
When any selection is active,no matter
which of the selection tools you started
off using,you can enable Photoshop’s Quick
Mask mode.Here is a less-than-perfect
selection we have made using the Magic Wand.
1
When painting, take notice of
the foreground colour
indicated in the bottom of the
toolbar. When in Quick Mask mode
this will only indicate shades of
grey, so any colours you have set
will appear grey. Hitting the [D] key
sets the colours to the default, white
and black. As you paint you can use
the [X] key to reverse the background
and foreground colours so that you
can paint in white (unmask) or black
(mask) to edit the mask.
Once you have touched up the
mask, you can press the [Q] key
once more to exit Quick Mask
mode. You’ll then be able to convert
the edited mask to a selection.
Working with the Quick Mask
The Quick Mask lets you create a ready-made
mask,which you can edit or turn into a selection
19ADOBE PHOTOSHOP TOOL TECHNIQUES – FOCUS GUIDE
Selections
Make use of the foreground and background
switch key [X] to flip between masked and
unmasked colours
Disappearing ants
To hide the‘marching
ants’while a selection
is active use the
[Crtl]+[H] shortcut
(that’s
[Command]+[H]
for Mac users).Be
careful to remember
that you have a
selection active
though!
Hiding
applications
To hide other
applications on a Mac
and leave only
Photoshop visible,type
[Command]+[Alt]+[H].
On PCs,Photoshop has
an application
background window,
so this is not
applicable.
IF YOU need to make a selection slightly bigger all the way round, you
can do so using the Select > Modify > Expand menu command. A dialog
will appear in which you can enter the number of pixels by which you
wish to expand the selection.
YOU CAN contract a selection by using the Select > Modify > Contract
menu command.To make a selection larger by a specified number of
pixels around it, choose Select > Modify > Expand from the menu.
TO SOFTEN a selection and make its border less jagged, you can use
the Select > Feather menu command, enter a value in pixels (from 1 to
250) and click OK.
IF YOU need to modify just the border of the selection area you can
select it using the Select > Modify > Border.This is useful for creating
special edge effects, in combination with some filters, like Torn Edges.
HOW TO MODIFY YOUR SELECTIONS
Selections,Masks and Channels
Let’s look at selections in a little more detail to
see how how they relate to layers and channels
20 FOCUS GUIDE – ADOBE PHOTOSHOP TOOL TECHNIQUES
Chapter 1
Alpha channels
The term alpha
channel simply means
any extra greyscale
channel saved along
with the three RGB
channels,or four CMYK
channels,that make up
a colour image file.
Photoshop files can
store many of these
alpha channels at once.
Channel selection
[Ctrl]+[Alt]+[Shift]+click
on a channel to load
the intersection of the
current selection
and a channel.
To reload a channel as a selection once
again,click the Load Channel As Selection
button at the bottom-left of the Channels palette.
A better technique is to press [Ctrl] (or
[Command] on a Mac) while clicking on the
channel icon directly – we can load the larger
ellipse as a selection (by pressing [Ctrl/Command]
while clicking on it) then subtract the smaller
ellipse by pressing [Ctrl/Command]+[Alt] while
clicking its icon in the Channel palette.
4
Now that the selection is saved as a
channel, we can drop the selection and
continue to make new ones. It’s only possible
to have one selection active at a time, so
saving them to a channel is a convenient way
to store them for use later on. Here we’ve
created another selection and saved it as
another channel. It’s just a larger ellipse.
3
We can convert the selection into an
‘alpha’channel by switching to the
Channels tab and clicking the Save Selection
As Channel button, (second from the left at
the bottom of the palette).The selection is
then represented by a greyscale image.
2
As we’ve seen with the Quick Mask
mode, selections are handled internally
by Photoshop as a greyscale image or‘mask’.
White areas in the mask are pixels that are
fully selected, black areas are fully unselected
and grey areas are partially selected. Let’s
create a simple selection using the Elliptical
Marquee tool.
1
Slices
Slices are special kinds of selections for web
page design,before the Image Ready stage
21ADOBE PHOTOSHOP TOOL TECHNIQUES – FOCUS GUIDE
Selections
Reassembled slices
When you save the
sliced page Photoshop
creates an HTML file
plus separate image files
for each slice.When the
HTML file is read by a
web browser all the
slices are reassembled in
their original position,
giving the appearance
of a single image
once again.
Keep it tidy
Hold the [Ctrl] key
while using the Slice
tool to toggle the Slice
Select tool on and off.
Use this to select a
slice and drag its edge
handles to resize it.Be
careful not to have
any unnecessary
‘sliver’slices between
the main slices.Zoom
in to check they all
butt up against each
other nicely.
Now choose File > Save ForWeb to open
Photoshop’s web compression tool.In
this panel,you can select each slice and apply
precisely the compression most suitable.For
example,a photo saved as high quality JPEG,
the text as a medium quality JPEG and the
graphics as GIFs.The backgrounds can be saved
as low quality JPEGs.This sliced,higher quality
image is only 5k larger than our first attempt.
4
Using the Slice tool we can divide up
the image into sections. It’s simple to
use – just select the tool and drag out
marquees to cut the image into appropriate
boxes. Photoshop automatically adds extra
slices where necessary to keep everything
rectangular because each slice essentially
becomes a separate image file.
3
The problem here is that the different
kinds of graphics element on the page
really need to be saved individually using the
compression settings best suited to each.
We can’t do this without using slices in
Photoshop. As this pretty extreme example
shows, achieving a small file size causes most
of the elements to look terrible.
2
Here’s an example of where slicing can
really help.This is an example web page,
containing text, a background, a photographic
image and graphics created in Photoshop.
Obviously, for the web we want the page to
download as fast as possible but also look as
good a possible.
1
Chapter 2
NAVIGATING
AND EDITING
YOUR IMAGES
Being able to zoom and pan an
image is important when
working on a Photoshop document.
Like all other aspects of the program
there is more than one way to get
around an image, manage your
windows and documents, and
generally navigate the Photoshop
landscape. Similarly you’ll need to
be able to work with the elements
within a document, such as masks,
layers, floating selections, paths and
vector masks. There are a number of
tools to accomplish these tasks.
As mentioned before, Photoshop is
not an object-based 2D program –
that is, you work directly with the
pixels of a layer until you explicitly
In this chapter…
Learn how to pan and
zoom images
Discover how to select
and move layer
elements
Use shortcuts to scale
and pan the view
Work more efficiently
and productively
Getting around inside an image is important if
you are to work quickly and efficiently.This
chapter covers the view navigation tools and
shortcuts for managing your workspace
do something to change that fact,
such as creating a new layer on
which to paint. In some 2D
programs, every time you paint a
stroke or apply an effect, a new
object is created. While this gives
you a totally non-destructive way of
image editing, it can make managing
your document a very complicated
procedure. In Photoshop it’s much
more straightforward.
Painting in layers
If you paint on an image layer, stop
say, to change colour, then paint over
what you just did, the result
destructively alters those pixels in
the layer. It’s much like painting in
the real world, except in Photoshop
you have an Undo command.
If you need to paint over the top of
existing artwork and be able to go
back and change the position, size,
colour and opacity of those strokes
later on, then you have to paint on a
new layer. This holds true for any
other aspect of the program where
new pixels are created.
While the Selection tools – the
Marquee, Lasso and so on – are used
to select pixels within a layer, there
are other tools for selecting and
moving layer elements themselves.
These include the Move tool, the
Path Select tool and the Direct
Selection tool for dealing with
vector-based elements. It’s important
to learn the difference between
them, and we’ll examine these
differences more closely in the
following pages.
Old and new
The Path Select and Direct Selection
tools are not easy to find in older
versions of Photoshop. The Path
Select tool used to be part of the Pen
tool group, but can now be found in
its own tool group on the toolbar.
Many revisions have been made to
both the menus and toolbar, but
rest assured that most of the
information in this book also applies
to older versions of Photoshop.
23ADOBE PHOTOSHOP TOOL TECHNIQUES – FOCUS GUIDE
Navigation and manipulation
Page 24 Use the Zoom and Pan tools
to navigate your images on screen
Page 25The Navigation palette is great
for giving an overview of the whole page
Page 26 Manage your screen space
when multiple documents are open
Page 31 Use the Direct Selection and
Path tools to work with paths and vectors
Page 29 Quick 3D effects are possible
using the Move tool in copy mode
Page 28The Move tool enables you to
navigate your layers with a pop-up menu
Panning and Zooming images
Here we show you the basic navigation tools
available for viewing your image
24 FOCUS GUIDE – ADOBE PHOTOSHOP TOOL TECHNIQUES
Chapter 2
100% accuracy
To zoom the image so
that it is at exactly
100% scale,double-
click the Zoom tool
in the toolbar.
Viewing options
Use the buttons in the
Option bar to zoom
the image to full size,
print size or to make
it fit on screen.
Two useful options are the Resize
Window To Fit and Ignore Palettes
options in the Zoom tool’s Option bar.With
the former option enabled the window will
change size along with the image, and with
the latter option enabled the window will
continue to extend below any open palettes,
though not the toolbar.
4
To zoom out again, either click the
Zoom Out button in the Option bar and
click in the image, or hold down [Ctrl] and click
(that’s [Option]+click on a Mac). If the image
extends past the borders of the window you
can pan the image by clicking on the Pan tool,
or holding the Space Bar at any time and
dragging in the window.
3
At the bottom of the toolbar are the
Hand (which we’ll refer to as the Pan
tool) and Zoom tools. Click the Zoom tool
then click on your image to zoom in.
Eventually you’ll zoom in so far that the
individual pixels will become visible as large
blocks of a single colour.You’ve exceeded the
resolution limit for the image on your monitor,
but getting this close is often very useful.
2
When you open an image in Photoshop
it is automatically scaled so that the
whole image is visible at once.The scaling
factor is displayed as a percentage in the
window’s title bar. But how do you zoom in to
see more detail in a large image? As is often
the case when using Photoshop, there are a
number of different options.
1
The Navigator panel
A useful device for getting around documents
is the Navigator panel.Here’s how it works
25ADOBE PHOTOSHOP TOOL TECHNIQUES – FOCUS GUIDE
Navigation and manipulation
Navigator panel
This can be very
useful when working
on multiple monitor
set-ups.You can have
a full-screen preview
of your image on one
monitor while you
work up close on
another.This prevents
you continually
zooming in and out to
see how the editing
looks relative to the
rest of the image.
A different scale
Some previous
versions of Photoshop
do not allow
incremental and
fractional scaling –
you can only scale out
to 75%,50%,25%,
12.5%… or in to
125%,150%,200%
and so on.
The triangle at the top-right of the
Navigator accesses the options for the
panel.There are only two in Photoshop 7:
Dock To Palette Well and Options.The latter
lets you change the colour of the zoom box,
which can be handy if you have a very red
image like ours and the box is hard to see, of if
you just don’t like working with the red colour.
4
To zoom in and out using the Navigator
you have a few different options.You
can use the zoom slider to interactively zoom
the image, and that’s quite fun to do. Or you
can click on the Zoom In and Zoom Out
buttons either side of the slider. Or you can
click in the text field to enter an exact scale.
3
The Navigator panel is very useful when
zoomed in very close to an image,
because it shows you with a red box exactly
where in the main image the zoomed in
portion is located. Note that you can make the
preview larger by dragging the lower right
corner of the palette to resize it, even to fill the
whole screen.
2
From the Windows menu you can access
the Navigator panel, though it’s open by
default in Photoshop.This is a handy tool
because it enables you to view the entire
image in a small window, pan the main view,
and zoom in and out, all from the same small
area on screen. It’s great for those that don’t
like to use keyboard shortcuts.
1
The main interface in Photoshop
is quite simple and well laid-
out, but it has been constantly
refined through development to
offer highly efficient document and
view management. Within the main
menu is the View menu which has
many view management options –
the Zoom In and Out commands and
their respective shortcuts, as well as
commands to show the Rulers,
Guides and Grids and the option to
enable various kinds of snapping.
As well as using the Navigator or
Zoom tool you can use the shortcuts
[Ctrl]+[+] and [Ctrl]+[–] to zoom in
and out (Mac users replace [Ctrl]
with [Command]).
View management
Photoshop has several gadgets to help you
work with various views of your document
26 FOCUS GUIDE – ADOBE PHOTOSHOP TOOL TECHNIQUES
Chapter 2
Multiple documents can be arranged on the
screen using Tile,in Windows > Documents.This
fits your images next to each other on screen
Floating away
The floating palettes
can get in that way,
especially if you are
working on a small
monitor.No matter,at
any time you can hit
the [F] key to toggle
the display mode to
full screen.Use the
Tab key to toggle the
palettes on and off to
get a totally
uncluttered view.
When the Zoom tool is
active the Options bar
displays a few extra buttons –
Actual Pixels,Fit On Screens
and Print Size.These zoom
the view to specific sizes.
The Navigator panel is
grouped with the Info
palette.Use the navigator to
perform multiple view
navigation tasks in one area,
with one hand.You also get a
handy image preview.
The Print Size pop-up is
located at the bottom of the
document window.Click on
the blank space here to
preview how large the image
will print out on the paper
size set in the Print dialog.
Yet another way to zoom
the document is to type in a
value here at the bottom-left
of the document window.
The Zoom and Pan tools
can be found at the bottom
of the toolbar.Click on these
to zoom and pan inside
the image.
At the bottom of the toolbar
are buttons to control full
screen view.The middle one
makes the current window fill
the screen,the right makes
the menu bar disappear and
the left returns it to normal.
ZOOMING AROUND
As well as moving and copying
pixels, Photoshop’s Move tool
allows you to align and distribute
objects evenly across the document
or within a selection. With the Move
tool selected you will see a number
of options available.
The first option, Auto Select
Layer, is very handy. It enables you
to click on a pixel in the image to
select that layer. The next, Show
Bounding Box, displays a transform
box around the selection or element
or layer. You can drag the handles on
the edge of the box to move the
selection. If you click on the lines,
you’ll switch to the Free Transform
mode, enabling you to scale, rotate
and deform the objects.
The next section of options only
becomes active when you have
linked layers. To link layers so that
you can move them as one object, go
to the Layers palette and click the
blank icon box between the eye icon
and one of your layers. A chain icon
now appears in the blank icon box,
indicating that the layer you have
just clicked next to is now linked to
the currently selected layer.
Move,Align and Distribute
The latest version of Photoshop has handy
Align and Distribute features
27ADOBE PHOTOSHOP TOOL TECHNIQUES – FOCUS GUIDE
Navigation and manipulation
Line them up
The Align features
work with selections
on fully filled layers
too.If a selection is
active then it is used
as a master guide for
all the layers to be
aligned to.If you have
accidentally moved
image layers so that
they lie partially off
the canvas you can
use the Align feature
to make them all line
up again squarely on
the canvas.
When you select a layer that has other layers linked to it the
Align and Distribute options of the Move tool become
active. Click on these to distribute the layers or align them to
various key points.You can use the Align Left Edges button,
for example, to align individual text layers so that their left
edges line up. It’s important to note that these options only
take into account the bounding box of the layer. If you have
a series of layers linked together but they are filled totally
with pixels, then the align options will have no effect.This is
because the layers have nowhere to be aligned to, as they
are already lined up on the canvas.
ACTIVATING ALIGN AND DISTRIBUTE
Feel like going MAD? Here’s how to Move,Align and Distribute
The Align and Distribute buttons in
the Move options bar can be used to
align multiple linked layers
The Move tool
The Move tool is a very handy,multi-purpose
gadget – and surprisingly easy to use
28 FOCUS GUIDE – ADOBE PHOTOSHOP TOOL TECHNIQUES
Chapter 2
On the Move
Atanytime,nomatter
whattoolisselected,
youcan accessthe
Movetoolbypressing
[V]onyourkeyboard.
Scissor action
The Move tool cursor
displays a pair of
scissors next to it
when it is over an
active selection.
If a selection is active then the Move
tool will move the pixels in the selection
only, as opposed to the whole layer. Here
we’ve selected the whole object in a flattened
document and dragged it.The result is that
the pixels are lifted and moved, leaving a
hole behind.
4
You can scroll your mouse through the
list to select precisely the right layer you
want to move without having to go to the
Layers palette. Here we’ve selected the
Wireframe layer, and moved it. Getting into
the habit of naming your layers will help here.
3
The neat thing about the Move tool is
that it has a built-in layer navigation
feature. In a multi-layer document you can
find out exactly which layers are beneath any
given point in an image by control-clicking
and holding on the image. A menu will pop up
displaying the names of the layers in order,
from the top downwards.
2
The Move tool is the second tool at the
top of the toolbar. It looks like an arrow
but without the tail. Use this tool when you
want to move elements in a document, be
they selected pixels or whole layers.
1
29ADOBE PHOTOSHOP TOOL TECHNIQUES – FOCUS GUIDE
Navigation and manipulation
Extrude and move
In the 3D text example
on the left,we first
created a text layer,
then loaded it as a
selection by command
clicking the layer.In a
new layer below the
text layer we created a
gradient through the
selection,and with it
still active we carried
out an extrude-
move function.
Computer Arts
To discover even more
ways to develop your
Photoshop skills,
check out our sister
magazine,
Computer Arts.
You can find the
magazine’s website at
www.computerarts.co.uk.
A nifty trick is to hold down the [Alt] key
and use the arrow keys to nudge the
selection diagonally. Used on a text outline
filled with a gradient like this, repeatedly
pressing the Up and Right Arrow keys creates
an extruded 3D object.
8
Another way to do this is to create a
new layer from the selection first, then
use the Move tool as normal.With a selection
active press [Ctrl] + [J] (that’s [Command] + [J]
on a Mac) to convert the selection to a new
layer, then move it as normal.
7
Now as you drag the selection will be
copied, lifted and moved to another
location on the layer. Note that while the
selection is still active the copied pixels
occupy a quasi-layer.This is said to be
‘floating’selection.You can move it around
as if it was on its own layer. Only when you
deselect the pixels will it be dropped on to
the layer.
6
Moving pixels and leaving a hole behind
may be fine in some circumstances but if
you want to copy the pixels instead of cutting
them out then you have to hold down the [Alt]
key (often called the‘Option’key on a Mac,
although it’s still labelled‘Alt’) as you drag with
the Move tool. Notice that the cursor will
change to a double arrow, indicating you’re
now in Copy mode.
5
Direct and Path Selection tools
Use the Path Selection and Direct Selection
tools to move and edit paths and vector shapes
30 FOCUS GUIDE – ADOBE PHOTOSHOP TOOL TECHNIQUES
Chapter 2
A familiar Path
The Path Selection
tool is much like the
old arrow cursor in
the Pen tool group of
previous versions of
Photoshop,before
vector shapes
and masks
were introduced.
Hide and seek
You can show and
hide the path outlines
by typing
[Ctrl]+[Shift]+[H],on
your keyboard (that’s
[Command]
+[Shift]+[H] for Mac
users) or toggling the
Views > Show >
Target Pathsmenu
command on and off.
With both paths selected you can click
on the Combine button in the Path
Selection’s Option bar to merge both (or as
many as you like) into a single path. If you click
away from the paths to deselect them, then
reselect them, you’ll see that all the paths are
now selected because they are one.
4
Much like other selections in Photoshop
you can add to them using the [Shift]
key. Here we have selected both paths by
[Shift]-clicking on the second path to activate
it. Both can now be transformed together.
However, to make this work you must have
the Show Bounding Box option turned off.
3
For this we need to activate the Path
Selection tool.This is in the eighth row
of the toolbar and looks like a black arrow
cursor.With this selected, clicking on the
edges of each path in the vector mask selects
it.We are able to move the path and transform
it to fit by making the bounding box visible
and clicking on the edge of the box to activate
Free Transform.
2
Here we have two vector shapes in a
single vector mask applied to a Solid
Colour layer.They are not properly aligned
and we need to select them independently,
but how? The Move tool only lets us move
the whole layer, so we’re not able to select
the paths independently.
1
Vectorshapesandmultiplepaths
Follow our step-by-step guide to working
on vector shapes and multiple paths
31ADOBE PHOTOSHOP TOOL TECHNIQUES – FOCUS GUIDE
Navigation and manipulation
Take the A road
The [A] key is the
shortcut to the Path
Selection tool group.
To toggle between
Path and Direct
Selection mode type
[Shift]+[A].
Make a point
Clicking once on a
point that already has
handles with the Cusp
cursor converts it to a
sharp point with
no handles.
With the Direct Selection tool you can
select a point in order to access its
Bezier handles and modify the shape of the
curve. If a point has no handles you can pull
them out by holding down [Ctrl]+[Alt] as you
drag ([Command]+[Alt] on a Mac).The tool
changes to an inverted‘V’,called the Cusp tool.
4
With either the Direct Selection or Path
Selection tools active you can duplicate
a path,or multiple paths by [Option]+dragging
them.The cursor will change to display a plus
sign next to it when you hold the Option key
down as a visual cue that you are about to
make a copy.
3
If you need to select multiple points on
a path and move them as one you can
drag out a marquee with the Direct Selection
tool. Alternatively the usual‘shift to add’
maxim holds true: [Shift]+click to add points
to the selection that are difficult to select
within a single marquee.
2
If you want to edit the points of a vector
shape mask then you need to change
from the Path Selection to the Direct Selection
tool.With this tool active, you are able to
click to select individual points in a path or
vector shape.
1
Chapter 3
USING THE
BRUSHES AND
PENCIL TOOLS
Photoshop is traditionally known
for image manipulation,
retouching, effects and colour
correction, but not so much as a
painter’s tool. This has partly been
due to the fact that the artistic
capabilities of the program were
severely limited due to the poor
support for artistic media
simulation. Other programs such as
Corel Painter used to lead the market
here, but the last few versions of
Photoshop has seen it’s Brushes
system completely overhauled,
making it much more useful as an
artistic media program.
Having said that, Brushes have
always been essential for just about
In this chapter…
Using the Brush and
Pencil tools
Editing and saving
brush properties
Creating custom
brush tips
Using the History and
Art History brush
This chapter introduces you to Photoshop’s
more arty tools,the Brushes.However,as we’ll
see,you can use these versatile tools for far
more than just painting
everything else in Photoshop, and
getting the most out of the Brush
tools involves finding out all the
little secrets and features buried
inside the program. Actually they’re
not that secret but its surprising how
few of the shortcuts some Photoshop
users know. It’s usually those who
have been using it since the early
days that know all the best tips.
Spoilt for choice
In a way, the later, feature-rich
versions spoil you by giving you so
many options to work with. The
History palette, introduced in
version 5, is a fantastic time-saving
device. It’s also an incredible feature
that takes the basic Photoshop
functions and multiplies their
capabilities tenfold. The History
palette essentially adds a kind of
non-linear undo to the program.
Previously undo was limited to just
hopping back step-by-step. The
History palette displays all your
operations (up to a maximum
number that you specify) in a list,
complete with the tool used and its
icon. By clicking on any of these
steps you can immediately jump
straight back to the document as it
was at that point in time.
Even more impressive is the
ability to store permanent snapshots
of the state of the document at any
time. These will not ‘fall off the
back’ like items in the undo list
would when the list exceeded the
number of steps set in the
Preferences. However all this power
and flexibility comes at a cost:
disk space. The History states can
consume very large amounts of
‘scratch disk’ space, the random
storage bin that Photoshop uses as a
kind of virtual memory.
Performance figures
Keep a large amount of hard disk
space free for Photoshop – as much
as 2 to 4GB if working on large
images. Ideally, partition your disk
and dedicate one part to Photoshop.
33ADOBE PHOTOSHOP TOOL TECHNIQUES – FOCUS GUIDE
Brushes and Pencil tools
Page 41 Dual Brushes offer the user
unprecedented levels of detail
Page 45The Art History Brush allows
you to turn an image into a painting
Page 34 Photoshop’s brush editing
system gets the most from Brush tools
Page 35 Access Photoshop’s hidden
extras for more versatility
Page 36 Learn about the importance of
Spacing,Flow and Opacity for brushes
Page 43The History Brush offers
superb photo manipulation options
The Brush tool can be found in
the fourth row of Photoshop’s
toolbar. When selected, the options
bar displays quite a few settings for
the current Brush such as Opacity,
Flow and whether it is in Airbrush
mode or not. There are also pull-
down menus for the Apply mode,
Brush Shape preset and the new
Brush Editing palette.
Brushes are used to apply coloured
pixels to an image. They take their
colour from the current Foreground
Colour swatch. The Colour palette
can be used to choose colours in a
number of different ways – by using
the small gradient strip at the base,
the sliders or the Swatch tab.
The Brush tool
Brushes offer some of Photoshop’s most
flexible features.So where can you find them?
34 FOCUS GUIDE – ADOBE PHOTOSHOP TOOL TECHNIQUES
Chapter 3
The Color palette lets you choose colours in
various ways – via a gradient strip,sliders or
swatches,which are located in their own tab
Back and forth
You can set two
colours,a foreground
and background
colour,and switch
between them while
painting with the
Brush tool by pressing
the [X] key.
The Brush presets are
located here at the top-left of
the Options palette when the
Brush tool is selected.
The Brushes palette can be
accessed by clicking this icon
in the Brush tool’s Option bar.
The basic Brush settings,
such as Size,Shape and
Angle as well as the spacing
control can be accessed by
clicking the Brush Tip Shape
section at the top,the
controls of which display at
the bottom of the palette.
The Brushes palette is very
versatile but can seem a bit
complicated at first.It’s far
more advanced than in
previous versions.
Choose the display option
for the presets from the
preset menu.You can display
the presets as a list or as
icons if you prefer.
The panel can be
expanded by dragging the
bottom-right corner.
THE BRUSH INTERFACE AND CONTROLS
Using Brushes
There is a huge range of customisable and
preset brushes.Here’s how to use them
35ADOBE PHOTOSHOP TOOL TECHNIQUES – FOCUS GUIDE
Brushes and Pencil tools
The key to opacity
You can also reduce
opacity using the
numeric key pad.
Pressing the 0 key sets
the opacity to 100%,
while pressing the [5]
key sets the opacity to
50%.Pressing the [1]
numeric key sets the
opacity to 10%
and so on.
Nimble numeracy
To get an intermediate
opacity value like 15%,
type 1 followed
quickly by 5 on the
numeric keypad.
In this case the paint‘builds’,
accumulating opacity the more and
more you paint.This is very useful for building
up tones and colours in an image gradually.
You can see the effect clearly here.Where the
strokes double back and cross each other the
colour intensifies.The downside is that the
individual‘dabs’are also visible.
4
Flow is like opacity but is a dynamic
property.Whereas opacity sets a value
for the maximum amount of opacity, Flow sets
the minimum amount.With the Flow setting
very low, say 10%, and opacity set to full, you
can paint with what seems like a low opacity,
except when you paint over the strokes you
have just applied.
3
The Opacity of the brush defines how
transparent the paint is – that is, how
much of the colour underneath shows
through the paint. By default it is set to 100%,
but you can reduce this using the Opacity
slider in the Options bar.
2
Once you select the Brush tool you can
choose a Brush Shape from the Brush
preset drop-down menu in the Options bar.
Each preset is saved at a given size, indicated
below the brush preview icon in the preset
list.You can alter this by dragging the master
diameter slider.
1
Using Brushes continued
36 FOCUS GUIDE – ADOBE PHOTOSHOP TOOL TECHNIQUES
Chapter 3
Brush size shortcut
You can change the
brush size up and down
in 10 point increments
using the square
bracket keys [ and ].
More shortcuts
On this month’s CD
you’ll find PDF files
that contain all the
possible keyboard
shortcuts for both PCs
and Apple Macs..
You can also turn Spacing off using
the check-box in the Brushes palette.
When it’s off, Photoshop applies spacing
depending on how quickly you draw your
stroke.This can be good or bad, depending
what you want the stroke to look like.
8
In order to counteract this effect, you
need to use an even lower Flow setting.
Here the flow has been reduced to 3% for a
5% spacing value.You can see that the strokes
appear much smoother and build nicely as we
apply more paint.
7
By reducing the Spacing you can get
better results when using a low Flow
setting. Here the Spacing is reduced to 5%,
which means each dab overlaps by 95% of its
diameter.This results in a much smoother
stroke, but its also more opaque, as the brush
tends to‘self build’.
6
This brings us on to the Brushes palette,
which is opened by clicking the icon at
the top-right of the Options bar.The palette
contains a setting called Spacing.This controls
how frequently Photoshop places a‘dab’of
paint as you drag the brush.The default
setting of 25% makes each dab overlap the
next by three quarters of its diameter.
Here’s the result from a low Flow setting.
5
37ADOBE PHOTOSHOP TOOL TECHNIQUES – FOCUS GUIDE
Brushes and Pencil tools
Brush shortcuts
Lots of Photoshop’s
tools use the same
brushes interface.You
can use the same
shortcuts to change
brush size and pop up
the preset panel with
any of them.Take a
look at the PDF files
included on the CD for
a full list of shortcuts
for both PC and Mac.
Straight ahead
To paint perfectly
straight lines click
once to place the star
point of the stroke
then shift-click
elsewhere.A straight
stroke will joint the
two points.
Also, while painting you can choose a
new colour from the image by holding
down the [Alt] key.The Brush tool changes to
the Eye Dropper, allowing you to sample a
colour from any pixel.
12
When painting an image using brushes
it can be a chore moving to the Options
bar to change brush size and shape. However
the preset pop-up is available right beneath
your mouse if you right-click in your image.
Mac users should hold down [Ctrl] and click
for the same effect.
11
Soft brushes are very useful especially
when used with other tools such as the
Rubber Stamp, which uses the same brush
interface as the Brush tool. A Hardness of
100% is not totally hard, however.There is still
some edge smoothing because of the effect
of‘anti-aliasing’(on the right stroke). If you
want a totally hard brush (left stroke) switch
to the Pencil tool.
10
Other brush properties include
Hardness.This defines how sharp the
edges of the brush are and can be varied from
0 to 100% in the Brushes panel.The brush on
the left has a hardness of 100% while the one
on the right has a Hardness of 0%.They are
exactly the same diameter, but notice that the
soft brush seems smaller because its edges
are less opaque.
9
The Brushes palette is where it
all happens. It’s Photoshop’s
answer to its previous lack of natural
media tools. In truth, it’s not really a
natural media simulation system, but
rather an extension of the brush
dynamics features that previous
versions of the program already had.
When you open the Brushes
palette you are faced with an
overwhelming array of controls and
they do take a while to become
familiar with. Most of the controls
are to do with the ‘dynamics’ of the
brushes – how the brush properties
vary during use. Photoshop allows
you to set the various properties,
such as scattering, colour and hue
variation. These can stay fixed,
respond to cursor speed or fade over
a pre-defined distance. This gives
you a large additional range of
natural, organic variances to your
brush strokes which would not
otherwise be possible with a mouse.
However, to get the most from the
brush dynamics, and experience
their intuitive ‘feel’, you should
really invest in a graphics tablet and
pen, such as the Wacom Intuos.
Exploring the Brushes palette
The basics of the Brushes palette and presets
and how they affect the look of your strokes
38 FOCUS GUIDE – ADOBE PHOTOSHOP TOOL TECHNIQUES
Chapter 3
Take a tablet
With a graphics tablet
attached,the brush
parameters can
respond to pen
pressure,speed and tilt
(if supported).The
result is that you can
create brushes that are
responsive to your
touch and work more
like real artists tools.
But you can also set up
the dynamics so that
the brushes perform in
a totally unnatural way
too,if you wish.
Brush shape is the final part of the jigsaw when creating and
editing brushes.The standard brushes offer a circular shape
that can be hard or soft, round or oval and rotated at any
angle. But there are a number of special brushes that are
more graphic in nature.These can be selected from the
Preset menu and there are many more that come with
Photoshop but are not loaded by default.To load a preset
library choose one from the Brush preset panel menu (the
triangle at the top-right).You are then asked to Replace or
Append the current list. Append adds the selected library
to the current list of brushes, rather than replacing it.
CHOOSING YOUR BRUSH SHAPE
Having the right brush shape for the task is the key to success
The preset brush libraries have many
different brush shapes.The menu is at
the top-right of the preset brush pop-up
There are 13 sections in the
Brushes palette, displayed in a
list down the left-hand side. The first
of these is the Presets section –
essentially a duplicate of the Preset
pull-down menu in the Option bar.
You can choose a brush preset from
the list, or load new ones from the
pop-up menu at the top-right of the
palette. At the bottom is a preview
of how the current brush stroke
would behave, and above that is the
Master Diameter slider. At the very
bottom are the New Brush and
Delete buttons. Clicking the New
Brush button creates a new preset,
which you can name and save to
reuse another time.
The Brushes palette in detail
Having seen the Brush palette’s potential,let’s
delve deeper into the Brush Preset features
39ADOBE PHOTOSHOP TOOL TECHNIQUES – FOCUS GUIDE
Brushes and Pencil tools
The Brush Presets section at the very top stores
complete brush settings,including the type of
tip shape and the dynamics settings
Saving your presets
You can save the
currently loaded set of
presets as a library
using the Save Brushes
command in the pop-
up menu at the
top-right corner of the
palette.The library is
saved as a .abr file,
which only Photoshop
can read.
Size Jitter – Controls the
variation in size of the dabs in
a stroke.The higher the value,
the greater the variation.
Minimum – Sets the
smallest size the brush will
reach when it is jittered.
Control – These menus
define what dynamics
attribute controls the
parameter.Fade reduces the
effect of the parameter over a
certain distance,entered in
the numeric field.Other
options are Off,Pen Tilt,Pen
Pressure and Stylus Wheel.
Minimum Roundness –
Sets the minimum value that
is reached when randomly
jittering the Roundness.
Tilt Scale – Enabled when
the Pen Tilt option is selected
in the Control pop-up.
Adjusts the tilting sensitivity.
Angle Jitter – If the brush is
asymmetrical you can jitter
the angle of the dabs,but not
on a perfectly round brush.
Roundness jitter – This tool
randomly alters the amount
a brush is squashed or
‘rounded’on one axis.
THE TOOLS OF BRUSH DYNAMICS
Scattering
Scattering is a great way of adding random
brush strokes to images.Here’s how it works
40 FOCUS GUIDE – ADOBE PHOTOSHOP TOOL TECHNIQUES
Chapter 3
Better late
than never
Brushes in later
versions of Photoshop
have more options to
control their behaviour.
If you’re using an older
version you may find
that some of the
features that we’ve
mentioned do
not apply.
Scatter effects
Wide Scatter settings
can be used to create
random but even
variation in tone or
colour on your
artwork.Use it with
selections to control
the placement
of the effect.
Count Jitter simply varies the number in
the Count setting per dab, and is not
very noticeable in most situations. Note that
there are Control pop-ups in the Scatter
section so you can link the parameters to
graphics pen tilt, pressure and scroll wheel,
or fake the effect of distance.
4
The Count slider multiplies each dab by
the number shown. instead of a single
dab, a setting of 5 in the Count slider will
produce five times as many dabs, each of
which may be scattered. Because it increases
the density of the brush dabs you may want to
lower the Flow setting of the brush.
3
When the Both Axes option is enabled
the scattering takes place perpendicular
to the stroke and along it. Most of the time
you’d leave this option off, unless you want a
very randomized stroke, almost like a spray.
2
The Scattering section is great fun.This
adds a random scattering of the dabs
and is a great way to add random, organic
strokes to images.The Scatter slider controls
the amount of scattering perpendicular to the
stroke direction.
1
Textures and Dual Brushes
Achieve seriously complex brush effects with
additional features of the Brushes palette
41ADOBE PHOTOSHOP TOOL TECHNIQUES – FOCUS GUIDE
Brushes and Pencil tools
Precise strokes
Don’t forget gradient
selections are a great
way to control where
‘paint’will go on an
image.You can blend
or fade away your
strokes very precisely
using these gradients.
Go easy
Dual brushes are the
key to getting more
detailed brush strokes
in less time.They are
more suited,however,to
be used sparsely rather
than as dense strokes.
Enabling Scattering
is a good idea.
Enabling all of the numerous other
settings and it becomes like playing
with wet paint, and great fun. It only takes
seconds to spray the canvas with incredibly
detailed patterns and colours, and work them
together like real paint.
4
Colour Dynamics takes the concept of
scattering and jitter but applies it to the
colour properties of a brush.You can achieve
very complex and detailed strokes using the
settings in this section.
3
Enabling the Dual Brush option makes
things really interesting.This feature
adds a second brush tip to texture the main
one. It has its own Spacing, Size, Scattering
and Count settings and is mixed in using an
Apply mode chosen from the pop-up menu at
the top of the panel.
2
The rest of the parameters are operated
in much the same way as the Scattering
section that we looked at in detail.The best
thing to do is to experiment with the settings
by playing around with them. Here the Texture
section is enabled.This lets you add texture
to the brush tip using one of Photoshop’s
preset textures.
1
The History Brush seems a bit
of a mysterious tool in the
Photoshop toolbox for both
newcomer and veteran alike, and for
that reason is one that often gets
overlooked. This is usually because
veteran Photoshoppers have got used
to the way Photoshop used to work
before the advent of the History
Brush and old habits die hard.
But it’s worth getting to know this
unusual tool because, together with
its indispensable partner the History
palette, it should turn out to be a
total delight to any newcomer.
Every time you perform an action,
such as painting a stroke, applying a
filter, or deleting a layer, that step is
stored in the History palette as a
‘state’. By clicking on any of these,
you can return your document to the
state it was in at that point. Now,
here’s the best bit – by clicking on
the small icon box next to a history
state in the History palette, you
earmark that layer as the source for
the History Brush. When you then
paint on the image with the History
Brush only those pixels will be
returned back to the earmarked state.
The History Brush
Discover Photoshop’s secret weapon for
retouching and photo manipulation
42 FOCUS GUIDE – ADOBE PHOTOSHOP TOOL TECHNIQUES
Chapter 3
Step back in
History
The History Brush lets
you paint previous
states of the current
document over the
current state.This
makes it a powerful
tool for selectively
applying filters
to an image.
Photoshop 5 onwards has two kinds of undo.There’s the
normal [Ctrl]+[Z] undo ([Command]+[Z] on a Mac), which
undoes and redoes the last action you performed.This can
be handy to flip back and forth, checking the result of your
last action.There is also History.You can step backwards in
History using [Ctrl]+[Alt]+[Z] (that’s [Command]+[Alt]+[Z] for
Mac users). By repeatedly pressing this shortcut, you step
back further and further through the history.To go forwards
again press [Ctrl/Command]+[Shift]+[Z]. Set the number of
states stored in History by going to Preferences > General
and entering a new number in the History States field.
HISTORY AND UNDO
So what’s the difference between Undo and History?
You can set Photoshop’s maximum
number of History states from the
General section in Preferences
Using the History Brush
The History Brush is a powerful and flexible
tool,but has all the simplicity of a normal brush
43ADOBE PHOTOSHOP TOOL TECHNIQUES – FOCUS GUIDE
Brushes and Pencil tools
Size does matter
To paint with History
states the source state
must be the same size
as the current
document.if you
resized an image you
will not be able to use
any states prior to
that as a source for
the History Brush.
United states
In order to paint with
History states,the
source state must also
be the same colour
space.If you changed
this you will not be
able to use any states
prior to that point as
a source for the
History Brush.
Now we can change the History source
to the Inverted state, select the History
tool and a fancy brush and paint.Wherever we
paint the pixels in the image will be inverted.
Obviously you can use this technique with any
effect, filter or adjustment you like.
4
We want to get the image back as is was
so that we can selectively invert it, but
undoing the last step also clears the state
from the History, which is no good. Instead we
mark the uninverted state as a History source.
Choose Edit > Fill and set the Fill mode to
History, et voilá, back to normal but with
History intact.
3
Typing [Ctrl/Command]+[I] inverts the
image, turning the shades and colours
to their opposites.This will be be the basis for
the effect we want to achieve using the
History Brush, and it has been saved as a state
in the History palette.
2
A good use of the History Brush is to
apply an effect to an image in localised
areas without the need to construct a mask or
selection first. Here’s our starting image to
which we want to apply some special effects.
First of all we resized it to make it a bit smaller.
1
Using the History Brush continued
44 FOCUS GUIDE – ADOBE PHOTOSHOP TOOL TECHNIQUES
Chapter 3
Filter tip
You can use this same
technique of Brushing
using History to
selectively apply any
filter to an image.
Early edits
In earlier versions of
Photoshop you could
open part of a large
image and edit it,
placing the edited
part back into the
large image once
finished.That was in
the days when RAM
was expensive.
Now we select the Gaussian Blur state
as the source for the History Brush and
paint in the image precisely where we want it
to be blurred, leaving the unblurred pixels
intact to create a forced‘depth of focus’effect.
8
Now we return the image to its original
state by selecting the unblurred state as
the History source then using the Edit > Fill
command set to History mode.
7
So, we follow the same steps as before
except this time we blur the whole
image by Applying the Gaussian Blur filter
instead of inverting it.
6
Here’s another example of the same
technique.We’ll use History to fake a
‘depth of field’blur effect on this 3D image.
Normally you might do this using a depth
render as a mask, but what if you forgot to
save one?
5
Art History Brush
The History Brush has an even more creative
cousin – meet the Art History Brush
45ADOBE PHOTOSHOP TOOL TECHNIQUES – FOCUS GUIDE
Brushes and Pencil tools
Historic detail
Even if the detail has
been obliterated,you
can bring it back by
using a smaller brush,
because the original,
untouched image is
used as the source.
Pick a mode
The Art History Brush
can be applied in
different blending
modes: Darken,
Lighten,Hue,Colour,
Saturation
and Luminosity.
You can carry on adding details back,
changing brushes and styles until you
get the result you want. Here we went back
and lightened the original image then used
this as the source, enabling us to add in some
detail in the darker part of the face.
4
That blocks out the image nicely. Now
we can paint some of the finer details
back in. Changing the brush to a much smaller
radius lets you add back some details, but you
can do this only to certain areas.We’ve used a
3-pixel brush, and the Loose Medium Style
from the History Brush’s Options bar.
3
Here’s how it works. Open any photo,
preferably one that will work well as a
painting.You don’t need to perform any
action to set things up, just select the current
state as the History Source and select the
Art History Brush.We used the Impressionist
preset from the pop-up menu at the very
top-left of the Options bar and painted over
the image.
2
The Art History Brush is one of those
bizarre but fun features Adobe comes
up with once in a while. Basically, it is used to
convert any image into one that looks hand-
painted.The original photo is on the left, and
the Art History conversion on the right.
1
Chapter 4
USING THE
CLONING AND
HEALING TOOLS
Cloning is a very simple and
obvious concept in image
manipulation. Take pixels from over
here and duplicate them over there.
That’s really all there is to it. The
Clone tool, also known as the
Rubber Stamp, is Photoshop’s
implementation of this technique
and offers you a great deal of power
for retouching images.
The tool works by ‘sampling’
pixels at one location in an image,
or even in a different document
altogether, and painting them in a
different location using what is
essentially a brush. The Clone tool
offers most of the properties of the
normal Brush tool – size, hardness,
In this chapter…
Learn how to wield the
Clone tool (Rubber
Stamp) like a pro
Using blending modes
to get better results
when cloning difficult
textures like skin
Learn how to clone
pixels between
documents
Working with the
Healing and Patch
tools to improve
portraits and photos
Perform special
effects and image
manipulation tricks
using Cloning
The Cloning and Healing tools in Photoshop
offer an elegant way to fix damaged photos,
correct bad scans and generally clean up
your images.They’re great fun to use too
tip shapes, dynamics and blending
modes, but applies these to cloning.
In addition to these the Clone tool
lets you clone not only pixels from a
single layer but from the whole of a
multi-layered document. This can be
a very powerful feature for advanced
users but can cause problems if you
don’t keep your wits about you.
Seamless sampling
When sampling pixels from a multi-
layered, composite image you must
be aware of any Adjustment layers
present. If you sample a composite
image with say, a Hue/Saturation
Adjustment layer applied to it,
boosting the saturation, cloning on
to layers below this adjustment layer
will result in the cloned pixels being
boosted twice. If your intention is to
have a seamless result, your hopes
will be dashed, so it always pays to
be aware of this.
In version 7 of Photoshop, Adobe
introduced a tool that takes the
concept of cloning to the next level
in terms of ease of use, known as the
Healing tool. Cloning is a great tool
to have but as we saw earlier, it can
take some effort to get a seamless
result, especially when the sample
point pickings are slim and when
dealing with multi-layered images.
It can take quite a bit of practice to
achieve smooth results.
Healing, however, lets you clone
pixels over a problem area but rather
than simply overlaying them, as the
Clone tool does, it blends them with
those they are replacing, using some
clever algorithms.
Skin care
As you may have guessed, the
upshot of such technology is that
you don’t need to be nearly so
careful in your cloning – when
blending the blemishes on the face
of a subject in a portrait, for
example. The Healing tool will
intelligently blend the pixels to get
the best result (at least most of the
time), which works well on skin.
47ADOBE PHOTOSHOP TOOL TECHNIQUES – FOCUS GUIDE
Cloning and Healing tools
Page 52The new Healing tool can
make someone look years younger
Page 51 Revive damaged photos and
images with cloning techniques
Page 53The Healing Patch tool is a
great way to fix up photos
Page 48 Cloning copies parts of your
image and transplants them elsewhere
Page 49The Clone tool can remove
unwanted parts of an image
Page 50 Less-than-perfect portraits
can be fixed up in seconds
The Rubber Stamp (Clone) tool
The Rubber Stamp tool is useful for copying
pixels from one part of an image to another
48 FOCUS GUIDE – ADOBE PHOTOSHOP TOOL TECHNIQUES
Chapter 4
Sample mode
When you hold the [Alt]
key down the Clone
cursor changes from
the brush outline to
crosshairs to show that
it’s in sample mode and
allowing more
precise sampling.
Precision painting
Use the Caps Lock key
on any brush tool to
activate Precise
Cursor mode.
Now we can clone the boy. Releasing
the [Option] key returns to normal
cloning mode.We can clone over the face of
the boy at the top-right, replacing his with the
face of the boy from the lower-left.We can
carry on and make as many clones as we like.
4
Selecting a 20-pixel soft brush we first
set the Sample point from which to
clone.To do this we hold down the [Alt] key
and click where we want to sample from – in
this case the face of the boy in the lower-right
of the photo.
3
To ensure that we can easily return to
the original if necessary, we first make a
copy of the image as a new layer. Selecting the
Clone tool we can see the Options bar looks
much like the Brush tool’s. At the far right are
two extra options though: Aligned and Use
All Layers.Turn off the Aligned check-box.
2
Let’s focus on the more creative and fun
aspects. Here’s a great example of what
cloning is all about – our source image is a
typical group portrait.
1
Removing unwanted elements
Cloning is ideal when you need to seamlessly
eradicate an unwanted part of an image
49ADOBE PHOTOSHOP TOOL TECHNIQUES – FOCUS GUIDE
Cloning and Healing tools
In the right
measure
Use the Measure tool
to drag along the top
edge of one of the
bench slats to read its
angle,then use the
Edit >Transform >
Rotate command.The
angle that you
just found will
automatically be
entered in the
rotation field.
Online tutorials
You’ll find a host of
handy tutorials to help
you take your
Photoshop skills further
at the website of our
sister magazine,
Computer Arts.
www.computerarts.co.uk
With a bit of effort we can remove the
man entirely from the image. Note that
to do this successfully we need to stop when
the alignment of the image begins to drift,
and take a new sample point.
4
It sort of works but the cloned part of
the bench does not line up properly
with the original.To fix this we can undo the
cloning, rotate the image slightly so that the
slats are horizontal, and clone again.This time
they line up.
3
This time we make sure the Aligned
option is enabled.This allows us to use
multiple strokes, and to maintain the offset so
that the cloning is consistent. In a duplicate
layer we set the sample point on to the middle
of the park bench and begin cloning out the
man on the left.
2
Another great use for cloning is for
removing objects from a picture. Here’s
an example image. Perhaps you wanted to use
the image with some text overlaid on one side,
or you just need to change the composition.
1
One of the most common uses
of the Clone tool is to fix
blemishes, bruises and marks on
skin. If you want to fix marks on the
skin such as a rash or the occasional
spot you can easily clone it out using
the Clone tool as normal. While
you’ll remove the blemish you’ll
probably find it very difficult to get
a seamless clone. What tends to
happen is that the clone will be
slightly the wrong shade or colour,
so that when you zoom out to
inspect the whole image, the cloned
point is almost as visible as the
original blemish, which defeats the
whole point of removing the blemish
in the first place!
Cloning Skin
You can fix problem portraits in seconds using
the Clone tool and its subtle blending mode
50 FOCUS GUIDE – ADOBE PHOTOSHOP TOOL TECHNIQUES
Chapter 4
Fixing skin in photos is easy,once you know that
the secret is simply to change the Clone tool’s
blending mode and subtly clone out the marks
A cloning
alternative
An alternative
technique,which uses
the same principal,is
to clone on to a new
layer using the
Normal mode but set
the layer’s blending
mode to Colour
or Luminosity.
Less is more
Using a low opacity
allows you to clone
away blemishes
gradually.
You don’t always
need to eradicate
blemishes totally.In
fact,doing so can
look too fake.Instead
just reduce their
intensity a little.
CLONING SKIN correctly requires careful use of the brush blending
modes. In the Options bar set the blending mode in the drop-down
menu to Luminosity and the opacity to 50%.You can then clone the
image using only the brightness of the sampled point.This lets you get
rid of light or dark blemishes easily, without changing the colour.
IF THE blemish is a red patch of skin or bruise, set the blending mode to
Colour before you clone.That way the brightness of the pixels remains
the same, but the off-colour will be removed.
MAKING USE of both apply modes in turn is likely to be the best
option for very bad marks like cuts and bruises.This allows you to deal
with the colour and brightness independently.
WITH BOTH methods try to keep the sample point as close as you can
to the problem area to minimize the difference in skin tone.
THE TRICKS FOR SKIN CLONING REVEALED
The Healing Brush
No time to fuss with the Clone tool? Then fix
up an image with the Healing Brush instead
51ADOBE PHOTOSHOP TOOL TECHNIQUES – FOCUS GUIDE
Cloning and Healing tools
Extreme healing
The same technique
of setting the
blending mode to
either Colour or
Luminosity instead of
Normal works with
the Healing tool just
as well as the Clone
tool,but you’ll only
need it for extreme
situations when the
built-in blending
algorithm doesn’t
quite cut it.
Sample and
Pattern
The Healing tool
works in two modes:
Sample and Pattern.
In Sample mode it
works like the Clone
tool,while in Pattern
mode it blends the
pixels with one of
Photoshop’s stored
patterns.The uses for
this mode are less
obvious,but useful for
certain effects.
The Healing brush has different
blending modes which you can choose
from the Options bar drop-down menu, 90%
of the time you won’t need to use them.
4
Using the Healing brush instead results
in a totally invisible repair.There’s no
need to change blending modes or opacity,
just set the sample point using the [Alt] key
then click and drag over the damage.
3
Using the Clone tool works, but leaves a
very slight, but noticeable mark behind
due to the sampled pixels being a sightly
different shade.We could use more advanced
techniques, but why bother when the Healing
brush is at hand?
2
The Healing Brush can be found in the
fourth row on the toolbar, and looks like
a plaster. It uses the same sampling principal
as the Clone tool but works by blending the
original and cloned pixels together to create a
near-perfect fix. Here’s an image that needs a
bit of a repair.
1
The Healing Patch tool
If you don’t like using brushes and selections
are more your thing,try the Patch tool
52 FOCUS GUIDE – ADOBE PHOTOSHOP TOOL TECHNIQUES
Chapter 4
No smear
TheHealingandPatch
toolscansmearifthey
areneartoverydark
pixels.Useaselectionto
protecttheareayou
wanttofixif
smearingoccurs.
When you release the mouse button,
the pixels will become merged with
those below. Photoshop performs its trick
intelligently, so the dark area vanishes but
the skin tone looks normal.We can repeat
this on the other eye to complete the anti-
ageing process.
4
Because Destination mode is enabled
we can drag these selected pixels onto
the destination pixels. As you drag a copy of
the pixels, the selected area moves with the
mouse as a visual cue – you are actually
cloning the pixels.
3
With the Patch tool selected we lasso an
area of clean skin texture, just below the
eye we want to fix.That area is highlighted
with the familiar marching ants.
2
The Patch tool can be found in the same
tool group as the Healing Brush, but it
has fewer options.The most logical mode to
use is Destination, so this is how we have it set
for now.We want to make the man in this
photo look a bit younger by removing the
bags under his eyes.
1
53ADOBE PHOTOSHOP TOOL TECHNIQUES – FOCUS GUIDE
Cloning and Healing tools
Large patches
The Patch tool can be
useful when
attempting to repair
very large areas in
one go.It’s much
quicker than using
the Healing Brush too.
Select then Patch
If you need to,you can
make the selection
before you choose the
Patch tool.This means
that you can use any of
Photoshop’s advanced
selections tools,such as
Quick Mask,Colour
Range or the Magic
Wand to preselect the
area you require
more precisely.
When you are happy with the selected
area you release the mouse.The
selection snaps back to its original location
taking the source pixels with it.When
Photoshop blends the two, the line vanishes.
Here’s the result on both eyes.
4
Now all you need to do is to drag the
selection over the pixels you want to
use to fix the problem area.This time only the
selection outline moves, not the pixels that are
selected, as is the case in Destination mode.
3
When in Source mode you need to
select the pixel that you want to change
first, as opposed to selecting the pixel you
want to use to fix the problem area. Here we
drag around the line under the left eye using
the Patch tool to select it.
2
The Healing Patch tool works the
opposite way round when in Source
mode. Depending on your way of thinking,
Source mode may seem less intuitive.We will
perform the same trick of removing lines
under the eyes in this image but use Source
mode instead.
1
Chapter 5
THE GRADIENT,
FILL AND
ERASER TOOLS
Gradients and Fills are such
simple tools in Photoshop that
their simplicity can often hide their
power, especially in the hands of an
experienced Photoshop user.
A Fill is simply a way to pour a
single flat colour, pattern or history
state into a selected area, or the
whole canvas. Like most of the tools
in Photoshop, there is more than one
way in which to accomplish a Fill;
we’ll explore some of these different
techniques later on in this chapter.
Gradual benefits
The Gradient options are even
more powerful than Fills. With the
Gradient tool you can create a fill
In this chapter…
Learn to use and
control Gradients
Create Custom
Gradients, using the
gradient editing
features in Photoshop 7
Use the Paint Bucket
tool to fill areas with
a colour, pattern
or history
Use Gradients and
Fills for special effects
and image
manipulation
Remove a subject from
its background using
the Background and
Magic Eraser tools
Once you get more competent with
Photoshop you’ll appreciate the importance of
these utility tools.The Gradient tool in particular
is essential for all manner of tricks and effects
that gradually changes colour.
Gradients come in all kinds of
different shapes: Linear, Radial,
Angular, Reflected and Diamond,
and this makes them very useful for
a variety of different situations.
The Gradient Editing feature in
Photoshop enables you to create
gradients with two or more colours.
You can have a simple white-to-
black gradient, or a whole rainbow
of colours. For special effects work
the simple black and white gradient
is absolutely indispensable, putting
a whole range of additional options
at your disposal. For example, if you
want an effect to smoothly fade
from full strength to invisible then
it’s easy to use a white-to-black
gradient to control this, usually as
a layer mask.
Photo perfection
For photographers, coloured
gradients can play the role of custom
filters, making it easy to create
sultry sunsets or brooding, stormy
skies at the drag of a mouse. If you
combine gradients with alpha
channels you have the power user’s
playground. The ability to construct
complex masks and selections using
alpha channels and the Gradient tool
is unparalleled.
While the Fill and Gradient tools
are concerned with adding pixels to
an image, the next family of tools
that we’ll look at does quite the
opposite. The Eraser tool lets you
remove pixels by simply using a
brush, like an anti-paint brush,
which enables you to paint away
pixels on a layer leaving nothing but
transparency behind. The power
version of the Eraser is the
Background Eraser. This tool is
designed to make the extraction of
subjects from their background a
relatively simple task. Don’t be
fooled though – it’s still a tricky
proposition, but we’ll show you how
to avoid the pitfalls of this technique
so that you can achieve the best
possible results every time.
55ADOBE PHOTOSHOP TOOL TECHNIQUES – FOCUS GUIDE
Gradients, Fills and Erasing
Page 64 Blend two or more image
layers together with Gradients
Page 62 Use gradients and blending
layers to simulate photographic filters
Page 66 Learn how to avoid the pitfalls
of the Background Eraser tool
Page 56 Learn how to fill colours in an
image using the Paint Bucket tool
Page 57 Fill with 50% grey for special
effects and image enhancement
Page 59 We look at the Gradient tool
and its various options
The Paint Bucket
The Paint Bucket tool lets you pour pixels
into any selection,and it has a few tricks too
56 FOCUS GUIDE – ADOBE PHOTOSHOP TOOL TECHNIQUES
Chapter 5
Missing Paint
Bucket?
Photoshop’s toolbar
has undergone many
revisions over the
years,so the Paint
Bucket may be
located elsewhere in
older versions.
Select and fill
Save time by using
the Paint Bucket in
one fell swoop,
instead of using the
Magic Wand to make
a selection and
then filling it.
Instead, what happens is the same as
with the Magic Wand tool.The Paint
Bucket searches for similar coloured pixels
to fill, within the tolerance that you set, rather
than covering the whole layer. Increase the
Tolerance setting in the Option bar to fill a
wider range of colours.
4
However, the Paint Bucket has more in
common with the Magic Wand than you
think. If your selected area already has image
pixels in it, clicking on the image will not
necessarily fill the whole selection or layer.
3
It can operate in Foreground Colour
mode or in Pattern mode, which you
choose from the drop-down menu in the
Options bar.You can then select a pattern
from the drop-down presets menu, also in the
Option bar, and click in the image to fill it.
2
The Paint Bucket can be found in the
sixth row of the toolbar in Photoshop 7,
in the same tool group as the Gradient tool.
If you make a selection you can use this tool
to fill it with the current foreground colour.
1
57ADOBE PHOTOSHOP TOOL TECHNIQUES – FOCUS GUIDE
Gradients, Fills and Erasing
In the mode
In Overlay mode 50%
grey pixels are totally
transparent.Pixels
brighter than 50% are
applied in Screen mode,
while those darker than
50% are applied in
Multiply mode.
Video tutorials
On the CD this month
is a set of video
training tutorials
created by our very
own Photoshop guru,
George Cairns.If you
want to learn more
about using every
tool in the Photoshop
toolbar,you’ll find
your CD invaluable.
The layer is filled with the grey, by
making sure the Use All Layers option is
off and clicking in it. Now we can set the Layer
mode to Overlay and apply the noise, blur it
slightly, then change the opacity of the layer
any time we want to control the effect.
8
We need to soften the noise, by blurring
it but not the image. So we need to
apply the noise in a layer above the image.
However, the Noise filter does not work on a
transparent layer. Enter the Paint Bucket.
The Foreground Colour is set to 50% grey
using Colour Picker and setting Lab Lightness
to 50, A and B to 0.
7
Another use for fills is for special effects.
An example is for adding noise to a 3D
or digital image to make it look more like
photographic film.We could simply apply
noise to the image directly but this limits our
options later if we want to change the noise,
say, to make it less obvious. Applying the
noise as-is also tends to looks fake.
6
Using a lower tolerance you can build
up the fill by clicking a couple of times
on different areas of the image.In this example
we did so in a new layer.You have to make
sure the Use All Layers option is checked
when using a transparent layer for the fill.
Applying the layer in Color mode allows us to
change the colour of the girl’s kagool.
5
Adobe photoshop   every tool explained! -Prabhaharan429

Contenu connexe

Tendances

Adobe photoshop about
Adobe photoshop aboutAdobe photoshop about
Adobe photoshop about
Boy Jeorge
 
Adobe Photoshop CS4 Essentials welcome & course outline (2010)
Adobe Photoshop CS4 Essentials welcome & course outline (2010)Adobe Photoshop CS4 Essentials welcome & course outline (2010)
Adobe Photoshop CS4 Essentials welcome & course outline (2010)
Matteo Wyllyamz
 
Photoshop Cs4 Quick Steps
Photoshop Cs4 Quick StepsPhotoshop Cs4 Quick Steps
Photoshop Cs4 Quick Steps
Yogesh Shinde
 

Tendances (19)

Photoshop cc Tutorial
Photoshop cc TutorialPhotoshop cc Tutorial
Photoshop cc Tutorial
 
Adobe Photoshop Report
Adobe Photoshop ReportAdobe Photoshop Report
Adobe Photoshop Report
 
DAY 1 - Introduction to Photo Editing and Photoshop CS6
DAY 1 - Introduction to Photo Editing and Photoshop CS6DAY 1 - Introduction to Photo Editing and Photoshop CS6
DAY 1 - Introduction to Photo Editing and Photoshop CS6
 
TUTORIAL ON PHOTOSHOP
TUTORIAL ON PHOTOSHOPTUTORIAL ON PHOTOSHOP
TUTORIAL ON PHOTOSHOP
 
DAY 2 - Starting in Photoshop (Images and Layers)
DAY 2 - Starting in Photoshop (Images and Layers)DAY 2 - Starting in Photoshop (Images and Layers)
DAY 2 - Starting in Photoshop (Images and Layers)
 
Introduction to photoshop
Introduction to photoshopIntroduction to photoshop
Introduction to photoshop
 
Adobe Photoshop for Beginners
Adobe Photoshop for BeginnersAdobe Photoshop for Beginners
Adobe Photoshop for Beginners
 
Photoshop Introduction
Photoshop IntroductionPhotoshop Introduction
Photoshop Introduction
 
Photoshop Essentials Workshop
Photoshop Essentials WorkshopPhotoshop Essentials Workshop
Photoshop Essentials Workshop
 
Photoshop
PhotoshopPhotoshop
Photoshop
 
Adobe photoshop cs6
Adobe photoshop cs6Adobe photoshop cs6
Adobe photoshop cs6
 
Adobe photoshop about
Adobe photoshop aboutAdobe photoshop about
Adobe photoshop about
 
Adobe Photoshop CS4 Essentials welcome & course outline (2010)
Adobe Photoshop CS4 Essentials welcome & course outline (2010)Adobe Photoshop CS4 Essentials welcome & course outline (2010)
Adobe Photoshop CS4 Essentials welcome & course outline (2010)
 
Adobe Photoshop
Adobe PhotoshopAdobe Photoshop
Adobe Photoshop
 
The Selection Tools
The Selection ToolsThe Selection Tools
The Selection Tools
 
The photoshop CC book volume 1, 2014
The photoshop CC book volume 1, 2014The photoshop CC book volume 1, 2014
The photoshop CC book volume 1, 2014
 
Adobe ps color palettes
Adobe ps color palettesAdobe ps color palettes
Adobe ps color palettes
 
Photoshop Cs4 Quick Steps
Photoshop Cs4 Quick StepsPhotoshop Cs4 Quick Steps
Photoshop Cs4 Quick Steps
 
Photoshop tutorial: how to add text to an image.
Photoshop tutorial: how to add text to an image.Photoshop tutorial: how to add text to an image.
Photoshop tutorial: how to add text to an image.
 

Similaire à Adobe photoshop every tool explained! -Prabhaharan429

Peachpit mastering xcode 4 develop and design sep 2011
Peachpit mastering xcode 4 develop and design sep 2011Peachpit mastering xcode 4 develop and design sep 2011
Peachpit mastering xcode 4 develop and design sep 2011
Jose Erickson
 
6351420 autocad-gstarted(2)
6351420 autocad-gstarted(2)6351420 autocad-gstarted(2)
6351420 autocad-gstarted(2)
Yasir Qazalbash
 
Manual Photoshop Cs5
Manual Photoshop Cs5Manual Photoshop Cs5
Manual Photoshop Cs5
Moy Gp
 
Photoshop 6 classroom in a book
Photoshop 6 classroom in a bookPhotoshop 6 classroom in a book
Photoshop 6 classroom in a book
tamuna01
 
Strategies For Real Estate Business
Strategies For Real Estate BusinessStrategies For Real Estate Business
Strategies For Real Estate Business
Bibek Banerjee
 
Strategies for-real-estate-business3809
Strategies for-real-estate-business3809Strategies for-real-estate-business3809
Strategies for-real-estate-business3809
amolaarya007
 
Move the mouse and make billions
Move the mouse and make billionsMove the mouse and make billions
Move the mouse and make billions
Nits Kedia
 
Manual flash
Manual flashManual flash
Manual flash
Rui Silva
 
162tipsandtricksforworkingwithe learningtools-111207024037-phpapp02
162tipsandtricksforworkingwithe learningtools-111207024037-phpapp02162tipsandtricksforworkingwithe learningtools-111207024037-phpapp02
162tipsandtricksforworkingwithe learningtools-111207024037-phpapp02
RAJ Kumar
 

Similaire à Adobe photoshop every tool explained! -Prabhaharan429 (20)

PS Comics Tutorial
PS Comics TutorialPS Comics Tutorial
PS Comics Tutorial
 
Outlook
OutlookOutlook
Outlook
 
Artisteer manual del Usuario
Artisteer manual del UsuarioArtisteer manual del Usuario
Artisteer manual del Usuario
 
Peachpit mastering xcode 4 develop and design sep 2011
Peachpit mastering xcode 4 develop and design sep 2011Peachpit mastering xcode 4 develop and design sep 2011
Peachpit mastering xcode 4 develop and design sep 2011
 
6351420 autocad-gstarted(2)
6351420 autocad-gstarted(2)6351420 autocad-gstarted(2)
6351420 autocad-gstarted(2)
 
Manual Photoshop Cs5
Manual Photoshop Cs5Manual Photoshop Cs5
Manual Photoshop Cs5
 
Photoshop 6 classroom in a book
Photoshop 6 classroom in a bookPhotoshop 6 classroom in a book
Photoshop 6 classroom in a book
 
Branding Guidlines
Branding GuidlinesBranding Guidlines
Branding Guidlines
 
Strategies For Real Estate Business
Strategies For Real Estate BusinessStrategies For Real Estate Business
Strategies For Real Estate Business
 
Strategies for-real-estate-business3809
Strategies for-real-estate-business3809Strategies for-real-estate-business3809
Strategies for-real-estate-business3809
 
10. cutipa portillo, edy dany
10. cutipa portillo, edy dany10. cutipa portillo, edy dany
10. cutipa portillo, edy dany
 
Move the mouse and make billions
Move the mouse and make billionsMove the mouse and make billions
Move the mouse and make billions
 
BlenderBasics2ndEdition.pdf
BlenderBasics2ndEdition.pdfBlenderBasics2ndEdition.pdf
BlenderBasics2ndEdition.pdf
 
0321719905
03217199050321719905
0321719905
 
Acad aug
Acad augAcad aug
Acad aug
 
tutorial poser
tutorial posertutorial poser
tutorial poser
 
Manual flash
Manual flashManual flash
Manual flash
 
162tipsandtricksforworkingwithe learningtools-111207024037-phpapp02
162tipsandtricksforworkingwithe learningtools-111207024037-phpapp02162tipsandtricksforworkingwithe learningtools-111207024037-phpapp02
162tipsandtricksforworkingwithe learningtools-111207024037-phpapp02
 
Keylight ae user guide
Keylight ae user guideKeylight ae user guide
Keylight ae user guide
 
Strategies For Real Estate Business
Strategies  For  Real  Estate  BusinessStrategies  For  Real  Estate  Business
Strategies For Real Estate Business
 

Plus de PRABHAHARAN429

Very Large Scale Integration -VLSI
Very Large Scale Integration -VLSIVery Large Scale Integration -VLSI
Very Large Scale Integration -VLSI
PRABHAHARAN429
 

Plus de PRABHAHARAN429 (20)

Professional Ethics and Human Values
Professional Ethics and Human ValuesProfessional Ethics and Human Values
Professional Ethics and Human Values
 
NUMERICAL METHODS
NUMERICAL METHODSNUMERICAL METHODS
NUMERICAL METHODS
 
MAKING OF LINE FOLLOWER ROBOT
MAKING OF LINE FOLLOWER ROBOTMAKING OF LINE FOLLOWER ROBOT
MAKING OF LINE FOLLOWER ROBOT
 
Digital Signal Processing
Digital Signal ProcessingDigital Signal Processing
Digital Signal Processing
 
Power System Analysis!
Power System Analysis!Power System Analysis!
Power System Analysis!
 
Environmental Science!
Environmental Science!Environmental Science!
Environmental Science!
 
Linear Integrated Circuits -LIC!
Linear Integrated Circuits -LIC!Linear Integrated Circuits -LIC!
Linear Integrated Circuits -LIC!
 
Oops
OopsOops
Oops
 
Electrical drives lectures
Electrical drives lecturesElectrical drives lectures
Electrical drives lectures
 
Micro Processor Lab Manual!
Micro Processor Lab Manual!Micro Processor Lab Manual!
Micro Processor Lab Manual!
 
Microprocessor and Microcontroller Lab Manual!
Microprocessor and Microcontroller Lab Manual!Microprocessor and Microcontroller Lab Manual!
Microprocessor and Microcontroller Lab Manual!
 
Grid Integration Of Large Scale!
Grid Integration Of Large Scale!Grid Integration Of Large Scale!
Grid Integration Of Large Scale!
 
Electromagnetic Theory
Electromagnetic TheoryElectromagnetic Theory
Electromagnetic Theory
 
Electron Device Control
Electron Device ControlElectron Device Control
Electron Device Control
 
8051 Micro Controller
8051 Micro Controller8051 Micro Controller
8051 Micro Controller
 
Transmission and Distribution.
Transmission and Distribution.Transmission and Distribution.
Transmission and Distribution.
 
Very Large Scale Integration -VLSI
Very Large Scale Integration -VLSIVery Large Scale Integration -VLSI
Very Large Scale Integration -VLSI
 
Measurement & Instrumentation (BE)
Measurement & Instrumentation (BE)Measurement & Instrumentation (BE)
Measurement & Instrumentation (BE)
 
Control For Renewable Energy & Smart Grids
Control For Renewable Energy & Smart GridsControl For Renewable Energy & Smart Grids
Control For Renewable Energy & Smart Grids
 
IQ Gym Grow Your Mind.
IQ Gym Grow Your Mind.IQ Gym Grow Your Mind.
IQ Gym Grow Your Mind.
 

Dernier

Russian Escort Service in Delhi 11k Hotel Foreigner Russian Call Girls in Delhi
Russian Escort Service in Delhi 11k Hotel Foreigner Russian Call Girls in DelhiRussian Escort Service in Delhi 11k Hotel Foreigner Russian Call Girls in Delhi
Russian Escort Service in Delhi 11k Hotel Foreigner Russian Call Girls in Delhi
kauryashika82
 
1029 - Danh muc Sach Giao Khoa 10 . pdf
1029 -  Danh muc Sach Giao Khoa 10 . pdf1029 -  Danh muc Sach Giao Khoa 10 . pdf
1029 - Danh muc Sach Giao Khoa 10 . pdf
QucHHunhnh
 
Jual Obat Aborsi Hongkong ( Asli No.1 ) 085657271886 Obat Penggugur Kandungan...
Jual Obat Aborsi Hongkong ( Asli No.1 ) 085657271886 Obat Penggugur Kandungan...Jual Obat Aborsi Hongkong ( Asli No.1 ) 085657271886 Obat Penggugur Kandungan...
Jual Obat Aborsi Hongkong ( Asli No.1 ) 085657271886 Obat Penggugur Kandungan...
ZurliaSoop
 
Activity 01 - Artificial Culture (1).pdf
Activity 01 - Artificial Culture (1).pdfActivity 01 - Artificial Culture (1).pdf
Activity 01 - Artificial Culture (1).pdf
ciinovamais
 

Dernier (20)

ICT Role in 21st Century Education & its Challenges.pptx
ICT Role in 21st Century Education & its Challenges.pptxICT Role in 21st Century Education & its Challenges.pptx
ICT Role in 21st Century Education & its Challenges.pptx
 
Unit-IV; Professional Sales Representative (PSR).pptx
Unit-IV; Professional Sales Representative (PSR).pptxUnit-IV; Professional Sales Representative (PSR).pptx
Unit-IV; Professional Sales Representative (PSR).pptx
 
Python Notes for mca i year students osmania university.docx
Python Notes for mca i year students osmania university.docxPython Notes for mca i year students osmania university.docx
Python Notes for mca i year students osmania university.docx
 
Russian Escort Service in Delhi 11k Hotel Foreigner Russian Call Girls in Delhi
Russian Escort Service in Delhi 11k Hotel Foreigner Russian Call Girls in DelhiRussian Escort Service in Delhi 11k Hotel Foreigner Russian Call Girls in Delhi
Russian Escort Service in Delhi 11k Hotel Foreigner Russian Call Girls in Delhi
 
1029 - Danh muc Sach Giao Khoa 10 . pdf
1029 -  Danh muc Sach Giao Khoa 10 . pdf1029 -  Danh muc Sach Giao Khoa 10 . pdf
1029 - Danh muc Sach Giao Khoa 10 . pdf
 
ICT role in 21st century education and it's challenges.
ICT role in 21st century education and it's challenges.ICT role in 21st century education and it's challenges.
ICT role in 21st century education and it's challenges.
 
Micro-Scholarship, What it is, How can it help me.pdf
Micro-Scholarship, What it is, How can it help me.pdfMicro-Scholarship, What it is, How can it help me.pdf
Micro-Scholarship, What it is, How can it help me.pdf
 
Jual Obat Aborsi Hongkong ( Asli No.1 ) 085657271886 Obat Penggugur Kandungan...
Jual Obat Aborsi Hongkong ( Asli No.1 ) 085657271886 Obat Penggugur Kandungan...Jual Obat Aborsi Hongkong ( Asli No.1 ) 085657271886 Obat Penggugur Kandungan...
Jual Obat Aborsi Hongkong ( Asli No.1 ) 085657271886 Obat Penggugur Kandungan...
 
2024-NATIONAL-LEARNING-CAMP-AND-OTHER.pptx
2024-NATIONAL-LEARNING-CAMP-AND-OTHER.pptx2024-NATIONAL-LEARNING-CAMP-AND-OTHER.pptx
2024-NATIONAL-LEARNING-CAMP-AND-OTHER.pptx
 
Unit-IV- Pharma. Marketing Channels.pptx
Unit-IV- Pharma. Marketing Channels.pptxUnit-IV- Pharma. Marketing Channels.pptx
Unit-IV- Pharma. Marketing Channels.pptx
 
How to Manage Global Discount in Odoo 17 POS
How to Manage Global Discount in Odoo 17 POSHow to Manage Global Discount in Odoo 17 POS
How to Manage Global Discount in Odoo 17 POS
 
Activity 01 - Artificial Culture (1).pdf
Activity 01 - Artificial Culture (1).pdfActivity 01 - Artificial Culture (1).pdf
Activity 01 - Artificial Culture (1).pdf
 
This PowerPoint helps students to consider the concept of infinity.
This PowerPoint helps students to consider the concept of infinity.This PowerPoint helps students to consider the concept of infinity.
This PowerPoint helps students to consider the concept of infinity.
 
Mixin Classes in Odoo 17 How to Extend Models Using Mixin Classes
Mixin Classes in Odoo 17  How to Extend Models Using Mixin ClassesMixin Classes in Odoo 17  How to Extend Models Using Mixin Classes
Mixin Classes in Odoo 17 How to Extend Models Using Mixin Classes
 
Food safety_Challenges food safety laboratories_.pdf
Food safety_Challenges food safety laboratories_.pdfFood safety_Challenges food safety laboratories_.pdf
Food safety_Challenges food safety laboratories_.pdf
 
TỔNG ÔN TẬP THI VÀO LỚP 10 MÔN TIẾNG ANH NĂM HỌC 2023 - 2024 CÓ ĐÁP ÁN (NGỮ Â...
TỔNG ÔN TẬP THI VÀO LỚP 10 MÔN TIẾNG ANH NĂM HỌC 2023 - 2024 CÓ ĐÁP ÁN (NGỮ Â...TỔNG ÔN TẬP THI VÀO LỚP 10 MÔN TIẾNG ANH NĂM HỌC 2023 - 2024 CÓ ĐÁP ÁN (NGỮ Â...
TỔNG ÔN TẬP THI VÀO LỚP 10 MÔN TIẾNG ANH NĂM HỌC 2023 - 2024 CÓ ĐÁP ÁN (NGỮ Â...
 
How to Give a Domain for a Field in Odoo 17
How to Give a Domain for a Field in Odoo 17How to Give a Domain for a Field in Odoo 17
How to Give a Domain for a Field in Odoo 17
 
Application orientated numerical on hev.ppt
Application orientated numerical on hev.pptApplication orientated numerical on hev.ppt
Application orientated numerical on hev.ppt
 
Mehran University Newsletter Vol-X, Issue-I, 2024
Mehran University Newsletter Vol-X, Issue-I, 2024Mehran University Newsletter Vol-X, Issue-I, 2024
Mehran University Newsletter Vol-X, Issue-I, 2024
 
On National Teacher Day, meet the 2024-25 Kenan Fellows
On National Teacher Day, meet the 2024-25 Kenan FellowsOn National Teacher Day, meet the 2024-25 Kenan Fellows
On National Teacher Day, meet the 2024-25 Kenan Fellows
 

Adobe photoshop every tool explained! -Prabhaharan429

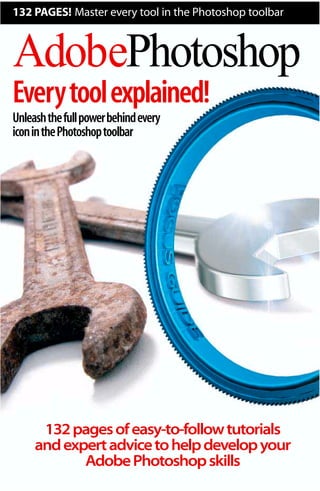
  • 1. 132 PAGES! Master every tool in the Photoshop toolbar AdobePhotoshop Everytoolexplained! Unleashthefullpowerbehindevery iconinthePhotoshoptoolbar 132pagesofeasy-to-followtutorials andexpertadvicetohelpdevelopyour AdobePhotoshopskills
  • 2.
  • 3. S tart up Photoshop and what do you see? Well, besides the menu options along the top of the screen, you’ll see a Toolbar that’s chock-a-block with icons. You’ll probably recognise some of these, such as the ‘T’ that designates the Type tool and the paintbrush icon that unlocks the various Brush tools. But do you really know what the rest of these icons mean? … Honestly? The chances are that – like many Photoshop users across the world – you’re only using a fraction of the program’s full potential, but this second issue in the Photoshop Focus Guide series will change all that, helping you make the most of all the tools at your disposal. Even professional designers often admit to being hopeless with the Healing Brush and dodgy with the Dodge tool, but there’s really no reason for any of the tools to be a mystery. This issue will help you get more from the Clone, Gradient, Paths and Effects tools, to name but a few. You’ll find expert tips and advice for working more efficiently with each of the tools, as well as tutorials to demonstrate exactly how to carry out useful image-editing tasks. In the final section you’ll find a step-by-step guide that brings together all the skills you’ve learnt, showing how to create a striking Photoshop image. And let’s not forget the CD that accompanies your Focus Guide. On here you’ll find a library of stock images (worth £1,990), plug-ins and video training tutorials to enhance your enjoyment of Photoshop further still! Have fun! Polish up your knowledge… Unravel the mysteries of the Photoshop Toolbar and its resident icons.They’re not as scary as they look! 3ADOBE PHOTOSHOP TOOL TECHNIQUES – FOCUS GUIDE Welcome
  • 4. Editor Dan McNamara Art Editor Simon Bleeze Writer Simon Danaher Production Clive Somerville Jonathan Palmer Cover image Chris Stocker New Media Co-ordinator Matt Gallimore Production Co-ordinator Diane Ross Group Publisher DaveTaylor Publishing Director JohnWeir Distributed through the UK Newstrade by Seymour Distribution, 86 Newman Street,LondonW1T 3EX Overseas Distribution by Future Publishing Ltd. Printed in the EU Future Publishing Ltd 30 Monmouth Street, Bath BA1 2BW www.thefuturenetwork.plc.uk We recommend that you always maintain an up-to-date backup of your hard disk data. Future Publishing does not accept any responsibility for disruption,damage and/or loss to your data or computer system that may occur while carrying out procedures described in this publication. Future Publishing is part of The Future Network plc. The Future Network produces carefully targeted specialist magazines and websites for groups of people who share a passion.We aim to satisfy their passion by creating titles that offer superb value for money, trustworthy information, multiple ways to save time and money, and are a pleasure to read or visit. Today we publish more than 80 magazines and over 30 magazine websites and networks from offices in four countries. The company also licenses 32 of its titles resulting in over 60 local editions in a further 23 countries.The Future Network plc is a public company quoted on the London Stock Exchange (symbol: FNET). Non-executive Chairman Roger Parry Chief Executive Greg Ingham Chief Operating Officer & Managing Director, UK Colin Morrison Finance Director John Bowman Tel +44 1225 442244 www.thefuturenetwork.plc.uk Bath • London • Milan • New York • Paris • San Francisco All contents © Future Publishing Ltd, 2003 All rights reserved. No part of this publication may be reproduced, stored in a retrieval system, or transmitted in any form or by any means without the prior permission of the publisher. Websites mentioned in this publication are not under our control. We are not responsible for the contents of these sites or any changes or updates to them. None of the information in this guide is intended as legal advice.The articles are for information purposes only. 4 FOCUS GUIDE – ADOBE PHOTOSHOP TOOL TECHNIQUES
  • 5. With so much to say about Adobe Photoshop it’s been difficult to cram all the information that we wanted to include into this Focus Guide. That’s why you’ll find the special icons that occupy the margins so very useful. As you leaf through the pages, you’ll find a range of attractive symbols, each of which denotes an extra nugget of knowledge. The icons enable you to identify exactly what kind of information you’re dealing with – for a full guide to icon categories, see below. These handy hints, tips and shortcuts are always relevant to the topic that’s being discussed, and will help you develop your Photoshop skills that little bit faster. Our writers are always experienced Photoshop experts who regularly contribute to our sister magazines, such as Computer Arts and Digital Camera Magazine. So you can rest assured that all the information they provide is both authoritative and thoroughly tried-and-tested. Finding your way Read this Guide from beginning to end or dip in and out as you please.Either way,our icons will prove indispensable… 5ADOBE PHOTOSHOP TOOL TECHNIQUES – FOCUS GUIDE Icons explained On your CD-ROM Some of the software that we refer to may be included on your bonus CD.Every now and then we remind you of this by flagging up the disc icon and listing what’s on it.Handy,eh? Top tips This indicates an expert tip.Anything sheltered beneath this icon is guaranteed to reveal a useful hint about using Photoshop’s extensive range of tools,palettes and features. Further information We’d like to tell you absolutely everything,but there’s just not enough space.Instead we refer you to other useful resources,such as websites and specialist books for further reading. Shortcuts Carrying out common tasks again and again can get a little tedious.Our handy shortcuts show you how to carry out these tasks with a few deft key-presses,saving you lots of time and effort. Take note You’ll find a number of these nuggets of knowledge scattered throughout the Guide.They’re crammed with useful information that complements the main text perfectly. Watch out! The skull and crossbones sign means proceed with caution.You’ll find some important points outlined below this icon,which you should certainly take seriously. Links When we refer to a website,we may pull out the web address in the sidebar to make it easier for you to read and remember.
  • 6. 6 FOCUS GUIDE – ADOBE PHOTOSHOP TOOL TECHNIQUES Contents CONTENTS Selections 1 SELECTIONTOOLS IN PHOTOSHOP 10 Making selections is the core of Photoshop’s way of working.There are a variety of tools you can use for the purpose,so here’s how to get the most out of them BASIC SELECTION TOOLS . . . . . . . . . . . . . . . . . . . . . . . . . . . . . . 12 THE LASSO TOOLS . . . . . . . . . . . . . . . . . . . . . . . . . . . . . . . . . . 14 THE MAGNETIC LASSO . . . . . . . . . . . . . . . . . . . . . . . . . . . . . . . 15 THE MAGIC WAND . . . . . . . . . . . . . . . . . . . . . . . . . . . . . . . . . 16 QUICK MASK . . . . . . . . . . . . . . . . . . . . . . . . . . . . . . . . . . . . . 18 WORKING WITH THE QUICK MASK. . . . . . . . . . . . . . . . . . . . . . . 19 SELECTIONS, MASKS AND CHANNELS . . . . . . . . . . . . . . . . . . . . . 20 SLICES. . . . . . . . . . . . . . . . . . . . . . . . . . . . . . . . . . . . . . . . . . . 21 Navigation and manipulation NAVIGATING AND EDITINGYOUR IMAGES 22 Getting around inside an image is important if you are to work quickly and efficiently. This chapter covers the view navigation tools and shortcuts for managing your workspace2 PANNING AND ZOOMING IMAGES . . . . . . . . . . . . . . . . . . . . . . . 24 THE NAVIGATOR PANEL. . . . . . . . . . . . . . . . . . . . . . . . . . . . . . . 25 VIEW MANAGEMENT . . . . . . . . . . . . . . . . . . . . . . . . . . . . . . . . . 26 MOVE, ALIGN AND DISTRIBUTE . . . . . . . . . . . . . . . . . . . . . . . . . 27 THE MOVE TOOL . . . . . . . . . . . . . . . . . . . . . . . . . . . . . . . . . . . 28 DIRECT AND PATH SELECTION TOOLS . . . . . . . . . . . . . . . . . . . . . 30 VECTOR SHAPES AND MULTIPLE PATHS . . . . . . . . . . . . . . . . . . . . . 31
  • 7. 7ADOBE PHOTOSHOP TOOL TECHNIQUES – FOCUS GUIDE Contents Brushes and Pencil tools USINGTHE BRUSHES AND PENCILTOOLS 32 This chapter introduces you to Photoshop’s more arty tools,the Brushes. But as you’ll discover,you can use these versatile tools for far more than just painting3 THE BRUSH TOOL. . . . . . . . . . . . . . . . . . . . . . . . . . . . . . . . . . . 34 USING BRUSHES . . . . . . . . . . . . . . . . . . . . . . . . . . . . . . . . . . . 35 EXPLORING THE BRUSHES PALETTE. . . . . . . . . . . . . . . . . . . . . . . . 38 THE BRUSHES PALETTE IN DETAIL. . . . . . . . . . . . . . . . . . . . . . . . . 39 SCATTERING. . . . . . . . . . . . . . . . . . . . . . . . . . . . . . . . . . . . . . . 40 TEXTURES AND DUAL BRUSHES . . . . . . . . . . . . . . . . . . . . . . . . . 41 THE HISTORY BRUSH . . . . . . . . . . . . . . . . . . . . . . . . . . . . . . . . 42 USING THE HISTORY BRUSH . . . . . . . . . . . . . . . . . . . . . . . . . . . 43 ART HISTORY BRUSH . . . . . . . . . . . . . . . . . . . . . . . . . . . . . . . . 45 4 THE RUBBER STAMP (CLONE) TOOL . . . . . . . . . . . . . . . . . . . . . . 48 REMOVING UNWANTED ELEMENTS . . . . . . . . . . . . . . . . . . . . . . . 49 CLONING SKIN. . . . . . . . . . . . . . . . . . . . . . . . . . . . . . . . . . . . . 50 THE HEALING BRUSH . . . . . . . . . . . . . . . . . . . . . . . . . . . . . . . . 51 THE HEALING PATCH TOOL . . . . . . . . . . . . . . . . . . . . . . . . . . . . 52 5 THE PAINT BUCKET . . . . . . . . . . . . . . . . . . . . . . . . . . . . . . . . . 56 MORE FILL OPTIONS . . . . . . . . . . . . . . . . . . . . . . . . . . . . . . . . 58 THE GRADIENT TOOL . . . . . . . . . . . . . . . . . . . . . . . . . . . . . . . . 59 THE GRADIENT EDITOR PANEL . . . . . . . . . . . . . . . . . . . . . . . . . . 61 USING GRADIENTS CREATIVELY . . . . . . . . . . . . . . . . . . . . . . . . . . 62 GRADIENT STYLES. . . . . . . . . . . . . . . . . . . . . . . . . . . . . . . . . . . 63 GRADIENT MASKS . . . . . . . . . . . . . . . . . . . . . . . . . . . . . . . . . . 64 MASKS AND SELECTIONS IN DETAIL . . . . . . . . . . . . . . . . . . . . . . . 65 MAGIC AND BACKGROUND ERASERS . . . . . . . . . . . . . . . . . . . . . 66 Cloning and Healing tools USINGTHE CLONING AND HEALINGTOOLS 46 The Cloning and Healing tools in Photoshop offer an elegant way to fix damaged photos, correct bad scans and generally clean up your images.And they’re great fun to use Gradients,Fills and Erasing THE GRADIENT,FILL AND ERASERTOOLS 54 Once you get more competent with Photoshop you’ll appreciate the importance of these utility tools.The Gradient tool in particular is essential for all manner of tricks and effects
  • 8. 8 FOCUS GUIDE – ADOBE PHOTOSHOP TOOL TECHNIQUES Contents 6 THE ‘FOCUS’ TOOLS . . . . . . . . . . . . . . . . . . . . . . . . . . . . . . . . . 70 THE BLUR TOOL. . . . . . . . . . . . . . . . . . . . . . . . . . . . . . . . . . . . 71 THE SHARPEN TOOL . . . . . . . . . . . . . . . . . . . . . . . . . . . . . . . . . 72 THE SMUDGE TOOL . . . . . . . . . . . . . . . . . . . . . . . . . . . . . . . . . 73 WORKING WITH THE SMUDGE TOOL. . . . . . . . . . . . . . . . . . . . . . 74 DODGE AND BURN . . . . . . . . . . . . . . . . . . . . . . . . . . . . . . . . . 75 THE SPONGE TOOL. . . . . . . . . . . . . . . . . . . . . . . . . . . . . . . . . . 77 USING DODGE AND BURN . . . . . . . . . . . . . . . . . . . . . . . . . . . . 78 FOCUSING IN WITH DODGE AND BURN . . . . . . . . . . . . . . . . . . . 79 7 THE TYPE TOOL . . . . . . . . . . . . . . . . . . . . . . . . . . . . . . . . . . . . 82 TYPE OPTIONS. . . . . . . . . . . . . . . . . . . . . . . . . . . . . . . . . . . . . 84 TYPE TOOL TIPS . . . . . . . . . . . . . . . . . . . . . . . . . . . . . . . . . . . . 85 USING THE WARP TEXT PANEL . . . . . . . . . . . . . . . . . . . . . . . . . . 87 RASTERIZING TYPE. . . . . . . . . . . . . . . . . . . . . . . . . . . . . . . . . . . 88 STYLED TYPE . . . . . . . . . . . . . . . . . . . . . . . . . . . . . . . . . . . . . . 89 8 USING THE PEN TOOLS . . . . . . . . . . . . . . . . . . . . . . . . . . . . . . . 92 VECTOR SHAPES. . . . . . . . . . . . . . . . . . . . . . . . . . . . . . . . . . . . 95 USING VECTOR SHAPES. . . . . . . . . . . . . . . . . . . . . . . . . . . . . . . 96 MASKS . . . . . . . . . . . . . . . . . . . . . . . . . . . . . . . . . . . . . . . . . . 98 VECTOR SHAPE DETAILS. . . . . . . . . . . . . . . . . . . . . . . . . . . . . . . 99 Effects Tools GETTINGTO KNOW THE EFFECTSTOOLS 68 Photoshop’s effects tools include Blur,Sharpen,Smudge,Dodge and Burn.Discover how best to use them to spice up your artwork,composites and photographic images Text WORKING WITHTHETYPETOOL 80 Creating text in Photoshop is quite easy to do,whether it’s for artistic effect or simply to add essential information.This chapter looks at the various options available with theType tool Vectors WORKING WITH PATHS,VECTORS AND MASKS 90 Photoshop has always used vector-based‘paths’to draw smooth shapes and outlines. Learn how the latest version has the ability to create shapes and masks with vectors too
  • 9. 9ADOBE PHOTOSHOP TOOL TECHNIQUES – FOCUS GUIDE Contents CD PAGES. . . . . . . . . . . . . . . . . . . . . . . . . . . . . . . . . . . . . . . 120 INDEX. . . . . . . . . . . . . . . . . . . . . . . . . . . . . . . . . . . . . . . . . . 124 GLOSSARY. . . . . . . . . . . . . . . . . . . . . . . . . . . . . . . . . . . . . . . 126 9 NOTES AND ANNOTATIONS . . . . . . . . . . . . . . . . . . . . . . . . . . . 102 THE EYE DROPPER TOOL . . . . . . . . . . . . . . . . . . . . . . . . . . . . 104 USING THE EYE DROPPER TOOL . . . . . . . . . . . . . . . . . . . . . . . . 105 THE COLOUR SAMPLER. . . . . . . . . . . . . . . . . . . . . . . . . . . . . . 106 THE MEASURE TOOL. . . . . . . . . . . . . . . . . . . . . . . . . . . . . . . . 107 Miscellaneous tools and Utilities ANNOTATIONS,NOTES ANDTHE MEASURETOOL 100 Along with the creative tools,Photoshop provides several tools to add accuracy,sound and vision to your work.These fall into two tool groups – Notation and Measurement tools Essential information CD PAGES AND RESOURCES 120 Your essential guide to the software on your disc. Plus our handy glossary and index 10 CREATING A MONTAGE . . . . . . . . . . . . . . . . . . . . . . . . . . . . . . 110 FIX MISSING PARTS OF THE IMAGE . . . . . . . . . . . . . . . . . . . . . . . 112 USING THE PEN AS A BRUSH . . . . . . . . . . . . . . . . . . . . . . . . . . 113 ADDING A BACKGROUND . . . . . . . . . . . . . . . . . . . . . . . . . . . . 115 APPLYING ARTISTIC DETAIL . . . . . . . . . . . . . . . . . . . . . . . . . . . . 118 VECTOR SHAPE AND TYPE LAYERS. . . . . . . . . . . . . . . . . . . . . . . 119 Artwork project CREATINGTOP QUALITY ARTWORK 108 In this final chapter we’ll put together a piece of artwork using all the tools and options that we’ve looked at over the course of this Photoshop Focus Guide
  • 10. Chapter 1 SELECTION TOOLSIN PHOTOSHOP In earlier versions of Photoshop there was no Select tool – one that looked like a traditional arrow cursor, that you would use to select ‘objects’. Because Photoshop dealt primarily with pixels, it made no sense to have a Select tool – there were no ‘objects’ to select. Instead, the selection tools were default tools – ones you used automatically, to begin editing. In Photoshop 7.0 there is an arrow tool for selecting objects, since the introduction of vector shapes (those drawn using a series of points or ‘vectors’) made this necessary. Despite this, the selection tools, in their many and varied forms, are still In this chapter… Discover how the Photoshop selection tools work Learn how to make accurate selections Create partial or gradient selections Making selections is the core of Photoshop’s way of working.There are a variety of tools you can use for the purpose,so let’s take a look at how to get the most out of them the main tools for doing 90% of the tasks in Photoshop. Selections are an essential part of understanding Photoshop’s methods and central to the way the program works – making a selection then performing an action on that selection is the basic workflow. The better you become at Photoshop the better you’ll become at making selections and vice-versa. No need for discretion What’s important to understand, though, is that selections are not necessarily discreet. They don’t have to define rigidly what is or is not selected – they can be partial too.
  • 11. It is perfectly possible to make selections so that some pixels are 100% selected and others are 100% unselected, and in between there is a selection gradient, where pixels are partially selected. This is how you create effects that blend smoothly into existing pixels, and this also forms the basis of ‘anti-aliasing’ – smoothing jagged, pixelated edges. Feathering is the most basic implementation of gradient selections in Photoshop. When making a rigid selection using one of the Marquee tools for instance, you can tell Photoshop to make the edge of the selection slightly soft, or ‘feathered’. This effectively creates a border around the selection where some of the pixels are partially selected, smoothing whatever effect or operation is applied to the selection, or merely preventing jagged edges. The soft option By making the feathered edge larger, you’ll be able to create very soft selections, and this is very useful when making photo-montages, for instance, or retouching images. We’ll look at how anti-aliasing and feathering are implemented in Photoshop’s selection tools, and how you can use them to achieve professional results quickly and easily. 11ADOBE PHOTOSHOP TOOL TECHNIQUES – FOCUS GUIDE Selections Page 17The Magic Wand tool selects an object in an image to change the colour Page 20 Photoshop can convert channels into selections and vice-versa Page 18 Quick mask mode turns any painting tool into a selection tool Page 12The Circular Marquee tool makes an elliptical selection Page 13 Single Column marquees are used to select only certain columns Page 15The Magnetic Lasso lets you make detailed selections with ease
  • 12. Basic Selection tools Let’s take a look at the various tools in the toolbar available for making selections 12 FOCUS GUIDE – ADOBE PHOTOSHOP TOOL TECHNIQUES Chapter 1 Changing marquees Holding down the [Alt] key will change the marquee mode so that the selection expands from the centre,rather than the corners,as you drag. Shifting around Rather than using the buttons you can hold down modifier keys to add and subtract selections.To add,hold the [Shift] key before you begin to click and drag.To subtract hold the [Alt] key before you click and drag.The marquee cursor will change to show which mode you are in. In Subtract mode, you can remove areas from the current selection. Here we changed to the Circle Marquee tool to subtract an elliptical shape from the rectangular selection we had made.You can continue to make negative selections that chip away at the current selection.This is a good way to refine a selection to fit a specific shape in an image. 4 The Options bar displays tool-specific settings.The selection tools all have a set of four buttons that change the effect that subsequent selections have on the one that’s currently active.The normal mode is New Selection – each time you click and drag,a new selection is made and the current one is lost. Add mode makes the current selection larger and a different shape. 3 The Circular Marquee works in exactly the same way, except the selection will be elliptical.With both tools you can constrain the selection so it is either a perfect circle or a perfect square by holding down the [Shift] key while you drag. Lift your finger off the [Shift] key while still holding the mouse button down to switch back to unconstrained mode. 2 The Rectangular Marquee tool is the first tool in the Toolbar, and is used to select rectangular areas of an image. It’s simple to use – just select the tool and drag across the image to select the area you want. By default the tools works in corner-to-corner mode. Dragging from top-left or bottom-right creates the marquee. 1
  • 13. 13ADOBE PHOTOSHOP TOOL TECHNIQUES – FOCUS GUIDE Selections Short intersection To activate Intersect mode without using the buttons hold down the [Alt} and [Shift] keys before you drag. Perfect circle If,after dragging while holding down the [Shift] key,you want to force the selection to be constrained to a perfect circle or rectangle, release the [Shift] key momentarily and press it again.Holding the [Alt] key while dragging will force a selection to be drawn from its centre as mentioned. If already holding the [Alt] key,such as when using the Intersection shortcut,momentarily release it and then press the [Alt] key. This forces the ‘constraint from centre’to occur. Uses for the Single Row and Column Marquees are varied, but not always obvious. Here, they’re used to create multiple random vertical and/or horizontal lines in an image much more quickly than using the Pencil or Line tool.The Add Selection mode was used and the selections filled with black, on separate layers, to create lines whose opacity and blending mode we can vary. 8 The last two selection types in this tool group are the Single Row and Single Column Marquees.These are special types of marquee which, as their name suggests, select either a single row or column of pixels. In this case dragging only defines which row or column in the image is selected and the selection extends to the edges of the image in either mode. 7 This is the result of the intersection. Note that it’s only the overlapping parts of the two selections that remain selected. This selection method is not used very often but you’ll appreciate just how handy it can be in certain situations. Creating similar selections any other way would be very difficult and time-consuming. 6 The fourth mode is Intersect.When in this mode, you can create a new selection that is the intersection between the currently active one and one you will drag out. Basically all parts of the current selection will disappear except that portion that overlaps with the new selection you drag out. Here is the original selection with a new one being dragged out over it, using the Intersect mode. 5
  • 14. The Lasso tool is a free-form selection tool. You can use it like a pen to draw your selection border by hand. When using the Lasso tool selections can be any shape you like, but it can be hard to be precise because selection must be drawn in a single motion. The Polygonal Lasso is much easier to use, and can be found in the Lasso tool pop-up in the toolbar. This enables you to click from one point to another to create straight line segments to make up your selection. All you need to do is double-click, or click on the starting point of the selection to end it and consequently close your selection. The LassoTools The standard,Polygonal and Magnetic Lassos are ideal for creating complex selections 14 FOCUS GUIDE – ADOBE PHOTOSHOP TOOL TECHNIQUES Chapter 1 Using the [Alt] key technique allows you the best of both worlds,drawing straight sections or detailed curves as and when you need to Poly-gone When using the Polygonal Lasso holding down the [Alt] key invokes the normal Lasso tool. Releasing the [Alt] key reverts back to the Polygonal Lasso. Combined Lasso With the Lasso tool active,just hold down the [Alt] key at any stage to turn it into the Polygonal Lasso. THERE ARE two ways in which to work using the [Alt] shortcut. Assuming you have the normal Lasso tool selected, if you keep the [Alt] key held down when you click and drag, the tool will behave like the normal Lasso. IF YOU want to get really precise, then the Magnetic Lasso is the key. With this selection tool you can draw close to the edge of the object you wish to select and the tool will figure out where the boundary should be and adjust the selection to fit. YOU CAN set the Frequency high to place lots of points as you drag. This can be handy for jagged edges. A LOW Frequency is also useful when you don’t need the added complexity of hundreds of anchor points, but can make do with a less precise selection. LASSO OPTIONS ROUNDED UP
  • 15. The Magnetic Lasso If you want detailed selections without too much effort,here’s the perfect tool for the task 15ADOBE PHOTOSHOP TOOL TECHNIQUES – FOCUS GUIDE Selections Fast pan and zoom You can use the Pan and Zoom shortcuts to move the image around while still in mid-selection.See Chapter 2 for more about navigating and editing your images. Magnetic switch Hold the [Alt] key to activate the Polygonal Lasso tool when using the Magnetic Lasso. Another trick to help on very low contrast portions of an image, such as where the pumpkin stalk is in front of the girl’s face again, it can help to increase the Frequency setting.This will cause the tool to place anchor points more often, therefore reducing the span of pixels it has to analyze as you drag the mouse. 4 This is a problem of contrast. By reducing the Edge Contrast setting in the Option bar you can help the Magnetic Lasso to detect edges that are lower in contrast. But you will still need to manually add anchor points by clicking, to help the Lasso do this. 3 If the area you are tracing is too indistinct and low in contrast for Photoshop to find an edge itself, you can click the mouse to force an anchor point to be placed.The default setting in the Options bar is fine most of the time, but there can be problems – here, the tool has no problem with the edge of the hair, but it didn’t seem to detect the pumpkin stalk. 2 This tool lets you make more detailed selections, particularly of specific objects in an image, without requiring too much effort.You don’t have to keep the mouse button held down when drawing either – click once to start, drag close to the object edge, then double-click to end. Note that the tool automatically places‘anchor points’as you draw to keep the selection in place. 1
  • 16. The MagicWand The Magic Wand is a special selection tool, used for selecting areas of similar colour 16 FOCUS GUIDE – ADOBE PHOTOSHOP TOOL TECHNIQUES Chapter 1 Unrestricted colours When the Contiguous setting in the Options bar is checked, Photoshop makes a selection of similar- coloured pixels that are also physically joined to your starting point.Disable this setting and similar colour pixels across the whole image will be included,which can take a few moments. Use All Layers The Use All Layers option allows you to calculate the selection based on how the image actually appears on screen when working with multi-layered documents. If this is left unchecked,then only colours on the currently selected layer will be analysed for similarity. We can improve the ability of the wand to select the colours we want by increasing the Tolerance setting, from the default 32, to 50 then [Shift]+clicking in each of the separate areas. Any other parts of the jumper still not selected can be added by [Shift]+clicking on them again until you have a good clean selection with no‘islands’. 4 The Magic Wand will only select colours within a certain range, defined by the Tolerance setting. And it will only look at contiguous pixels – that is, ones that actually touch each other. Areas of colour not directly connected, like the chest and other arm, are not considered for selection. 3 Most images don’t contain large areas of flat colour like the one above,so here’s a more typical use for the MagicWand – selecting the girl’s jumper to change its colour.Using the MagicWand,we can click on a section of the jumper to select all pixels with a similar colour. However,using the default setting there are many‘islands’of unselected pixels,so not all of the jumper has been selected. 2 The Magic Wand tool is used to select areas using a single click.The tool works by sampling the colour of the image where you click and then looking at all adjacent pixels for those that are the same or similar in colour.Take a well-defined shape like the one here and click in it with the Magic Wand – the whole shape is selected in one go. 1
  • 17. 17ADOBE PHOTOSHOP TOOL TECHNIQUES – FOCUS GUIDE Selections Colour tweaks The Hue/Saturation panel lets you adjust the whole spectrum or individual sectors of the colour spectrum.Choose these from the pop-up menu. Let it slide The sliders at the bottom of the Hue/Saturation panel enable you to adjust the range of colours affected in each sector. By selecting the layer mask and applying the Gaussian Blur filter with a smallish value we can make the layer mask slightly bigger.Then by applying Levels to the layer mask we can make the blurred edges brighter, controlling how much of the Hue/Saturation effect is applied to this area. 8 If we zoom into the document we can see that there is a slight fringe of red. This is because some of the jumper that overlaps the background was left unselected. This is a limitation of the tolerance setting used by the Magic Wand. Fortunately, there is a way we can fix this. 7 By adding a Hue/Saturation Adjustment Layer while the selection is still active, you can change the colour of the the jumper, and only the jumper. Photoshop creates a layer mask from the selection and uses is to limit which areas of the adjustment layer will actively affect the layers below. 6 Here you can see that a part of the arm has been selected.This is due to the high tolerance setting used.You can easily remove it from the selection, but first reduce the tolerance to a lower value, such as 24, then [Alt]-click on the arm inside the selection to remove it. 5
  • 18. Quick Mask Quick Mask is not a tool as such,but a mode you can enter when working with selections 18 FOCUS GUIDE – ADOBE PHOTOSHOP TOOL TECHNIQUES Chapter 1 Fill the gaps Holes in a Mask or Quick Mask can be filled by selecting the inside or outside area and applying the Minimum filter. Keep it sharp Apply the Minimum filter to a copy of a layer using the Overlay mode to give you a‘live’ sharpening layer. While in Quick Mask mode, therefore, you can use any of the normal painting tools to modify your mask, and hence your selection.You can see that Photoshop offers a huge amount of freedom when creating selections, and this is indicative of how important selections are when using Photoshop. Here, the Paintbrush tool is being used to clean up the mask. 4 The red overlay is slightly transparent so you can see what it beneath. Red areas are masked out (unselected) while clear areas are unmasked (selected). But internally, Photoshop stores the mask in shades of grey, not red – so this is how the mask looks to Photoshop. 3 By clicking the Quick Mask button at the bottom of the toolbar, or pressing the [Q] key, the selection is converted to a mask.The mask is displayed, not in shades of grey, but as a semi-transparent overlay.This mimics the techniques used in traditional printing where a red‘rubylith’overlay is used to mask out parts of a photo or artwork. 2 When any selection is active,no matter which of the selection tools you started off using,you can enable Photoshop’s Quick Mask mode.Here is a less-than-perfect selection we have made using the Magic Wand. 1
  • 19. When painting, take notice of the foreground colour indicated in the bottom of the toolbar. When in Quick Mask mode this will only indicate shades of grey, so any colours you have set will appear grey. Hitting the [D] key sets the colours to the default, white and black. As you paint you can use the [X] key to reverse the background and foreground colours so that you can paint in white (unmask) or black (mask) to edit the mask. Once you have touched up the mask, you can press the [Q] key once more to exit Quick Mask mode. You’ll then be able to convert the edited mask to a selection. Working with the Quick Mask The Quick Mask lets you create a ready-made mask,which you can edit or turn into a selection 19ADOBE PHOTOSHOP TOOL TECHNIQUES – FOCUS GUIDE Selections Make use of the foreground and background switch key [X] to flip between masked and unmasked colours Disappearing ants To hide the‘marching ants’while a selection is active use the [Crtl]+[H] shortcut (that’s [Command]+[H] for Mac users).Be careful to remember that you have a selection active though! Hiding applications To hide other applications on a Mac and leave only Photoshop visible,type [Command]+[Alt]+[H]. On PCs,Photoshop has an application background window, so this is not applicable. IF YOU need to make a selection slightly bigger all the way round, you can do so using the Select > Modify > Expand menu command. A dialog will appear in which you can enter the number of pixels by which you wish to expand the selection. YOU CAN contract a selection by using the Select > Modify > Contract menu command.To make a selection larger by a specified number of pixels around it, choose Select > Modify > Expand from the menu. TO SOFTEN a selection and make its border less jagged, you can use the Select > Feather menu command, enter a value in pixels (from 1 to 250) and click OK. IF YOU need to modify just the border of the selection area you can select it using the Select > Modify > Border.This is useful for creating special edge effects, in combination with some filters, like Torn Edges. HOW TO MODIFY YOUR SELECTIONS
  • 20. Selections,Masks and Channels Let’s look at selections in a little more detail to see how how they relate to layers and channels 20 FOCUS GUIDE – ADOBE PHOTOSHOP TOOL TECHNIQUES Chapter 1 Alpha channels The term alpha channel simply means any extra greyscale channel saved along with the three RGB channels,or four CMYK channels,that make up a colour image file. Photoshop files can store many of these alpha channels at once. Channel selection [Ctrl]+[Alt]+[Shift]+click on a channel to load the intersection of the current selection and a channel. To reload a channel as a selection once again,click the Load Channel As Selection button at the bottom-left of the Channels palette. A better technique is to press [Ctrl] (or [Command] on a Mac) while clicking on the channel icon directly – we can load the larger ellipse as a selection (by pressing [Ctrl/Command] while clicking on it) then subtract the smaller ellipse by pressing [Ctrl/Command]+[Alt] while clicking its icon in the Channel palette. 4 Now that the selection is saved as a channel, we can drop the selection and continue to make new ones. It’s only possible to have one selection active at a time, so saving them to a channel is a convenient way to store them for use later on. Here we’ve created another selection and saved it as another channel. It’s just a larger ellipse. 3 We can convert the selection into an ‘alpha’channel by switching to the Channels tab and clicking the Save Selection As Channel button, (second from the left at the bottom of the palette).The selection is then represented by a greyscale image. 2 As we’ve seen with the Quick Mask mode, selections are handled internally by Photoshop as a greyscale image or‘mask’. White areas in the mask are pixels that are fully selected, black areas are fully unselected and grey areas are partially selected. Let’s create a simple selection using the Elliptical Marquee tool. 1
  • 21. Slices Slices are special kinds of selections for web page design,before the Image Ready stage 21ADOBE PHOTOSHOP TOOL TECHNIQUES – FOCUS GUIDE Selections Reassembled slices When you save the sliced page Photoshop creates an HTML file plus separate image files for each slice.When the HTML file is read by a web browser all the slices are reassembled in their original position, giving the appearance of a single image once again. Keep it tidy Hold the [Ctrl] key while using the Slice tool to toggle the Slice Select tool on and off. Use this to select a slice and drag its edge handles to resize it.Be careful not to have any unnecessary ‘sliver’slices between the main slices.Zoom in to check they all butt up against each other nicely. Now choose File > Save ForWeb to open Photoshop’s web compression tool.In this panel,you can select each slice and apply precisely the compression most suitable.For example,a photo saved as high quality JPEG, the text as a medium quality JPEG and the graphics as GIFs.The backgrounds can be saved as low quality JPEGs.This sliced,higher quality image is only 5k larger than our first attempt. 4 Using the Slice tool we can divide up the image into sections. It’s simple to use – just select the tool and drag out marquees to cut the image into appropriate boxes. Photoshop automatically adds extra slices where necessary to keep everything rectangular because each slice essentially becomes a separate image file. 3 The problem here is that the different kinds of graphics element on the page really need to be saved individually using the compression settings best suited to each. We can’t do this without using slices in Photoshop. As this pretty extreme example shows, achieving a small file size causes most of the elements to look terrible. 2 Here’s an example of where slicing can really help.This is an example web page, containing text, a background, a photographic image and graphics created in Photoshop. Obviously, for the web we want the page to download as fast as possible but also look as good a possible. 1
  • 22. Chapter 2 NAVIGATING AND EDITING YOUR IMAGES Being able to zoom and pan an image is important when working on a Photoshop document. Like all other aspects of the program there is more than one way to get around an image, manage your windows and documents, and generally navigate the Photoshop landscape. Similarly you’ll need to be able to work with the elements within a document, such as masks, layers, floating selections, paths and vector masks. There are a number of tools to accomplish these tasks. As mentioned before, Photoshop is not an object-based 2D program – that is, you work directly with the pixels of a layer until you explicitly In this chapter… Learn how to pan and zoom images Discover how to select and move layer elements Use shortcuts to scale and pan the view Work more efficiently and productively Getting around inside an image is important if you are to work quickly and efficiently.This chapter covers the view navigation tools and shortcuts for managing your workspace do something to change that fact, such as creating a new layer on which to paint. In some 2D programs, every time you paint a stroke or apply an effect, a new object is created. While this gives you a totally non-destructive way of image editing, it can make managing your document a very complicated procedure. In Photoshop it’s much more straightforward. Painting in layers If you paint on an image layer, stop say, to change colour, then paint over what you just did, the result destructively alters those pixels in the layer. It’s much like painting in
  • 23. the real world, except in Photoshop you have an Undo command. If you need to paint over the top of existing artwork and be able to go back and change the position, size, colour and opacity of those strokes later on, then you have to paint on a new layer. This holds true for any other aspect of the program where new pixels are created. While the Selection tools – the Marquee, Lasso and so on – are used to select pixels within a layer, there are other tools for selecting and moving layer elements themselves. These include the Move tool, the Path Select tool and the Direct Selection tool for dealing with vector-based elements. It’s important to learn the difference between them, and we’ll examine these differences more closely in the following pages. Old and new The Path Select and Direct Selection tools are not easy to find in older versions of Photoshop. The Path Select tool used to be part of the Pen tool group, but can now be found in its own tool group on the toolbar. Many revisions have been made to both the menus and toolbar, but rest assured that most of the information in this book also applies to older versions of Photoshop. 23ADOBE PHOTOSHOP TOOL TECHNIQUES – FOCUS GUIDE Navigation and manipulation Page 24 Use the Zoom and Pan tools to navigate your images on screen Page 25The Navigation palette is great for giving an overview of the whole page Page 26 Manage your screen space when multiple documents are open Page 31 Use the Direct Selection and Path tools to work with paths and vectors Page 29 Quick 3D effects are possible using the Move tool in copy mode Page 28The Move tool enables you to navigate your layers with a pop-up menu
  • 24. Panning and Zooming images Here we show you the basic navigation tools available for viewing your image 24 FOCUS GUIDE – ADOBE PHOTOSHOP TOOL TECHNIQUES Chapter 2 100% accuracy To zoom the image so that it is at exactly 100% scale,double- click the Zoom tool in the toolbar. Viewing options Use the buttons in the Option bar to zoom the image to full size, print size or to make it fit on screen. Two useful options are the Resize Window To Fit and Ignore Palettes options in the Zoom tool’s Option bar.With the former option enabled the window will change size along with the image, and with the latter option enabled the window will continue to extend below any open palettes, though not the toolbar. 4 To zoom out again, either click the Zoom Out button in the Option bar and click in the image, or hold down [Ctrl] and click (that’s [Option]+click on a Mac). If the image extends past the borders of the window you can pan the image by clicking on the Pan tool, or holding the Space Bar at any time and dragging in the window. 3 At the bottom of the toolbar are the Hand (which we’ll refer to as the Pan tool) and Zoom tools. Click the Zoom tool then click on your image to zoom in. Eventually you’ll zoom in so far that the individual pixels will become visible as large blocks of a single colour.You’ve exceeded the resolution limit for the image on your monitor, but getting this close is often very useful. 2 When you open an image in Photoshop it is automatically scaled so that the whole image is visible at once.The scaling factor is displayed as a percentage in the window’s title bar. But how do you zoom in to see more detail in a large image? As is often the case when using Photoshop, there are a number of different options. 1
  • 25. The Navigator panel A useful device for getting around documents is the Navigator panel.Here’s how it works 25ADOBE PHOTOSHOP TOOL TECHNIQUES – FOCUS GUIDE Navigation and manipulation Navigator panel This can be very useful when working on multiple monitor set-ups.You can have a full-screen preview of your image on one monitor while you work up close on another.This prevents you continually zooming in and out to see how the editing looks relative to the rest of the image. A different scale Some previous versions of Photoshop do not allow incremental and fractional scaling – you can only scale out to 75%,50%,25%, 12.5%… or in to 125%,150%,200% and so on. The triangle at the top-right of the Navigator accesses the options for the panel.There are only two in Photoshop 7: Dock To Palette Well and Options.The latter lets you change the colour of the zoom box, which can be handy if you have a very red image like ours and the box is hard to see, of if you just don’t like working with the red colour. 4 To zoom in and out using the Navigator you have a few different options.You can use the zoom slider to interactively zoom the image, and that’s quite fun to do. Or you can click on the Zoom In and Zoom Out buttons either side of the slider. Or you can click in the text field to enter an exact scale. 3 The Navigator panel is very useful when zoomed in very close to an image, because it shows you with a red box exactly where in the main image the zoomed in portion is located. Note that you can make the preview larger by dragging the lower right corner of the palette to resize it, even to fill the whole screen. 2 From the Windows menu you can access the Navigator panel, though it’s open by default in Photoshop.This is a handy tool because it enables you to view the entire image in a small window, pan the main view, and zoom in and out, all from the same small area on screen. It’s great for those that don’t like to use keyboard shortcuts. 1
  • 26. The main interface in Photoshop is quite simple and well laid- out, but it has been constantly refined through development to offer highly efficient document and view management. Within the main menu is the View menu which has many view management options – the Zoom In and Out commands and their respective shortcuts, as well as commands to show the Rulers, Guides and Grids and the option to enable various kinds of snapping. As well as using the Navigator or Zoom tool you can use the shortcuts [Ctrl]+[+] and [Ctrl]+[–] to zoom in and out (Mac users replace [Ctrl] with [Command]). View management Photoshop has several gadgets to help you work with various views of your document 26 FOCUS GUIDE – ADOBE PHOTOSHOP TOOL TECHNIQUES Chapter 2 Multiple documents can be arranged on the screen using Tile,in Windows > Documents.This fits your images next to each other on screen Floating away The floating palettes can get in that way, especially if you are working on a small monitor.No matter,at any time you can hit the [F] key to toggle the display mode to full screen.Use the Tab key to toggle the palettes on and off to get a totally uncluttered view. When the Zoom tool is active the Options bar displays a few extra buttons – Actual Pixels,Fit On Screens and Print Size.These zoom the view to specific sizes. The Navigator panel is grouped with the Info palette.Use the navigator to perform multiple view navigation tasks in one area, with one hand.You also get a handy image preview. The Print Size pop-up is located at the bottom of the document window.Click on the blank space here to preview how large the image will print out on the paper size set in the Print dialog. Yet another way to zoom the document is to type in a value here at the bottom-left of the document window. The Zoom and Pan tools can be found at the bottom of the toolbar.Click on these to zoom and pan inside the image. At the bottom of the toolbar are buttons to control full screen view.The middle one makes the current window fill the screen,the right makes the menu bar disappear and the left returns it to normal. ZOOMING AROUND
  • 27. As well as moving and copying pixels, Photoshop’s Move tool allows you to align and distribute objects evenly across the document or within a selection. With the Move tool selected you will see a number of options available. The first option, Auto Select Layer, is very handy. It enables you to click on a pixel in the image to select that layer. The next, Show Bounding Box, displays a transform box around the selection or element or layer. You can drag the handles on the edge of the box to move the selection. If you click on the lines, you’ll switch to the Free Transform mode, enabling you to scale, rotate and deform the objects. The next section of options only becomes active when you have linked layers. To link layers so that you can move them as one object, go to the Layers palette and click the blank icon box between the eye icon and one of your layers. A chain icon now appears in the blank icon box, indicating that the layer you have just clicked next to is now linked to the currently selected layer. Move,Align and Distribute The latest version of Photoshop has handy Align and Distribute features 27ADOBE PHOTOSHOP TOOL TECHNIQUES – FOCUS GUIDE Navigation and manipulation Line them up The Align features work with selections on fully filled layers too.If a selection is active then it is used as a master guide for all the layers to be aligned to.If you have accidentally moved image layers so that they lie partially off the canvas you can use the Align feature to make them all line up again squarely on the canvas. When you select a layer that has other layers linked to it the Align and Distribute options of the Move tool become active. Click on these to distribute the layers or align them to various key points.You can use the Align Left Edges button, for example, to align individual text layers so that their left edges line up. It’s important to note that these options only take into account the bounding box of the layer. If you have a series of layers linked together but they are filled totally with pixels, then the align options will have no effect.This is because the layers have nowhere to be aligned to, as they are already lined up on the canvas. ACTIVATING ALIGN AND DISTRIBUTE Feel like going MAD? Here’s how to Move,Align and Distribute The Align and Distribute buttons in the Move options bar can be used to align multiple linked layers
  • 28. The Move tool The Move tool is a very handy,multi-purpose gadget – and surprisingly easy to use 28 FOCUS GUIDE – ADOBE PHOTOSHOP TOOL TECHNIQUES Chapter 2 On the Move Atanytime,nomatter whattoolisselected, youcan accessthe Movetoolbypressing [V]onyourkeyboard. Scissor action The Move tool cursor displays a pair of scissors next to it when it is over an active selection. If a selection is active then the Move tool will move the pixels in the selection only, as opposed to the whole layer. Here we’ve selected the whole object in a flattened document and dragged it.The result is that the pixels are lifted and moved, leaving a hole behind. 4 You can scroll your mouse through the list to select precisely the right layer you want to move without having to go to the Layers palette. Here we’ve selected the Wireframe layer, and moved it. Getting into the habit of naming your layers will help here. 3 The neat thing about the Move tool is that it has a built-in layer navigation feature. In a multi-layer document you can find out exactly which layers are beneath any given point in an image by control-clicking and holding on the image. A menu will pop up displaying the names of the layers in order, from the top downwards. 2 The Move tool is the second tool at the top of the toolbar. It looks like an arrow but without the tail. Use this tool when you want to move elements in a document, be they selected pixels or whole layers. 1
  • 29. 29ADOBE PHOTOSHOP TOOL TECHNIQUES – FOCUS GUIDE Navigation and manipulation Extrude and move In the 3D text example on the left,we first created a text layer, then loaded it as a selection by command clicking the layer.In a new layer below the text layer we created a gradient through the selection,and with it still active we carried out an extrude- move function. Computer Arts To discover even more ways to develop your Photoshop skills, check out our sister magazine, Computer Arts. You can find the magazine’s website at www.computerarts.co.uk. A nifty trick is to hold down the [Alt] key and use the arrow keys to nudge the selection diagonally. Used on a text outline filled with a gradient like this, repeatedly pressing the Up and Right Arrow keys creates an extruded 3D object. 8 Another way to do this is to create a new layer from the selection first, then use the Move tool as normal.With a selection active press [Ctrl] + [J] (that’s [Command] + [J] on a Mac) to convert the selection to a new layer, then move it as normal. 7 Now as you drag the selection will be copied, lifted and moved to another location on the layer. Note that while the selection is still active the copied pixels occupy a quasi-layer.This is said to be ‘floating’selection.You can move it around as if it was on its own layer. Only when you deselect the pixels will it be dropped on to the layer. 6 Moving pixels and leaving a hole behind may be fine in some circumstances but if you want to copy the pixels instead of cutting them out then you have to hold down the [Alt] key (often called the‘Option’key on a Mac, although it’s still labelled‘Alt’) as you drag with the Move tool. Notice that the cursor will change to a double arrow, indicating you’re now in Copy mode. 5
  • 30. Direct and Path Selection tools Use the Path Selection and Direct Selection tools to move and edit paths and vector shapes 30 FOCUS GUIDE – ADOBE PHOTOSHOP TOOL TECHNIQUES Chapter 2 A familiar Path The Path Selection tool is much like the old arrow cursor in the Pen tool group of previous versions of Photoshop,before vector shapes and masks were introduced. Hide and seek You can show and hide the path outlines by typing [Ctrl]+[Shift]+[H],on your keyboard (that’s [Command] +[Shift]+[H] for Mac users) or toggling the Views > Show > Target Pathsmenu command on and off. With both paths selected you can click on the Combine button in the Path Selection’s Option bar to merge both (or as many as you like) into a single path. If you click away from the paths to deselect them, then reselect them, you’ll see that all the paths are now selected because they are one. 4 Much like other selections in Photoshop you can add to them using the [Shift] key. Here we have selected both paths by [Shift]-clicking on the second path to activate it. Both can now be transformed together. However, to make this work you must have the Show Bounding Box option turned off. 3 For this we need to activate the Path Selection tool.This is in the eighth row of the toolbar and looks like a black arrow cursor.With this selected, clicking on the edges of each path in the vector mask selects it.We are able to move the path and transform it to fit by making the bounding box visible and clicking on the edge of the box to activate Free Transform. 2 Here we have two vector shapes in a single vector mask applied to a Solid Colour layer.They are not properly aligned and we need to select them independently, but how? The Move tool only lets us move the whole layer, so we’re not able to select the paths independently. 1
  • 31. Vectorshapesandmultiplepaths Follow our step-by-step guide to working on vector shapes and multiple paths 31ADOBE PHOTOSHOP TOOL TECHNIQUES – FOCUS GUIDE Navigation and manipulation Take the A road The [A] key is the shortcut to the Path Selection tool group. To toggle between Path and Direct Selection mode type [Shift]+[A]. Make a point Clicking once on a point that already has handles with the Cusp cursor converts it to a sharp point with no handles. With the Direct Selection tool you can select a point in order to access its Bezier handles and modify the shape of the curve. If a point has no handles you can pull them out by holding down [Ctrl]+[Alt] as you drag ([Command]+[Alt] on a Mac).The tool changes to an inverted‘V’,called the Cusp tool. 4 With either the Direct Selection or Path Selection tools active you can duplicate a path,or multiple paths by [Option]+dragging them.The cursor will change to display a plus sign next to it when you hold the Option key down as a visual cue that you are about to make a copy. 3 If you need to select multiple points on a path and move them as one you can drag out a marquee with the Direct Selection tool. Alternatively the usual‘shift to add’ maxim holds true: [Shift]+click to add points to the selection that are difficult to select within a single marquee. 2 If you want to edit the points of a vector shape mask then you need to change from the Path Selection to the Direct Selection tool.With this tool active, you are able to click to select individual points in a path or vector shape. 1
  • 32. Chapter 3 USING THE BRUSHES AND PENCIL TOOLS Photoshop is traditionally known for image manipulation, retouching, effects and colour correction, but not so much as a painter’s tool. This has partly been due to the fact that the artistic capabilities of the program were severely limited due to the poor support for artistic media simulation. Other programs such as Corel Painter used to lead the market here, but the last few versions of Photoshop has seen it’s Brushes system completely overhauled, making it much more useful as an artistic media program. Having said that, Brushes have always been essential for just about In this chapter… Using the Brush and Pencil tools Editing and saving brush properties Creating custom brush tips Using the History and Art History brush This chapter introduces you to Photoshop’s more arty tools,the Brushes.However,as we’ll see,you can use these versatile tools for far more than just painting everything else in Photoshop, and getting the most out of the Brush tools involves finding out all the little secrets and features buried inside the program. Actually they’re not that secret but its surprising how few of the shortcuts some Photoshop users know. It’s usually those who have been using it since the early days that know all the best tips. Spoilt for choice In a way, the later, feature-rich versions spoil you by giving you so many options to work with. The History palette, introduced in version 5, is a fantastic time-saving device. It’s also an incredible feature
  • 33. that takes the basic Photoshop functions and multiplies their capabilities tenfold. The History palette essentially adds a kind of non-linear undo to the program. Previously undo was limited to just hopping back step-by-step. The History palette displays all your operations (up to a maximum number that you specify) in a list, complete with the tool used and its icon. By clicking on any of these steps you can immediately jump straight back to the document as it was at that point in time. Even more impressive is the ability to store permanent snapshots of the state of the document at any time. These will not ‘fall off the back’ like items in the undo list would when the list exceeded the number of steps set in the Preferences. However all this power and flexibility comes at a cost: disk space. The History states can consume very large amounts of ‘scratch disk’ space, the random storage bin that Photoshop uses as a kind of virtual memory. Performance figures Keep a large amount of hard disk space free for Photoshop – as much as 2 to 4GB if working on large images. Ideally, partition your disk and dedicate one part to Photoshop. 33ADOBE PHOTOSHOP TOOL TECHNIQUES – FOCUS GUIDE Brushes and Pencil tools Page 41 Dual Brushes offer the user unprecedented levels of detail Page 45The Art History Brush allows you to turn an image into a painting Page 34 Photoshop’s brush editing system gets the most from Brush tools Page 35 Access Photoshop’s hidden extras for more versatility Page 36 Learn about the importance of Spacing,Flow and Opacity for brushes Page 43The History Brush offers superb photo manipulation options
  • 34. The Brush tool can be found in the fourth row of Photoshop’s toolbar. When selected, the options bar displays quite a few settings for the current Brush such as Opacity, Flow and whether it is in Airbrush mode or not. There are also pull- down menus for the Apply mode, Brush Shape preset and the new Brush Editing palette. Brushes are used to apply coloured pixels to an image. They take their colour from the current Foreground Colour swatch. The Colour palette can be used to choose colours in a number of different ways – by using the small gradient strip at the base, the sliders or the Swatch tab. The Brush tool Brushes offer some of Photoshop’s most flexible features.So where can you find them? 34 FOCUS GUIDE – ADOBE PHOTOSHOP TOOL TECHNIQUES Chapter 3 The Color palette lets you choose colours in various ways – via a gradient strip,sliders or swatches,which are located in their own tab Back and forth You can set two colours,a foreground and background colour,and switch between them while painting with the Brush tool by pressing the [X] key. The Brush presets are located here at the top-left of the Options palette when the Brush tool is selected. The Brushes palette can be accessed by clicking this icon in the Brush tool’s Option bar. The basic Brush settings, such as Size,Shape and Angle as well as the spacing control can be accessed by clicking the Brush Tip Shape section at the top,the controls of which display at the bottom of the palette. The Brushes palette is very versatile but can seem a bit complicated at first.It’s far more advanced than in previous versions. Choose the display option for the presets from the preset menu.You can display the presets as a list or as icons if you prefer. The panel can be expanded by dragging the bottom-right corner. THE BRUSH INTERFACE AND CONTROLS
  • 35. Using Brushes There is a huge range of customisable and preset brushes.Here’s how to use them 35ADOBE PHOTOSHOP TOOL TECHNIQUES – FOCUS GUIDE Brushes and Pencil tools The key to opacity You can also reduce opacity using the numeric key pad. Pressing the 0 key sets the opacity to 100%, while pressing the [5] key sets the opacity to 50%.Pressing the [1] numeric key sets the opacity to 10% and so on. Nimble numeracy To get an intermediate opacity value like 15%, type 1 followed quickly by 5 on the numeric keypad. In this case the paint‘builds’, accumulating opacity the more and more you paint.This is very useful for building up tones and colours in an image gradually. You can see the effect clearly here.Where the strokes double back and cross each other the colour intensifies.The downside is that the individual‘dabs’are also visible. 4 Flow is like opacity but is a dynamic property.Whereas opacity sets a value for the maximum amount of opacity, Flow sets the minimum amount.With the Flow setting very low, say 10%, and opacity set to full, you can paint with what seems like a low opacity, except when you paint over the strokes you have just applied. 3 The Opacity of the brush defines how transparent the paint is – that is, how much of the colour underneath shows through the paint. By default it is set to 100%, but you can reduce this using the Opacity slider in the Options bar. 2 Once you select the Brush tool you can choose a Brush Shape from the Brush preset drop-down menu in the Options bar. Each preset is saved at a given size, indicated below the brush preview icon in the preset list.You can alter this by dragging the master diameter slider. 1
  • 36. Using Brushes continued 36 FOCUS GUIDE – ADOBE PHOTOSHOP TOOL TECHNIQUES Chapter 3 Brush size shortcut You can change the brush size up and down in 10 point increments using the square bracket keys [ and ]. More shortcuts On this month’s CD you’ll find PDF files that contain all the possible keyboard shortcuts for both PCs and Apple Macs.. You can also turn Spacing off using the check-box in the Brushes palette. When it’s off, Photoshop applies spacing depending on how quickly you draw your stroke.This can be good or bad, depending what you want the stroke to look like. 8 In order to counteract this effect, you need to use an even lower Flow setting. Here the flow has been reduced to 3% for a 5% spacing value.You can see that the strokes appear much smoother and build nicely as we apply more paint. 7 By reducing the Spacing you can get better results when using a low Flow setting. Here the Spacing is reduced to 5%, which means each dab overlaps by 95% of its diameter.This results in a much smoother stroke, but its also more opaque, as the brush tends to‘self build’. 6 This brings us on to the Brushes palette, which is opened by clicking the icon at the top-right of the Options bar.The palette contains a setting called Spacing.This controls how frequently Photoshop places a‘dab’of paint as you drag the brush.The default setting of 25% makes each dab overlap the next by three quarters of its diameter. Here’s the result from a low Flow setting. 5
  • 37. 37ADOBE PHOTOSHOP TOOL TECHNIQUES – FOCUS GUIDE Brushes and Pencil tools Brush shortcuts Lots of Photoshop’s tools use the same brushes interface.You can use the same shortcuts to change brush size and pop up the preset panel with any of them.Take a look at the PDF files included on the CD for a full list of shortcuts for both PC and Mac. Straight ahead To paint perfectly straight lines click once to place the star point of the stroke then shift-click elsewhere.A straight stroke will joint the two points. Also, while painting you can choose a new colour from the image by holding down the [Alt] key.The Brush tool changes to the Eye Dropper, allowing you to sample a colour from any pixel. 12 When painting an image using brushes it can be a chore moving to the Options bar to change brush size and shape. However the preset pop-up is available right beneath your mouse if you right-click in your image. Mac users should hold down [Ctrl] and click for the same effect. 11 Soft brushes are very useful especially when used with other tools such as the Rubber Stamp, which uses the same brush interface as the Brush tool. A Hardness of 100% is not totally hard, however.There is still some edge smoothing because of the effect of‘anti-aliasing’(on the right stroke). If you want a totally hard brush (left stroke) switch to the Pencil tool. 10 Other brush properties include Hardness.This defines how sharp the edges of the brush are and can be varied from 0 to 100% in the Brushes panel.The brush on the left has a hardness of 100% while the one on the right has a Hardness of 0%.They are exactly the same diameter, but notice that the soft brush seems smaller because its edges are less opaque. 9
  • 38. The Brushes palette is where it all happens. It’s Photoshop’s answer to its previous lack of natural media tools. In truth, it’s not really a natural media simulation system, but rather an extension of the brush dynamics features that previous versions of the program already had. When you open the Brushes palette you are faced with an overwhelming array of controls and they do take a while to become familiar with. Most of the controls are to do with the ‘dynamics’ of the brushes – how the brush properties vary during use. Photoshop allows you to set the various properties, such as scattering, colour and hue variation. These can stay fixed, respond to cursor speed or fade over a pre-defined distance. This gives you a large additional range of natural, organic variances to your brush strokes which would not otherwise be possible with a mouse. However, to get the most from the brush dynamics, and experience their intuitive ‘feel’, you should really invest in a graphics tablet and pen, such as the Wacom Intuos. Exploring the Brushes palette The basics of the Brushes palette and presets and how they affect the look of your strokes 38 FOCUS GUIDE – ADOBE PHOTOSHOP TOOL TECHNIQUES Chapter 3 Take a tablet With a graphics tablet attached,the brush parameters can respond to pen pressure,speed and tilt (if supported).The result is that you can create brushes that are responsive to your touch and work more like real artists tools. But you can also set up the dynamics so that the brushes perform in a totally unnatural way too,if you wish. Brush shape is the final part of the jigsaw when creating and editing brushes.The standard brushes offer a circular shape that can be hard or soft, round or oval and rotated at any angle. But there are a number of special brushes that are more graphic in nature.These can be selected from the Preset menu and there are many more that come with Photoshop but are not loaded by default.To load a preset library choose one from the Brush preset panel menu (the triangle at the top-right).You are then asked to Replace or Append the current list. Append adds the selected library to the current list of brushes, rather than replacing it. CHOOSING YOUR BRUSH SHAPE Having the right brush shape for the task is the key to success The preset brush libraries have many different brush shapes.The menu is at the top-right of the preset brush pop-up
  • 39. There are 13 sections in the Brushes palette, displayed in a list down the left-hand side. The first of these is the Presets section – essentially a duplicate of the Preset pull-down menu in the Option bar. You can choose a brush preset from the list, or load new ones from the pop-up menu at the top-right of the palette. At the bottom is a preview of how the current brush stroke would behave, and above that is the Master Diameter slider. At the very bottom are the New Brush and Delete buttons. Clicking the New Brush button creates a new preset, which you can name and save to reuse another time. The Brushes palette in detail Having seen the Brush palette’s potential,let’s delve deeper into the Brush Preset features 39ADOBE PHOTOSHOP TOOL TECHNIQUES – FOCUS GUIDE Brushes and Pencil tools The Brush Presets section at the very top stores complete brush settings,including the type of tip shape and the dynamics settings Saving your presets You can save the currently loaded set of presets as a library using the Save Brushes command in the pop- up menu at the top-right corner of the palette.The library is saved as a .abr file, which only Photoshop can read. Size Jitter – Controls the variation in size of the dabs in a stroke.The higher the value, the greater the variation. Minimum – Sets the smallest size the brush will reach when it is jittered. Control – These menus define what dynamics attribute controls the parameter.Fade reduces the effect of the parameter over a certain distance,entered in the numeric field.Other options are Off,Pen Tilt,Pen Pressure and Stylus Wheel. Minimum Roundness – Sets the minimum value that is reached when randomly jittering the Roundness. Tilt Scale – Enabled when the Pen Tilt option is selected in the Control pop-up. Adjusts the tilting sensitivity. Angle Jitter – If the brush is asymmetrical you can jitter the angle of the dabs,but not on a perfectly round brush. Roundness jitter – This tool randomly alters the amount a brush is squashed or ‘rounded’on one axis. THE TOOLS OF BRUSH DYNAMICS
  • 40. Scattering Scattering is a great way of adding random brush strokes to images.Here’s how it works 40 FOCUS GUIDE – ADOBE PHOTOSHOP TOOL TECHNIQUES Chapter 3 Better late than never Brushes in later versions of Photoshop have more options to control their behaviour. If you’re using an older version you may find that some of the features that we’ve mentioned do not apply. Scatter effects Wide Scatter settings can be used to create random but even variation in tone or colour on your artwork.Use it with selections to control the placement of the effect. Count Jitter simply varies the number in the Count setting per dab, and is not very noticeable in most situations. Note that there are Control pop-ups in the Scatter section so you can link the parameters to graphics pen tilt, pressure and scroll wheel, or fake the effect of distance. 4 The Count slider multiplies each dab by the number shown. instead of a single dab, a setting of 5 in the Count slider will produce five times as many dabs, each of which may be scattered. Because it increases the density of the brush dabs you may want to lower the Flow setting of the brush. 3 When the Both Axes option is enabled the scattering takes place perpendicular to the stroke and along it. Most of the time you’d leave this option off, unless you want a very randomized stroke, almost like a spray. 2 The Scattering section is great fun.This adds a random scattering of the dabs and is a great way to add random, organic strokes to images.The Scatter slider controls the amount of scattering perpendicular to the stroke direction. 1
  • 41. Textures and Dual Brushes Achieve seriously complex brush effects with additional features of the Brushes palette 41ADOBE PHOTOSHOP TOOL TECHNIQUES – FOCUS GUIDE Brushes and Pencil tools Precise strokes Don’t forget gradient selections are a great way to control where ‘paint’will go on an image.You can blend or fade away your strokes very precisely using these gradients. Go easy Dual brushes are the key to getting more detailed brush strokes in less time.They are more suited,however,to be used sparsely rather than as dense strokes. Enabling Scattering is a good idea. Enabling all of the numerous other settings and it becomes like playing with wet paint, and great fun. It only takes seconds to spray the canvas with incredibly detailed patterns and colours, and work them together like real paint. 4 Colour Dynamics takes the concept of scattering and jitter but applies it to the colour properties of a brush.You can achieve very complex and detailed strokes using the settings in this section. 3 Enabling the Dual Brush option makes things really interesting.This feature adds a second brush tip to texture the main one. It has its own Spacing, Size, Scattering and Count settings and is mixed in using an Apply mode chosen from the pop-up menu at the top of the panel. 2 The rest of the parameters are operated in much the same way as the Scattering section that we looked at in detail.The best thing to do is to experiment with the settings by playing around with them. Here the Texture section is enabled.This lets you add texture to the brush tip using one of Photoshop’s preset textures. 1
  • 42. The History Brush seems a bit of a mysterious tool in the Photoshop toolbox for both newcomer and veteran alike, and for that reason is one that often gets overlooked. This is usually because veteran Photoshoppers have got used to the way Photoshop used to work before the advent of the History Brush and old habits die hard. But it’s worth getting to know this unusual tool because, together with its indispensable partner the History palette, it should turn out to be a total delight to any newcomer. Every time you perform an action, such as painting a stroke, applying a filter, or deleting a layer, that step is stored in the History palette as a ‘state’. By clicking on any of these, you can return your document to the state it was in at that point. Now, here’s the best bit – by clicking on the small icon box next to a history state in the History palette, you earmark that layer as the source for the History Brush. When you then paint on the image with the History Brush only those pixels will be returned back to the earmarked state. The History Brush Discover Photoshop’s secret weapon for retouching and photo manipulation 42 FOCUS GUIDE – ADOBE PHOTOSHOP TOOL TECHNIQUES Chapter 3 Step back in History The History Brush lets you paint previous states of the current document over the current state.This makes it a powerful tool for selectively applying filters to an image. Photoshop 5 onwards has two kinds of undo.There’s the normal [Ctrl]+[Z] undo ([Command]+[Z] on a Mac), which undoes and redoes the last action you performed.This can be handy to flip back and forth, checking the result of your last action.There is also History.You can step backwards in History using [Ctrl]+[Alt]+[Z] (that’s [Command]+[Alt]+[Z] for Mac users). By repeatedly pressing this shortcut, you step back further and further through the history.To go forwards again press [Ctrl/Command]+[Shift]+[Z]. Set the number of states stored in History by going to Preferences > General and entering a new number in the History States field. HISTORY AND UNDO So what’s the difference between Undo and History? You can set Photoshop’s maximum number of History states from the General section in Preferences
  • 43. Using the History Brush The History Brush is a powerful and flexible tool,but has all the simplicity of a normal brush 43ADOBE PHOTOSHOP TOOL TECHNIQUES – FOCUS GUIDE Brushes and Pencil tools Size does matter To paint with History states the source state must be the same size as the current document.if you resized an image you will not be able to use any states prior to that as a source for the History Brush. United states In order to paint with History states,the source state must also be the same colour space.If you changed this you will not be able to use any states prior to that point as a source for the History Brush. Now we can change the History source to the Inverted state, select the History tool and a fancy brush and paint.Wherever we paint the pixels in the image will be inverted. Obviously you can use this technique with any effect, filter or adjustment you like. 4 We want to get the image back as is was so that we can selectively invert it, but undoing the last step also clears the state from the History, which is no good. Instead we mark the uninverted state as a History source. Choose Edit > Fill and set the Fill mode to History, et voilá, back to normal but with History intact. 3 Typing [Ctrl/Command]+[I] inverts the image, turning the shades and colours to their opposites.This will be be the basis for the effect we want to achieve using the History Brush, and it has been saved as a state in the History palette. 2 A good use of the History Brush is to apply an effect to an image in localised areas without the need to construct a mask or selection first. Here’s our starting image to which we want to apply some special effects. First of all we resized it to make it a bit smaller. 1
  • 44. Using the History Brush continued 44 FOCUS GUIDE – ADOBE PHOTOSHOP TOOL TECHNIQUES Chapter 3 Filter tip You can use this same technique of Brushing using History to selectively apply any filter to an image. Early edits In earlier versions of Photoshop you could open part of a large image and edit it, placing the edited part back into the large image once finished.That was in the days when RAM was expensive. Now we select the Gaussian Blur state as the source for the History Brush and paint in the image precisely where we want it to be blurred, leaving the unblurred pixels intact to create a forced‘depth of focus’effect. 8 Now we return the image to its original state by selecting the unblurred state as the History source then using the Edit > Fill command set to History mode. 7 So, we follow the same steps as before except this time we blur the whole image by Applying the Gaussian Blur filter instead of inverting it. 6 Here’s another example of the same technique.We’ll use History to fake a ‘depth of field’blur effect on this 3D image. Normally you might do this using a depth render as a mask, but what if you forgot to save one? 5
  • 45. Art History Brush The History Brush has an even more creative cousin – meet the Art History Brush 45ADOBE PHOTOSHOP TOOL TECHNIQUES – FOCUS GUIDE Brushes and Pencil tools Historic detail Even if the detail has been obliterated,you can bring it back by using a smaller brush, because the original, untouched image is used as the source. Pick a mode The Art History Brush can be applied in different blending modes: Darken, Lighten,Hue,Colour, Saturation and Luminosity. You can carry on adding details back, changing brushes and styles until you get the result you want. Here we went back and lightened the original image then used this as the source, enabling us to add in some detail in the darker part of the face. 4 That blocks out the image nicely. Now we can paint some of the finer details back in. Changing the brush to a much smaller radius lets you add back some details, but you can do this only to certain areas.We’ve used a 3-pixel brush, and the Loose Medium Style from the History Brush’s Options bar. 3 Here’s how it works. Open any photo, preferably one that will work well as a painting.You don’t need to perform any action to set things up, just select the current state as the History Source and select the Art History Brush.We used the Impressionist preset from the pop-up menu at the very top-left of the Options bar and painted over the image. 2 The Art History Brush is one of those bizarre but fun features Adobe comes up with once in a while. Basically, it is used to convert any image into one that looks hand- painted.The original photo is on the left, and the Art History conversion on the right. 1
  • 46. Chapter 4 USING THE CLONING AND HEALING TOOLS Cloning is a very simple and obvious concept in image manipulation. Take pixels from over here and duplicate them over there. That’s really all there is to it. The Clone tool, also known as the Rubber Stamp, is Photoshop’s implementation of this technique and offers you a great deal of power for retouching images. The tool works by ‘sampling’ pixels at one location in an image, or even in a different document altogether, and painting them in a different location using what is essentially a brush. The Clone tool offers most of the properties of the normal Brush tool – size, hardness, In this chapter… Learn how to wield the Clone tool (Rubber Stamp) like a pro Using blending modes to get better results when cloning difficult textures like skin Learn how to clone pixels between documents Working with the Healing and Patch tools to improve portraits and photos Perform special effects and image manipulation tricks using Cloning The Cloning and Healing tools in Photoshop offer an elegant way to fix damaged photos, correct bad scans and generally clean up your images.They’re great fun to use too tip shapes, dynamics and blending modes, but applies these to cloning. In addition to these the Clone tool lets you clone not only pixels from a single layer but from the whole of a multi-layered document. This can be a very powerful feature for advanced users but can cause problems if you don’t keep your wits about you. Seamless sampling When sampling pixels from a multi- layered, composite image you must be aware of any Adjustment layers present. If you sample a composite image with say, a Hue/Saturation Adjustment layer applied to it, boosting the saturation, cloning on
  • 47. to layers below this adjustment layer will result in the cloned pixels being boosted twice. If your intention is to have a seamless result, your hopes will be dashed, so it always pays to be aware of this. In version 7 of Photoshop, Adobe introduced a tool that takes the concept of cloning to the next level in terms of ease of use, known as the Healing tool. Cloning is a great tool to have but as we saw earlier, it can take some effort to get a seamless result, especially when the sample point pickings are slim and when dealing with multi-layered images. It can take quite a bit of practice to achieve smooth results. Healing, however, lets you clone pixels over a problem area but rather than simply overlaying them, as the Clone tool does, it blends them with those they are replacing, using some clever algorithms. Skin care As you may have guessed, the upshot of such technology is that you don’t need to be nearly so careful in your cloning – when blending the blemishes on the face of a subject in a portrait, for example. The Healing tool will intelligently blend the pixels to get the best result (at least most of the time), which works well on skin. 47ADOBE PHOTOSHOP TOOL TECHNIQUES – FOCUS GUIDE Cloning and Healing tools Page 52The new Healing tool can make someone look years younger Page 51 Revive damaged photos and images with cloning techniques Page 53The Healing Patch tool is a great way to fix up photos Page 48 Cloning copies parts of your image and transplants them elsewhere Page 49The Clone tool can remove unwanted parts of an image Page 50 Less-than-perfect portraits can be fixed up in seconds
  • 48. The Rubber Stamp (Clone) tool The Rubber Stamp tool is useful for copying pixels from one part of an image to another 48 FOCUS GUIDE – ADOBE PHOTOSHOP TOOL TECHNIQUES Chapter 4 Sample mode When you hold the [Alt] key down the Clone cursor changes from the brush outline to crosshairs to show that it’s in sample mode and allowing more precise sampling. Precision painting Use the Caps Lock key on any brush tool to activate Precise Cursor mode. Now we can clone the boy. Releasing the [Option] key returns to normal cloning mode.We can clone over the face of the boy at the top-right, replacing his with the face of the boy from the lower-left.We can carry on and make as many clones as we like. 4 Selecting a 20-pixel soft brush we first set the Sample point from which to clone.To do this we hold down the [Alt] key and click where we want to sample from – in this case the face of the boy in the lower-right of the photo. 3 To ensure that we can easily return to the original if necessary, we first make a copy of the image as a new layer. Selecting the Clone tool we can see the Options bar looks much like the Brush tool’s. At the far right are two extra options though: Aligned and Use All Layers.Turn off the Aligned check-box. 2 Let’s focus on the more creative and fun aspects. Here’s a great example of what cloning is all about – our source image is a typical group portrait. 1
  • 49. Removing unwanted elements Cloning is ideal when you need to seamlessly eradicate an unwanted part of an image 49ADOBE PHOTOSHOP TOOL TECHNIQUES – FOCUS GUIDE Cloning and Healing tools In the right measure Use the Measure tool to drag along the top edge of one of the bench slats to read its angle,then use the Edit >Transform > Rotate command.The angle that you just found will automatically be entered in the rotation field. Online tutorials You’ll find a host of handy tutorials to help you take your Photoshop skills further at the website of our sister magazine, Computer Arts. www.computerarts.co.uk With a bit of effort we can remove the man entirely from the image. Note that to do this successfully we need to stop when the alignment of the image begins to drift, and take a new sample point. 4 It sort of works but the cloned part of the bench does not line up properly with the original.To fix this we can undo the cloning, rotate the image slightly so that the slats are horizontal, and clone again.This time they line up. 3 This time we make sure the Aligned option is enabled.This allows us to use multiple strokes, and to maintain the offset so that the cloning is consistent. In a duplicate layer we set the sample point on to the middle of the park bench and begin cloning out the man on the left. 2 Another great use for cloning is for removing objects from a picture. Here’s an example image. Perhaps you wanted to use the image with some text overlaid on one side, or you just need to change the composition. 1
  • 50. One of the most common uses of the Clone tool is to fix blemishes, bruises and marks on skin. If you want to fix marks on the skin such as a rash or the occasional spot you can easily clone it out using the Clone tool as normal. While you’ll remove the blemish you’ll probably find it very difficult to get a seamless clone. What tends to happen is that the clone will be slightly the wrong shade or colour, so that when you zoom out to inspect the whole image, the cloned point is almost as visible as the original blemish, which defeats the whole point of removing the blemish in the first place! Cloning Skin You can fix problem portraits in seconds using the Clone tool and its subtle blending mode 50 FOCUS GUIDE – ADOBE PHOTOSHOP TOOL TECHNIQUES Chapter 4 Fixing skin in photos is easy,once you know that the secret is simply to change the Clone tool’s blending mode and subtly clone out the marks A cloning alternative An alternative technique,which uses the same principal,is to clone on to a new layer using the Normal mode but set the layer’s blending mode to Colour or Luminosity. Less is more Using a low opacity allows you to clone away blemishes gradually. You don’t always need to eradicate blemishes totally.In fact,doing so can look too fake.Instead just reduce their intensity a little. CLONING SKIN correctly requires careful use of the brush blending modes. In the Options bar set the blending mode in the drop-down menu to Luminosity and the opacity to 50%.You can then clone the image using only the brightness of the sampled point.This lets you get rid of light or dark blemishes easily, without changing the colour. IF THE blemish is a red patch of skin or bruise, set the blending mode to Colour before you clone.That way the brightness of the pixels remains the same, but the off-colour will be removed. MAKING USE of both apply modes in turn is likely to be the best option for very bad marks like cuts and bruises.This allows you to deal with the colour and brightness independently. WITH BOTH methods try to keep the sample point as close as you can to the problem area to minimize the difference in skin tone. THE TRICKS FOR SKIN CLONING REVEALED
  • 51. The Healing Brush No time to fuss with the Clone tool? Then fix up an image with the Healing Brush instead 51ADOBE PHOTOSHOP TOOL TECHNIQUES – FOCUS GUIDE Cloning and Healing tools Extreme healing The same technique of setting the blending mode to either Colour or Luminosity instead of Normal works with the Healing tool just as well as the Clone tool,but you’ll only need it for extreme situations when the built-in blending algorithm doesn’t quite cut it. Sample and Pattern The Healing tool works in two modes: Sample and Pattern. In Sample mode it works like the Clone tool,while in Pattern mode it blends the pixels with one of Photoshop’s stored patterns.The uses for this mode are less obvious,but useful for certain effects. The Healing brush has different blending modes which you can choose from the Options bar drop-down menu, 90% of the time you won’t need to use them. 4 Using the Healing brush instead results in a totally invisible repair.There’s no need to change blending modes or opacity, just set the sample point using the [Alt] key then click and drag over the damage. 3 Using the Clone tool works, but leaves a very slight, but noticeable mark behind due to the sampled pixels being a sightly different shade.We could use more advanced techniques, but why bother when the Healing brush is at hand? 2 The Healing Brush can be found in the fourth row on the toolbar, and looks like a plaster. It uses the same sampling principal as the Clone tool but works by blending the original and cloned pixels together to create a near-perfect fix. Here’s an image that needs a bit of a repair. 1
  • 52. The Healing Patch tool If you don’t like using brushes and selections are more your thing,try the Patch tool 52 FOCUS GUIDE – ADOBE PHOTOSHOP TOOL TECHNIQUES Chapter 4 No smear TheHealingandPatch toolscansmearifthey areneartoverydark pixels.Useaselectionto protecttheareayou wanttofixif smearingoccurs. When you release the mouse button, the pixels will become merged with those below. Photoshop performs its trick intelligently, so the dark area vanishes but the skin tone looks normal.We can repeat this on the other eye to complete the anti- ageing process. 4 Because Destination mode is enabled we can drag these selected pixels onto the destination pixels. As you drag a copy of the pixels, the selected area moves with the mouse as a visual cue – you are actually cloning the pixels. 3 With the Patch tool selected we lasso an area of clean skin texture, just below the eye we want to fix.That area is highlighted with the familiar marching ants. 2 The Patch tool can be found in the same tool group as the Healing Brush, but it has fewer options.The most logical mode to use is Destination, so this is how we have it set for now.We want to make the man in this photo look a bit younger by removing the bags under his eyes. 1
  • 53. 53ADOBE PHOTOSHOP TOOL TECHNIQUES – FOCUS GUIDE Cloning and Healing tools Large patches The Patch tool can be useful when attempting to repair very large areas in one go.It’s much quicker than using the Healing Brush too. Select then Patch If you need to,you can make the selection before you choose the Patch tool.This means that you can use any of Photoshop’s advanced selections tools,such as Quick Mask,Colour Range or the Magic Wand to preselect the area you require more precisely. When you are happy with the selected area you release the mouse.The selection snaps back to its original location taking the source pixels with it.When Photoshop blends the two, the line vanishes. Here’s the result on both eyes. 4 Now all you need to do is to drag the selection over the pixels you want to use to fix the problem area.This time only the selection outline moves, not the pixels that are selected, as is the case in Destination mode. 3 When in Source mode you need to select the pixel that you want to change first, as opposed to selecting the pixel you want to use to fix the problem area. Here we drag around the line under the left eye using the Patch tool to select it. 2 The Healing Patch tool works the opposite way round when in Source mode. Depending on your way of thinking, Source mode may seem less intuitive.We will perform the same trick of removing lines under the eyes in this image but use Source mode instead. 1
  • 54. Chapter 5 THE GRADIENT, FILL AND ERASER TOOLS Gradients and Fills are such simple tools in Photoshop that their simplicity can often hide their power, especially in the hands of an experienced Photoshop user. A Fill is simply a way to pour a single flat colour, pattern or history state into a selected area, or the whole canvas. Like most of the tools in Photoshop, there is more than one way in which to accomplish a Fill; we’ll explore some of these different techniques later on in this chapter. Gradual benefits The Gradient options are even more powerful than Fills. With the Gradient tool you can create a fill In this chapter… Learn to use and control Gradients Create Custom Gradients, using the gradient editing features in Photoshop 7 Use the Paint Bucket tool to fill areas with a colour, pattern or history Use Gradients and Fills for special effects and image manipulation Remove a subject from its background using the Background and Magic Eraser tools Once you get more competent with Photoshop you’ll appreciate the importance of these utility tools.The Gradient tool in particular is essential for all manner of tricks and effects that gradually changes colour. Gradients come in all kinds of different shapes: Linear, Radial, Angular, Reflected and Diamond, and this makes them very useful for a variety of different situations. The Gradient Editing feature in Photoshop enables you to create gradients with two or more colours. You can have a simple white-to- black gradient, or a whole rainbow of colours. For special effects work the simple black and white gradient is absolutely indispensable, putting a whole range of additional options at your disposal. For example, if you want an effect to smoothly fade from full strength to invisible then
  • 55. it’s easy to use a white-to-black gradient to control this, usually as a layer mask. Photo perfection For photographers, coloured gradients can play the role of custom filters, making it easy to create sultry sunsets or brooding, stormy skies at the drag of a mouse. If you combine gradients with alpha channels you have the power user’s playground. The ability to construct complex masks and selections using alpha channels and the Gradient tool is unparalleled. While the Fill and Gradient tools are concerned with adding pixels to an image, the next family of tools that we’ll look at does quite the opposite. The Eraser tool lets you remove pixels by simply using a brush, like an anti-paint brush, which enables you to paint away pixels on a layer leaving nothing but transparency behind. The power version of the Eraser is the Background Eraser. This tool is designed to make the extraction of subjects from their background a relatively simple task. Don’t be fooled though – it’s still a tricky proposition, but we’ll show you how to avoid the pitfalls of this technique so that you can achieve the best possible results every time. 55ADOBE PHOTOSHOP TOOL TECHNIQUES – FOCUS GUIDE Gradients, Fills and Erasing Page 64 Blend two or more image layers together with Gradients Page 62 Use gradients and blending layers to simulate photographic filters Page 66 Learn how to avoid the pitfalls of the Background Eraser tool Page 56 Learn how to fill colours in an image using the Paint Bucket tool Page 57 Fill with 50% grey for special effects and image enhancement Page 59 We look at the Gradient tool and its various options
  • 56. The Paint Bucket The Paint Bucket tool lets you pour pixels into any selection,and it has a few tricks too 56 FOCUS GUIDE – ADOBE PHOTOSHOP TOOL TECHNIQUES Chapter 5 Missing Paint Bucket? Photoshop’s toolbar has undergone many revisions over the years,so the Paint Bucket may be located elsewhere in older versions. Select and fill Save time by using the Paint Bucket in one fell swoop, instead of using the Magic Wand to make a selection and then filling it. Instead, what happens is the same as with the Magic Wand tool.The Paint Bucket searches for similar coloured pixels to fill, within the tolerance that you set, rather than covering the whole layer. Increase the Tolerance setting in the Option bar to fill a wider range of colours. 4 However, the Paint Bucket has more in common with the Magic Wand than you think. If your selected area already has image pixels in it, clicking on the image will not necessarily fill the whole selection or layer. 3 It can operate in Foreground Colour mode or in Pattern mode, which you choose from the drop-down menu in the Options bar.You can then select a pattern from the drop-down presets menu, also in the Option bar, and click in the image to fill it. 2 The Paint Bucket can be found in the sixth row of the toolbar in Photoshop 7, in the same tool group as the Gradient tool. If you make a selection you can use this tool to fill it with the current foreground colour. 1
  • 57. 57ADOBE PHOTOSHOP TOOL TECHNIQUES – FOCUS GUIDE Gradients, Fills and Erasing In the mode In Overlay mode 50% grey pixels are totally transparent.Pixels brighter than 50% are applied in Screen mode, while those darker than 50% are applied in Multiply mode. Video tutorials On the CD this month is a set of video training tutorials created by our very own Photoshop guru, George Cairns.If you want to learn more about using every tool in the Photoshop toolbar,you’ll find your CD invaluable. The layer is filled with the grey, by making sure the Use All Layers option is off and clicking in it. Now we can set the Layer mode to Overlay and apply the noise, blur it slightly, then change the opacity of the layer any time we want to control the effect. 8 We need to soften the noise, by blurring it but not the image. So we need to apply the noise in a layer above the image. However, the Noise filter does not work on a transparent layer. Enter the Paint Bucket. The Foreground Colour is set to 50% grey using Colour Picker and setting Lab Lightness to 50, A and B to 0. 7 Another use for fills is for special effects. An example is for adding noise to a 3D or digital image to make it look more like photographic film.We could simply apply noise to the image directly but this limits our options later if we want to change the noise, say, to make it less obvious. Applying the noise as-is also tends to looks fake. 6 Using a lower tolerance you can build up the fill by clicking a couple of times on different areas of the image.In this example we did so in a new layer.You have to make sure the Use All Layers option is checked when using a transparent layer for the fill. Applying the layer in Color mode allows us to change the colour of the girl’s kagool. 5