1. HOW TO USE
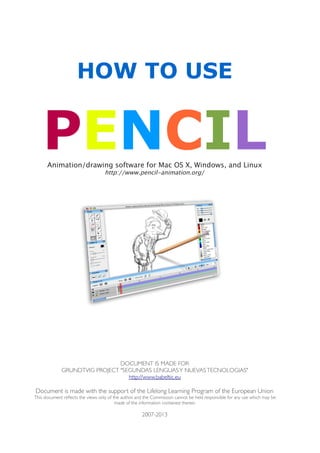
PENCILAnimation/drawing software for Mac OS X, Windows, and Linux
http://www.pencil-animation.org/
DOCUMENT IS MADE FOR
GRUNDTVIG PROJECT "SEGUNDAS LENGUASY NUEVASTECNOLOGIAS"
http://www.babeltic.eu
Document is made with the support of the Lifelong Learning Program of the European Union
This document reflects the views only of the author, and the Commission cannot be held responsible for any use which may be
made of the information contained therein
2007-2013
2. Table of Contents
Introduction 3
Layers 4
Layers Image visibility 5
How to Zoom Screen and Resize Image 7
Bitmap Layer 8
Vector Layer 9
How to use Bitmap and Vector Layers 10
Animating 11
Sound Layer 12
Camera Layer 13
Tips and Tricks. How to make Frame Borders visible! 14
Saving 15
Exporting 16
Resource List 17
3. 3
What is PENCIL ?
Pencil is an animation/drawing software for Mac OS X, Windows, and Linux.
It lets you create traditional hand-drawn animation (cartoon) using both
bitmap and vector graphics.
Pencil is FREE and open source.
'
PENCIL official website is: http://www.pencil-animation.org/
Interface
PENCIL interface is similar like any animation/drawing software interface.
'Pencil” interface have:
Tools
Options
Display
Colors
Time Line
Screen
4. 4
Layers
Layers are on Time Line.
There are 4 types of Layers:
Bitmap Layer
Vector Layer
Sound Layer
Camera Layer
To add and delete Layers:
use the
“+” or “-”
buttons.
To change the layer name:
click twice on the Layer,
opens a pop-up window,
where you can type a new
name.
5. 5
Layers Image visibility
Layer location determine IMAGE visibility
Layer Image visibility order
is from the bottom to up:
The bottom Layer image
on the Screen will be
located on top.
By moving Layers up and
down you can change
image visibility.
To move layer:
just click on Layer and drag
it up or down.
Layers can be active, inactive or invisible.
Layer condition indicates the circles on the left from Layer icon.
Black circle:
Layer is active,
you can draw on it.
Grey circle:
Layer is inactive,
you can not draw on it.
An inactive image layer is
hidden from the Screen
view.
Empty circle:
Layer is invisible
(on Time Line you don't see
the frames)
To change Layer activity, click on the Layer name or on the circle.
All Layers can be controlled simultaneously with a circle above the Layer row.
6. 6
Layers Image visibility examples
One Layer is active, the others are inactive:
The active layer image will
be displayed in full,
inactive layer image will be
pale.
All Layers are active:
All Layers images are
completely full visible.
One Layer active, the others are inactive:
Only active Layer image is
visible.
Important: on the finished film INVISIBLE Layer content will NOT BE SEEN!
ACTIVE and INACTIVE Layer content will BE VISIBLE.
7. 7
How to Zoom and Move Screen
To zoom Screen:
have the Hand Tool
selected, hold the
Command Key (Mac), or the
Alt or Ctrl Key (Windows)
and:
click and drag to zoom.
To move Screen:
use the Hand Tool, or drag
with the right button of
your mouse.
To return to the original
zoom settings:
double click with mouse in
Screen.
How to Resize and Move Image
To resize Image:
using Select Tool, draw
rectangular around an image.
Use the Arrow (select / move
object tool) you can move and
resize image.
To move image:
click on the image, hold down
the mouse button and drag ...
To resize image:
click on the select area
corner point, hold down the
mouse button and drag ...
8. 8
Bitmap Layer
Bitmap Layer is used for raster graphics
On the Bitmap Layer you can
work with photos
(.jpg or .gif format)
NOTE!
Bitmap image, if reduced, it
loses quality!
Image becomes blocky and
blurred.
To import photos on
Bitmap Layer
Edit → Import image
NOTE! To import an image
in certain location and
size: with the tool "select"
draw a rectangle on the
screen to the desired size.
The imported image will fit
into a rectangular range and
proportions.
9. 9
Vector Layer
Vector Layer is used for vector graphics
By increasing or decreasing,
Vector graphics quality don't
change.
Look on the image on the
left: by scaling character
“U”, line quality don't
change.
Use the Display Tools for to:
*) show only outlines;
*) don't show invisible lines;
*) show invisible lines.
NOTE! The Pencil Tool create a dashed path which do not appear in finished movie.
You can use them just for fill regions with color.
10. 10
IDEA - how to use Bitmap and Vector Layers
You can make a rotoscoping
animation!
Rotoscoping is
animation technique,
in which animators draw
over film footage, or photo
sequence - frame by frame ...
You can import photos or
photo sequence in Bitmap
Layer, than draw over in
Vector layer.
Frame by Frame !
11. 11
Animating
To make an animation, you must create KEY images in an Image Layer KEY FRAME
KEY FRAME
is displayed as a rectangle
on the Time Line.
Grey color indicates that the
key frame is empty.
Colored frame indicate that
here is an image in frame.
Black color indicates, that
frame is selected – you can
move selected frame: click
on a frame and drag it to
the desired location.
(To move multiple frames,
hold down the Shift key)
ONION SKIN
use for guide the drawing
the current key image, by
displaying pale previous or
next image.
Use the onion skin buttons
to activate or deactivate the
previous and next onion
skins.
CONTROL PANEL
use for:
PLAY or stop the movie;
LOOP or don't loop;
SOUND – on or off;
Fps – frames per second.
12. 12
Sound Layer
How to add sound:
1) create a Sound Layer;
2) Import a sound file from
Menu bar:
Edit -> "Import Sound"
When sound is added, on
Sound Layer will appear a
black triangle,
it indicates where the sound
will start to play.
You can move this triangle
as any other keys on Time
Line.
NOTE.
Windovs support only WAV format.
Mac support any format that can be read by QuickTime.
13. 13
Camera Layer
Camera Layer define a
frame borders.
You can set position for
frame borders for each key
on Camera Layer – view will
be linearly interpolated
between the keys:
move the red scrub to the
desired frame and, using the
hand tool, adjust the view
inside the camera frame.
You can set resolution of
the camera frame by
double-clicking on the
Camera Layer name.
14. 14
Tips and Tricks
How to make Frame Borders visible!
To make an animated film, here is a problem on Pencil program – during drawing
animation, you don't see the frame border.
You can see frame border, when you click on Camera Layer, but, for feel frame
composition, it is unhandy, all the time clicking Camera Layer.
The SOLUTION is: create their own background with frame border !
1) Use any graphics program
to create the necessary
frame size picture.
For example:
1) use Windows Paint program
or online PIXLR
http://pixlr.com/editor
2) Set up 640x480 pix picture
frame and save it as a PNG
file (background.png)
2) Create new Bitmap Layer
and name it “Background”
3) Use command:
Edit -> import image
import your
backgroung.png file
That's all ...
Happy animating ! :-)
NOTE. Anyway you create your own Background Layer with Frame border - to export the
film in required size and proportions: You must create an adequate Camera Layer !
15. 15
Saving
To Save your work as
Pencil project file,
choose:
File -> Save (or Save As..)
Your work will be saved
along with a folder
containing project data.
NOTE: keep these file and
folder together in the same
directory ! for to open up the
film properly the next time!
To open your work again,
1) from Menu bar choose:
File -> Open...
2) open your Pencil program
project file
16. 16
Exporting
To Export your work,
choose:
File -> Export
You can export your
animation as:
1) X-Sheet;
2) Image Sequence
(you can join your images in
animation - using any video
editing program: MovieMaker,
iMovie, ..);
3) as a QuickTime movie
(Mac OS X only).
4) as a Flash movie (swf);
NOTE. To export the film in required size and proportions – you must create an
adequate Camera Layer !
If you don't create Camera Layer, program will export current Screen view.
17. 17
Resource List
PENCIL official website:
http://www.pencil-animation.org/
User manual:
http://pencil-animation.org/wiki/doku.php?id=en:users:manual:0.4.3b:index
User manual Beta:
http://pencil-animation.org/wiki/doku.php?id=en:users:manual:0.5:index
PENCIL Forum
http://pencil-animation.org/forum/
THAT'S ALL FOR NOW !
HAPPY ANIMATING !
:-)
18. Document is made with the support of the Lifelong Learning Program of the European Union
This document reflects the views only of the author, and the Commission cannot be held responsible for any use which may be
made of the information contained therein
2007-2013
http://www.babeltic.eu/
Contact Details :
Tatjana Gvozdeva
Rīgas Interešu Izglītības metodiskais Centrs
www.intereses.lv
Rīga, Latvija