SlideShare une entreprise Scribd logo
1  sur  16
Télécharger pour lire hors ligne
Creating Videocast Lectures and Embedding in Pearson LearningStudio
By Rob Kadel, Ph.D., Academic Trainer & Consultant, Pearson eCollege
Videocast lectures are a fun and useful method for engaging students in online courses. Especially when students are separated by great distances and never
have an opportunity to meet their instructor, the videocast provides a greater connection between students and instructor than text presentations and discussion
forums alone.
These instructions will show you how to create videocast lectures in iMovie ’11 (Mac) or Windows Live Movie Maker, upload them to YouTube1, and then embed
the video into a Pearson LearningStudio “text/multimedia” content item.2
Sign Up for YouTube
The first requirement is that you have a YouTube account where you can upload videos. Point your Web browser to http://www.youtube.com, and in the upper-right
corner of the window, click the link that says Sign In. If you do not already have a Gmail account (YouTube is owned by Google), you can create one by clicking the
link in the lower-right corner that says Sign up for YouTube! Follow the instructions for creating an account, and provide as much or as little personal information
as you are comfortable with. Remember, your YouTube “channel” (where your videos will be published) will be viewable to anyone in the world; so discretion is the
better part of valor. Once you have completed the YouTube registration process, you may close your Web browser. We will return to YouTube later.
Best Practices: Effective Videocasts
YouTube limits the length of videos to 10 minutes, which is good because the most useful
videocasts are under 10 minutes in length. The goal of the videocast lecture is to provide the
highlights — things you want students to be sure to read in the course texts or in other
documents you provide (such as a series of PowerPoint slides or a bullet-point list of specifics
that they can read for themselves). Plus, shorter videos limit need for constant bandwidth and
processing power, a boon to students using the increasingly popular netbook-style computers.
Find a stationary and well-lit location for recording. Good lighting is essential, especially if
you’re using a built-in Web cam available on most newer computers. Holding your laptop
actually on your lap while recording may be convenient for you, but it will cause recorded
images to shake. Not only is this bad form, it also increases the file size of your video.3
Finally, have notes available. Some people are good at speaking off the top of their heads and
giving students exactly the information they will need — with no tangential discussions,
digressions, or Um’s. Most of us need a short list of the ideas or thoughts we want to get
across. I usually type my notes into a Word document, and then move the Word document to
the top of my screen, just beneath the built-in Web camera. I can scroll through the notes while recording, almost like a TelePrompTer.
1
1 Other online video sharing services are available and can be used just as easily as YouTube. However, YouTube is widely used and is used here as the most common example.
2 You can embed such video in any Web page or learning management system where you have the ability to paste HTML. Of course, I work for Pearson eCollege, so today’s
example will focus on LearningStudio.
3 Common video formats such as .mpg, .mp4, and .m4v reduce file size by looking at each frame of the video and computing how different it is from the previous frame. So a
stationary background with only your mouth and facial expressions moving takes less file space than when you and the background appear to be constantly moving because your
camera is shaking.
Web cam Notes
Recording the Raw Video
Now that you have a good location for recording, good lighting, and notes (if needed), you’re ready to record. The following instructions are provided side-by-side
for creating and saving your video whether using a Mac or a Windows PC.
iMovie in Mac OS X Windows Live Movie Maker in Windows 7
Open iMovie, either from the Dock or your Applications folder
Click the button on the left-middle of the screen for Open Camera Import
Window
Open Windows Live Movie Maker by clicking Start → All Programs →
Windows Live Movie Maker, or from the icon on your Taskbar.
Click the button toward the left corner of the screen to enable video capture
from your Webcam.
2
iMovie in Mac OS X Windows Live Movie Maker in Windows 7
In Mac OS, if you have a built in camera, such as the built-in iSight camera,
iMovie will automatically detect it. However, if you have an external camera
connected via USB or FireWire, iMovie will detect it by default. If you want to
use the external camera, leave the Camera Import window as is. If not, click
the drop-down menu in the lower left corner to change to a different camera
(e.g., built-in).
Once you have the camera (and yourself) ready, click the Capture… button
and begin recording your videocast.
Windows Live Movie Maker will open the recording window and show you
your image as it will be recorded.
Once you have the camera (and yourself) ready, click the Record button and
begin recording your videocast.
When you have finished recording, press the Stop button. You can begin
recording again by pressing the Record button. If you are finished recording,
close the
3
iMovie in Mac OS X Windows Live Movie Maker in Windows 7
iMovie will then prompt you for a file name and location. The default location
(which will be in your Movies folder) is usually fine. If this is your first video
recording, you will Create new Event — give the event a title, or use the
default, which includes the date. Then click Capture.
When you have finished recording, click the Stop button.
iMovie will take a few seconds to a few minutes to create thumbnail images
of what you have recorded (for ease in the editing process).
You then have the option of clicking Done, which will take you back to the
main window, or clicking Capture... again and adding more video to the event
you have just created. For now, let’s just click Done.
WLMM will then prompt you for a file name and a place to save your
captured video. Use a name that you can remember and locate easily — the
course name and date of recording are a good start. I recommend saving the
file to your Videos folder within the Libraries folder.
After you have saved the raw (unedited) video file, WLMM will return to the
main screen. You can start a new recording by clicking on the Webcam
button again and repeating the steps above.
4
iMovie in Mac OS X Windows Live Movie Maker in Windows 7
Once your video is saved, you can begin editing and adding your own style.
For example, use the
Upon returning to the main iMovie window, you will see the video event you
have just created displayed in thumbnails like this:
Hover your mouse over the thumbnails and drag right and left to move
forward and backward through the video. Press the space bar from any
location in the video to play it.
In iMovie, you will now create a new project for arranging and editing your
video. Either press ⌘-N or from the File menu, select New Project.
Give the project a name, such as the course name and week number, select
the Aspect Ratio (widescreen [like a newer TV] or standard [like an older
TV]), and for now, leave the Theme set to “None.” Then click the Create
button.
After you’ve captured this video, and as you add additional videos, their
thumbnail images will show here on the right side of the window. Drag them
left and right to reorder the clips.
Use the Theme tab to select the ways you would like your video clips to
transition, show titles and credits, etc.
WLMM has a ribbon similar to those used in Office 2007/2010. Use these
tabs to add additional flair to your project:
5
iMovie in Mac OS X Windows Live Movie Maker in Windows 7
In the event viewer, click-and-hold your mouse button while dragging to
select a portion or all of the video that you want to use in your finished
product. It will be highlighted in a yellow box. Then click and drag this section
into the project timeline below.
To edit the clips into a nice, seamless whole, you need to create “cut points.”
Click on the Edit tab in the ribbon, then set start and end points to trim
unwanted footage. You can also move the time slider to a specific point in the
video and click Split. Slide further (or just Play and then Pause the video)
and create another Split, then delete what’s in the middle.
6
iMovie in Mac OS X Windows Live Movie Maker in Windows 7
To trim video from the finished product, simply click and drag over the area
you want to trim and press the Delete key.
You can click on the gear icon on any clip in the project to adjust a number of
audio and video options.
On the right side of the window, click any of these buttons to insert different
options: music/sound effects; photos; titles; transitions; maps and
backgrounds
Before going much further, be sure to save your project. Click on the WLMM
button: , and choose Save project as >
Be sure once again that you are saving the project file in your Videos folder
in your Libraries (or some place where you know you can find the file again).
Then click the Save button.
7
iMovie in Mac OS X Windows Live Movie Maker in Windows 7
Once you are satisfied with how your video looks, you are ready to publish it
to YouTube. From the Share menu, select YouTube...
Once you are satisfied with how your video looks, you are ready to publish it
to YouTube. On the Home tab, click the YouTube button:
On the screen that appears, choose the size of the video you want to
publish. Remember -- larger sizes mean better picture resolution even on
small screens; the tradeoff is that the files are larger and thus take longer to
download.
8
iMovie in Mac OS X Windows Live Movie Maker in Windows 7
iMovie will present you with the following dialog box. Click the Add button to
enter the YouTube account that you created previously. Also enter your
YouTube password. Select a Category for your video (Education would be
the obvious choice, but there are other options). Then give your video a Title,
a Description, and enter Tags that will help YouTube’s search engine locate
your video (if desired).
When publishing to YouTube, you have several video size options; let’s stick
with the default (Medium) for now. Important: to allow students to see your
video without additional security steps UNCHECK the check box next to
“Make this movie personal.” Finally, click the Next button.
On the next screen, WLMM will prompt you for your YouTube login
credentials.
You may also be presented with a screen to sign into Windows Live. (This is
required, even if you will not be sharing the video on Windows live.)
9
iMovie in Mac OS X Windows Live Movie Maker in Windows 7
Next, you will see the YouTube terms of service, which includes, among
other information, a warning not to upload copyrighted materials for which
you are not authorized. Assuming you agree to the terms of service, click:
You will then be presented with information boxes showing the status of the
creation of the finished video to the uploading to YouTube.
Lastly, you will be alerted that the video has been uploaded and will be ready
for viewing in “several minutes or hours.” My experience is that it usually
takes about an hour for YouTube to fully process a videocast.
Fill in the relevant information in each of the boxes on the next screen:
Then click Publish. You will be presented with an information box showing
the progress from creating the final movie to uploading it to YouTube:
10
At any time, you can find the video by going to http://www.youtube.com, logging in, and from the top-right menu, clicking your Username and then My Videos.
Now it’s time to embed the video into a Pearson LearningStudio course shell…
Embedding your YouTube video into a Pearson LearningStudio Course
Start by logging into LearningStudio and clicking on the link for your course shell. As you would with any other course, switch to Author Mode from Course Home,
click the Course Items button.
Use the Add Unit button to add a new Unit (if you
do not already have one), and then use the Add Items button to add a Text/Multimedia item in that Unit. I’ll call
mine “Videocast Lecture” and choose to add it to the Unit I created, called “Introduction.”
11
Next, in the left-hand navigation menu, click on the name of the Content Item you just added. (Make sure you are still in Author mode.)
You’ll be presented with the dialog window to edit the Content Item. As shown on the right, type any introductory text you need, then press the return key at least
twice to put some space between the introductory text and where the video will show. Then, click the HTML button so that you can edit the raw html for that content
item.
12
Getting the Videocasts’ HTML Code from YouTube
Now, open a new browser window or a new browser tab. Go to http://www.youtube.com, go to your videos (click your user name in the upper-right corner, and from
the drop-down menu that appears, select “My Videos”). Next,
click the title of the video you uploaded so that you go to its
specific page. Below the video, you will see a button that says
“Embed” — click that. You will see a box that looks like the one
on the right of this page.
The line that says starts with “<object width…>” contains the
html code that you’ll copy into LearningStudio. Before copying it,
there are three options you need to consider here.
1. Include related videos — the default YouTube options
is to show, at the end of your video, links and images
from other videos it thinks are related to yours. I
recommend you deselect this, because it can be kind of
hard to predict what YouTube’s algorithm will select and
you don’t want to embarrass yourself.
2. Show Border — a border adds a nice aesthetic touch
to your embedded video. If you select this option, you
can then select one of the color schemes shown.
3. Video size — click on the size that best fits your video’s
size and the size you want it to be shown in
LearningStudio. About 500 to 600 pixels wide on the
longest side is usually fine.
You do not need to trouble with the “Enable privacy-enhanced
mode” or “Use iframe embed code” at this point.
Once you have selected the customization you want, click once
within the line of html code at the top of the box (the part that
starts with “<object width…>”. The code will automatically highlight. Click ⌘-c (Mac) or ctrl-c (Windows) to copy the html code.
13
Pasting the HTML Code into Pearson eCollege
Switch back the browser window with your eCollege course. You should see the Content Item editing window, and it should still be in HTML mode. (If not, click the
button again at the bottom left of the window.) Towards the bottom of the existing html code, you should see “<div><br/>” or “<br>” depending on what
browser you are using. Click in between the <div> and the <br/> OR in between any two <br>’s (again, depending on your browser) so your cursor is in between
them.
Type ⌘-v (Mac) or ctrl-v (Windows) to paste the html code from YouTube into the Content Item. It should then look something like this:
Click Save Changes to finish the task.
14
The eCollege Content Item window will return to the visual editor, like this:
Click on the Course tab to switch back to the course view. Students will see the Content Item as shown here:
A hearty congratulations! You have successfully created a videocast lecture, uploaded it to YouTube, and embedded it into a Pearson LearningStudio course!
15
Windows Movie Maker in Windows XP
If you’re using Windows XP, unfortunately, you do not have access to Windows Live Movie Maker. (WLMM only works in Vista and 7.) However, here are the basic
steps for creating video using Windows Movie Maker (note the absence of the word “Live” — this is a different program) in Windows XP.
• Open Windows Movie Maker by clicking Start → All Programs → Windows Movie Maker
• Click the File menu, then Capture Video…
• Or, if the Movie Tasks menu is open on the left, simply click “Capture from video device.”
• Windows Movie Maker will start the Video Capture Wizard, allowing you to set up your camera and record. If you have a built in camera, it will appear in
the dialog box as shown below. If you have an external camera connected via USB, it should also appear in the “Available devices” list.
• To ensure that you record sound along with your video, check that the Input level on your microphone is set so that when you speak, you get all green and
a little yellow in the Microphone meter. Usually setting it at about 7 out of 10 on the scale is sufficient. Finally, click the Next button.
• Windows Movie Maker will then prompt you for a file name and a place to save your captured video. Use a name that you can remember and locate easily
— the course name and date of recording are a good start. Then click Next.
• In the next dialog box, you can select your Video Settings, such as the video and audio quality. For best results, leave the default settings as shown. Then
click Next.
• Once you have the camera (and yourself) ready, click the Start Capture button and begin recording your videocast.
• Once you have finished what you want to record, click Stop Capture. If you want to add more video to the current file, simply click Start Capture again and
continue recording. When you are done, remember to click Stop Capture, then click Finish.
• Upon returning to the main Windows Movie Maker window, you will see the video event you have just created.
• Click and drag the video clip you recorded into the timeline below. Sometimes, Windows Movie Maker will chunk your video into several clips. If this
happens, be sure to drag all clips — in the right order (first to last) — into the timeline.
• To trim video from the finished product, press the Play button in the preview window and/or drag the slider across the timeline. When you reach the spot
where you would like to start cutting (called a cut-point), press Pause (the Play button becomes the Pause button when playing). Then click the Split
button to split the clip into two sections. Again, press Play, and when you get to the end of the section you’d like to cut, press Pause. Again, click the Split
button. You have now split your video at two cut-points, and the video in between the cut points can be deleted. Simply click on it in the timeline to highlight
it, and click the Delete key.
• From the Movie Tasks menu on the left, click the button next to “Edit Movie.” Links appear that allow you to insert video effects, transitions, and titles.
• The next dialog box allows you to set the video and audio quality in the video. Leave this at the default (best quality) and click Next >
• Your movie is now finished. If you kept the default location for saving, you can find the movie in the My Movies folder inside My Documents. Now click
Finish. You may exit Movie Maker at this point.
• To publish to YouTube from Windows, first open your Web browser and go to http://www.youtube.com. From the YouTube home page, in the upper right
corner, click on Upload. Alternatively, if you are already logged in to YouTube, you can click on the Upload link in the upper-right corner.
• Once logged in, click the gold Upload video button on the next page. Browse to your finished movie in the dialog window that appears. It is possible that
Windows’ default settings will have placed your finished video file and your raw video files into the same folder (My Videos). If so, be sure you select the
finished video for upload (it will have a file extension of .wmv and the name you gave earlier), then click the Open button.
• YouTube will upload the video and then give you a confirmation as well as an area to set some options. Give your video a Title, a Description, and enter
Tags that will help YouTube’s search engine locate your video (if desired). Select a Category for your video (Education would be the obvious choice, but
there are other options). You can make your video Public or Unlisted, but do not choose Private or else you will have to enter your students’ email
addresses in order to specify who can view the video. Scroll down, click Save changes, and you’re good to go.
• Congratulations! You’ve just created a video and uploaded it to YouTube! At any time, you can find the video by going to http://www.youtube.com,
logging in, and from the top-right menu, clicking your Username and then My Videos.
16

Contenu connexe

Tendances

Powerpoint: Video and Audio
Powerpoint: Video and AudioPowerpoint: Video and Audio
Powerpoint: Video and Audiosamharlow
 
Digital Media Academy Mac-D3
Digital Media Academy Mac-D3Digital Media Academy Mac-D3
Digital Media Academy Mac-D3Martin Cisneros
 
Digital Media Academy Mac-Day2
Digital Media Academy Mac-Day2Digital Media Academy Mac-Day2
Digital Media Academy Mac-Day2Martin Cisneros
 
Digital Media Academy: iMovie on Mac Day 1
Digital Media Academy: iMovie on  Mac Day 1Digital Media Academy: iMovie on  Mac Day 1
Digital Media Academy: iMovie on Mac Day 1Martin Cisneros
 
How to Embed & Edit YouTube Video in PowerPoint 2013
How to Embed & Edit YouTube Video in PowerPoint 2013 How to Embed & Edit YouTube Video in PowerPoint 2013
How to Embed & Edit YouTube Video in PowerPoint 2013 Glenda Mendoza, Assoc CIPD
 
Imovie workshop 2010.4
Imovie workshop 2010.4Imovie workshop 2010.4
Imovie workshop 2010.4ninghua
 
Invisible cloth streaming video presentation
Invisible cloth streaming video presentationInvisible cloth streaming video presentation
Invisible cloth streaming video presentationMarybeth O'Brien
 
iMovie Basics
iMovie BasicsiMovie Basics
iMovie Basicsbnipper
 
Digital Media Academy - Day 2
Digital Media Academy - Day 2Digital Media Academy - Day 2
Digital Media Academy - Day 2Martin Cisneros
 
Inserting Video in Dreamweaver (Using Plugin)
Inserting Video in Dreamweaver (Using Plugin)Inserting Video in Dreamweaver (Using Plugin)
Inserting Video in Dreamweaver (Using Plugin)Gabrielle Burey
 
Intro to iMovie
Intro to iMovieIntro to iMovie
Intro to iMoviesamharlow
 
Intro to Prezi
Intro to PreziIntro to Prezi
Intro to Prezisamharlow
 
Movies On Custom Web Sites 2
Movies On Custom Web Sites 2Movies On Custom Web Sites 2
Movies On Custom Web Sites 2CO767
 
Adding Audio Narration to PowerPoint
Adding Audio Narration to PowerPointAdding Audio Narration to PowerPoint
Adding Audio Narration to PowerPointdelhionlineeducation
 
Non interactive materials
Non interactive materialsNon interactive materials
Non interactive materialsu082929
 

Tendances (20)

Powerpoint: Video and Audio
Powerpoint: Video and AudioPowerpoint: Video and Audio
Powerpoint: Video and Audio
 
Digital Media Academy Mac-D3
Digital Media Academy Mac-D3Digital Media Academy Mac-D3
Digital Media Academy Mac-D3
 
Digital Media Academy Mac-Day2
Digital Media Academy Mac-Day2Digital Media Academy Mac-Day2
Digital Media Academy Mac-Day2
 
Digital Media Academy: iMovie on Mac Day 1
Digital Media Academy: iMovie on  Mac Day 1Digital Media Academy: iMovie on  Mac Day 1
Digital Media Academy: iMovie on Mac Day 1
 
I Movie 09
I Movie 09I Movie 09
I Movie 09
 
How to Embed & Edit YouTube Video in PowerPoint 2013
How to Embed & Edit YouTube Video in PowerPoint 2013 How to Embed & Edit YouTube Video in PowerPoint 2013
How to Embed & Edit YouTube Video in PowerPoint 2013
 
Imovie workshop 2010.4
Imovie workshop 2010.4Imovie workshop 2010.4
Imovie workshop 2010.4
 
Invisible cloth streaming video presentation
Invisible cloth streaming video presentationInvisible cloth streaming video presentation
Invisible cloth streaming video presentation
 
Slidecasting
SlidecastingSlidecasting
Slidecasting
 
Advanced iMovie
Advanced iMovieAdvanced iMovie
Advanced iMovie
 
iMovie Basics
iMovie BasicsiMovie Basics
iMovie Basics
 
Digital Media Academy - Day 2
Digital Media Academy - Day 2Digital Media Academy - Day 2
Digital Media Academy - Day 2
 
Inserting Video in Dreamweaver (Using Plugin)
Inserting Video in Dreamweaver (Using Plugin)Inserting Video in Dreamweaver (Using Plugin)
Inserting Video in Dreamweaver (Using Plugin)
 
Intro to iMovie
Intro to iMovieIntro to iMovie
Intro to iMovie
 
IMovie2015
IMovie2015IMovie2015
IMovie2015
 
Intro to Prezi
Intro to PreziIntro to Prezi
Intro to Prezi
 
Movies On Custom Web Sites 2
Movies On Custom Web Sites 2Movies On Custom Web Sites 2
Movies On Custom Web Sites 2
 
Adding Audio Narration to PowerPoint
Adding Audio Narration to PowerPointAdding Audio Narration to PowerPoint
Adding Audio Narration to PowerPoint
 
Camtasia
CamtasiaCamtasia
Camtasia
 
Non interactive materials
Non interactive materialsNon interactive materials
Non interactive materials
 

En vedette

2010 Carmean pk
2010  Carmean pk2010  Carmean pk
2010 Carmean pkWCET
 
Sate authorization from_a_z
Sate authorization from_a_zSate authorization from_a_z
Sate authorization from_a_zWCET
 
2010 Edu tools
2010 Edu tools2010 Edu tools
2010 Edu toolsWCET
 
2011Building classroommemories622
2011Building classroommemories6222011Building classroommemories622
2011Building classroommemories622WCET
 
2011State Authorization 101
2011State Authorization 1012011State Authorization 101
2011State Authorization 101WCET
 
Videoconferencing creating the_virtual
Videoconferencing creating the_virtualVideoconferencing creating the_virtual
Videoconferencing creating the_virtualWCET
 
2011Simpson Smackdown 2.0
2011Simpson Smackdown 2.02011Simpson Smackdown 2.0
2011Simpson Smackdown 2.0WCET
 
2010 Fields PK
2010  Fields PK2010  Fields PK
2010 Fields PKWCET
 
2011Approaches to Assessing Students
2011Approaches to Assessing Students2011Approaches to Assessing Students
2011Approaches to Assessing StudentsWCET
 
2010 Milliron
2010 Milliron2010 Milliron
2010 MillironWCET
 
2010 Designing a community of practice (co p)
2010 Designing a community of practice (co p)2010 Designing a community of practice (co p)
2010 Designing a community of practice (co p)WCET
 
2010 Creating Compelling Learning Experiencesarningexp139
2010 Creating Compelling Learning Experiencesarningexp1392010 Creating Compelling Learning Experiencesarningexp139
2010 Creating Compelling Learning Experiencesarningexp139WCET
 
Innovative models for_american_universities_cael
Innovative models for_american_universities_caelInnovative models for_american_universities_cael
Innovative models for_american_universities_caelWCET
 
2011Challenges and Successes of Faculty Development
2011Challenges and Successes of Faculty Development2011Challenges and Successes of Faculty Development
2011Challenges and Successes of Faculty DevelopmentWCET
 
2011Changing contextethicalbehavior634
2011Changing contextethicalbehavior6342011Changing contextethicalbehavior634
2011Changing contextethicalbehavior634WCET
 
2011BoydGarn Smackdown 2.0
2011BoydGarn Smackdown 2.02011BoydGarn Smackdown 2.0
2011BoydGarn Smackdown 2.0WCET
 
Process mapping
Process mappingProcess mapping
Process mappingWCET
 
2010 CENTSS overview with_images
2010 CENTSS overview with_images2010 CENTSS overview with_images
2010 CENTSS overview with_imagesWCET
 
2010 Goal setting, planning, engagement, success
2010 Goal setting, planning, engagement, success2010 Goal setting, planning, engagement, success
2010 Goal setting, planning, engagement, successWCET
 
Taking online teaching_to_task
Taking online teaching_to_taskTaking online teaching_to_task
Taking online teaching_to_taskWCET
 

En vedette (20)

2010 Carmean pk
2010  Carmean pk2010  Carmean pk
2010 Carmean pk
 
Sate authorization from_a_z
Sate authorization from_a_zSate authorization from_a_z
Sate authorization from_a_z
 
2010 Edu tools
2010 Edu tools2010 Edu tools
2010 Edu tools
 
2011Building classroommemories622
2011Building classroommemories6222011Building classroommemories622
2011Building classroommemories622
 
2011State Authorization 101
2011State Authorization 1012011State Authorization 101
2011State Authorization 101
 
Videoconferencing creating the_virtual
Videoconferencing creating the_virtualVideoconferencing creating the_virtual
Videoconferencing creating the_virtual
 
2011Simpson Smackdown 2.0
2011Simpson Smackdown 2.02011Simpson Smackdown 2.0
2011Simpson Smackdown 2.0
 
2010 Fields PK
2010  Fields PK2010  Fields PK
2010 Fields PK
 
2011Approaches to Assessing Students
2011Approaches to Assessing Students2011Approaches to Assessing Students
2011Approaches to Assessing Students
 
2010 Milliron
2010 Milliron2010 Milliron
2010 Milliron
 
2010 Designing a community of practice (co p)
2010 Designing a community of practice (co p)2010 Designing a community of practice (co p)
2010 Designing a community of practice (co p)
 
2010 Creating Compelling Learning Experiencesarningexp139
2010 Creating Compelling Learning Experiencesarningexp1392010 Creating Compelling Learning Experiencesarningexp139
2010 Creating Compelling Learning Experiencesarningexp139
 
Innovative models for_american_universities_cael
Innovative models for_american_universities_caelInnovative models for_american_universities_cael
Innovative models for_american_universities_cael
 
2011Challenges and Successes of Faculty Development
2011Challenges and Successes of Faculty Development2011Challenges and Successes of Faculty Development
2011Challenges and Successes of Faculty Development
 
2011Changing contextethicalbehavior634
2011Changing contextethicalbehavior6342011Changing contextethicalbehavior634
2011Changing contextethicalbehavior634
 
2011BoydGarn Smackdown 2.0
2011BoydGarn Smackdown 2.02011BoydGarn Smackdown 2.0
2011BoydGarn Smackdown 2.0
 
Process mapping
Process mappingProcess mapping
Process mapping
 
2010 CENTSS overview with_images
2010 CENTSS overview with_images2010 CENTSS overview with_images
2010 CENTSS overview with_images
 
2010 Goal setting, planning, engagement, success
2010 Goal setting, planning, engagement, success2010 Goal setting, planning, engagement, success
2010 Goal setting, planning, engagement, success
 
Taking online teaching_to_task
Taking online teaching_to_taskTaking online teaching_to_task
Taking online teaching_to_task
 

Similaire à 2010 Creating Videocast Lectures

Windows Movie Maker
Windows Movie MakerWindows Movie Maker
Windows Movie Makercronegeek
 
Presentation
PresentationPresentation
Presentationmonica
 
Windows Live Movie Maker Tutorial
Windows Live Movie Maker TutorialWindows Live Movie Maker Tutorial
Windows Live Movie Maker TutorialMindy McAdams
 
Photo story 3 guide
Photo story 3 guidePhoto story 3 guide
Photo story 3 guideCyMedina
 
How To Use Movie Maker
How To Use Movie MakerHow To Use Movie Maker
How To Use Movie MakerMike Hasley
 
Imovie tutorial
Imovie tutorial Imovie tutorial
Imovie tutorial stoliros
 
How to-use-movie-maker
How to-use-movie-makerHow to-use-movie-maker
How to-use-movie-makeraurelia garcia
 
Button Movie Maker Training Aid
Button Movie Maker Training AidButton Movie Maker Training Aid
Button Movie Maker Training Aidabutton1
 
GGC 1000 movie maker
GGC 1000 movie makerGGC 1000 movie maker
GGC 1000 movie makerabutton1
 
Abc open windows_livemoviemaker
Abc open windows_livemoviemakerAbc open windows_livemoviemaker
Abc open windows_livemoviemakergreenfrog88
 
Moviemaker 09-22-2010
Moviemaker 09-22-2010Moviemaker 09-22-2010
Moviemaker 09-22-2010makmal123
 
Firecoresoft video converter user guide
Firecoresoft video converter user guideFirecoresoft video converter user guide
Firecoresoft video converter user guideamalejackie
 
Presentation1
Presentation1Presentation1
Presentation1ameera11
 
Windows movie maker
Windows movie makerWindows movie maker
Windows movie makerhlkline
 

Similaire à 2010 Creating Videocast Lectures (20)

Digital Storytelling Feb 2010
Digital Storytelling Feb 2010Digital Storytelling Feb 2010
Digital Storytelling Feb 2010
 
Windows Movie Maker
Windows Movie MakerWindows Movie Maker
Windows Movie Maker
 
Presentation
PresentationPresentation
Presentation
 
Windows Live Movie Maker Tutorial
Windows Live Movie Maker TutorialWindows Live Movie Maker Tutorial
Windows Live Movie Maker Tutorial
 
Photo story 3 guide
Photo story 3 guidePhoto story 3 guide
Photo story 3 guide
 
Moviemaker report
Moviemaker reportMoviemaker report
Moviemaker report
 
How To Use Movie Maker
How To Use Movie MakerHow To Use Movie Maker
How To Use Movie Maker
 
Imovie tutorial
Imovie tutorial Imovie tutorial
Imovie tutorial
 
How to-use-movie-maker
How to-use-movie-makerHow to-use-movie-maker
How to-use-movie-maker
 
Button Movie Maker Training Aid
Button Movie Maker Training AidButton Movie Maker Training Aid
Button Movie Maker Training Aid
 
GGC 1000 movie maker
GGC 1000 movie makerGGC 1000 movie maker
GGC 1000 movie maker
 
Abc open windows_livemoviemaker
Abc open windows_livemoviemakerAbc open windows_livemoviemaker
Abc open windows_livemoviemaker
 
Filmora tutorial
Filmora tutorialFilmora tutorial
Filmora tutorial
 
Moviemaker 09-22-2010
Moviemaker 09-22-2010Moviemaker 09-22-2010
Moviemaker 09-22-2010
 
Lab1
Lab1Lab1
Lab1
 
Firecoresoft video converter user guide
Firecoresoft video converter user guideFirecoresoft video converter user guide
Firecoresoft video converter user guide
 
Digital Storytelling 2
Digital Storytelling 2Digital Storytelling 2
Digital Storytelling 2
 
Presentation1
Presentation1Presentation1
Presentation1
 
Windows movie maker
Windows movie makerWindows movie maker
Windows movie maker
 
Digital Storytelling
Digital StorytellingDigital Storytelling
Digital Storytelling
 

Plus de WCET

Infrastructure for digital_integration
Infrastructure for digital_integrationInfrastructure for digital_integration
Infrastructure for digital_integrationWCET
 
Student fraud
Student fraudStudent fraud
Student fraudWCET
 
Free range learners
Free range learnersFree range learners
Free range learnersWCET
 
Stretching LMS
Stretching LMSStretching LMS
Stretching LMSWCET
 
Equity answer-wcet
Equity answer-wcetEquity answer-wcet
Equity answer-wcetWCET
 
Faculty peer review_rubric
Faculty peer review_rubricFaculty peer review_rubric
Faculty peer review_rubricWCET
 
Partnering for performance_harrison
Partnering for performance_harrisonPartnering for performance_harrison
Partnering for performance_harrisonWCET
 
Collaborating for student_success
Collaborating for student_successCollaborating for student_success
Collaborating for student_successWCET
 
Guidance for designing_blended
Guidance for designing_blendedGuidance for designing_blended
Guidance for designing_blendedWCET
 
Success of success_coaching
Success of success_coachingSuccess of success_coaching
Success of success_coachingWCET
 
Designing gen ed_for_distance
Designing gen ed_for_distanceDesigning gen ed_for_distance
Designing gen ed_for_distanceWCET
 
An assessment based_degree
An assessment based_degreeAn assessment based_degree
An assessment based_degreeWCET
 
Using curriculum mapping
Using curriculum mappingUsing curriculum mapping
Using curriculum mappingWCET
 
Partnering for performance_harrisonb
Partnering for performance_harrisonbPartnering for performance_harrisonb
Partnering for performance_harrisonbWCET
 
Guidance for designing_blended_courses
Guidance for designing_blended_coursesGuidance for designing_blended_courses
Guidance for designing_blended_coursesWCET
 
Faculty competencies roundtable
Faculty competencies roundtableFaculty competencies roundtable
Faculty competencies roundtableWCET
 
Taking online teaching_to_task
Taking online teaching_to_taskTaking online teaching_to_task
Taking online teaching_to_taskWCET
 
E tutoring collaborative_communities
E tutoring collaborative_communitiesE tutoring collaborative_communities
E tutoring collaborative_communitiesWCET
 
Effective course design
Effective course designEffective course design
Effective course designWCET
 
Effective coursedesign
Effective coursedesignEffective coursedesign
Effective coursedesignWCET
 

Plus de WCET (20)

Infrastructure for digital_integration
Infrastructure for digital_integrationInfrastructure for digital_integration
Infrastructure for digital_integration
 
Student fraud
Student fraudStudent fraud
Student fraud
 
Free range learners
Free range learnersFree range learners
Free range learners
 
Stretching LMS
Stretching LMSStretching LMS
Stretching LMS
 
Equity answer-wcet
Equity answer-wcetEquity answer-wcet
Equity answer-wcet
 
Faculty peer review_rubric
Faculty peer review_rubricFaculty peer review_rubric
Faculty peer review_rubric
 
Partnering for performance_harrison
Partnering for performance_harrisonPartnering for performance_harrison
Partnering for performance_harrison
 
Collaborating for student_success
Collaborating for student_successCollaborating for student_success
Collaborating for student_success
 
Guidance for designing_blended
Guidance for designing_blendedGuidance for designing_blended
Guidance for designing_blended
 
Success of success_coaching
Success of success_coachingSuccess of success_coaching
Success of success_coaching
 
Designing gen ed_for_distance
Designing gen ed_for_distanceDesigning gen ed_for_distance
Designing gen ed_for_distance
 
An assessment based_degree
An assessment based_degreeAn assessment based_degree
An assessment based_degree
 
Using curriculum mapping
Using curriculum mappingUsing curriculum mapping
Using curriculum mapping
 
Partnering for performance_harrisonb
Partnering for performance_harrisonbPartnering for performance_harrisonb
Partnering for performance_harrisonb
 
Guidance for designing_blended_courses
Guidance for designing_blended_coursesGuidance for designing_blended_courses
Guidance for designing_blended_courses
 
Faculty competencies roundtable
Faculty competencies roundtableFaculty competencies roundtable
Faculty competencies roundtable
 
Taking online teaching_to_task
Taking online teaching_to_taskTaking online teaching_to_task
Taking online teaching_to_task
 
E tutoring collaborative_communities
E tutoring collaborative_communitiesE tutoring collaborative_communities
E tutoring collaborative_communities
 
Effective course design
Effective course designEffective course design
Effective course design
 
Effective coursedesign
Effective coursedesignEffective coursedesign
Effective coursedesign
 

Dernier

Dyslexia AI Workshop for Slideshare.pptx
Dyslexia AI Workshop for Slideshare.pptxDyslexia AI Workshop for Slideshare.pptx
Dyslexia AI Workshop for Slideshare.pptxcallscotland1987
 
Magic bus Group work1and 2 (Team 3).pptx
Magic bus Group work1and 2 (Team 3).pptxMagic bus Group work1and 2 (Team 3).pptx
Magic bus Group work1and 2 (Team 3).pptxdhanalakshmis0310
 
2024-NATIONAL-LEARNING-CAMP-AND-OTHER.pptx
2024-NATIONAL-LEARNING-CAMP-AND-OTHER.pptx2024-NATIONAL-LEARNING-CAMP-AND-OTHER.pptx
2024-NATIONAL-LEARNING-CAMP-AND-OTHER.pptxMaritesTamaniVerdade
 
Grant Readiness 101 TechSoup and Remy Consulting
Grant Readiness 101 TechSoup and Remy ConsultingGrant Readiness 101 TechSoup and Remy Consulting
Grant Readiness 101 TechSoup and Remy ConsultingTechSoup
 
Making communications land - Are they received and understood as intended? we...
Making communications land - Are they received and understood as intended? we...Making communications land - Are they received and understood as intended? we...
Making communications land - Are they received and understood as intended? we...Association for Project Management
 
psychiatric nursing HISTORY COLLECTION .docx
psychiatric  nursing HISTORY  COLLECTION  .docxpsychiatric  nursing HISTORY  COLLECTION  .docx
psychiatric nursing HISTORY COLLECTION .docxPoojaSen20
 
Kodo Millet PPT made by Ghanshyam bairwa college of Agriculture kumher bhara...
Kodo Millet  PPT made by Ghanshyam bairwa college of Agriculture kumher bhara...Kodo Millet  PPT made by Ghanshyam bairwa college of Agriculture kumher bhara...
Kodo Millet PPT made by Ghanshyam bairwa college of Agriculture kumher bhara...pradhanghanshyam7136
 
How to Manage Global Discount in Odoo 17 POS
How to Manage Global Discount in Odoo 17 POSHow to Manage Global Discount in Odoo 17 POS
How to Manage Global Discount in Odoo 17 POSCeline George
 
ICT role in 21st century education and it's challenges.
ICT role in 21st century education and it's challenges.ICT role in 21st century education and it's challenges.
ICT role in 21st century education and it's challenges.MaryamAhmad92
 
SOC 101 Demonstration of Learning Presentation
SOC 101 Demonstration of Learning PresentationSOC 101 Demonstration of Learning Presentation
SOC 101 Demonstration of Learning Presentationcamerronhm
 
Mixin Classes in Odoo 17 How to Extend Models Using Mixin Classes
Mixin Classes in Odoo 17  How to Extend Models Using Mixin ClassesMixin Classes in Odoo 17  How to Extend Models Using Mixin Classes
Mixin Classes in Odoo 17 How to Extend Models Using Mixin ClassesCeline George
 
Sociology 101 Demonstration of Learning Exhibit
Sociology 101 Demonstration of Learning ExhibitSociology 101 Demonstration of Learning Exhibit
Sociology 101 Demonstration of Learning Exhibitjbellavia9
 
Application orientated numerical on hev.ppt
Application orientated numerical on hev.pptApplication orientated numerical on hev.ppt
Application orientated numerical on hev.pptRamjanShidvankar
 
Third Battle of Panipat detailed notes.pptx
Third Battle of Panipat detailed notes.pptxThird Battle of Panipat detailed notes.pptx
Third Battle of Panipat detailed notes.pptxAmita Gupta
 
Holdier Curriculum Vitae (April 2024).pdf
Holdier Curriculum Vitae (April 2024).pdfHoldier Curriculum Vitae (April 2024).pdf
Holdier Curriculum Vitae (April 2024).pdfagholdier
 
Unit-IV; Professional Sales Representative (PSR).pptx
Unit-IV; Professional Sales Representative (PSR).pptxUnit-IV; Professional Sales Representative (PSR).pptx
Unit-IV; Professional Sales Representative (PSR).pptxVishalSingh1417
 
Spellings Wk 3 English CAPS CARES Please Practise
Spellings Wk 3 English CAPS CARES Please PractiseSpellings Wk 3 English CAPS CARES Please Practise
Spellings Wk 3 English CAPS CARES Please PractiseAnaAcapella
 
ComPTIA Overview | Comptia Security+ Book SY0-701
ComPTIA Overview | Comptia Security+ Book SY0-701ComPTIA Overview | Comptia Security+ Book SY0-701
ComPTIA Overview | Comptia Security+ Book SY0-701bronxfugly43
 
Unit-V; Pricing (Pharma Marketing Management).pptx
Unit-V; Pricing (Pharma Marketing Management).pptxUnit-V; Pricing (Pharma Marketing Management).pptx
Unit-V; Pricing (Pharma Marketing Management).pptxVishalSingh1417
 
1029-Danh muc Sach Giao Khoa khoi 6.pdf
1029-Danh muc Sach Giao Khoa khoi  6.pdf1029-Danh muc Sach Giao Khoa khoi  6.pdf
1029-Danh muc Sach Giao Khoa khoi 6.pdfQucHHunhnh
 

Dernier (20)

Dyslexia AI Workshop for Slideshare.pptx
Dyslexia AI Workshop for Slideshare.pptxDyslexia AI Workshop for Slideshare.pptx
Dyslexia AI Workshop for Slideshare.pptx
 
Magic bus Group work1and 2 (Team 3).pptx
Magic bus Group work1and 2 (Team 3).pptxMagic bus Group work1and 2 (Team 3).pptx
Magic bus Group work1and 2 (Team 3).pptx
 
2024-NATIONAL-LEARNING-CAMP-AND-OTHER.pptx
2024-NATIONAL-LEARNING-CAMP-AND-OTHER.pptx2024-NATIONAL-LEARNING-CAMP-AND-OTHER.pptx
2024-NATIONAL-LEARNING-CAMP-AND-OTHER.pptx
 
Grant Readiness 101 TechSoup and Remy Consulting
Grant Readiness 101 TechSoup and Remy ConsultingGrant Readiness 101 TechSoup and Remy Consulting
Grant Readiness 101 TechSoup and Remy Consulting
 
Making communications land - Are they received and understood as intended? we...
Making communications land - Are they received and understood as intended? we...Making communications land - Are they received and understood as intended? we...
Making communications land - Are they received and understood as intended? we...
 
psychiatric nursing HISTORY COLLECTION .docx
psychiatric  nursing HISTORY  COLLECTION  .docxpsychiatric  nursing HISTORY  COLLECTION  .docx
psychiatric nursing HISTORY COLLECTION .docx
 
Kodo Millet PPT made by Ghanshyam bairwa college of Agriculture kumher bhara...
Kodo Millet  PPT made by Ghanshyam bairwa college of Agriculture kumher bhara...Kodo Millet  PPT made by Ghanshyam bairwa college of Agriculture kumher bhara...
Kodo Millet PPT made by Ghanshyam bairwa college of Agriculture kumher bhara...
 
How to Manage Global Discount in Odoo 17 POS
How to Manage Global Discount in Odoo 17 POSHow to Manage Global Discount in Odoo 17 POS
How to Manage Global Discount in Odoo 17 POS
 
ICT role in 21st century education and it's challenges.
ICT role in 21st century education and it's challenges.ICT role in 21st century education and it's challenges.
ICT role in 21st century education and it's challenges.
 
SOC 101 Demonstration of Learning Presentation
SOC 101 Demonstration of Learning PresentationSOC 101 Demonstration of Learning Presentation
SOC 101 Demonstration of Learning Presentation
 
Mixin Classes in Odoo 17 How to Extend Models Using Mixin Classes
Mixin Classes in Odoo 17  How to Extend Models Using Mixin ClassesMixin Classes in Odoo 17  How to Extend Models Using Mixin Classes
Mixin Classes in Odoo 17 How to Extend Models Using Mixin Classes
 
Sociology 101 Demonstration of Learning Exhibit
Sociology 101 Demonstration of Learning ExhibitSociology 101 Demonstration of Learning Exhibit
Sociology 101 Demonstration of Learning Exhibit
 
Application orientated numerical on hev.ppt
Application orientated numerical on hev.pptApplication orientated numerical on hev.ppt
Application orientated numerical on hev.ppt
 
Third Battle of Panipat detailed notes.pptx
Third Battle of Panipat detailed notes.pptxThird Battle of Panipat detailed notes.pptx
Third Battle of Panipat detailed notes.pptx
 
Holdier Curriculum Vitae (April 2024).pdf
Holdier Curriculum Vitae (April 2024).pdfHoldier Curriculum Vitae (April 2024).pdf
Holdier Curriculum Vitae (April 2024).pdf
 
Unit-IV; Professional Sales Representative (PSR).pptx
Unit-IV; Professional Sales Representative (PSR).pptxUnit-IV; Professional Sales Representative (PSR).pptx
Unit-IV; Professional Sales Representative (PSR).pptx
 
Spellings Wk 3 English CAPS CARES Please Practise
Spellings Wk 3 English CAPS CARES Please PractiseSpellings Wk 3 English CAPS CARES Please Practise
Spellings Wk 3 English CAPS CARES Please Practise
 
ComPTIA Overview | Comptia Security+ Book SY0-701
ComPTIA Overview | Comptia Security+ Book SY0-701ComPTIA Overview | Comptia Security+ Book SY0-701
ComPTIA Overview | Comptia Security+ Book SY0-701
 
Unit-V; Pricing (Pharma Marketing Management).pptx
Unit-V; Pricing (Pharma Marketing Management).pptxUnit-V; Pricing (Pharma Marketing Management).pptx
Unit-V; Pricing (Pharma Marketing Management).pptx
 
1029-Danh muc Sach Giao Khoa khoi 6.pdf
1029-Danh muc Sach Giao Khoa khoi  6.pdf1029-Danh muc Sach Giao Khoa khoi  6.pdf
1029-Danh muc Sach Giao Khoa khoi 6.pdf
 

2010 Creating Videocast Lectures

  • 1. Creating Videocast Lectures and Embedding in Pearson LearningStudio By Rob Kadel, Ph.D., Academic Trainer & Consultant, Pearson eCollege Videocast lectures are a fun and useful method for engaging students in online courses. Especially when students are separated by great distances and never have an opportunity to meet their instructor, the videocast provides a greater connection between students and instructor than text presentations and discussion forums alone. These instructions will show you how to create videocast lectures in iMovie ’11 (Mac) or Windows Live Movie Maker, upload them to YouTube1, and then embed the video into a Pearson LearningStudio “text/multimedia” content item.2 Sign Up for YouTube The first requirement is that you have a YouTube account where you can upload videos. Point your Web browser to http://www.youtube.com, and in the upper-right corner of the window, click the link that says Sign In. If you do not already have a Gmail account (YouTube is owned by Google), you can create one by clicking the link in the lower-right corner that says Sign up for YouTube! Follow the instructions for creating an account, and provide as much or as little personal information as you are comfortable with. Remember, your YouTube “channel” (where your videos will be published) will be viewable to anyone in the world; so discretion is the better part of valor. Once you have completed the YouTube registration process, you may close your Web browser. We will return to YouTube later. Best Practices: Effective Videocasts YouTube limits the length of videos to 10 minutes, which is good because the most useful videocasts are under 10 minutes in length. The goal of the videocast lecture is to provide the highlights — things you want students to be sure to read in the course texts or in other documents you provide (such as a series of PowerPoint slides or a bullet-point list of specifics that they can read for themselves). Plus, shorter videos limit need for constant bandwidth and processing power, a boon to students using the increasingly popular netbook-style computers. Find a stationary and well-lit location for recording. Good lighting is essential, especially if you’re using a built-in Web cam available on most newer computers. Holding your laptop actually on your lap while recording may be convenient for you, but it will cause recorded images to shake. Not only is this bad form, it also increases the file size of your video.3 Finally, have notes available. Some people are good at speaking off the top of their heads and giving students exactly the information they will need — with no tangential discussions, digressions, or Um’s. Most of us need a short list of the ideas or thoughts we want to get across. I usually type my notes into a Word document, and then move the Word document to the top of my screen, just beneath the built-in Web camera. I can scroll through the notes while recording, almost like a TelePrompTer. 1 1 Other online video sharing services are available and can be used just as easily as YouTube. However, YouTube is widely used and is used here as the most common example. 2 You can embed such video in any Web page or learning management system where you have the ability to paste HTML. Of course, I work for Pearson eCollege, so today’s example will focus on LearningStudio. 3 Common video formats such as .mpg, .mp4, and .m4v reduce file size by looking at each frame of the video and computing how different it is from the previous frame. So a stationary background with only your mouth and facial expressions moving takes less file space than when you and the background appear to be constantly moving because your camera is shaking. Web cam Notes
  • 2. Recording the Raw Video Now that you have a good location for recording, good lighting, and notes (if needed), you’re ready to record. The following instructions are provided side-by-side for creating and saving your video whether using a Mac or a Windows PC. iMovie in Mac OS X Windows Live Movie Maker in Windows 7 Open iMovie, either from the Dock or your Applications folder Click the button on the left-middle of the screen for Open Camera Import Window Open Windows Live Movie Maker by clicking Start → All Programs → Windows Live Movie Maker, or from the icon on your Taskbar. Click the button toward the left corner of the screen to enable video capture from your Webcam. 2
  • 3. iMovie in Mac OS X Windows Live Movie Maker in Windows 7 In Mac OS, if you have a built in camera, such as the built-in iSight camera, iMovie will automatically detect it. However, if you have an external camera connected via USB or FireWire, iMovie will detect it by default. If you want to use the external camera, leave the Camera Import window as is. If not, click the drop-down menu in the lower left corner to change to a different camera (e.g., built-in). Once you have the camera (and yourself) ready, click the Capture… button and begin recording your videocast. Windows Live Movie Maker will open the recording window and show you your image as it will be recorded. Once you have the camera (and yourself) ready, click the Record button and begin recording your videocast. When you have finished recording, press the Stop button. You can begin recording again by pressing the Record button. If you are finished recording, close the 3
  • 4. iMovie in Mac OS X Windows Live Movie Maker in Windows 7 iMovie will then prompt you for a file name and location. The default location (which will be in your Movies folder) is usually fine. If this is your first video recording, you will Create new Event — give the event a title, or use the default, which includes the date. Then click Capture. When you have finished recording, click the Stop button. iMovie will take a few seconds to a few minutes to create thumbnail images of what you have recorded (for ease in the editing process). You then have the option of clicking Done, which will take you back to the main window, or clicking Capture... again and adding more video to the event you have just created. For now, let’s just click Done. WLMM will then prompt you for a file name and a place to save your captured video. Use a name that you can remember and locate easily — the course name and date of recording are a good start. I recommend saving the file to your Videos folder within the Libraries folder. After you have saved the raw (unedited) video file, WLMM will return to the main screen. You can start a new recording by clicking on the Webcam button again and repeating the steps above. 4
  • 5. iMovie in Mac OS X Windows Live Movie Maker in Windows 7 Once your video is saved, you can begin editing and adding your own style. For example, use the Upon returning to the main iMovie window, you will see the video event you have just created displayed in thumbnails like this: Hover your mouse over the thumbnails and drag right and left to move forward and backward through the video. Press the space bar from any location in the video to play it. In iMovie, you will now create a new project for arranging and editing your video. Either press ⌘-N or from the File menu, select New Project. Give the project a name, such as the course name and week number, select the Aspect Ratio (widescreen [like a newer TV] or standard [like an older TV]), and for now, leave the Theme set to “None.” Then click the Create button. After you’ve captured this video, and as you add additional videos, their thumbnail images will show here on the right side of the window. Drag them left and right to reorder the clips. Use the Theme tab to select the ways you would like your video clips to transition, show titles and credits, etc. WLMM has a ribbon similar to those used in Office 2007/2010. Use these tabs to add additional flair to your project: 5
  • 6. iMovie in Mac OS X Windows Live Movie Maker in Windows 7 In the event viewer, click-and-hold your mouse button while dragging to select a portion or all of the video that you want to use in your finished product. It will be highlighted in a yellow box. Then click and drag this section into the project timeline below. To edit the clips into a nice, seamless whole, you need to create “cut points.” Click on the Edit tab in the ribbon, then set start and end points to trim unwanted footage. You can also move the time slider to a specific point in the video and click Split. Slide further (or just Play and then Pause the video) and create another Split, then delete what’s in the middle. 6
  • 7. iMovie in Mac OS X Windows Live Movie Maker in Windows 7 To trim video from the finished product, simply click and drag over the area you want to trim and press the Delete key. You can click on the gear icon on any clip in the project to adjust a number of audio and video options. On the right side of the window, click any of these buttons to insert different options: music/sound effects; photos; titles; transitions; maps and backgrounds Before going much further, be sure to save your project. Click on the WLMM button: , and choose Save project as > Be sure once again that you are saving the project file in your Videos folder in your Libraries (or some place where you know you can find the file again). Then click the Save button. 7
  • 8. iMovie in Mac OS X Windows Live Movie Maker in Windows 7 Once you are satisfied with how your video looks, you are ready to publish it to YouTube. From the Share menu, select YouTube... Once you are satisfied with how your video looks, you are ready to publish it to YouTube. On the Home tab, click the YouTube button: On the screen that appears, choose the size of the video you want to publish. Remember -- larger sizes mean better picture resolution even on small screens; the tradeoff is that the files are larger and thus take longer to download. 8
  • 9. iMovie in Mac OS X Windows Live Movie Maker in Windows 7 iMovie will present you with the following dialog box. Click the Add button to enter the YouTube account that you created previously. Also enter your YouTube password. Select a Category for your video (Education would be the obvious choice, but there are other options). Then give your video a Title, a Description, and enter Tags that will help YouTube’s search engine locate your video (if desired). When publishing to YouTube, you have several video size options; let’s stick with the default (Medium) for now. Important: to allow students to see your video without additional security steps UNCHECK the check box next to “Make this movie personal.” Finally, click the Next button. On the next screen, WLMM will prompt you for your YouTube login credentials. You may also be presented with a screen to sign into Windows Live. (This is required, even if you will not be sharing the video on Windows live.) 9
  • 10. iMovie in Mac OS X Windows Live Movie Maker in Windows 7 Next, you will see the YouTube terms of service, which includes, among other information, a warning not to upload copyrighted materials for which you are not authorized. Assuming you agree to the terms of service, click: You will then be presented with information boxes showing the status of the creation of the finished video to the uploading to YouTube. Lastly, you will be alerted that the video has been uploaded and will be ready for viewing in “several minutes or hours.” My experience is that it usually takes about an hour for YouTube to fully process a videocast. Fill in the relevant information in each of the boxes on the next screen: Then click Publish. You will be presented with an information box showing the progress from creating the final movie to uploading it to YouTube: 10
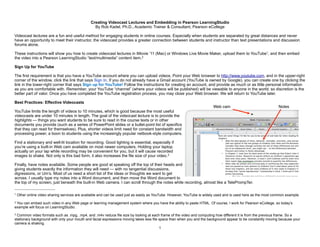
  • 11. At any time, you can find the video by going to http://www.youtube.com, logging in, and from the top-right menu, clicking your Username and then My Videos. Now it’s time to embed the video into a Pearson LearningStudio course shell… Embedding your YouTube video into a Pearson LearningStudio Course Start by logging into LearningStudio and clicking on the link for your course shell. As you would with any other course, switch to Author Mode from Course Home, click the Course Items button. Use the Add Unit button to add a new Unit (if you do not already have one), and then use the Add Items button to add a Text/Multimedia item in that Unit. I’ll call mine “Videocast Lecture” and choose to add it to the Unit I created, called “Introduction.” 11
  • 12. Next, in the left-hand navigation menu, click on the name of the Content Item you just added. (Make sure you are still in Author mode.) You’ll be presented with the dialog window to edit the Content Item. As shown on the right, type any introductory text you need, then press the return key at least twice to put some space between the introductory text and where the video will show. Then, click the HTML button so that you can edit the raw html for that content item. 12
  • 13. Getting the Videocasts’ HTML Code from YouTube Now, open a new browser window or a new browser tab. Go to http://www.youtube.com, go to your videos (click your user name in the upper-right corner, and from the drop-down menu that appears, select “My Videos”). Next, click the title of the video you uploaded so that you go to its specific page. Below the video, you will see a button that says “Embed” — click that. You will see a box that looks like the one on the right of this page. The line that says starts with “<object width…>” contains the html code that you’ll copy into LearningStudio. Before copying it, there are three options you need to consider here. 1. Include related videos — the default YouTube options is to show, at the end of your video, links and images from other videos it thinks are related to yours. I recommend you deselect this, because it can be kind of hard to predict what YouTube’s algorithm will select and you don’t want to embarrass yourself. 2. Show Border — a border adds a nice aesthetic touch to your embedded video. If you select this option, you can then select one of the color schemes shown. 3. Video size — click on the size that best fits your video’s size and the size you want it to be shown in LearningStudio. About 500 to 600 pixels wide on the longest side is usually fine. You do not need to trouble with the “Enable privacy-enhanced mode” or “Use iframe embed code” at this point. Once you have selected the customization you want, click once within the line of html code at the top of the box (the part that starts with “<object width…>”. The code will automatically highlight. Click ⌘-c (Mac) or ctrl-c (Windows) to copy the html code. 13
  • 14. Pasting the HTML Code into Pearson eCollege Switch back the browser window with your eCollege course. You should see the Content Item editing window, and it should still be in HTML mode. (If not, click the button again at the bottom left of the window.) Towards the bottom of the existing html code, you should see “<div><br/>” or “<br>” depending on what browser you are using. Click in between the <div> and the <br/> OR in between any two <br>’s (again, depending on your browser) so your cursor is in between them. Type ⌘-v (Mac) or ctrl-v (Windows) to paste the html code from YouTube into the Content Item. It should then look something like this: Click Save Changes to finish the task. 14
  • 15. The eCollege Content Item window will return to the visual editor, like this: Click on the Course tab to switch back to the course view. Students will see the Content Item as shown here: A hearty congratulations! You have successfully created a videocast lecture, uploaded it to YouTube, and embedded it into a Pearson LearningStudio course! 15
  • 16. Windows Movie Maker in Windows XP If you’re using Windows XP, unfortunately, you do not have access to Windows Live Movie Maker. (WLMM only works in Vista and 7.) However, here are the basic steps for creating video using Windows Movie Maker (note the absence of the word “Live” — this is a different program) in Windows XP. • Open Windows Movie Maker by clicking Start → All Programs → Windows Movie Maker • Click the File menu, then Capture Video… • Or, if the Movie Tasks menu is open on the left, simply click “Capture from video device.” • Windows Movie Maker will start the Video Capture Wizard, allowing you to set up your camera and record. If you have a built in camera, it will appear in the dialog box as shown below. If you have an external camera connected via USB, it should also appear in the “Available devices” list. • To ensure that you record sound along with your video, check that the Input level on your microphone is set so that when you speak, you get all green and a little yellow in the Microphone meter. Usually setting it at about 7 out of 10 on the scale is sufficient. Finally, click the Next button. • Windows Movie Maker will then prompt you for a file name and a place to save your captured video. Use a name that you can remember and locate easily — the course name and date of recording are a good start. Then click Next. • In the next dialog box, you can select your Video Settings, such as the video and audio quality. For best results, leave the default settings as shown. Then click Next. • Once you have the camera (and yourself) ready, click the Start Capture button and begin recording your videocast. • Once you have finished what you want to record, click Stop Capture. If you want to add more video to the current file, simply click Start Capture again and continue recording. When you are done, remember to click Stop Capture, then click Finish. • Upon returning to the main Windows Movie Maker window, you will see the video event you have just created. • Click and drag the video clip you recorded into the timeline below. Sometimes, Windows Movie Maker will chunk your video into several clips. If this happens, be sure to drag all clips — in the right order (first to last) — into the timeline. • To trim video from the finished product, press the Play button in the preview window and/or drag the slider across the timeline. When you reach the spot where you would like to start cutting (called a cut-point), press Pause (the Play button becomes the Pause button when playing). Then click the Split button to split the clip into two sections. Again, press Play, and when you get to the end of the section you’d like to cut, press Pause. Again, click the Split button. You have now split your video at two cut-points, and the video in between the cut points can be deleted. Simply click on it in the timeline to highlight it, and click the Delete key. • From the Movie Tasks menu on the left, click the button next to “Edit Movie.” Links appear that allow you to insert video effects, transitions, and titles. • The next dialog box allows you to set the video and audio quality in the video. Leave this at the default (best quality) and click Next > • Your movie is now finished. If you kept the default location for saving, you can find the movie in the My Movies folder inside My Documents. Now click Finish. You may exit Movie Maker at this point. • To publish to YouTube from Windows, first open your Web browser and go to http://www.youtube.com. From the YouTube home page, in the upper right corner, click on Upload. Alternatively, if you are already logged in to YouTube, you can click on the Upload link in the upper-right corner. • Once logged in, click the gold Upload video button on the next page. Browse to your finished movie in the dialog window that appears. It is possible that Windows’ default settings will have placed your finished video file and your raw video files into the same folder (My Videos). If so, be sure you select the finished video for upload (it will have a file extension of .wmv and the name you gave earlier), then click the Open button. • YouTube will upload the video and then give you a confirmation as well as an area to set some options. Give your video a Title, a Description, and enter Tags that will help YouTube’s search engine locate your video (if desired). Select a Category for your video (Education would be the obvious choice, but there are other options). You can make your video Public or Unlisted, but do not choose Private or else you will have to enter your students’ email addresses in order to specify who can view the video. Scroll down, click Save changes, and you’re good to go. • Congratulations! You’ve just created a video and uploaded it to YouTube! At any time, you can find the video by going to http://www.youtube.com, logging in, and from the top-right menu, clicking your Username and then My Videos. 16