
Recommandé
Contenu connexe
En vedette
En vedette (20)
Similaire à Auth & Auth: Forms, Windows, Roles
Similaire à Auth & Auth: Forms, Windows, Roles (20)
Plus de application developer
Dernier
Dernier (20)
Auth & Auth: Forms, Windows, Roles
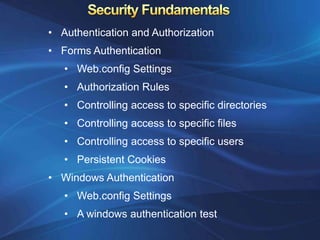
- 1. • Authentication and Authorization • Forms Authentication • Web.config Settings • Authorization Rules • Controlling access to specific directories • Controlling access to specific files • Controlling access to specific users • Persistent Cookies • Windows Authentication • Web.config Settings • A windows authentication test
- 2. Authentication: This is the process of determining a user’s identity and forcing users to prove they are who they claim to be. Usually, this involves entering credentials (typically a user name and password) into some sort of login page or window. These credentials are then authenticated against the Windows user accounts on a computer, a list of users in a file, or a back-end database. Authorization: Once a user is authenticated, authorization is the process of determining whether that user has sufficient permissions to perform a given action (such as viewing a page or retrieving information from a database).
- 3. Forms authentication: ASP.NET is in charge of authenticating users, tracking them, and authorizing every. Forms authentication is the best and most flexible way to run a subscription site or e-commerce store. Windows authentication: With Windows authentication, the web server forces every user to log in as a Windows user. This system requires that all users have Windows user accounts on the server. This scenario is poorly suited for a public web application but is often ideal with an intranet or company-specific site designed to provide resources for a limited set of users.
- 4. To implement forms-based security, you need to follow three steps: 1. Set the authentication mode to forms authentication in the web.config file. (If you prefer a graphical tool, you can use the WAT during development or IIS Manager after deployment.) 2. Restrict anonymous users from a specific page or directory in your application. 3. Create the login page.
- 5. <configuration> <system.web> <authentication mode="Forms"> <forms name="MyAppCookie" loginUrl="~/Login.aspx" protection="All" timeout="30" path="/" /> </authentication> ... </system.web> </configuration>
- 7. <configuration> <system.web> …. <authentication mode="Forms"> <forms loginUrl="~/Login.aspx" /> </authentication> <authorization> <deny users="?" /> <allow users="*" /> </authorization> ... </system.web> </configuration>
- 8. Leave the default <authorization> settings in the normal parent directory, and add a web.config file that specifies stricter settings in the secured directory. This web.config simply needs to deny anonymous users (all other settings and configuration sections can be omitted). <!-- This web.config file is in a subfolder. --> <configuration> <system.web> <authorization> <deny users="?" /> </authorization> </system.web> </configuration>
- 9. <configuration> <system.web> <authentication mode="Forms"> <forms loginUrl="~/Login.aspx" /> </authentication> <authorization> <allow users="*" /> </authorization> </system.web> <location path="AnotherSecuredPage.aspx"> <system.web> <authorization> <deny users="?" /> </authorization> </system.web> </location> </configuration>
- 10. The <allow> and <deny> rules don’t need to use the asterisk or question mark wildcards. Instead, they can specifically identify a user name or a list of comma- separated user names. <authorization> <deny users="?" /> <deny users="matthew,sarah" /> <deny users="john" /> <allow users="*" /> </authorization>
- 11. ASP.NET provides a special FormsAuthentication class in the System.Web.Security namespace, which provides static methods that help manage the process public partial class Login : System.Web.UI.Page { protected void cmdLogin_Click(Object sender, EventArgs e) { if (txtPassword.Text.ToLower() == "secret") { FormsAuthentication.RedirectFromLoginPage(txtName.Text, false); } else { lblStatus.Text = "Try again."; } } }
- 13. Once the user is logged in, you can retrieve the identity through the built-in User property, as shown here: protected void Page_Load(Object sender, EventArgs e) { lblMessage.Text = "You have reached the secured page, "; lblMessage.Text += User.Identity.Name + "."; } You can access the User object in your code because it’s a property of the current Page object. It has one property and one method : 1. The Identity property lets you retrieve the name of the logged-in user and the type of authentication that was used. 2. • The IsInRole() method lets you determine whether a user is a member of a given role
- 14. A persistent authentication cookie remains on the user’s hard drive and keeps the user signed in for hours, days, or weeks—even if the user closes and reopens the browser. If you want to allow the user to create a persistent cookie, you should make it optional, because the user may want to access your site from a public or shared computer. Generally, sites that use this technique include a check box with text such as Keep Me Logged In.
- 15. With Windows authentication, the web server takes care of the authentication process. When you use Windows authentication, you force users to log into IIS before they’re allowed to access secure content in your website. The user login information can be transmitted in several ways but the end result is that the user is authenticated using a local Windows account. To implement Windows-based security with known users, you need to follow three steps: 1. Set the authentication mode to Windows authentication in the web.config file. 2. Disable anonymous access for a directory by using an authorization rule. 3. Configure the Windows user accounts on your web server (if they aren’t already present).
- 16. <configuration> <system.web> <authentication mode="Windows" /> <authorization> <deny users="?" /> <allow roles=".SalesAdministrator,.SalesStaff" /> <deny users=".matthew" /> </authorization> ... </system.web> </configuration>
- 17. protected void Page_Load(Object sender, EventArgs e) { if (User.IsInRole(@"MyDomainNameSalesAdministrators")) { } else { Response.Redirect("Default.aspx"); } if (User.IsInRole(@"BUILTINAdministrators")) { // (Code goes here.) } }