
Recommandé
Contenu connexe
Dernier
Dernier (20)
En vedette
En vedette (20)
Rayographs
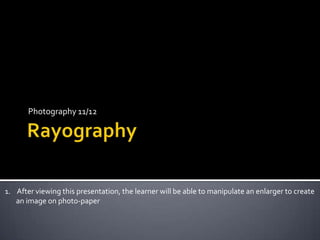
- 1. Photography 11/12 1. After viewing this presentation, the learner will be able to manipulate an enlarger to create an image on photo-paper
- 2. Photography 11/12 2. After viewing this presentation the viewer will be able to create an metaphorical and/or aesthetically pleasing image using items, photo-paper, and light.
- 3. Photography 11/12 3. After viewing this presentation the viewer will be able to mount and label an image.
- 4. Man Ray. 2010. Retrieved 02 13, 2012 from:http://www.flickr.com/photos/aconsagrada/5276101762/ Attribution-NonCommercial-ShareAlike 2.0 Generic Man Ray’s Bio
- 5. Man Ray Trust. (2004). Rayographies. Retrieved 02 13, 2012 from: http://tinyurl.com/78c4ka
- 7. 1 sec. 10 sec. o.1 sec.
- 8. 1. 2.
- 9. 1. One Minute 2. Thirty Sec. 3. Two Minutes
- 10. Two Minute Rinse Vertical Insertion
- 11. 1. 2. 3.
- 16. 2 separate sketches that represent a rough copy of the final image sketches depict evidence of the application of design principles Images on sketches evoke an emotional response, pose questions, or tell a story
- 17. Rayographs are: properly exposed tell a story/pose a question/evoke emotion mounted with even/straight borders labeled with all the required elements
Notes de l'éditeur
- Here are three examples of images produced by Man Ray in the 1920’s that attempt to evoke an emotional response or tell a story. What do these images say to you?
- You are to produce two rough copy sketches of images that you wish to produce using light, objects, and photo-paper.Consider the following when designing your image:- abstract representations to create meaning. - metaphor- Tell a story- Pose a question- evoke emotionRemember to consider elements of compositionS curvePerspectiveAnglesdepthdegree of lightbalanceelement relationshipdepending on the thickness both sides of an item may be illuminatedconsider the use of text
- Choose an EnlargerTurn on enlarger and place a white piece of paper inside the beam of light.Arrange items on the white paperSet the timer for an estimated exposure timeSomewhere between 10 to 30 seconds based on the translucency of your objects.
- Click the timer to “Timer” (the light will go off).Get a sheet of photo paper from meUsing the position of the white paper as a guide to the location of the light beam, place the photo paper in its place and rearrange your items.If possible, place a sheet of glass over your items.Press the Red button, stand back, don’t touch, and wait until the light goes off.Stand in line to run your print through the chemical process.
- Place face up in developer. Agitate and remove using tongs after one minute.Place in stop bath. Replace Tongs. Using new tongs, agitate and remove after 30 seconds.Place in Fixer. Replace tongs. Using new tongs, agitate and remove after 2 minutes.
- Place in water. Allow to soak for 2 minutes.Remove and place vertically in dryer.
- Using a glue stick, attach Rayograph to a sheet of plain white paper.Attach paper and Rayograph to a sheet of black construction paper.Be sure all boarders are equal and even this may require you to trim the edges of the paper or your Rayograph.
- This image illustrates what the final image should look like.
- Type up label and Print.Cut out label, glue to a small piece of black construction paper and using tape on the reverse side attach label to the lower right corner of mounted image.Label must have:Title of ImageYour NameMaterials (Items and Photo Paper)Photography 11/12
- Here are some examples of student made Rayographs. Notice the arrangement of items and the translucent quality of the image.
- This student used a variety of objects found in nature for a really incredible result.