Contenu connexe
Similaire à Cisco cme gui features
Similaire à Cisco cme gui features (20)
Cisco cme gui features
- 1. Cisco CME GUI Features
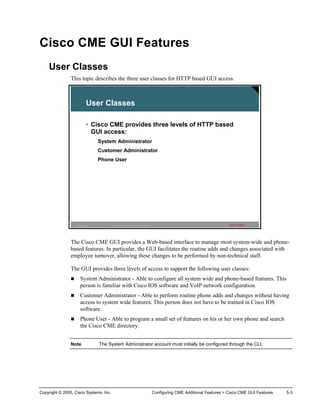
User Classes
This topic describes the three user classes for HTTP based GUI access.
User Classes
• Cisco CME provides three levels of HTTP based
GUI access:
System Administrator
Customer Administrator
Phone User
IP Telephony © 2005 Cisco Systems, Inc. All rights reserved. Cisco Public 3
The Cisco CME GUI provides a Web-based interface to manage most system-wide and phone-
based features. In particular, the GUI facilitates the routine adds and changes associated with
employee turnover, allowing these changes to be performed by non-technical staff.
The GUI provides three levels of access to support the following user classes:
System Administrator - Able to configure all system wide and phone-based features. This
person is familiar with Cisco IOS software and VoIP network configuration.
Customer Administrator - Able to perform routine phone adds and changes without having
access to system wide features. This person does not have to be trained in Cisco IOS
software.
Phone User - Able to program a small set of features on his or her own phone and search
the Cisco CME directory.
Note The System Administrator account must initially be configured through the CLI.
Copyright © 2005, Cisco Systems, Inc. Configuring CME Additional Features > Cisco CME GUI Features 5-3
- 2. User Classes (Cont.)
HTTP://ip_address/ccme.html
System and Customer
Administrator Web-
based GUI interface
IP Telephony © 2005 Cisco Systems, Inc. All rights reserved. Cisco Public 4
The system administrator and the customer administrator by default will have the same level of
access. The customer administrator can be customized to have a subset of the objects in the
menus. This will be covered later in the lesson. The objects that will be seen are the following
drop down menus:
Configure – Settings dealing with ephones, ephone-dns, and system settings
Voice Mail – Settings dealing with voice mail settings and integrations
Administrator – Where the backup and restore, saving of the changes, and reloading the
router can be done
Reports – Where various reports can be run and viewed
Help – Links to versions information and the help file
Note The System Administrator username and password may be changed from System
Administrator GUI.
5-4 Cisco Networking Academy Program: IP Telephony v1.0 Copyright © 2005, Cisco Systems, Inc.
- 3. User Classes (Cont.)
Phone User
GUI Web
interface
IP Telephony © 2005 Cisco Systems, Inc. All rights reserved. Cisco Public 5
The phone user GUI Web interface looks similar to the system and customer administrator GUI
Web interfaces. The phone users can make some basic changes to the configuration of their
phones, as well look up entries in the Cisco CME directory. The menus visible to the system
users will include very limited options under the following drop down menus.
Configure – Where some limited settings about the users associated phone can be made
Search – Where the user can search the directory of Cisco CME
Help – Links to the version information and help file for the users
Copyright © 2005, Cisco Systems, Inc. Configuring CME Additional Features > Cisco CME GUI Features 5-5
- 4. Cisco CallManager Express GUI Prerequisites
This topic describes the GUI prerequisite tasks to be completed.
Cisco CallManager Express GUI
Prerequisites
The following tasks should be completed before
the GUI is available
• Ensure the proper files are in flash on the Cisco
CallManager router
• Configure and enable the HTTP server on the router
• HTTP Server Authentication Method (Optional)
• Configure System Administrator Credentials
IP Telephony © 2005 Cisco Systems, Inc. All rights reserved. Cisco Public 6
The Cisco CME GUI uses HTTP to transfer information from the Cisco CME router to the PC
of an administrator or phone user. The router must be configured as an HTTP server and have
the proper Web files in flash locally to serve up to the browser. In addition an initial system
administrator username and password must be defined from the router command-line interface
(CLI). Customer administrators and phone users can be added from the Cisco CME router
using CLI commands or from a PC using GUI Web pages. The GUI Web page functions for
Customer Administrators can be restricted and customized with support in Cisco CME for
XML cascading style sheets (files with a .css suffix).
Note In order to access the GUI interface, Internet Explorer (IE) 5.5 or greater is required.
5-6 Cisco Networking Academy Program: IP Telephony v1.0 Copyright © 2005, Cisco Systems, Inc.
- 5. Cisco CallManager Express GUI
Prerequisites (Cont.)
router(config)#
ip http server
ip http server
• Enables the HTTP server on the router
router(config)#
ip http path flash:
ip http path flash:
• Sets the http server path to the flash memory
router(config)#
ip http authentication {aaa | enable | local | tacacs}
ip http authentication {aaa | enable | local | tacacs}
• Determines the method type of authentication used
by the HTTP Server
IP Telephony © 2005 Cisco Systems, Inc. All rights reserved. Cisco Public 7
The GUI Web interface files must be installed in flash memory on a Web server that runs
locally on the Cisco CME router. The HTTP server on the Cisco CME router is disabled by
default. In order to enable it, enter ip http server from global configuration mode. While this
starts the HTTP service, it does not define where the files are that will be served up by the local
routers Web server will reside. To configure the location of the files to be served by the Web
server enter the command ip http path flash: from global configuration mode. Authentication
is set to use the enable password by default. It is recommended that authentication be
configured to use AAA or a local username and password pair. The ip http authentication
command is used to configure the authentication method that is desired.
Copyright © 2005, Cisco Systems, Inc. Configuring CME Additional Features > Cisco CME GUI Features 5-7
- 6. Command Purpose
ip http server Enables the Cisco Web server on the local Cisco
CME router
Example: Router(config)#ip http server
ip http path flash: Sets the base HTTP path for HTML files to Flash
memory on the router.
Example: Router(config)# ip http path flash:
ip http authentication {aaa | enable | local Specifies method of authentication to use for the
|tacacs} system administrator when accessing the HTTP
server. Default is the enable keyword.
Example: Router(config)# ip http authentication
aaa
This command has no effect for customer • aaa - Indicates that the authentication
administrator and phone users. method used for the AAA login service
should be used for authentication. The
AAA login service method is specified by
the aaa authentication login command.
• enable -Uses the enable password. This
is the default if this command is not used.
• local - Uses login user name, password,
and privilege level access combination
specified in the local system configuration
(by the username global configuration
command).
• tacacs - Uses TACACS (or XTACACS)
server.
5-8 Cisco Networking Academy Program: IP Telephony v1.0 Copyright © 2005, Cisco Systems, Inc.
- 7. Cisco CallManager Express GUI
Prerequisites (Cont.)
router(config)#
telephony-service
telephony-service
• Enters telephony-service configuration mode
router(config-telephony-service)#
web admin system name username {password string | secret
web admin system name username {password string | secret
{0 | 5} string}
{0 | 5} string}
• Sets a username and password for the GUI system
administrator
IP Telephony © 2005 Cisco Systems, Inc. All rights reserved. Cisco Public 8
To configure the system administrator credentials, from global configuration mode, enter the
telephony-service command. From the telephony service sub mode enter web admin system
name username password password command. This defines an initial username and password
for the system administrator to access the GUI. Once you have created this account you can log
in to the GUI. While in the GUI as the system administrator, the customer administrator and
phone users may be defined. Alternatively, you can continue to use router CLI to create the
customer administrator and phone users’ credentials.
The password will not be encrypted if the 0 options is used and will be clearly visible in the
configuration. If the password is set with the 5 option the password will be shown as a MD5
hash.
Note There is only one system administrator set of credentials.
Copyright © 2005, Cisco Systems, Inc. Configuring CME Additional Features > Cisco CME GUI Features 5-9
- 8. Command Purpose
telephony-service Enters telephony-service configuration mode.
Example: Router(config)# telephony-
service
web admin system name username {password Defines a username and password for a system
string | secret {0 | 5} string} administrator. The default username is Admin.
There is no default password.
Example:
• name username – System administrator
Router(config-telephony-service)# web admin username.
system name pwa3 secret 0 wp78pw
• password string – String to verify system
administrator identity. Default is empty string.
• secret {0 | 5} string – Password should be
encrypted. The digit specifies state of encryption
of the string that follows, as explained here:
– 0 – Password that follows is not yet
encrypted.
– 5 – Password that follows is encrypted using
MD5.
Note The secret 5 keyword pair is used in the output of show commands when encrypted
passwords are displayed and it indicates that the password that follows is encrypted.
5-10 Cisco Networking Academy Program: IP Telephony v1.0 Copyright © 2005, Cisco Systems, Inc.
- 9. Cisco CallManager Express GUI
Prerequisites (Cont.)
router(config-telephony-service)#
dn-webedit
dn-webedit
• (Optional) Enables the ability to add ephone directory
numbers through the CallManager Express GUI
router(config-telephony-service)#
time-webedit
time-webedit
• (Optional) Enables the ability to set the system time
through the CallManager Express GUI
IP Telephony © 2005 Cisco Systems, Inc. All rights reserved. Cisco Public 9
By default, ephone-dns can only be created through the CLI of the Cisco CME router. The
ability to add ephone-dns through the GUI Web interface can be enabled if desired. To enable
this functionality, use the dn-webedit command.
Similarly, the ability to set the system time of the Cisco CallManager router in the GUI Web
interface, which ultimately sets the time which is displayed on the display of the IP phones, has
to be enabled and by default will not be available in the GUI Web interface. To enable the
setting of the time in the GUI Web interface, use the time-webedit command.
These settings provide a way to allow the non technical administrator to create new ephone-dns
and modify the time through the GUI Web-based interface instead of the CLI that the non-
technical administrator may not be comfortable in.
Copyright © 2005, Cisco Systems, Inc. Configuring CME Additional Features > Cisco CME GUI Features 5-11
- 10. Command Purpose
dn-webedit (Optional) Enables the ability to add directory
numbers through the Web interface. The no form
Example: Router(config-telephony- of this command disables the ability to create IP
service)# dn-webedit phone extension telephone numbers. That ability
could disrupt the network-wide management of
telephone numbers. If this command is not used,
the ability to create directory numbers is disabled
by default.
time-webedit (Optional) Enables the ability to set the phone time
for the Cisco CME system through the Web
Example: Router(config-telephony- interface.
service)# time-webedit
Note Cisco discourages this method for setting
network time. The router should be set up to
automatically synchronize its router clock from a
network-based clock source using Network Time
Protocol (NTP). In the rare case that a network
NTP clock source is not available, the time-
webedit command can be used to allow manual
setting and resetting of the router clock through the
GUI.
5-12 Cisco Networking Academy Program: IP Telephony v1.0 Copyright © 2005, Cisco Systems, Inc.
- 11. Accessing the GUI
This topic describes how to access the GUI.
Accessing the GUI
The GUI in CallManager Express is Web-based
• Use IE 6.0 or greater
• Use the URL
Hyperlink: http://router_ipaddr/ccme.html
• Enter either system admin, customer admin or
phone user credentials when prompted
IP Telephony © 2005 Cisco Systems, Inc. All rights reserved. Cisco Public 10
To access the Administrative Web site to make changes use the URL
http://router_ipaddr/ccme.html in your IE 5.5 browser. When prompted for credentials, use the
administrative credentials previously defined in the CLI. Based on the credentials presented to
the Cisco CME router, the router will display the appropriate Web page for either the system
administrator, customer administrator or a phone user.
Copyright © 2005, Cisco Systems, Inc. Configuring CME Additional Features > Cisco CME GUI Features 5-13
- 12. Configuring Administrative User Classes
This topic describes how to configure a customer administrator.
Configuring Administrative User Classes
To configure a customer administrator with a
subset of the system administrator access, two
steps must be taken:
• Create and load a custom XML configuration file
• Define the customer administrator credentials
IP Telephony © 2005 Cisco Systems, Inc. All rights reserved. Cisco Public 11
In the Cisco CME system there is a system administrator that has full control of the system. It
may be desirable to create another custom level of access to the system by configuring what is
known as a customer administrator. This customer administrator can have a subset of the full
level of access enjoyed by the default system administrator. The end result will be the existence
of two levels of administrators one with full access and the customer administrator with some
defined subset of full access.
Creating and defining the level of access for the customer administrator to log in to the GUI
Cisco CME interface is a two-step process. The first step is to create the XML file that will
define the level of access to objects in the Cisco CallManager GUI Web interface. The second
step is to create the user credentials that will be used by the customer administrator. This may
be done by either using the CLI or the system administrator GUI Web interface.
5-14 Cisco Networking Academy Program: IP Telephony v1.0 Copyright © 2005, Cisco Systems, Inc.
- 13. Configuring Administrative User Classes
(Cont.)
Creating and loading an XML configuration file is
a five step process
• Step 1 - Open a copy of the xml.template file in a
text editor
• Step 2 - Edit the file with desired changes to access
• Step 3 - Save the file with a desired name
• Step 4 - Upload to flash on the CallManager
Express router via TFTP or FTP
• Step 5 - Load the template from flash to the RAM on
the CallManager Express router
IP Telephony © 2005 Cisco Systems, Inc. All rights reserved. Cisco Public 12
The xml.template file is included in both the .tar and .zip that Cisco CME was installed with.
First open the xml.template file with a text editor. Then delete either the “Hide” word or
“Show” word, as well as the pipe symbol and the brackets, leaving only “Hide” or “Show”
remaining whichever level of access is desired for that object. Save the file with a name that
has significance and an .xml extension. This file will then need to be uploaded to the flash of
the Cisco CME router. Finally the file will be loaded into RAM from flash.
Step Action Notes
1. Open a copy of the xml.template file The xml.template file is included in both the
tar and the zip file that the Cisco CME files
came in
2. Modify the xml file Leave only the “Hide” or “Show” word,
whichever action is desired, deleting the
other word and any brackets or pipe symbols
3. Save the file with the desired name The name of the file can be anything desired
as long as it is a known value
Example:CustomerAdmin.xml
4. Upload the xml file to flash memory on the TFTP or FTP can be used to move the new
Cisco CME router xml file to flash memory
copy ftp flash
5. Load the template from flash to RAM on the This command will be executed if saved to
Cisco CME router the startup-config at boot up
web customize load filename
Copyright © 2005, Cisco Systems, Inc. Configuring CME Additional Features > Cisco CME GUI Features 5-15
- 14. Example
Changing a line in the xml.template file that controls the ability to add a new phone in Cisco
CME GUI Web interface.
“<AddPhone> [Hide | Show] </AddPhone>” becomes “<AddPhone> Hide </AddPhone>” and
would prevent the Customer Administrator from adding a phone through the Web-based
interface.
5-16 Cisco Networking Academy Program: IP Telephony v1.0 Copyright © 2005, Cisco Systems, Inc.
- 15. Configuring Administrative User Classes
(Cont.) – Demonstration
• Step 1 – Copy of xml.template in text editor
<Presentation>
<MainMenu>
<!-- Take Higher Precedence over CLI "dn-web-edit" -->
<AddExtension> [Hide | Show] </AddExtension>
<DeleteExtension> [Hide | Show] </DeleteExtension>
<AddPhone> [Hide | Show] </AddPhone>
<DeletePhone> [Hide | Show] </DeletePhone>
</MainMenu>
<Extension>
<!--Control both view and change, and possible add or delete-->
<SequenceNumber> [Hide | Show] </SequenceNumber>
<Type> [Hide | Show] </Type>
<Huntstop> [Hide | Show] </Huntstop>
<Preference> [Hide | Show] </Preference>
<HoldAlert> [Hide | Show] </HoldAlert>
<TranslationRules> [Hide | Show] </TranslationRules>
<Paging> [Hide | Show] </Paging>
<Intercom> [Hide | Show] </Intercom>
<MWI> [Hide | Show] </MWI>
<MoH> [Hide | Show] </MoH>
<LBDN> [Hide | Show] </LBDN>
<DualLine> [Hide | Show] </DualLine>
<Reg> [Hide | Show] </Reg>
<PGroup> [Hide | Show] </PGroup>
…
IP Telephony © 2005 Cisco Systems, Inc. All rights reserved. Cisco Public 13
This is an example of the xml.template that comes with Cisco CME 3.1. Notice the [Hide |
Show]. This needs to be edited to leave only the desired action.
Copyright © 2005, Cisco Systems, Inc. Configuring CME Additional Features > Cisco CME GUI Features 5-17
- 16. Configuring Administrative User Classes
(Cont.) – Demonstration
• Step 2 - xml.template in text editor
<Presentation>
<MainMenu>
<AddExtension> Hide </AddExtension>
<DeleteExtension> Hide </DeleteExtension>
<AddPhone> Show </AddPhone>
<DeletePhone> Show </DeletePhone>
</MainMenu>
<Extension>
<SequenceNumber> Hide </SequenceNumber>
<Type> Hide </Type>
<Huntstop> Hide </Huntstop>
<Preference> Hide </Preference>
<HoldAlert> Hide </HoldAlert>
<TranslationRule> Hide </TranslationRule>
<Paging> Show </Paging>
<Intercom> Hide </Intercom>
<MWI> Hide </MWI>
<MoH> Hide </MoH>
<LBDN> Hide </LBDN>
<DualLine> Hide </DualLine>
<Reg> Hide </Reg>
<PGroup> Hide </PGroup>
</Extension>
…
IP Telephony © 2005 Cisco Systems, Inc. All rights reserved. Cisco Public 14
This example XML file shows the proper syntax for an XML file. Notice that this XML file
would allow the customer administrator to add and delete a phone but not an extension. Once
the desired changes to access have been made, save the file (step 3) and put it on an ftp or tftp
server that the Cisco CME router can communicate with. Next in step 4, use the copy ftp flash
or copy tftp flash command to move the file to flash on the Cisco CME router. The last step is
step 5 and uses the command web customize load filename from telephony service mode to
load the file into RAM on the Cisco CME router. Any syntax errors that exist in this step will
cause the process to fail, which will then cause the Cisco CME router to output a syslog
message.
Command Purpose
web customize load filename Used to load and parse an eXtensible Markup
Language (XML) file in router Flash memory to
Example: Router(config-telephony- customize a Cisco CME GUI for a customer
Tservice)# web customize load myxmlfile.xml administrator.
h
5-18 Cisco Networking Academy Program: IP Telephony v1.0 Copyright © 2005, Cisco Systems, Inc.
- 17. Configuring Administrative User Classes
(Cont.) – Demonstration Results
Default system
Administrator
access
Modified XML
Template applied
IP Telephony © 2005 Cisco Systems, Inc. All rights reserved. Cisco Public 15
This slide shows the results of the previous XML configuration file. The difference in access to
the GUI Web interface is a direct result of the <Extensions> section in the previous slide.
Copyright © 2005, Cisco Systems, Inc. Configuring CME Additional Features > Cisco CME GUI Features 5-19
- 18. Configuring Administrative User Classes
(Cont.)
Define the custom administrator credentials
in one of two ways:
• Through the System Administrator GUI
• From the CLI of the CallManager Express
IP Telephony © 2005 Cisco Systems, Inc. All rights reserved. Cisco Public 16
Defining the Custom Administrator Credentials
After the XML file is configured and loaded into RAM, the system administrator can set up the
credentials for the customer administrator. There are two different ways to achieve this. The
first is through the system administrator Web pages, and the second is from the CLI.
5-20 Cisco Networking Academy Program: IP Telephony v1.0 Copyright © 2005, Cisco Systems, Inc.
- 19. Configuring Administrative User Classes
(Cont.)
To add a
Customer
Admin
• Add a
username
• Select
Customer
from the
Admin type
• Set the
password
IP Telephony © 2005 Cisco Systems, Inc. All rights reserved. Cisco Public 17
Defining the Custom Administrator Credentials in the GUI
This slide shows the creation of the Customer Administrator by the System Administrator.
Access to this page is through the “Configure” drop-down menu, then selecting System
Parameters.
The end result will be that there will now be a system administrator and a customer
administrator.
Note Only one set of customer administrator credentials may be defined. Any subsequent
changes will simply overwrite the initial configuration.
Copyright © 2005, Cisco Systems, Inc. Configuring CME Additional Features > Cisco CME GUI Features 5-21
- 20. Configuring Administrative User Classes
(Cont.)
router(config)#
telephony-service
telephony-service
• Enters telephony-service configuration mode
router(config-telephony-service)#
web admin customer name username password string
web admin customer name username password string
• Sets a username and password for the GUI customer
administrator
IP Telephony © 2005 Cisco Systems, Inc. All rights reserved. Cisco Public 18
Defining the Custom Administrator Credentials in the CLI
To create the customer administrator from the CLI first enter the telephony-service command
from global configuration mode. Then, enter the web admin customer name username
password password command to create the credentials to be used by the customer
administrator.
Note Only one set of customer administrator credentials may be defined. Any subsequent
changes will simply overwrite the initial configuration.
Command Purpose
telephony-service Enters telephony-service configuration mode.
Example: Router(config)# telephony-
service
web admin customer name username Defines a username and password for a customer
{password string | secret {0 | 5} string} administrator. The default username is Customer.
There is no default password.
Example: Router(config-telephony-service)# web
admin customer name user44 password • name username—Username of customer
w10293847 administrator.
• password string—String to verify customer
administrator
5-22 Cisco Networking Academy Program: IP Telephony v1.0 Copyright © 2005, Cisco Systems, Inc.
- 21. Configuring Administrative User Classes
(Cont.)
Two ways to define phone users:
• Through the System Administrator GUI
• From the CLI of the CallManager Express
IP Telephony © 2005 Cisco Systems, Inc. All rights reserved. Cisco Public 19
Like the customer administrator, phone users can also be configured from either the GUI or the
CLI. One set of credentials may be defined per phone.
Configuring Administrative User Classes
(Cont.)
Select the phone of the
user, then set credentials
on the phone
IP Telephony © 2005 Cisco Systems, Inc. All rights reserved. Cisco Public 20
To set phone user credentials from the phone user Web pages, go to the “Configure” drop-
down menu and select “Phones.” Either add a new phone or change an existing phone by
selecting it. Scroll to the bottom of the page and in the “Login Account” area, define the user
and password. Select the “Change” button to commit the changes.
Copyright © 2005, Cisco Systems, Inc. Configuring CME Additional Features > Cisco CME GUI Features 5-23
- 22. Configuring Administrative User Classes
(Cont.)
router(config)#
ephone phone tag
ephone phone tag
• Enters telephony-service configuration mode
router(config-ephone)#
username username password password
username username password password
• Sets a username and password for the GUI phone
user
IP Telephony © 2005 Cisco Systems, Inc. All rights reserved. Cisco Public 21
To configure the phone user credentials for a phone, enter the ephone sub configuration mode
by entering the ephone phone tag from global configuration mode. Then enter the username
username password password command. This will be used by the phone users to log into the
GUI Web interface and for any TAPI lite connections.
Note The password will be shown in clear text in the router configuration.
Command Purpose
ephone phone tag Enters ephone configuration mode to register Cisco
IP phones.
Example: Router(config)# ephone 44
username username password password Assigns a phone user login account name and
password. This allows individual phone users to
Example: Router(config-ephone)# username prx log in to the Cisco CME router through a Web
password pk59wq interface to change a limited number of personal
settings.
.
5-24 Cisco Networking Academy Program: IP Telephony v1.0 Copyright © 2005, Cisco Systems, Inc.