
Recommandé
Contenu connexe
Tendances
Tendances (20)
Similaire à posterior direct composite restoration
Similaire à posterior direct composite restoration (20)
Dernier
Dernier (20)
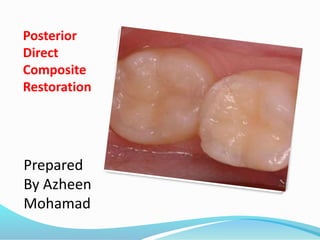
posterior direct composite restoration
- 2. References Sturdevant's Art and science of operative dentistry.2013 Mosby Elsevier . Sixth Edition chapter 10 pep 254 Contemporary esthetic dentistry .2012 Mosby Elsevier. first Edition chapter 10 .pep 244 Tooth colored restorative ,principle and techniques . 2012 Albers .ninth edition https://www.dentalaegis.com/special-issues/2010/06/limiting-postoperative- sensitivity-in-composite-restorations-part-ii http://www.powershow.com/product/presentations/ http://www.dentaleconomics.com/articles/print/volume-103/issue- 7/features/posterior-composites-choosing-and-using-them-well.html
- 3. Introduction When esthetic dentistry began its evolution, the posterior teeth were considered unimportant. As patient expectations have increased, more focus has been placed on the esthetic contribution of posterior teeth With the mechanics of mandibular function, as humans speak, laugh, and exhibit the behaviors considered human, the incisal edges of the lower anterior teeth and the occlusal surfaces of the posterior teeth are critical .
- 4. DEFINITION composite resin is three dimensional combination of two or more chemically different materials with a distinct interface between them.in combination, the properties are superior to those of individual components.
- 5. Composites are indicated for Class 1, class 2 and class 5 defects on premolars and molars. Ideally, an isthmus width of less than one third the intercuspal distance is required. This requirement is balanced against forces created on remaining tooth structure and composite material. Forces are analyzed by direction, frequency, duration and intensity. High force occurs with low angle cases, in molar areas, with strong muscles, point contacts and parafunctional forces such as grinding and biting finger nails. Composite is strongest in compressive strength and weakest in shear, tensile and modulus of elasticity strengths. Failure of a restoration occurs if composite fractures, tooth fractures, composite debonds from tooth structure or micro-leakage and subsequent caries occurs. A common area of failure is direct point contact by sharp opposing cusps. DIRECT POSTERIOR COMPOSITES
- 6. Tooth preparation requires adequate access to remove caries, removal of caries, elimination of weak tooth structure that could fracture, beveling of enamel to maximize enamel bond strength, and extension into defective areas such as stained grooves and decalcified areas. Matrix systems are placed to contain materials within the tooth and form proper interproximal contours and contacts Enamel and dentin bonding is completed. Composite shrinks when cured so large areas must be layered to minimize negative forces. Generally, any area thicker than two millimeters requires layering. In addition, cavity preparation produces multiple wall defects. Composite curing when touching multiple walls creates dramatic stress and should be avoided.
- 7. Composite built in layers replicate tooth structure by placing dentin layers first and then enamel layers. Final contouring with hand instruments is ideal to minimize the trauma of shaping with burs. Matrix systems are removed and refined shaping and occlusal adjustment done with a 245 bur and a flame shaped finishing bur. Interproximal buccal and lingual areas are trimmed of excess with a flame shaped finishing bur. Final polish is achieved with polishing cups, points, sandpaper disks, and polishing paste.
- 8. Polymerization Shrinkage Composite materials shrink while polymerizing. This is referred to as polymerization shrinkage. This phenomenon cannot be avoided, and important clinical procedural techniques must be incorporated to help offset the potential problems associated with a material pulling away from the preparation walls as it polymerizes. Careful control of the amount and insertion point of the material and appropriate use of an adhesive on the prepared tooth structure to improve bonding reduce these problems.
- 9. There are several mechanisms of composite wear including adhesive wear, abrasive wear, fatigue, and chemical wear:_ Adhesive wear is created by extremely small contacts and therefore extremely high forces, of two opposing surfaces. When small forces release, material is removed. All surfaces have microscopic roughness which is where extremely small contacts occur between opposing surfaces. Abrasive wear is when a rough material gouges out material on an opposing surface. A harder surface gouges a softer surface. Materials are not uniform so hard materials in a soft matrix, such as filler in resin, gouge resin and opposing surfaces. Fatigue causes wear. Constant repeated force causes substructure deterioration and eventual loss of surface material. Chemical wear occurs when environmental materials such s saliva, acids or like affect a surface. COMPOSITE WEAR
- 10. Significance of Gap Formation The gap formation that usually occurs when the composite restoration is extended onto the root surface may not have any long-term clinical effects. With the two vectors of the defect being primarily resin or composite, recurrent caries may not be a problem. How long the exposed hybridized resin layer on the root stays intact is unknown, however, and if it deteriorates in a short time, the area is exposed to risk for caries. Use of an RMGI liner material may reduce the effect of gap formation by rendering the surrounding tooth structure more resistant to recurrent caries.
- 11. Dental composite is composed of a resin matrix and filler materials. The resin filler interface is important for most physical properties. There are three causes of stress on this interface including: i. resin shrinkage pulls on fillers, filler modulus of elasticity is higher than resin, and filler thermo coefficient of expansion allows resin to expand more with heat. ii. When fracture occurs, a crack propagates and strikes a filler particle. Resin pulls away from filler particle surfaces during failure. This type of failure is more difficult with larger particles as surface area is greater. A macrofill composite is stronger than a microfill composite. iii. Coupling agents are used to improve adherence of resin to filler surfaces. COMPOSITE FRACTURE
- 12. 1) Class-I, II, III, IV, V & VI restorations. 2) Foundations or core buildups. 3) Sealant & Preventive resin restorations. 4) Esthetic enhancement procedures. 5) Luting. 6) Temporary restorations. 7) Periodontal splinting. INDICATIONS of composite
- 13. 1) Inability to isolate the site. 2) Excessive masticatory forces. 3) Restorations extending to the root surfaces. 4) high caries incidence and poor oral hygiene. CONTRAINDICATIONS
- 14. Advantage The advantages of composite as a Class I and II direct restorative material relative to other restorative materials are: 1. Esthetics 2. Conservative tooth structure removal 3. Easier, less complex tooth preparation 4. Insulation 5. Decreased microleakage 6. Increased short-term strength of remaining tooth Structure.
- 15. Disadvantages The disadvantages of Class I and II direct composite restorations are as follows: 1. Polymerization shrinkage effects 2. Lower fracture toughness than most indirect restorations 3. More technique-sensitive than amalgam restorations and some indirect restorations 4. Possible greater localized occlusal wear. 5. Unknown biocompatibility of some components (bisphenol A [BPA])
- 16. Composite Variants Packable Flowable
- 17. Packable Composites Marketed for posterior use increase in viscosity better proximal contacts handle like amalgam Subtle alteration of filler shape size particle distribution Similar resin chemistry and filler volume
- 18. Proximal Contact Studies Packables similar to hybrids diameter and tightness Best contacts sectional matrix system
- 19. Flowable Composites Clinical applications:- • preventive resin restorations • small Class 5 • provisional repair • composite repair • liners
- 20. Advanced composite for direct posterior restoration Bulk Fill Composite Advanced composite technology allows for directly placed posterior restorations with bulk-fill resin-bonded composite in a single increment. Engineered with a smooth and creamy consistency, bulk-fill composite (eg, Tetric EvoCeram® Bulk Fill, Ivoclar Vivadent , can achieve high marginal adaptation to the floor and walls of cavity preparations, eliminating the need for a flowable liner. The patented shrinkage stress reliever technology increases marginal integrity and decreases polymerization shrinkage due to a low shrinkage stress of 1.13 MPa and a low shrinkage volume of 1.9%.Good marginal integrity and low polymerization shrinkage can result in a decreased probability of tooth deformation, postoperative sensitivity,microleakage, and secondary caries.
- 21. 1) Local anaesthesia. 2) Preparation of the operating site. 3) Shade selection 4) Isolation of the operating site. 5) Tooth preparation. 6) preliminary steps of enamel and dentin bonding. 7) Matrix placement. 8) Inserting the composite. 9) Contouring the composite. 10) polishing the composite. STEPS IN COMPOSITE RESTORATION
- 22. Tooth Preparation As a general rule, similar to the tooth preparation for direct anterior restorations, the tooth preparation for direct posterior composites involves (1) creating access to the faulty Structure. (2) removal of faulty structures (caries, defective restoration and base material, if present). (3) creating convenience form for the restoration. Retention is obtained by bonding. When placing most posterior composites, it is not necessary to incorporate mechanical retention features in the tooth preparation.
- 23. Small to Moderate Class I Direct Composite Restorations Small to moderate Class I direct composite restorations may use minimally invasive tooth preparations and do not require typical resistance and retention form features. Instead, these conservative preparations typically use more flared cavosurface forms without uniform or flat pulpal or axial walls. These preparations are less specific in form, having a scooped-out appearance. They are prepared with a small round or elongated pear diamond or bur with round features. The initial pulpal depth is approximately 0.2 mm inside the DEJ but may not be uniform (i.e., the pulpal floor is not flat throughout its length).
- 24. Small to Moderate Class I Direct Composite Restorations
- 25. Moderate to Large Class I Direct Composite Restorations Moderate to large Class I direct composite restorations, especially when used for larger caries lesions or to replace existing defective amalgam restorations, will typically feature flat walls that are perpendicular to occlusal forces, as well as strong tooth and restoration marginal configurations. All of these features help resist potential fracture in less conservative tooth preparations. However, the preparation should never be excessively extended beyond removal of faulty structures to justify resistance and retention forms, as this will weaken the tooth structure and can ultimately lead to failure of the tooth restoration unit. If the occlusal portion of the restoration is expected to be extensive, elongated pearl cutting instruments with round features are preferred because they result in strong, 90-degree cavosurface margins. However, this box-like form
- 26. preparation may increase the negative effects of the configuration factor (C-factor). (See the section on inserting and light activating the composite for other considerations regarding the C-factor for Class I direct composite restorations.) The objective of the tooth preparation is to remove all of the caries or fault as conservatively as possible. Because the composite is bonded to the tooth structure, other less involved, or at-risk, areas can be sealed as part of the conservative preparation techniques. Sealants may be combined with the Class I composite Restoration.
- 27. Small Class II Direct Composite Restorations Small Class II direct composite restorations are often used for primary caries lesions, that is, initial restorations. A small round or elongated pearl diamond or bur with round features may be used for this preparation to scoop out the carious or faulty material from the occlusal and proximal surfaces. The pulpal and axial depths are dictated only by the depth of the lesion and are not uniform. The proximal extensions likewise are dictated only by the extent of the lesion but may require extended occlusally , facially, and gingivally enough to remove the lesion. The axial depth is determined by the extent of the lesion. The occlusal, facial, and gingival cavosurface margins are 90 degrees or greater. Care should be taken not to undermine the marginal ridge during the preparation.
- 28. Moderate to Large Class II Direct Composite Restorations the tooth preparation for moderate to large class ii direct composite restorations has features that resemble a more traditional class ii amalgam tooth preparation and include an occlusal step and a proximal box. OCCLUSAL STEP:_ The occlusal portion of the Class II preparation is prepared similarly as described for the Class I preparation. The primary differences are related to technique of incorporating the faulty proximal surface. Pre-operatively, the proposed facial and lingual proximal extensions should be visualized . Initial occlusal extension toward the involved proximal surface should go through the marginal ridge area at initial pulpal floor depth, exposing the DEJ. The DEJ serves as a guide for preparing the proximal box portion of the preparation.
- 29. The pulpal floor is prepared with the instrument to a depth that is approximately 0.2 mm inside the DEJ. The instrument is moved to include caries and all defects facially or lingually or both, as it transverses the central groove. Every effort should be made, however, to keep the faciolingual width of the preparation as narrow as possible. The initial depth is maintained during the mesiodistal movement, but follows the rise and fall of the underlying DEJ
- 30. PROXIMAL BOX Typically, caries develops on a proximal surface immediately gingival to the proximal contact. The extent of the caries lesion and amount of old restorative material are two factors that dictate the facial, lingual, and gingival extensions of the proximal box of the preparation. Although it is not required to extend the proximal box beyond contact with the adjacent tooth (i.e., provide clearance with the adjacent tooth), it may simplify the preparation, matrix placement, and contouring procedures. If all of the defect can be removed without extending the proximal preparation beyond the contact, however, the restoration of the proximal contact with the composite is simplified.
- 31. After the operator cleans the teeth, administers local anesthetic, selects the shade of composite, and isolates the area, a wedge is placed in the gingival embrasure .Early wedging helps in the separation of teeth, to compensate later for the thickness of the matrix band, fulfilling one of several requirements for a good proximal contact for the composite restoration. The placement of a bitine ring preoperatively can achieve the same goal. The lack of pressure against the matrix during placement of composite compared with pressure of amalgam during its condensation dictates the need not only for increased separation by early wedging but also the need for operator alertness to verify matrix contact with the adjacent tooth before composite placement. The wedge also depresses and protects the rubber dam and gingival tissue when the proximal area is prepared. An additional, further tightening (insertion) of the wedge during tooth preparation may be helpful. The presence of the wedge during the composite in these areas. Beveled composite margins also may be more difficult to finish.
- 33. Mesio-occlusal (MO) Class II tooth preparation for posterior composite restoration in the maxillary first premolar. A, Esthetic problem is caused by caries and existing amalgam restoration. B, In this patient, the mesial marginal ridge is not a centric holding area. C, Early wedging after rubber dam placement. D, An elongated pear bur or diamond is used for initial tooth preparations on both premolars. E, After extensive caries is excavated, a calcium hydroxide liner and a resin-modified glass ionomer (RMGI) base are inserted. F, Preparations are completed, if necessary, by roughening the prepared tooth structure with diamond instrument.
- 34. Bevels are rarely used on any of the proximal box walls because of the difficulty in restoring these areas, particularly when using inherently viscous packable composites. Bevels also are not recommended along the gingival margins of the proximal box; however, it is still necessary to remove any unsupported enamel rods along the margins because of the gingival orientation of the enamel rods. For most Class II preparations, this margin already is approaching the cementoenamel junction (CEJ), and the enamel is thin.
- 35. Factors can influence the clinical success of class II composite restorations patient characteristics tooth preparation matrix utilization composite composition–dentin bonding
- 36. *Patient selection The popularity and demand for resin-based posterior restorations. societal focus on aesthetics. restorations placed in patients with high caries risk have restoration failure rates two times than those of patients with low caries risk. the practitioner must give careful consideration to the caries status of the patient and adjust recommendations for restorative materials accordingly.
- 37. *Tooth preparation resins are utilized to maximize aesthetics and minimize the loss of tooth structure during preparation. Due to the location of the caries and thus the need to restore proximal surfaces in class II restorations, a number of tooth preparation designs have been advocated:_
- 39. Minibox or “slot” preparations These preparation designs have been described as minimally invasive and relatively successful with a reported 70% success rate over an average of 7 years.
- 40. traditional preparation designs traditional preparation designs, which involve access through the carious marginal ridge and the removal of infected occlusal enamel and dentin, may be required.
- 41. aesthetics deemed restoration that clinicians should utilize posterior resin composites in areas where aesthetics is deemed essential and should maintain as much tooth structure as possible.
- 42. aesthetics deemed restoration the aesthetic results obtained when replacing a proximal amalgam restoration with a resin- based composite restoration.
- 43. Matrix Application One of the most important steps in restoring Class II preparations with direct composites is the selection and proper placement of the matrix. In contrast to amalgam, which can be condensed to improve the proximal contact, Class II composites are almost totally dependent on the contour and position of the matrix for establishing appropriate proximal contacts. Early wedging and re-tightening of the wedge during tooth preparation aid in achieving sufficient separation of teeth to compensate for the thickness of the matrix band. Before placing the composite material, the matrix band must be in absolute contact with (touching) the adjacent contact area. two basic types: (1) metal matrices, which are straight or circumferential/ precontoured (2) transparent matrices which are either straight or circumferential/ precontoured
- 44. The influence of matrix type Despite the theory that transparent matrices will enhance polymerization at the gingival margin, the recent literature suggests that the choice of matrix does not influence the clinical success of class II posterior resins.
- 45. Restorative Technique Placement of the Adhesive When using an etch-and-rinse adhesive, over-drying the etched dentin can compromise dentin bonding. Aqueous solutions containing glutaraldehyde and 2-hydroxyethyl methacrylate (HEMA) can be used as a re-wetting agent when using etch-and-rinse systems . The bonding agent is applied to the entire preparation with a Micro brush , in accordance with the manufacturer’s instructions. After application, the adhesive is polymerized with a light-activation unit, as recommended by the manufacturer
- 46. When the final tooth preparation is judged to be near the pulp in vital teeth, the operator may elect to use a base material prior to placing the adhesive and the composite. If the remaining dentin thickness (RDT) is between 0.5 and 1.5 mm, a resin-modified glass ionomer (RMGI) base is used; if the RDT is less than 0.5 mm, a calcium hydroxide liner should be applied to the deepest aspect of the preparation, then protected with an RMGI base prior to adhesive placement.
- 47. enamel and dentin bonding The clinical success of enamel bonding with 37% phosphoric acid led clinicians to take the same approach to dentin bonding .however , the early dentin bonding systems resulted in low bond strength. Enamel is 95% inorganic matter( hydroxy –apatite). 4% water, and 1% organic matter(a collagen substance called enamelin)by weight. Although enamel is naturally hydrophilic (readily absorbing water),hydrophobic(resist to absorbing water) bonding resins can wet and penetrate dried,etched enamel because of high surface energy of an etched surface.
- 48. Dentin , on the other hand, is just 70% hydroxy apatite,18% collagen ,and 12% water by weight. This collagen is normally inaccessible, owing to surrounding hydroxyapatite crystals. The only obvious “pores” available for resin to penetrate are the dentin tubules , because of fluid flow from the dentine tubules , dentin is more hydrophilic than enamel ,which makes bonding a hydrophobic resin in to the dentin substrate difficult. Dentine bonding is highly technique sensitive and can be highly variable. Deep dentin exhibits far more tubules than superficial dentin , but also shows lower bond strength partly because the tubules are more fluid filled near the pulp . dentin fluids can interfere with a resin-dentin bond. Bond strength to all dentin surfaces are consistently lower than to enamel, regardless of the material used or the presence or absence of pulpal pressure.
- 49. Insertion and Light-Activation of the Composite A matrix is usually not necessary for Class I direct composite restorations, even when facial and lingual surface grooves are included. The composite should not be dispensed until it is ready to use because it may begin to polymerize from the ambient light in the operatory. Because of variations in materials, each manufacturer’s specific instructions should be followed. Composite insertion hand instruments or a compule may be used to insert the composite material. The dispenser, for example, a syringe or compule, must be kept covered when not in use to prevent premature hardening of the material. Small increments of composite material are added and successively light-activated . It is important to place (and light-activate) the composite incrementally to maximize the polymerization depth of cure and possibly to reduce the negative effects of polymerization shrinkage.
- 50. Insertion and Light-Activation of the Composite
- 51. C- factors the term “configuration factor” or “c-factor” has been used to describe the ratio of bonded to unbonded surfaces in a tooth preparation and restoration. a typical class i tooth preparation will have a high c-factor of 5 (five bonded surfaces— pulpal, facial, lingual, mesial, and distal. one unbounded surface— occlusal). the higher the c-factor of a tooth preparation, the higher the potential for composite polymerization shrinkage stress, as the composite shrinkage deformation is restricted by the bonded surfaces. Incremental insertion and light-activation of the composite may reduce the negative c-factor effects for class i composite restorations. the use of an rmgi liner or a flowable composite liner also may reduce the effects of polymerization shrinkage stress because of their favorable elastic modulus (more elastic material will more effectively absorb polymerization stresses). when composite is placed over an rmgi material, this technique is often referred to as a “sandwich” technique.
- 52. The potential advantages of this technique are:_ (1) the RMGI material bonds to the dentin without opening the dentinal tubules, reducing the potential for post-operative sensitivity (2) the RMGI material, because of its bond to dentin and potential for fluoride release (potential anti- cariogenicity), provides a better seal when used in cases where the preparation extends gingivally onto root structure. (3) the favorable elastic modulus of the RMGI reduces the effects of polymerization shrinkage stresses. These suggested advantages are considered controversial, as no published research based on longitudinal clinical trials evaluating the technique is available.
- 53. Flowable composites also are advocated as liners under posterior composite restorations. The purported primary advantage is that they may reduce some of the negative effects of polymerization shrinkage because of their very favorable elastic modulus. When it is necessary to extend a composite restoration onto the root surface, the use of an RMGI liner beneath the portion of the restoration on the root surface may decrease microleakage, gap formation, and recurrent caries.
- 54. Contouring and Polishing of the Composite If the composite is carefully placed and shaped before light activation, as described in the previous section, additional contouring with burs is substantially minimized. However, in many cases, refined contouring may be needed, especially when occlusion adjustments are necessary. The occlusal surface is shaped with a round or oval carbide finishing bur or similarly shaped finishing diamonds. Finishing is accomplished with appropriate polishing cups, points, or both after the occlusion is adjusted as necessary.
- 55. Contouring and polishing of Class I composite. A, Mandibular molar with old amalgam restoration. B, Rubber dam isolation; old restoration is carefully removed to minimize increasing preparation size. C, Final tooth preparation. D, Incremental placement of composite.
- 56. E, Incremental placement of composite. F, Rubber dam is removed and occlusion checked. G, Buccal view, a finishing fluted bur is used to selectively adjust the occlusion. H, Polishing with brush and diamond paste. I, Completed restoration.
- 57. sensitivity post-operative sensitivity used to go hand in hand with the restoration of teeth. this sensitivity is associated with the odontoblastic process and is most commonly caused by inappropriate use of the dentin bonding agent. the pain ranges from slight to acute. with amalgam, for example, sensitivity commonly occurs immediately after placement and lasts for a week to 10 days. during the first several days after restoration a definite gap of several microns exists between the walls of the preparation and the amalgam restoration, thereby allowing the transfer of fluids. the sensitivity associated with posterior composites can last considerably longer and demonstrate appreciably greater intensity. the mechanism of sensitivity is somewhat complex. regardless of the cause, the pain can be directly related to the odontoblast itself. whatever creates a negative pressure on the odontoblastic process creates a pain response. Positive pressure has no effect; only negative pressure creates a response.
- 58. Postoperative Sensitivity and Restorative Imperatives The extent of preparation should be dictated by the amount and location of sound tooth structure present, with the clinician taking care to confine tooth reduction to the elimination of carious tooth structures and creating a cavity design sufficient to withstand the demands of the intraoral environment. Whenever possible, preparations should remain in the enamel. Bevel enamel margins to conceal the margin, Leaving the enamel margins roughened will enhance bond strength as well. Good bonding to prevent micro leakage. The cavity design should feature rounded internal line angles to improve stress distribution upon placement of the restorative materials through a micromechanical adhesive approach. Rubber dam isolation is recommended for proper moisture control at the restorative site as well as to prevent bacterial or salivary contamination and to reduce airborne debris. Postoperative sensitivity causes patient discomfort that often predisposes him or her for re-treatment and additional office time. Consequently, the ability of modern adhesive dental approaches to eliminate this sequellae is a considerable benefit to patient and practitioner alike.